
This simple method for cleaning a stainless steel sink is quite literally my favorite household cleaning task. I am not exaggerating. It is SO easy, SO simple, and SO SO SO effective. It requires no special or harsh cleaners and will restore your sink to its original sparkle within minutes. Sherry tried this method first and we have both loved using it ever since. I even taught our kids how to do it. But honestly, it’s so satisfying to do that I usually keep it to myself.
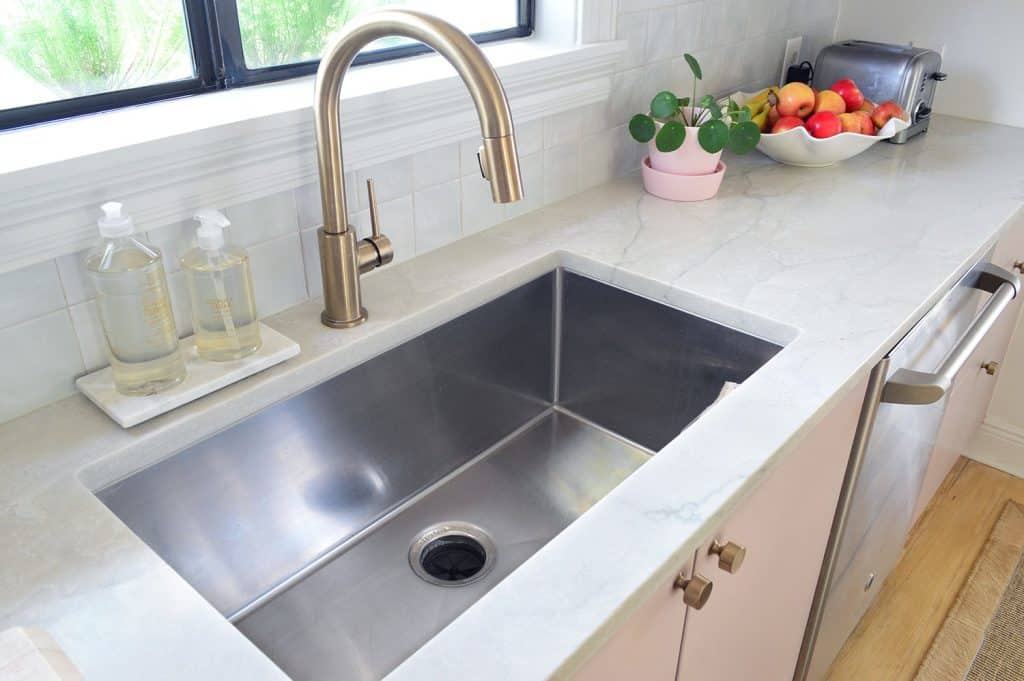
We’ve always loved the look and durability of a stainless steel sink. It looks high-end and coordinates beautifully with stainless steel appliances. But like fridges and dishwashers, they’re prone to smudges, fingerprints, and dulling grime. Probably most of all because we’re constantly washing dirty hands and dirty dishes in them. Luckily, cleaning the stainless steel in your sink is much easier and more fun than wiping down your appliance front. And did I mention satisfying?
Table of Contents
Supplies Needed (Just 3!)
The method we use for cleaning kitchen sinks and restoring their shine requires only 3 ingredients:
- Baking soda
- Dish soap
- Warm water (from your faucet)
That’s literally the entire list.
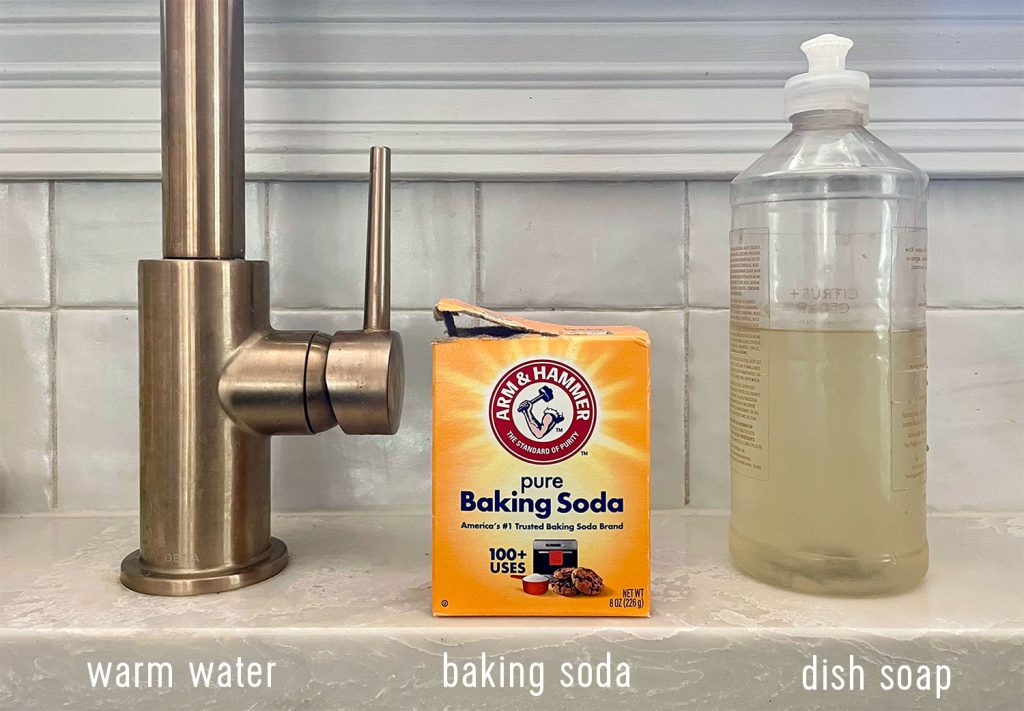
The only supply you may not already have nearby is baking soda. You can pick up a small box for less than $2 at any grocery store. Other methods include supplies like white vinegar, lemon juice, rubber gloves, and microfiber cloths. Those can be used, but we don’t usually find them necessary. Instead, keeping the material list short and sweet makes it more likely that you’ll tackle the task.
Six Steps To Clean A Stainless Steel Sink
If you’re like us, you’ll find the steps easy, fun, and oddly satisfying. It’s almost like playing with slime or kinetic sand, but you get a shiny sink at the end as a bonus. Watch the process in this video or follow the full written instructions below.
- Empty your sink
- Sprinkle with baking soda
- Add some dish sap
- Scrub
- Rinse
- Dry or Buff
NOTE: You can also watch this video on YouTube.
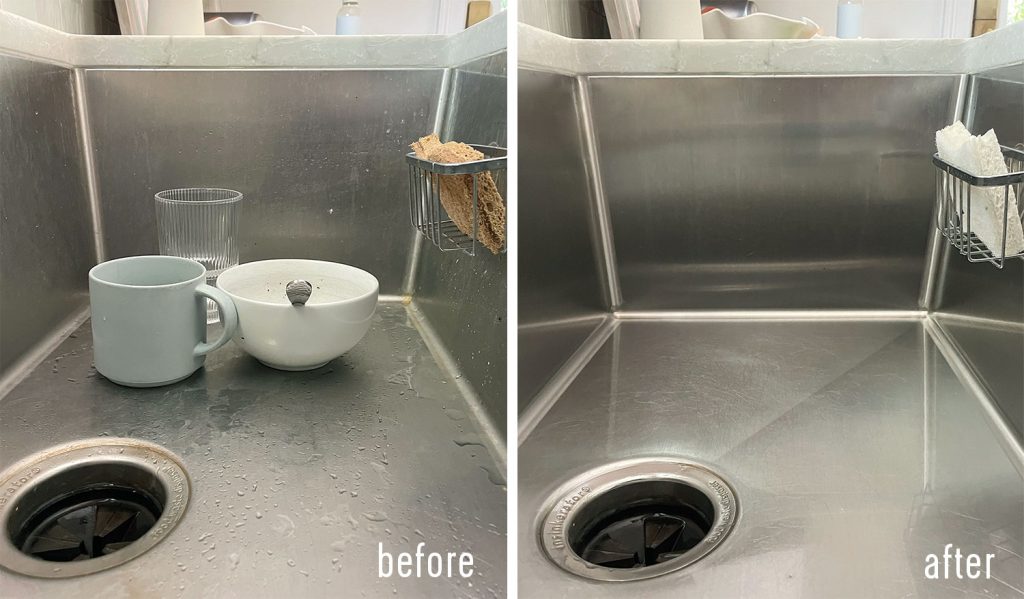
Step 1: Empty Your Sink
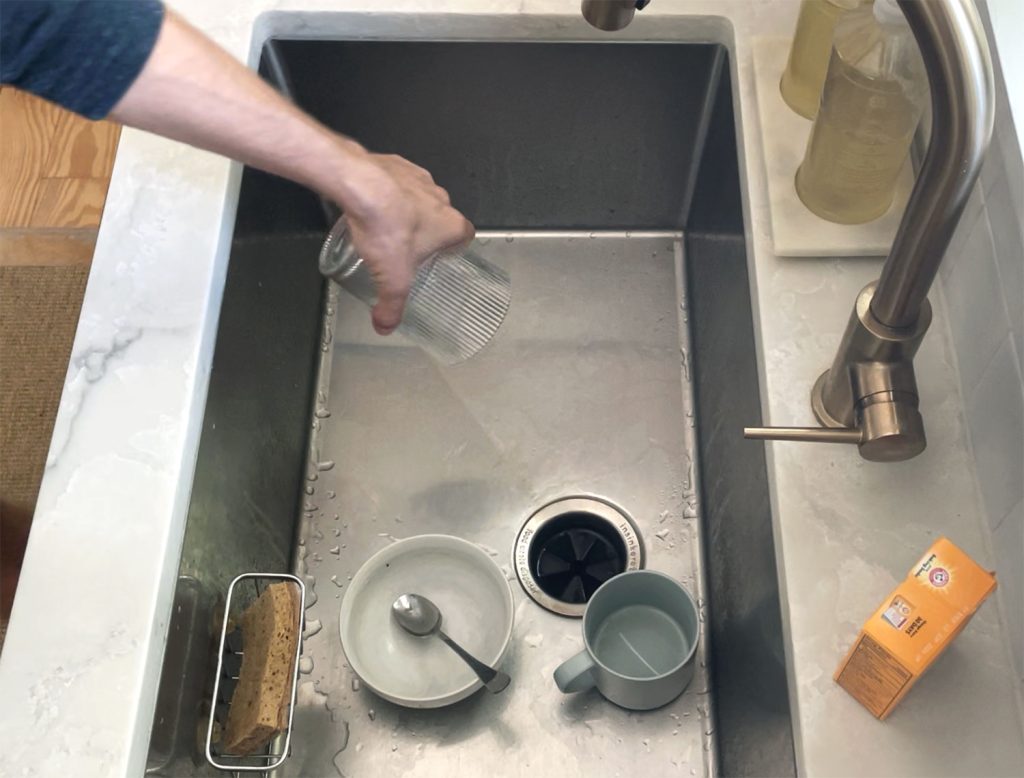
First, clear your sink of any dishes or debris. That means: load the dishwasher, remove any pots or pans, and rinse away leftover food particles. You also want to remove any basin trays, sponge caddies, or other obstructions. This will give you clear access to the entire surface of the sink.
Step 2: Sprinkle With Baking Soda
Next, sprinkle baking soda on all surfaces of your damp sink. It doesn’t need to be fully coated, but we suggest using a generous amount of baking soda. We don’t measure anything – just shake it directly from the box and go for a light dusting throughout the sink. You can always add more as you go.
Step 3: Add Some Dish Soap
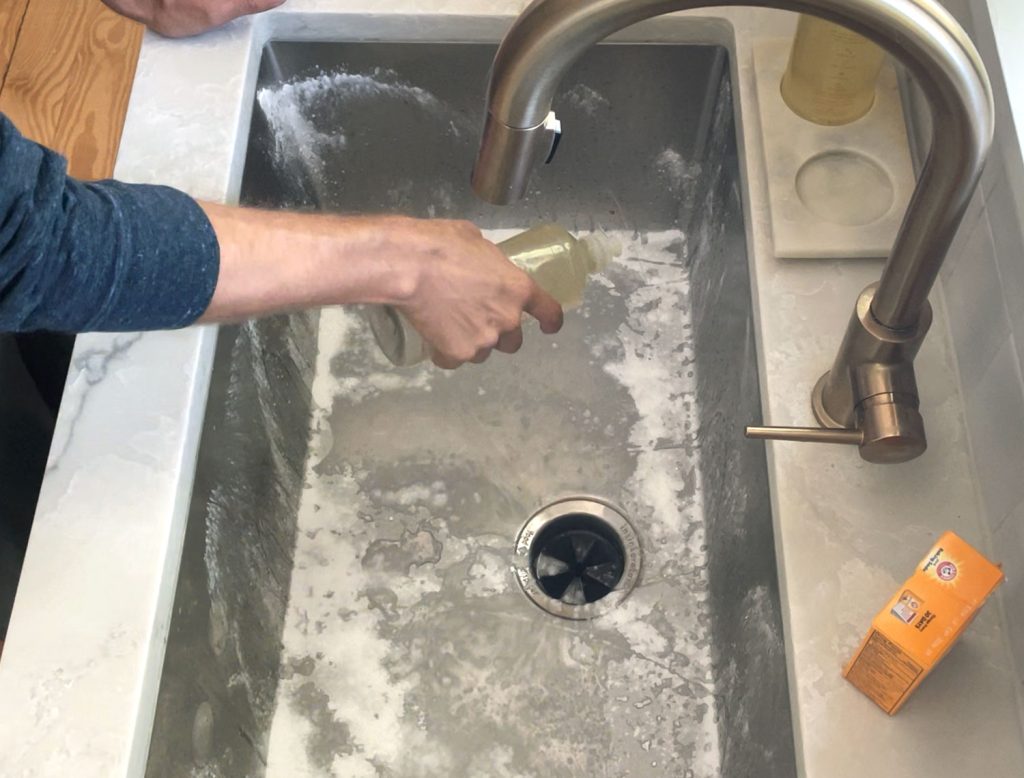
Next, we squirt some liquid dish soap over the baking soda. This drizzle of soap will help clean, sanitize, and deodorize your sink. Lemon juice and/or essential oils can also be used to add natural fragrance. Just a light drizzle around the sink should do the trick. Again, more can be added as you go if needed.
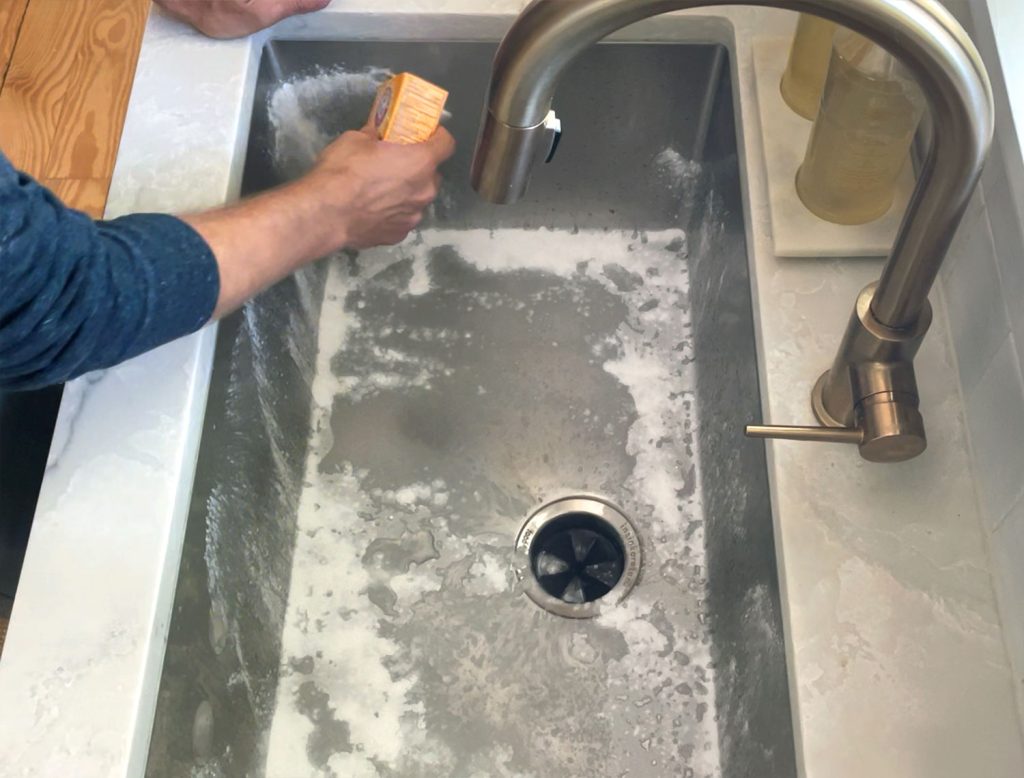
Step 4: Scrub, Scrub, Scrub!
Now for the fun part! The baking soda + soap form a gritty paste-like scrub (sounds gross, but it’s not) that you can rub around your sink. You may need to add a bit of water to achieve a consistency that’s easy to scrub with. Just don’t add too much and rinse it all down the drain.
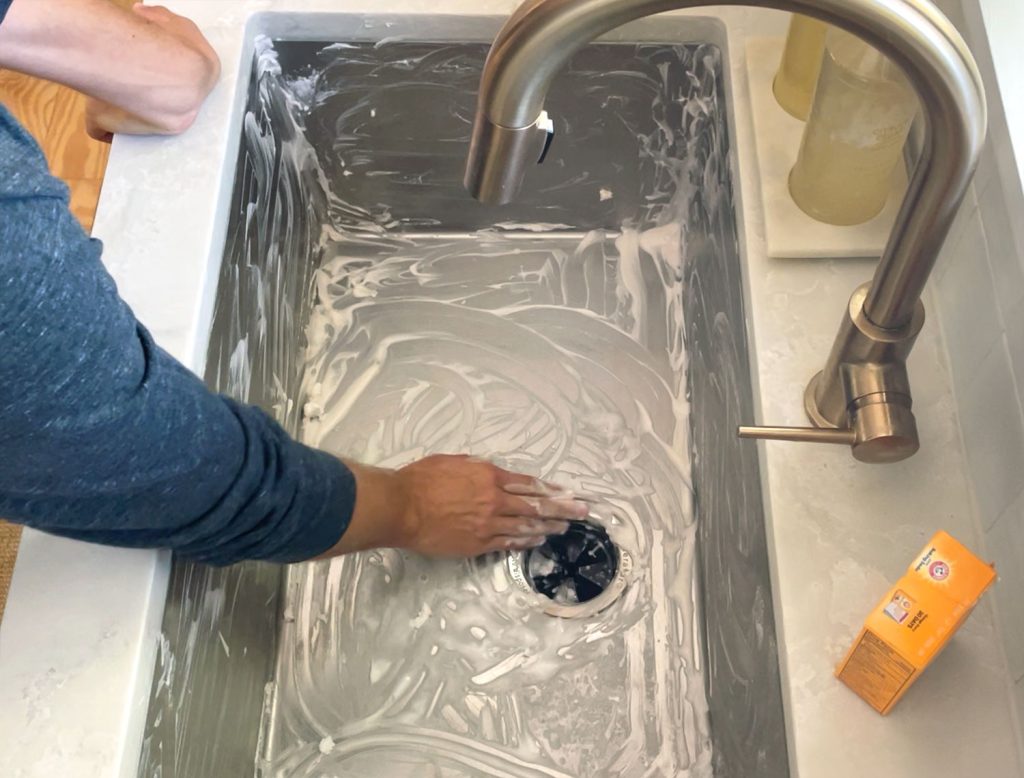
You can wear gloves or use a microfiber cloth for this part, but we prefer scrubbing with our bare fingertips. This makes it easiest to feel which areas have been scrubbed smooth, and which might need extra attention. It’s a little messy this way, but it’s also what makes it extremely satisfying.
Step 5: Rinse Your Sink
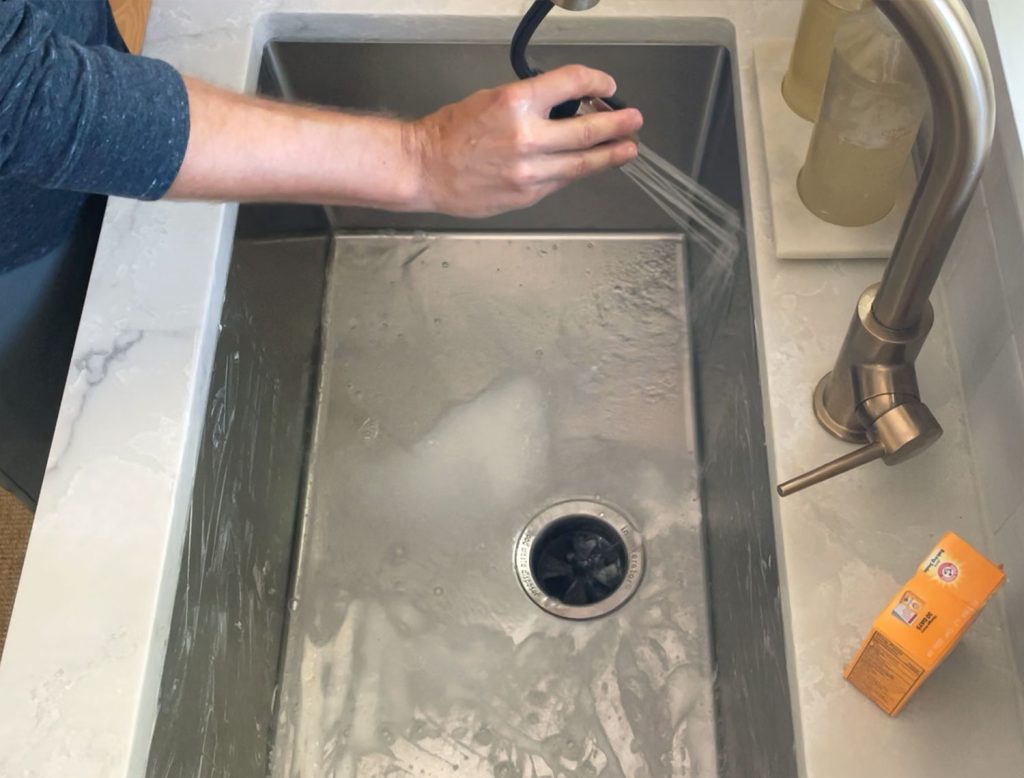
Once you’ve scrubbed the whole sink – don’t neglect corners, edges, and around the drain! – rinse everything down with some warm water. If you notice any missed spots, just sprinkle in some more baking soda and scrub that area again. It’s easy, so don’t fret if you don’t get it 100% perfect on your first pass.
Step 6 (Optional): Dry Or Buff
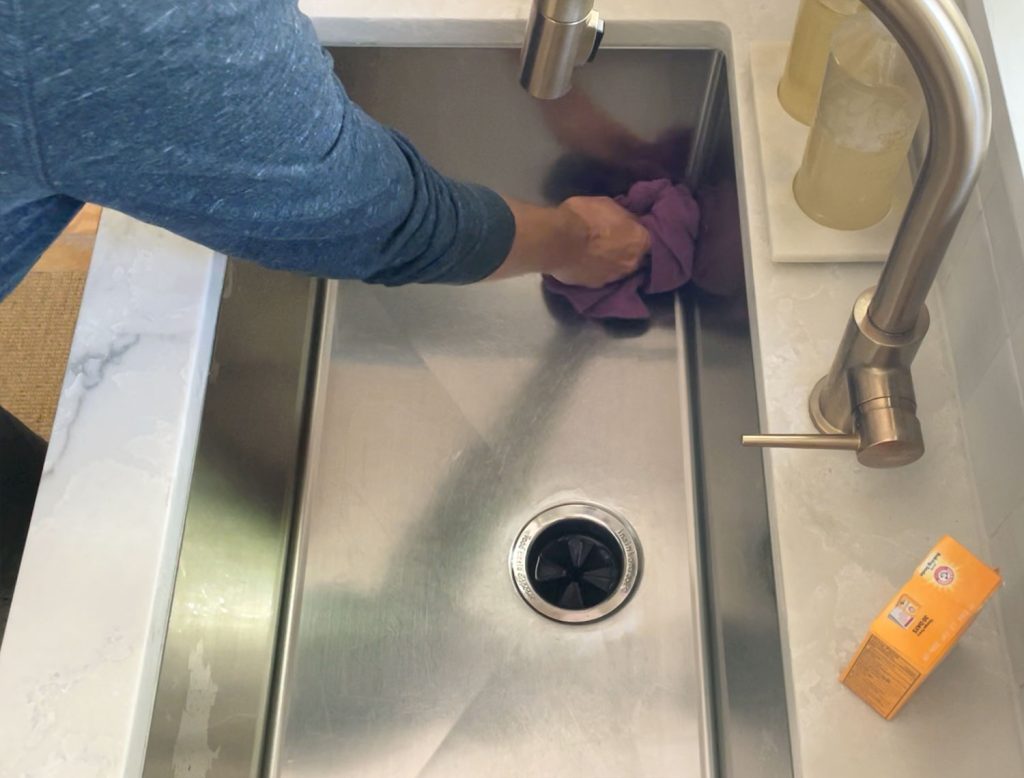
Lastly, you can use a paper towel or clean cloth to wipe your sink dry. This last sort of “buffing” step really makes it gleam. This will also prevent any water spots or streaks from forming on your freshly rinsed steel. Feel free to skip this step since the faucet will inevitably be used again soon, getting the sink wet all over again – but if you’re in it for that satisfying “after,” just give it a try.
When To Clean Your Stainless Steel Sink
The method described above is something we do on an as-needed basis, usually once every 1-2 weeks. For daily cleaning, we typically just use the faucet sprayer and sponge to rinse away any obvious food scraps or residue. This keeps messes, odors, and rust spots at bay, but doesn’t restore the like-new shine that the baking soda offers.
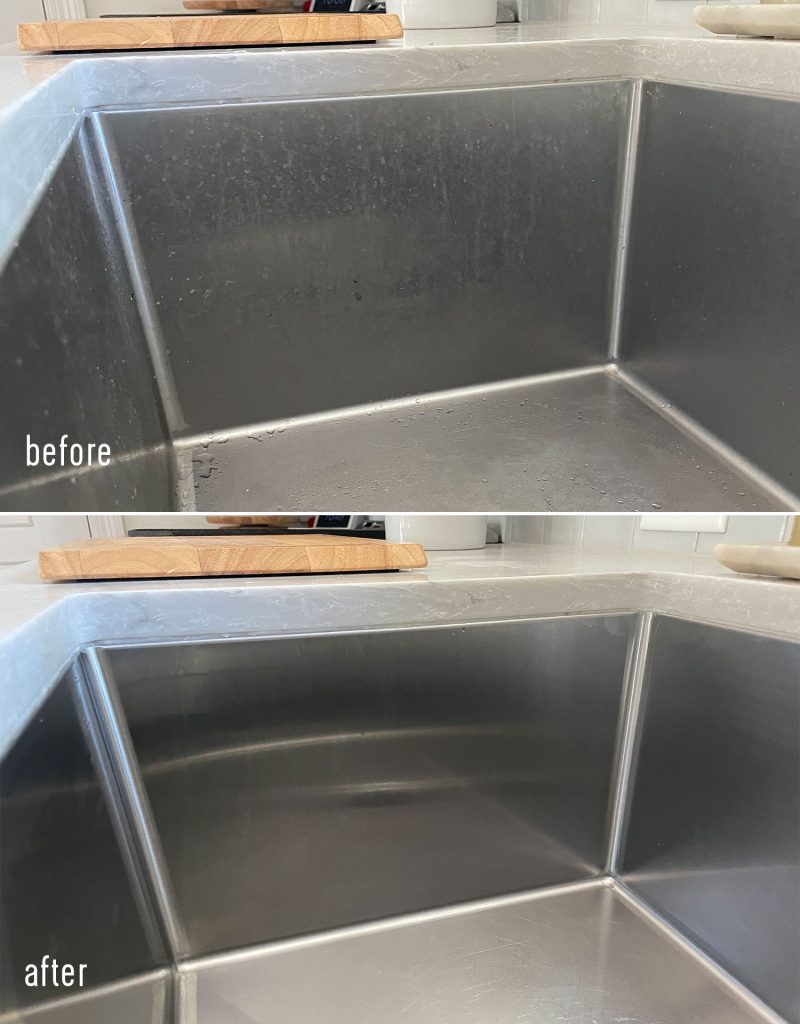
Can you believe that after shot of our sink above was taken OVER FOUR YEARS AFTER HEAVY USE! For even deeper cleanings or tougher stains, you can use the above method but substitute white vinegar for dish soap. We’ve heard that the reaction between the vinegar and the baking soda may help fizz away stubborn stains. We haven’t ever needed to go that route though, because we just use the steps that we detailed above. You can also try commercial stainless steel cleaners like Bar Keepers Friend as another line of defense against extra stubborn stains.
What To Avoid
As you’ll learn from this method, it doesn’t take a lot to keep your stainless steel sink looking its best. But stainless steel can be prone to rust and hard water spots, so you may be tempted to try heavier-duty techniques. Just keep the following limitations in mind:
- Don’t use steel wool or other stiff brushes, which can leave scratches
- Avoid harsh chemicals like bleach or other cleaners that aren’t intended for stainless steel
- Don’t let metal pots or utensils sit for extended periods, which can scratch or encourage rust
- Stagnant standing water can lead to spots or corrosion, so make sure your drain works well and your sink is level
These practices, plus regular cleaning, will help maintain your stainless sink for the long haul.
Why Clean Your Stainless Steel Sink?
In addition to making your sink look better, doing regular deeper cleanings of your sink has other benefits:
It Reduces Odor
Food stains aren’t just unsightly, they can also lead to unpleasant kitchen smells. This baking soda method not only eliminates those stains, the use of dish soap (or lemon juice) adds a fresh scent to your sink.
It Improves Hygiene
Baking soda, white vinegar, lemon juice, and dish soaps all have antibacterial qualities that help keep your sink more sanitary, including fighting bacteria like E. coli and salmonella. This will help make your sink a more hygienic place for rinsing/prepping food or doing dishes.
It Prevents Stains
Consistent cleanings with baking soda will help prevent permanent stains, especially in areas where things like sponge caddies or basin racks might harbor build-up that you don’t see on a daily basis.