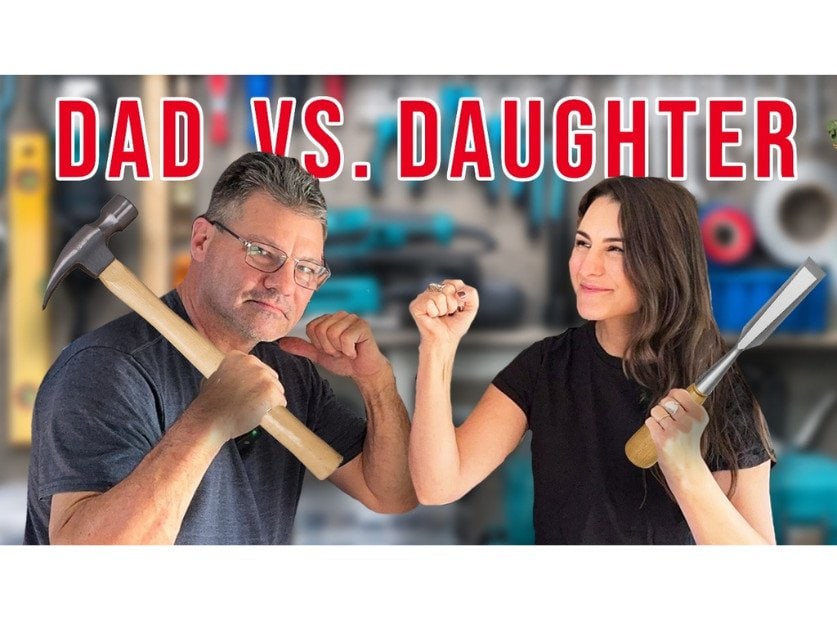
Inspired by Jon at Lincoln St. Woodworks, my dad and I challenged each other to a build off. He has always wanted to make a river table and I had a slab lying around that needed to be made into a coffee table. So I called up my friends at Total Boat and asked if we could crash their shop. It was such a fun trip and we probably enjoyed competing with each other a little too much. But I’m so proud of how our projects turned out and can’t wait to do something like this again!
This post contains affiliate links, which helps support more projects on my website! For my full disclosure policy regarding affiliate links, click here!
Want to see this build in action? You can watch my build video here (+ make sure to subscribe to my channel)!
Tools + Materials
Tools
Materials
Total Boat Supplies
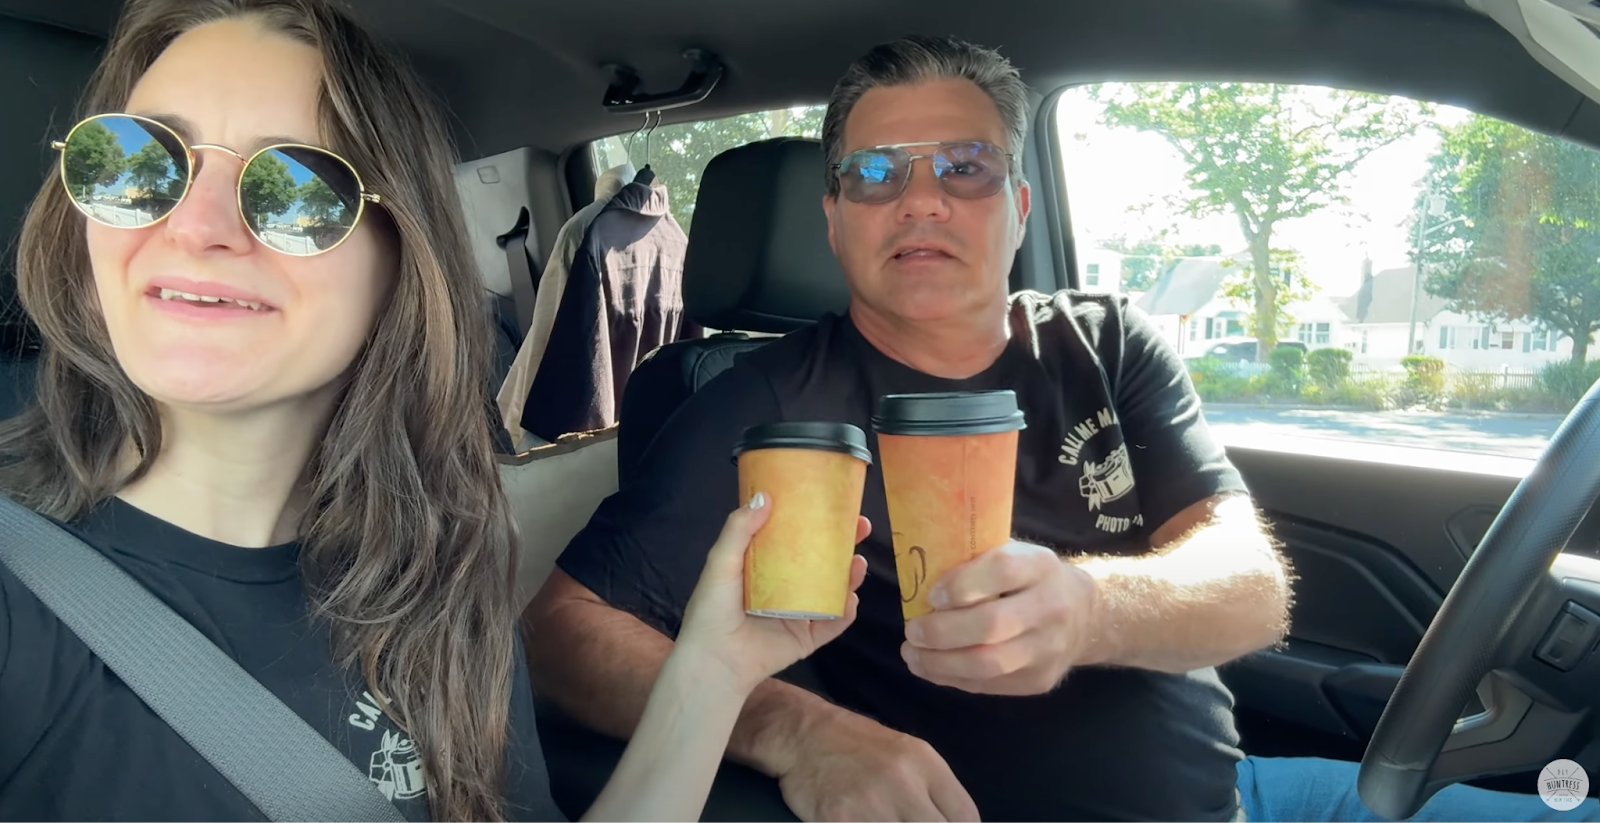
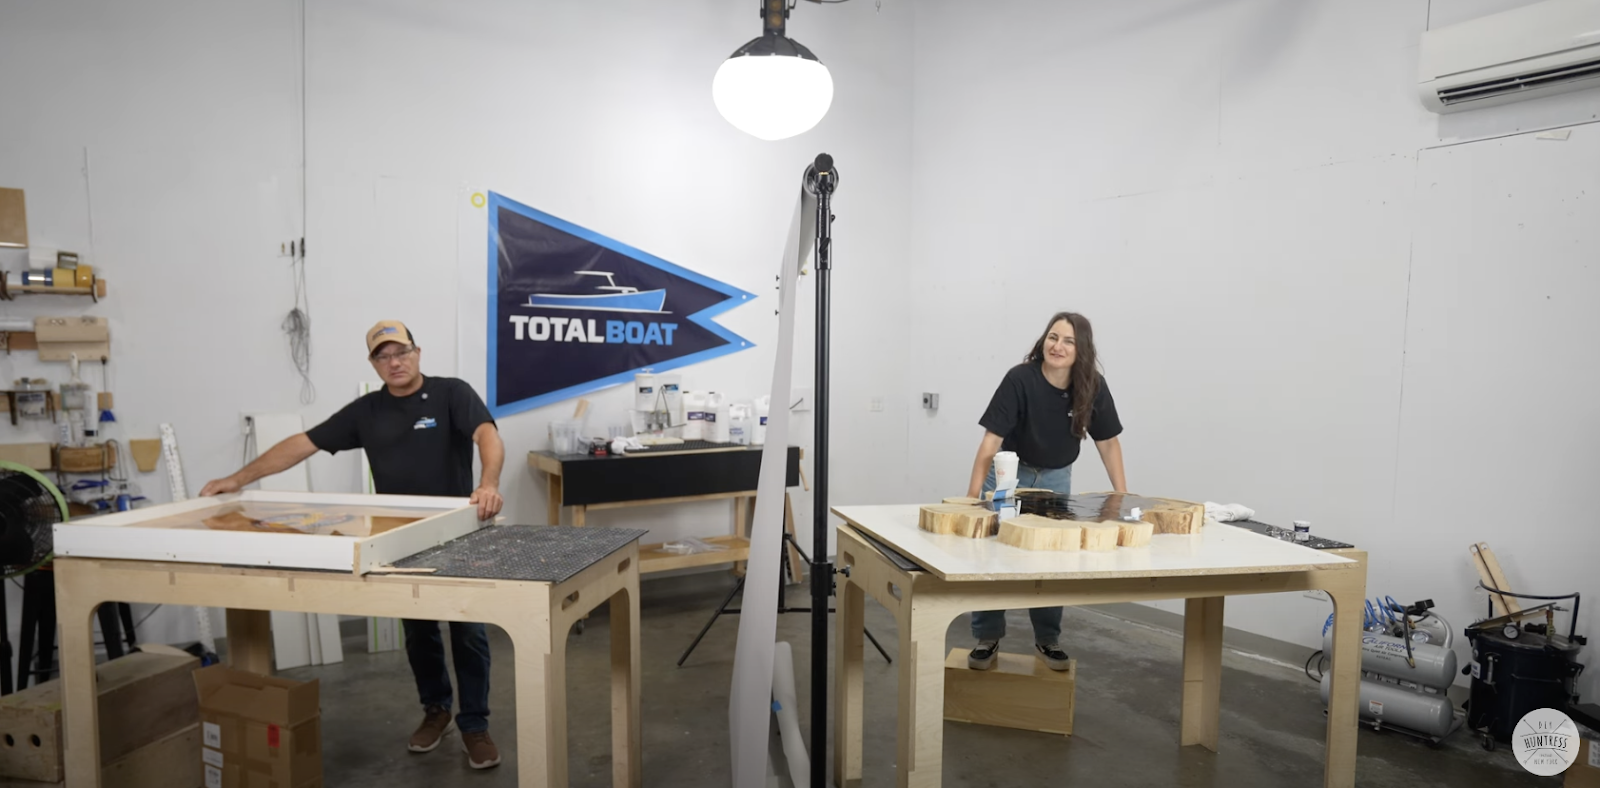
Inspired by my friend Jon at Lincoln St. Woodworks we hit the road and set the GPS for Total Boat.
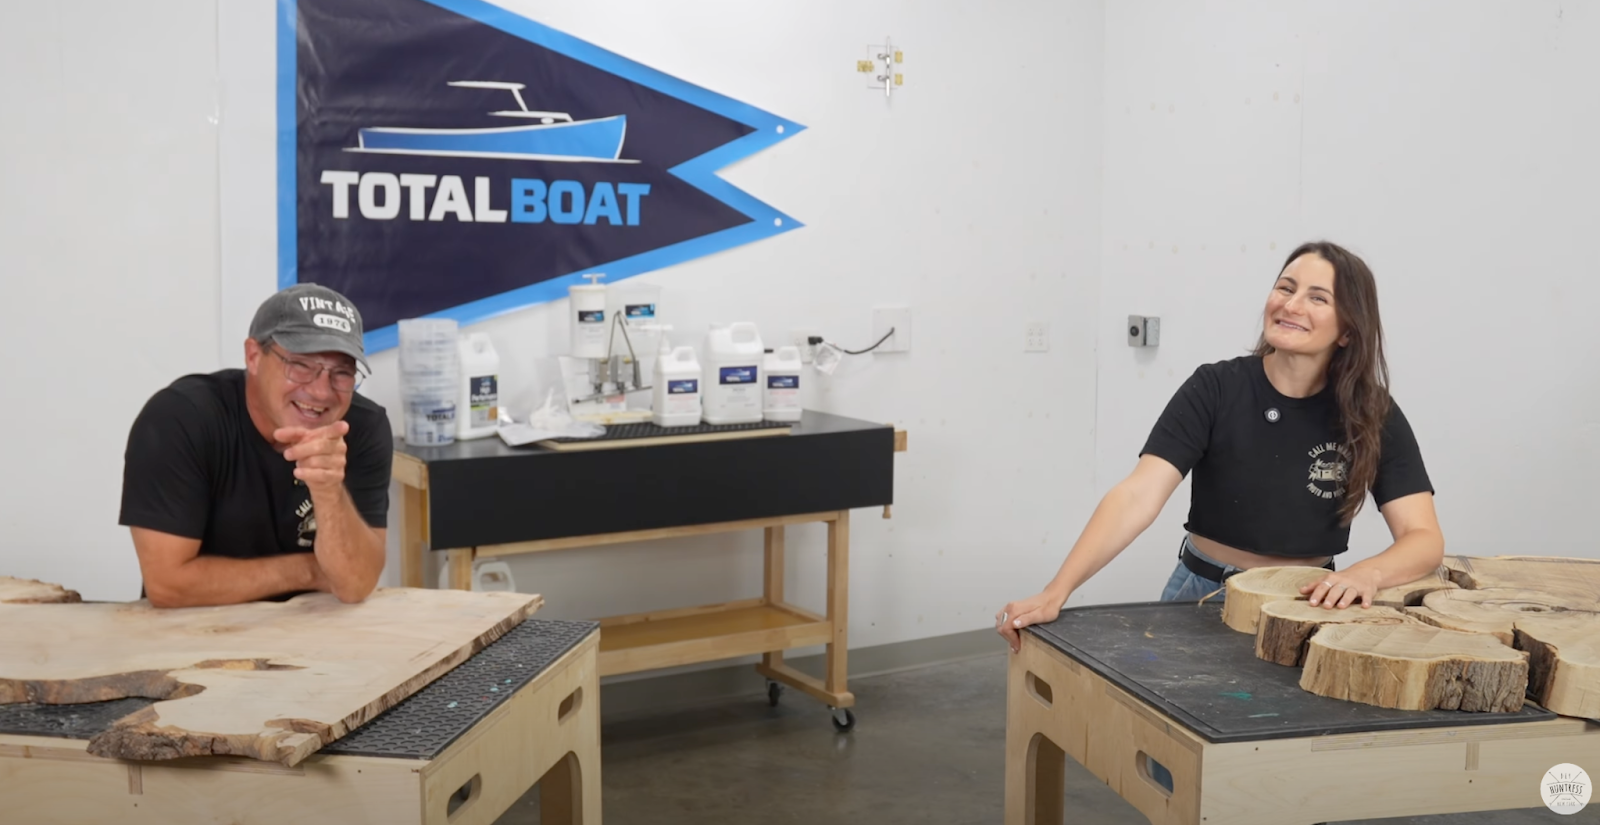
Clearly the excitement level was high before we even got started.
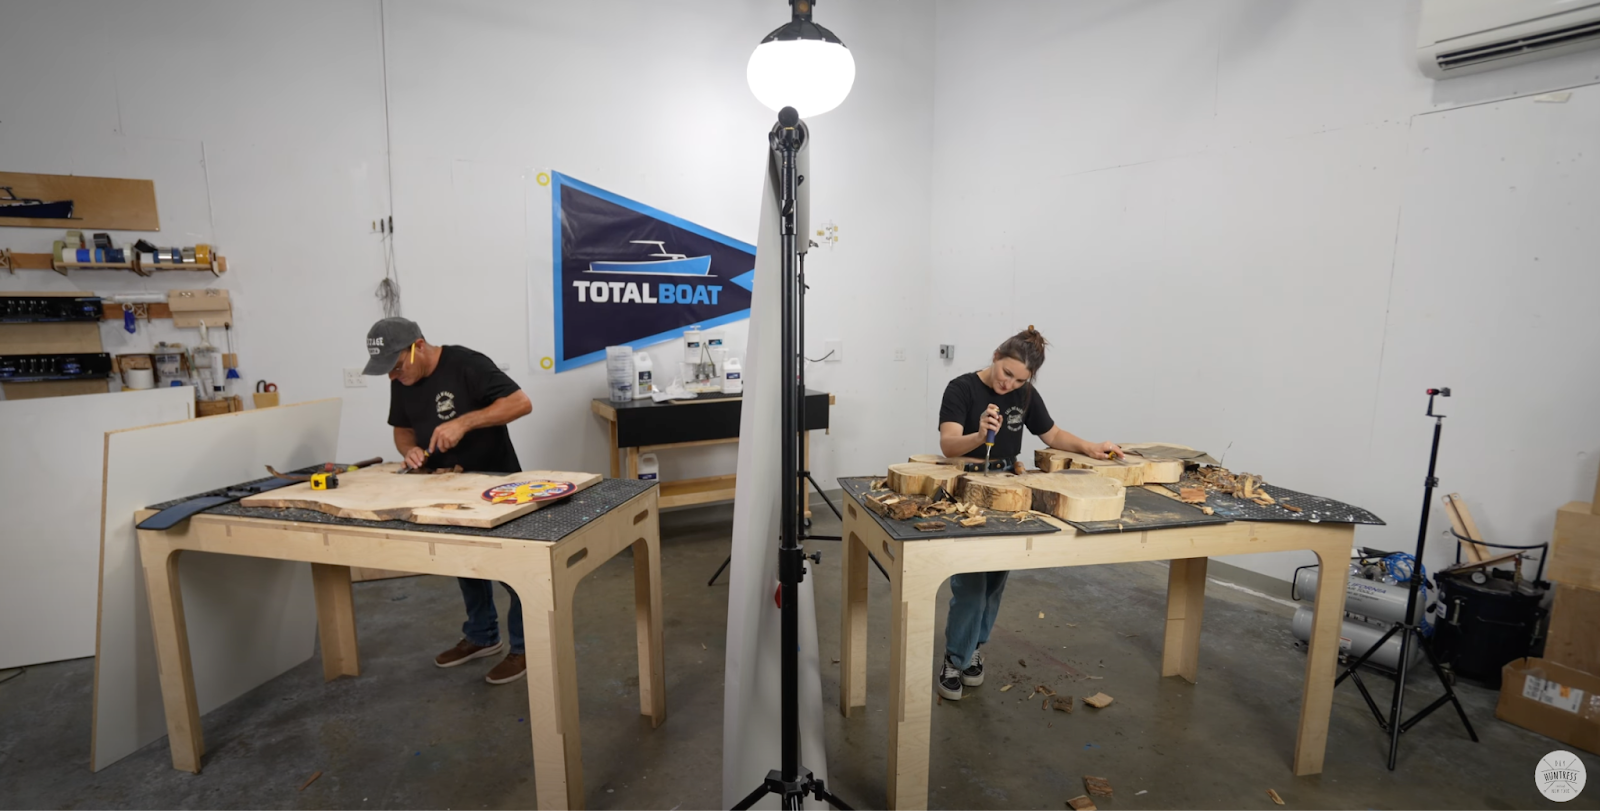
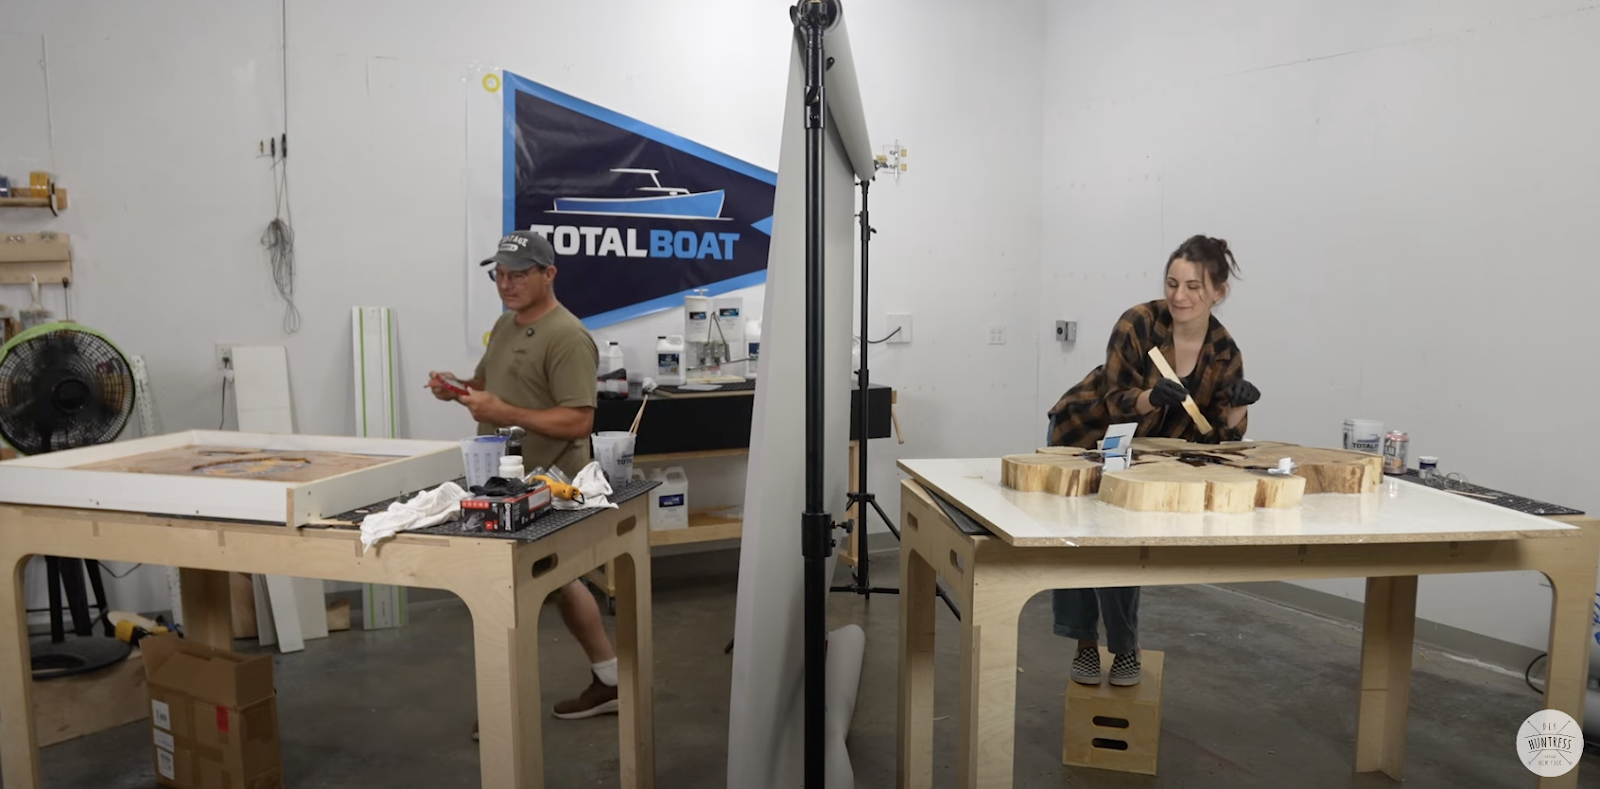
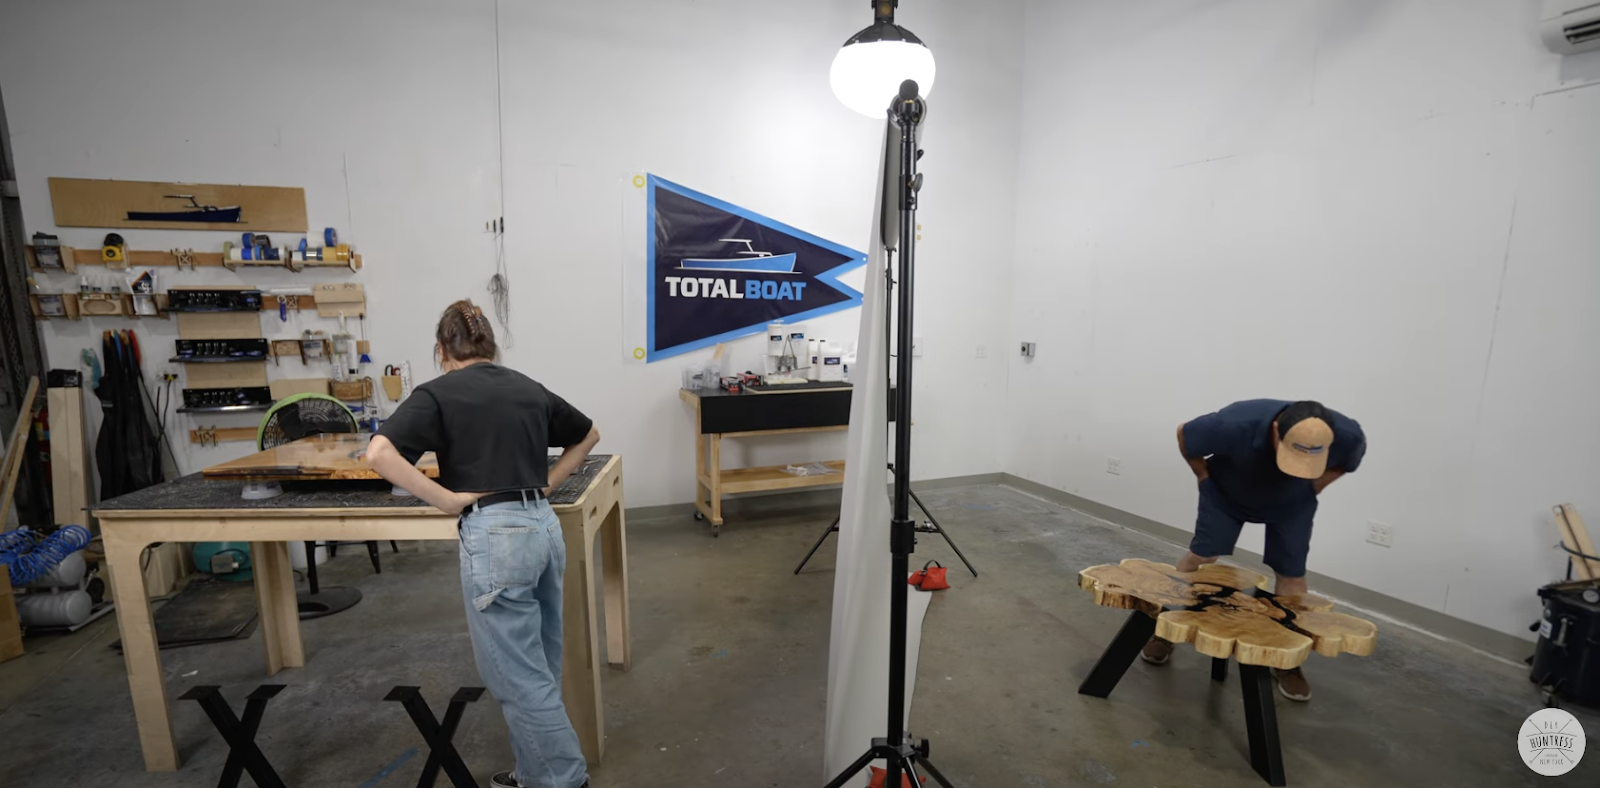
Day 1 – Planning Our Builds
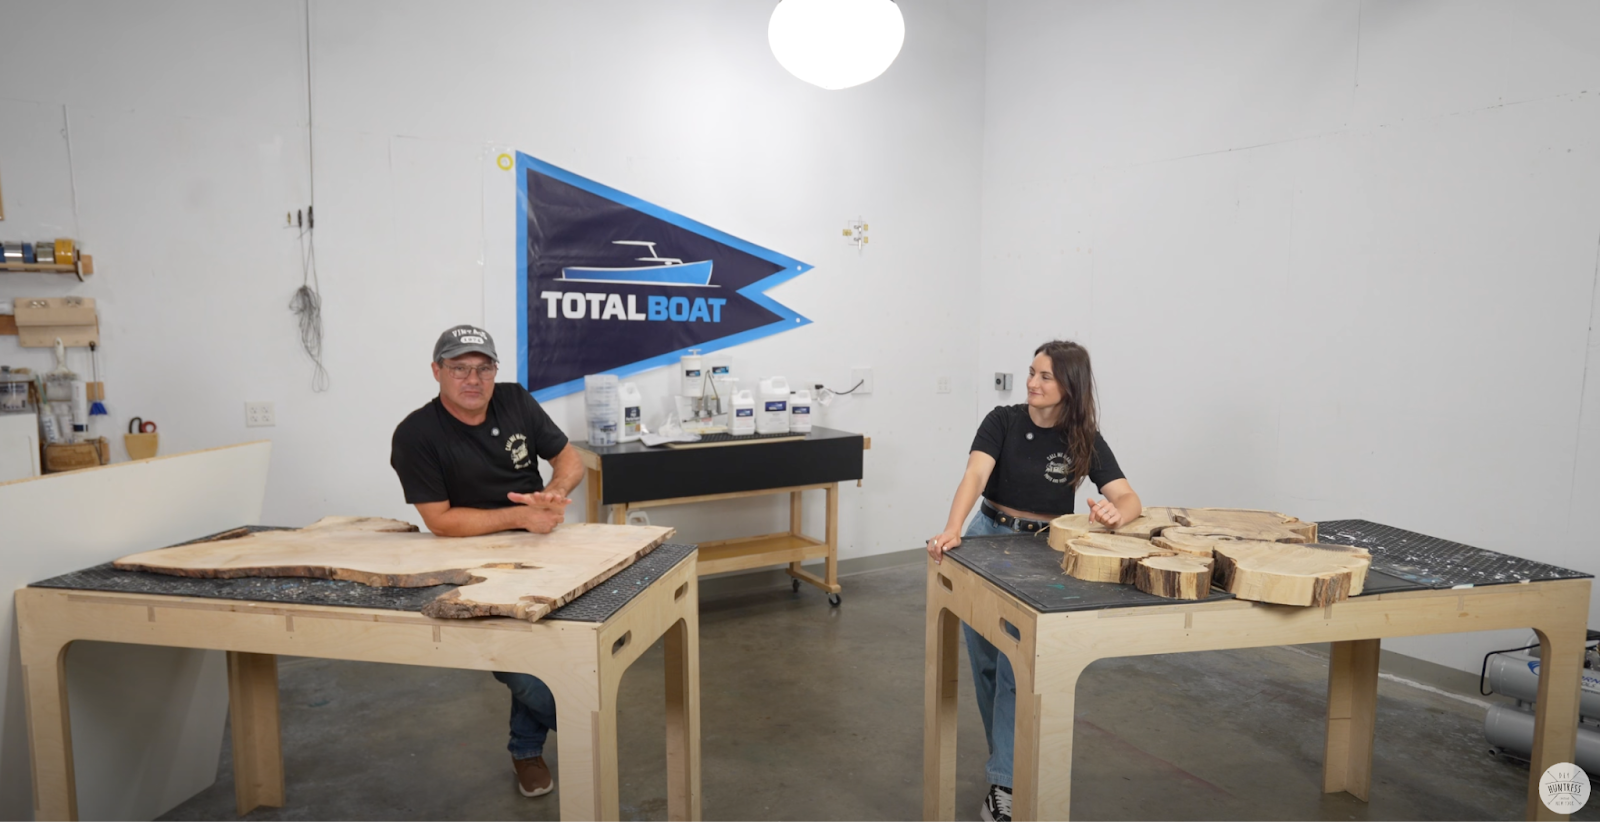
We both acquired our slabs in some unique ways. My dad got his slab from a client’s home when they were moving and couldn’t take it with them. I spotted my slab on the side of the road when I was taking my dog to the vet and made a wrong turn. Two very different pieces rescued in different ways but both are destined to become tables.
Joe’s Plan
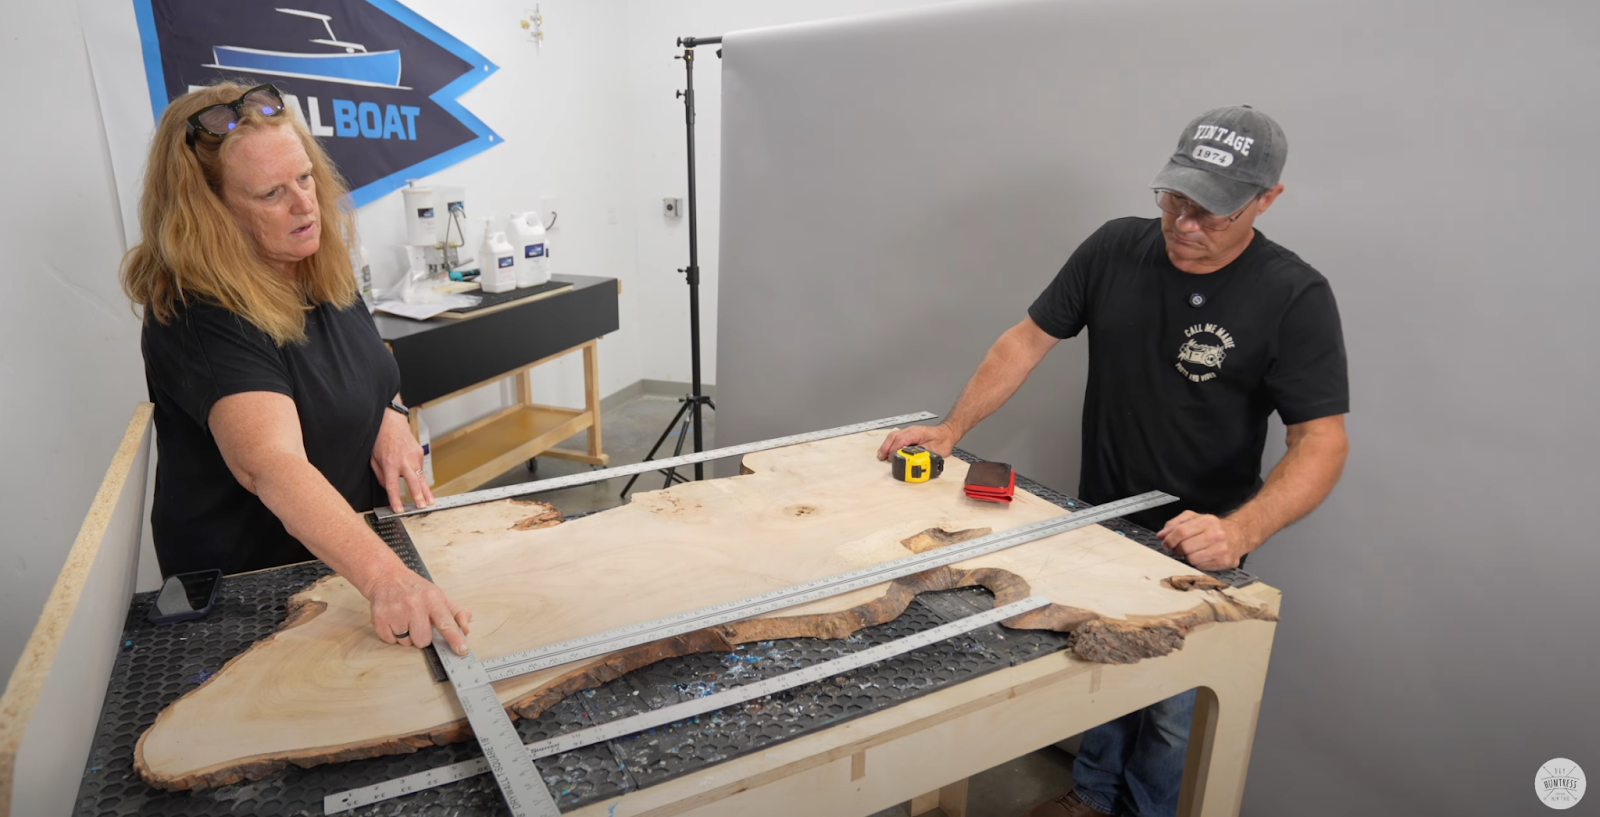
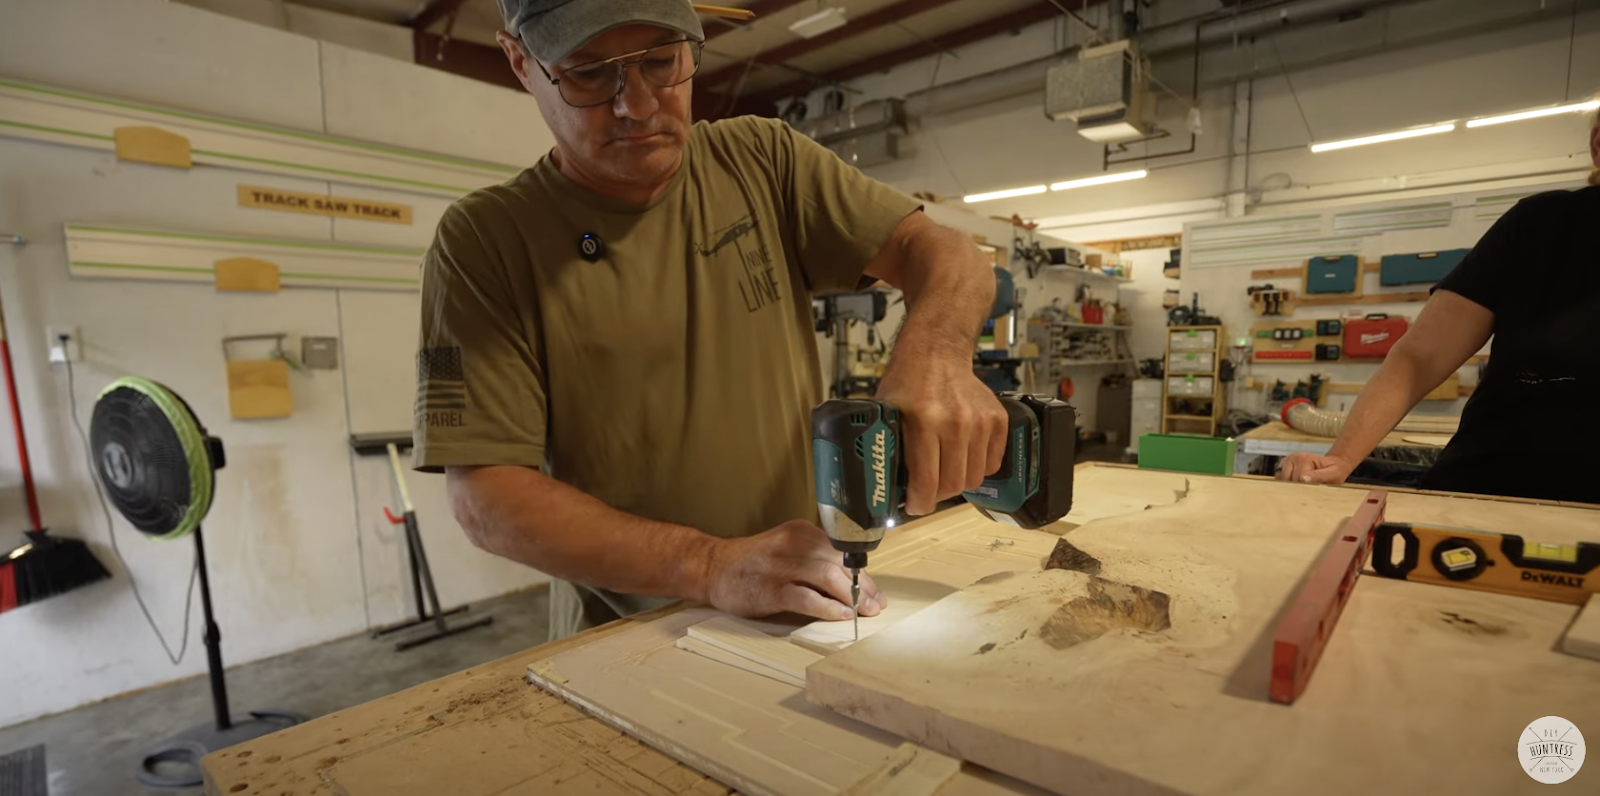
To start my dad decided to square up his slab. I heard him struggling a bit through this part but I resisted helping him (he wouldn’t let me!)
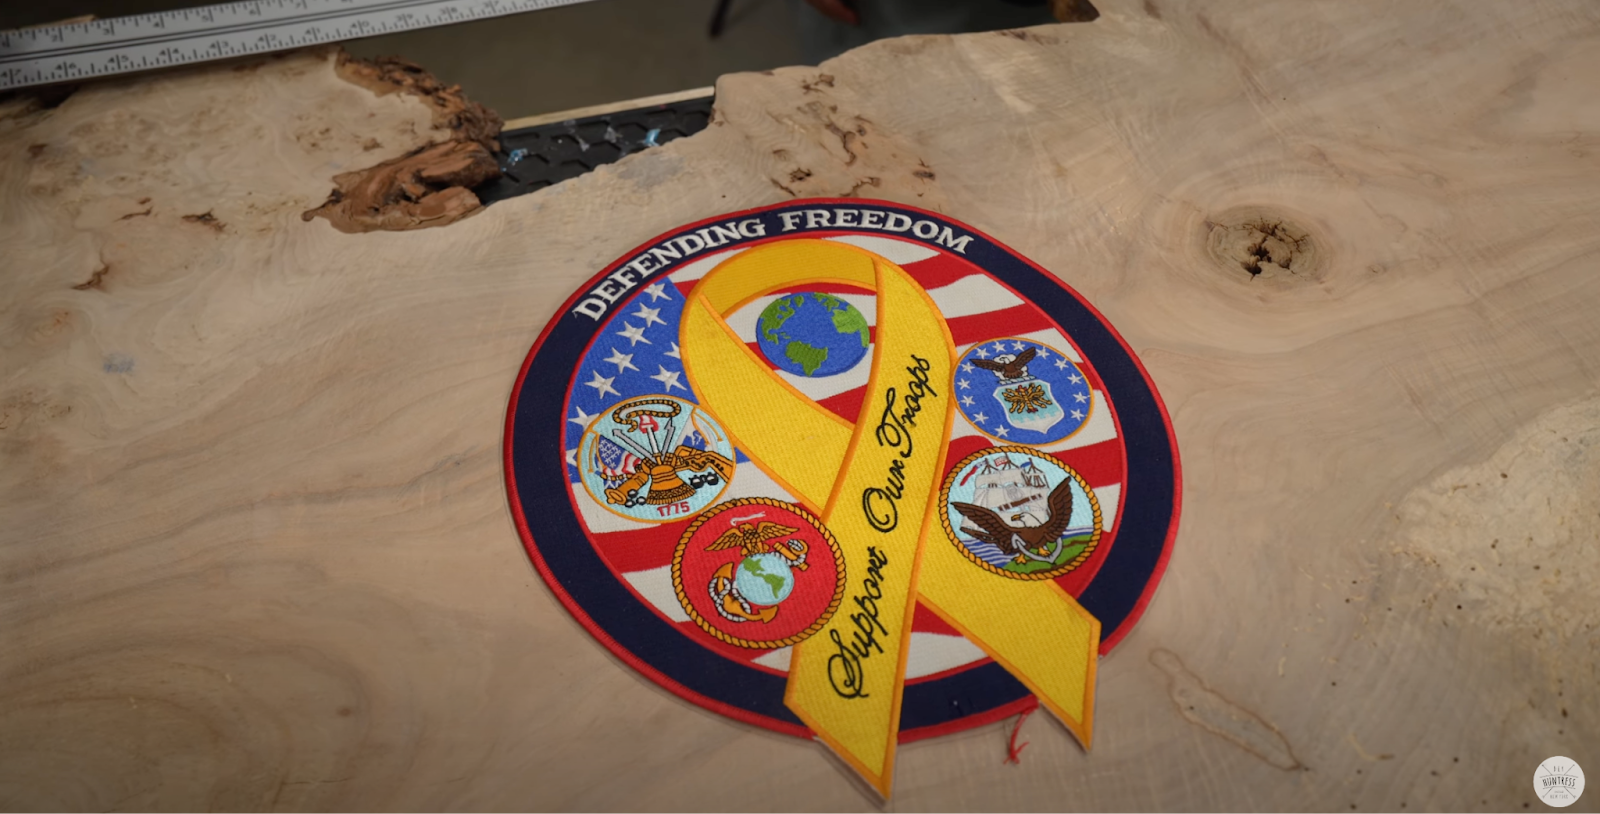
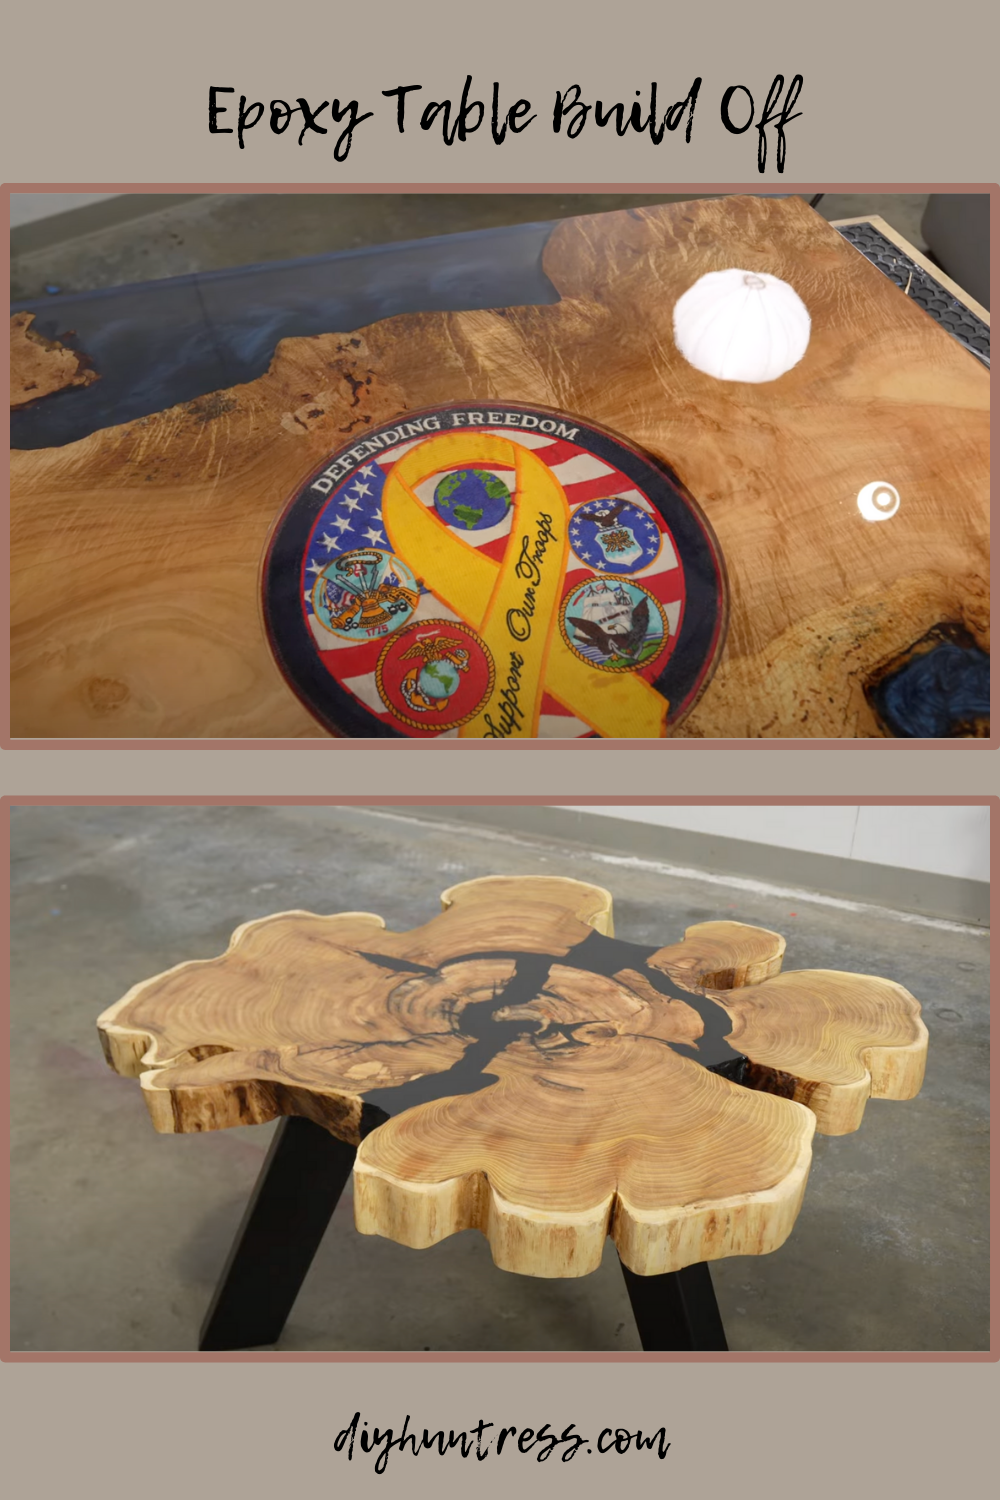
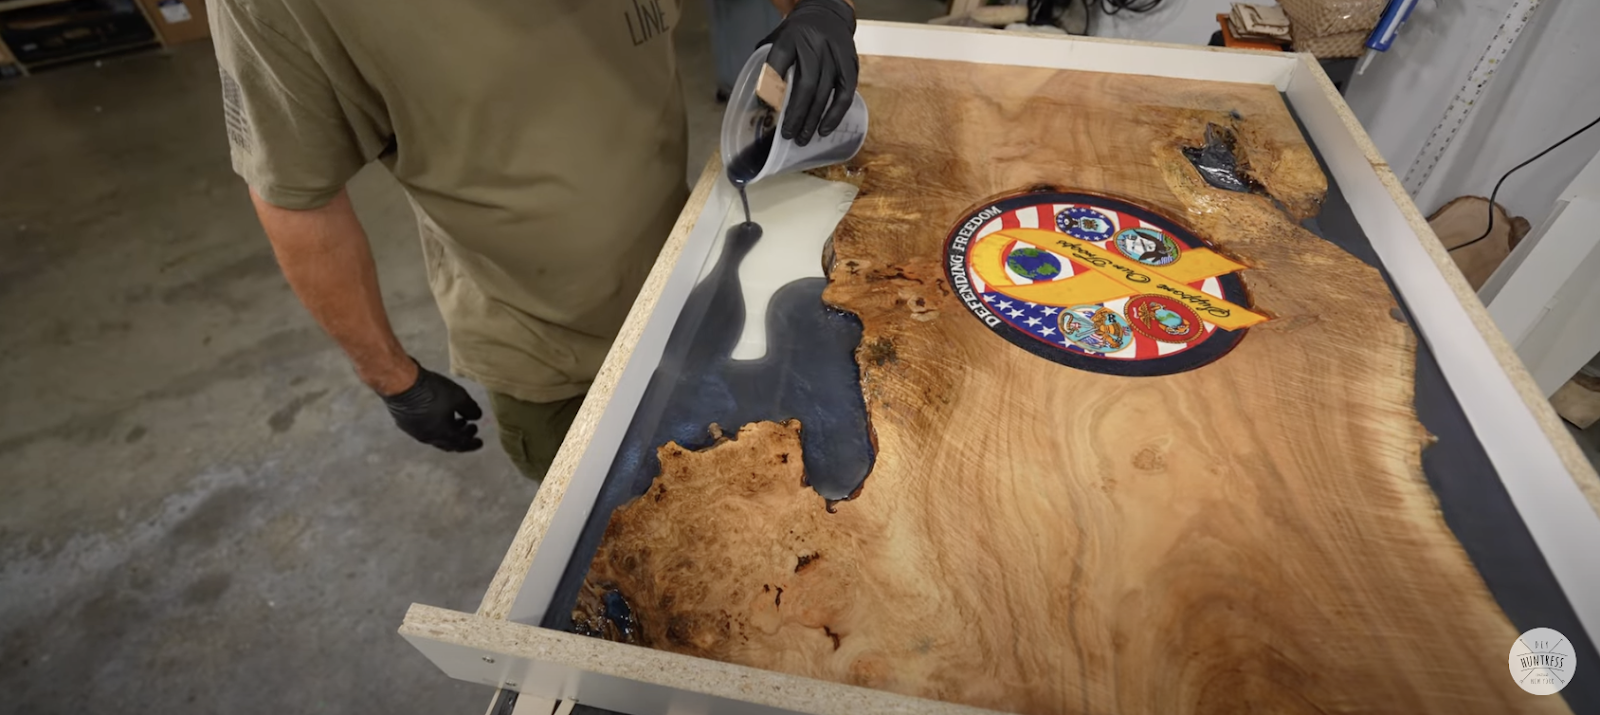
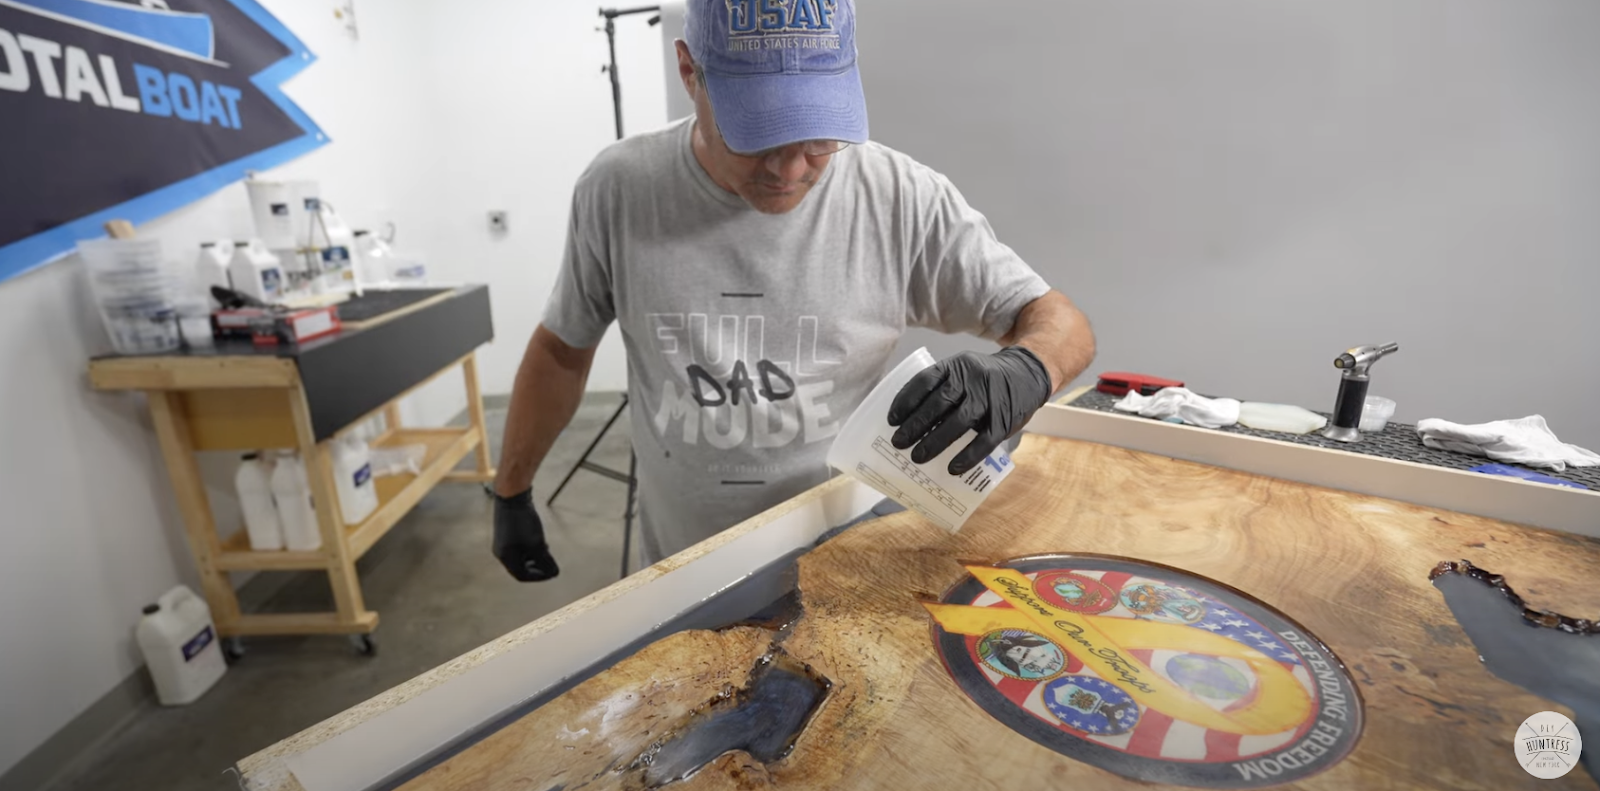
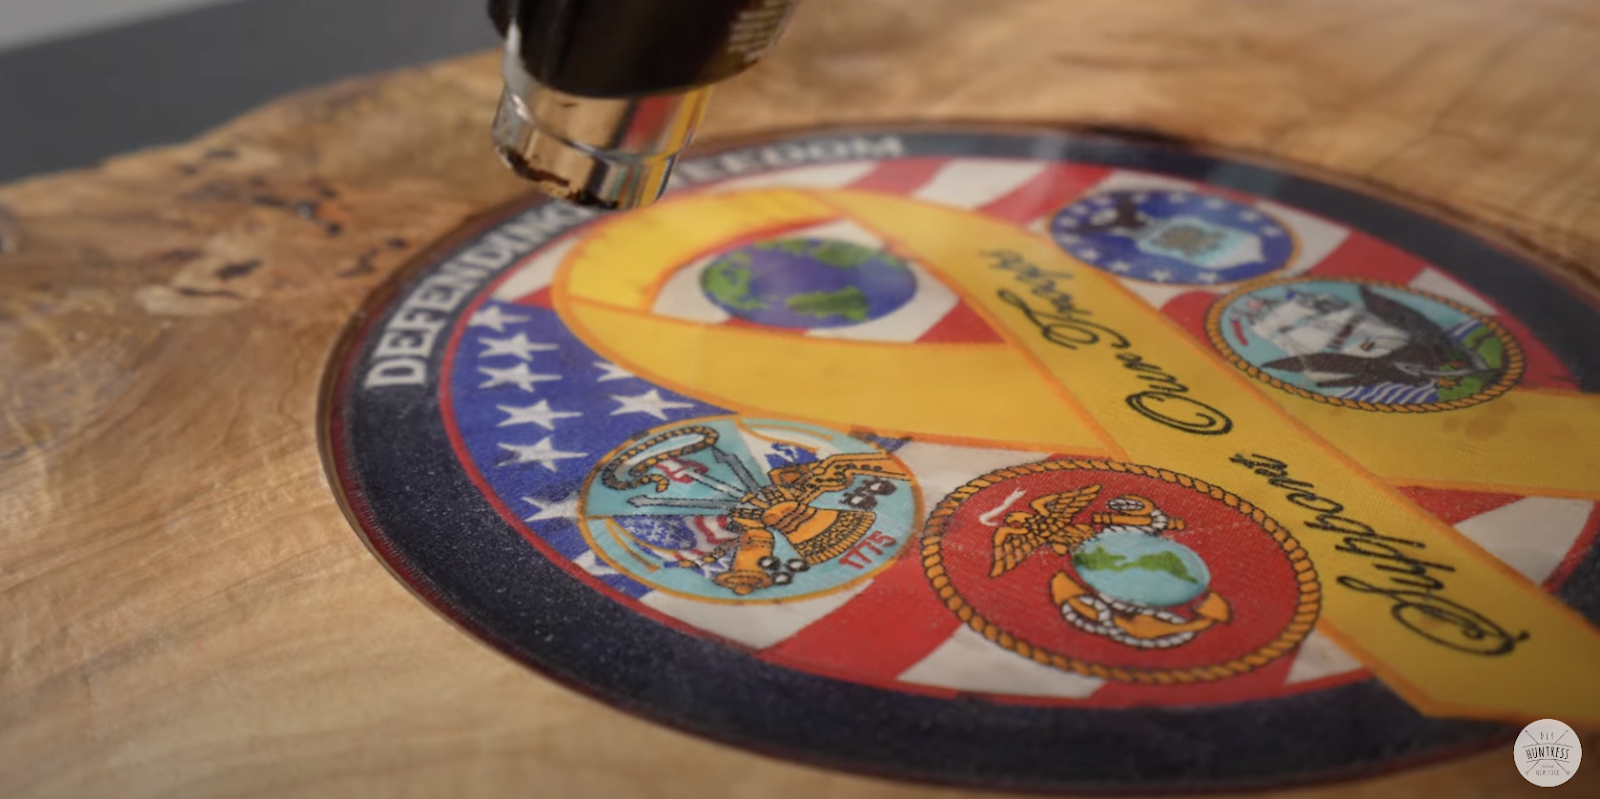
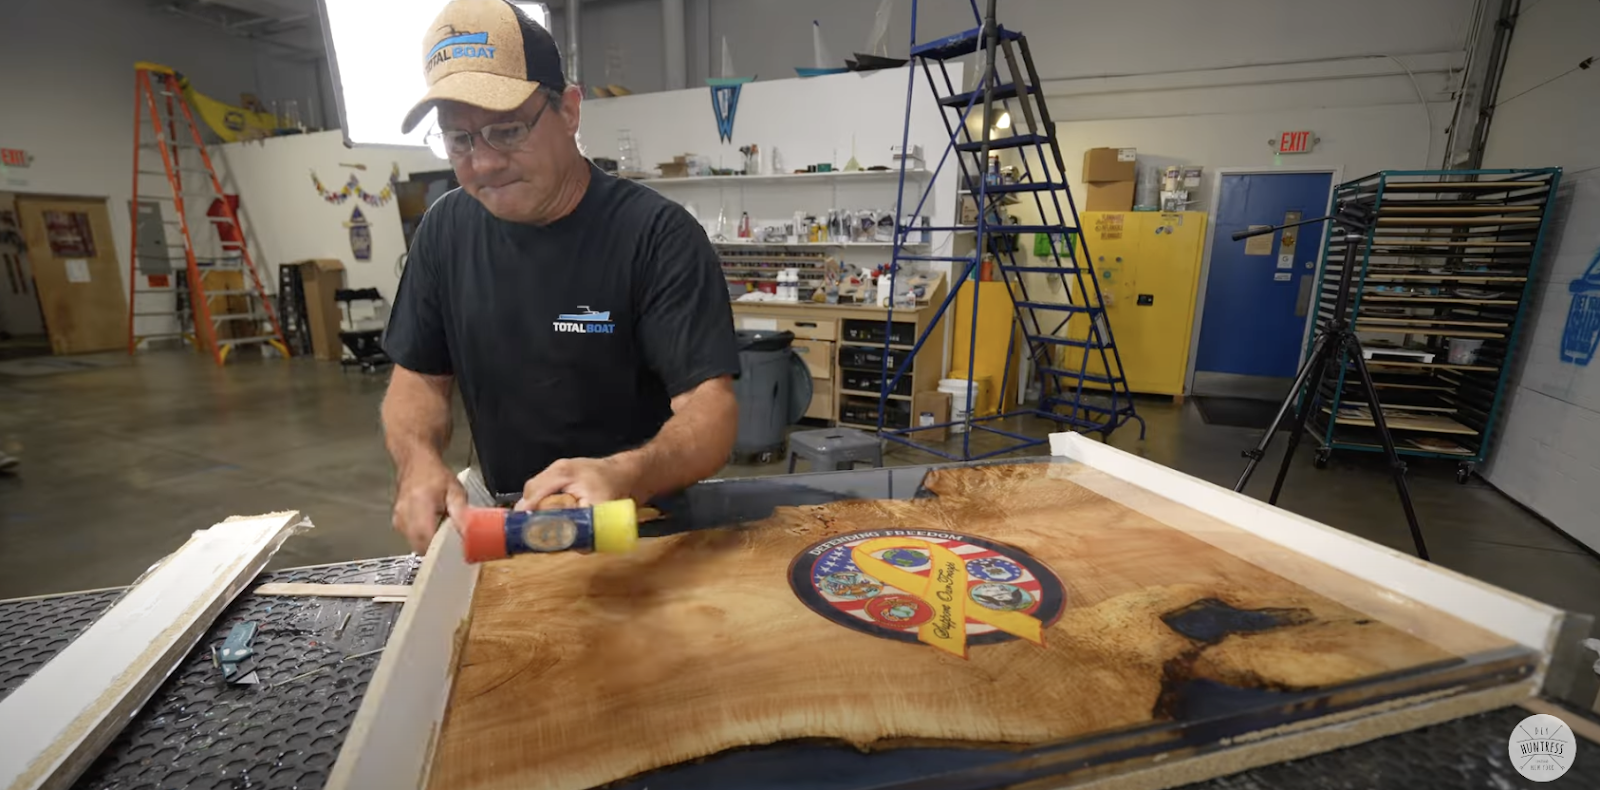
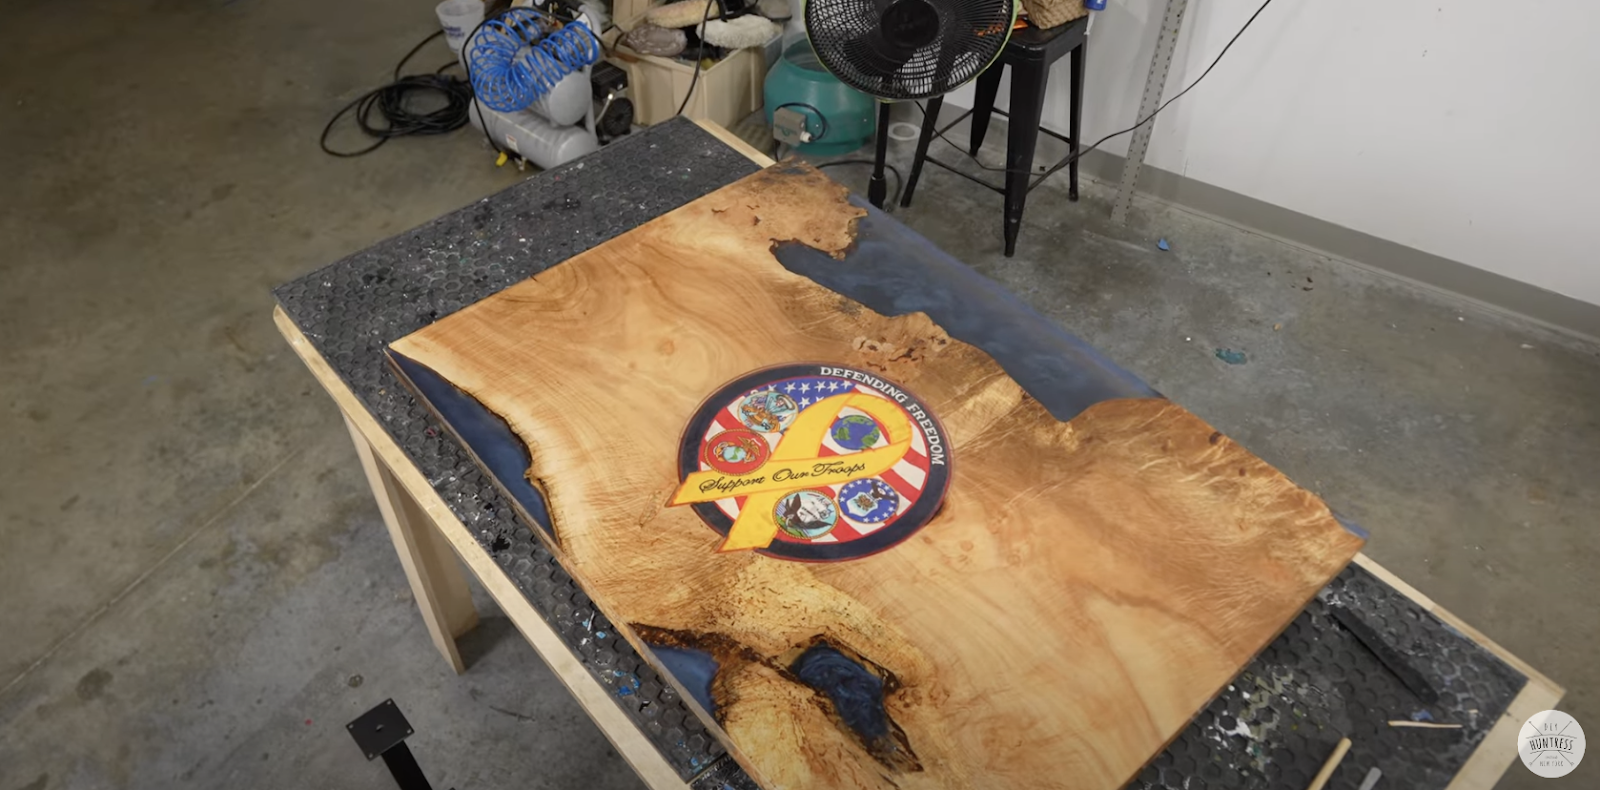
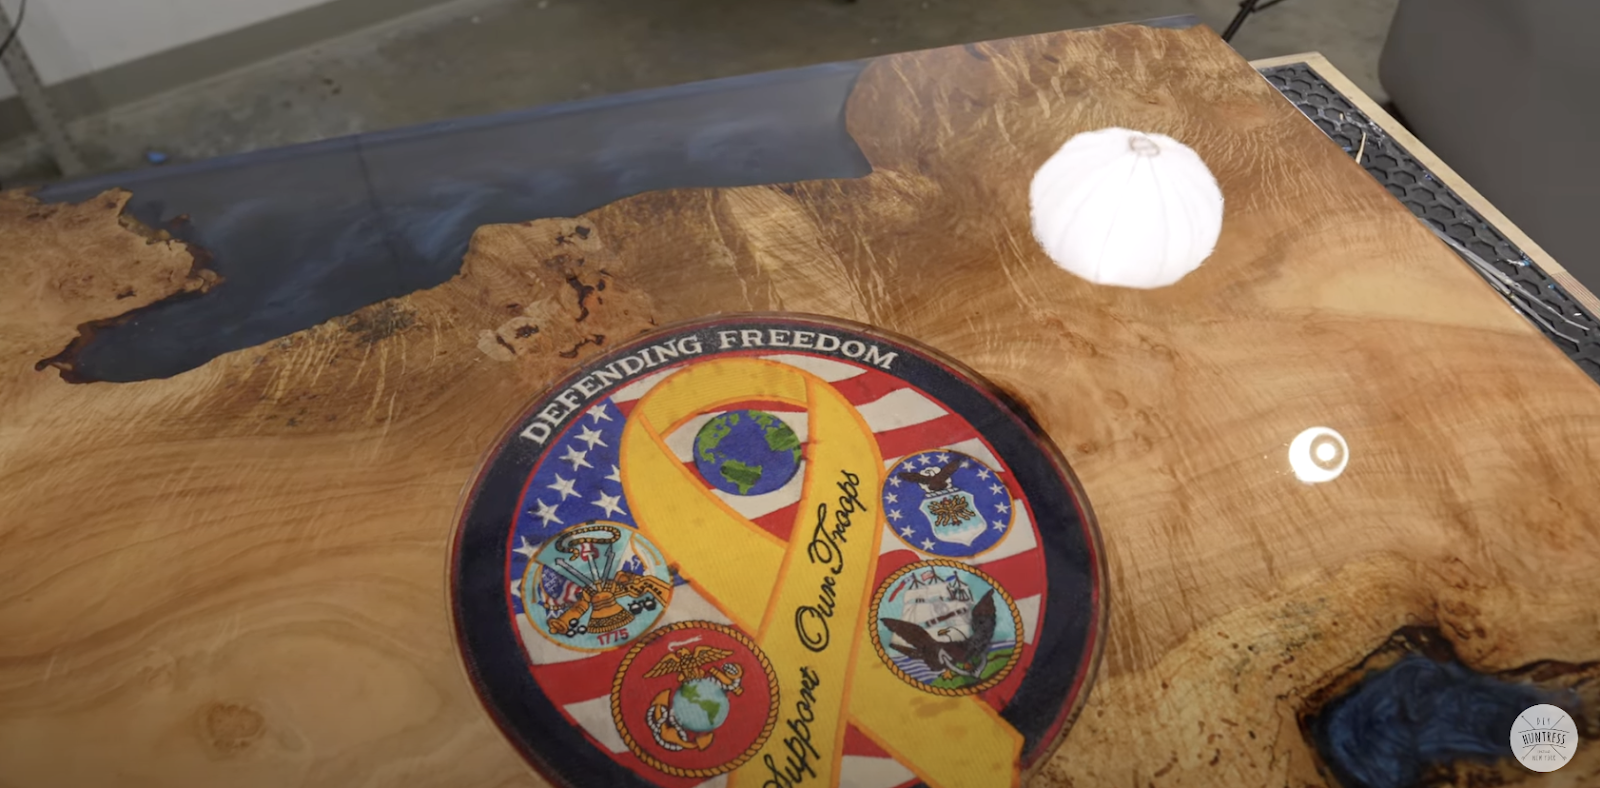
He wanted to create an inlay for this patch, so his plan was use the CNC to carve out the spot for it and set it in with the epoxy.
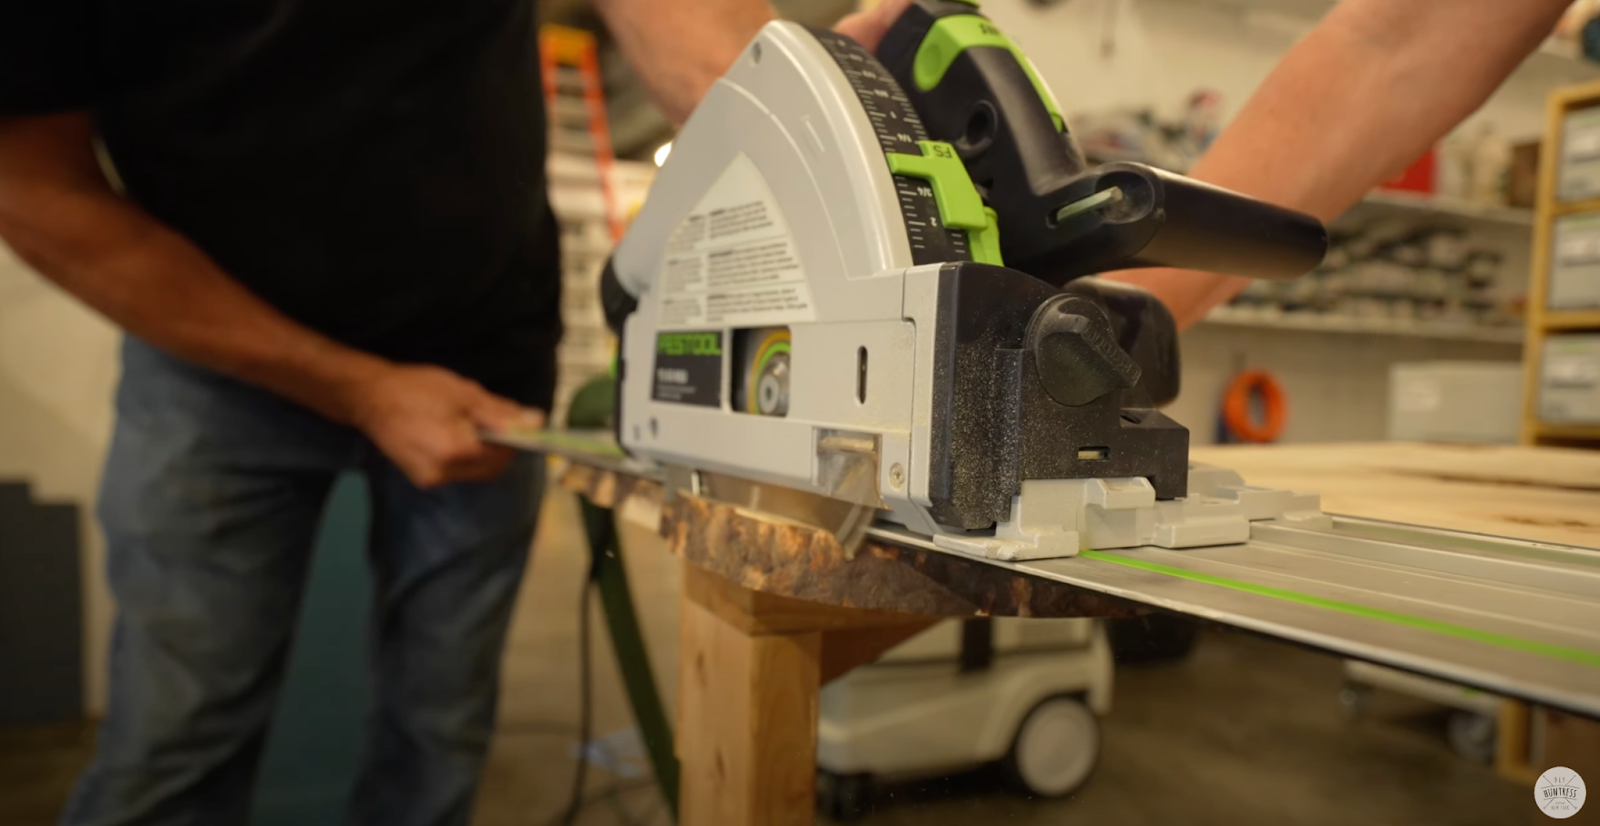
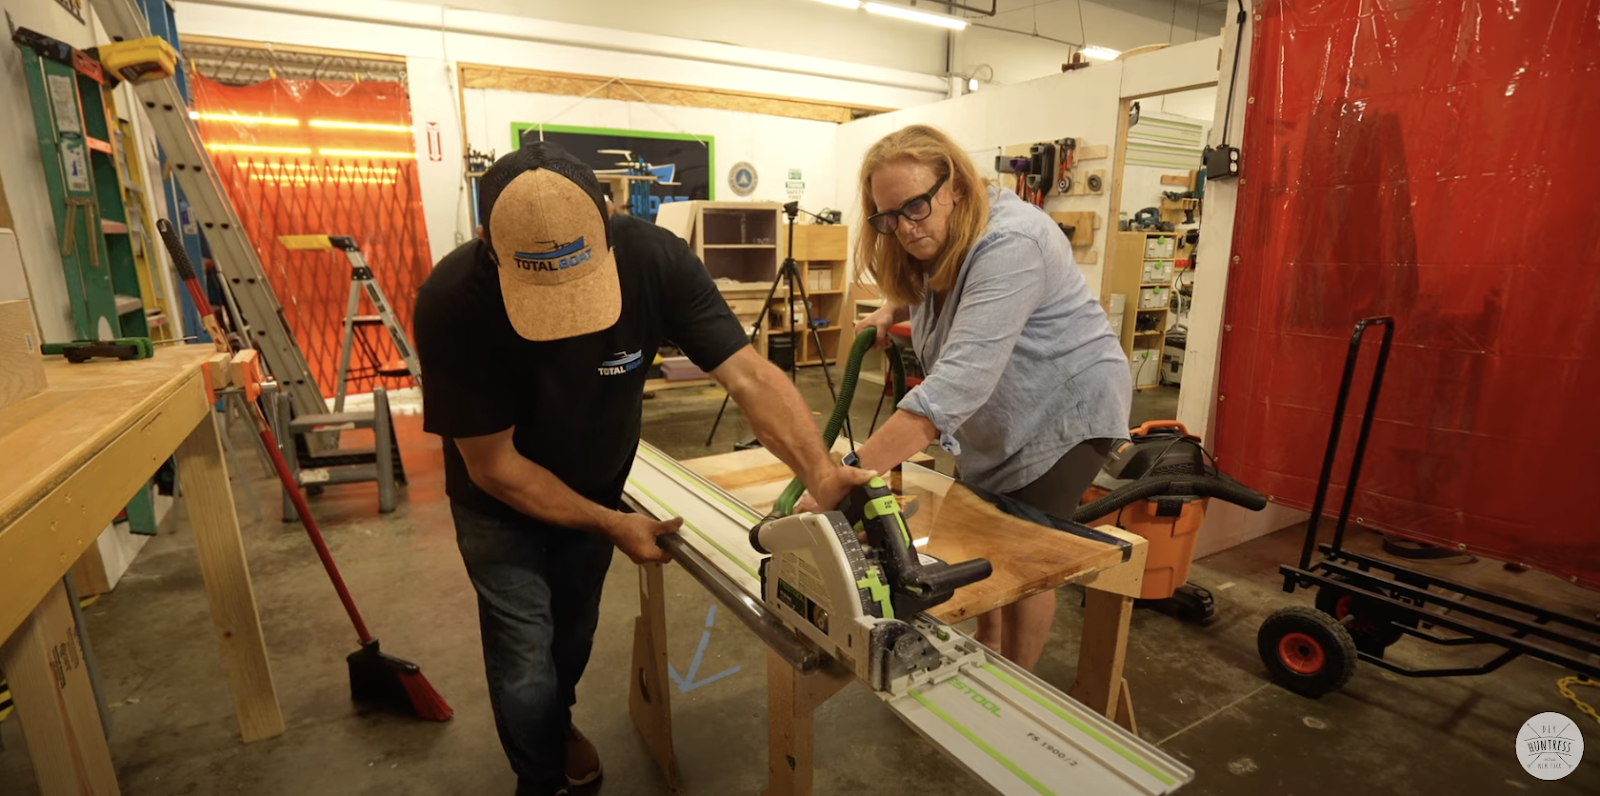
Spoiler alert, this was his first time using a track saw!
He also had to use the track saw to trim up this side.
Of course there was some bark cleanup to do around the live edge.
Once the cleanup was done he put together a melamine frame with silicone and screws to prevent the epoxy from leaking out during the pour.
Sam’s Game Plan
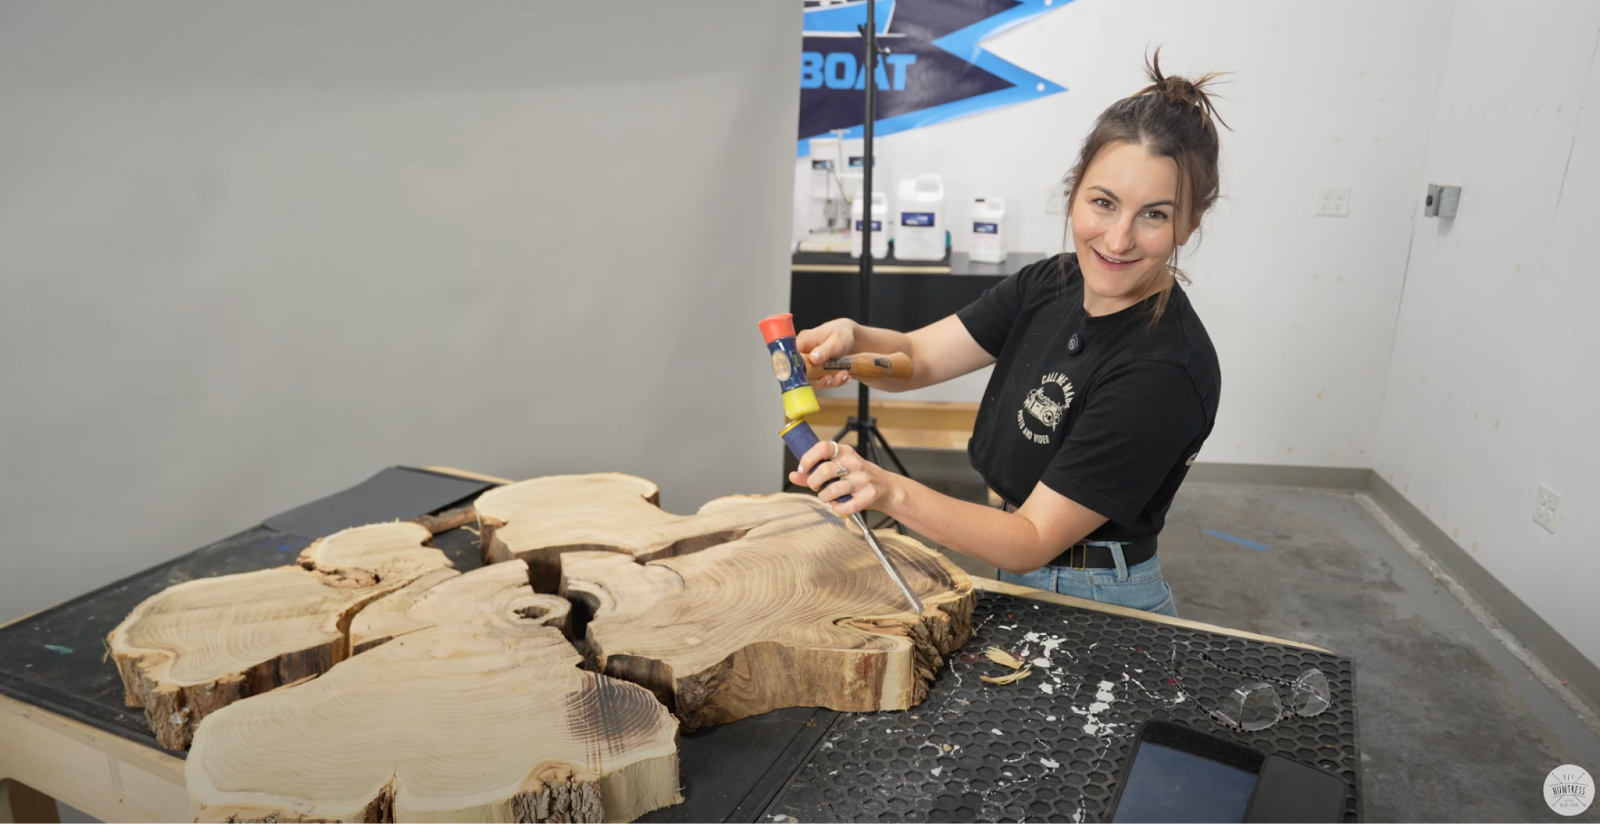
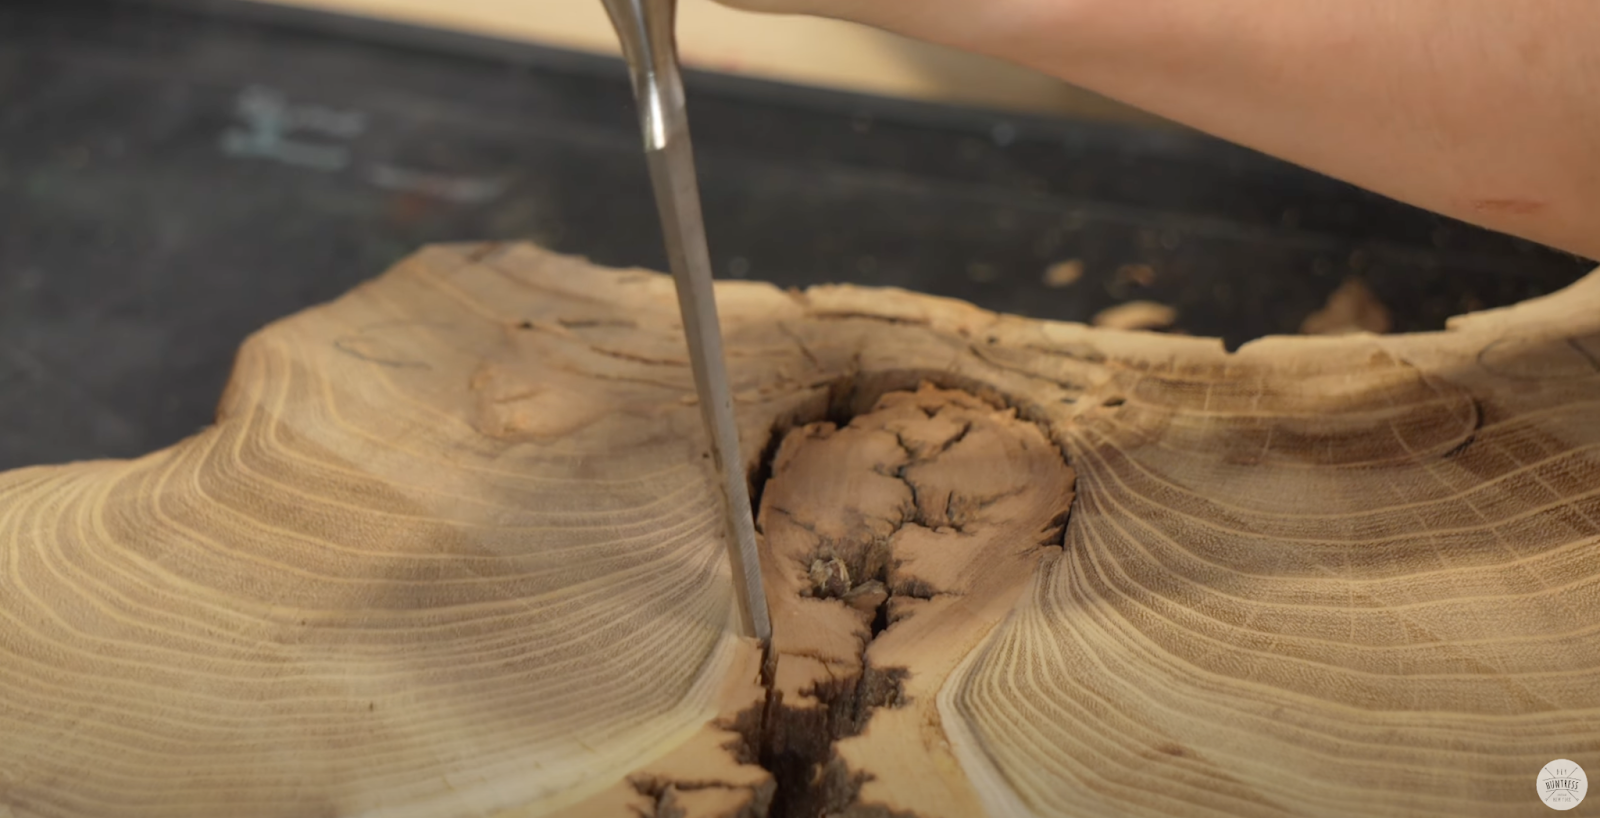
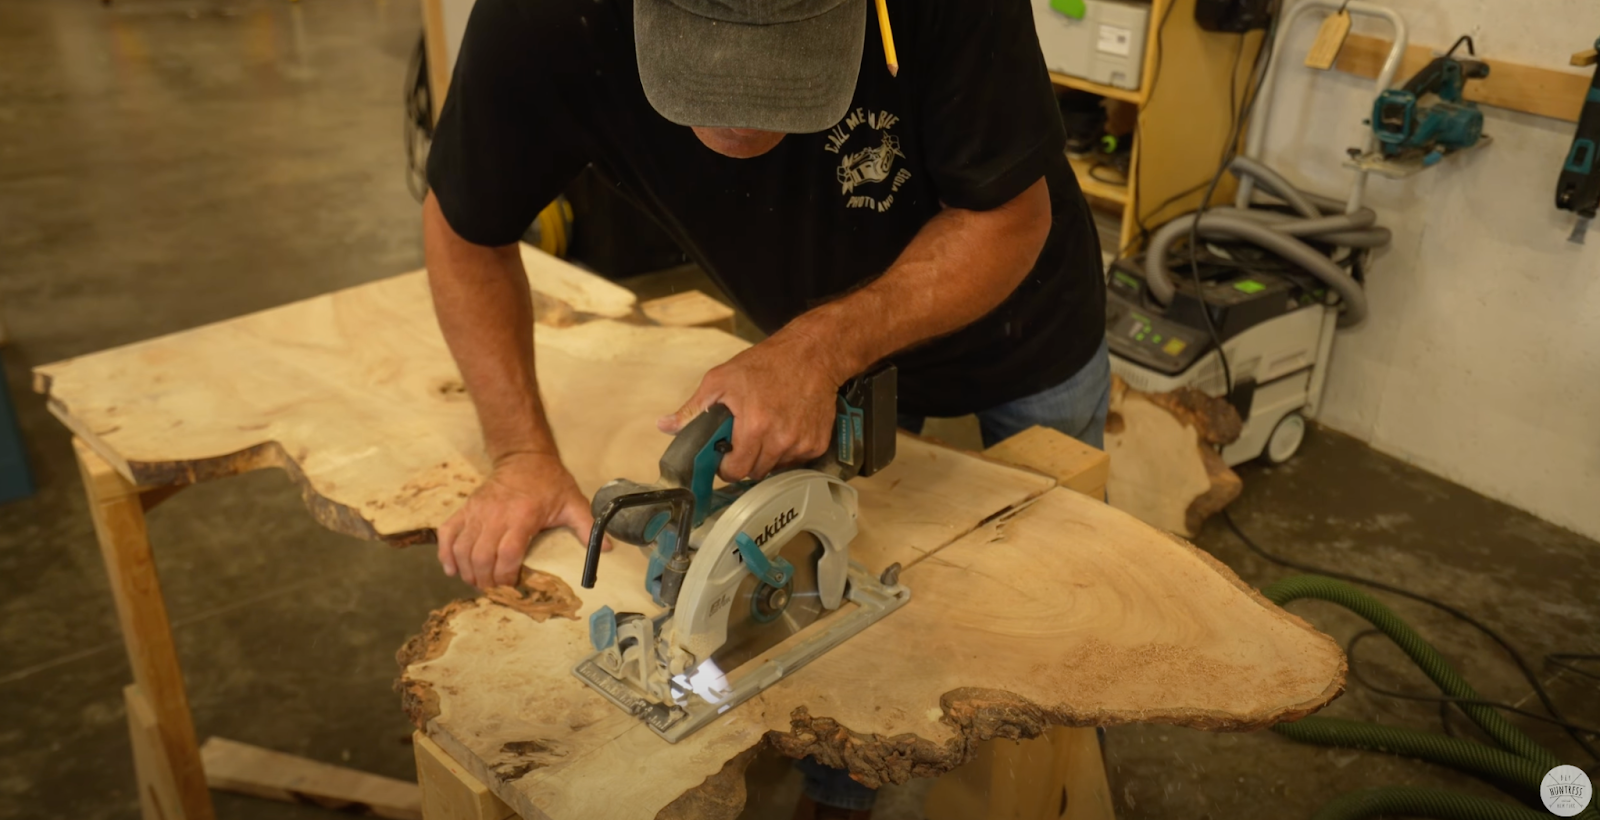
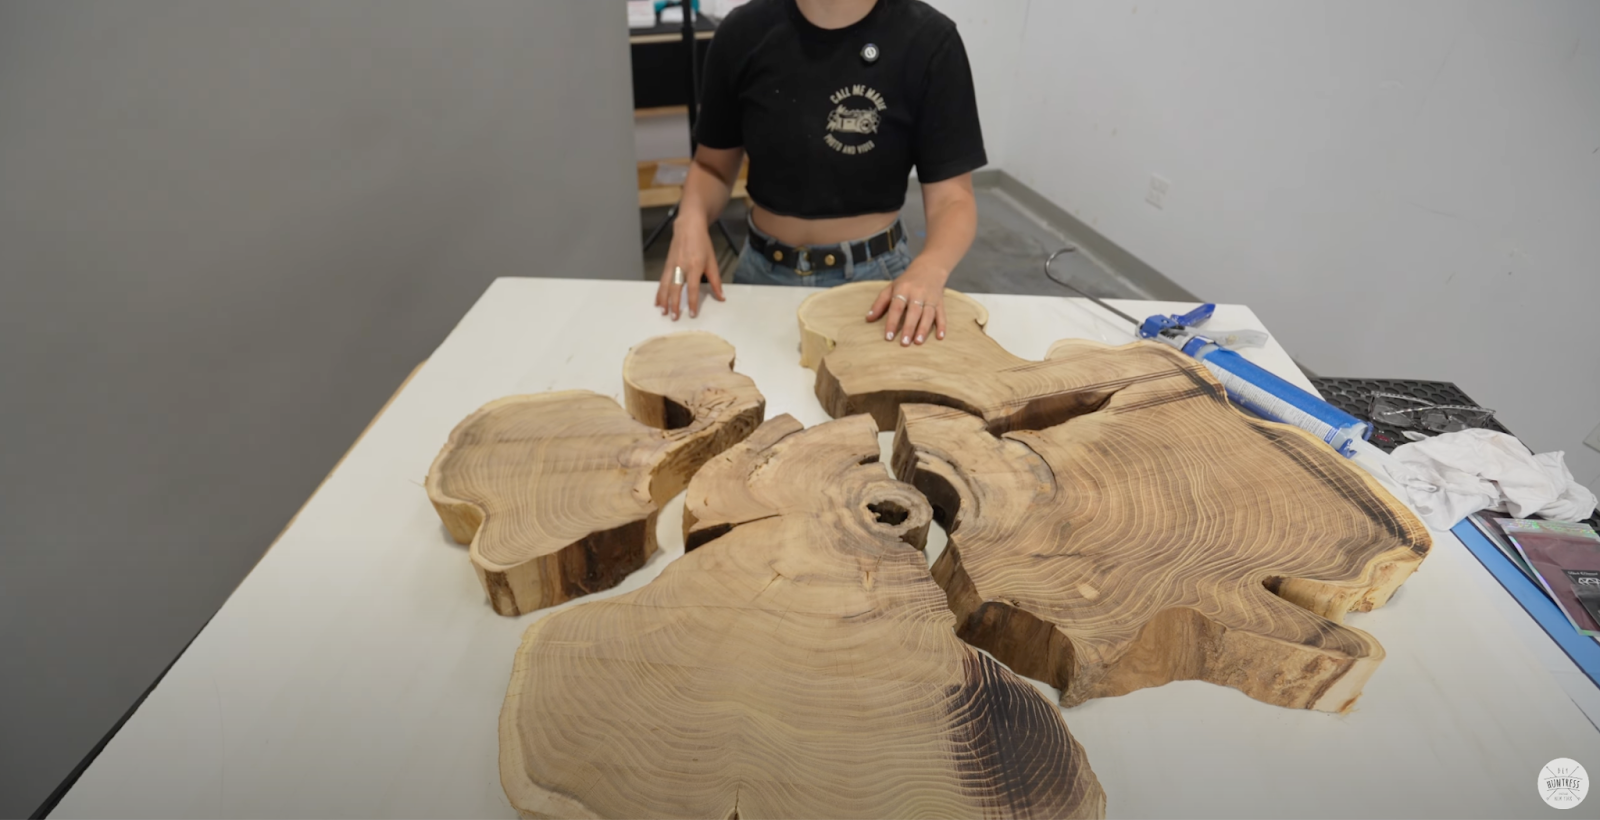
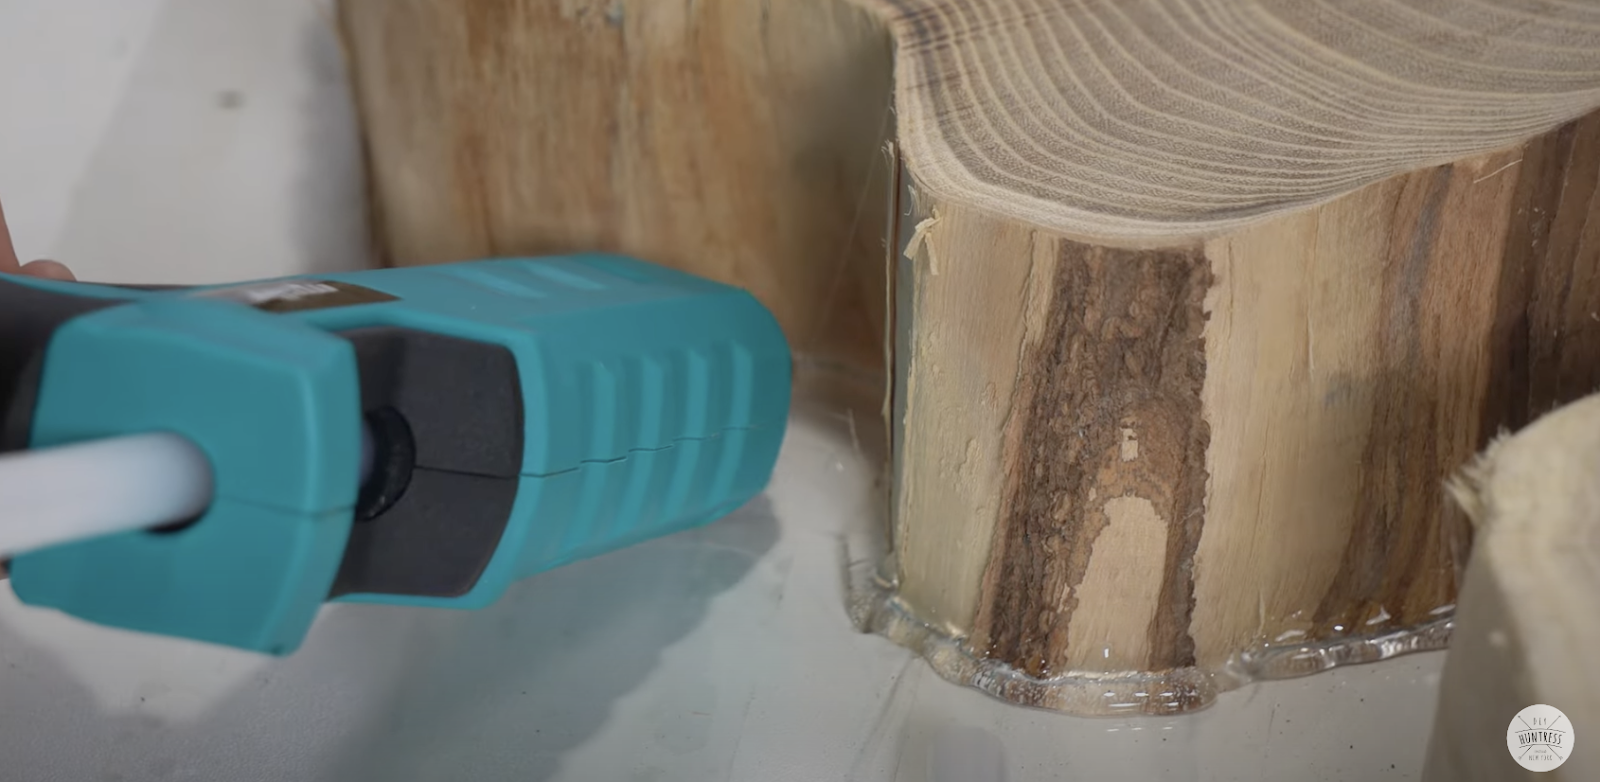
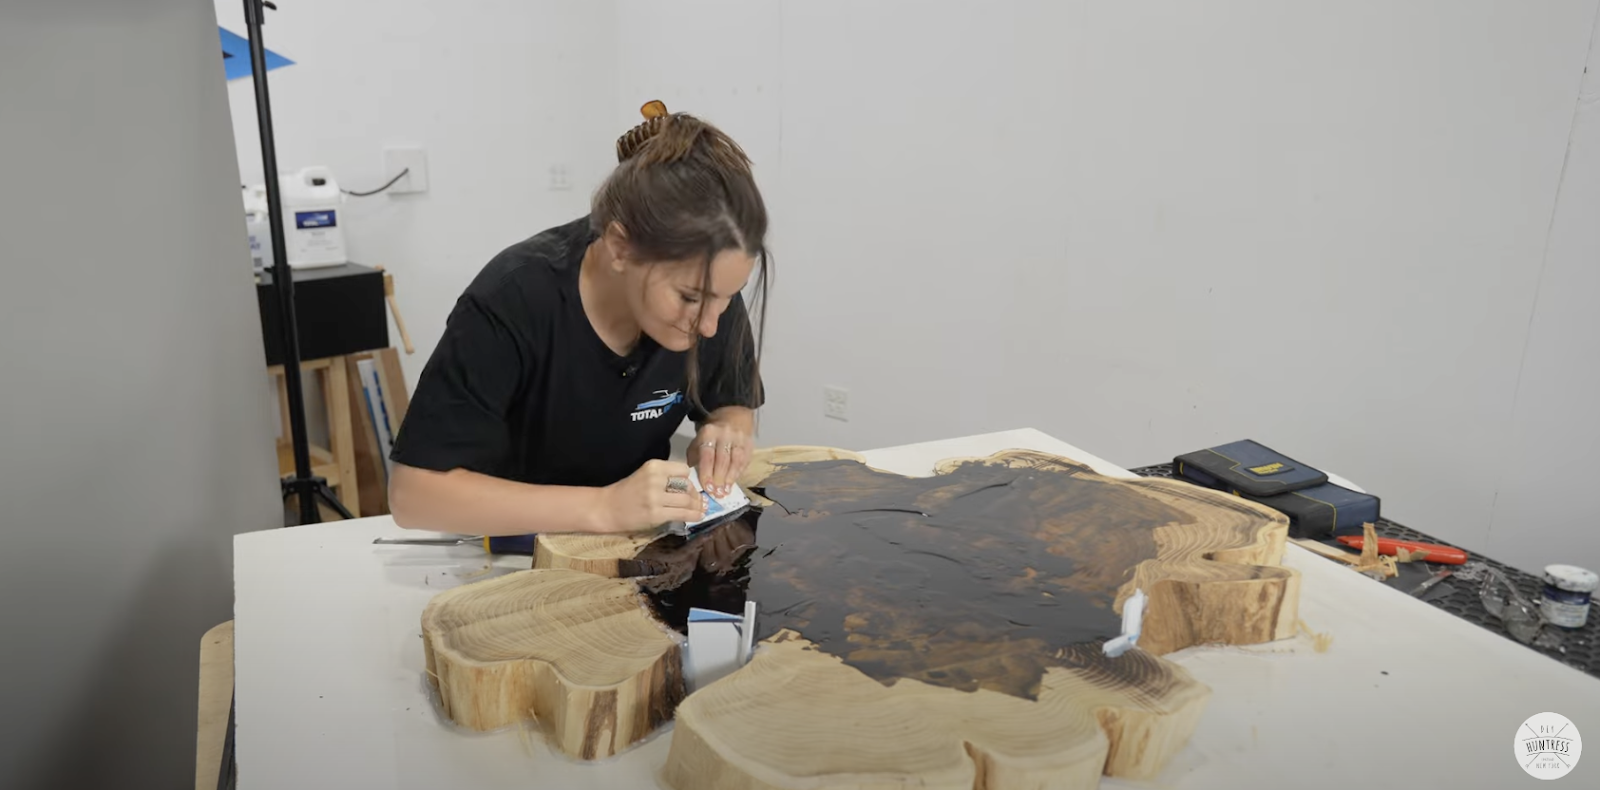
My coffee table will only be held together by epoxy resin so it was really important to clean up my slab really well. I removed all of the bark, and any dirt, this way the epoxy could really stick to the slab. Every crack had to be thoroughly brushed out.
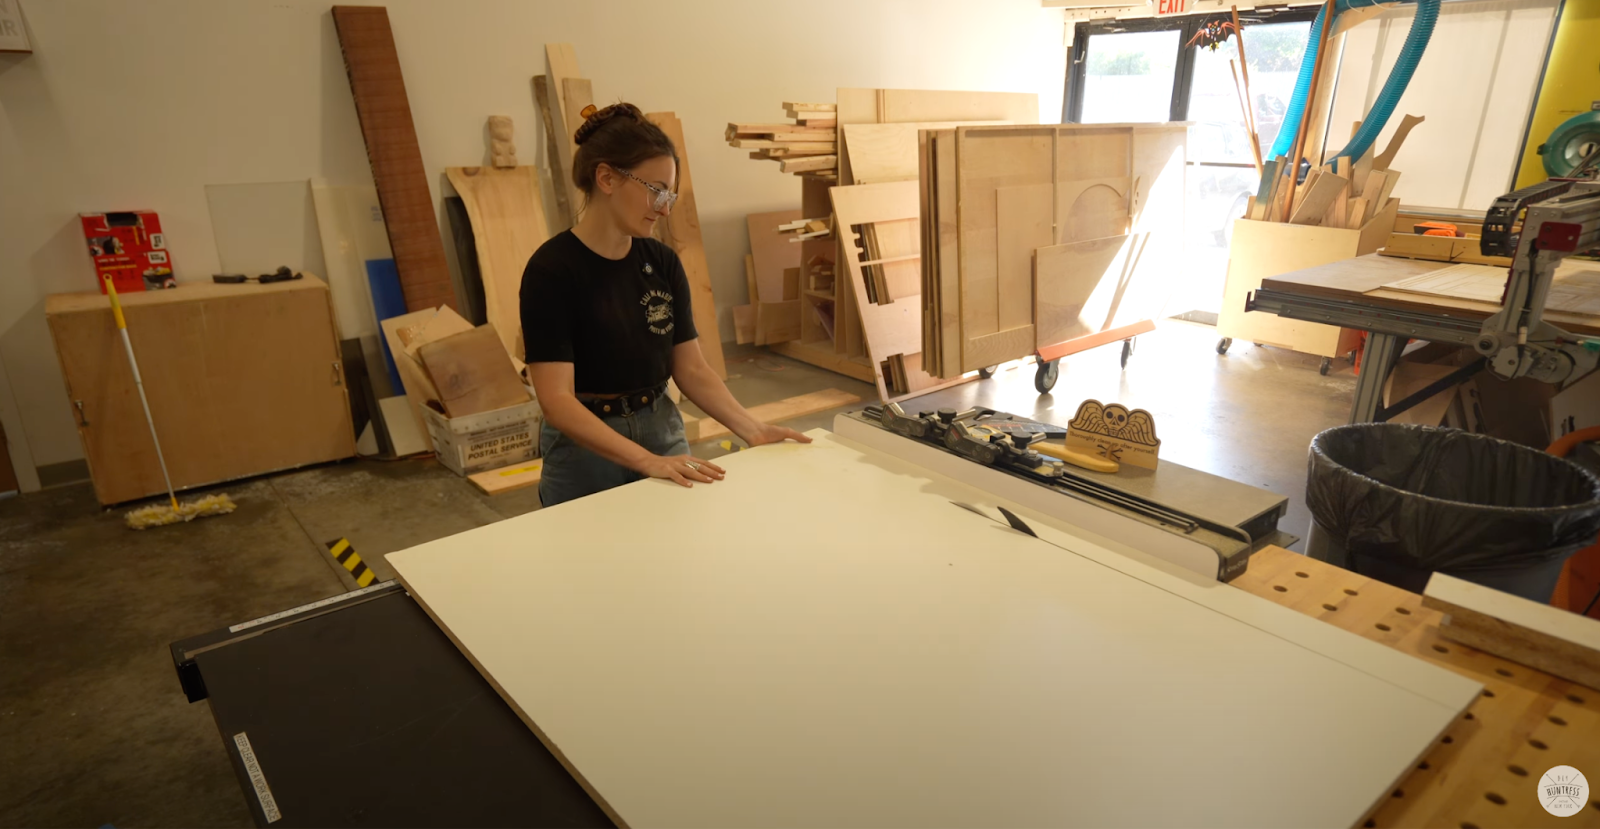
I also had to cut out the melamine that the slab was going to be attached to during the pour.
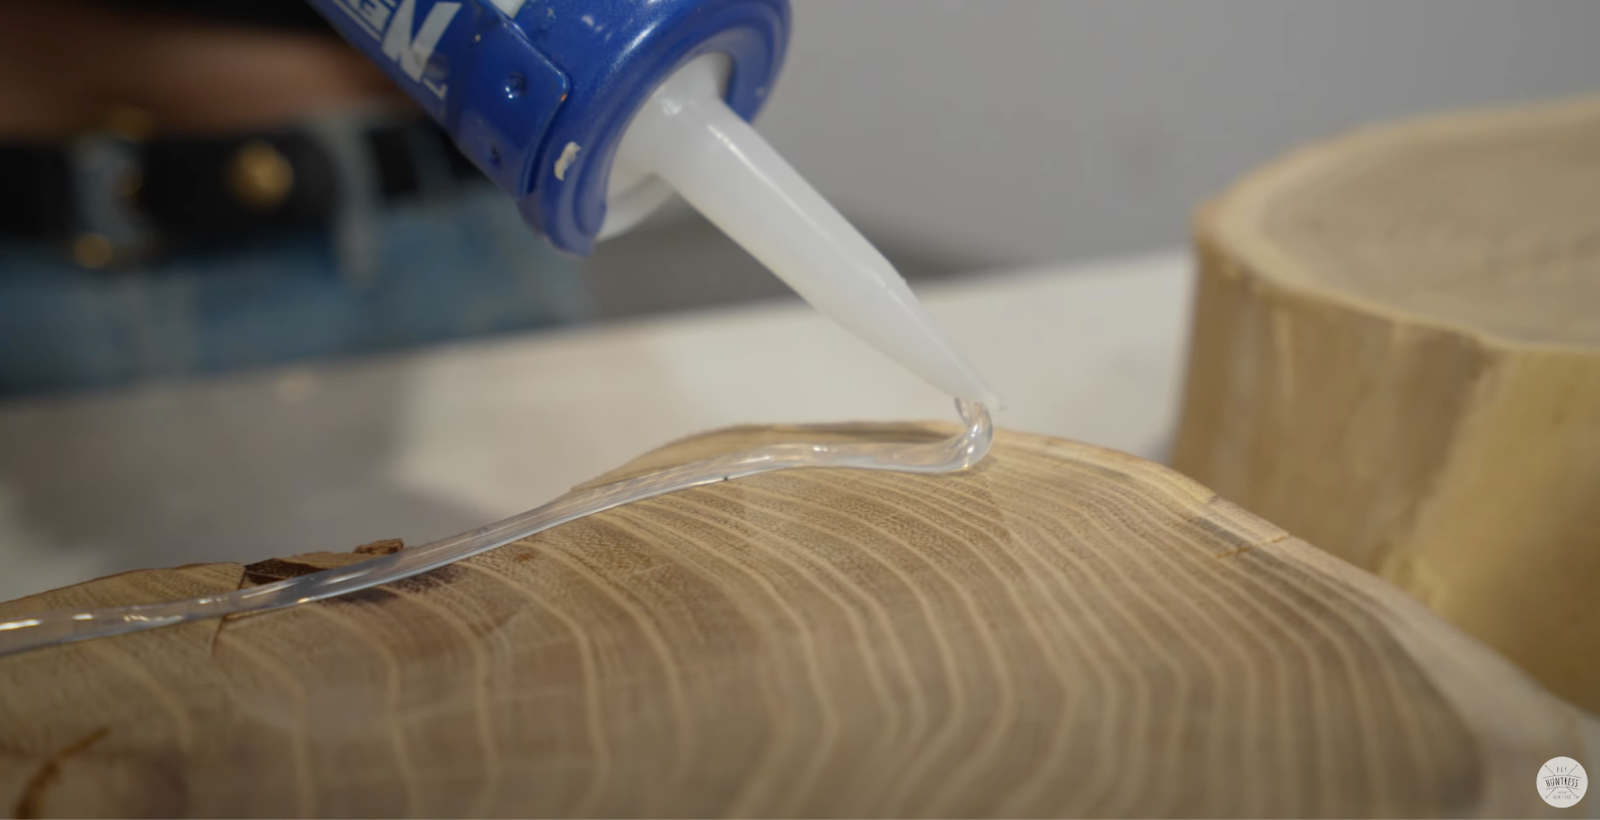
Then I siliconed the entire slab to the melamine to keep everything in place.
At the end of Day 1 we had our work cut out for us…and a dividing wall to keep everything a surprise.
Day 2 – Pour Day
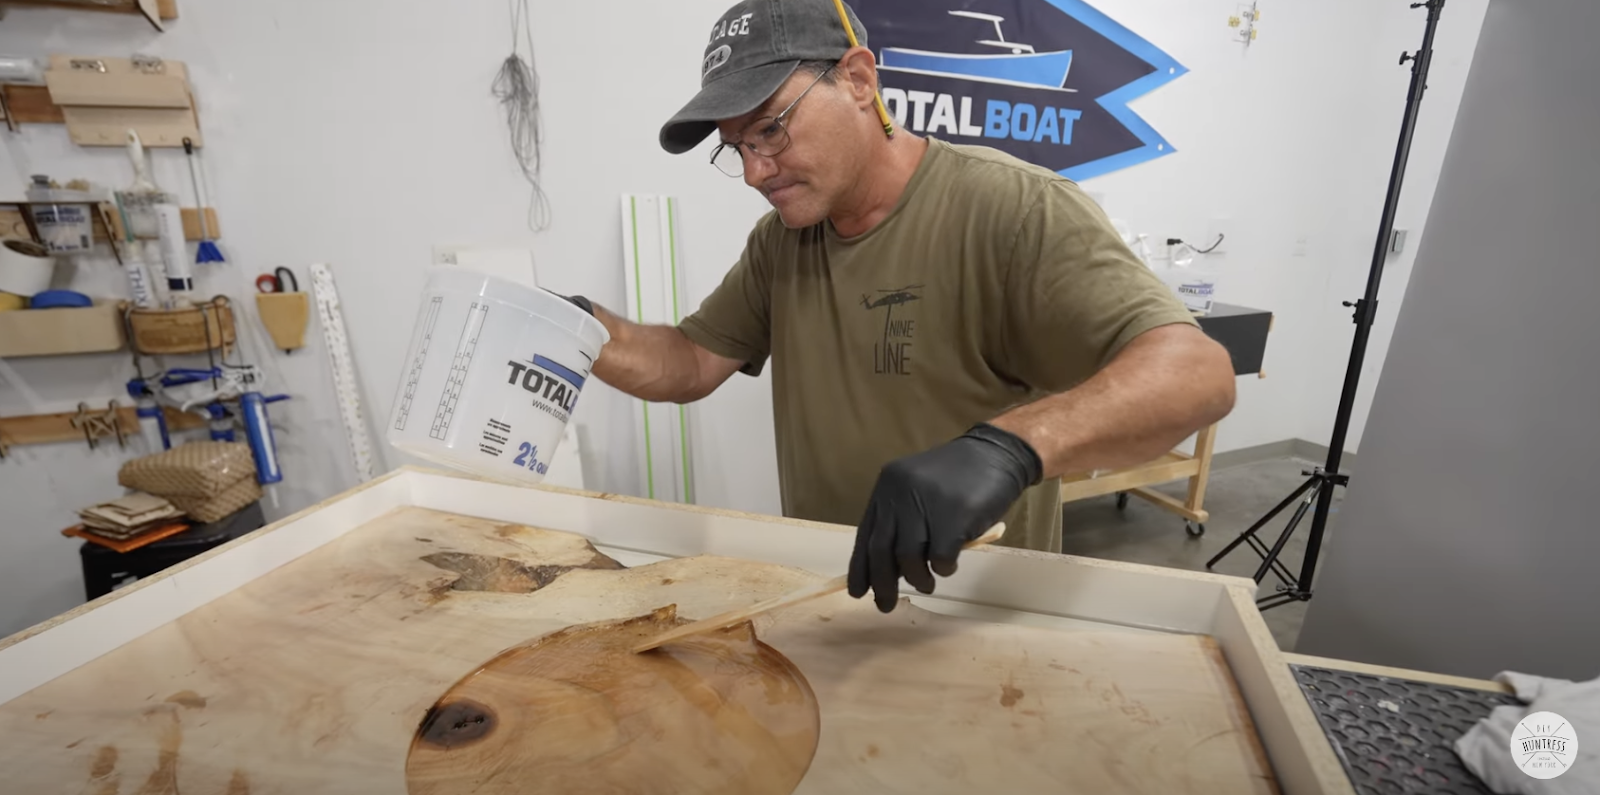
Before Joe go to pouring he had to CNC out an inlay. I really thought he was going to do a river table but he switched it up to trick me! So before he could run the CNC he had to secure his slab to the table.
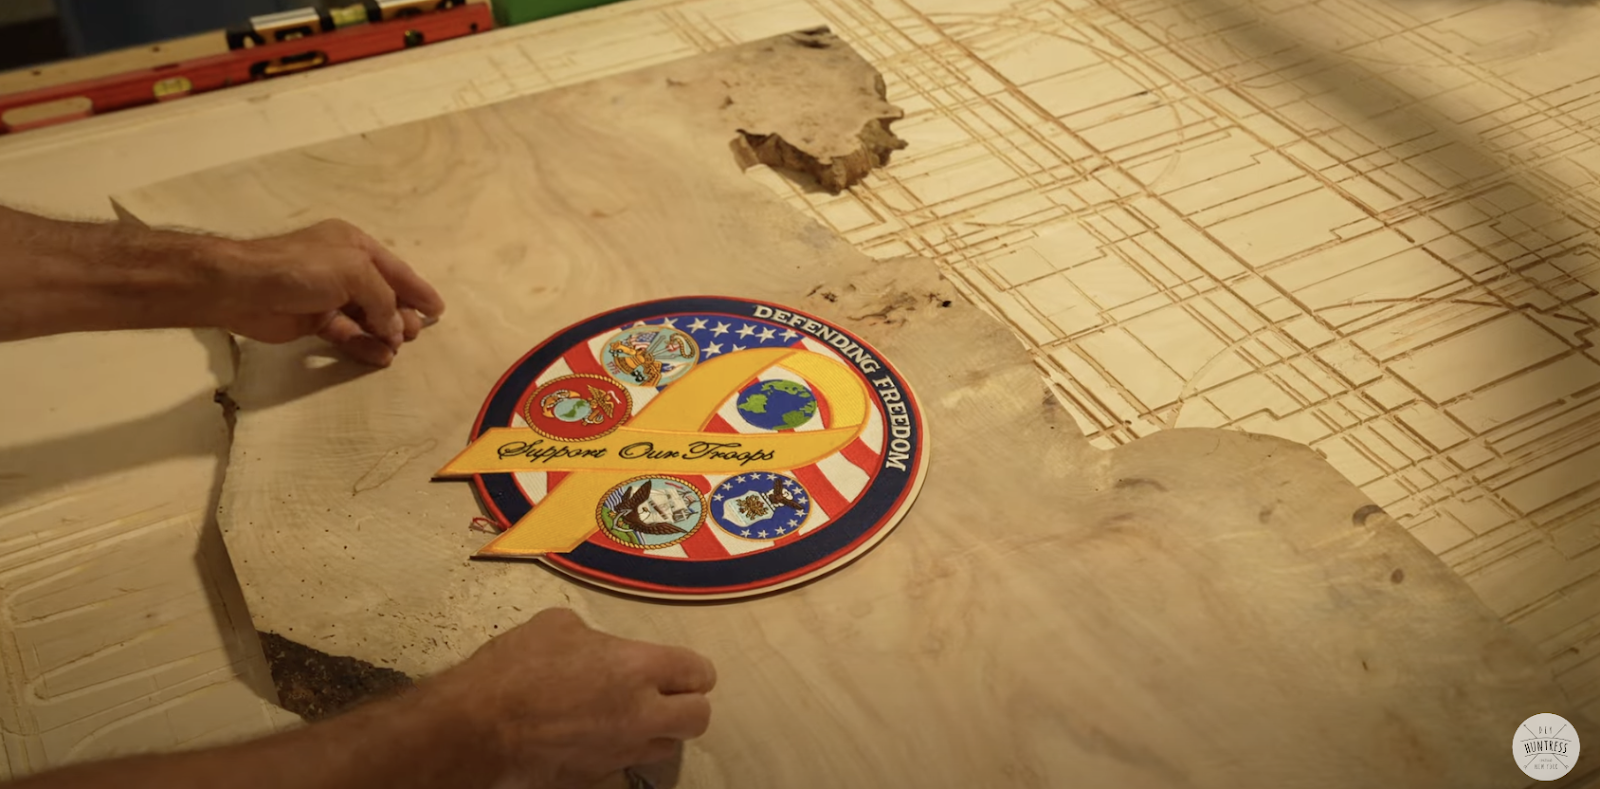
My dad comes from a military family so he wanted to honor both troops that have served and are currently serving. So his plan was to auction off the table and make a split donation between Wounded Warriors and Tunnels to Towers.

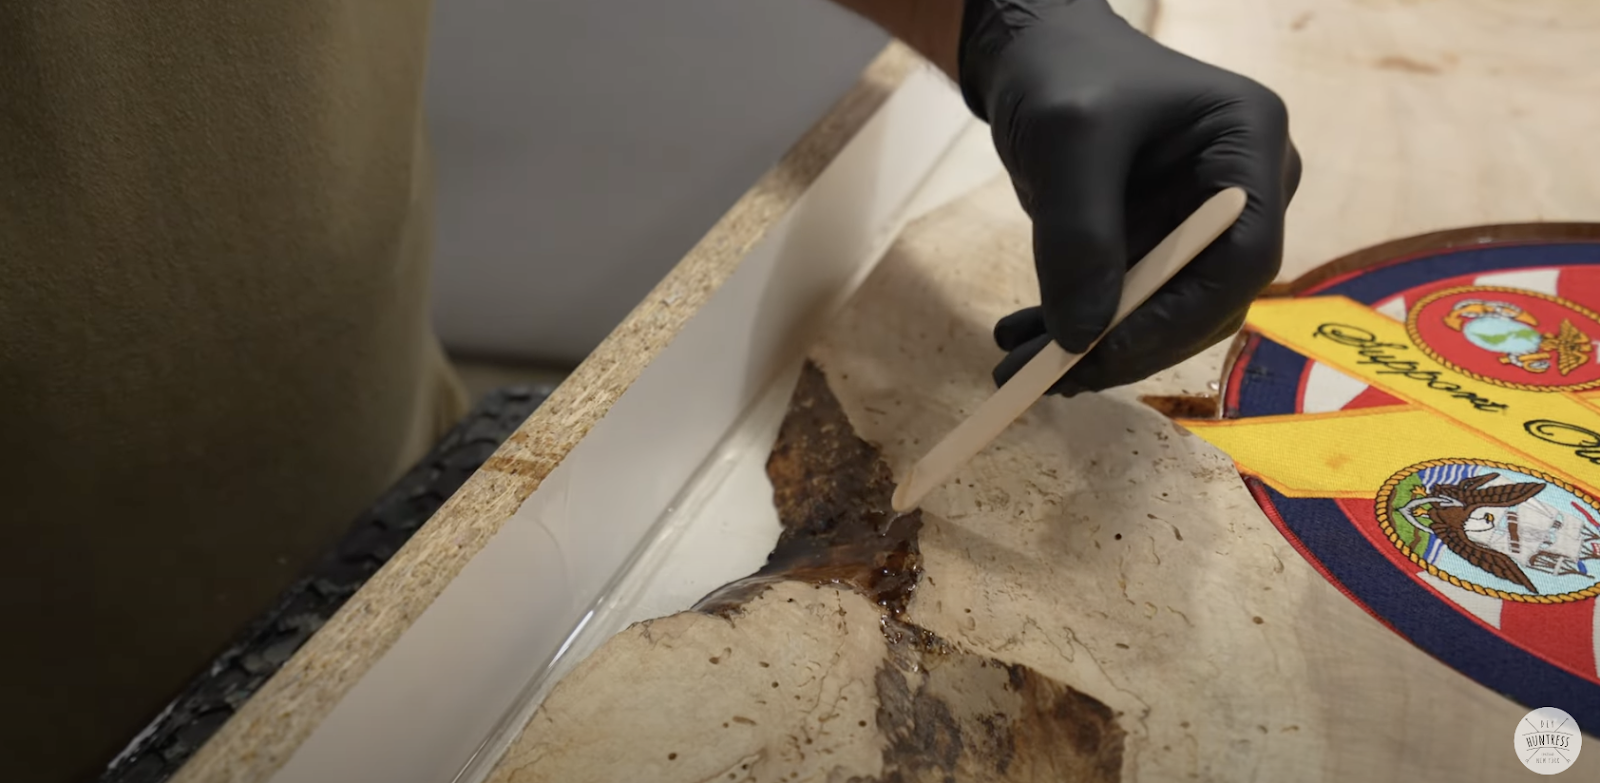
He was pretty nervous about carving into his slab but once it was done and his patch fit perfectly he was feeling pretty confident in the rest of his build.
The hardest part of this was not being able to be there to teach my dad how to do his first epoxy pour. But he had plenty of help. He started with a clear coat along the bottom of his mold and then placed the slab on top of it.

Then he poured epoxy into the inlay to help the patch adhere to the slab.
He made sure to fill in all the spaces and pop any bubbles.
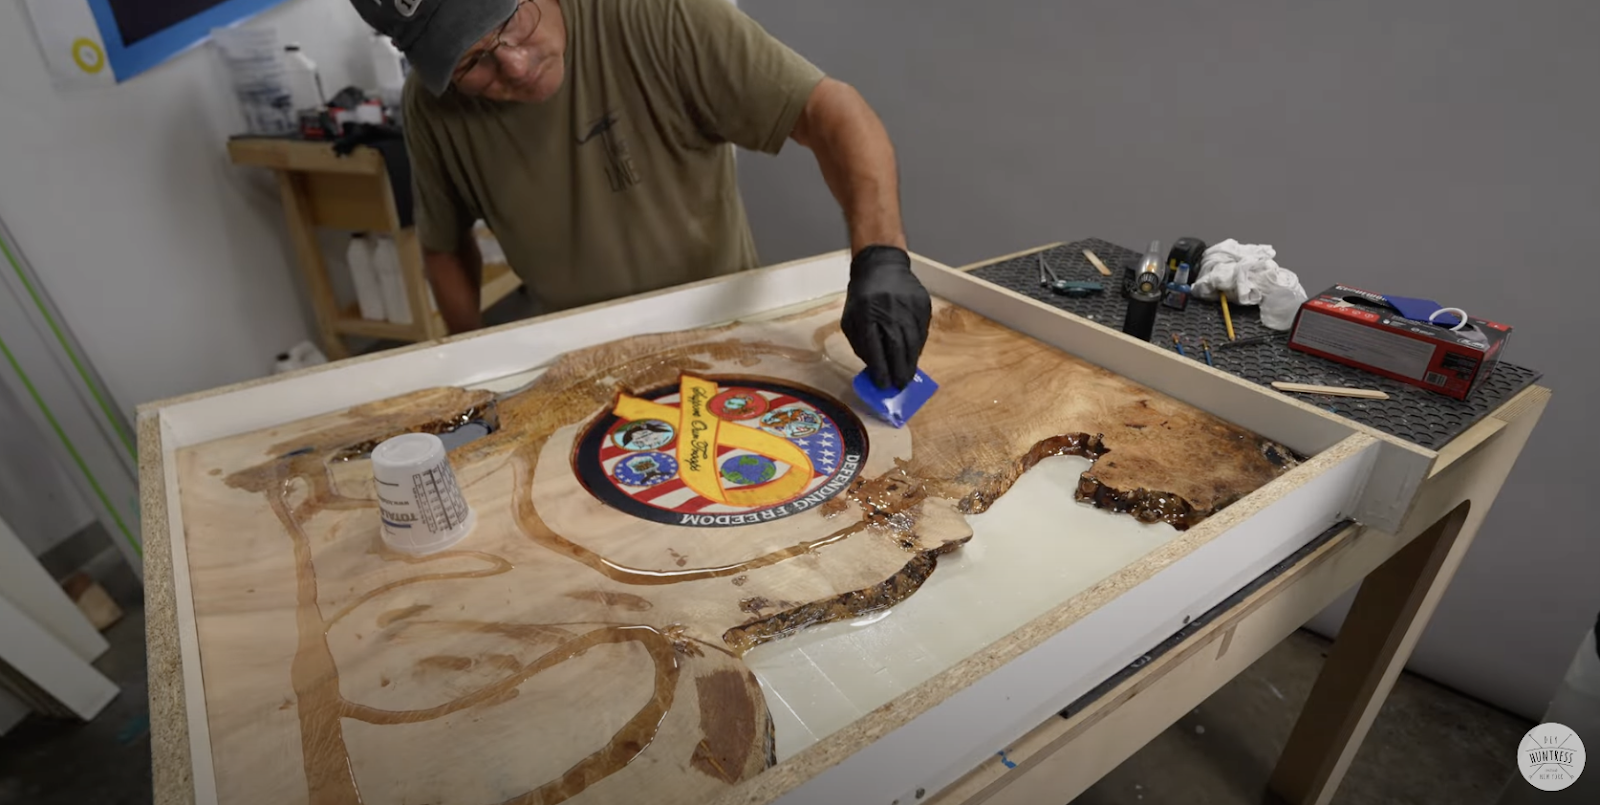
And he also spread the clear coat on top of the slab.
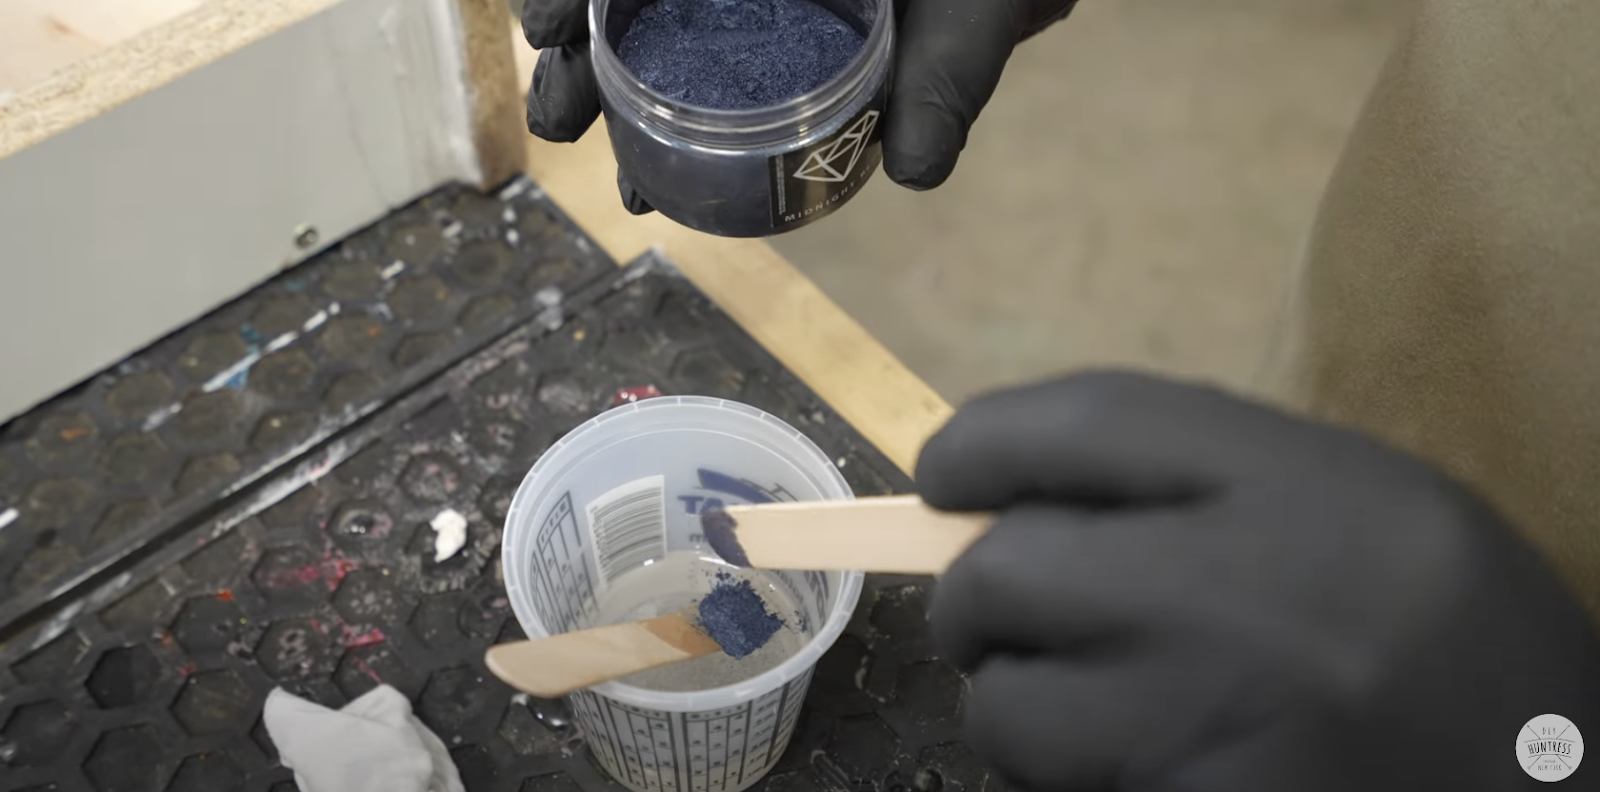
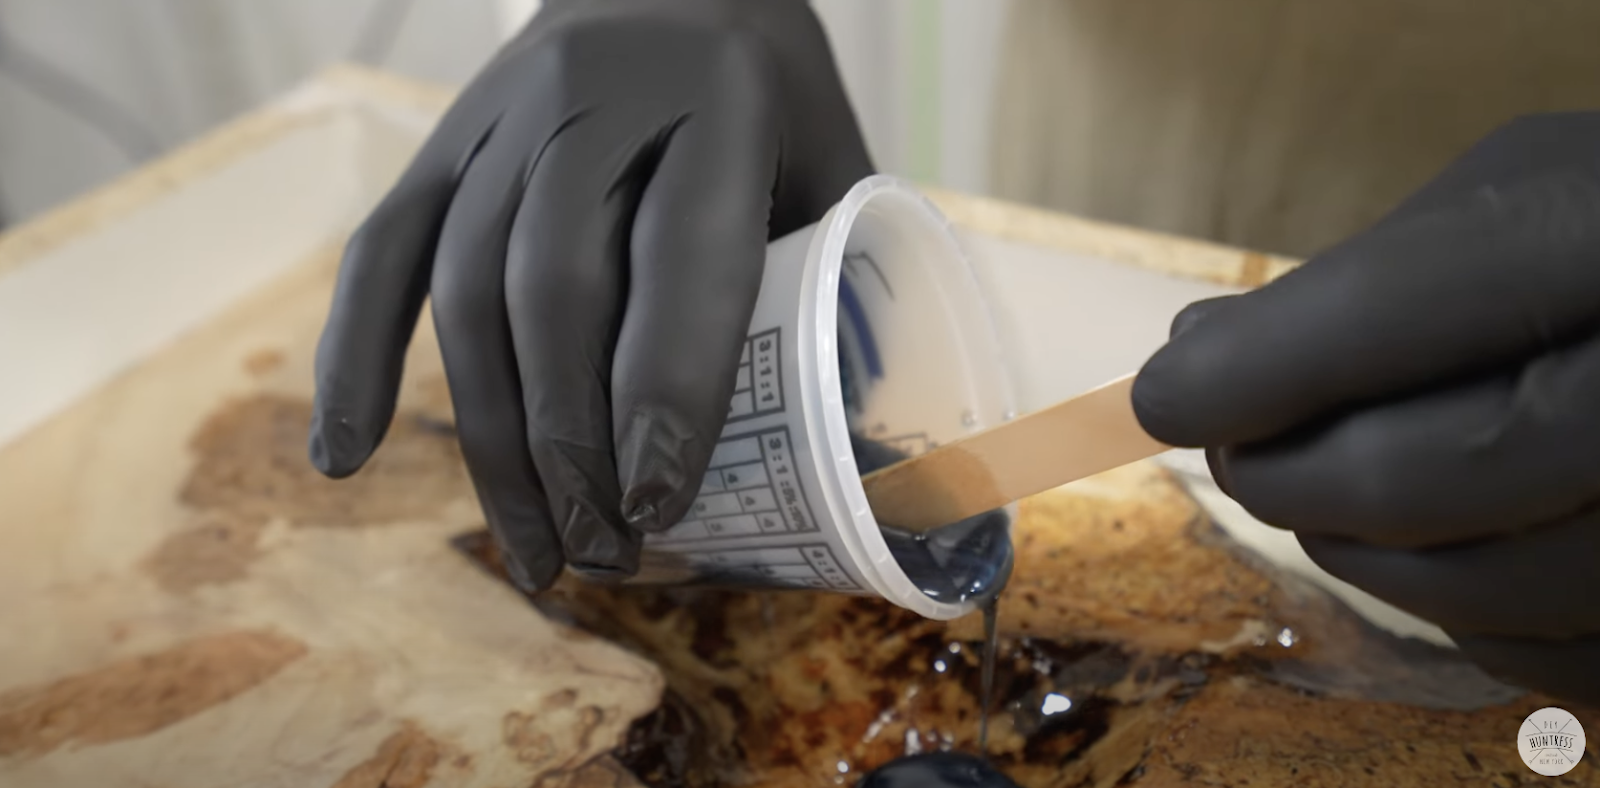
He mixed some pigment into the epoxy to fill in the negative spaces and open edges.
After his first layer dried dad ended Day 2 with another clear layer.

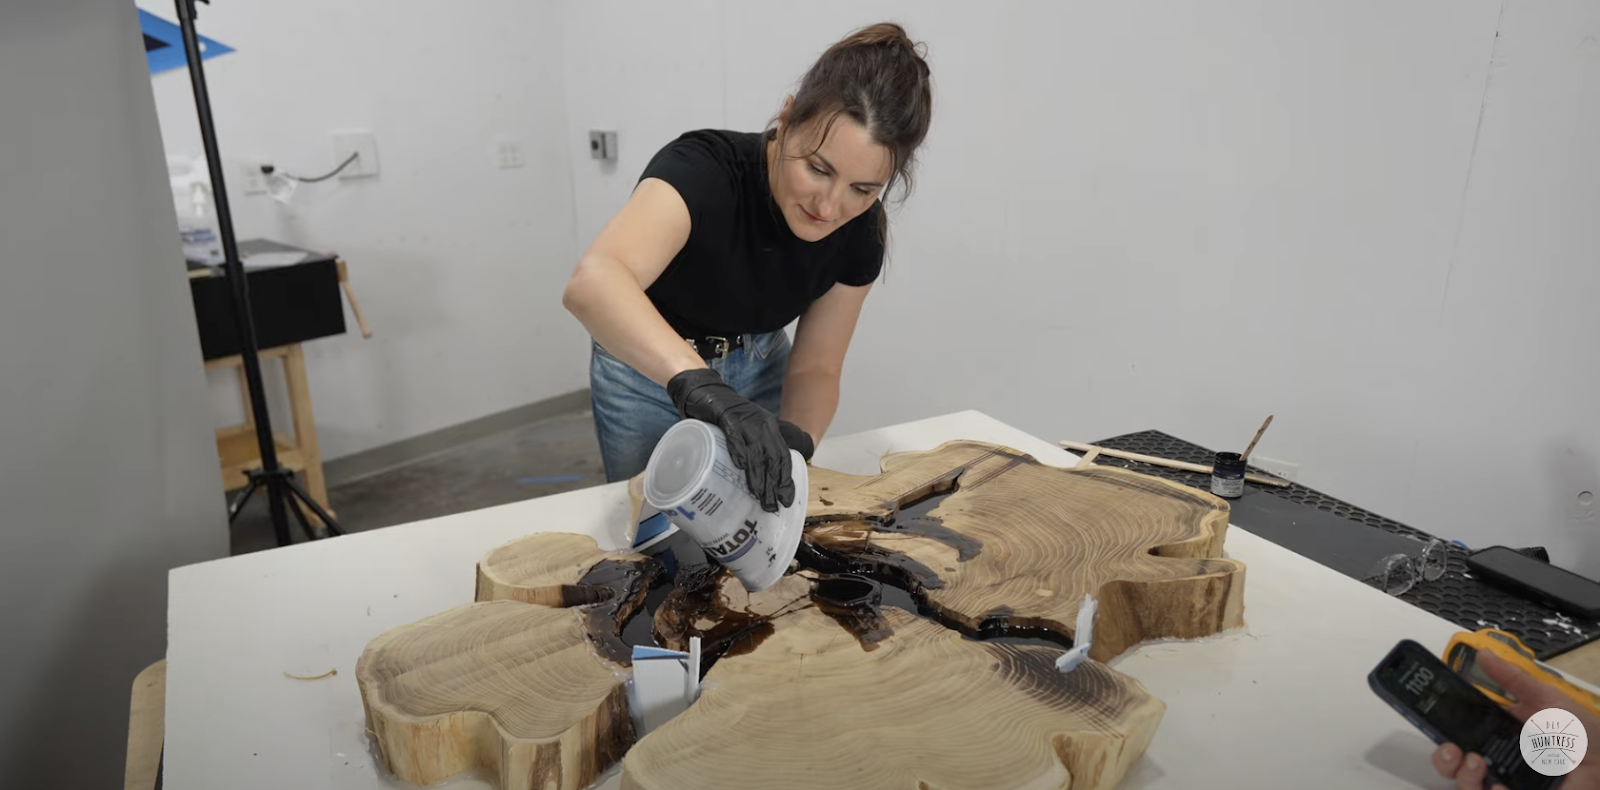
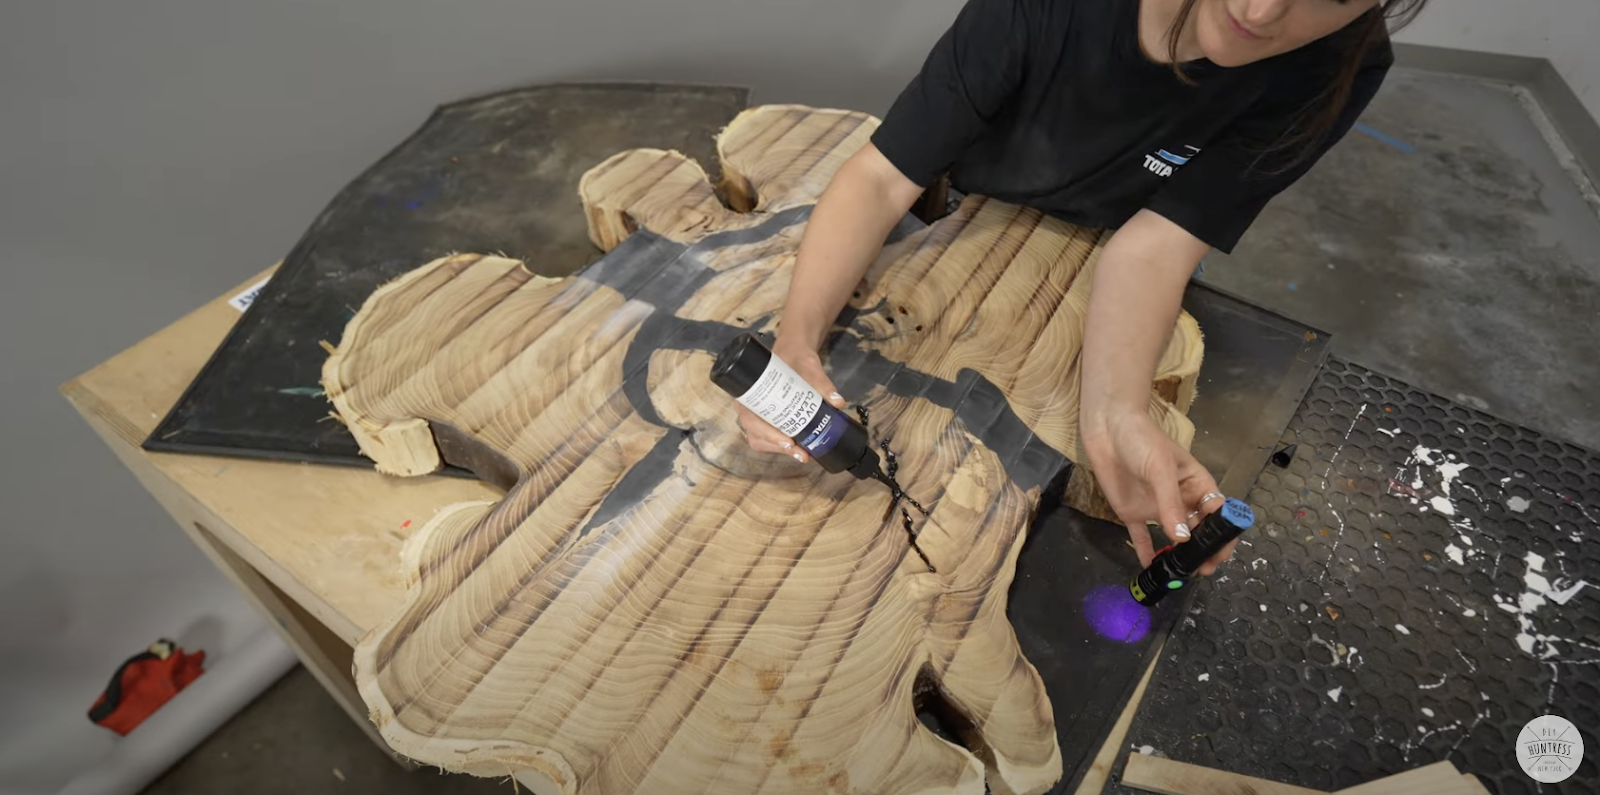
As for my table, I had to create dams in between my slab sections to make sure the epoxy would fill the negative spaces. I used this flexible plastic material and hot glued it into place.
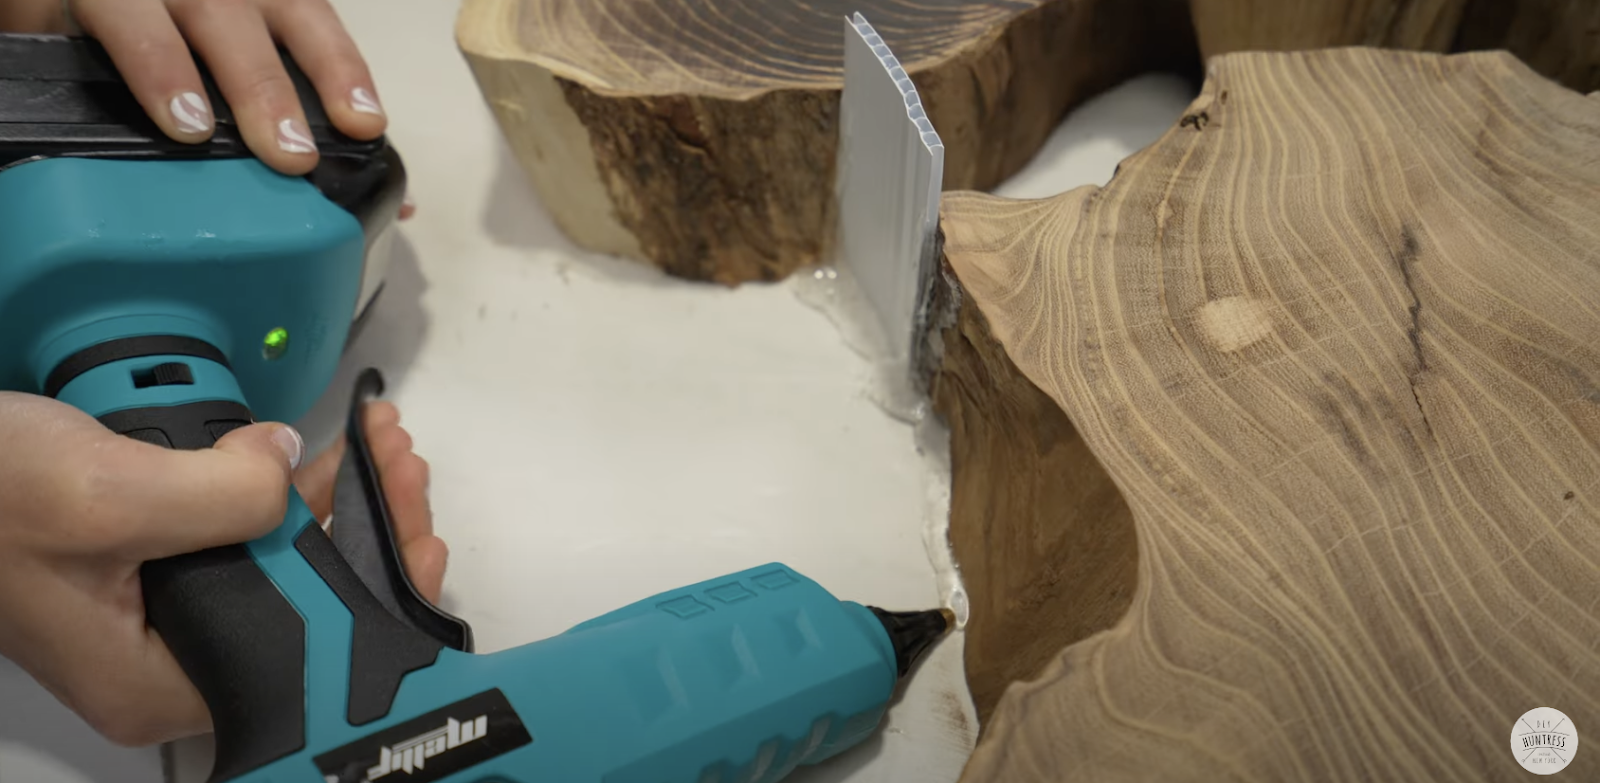
And I was very generous with the hot glue…hot glue and a prayer sent to the Resin Gods that there were going to be no leaks.
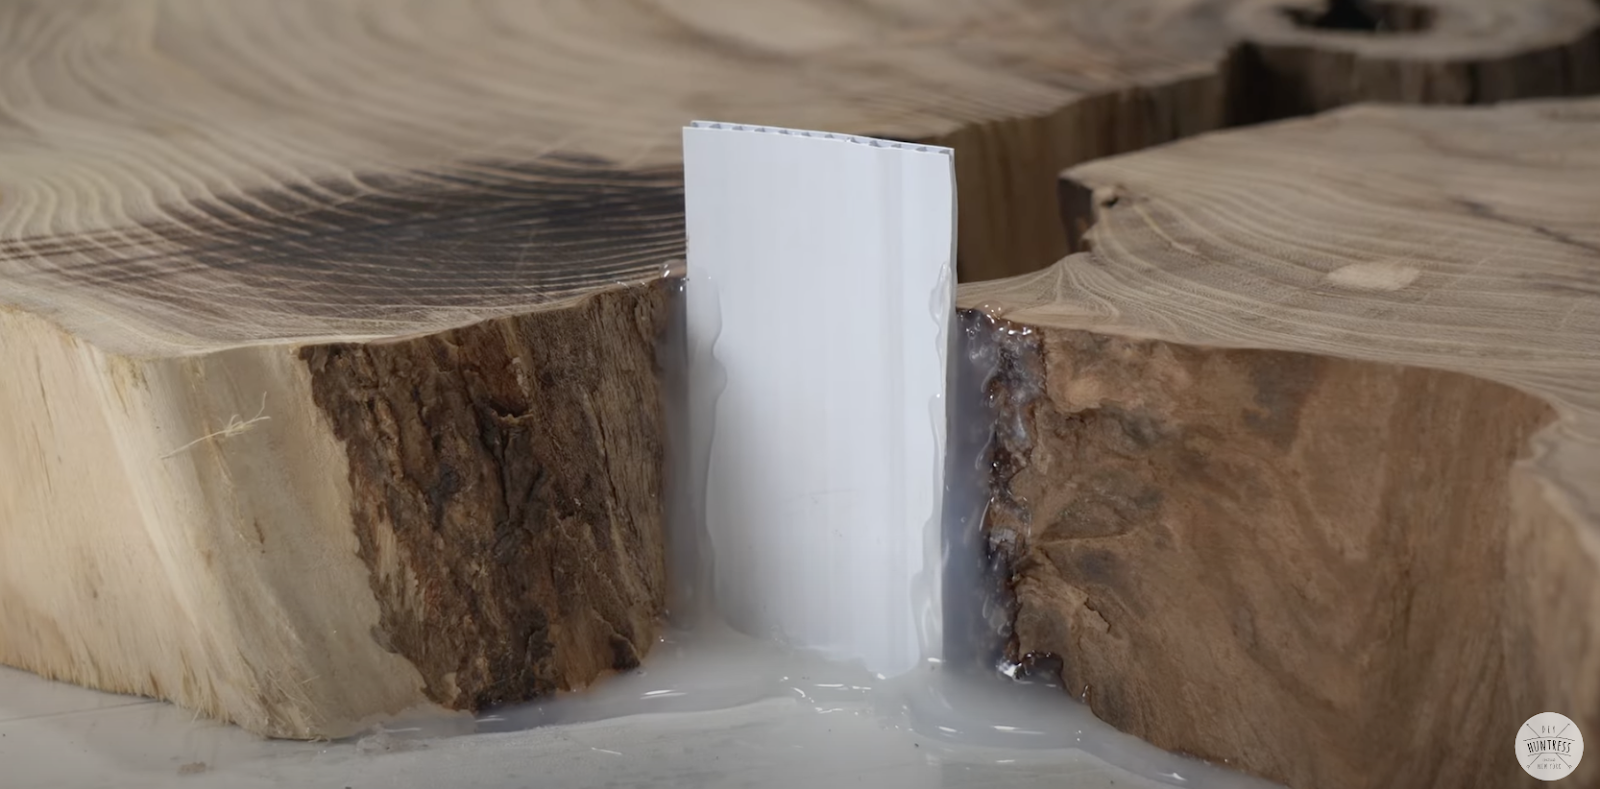
Like every edge and space had to be perfectly sealed.

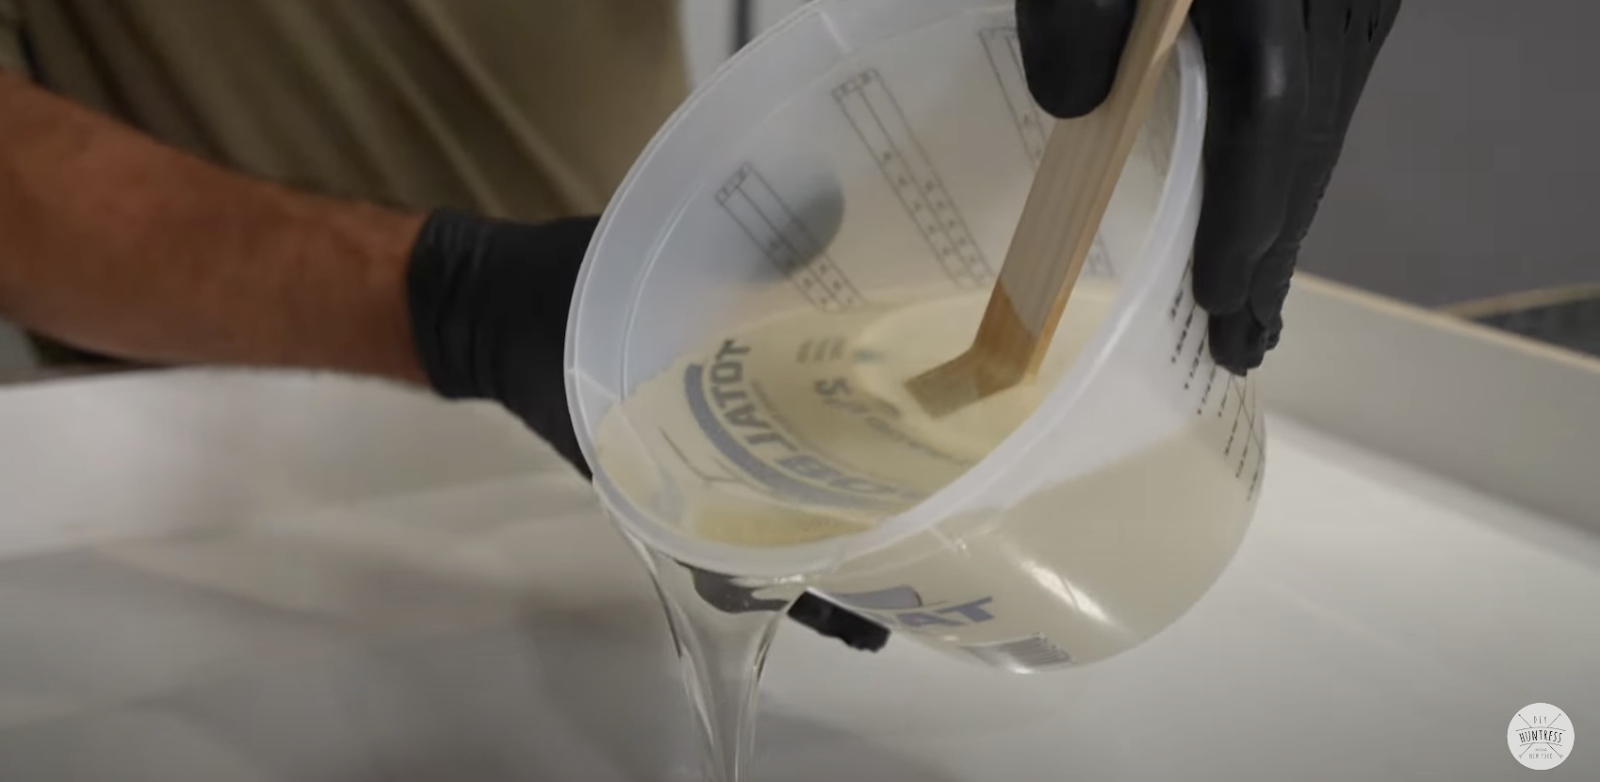
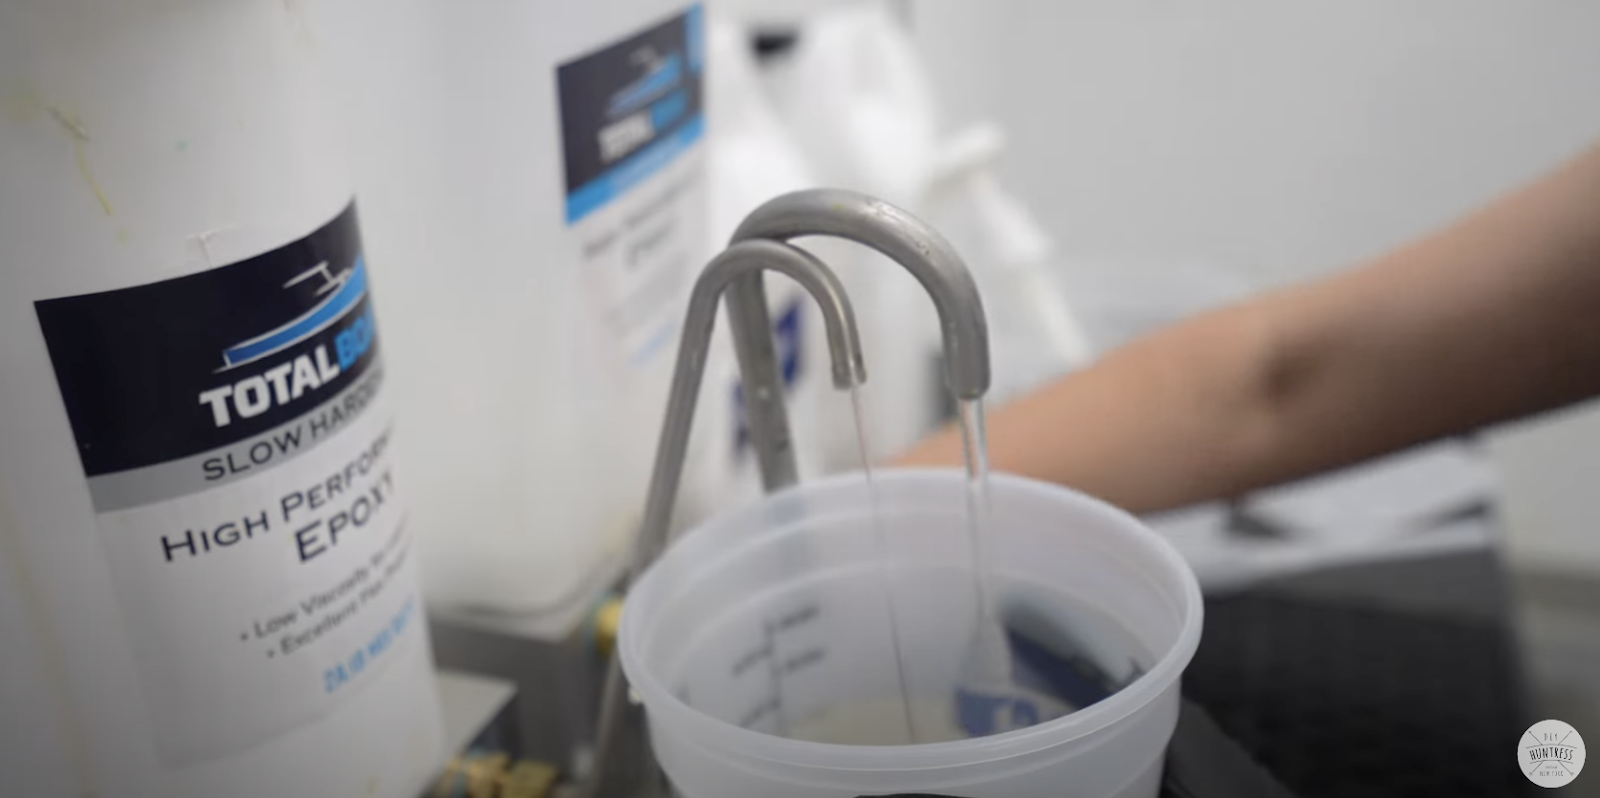
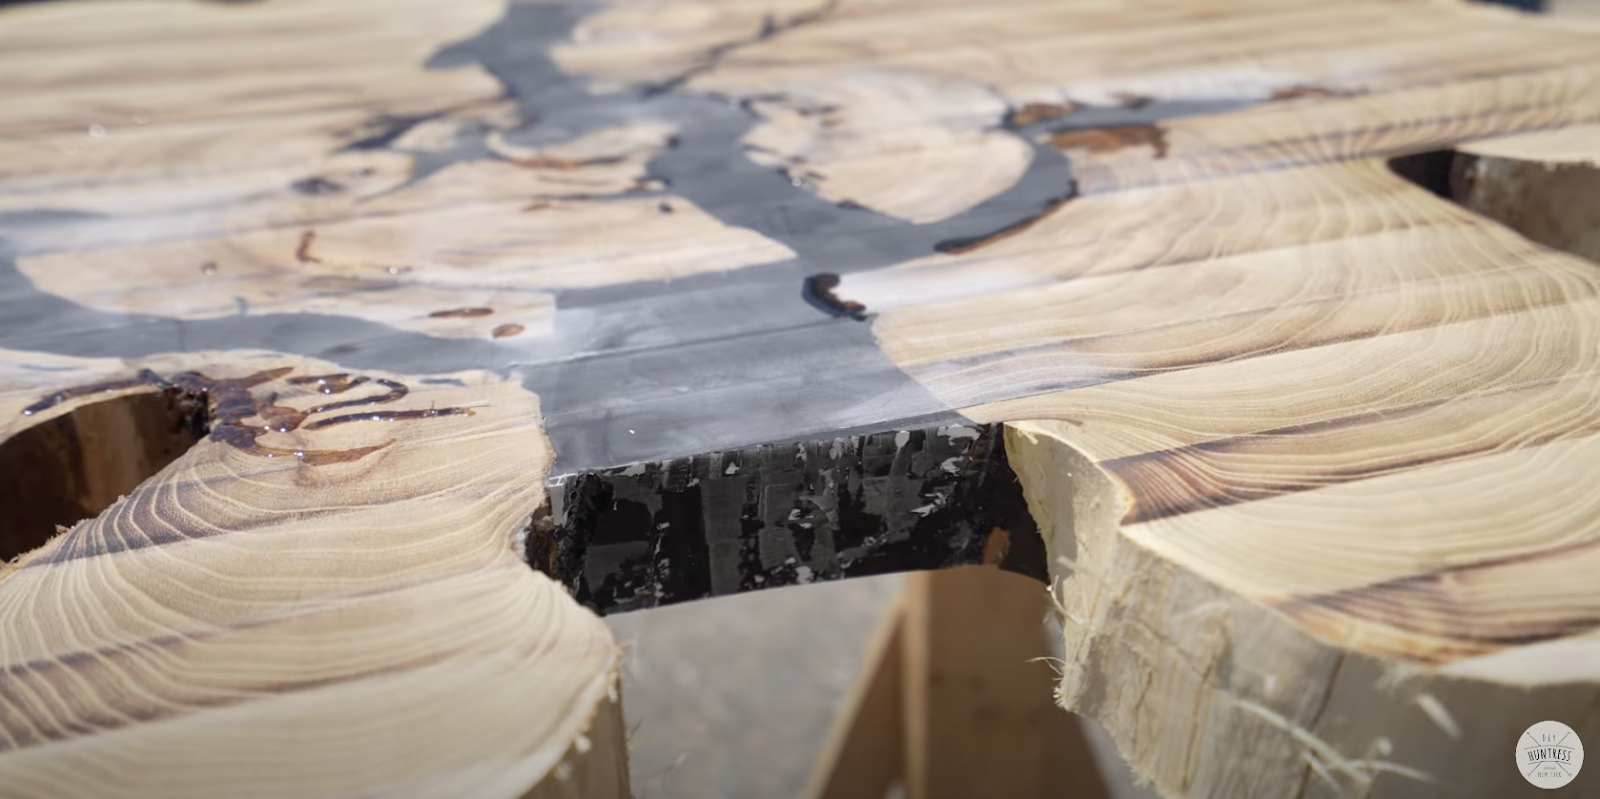
I used High Performance Epoxy with Slow Hardener and I decided to go with black because I wanted it to match my house. I was also hoping that the black would help conceal the layers as I had to step pour because it was such a thick slab.
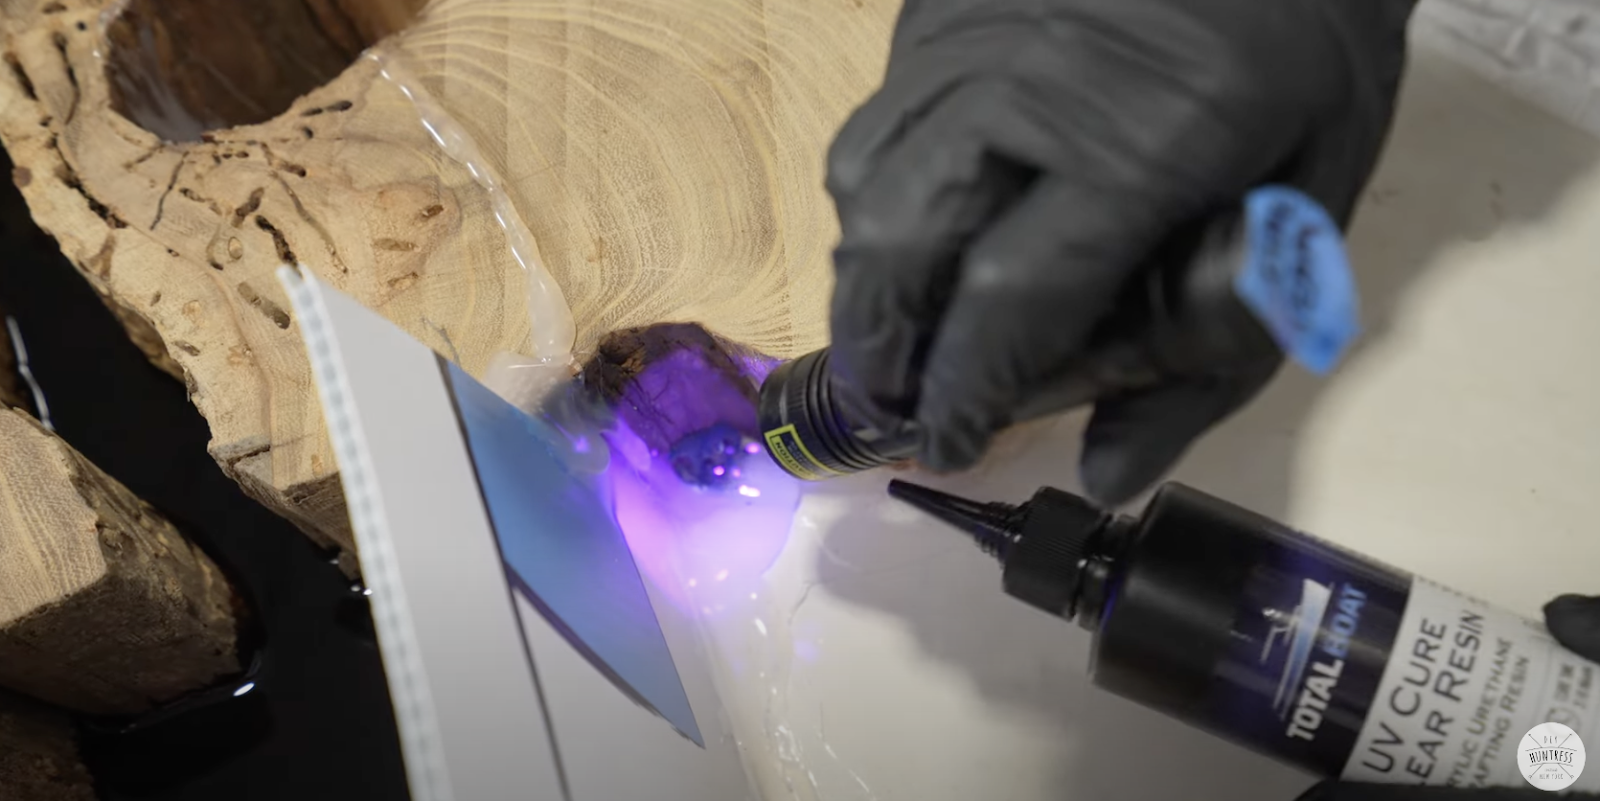
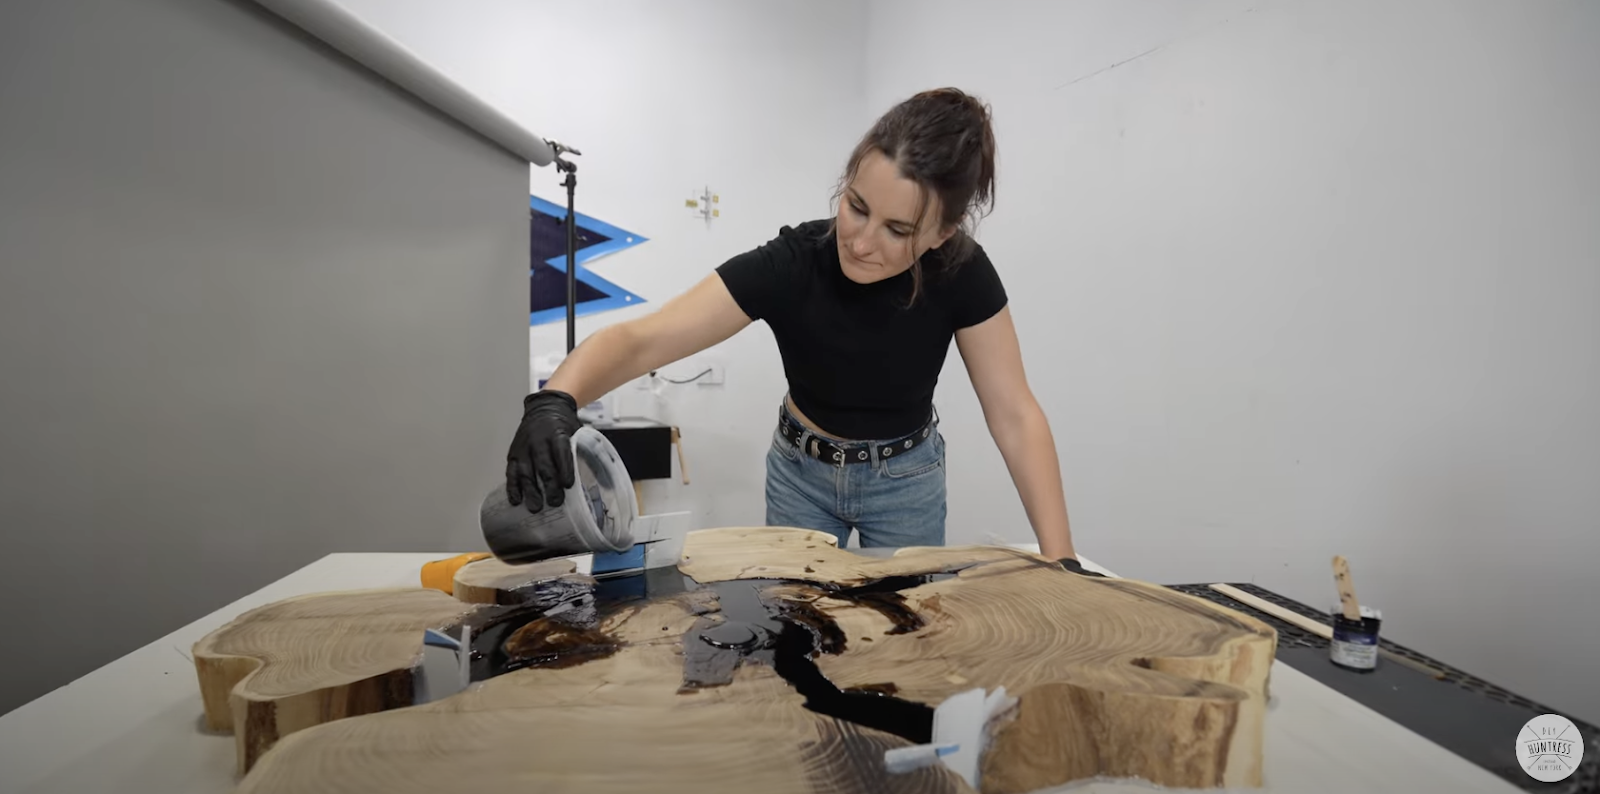
After pouring the first layer there of course was a leak. So I used UV Cure Resin to quickly close it up.
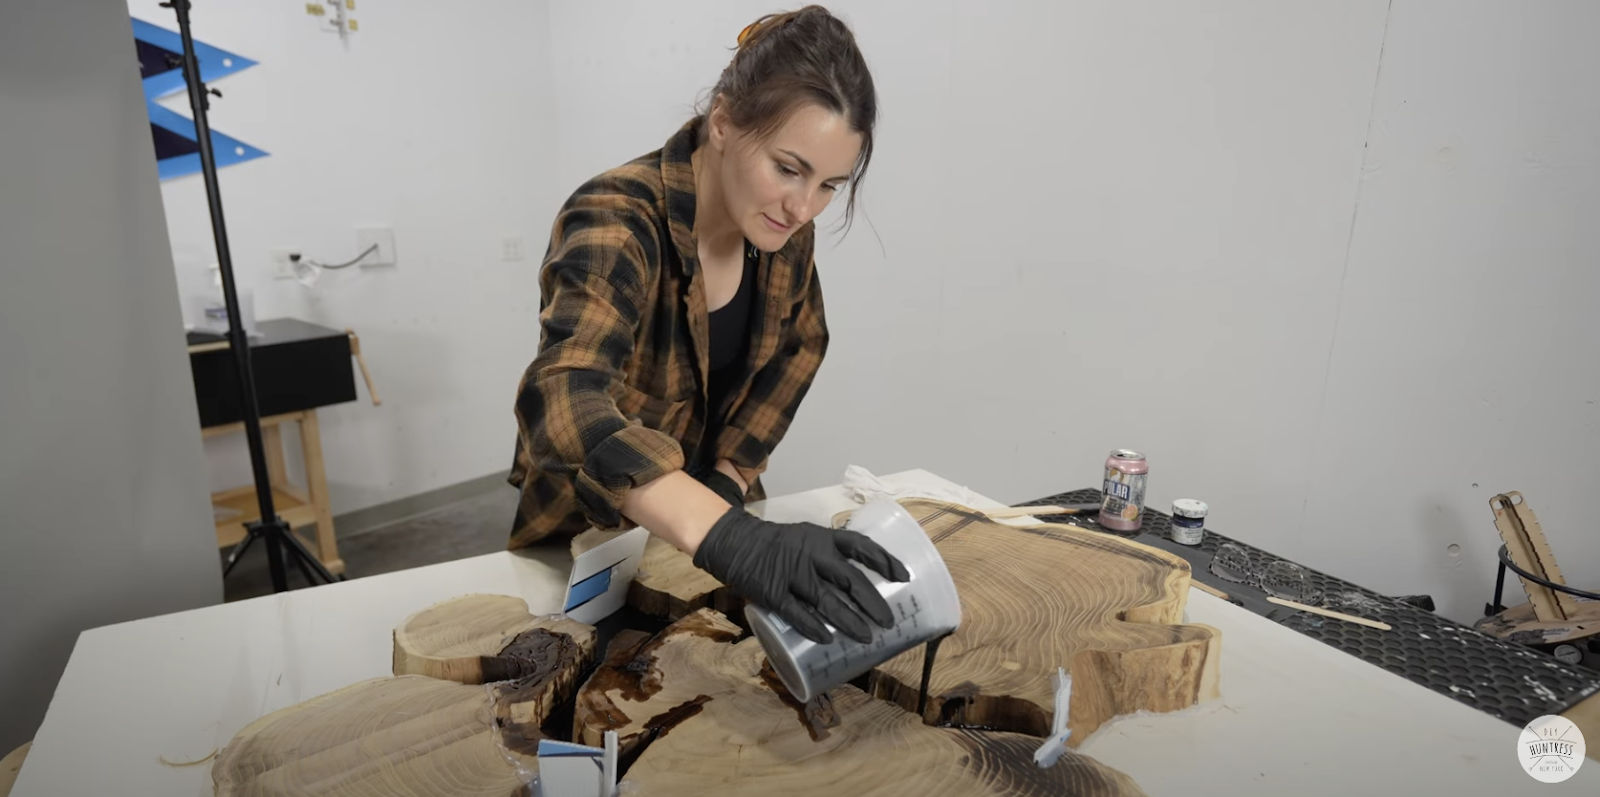
With a second pour I was feeling confident that Day 2.5 or 3 (I was having trouble counting) would only require a few more pours and I would be in good shape.
So with that we finished Day 2 with Dad feeling very confident about his table (he was taking photos while I kept working).
Day 2.5
Dad started this day with 2 more pours and a plan to do the final pour that night.
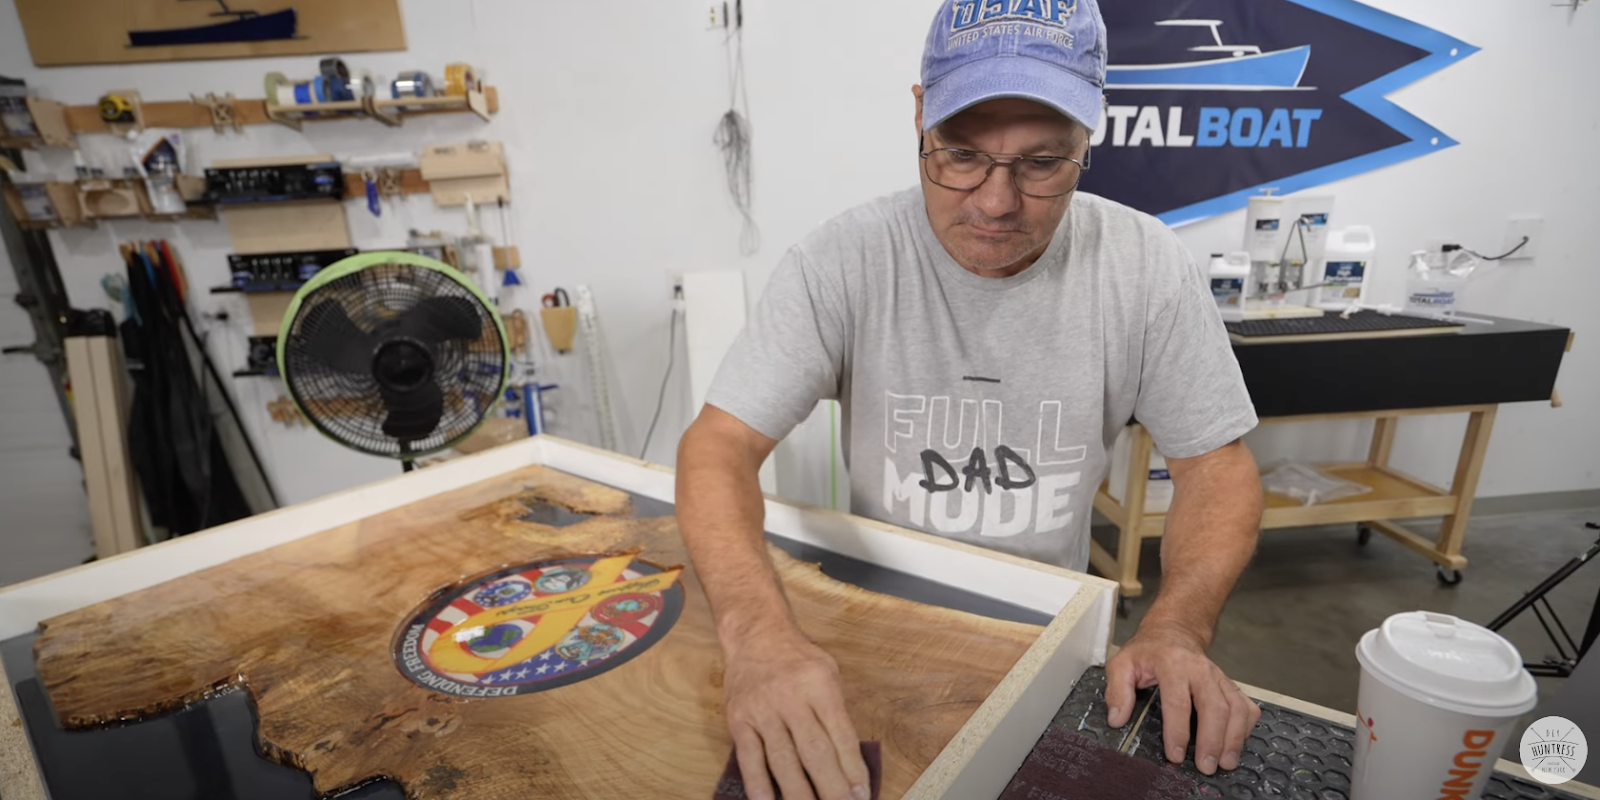

After those 2 layers dried he did a light sanding to scuff the epoxy and give the final layer something to adhere to.

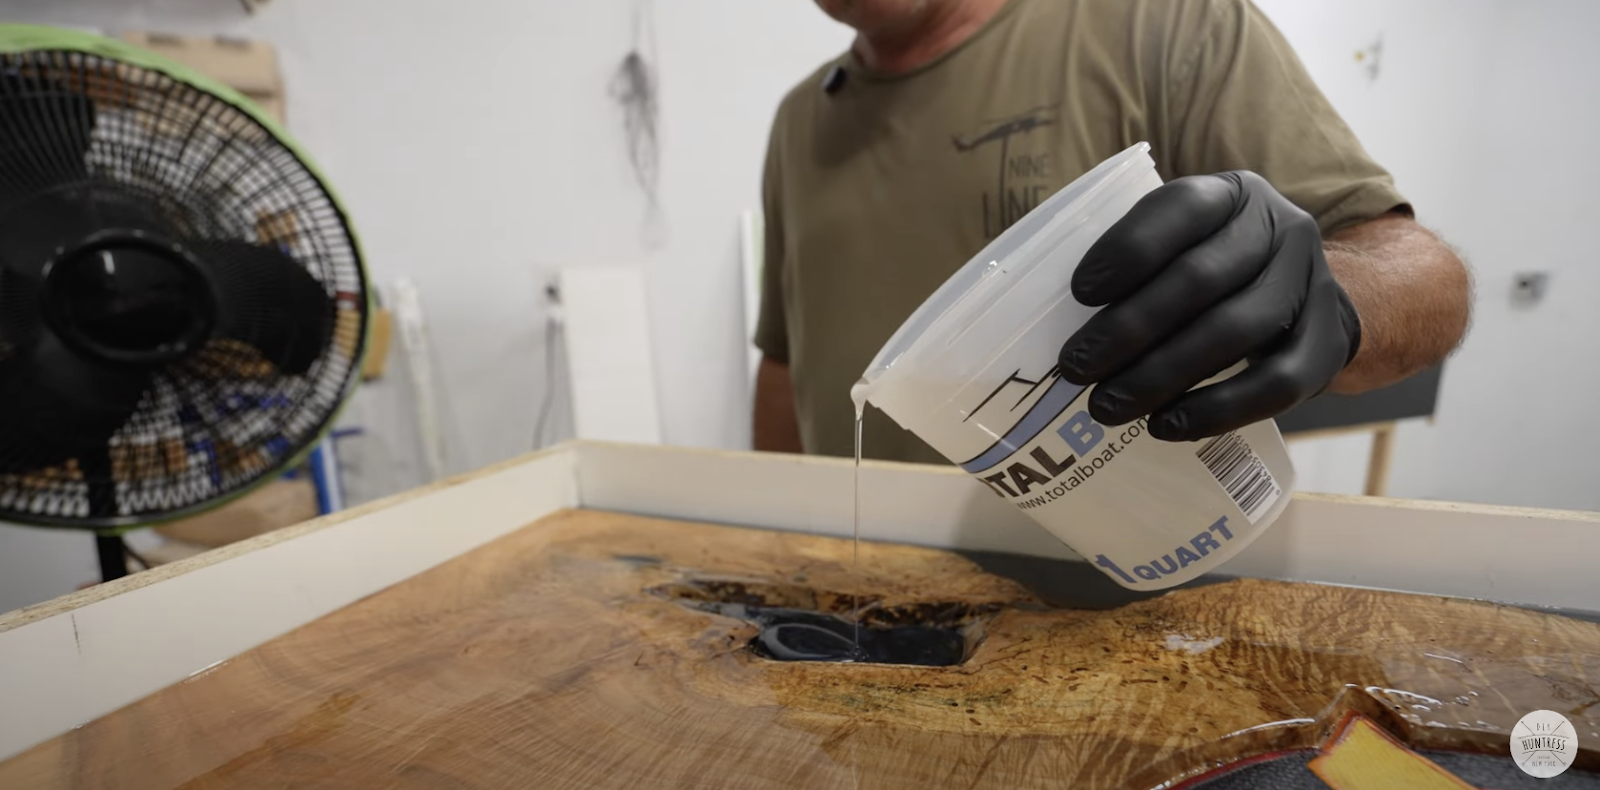
The final pour before the flood coat brought the entire piece to the same level.
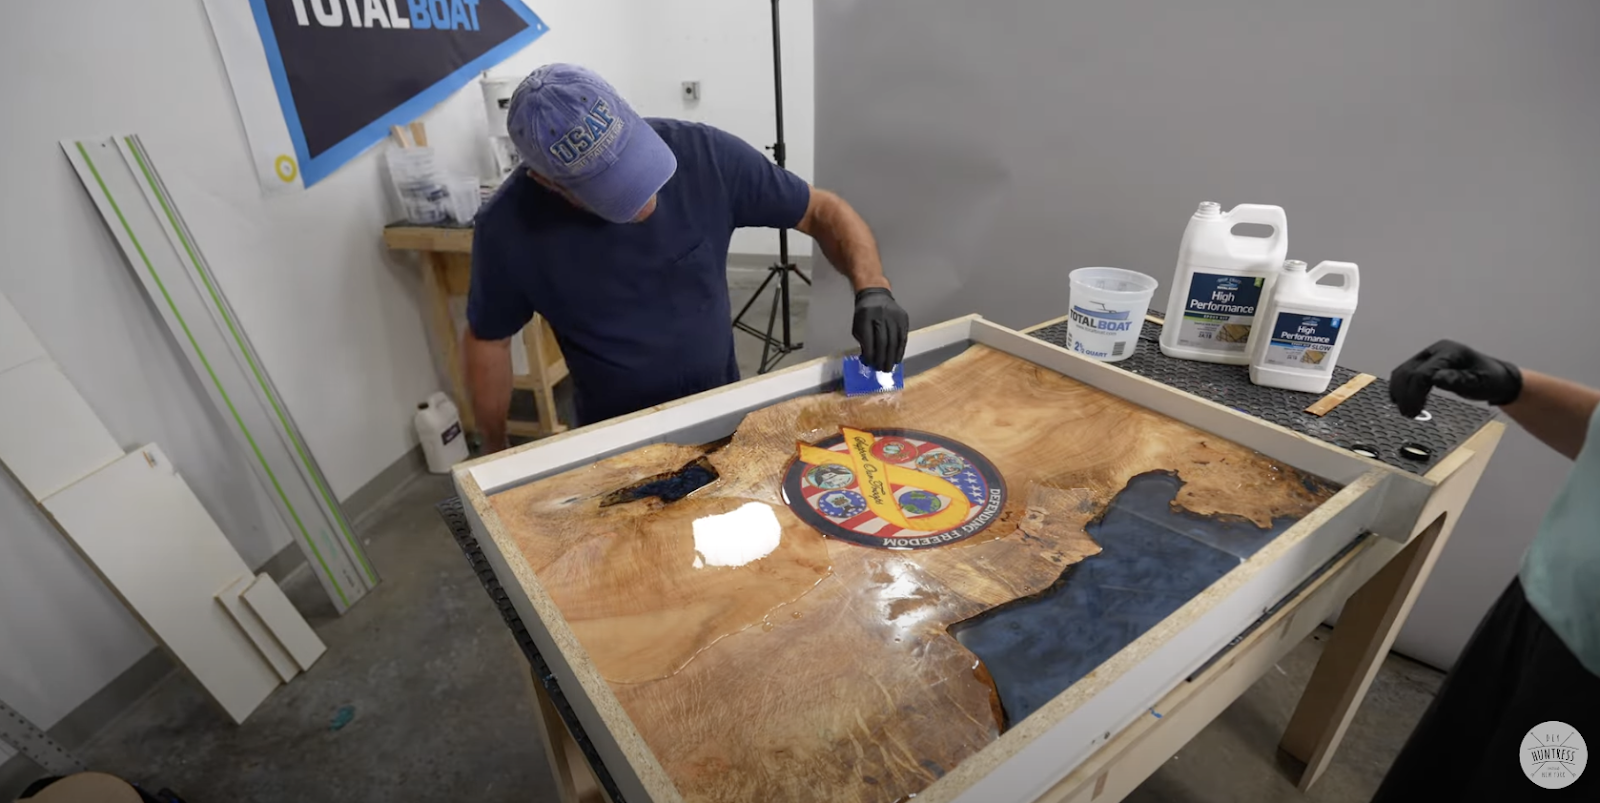
Once he poured his flood coat he spread it evenly over the entire piece.
And then used a heat gun to pop the bubbles before it cured.
I started Day 2.5 not feeling so great. Because my slab was so thick I felt like I was just repeating the same step over and over without making any progress. There were a few things working against me. If we had just done one big pour we would’ve been waiting 3 days for it to dry, which was the entire time we were at Total Boat, so that wouldn’t work. But we were also having a heat wave so I had to keep the temperature of the Epoxy down otherwise it would exotherm and I didn’t want my table to go up in smoke! Aside from the chemical reaction difficulties it was also really difficult to tell what the shape of the table was going to turn out like so I wasn’t confident that it was going to look good…
With my final pour I was low-key nervous that I wouldn’t get this project done. It wasn’t helping that everyone who walked by my dad’s table was hyping him up and saying he was crushing it.
The Final Day
Yes I am standing on an apple box to be able to work on my table, and to make me look super tall.
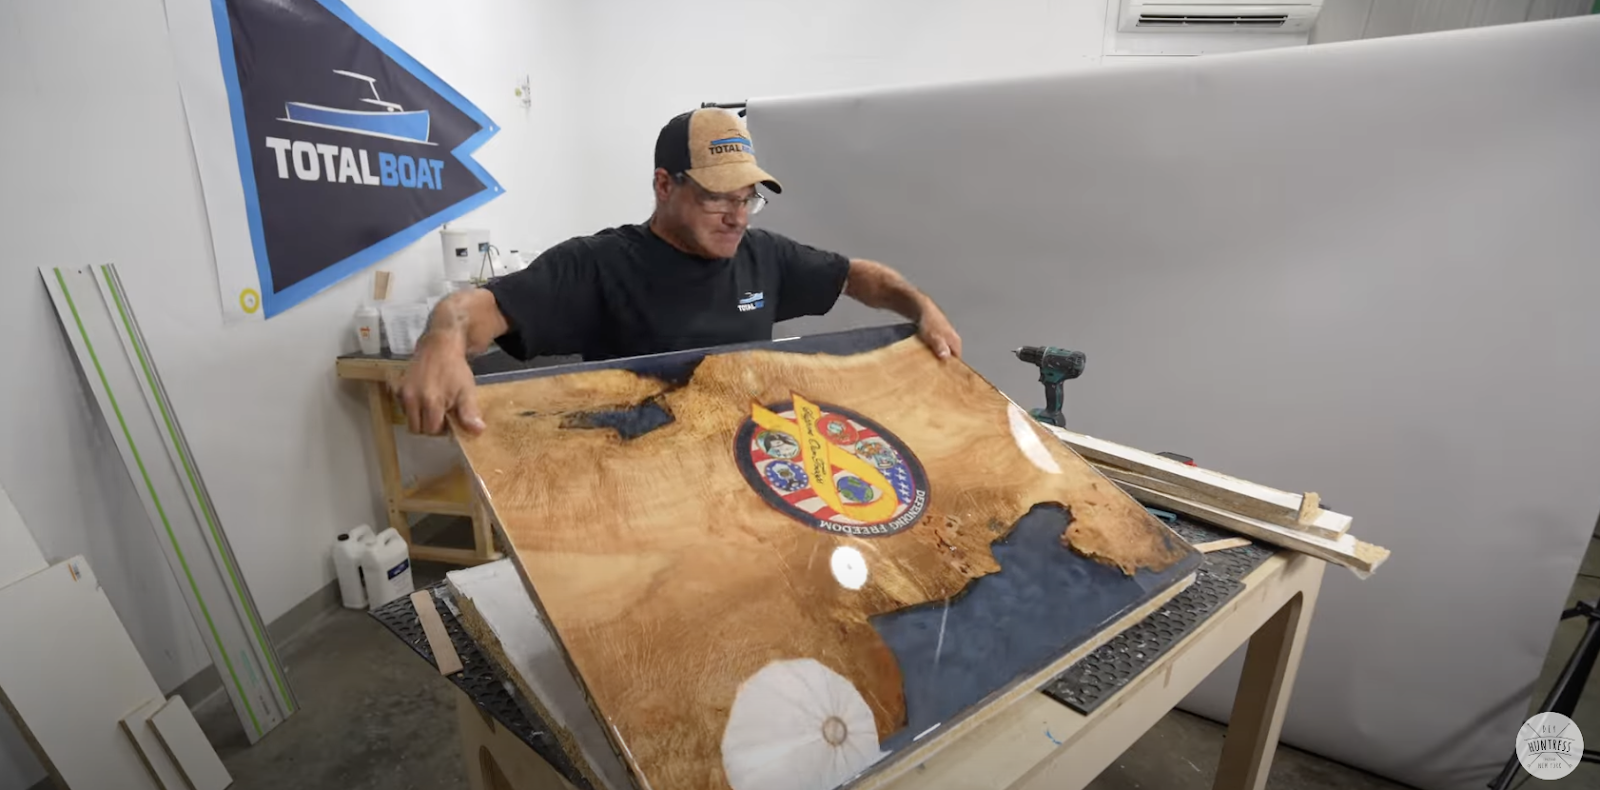
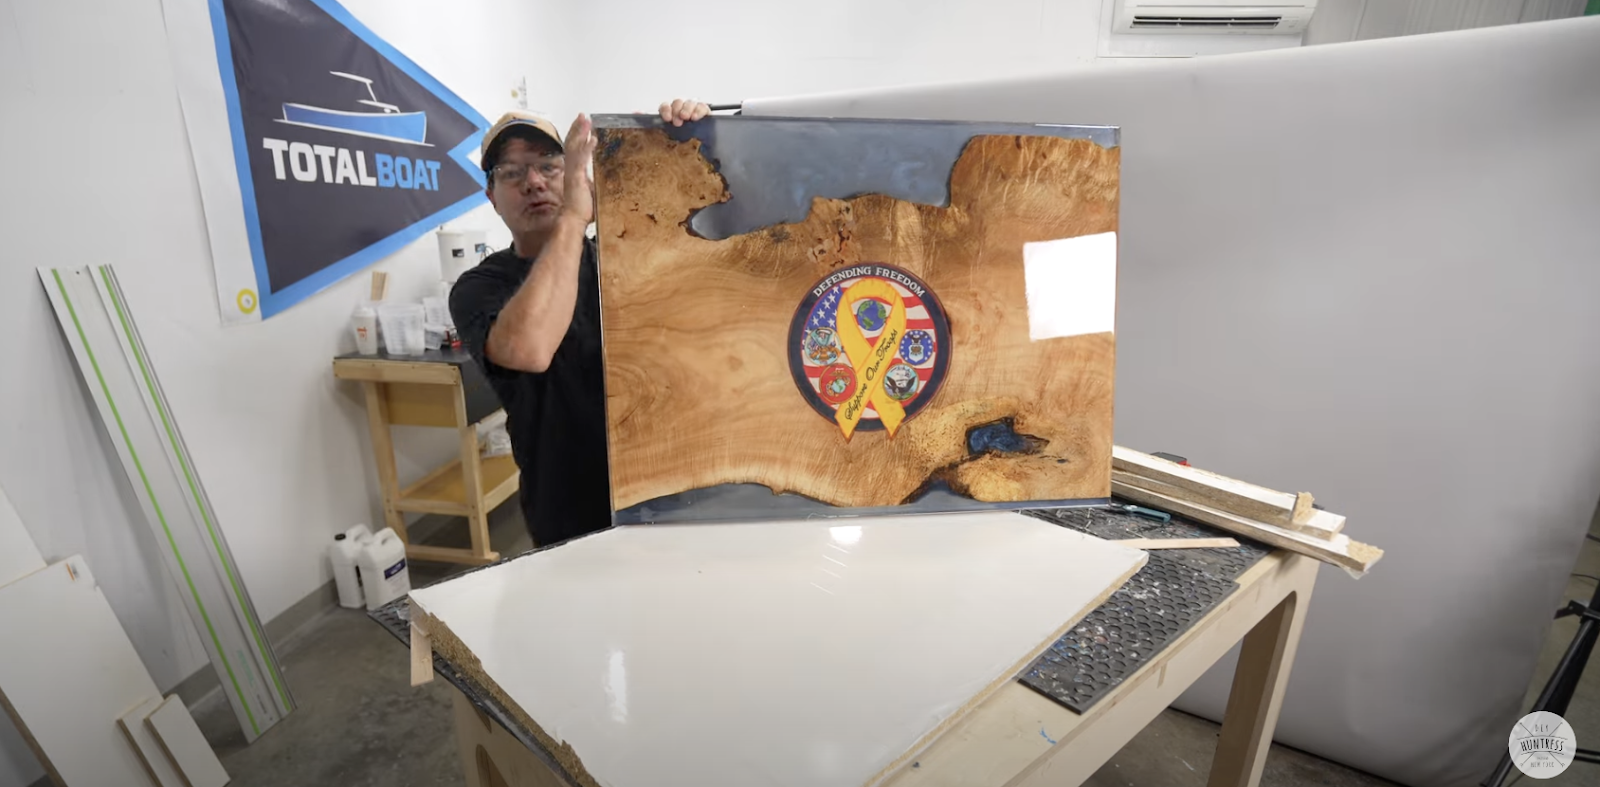
Dad got started by de-molding his project and he was definitely feeling good about it.

He cleaned up the edges with the track saw. (Thank you for your help Kristin!)
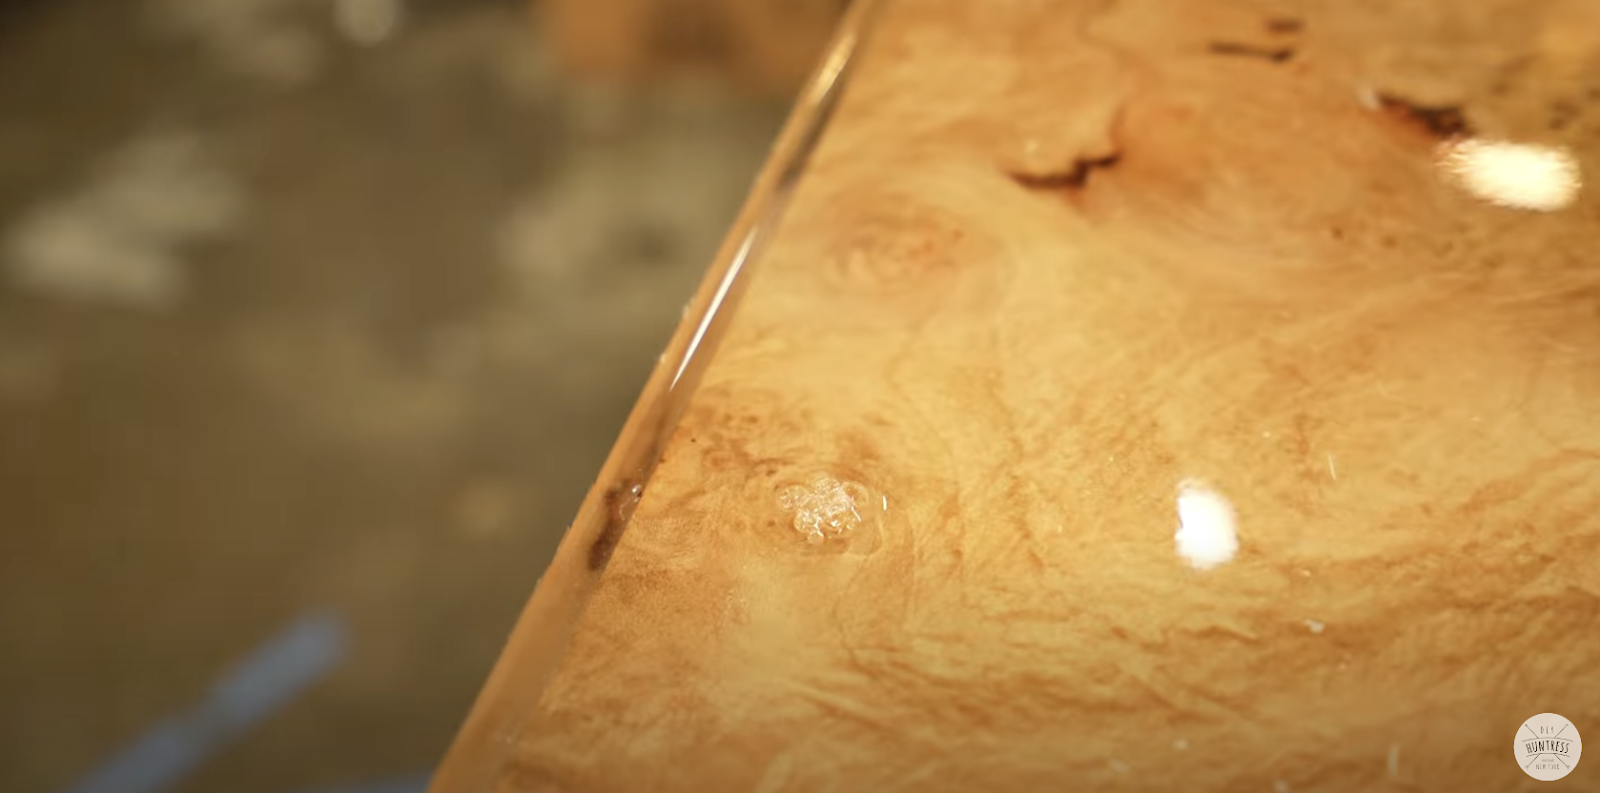
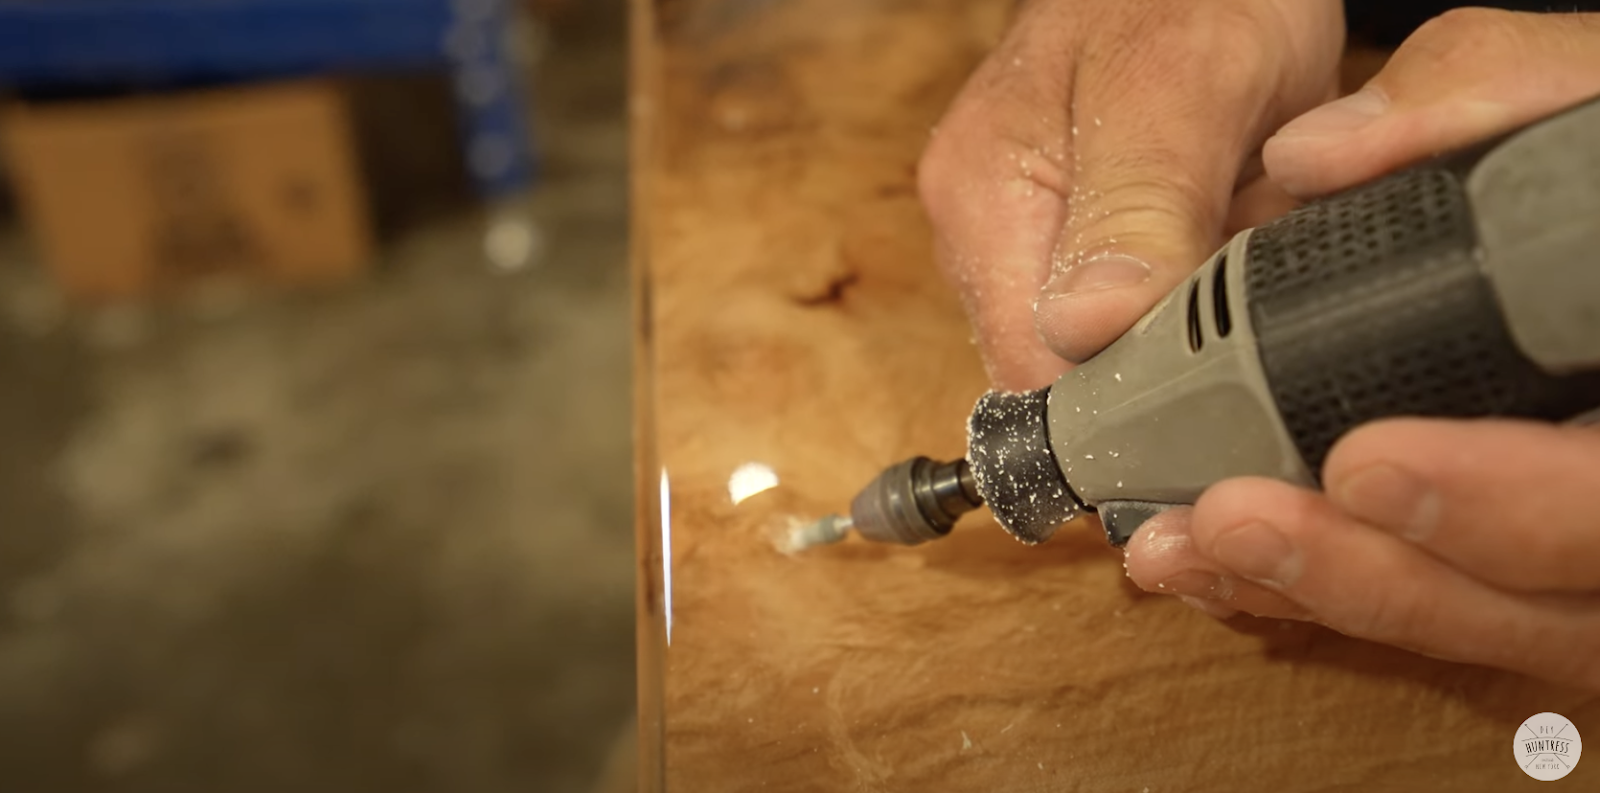
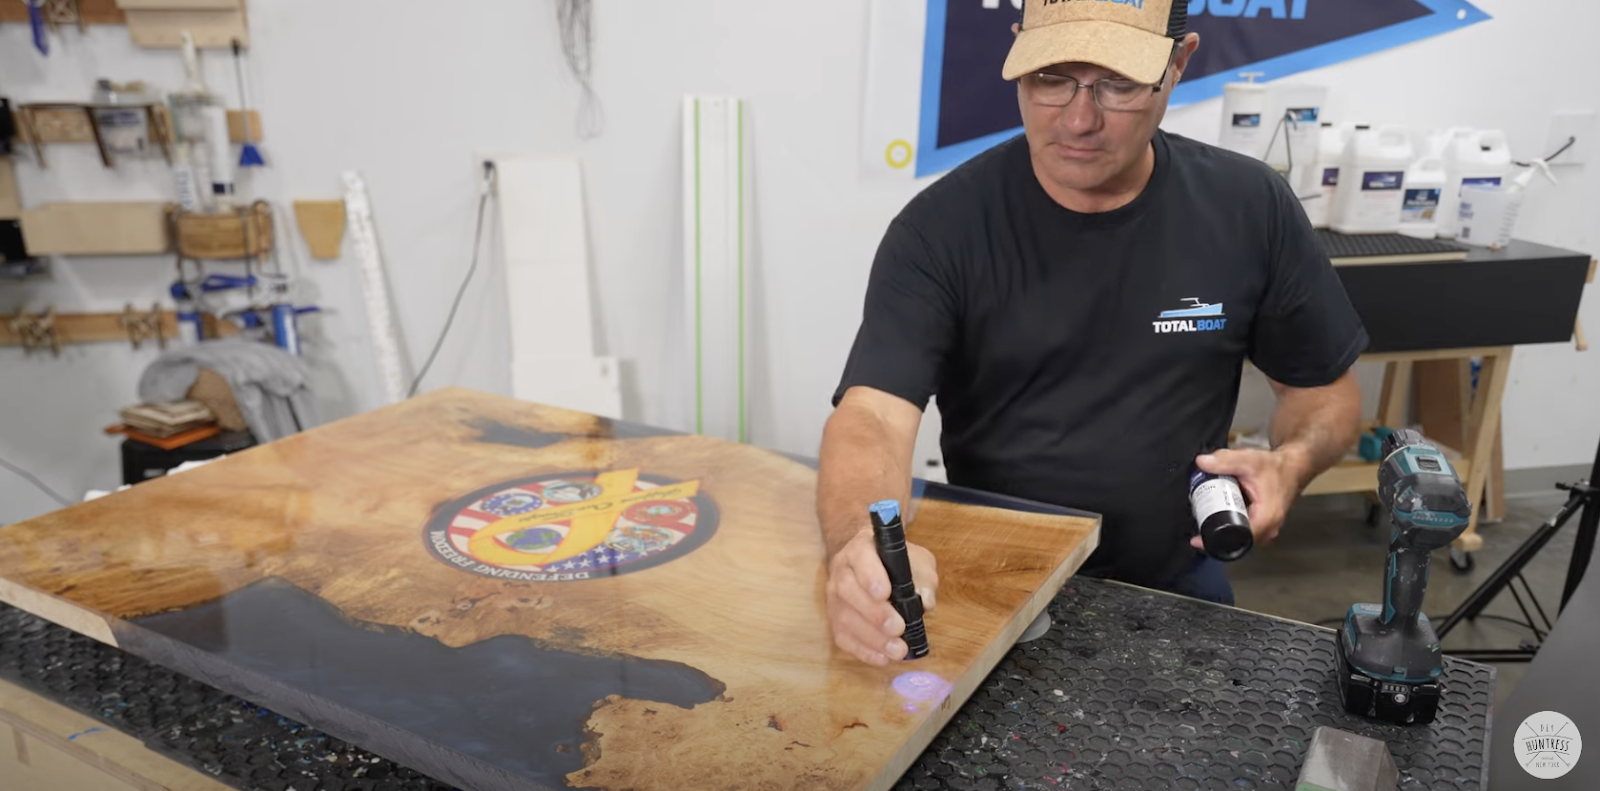
He did have a few bubbles so he used a dremel to dig them out and then he used the UV Cure Resin to fill them in. It’s pretty cool that you can fix the bubbles this way.
Then his edges also got a clear coat.
At this point he was finished. But you tell me if you think this counts. It’s a table build off, but he decided that since his “table” could also be a piece of art to hang on a wall he wasn’t going to attach the legs. Seems a little like a work around if you ask me…
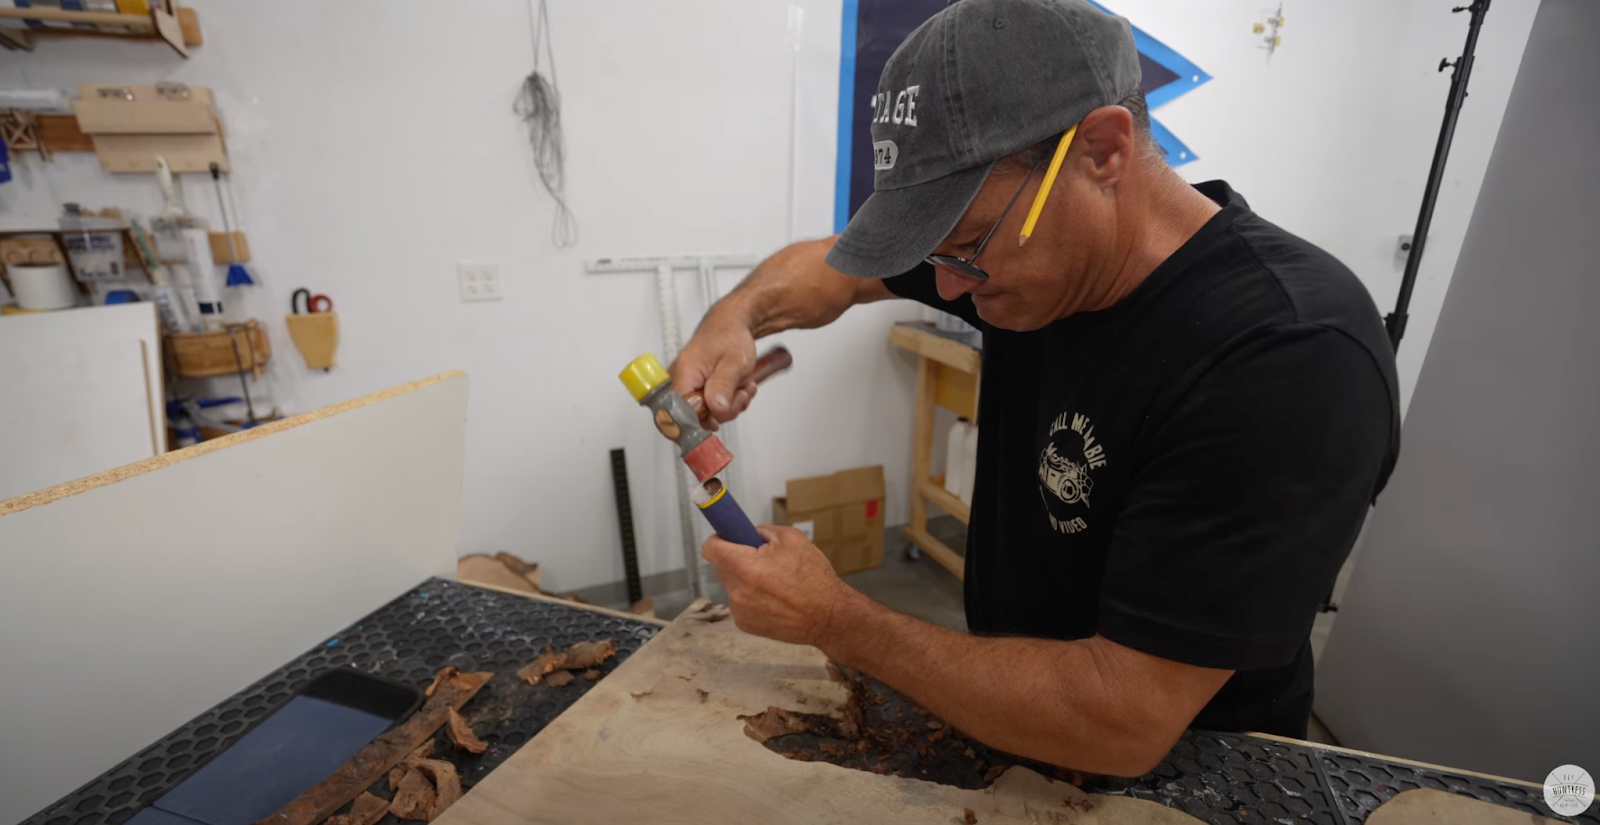
I started this day by officially freaking out because the plastic dividers I used to create dams around my table were completely stuck to the epoxy.
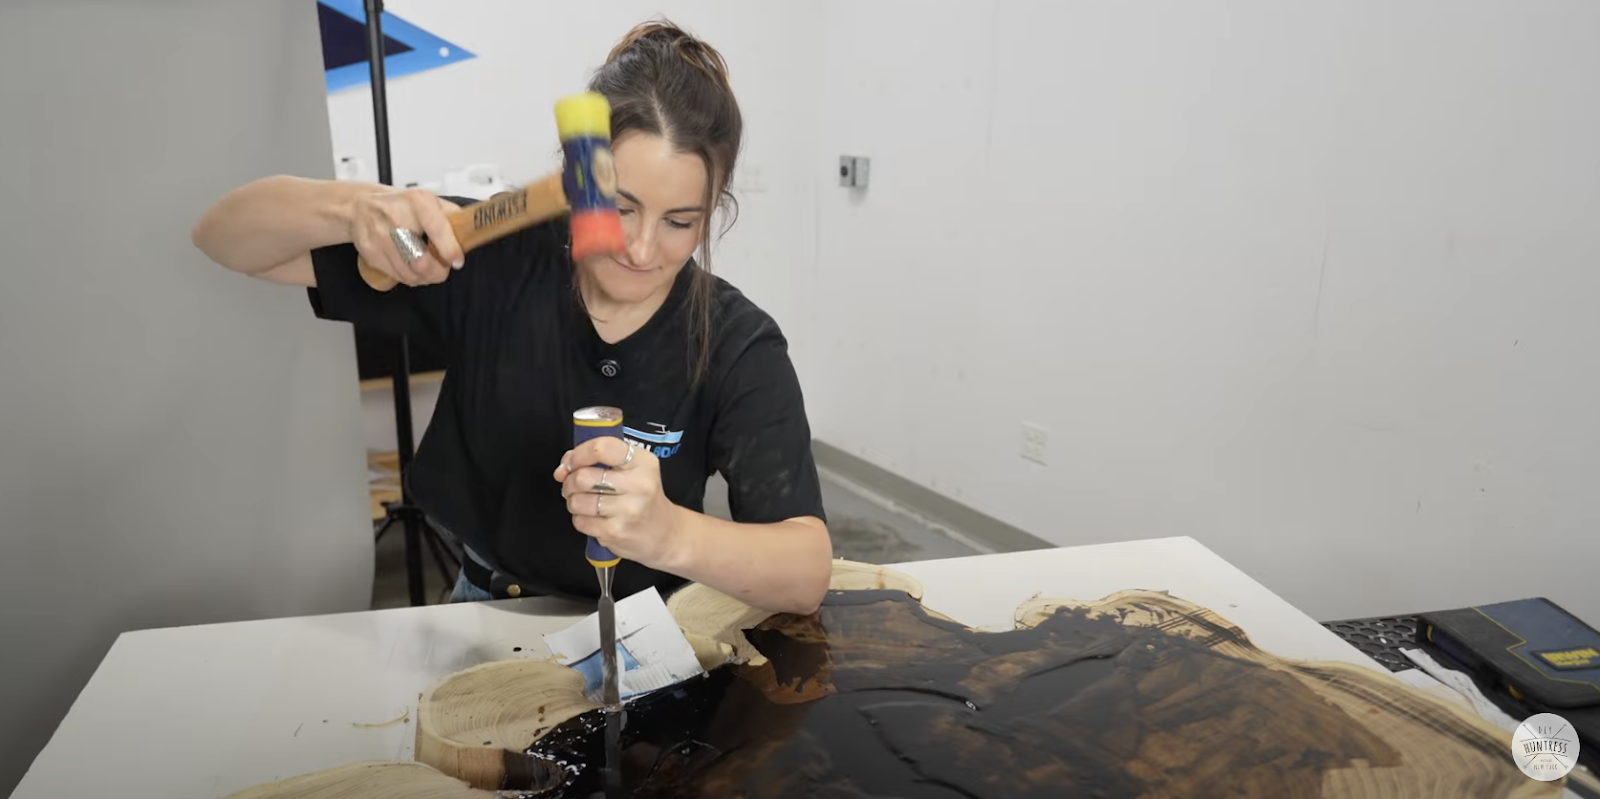
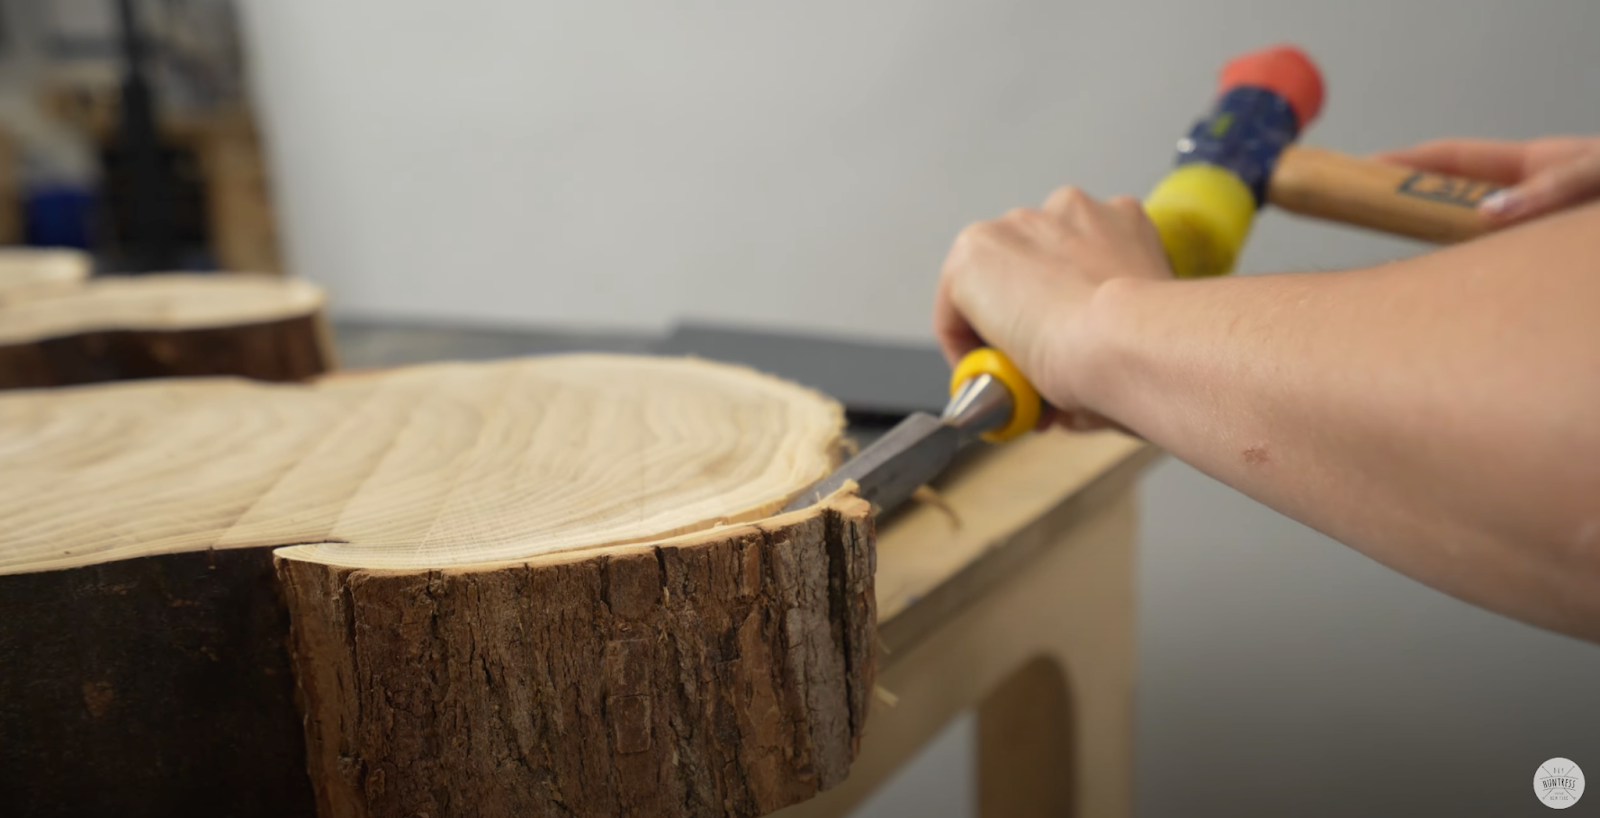
It was a job for a chisel and hammer.
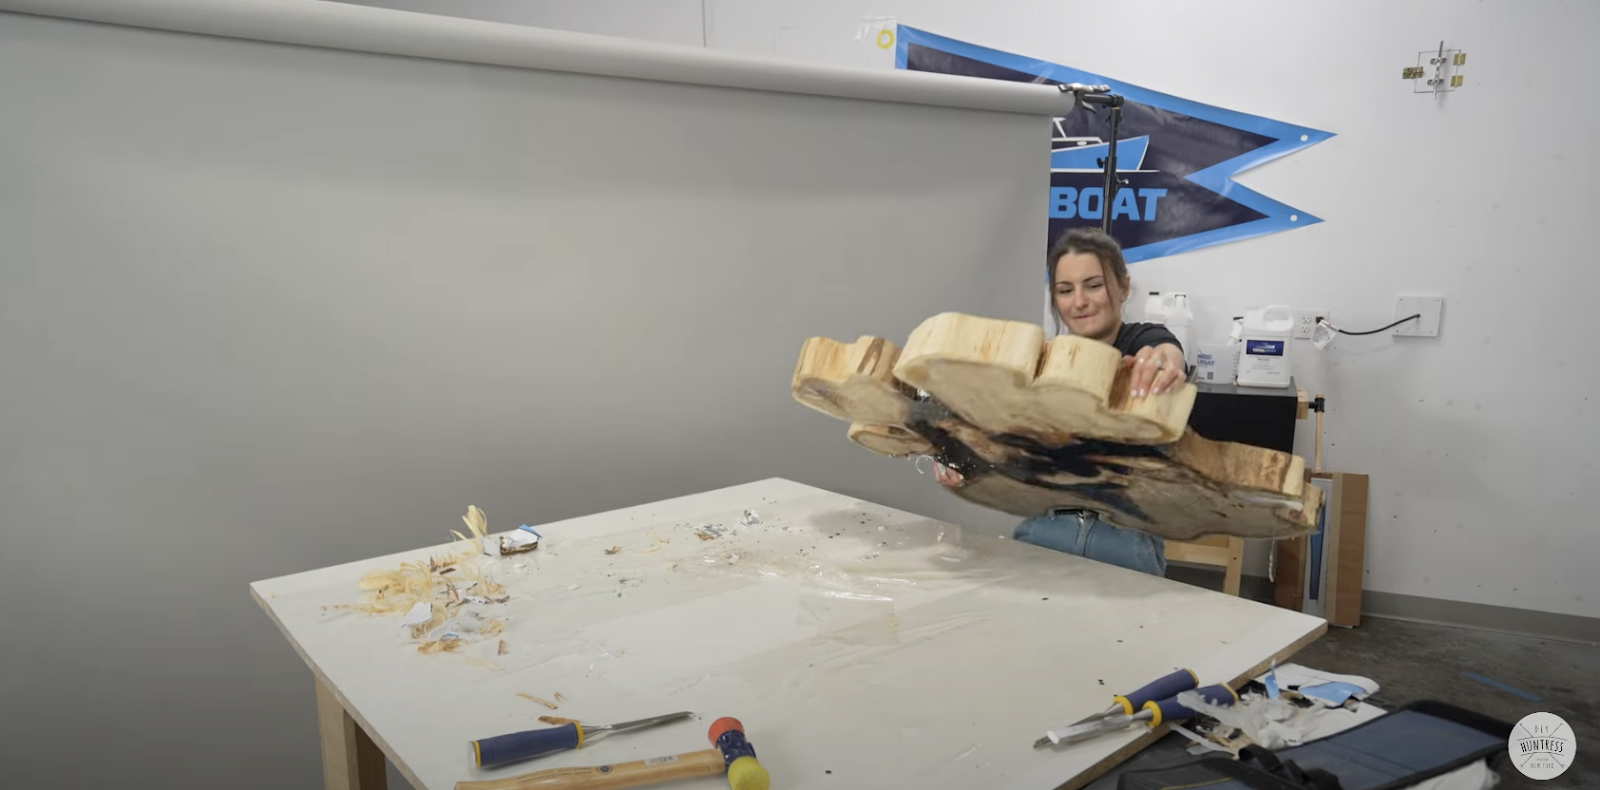
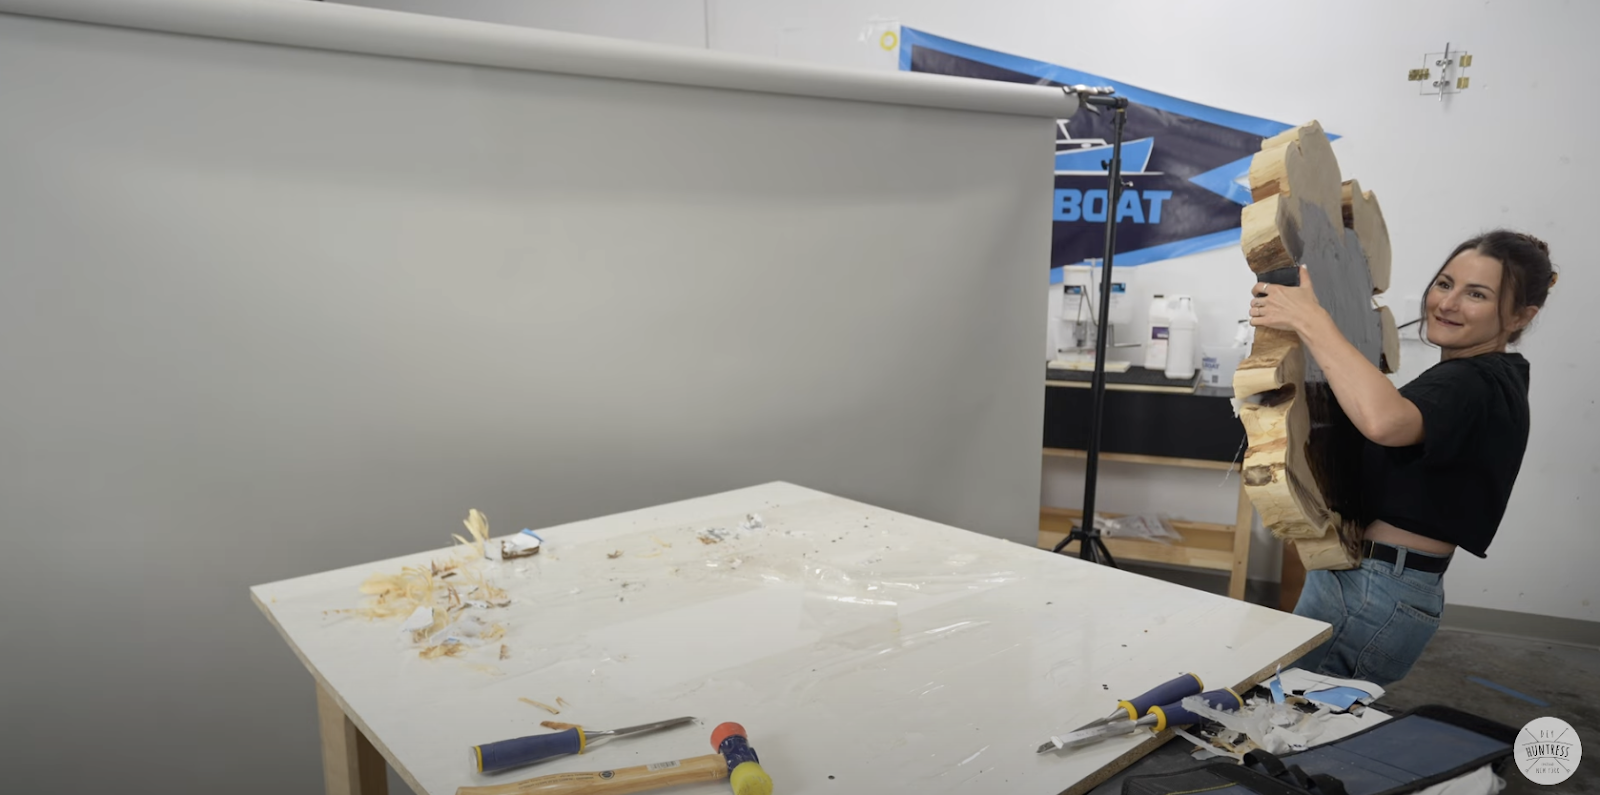
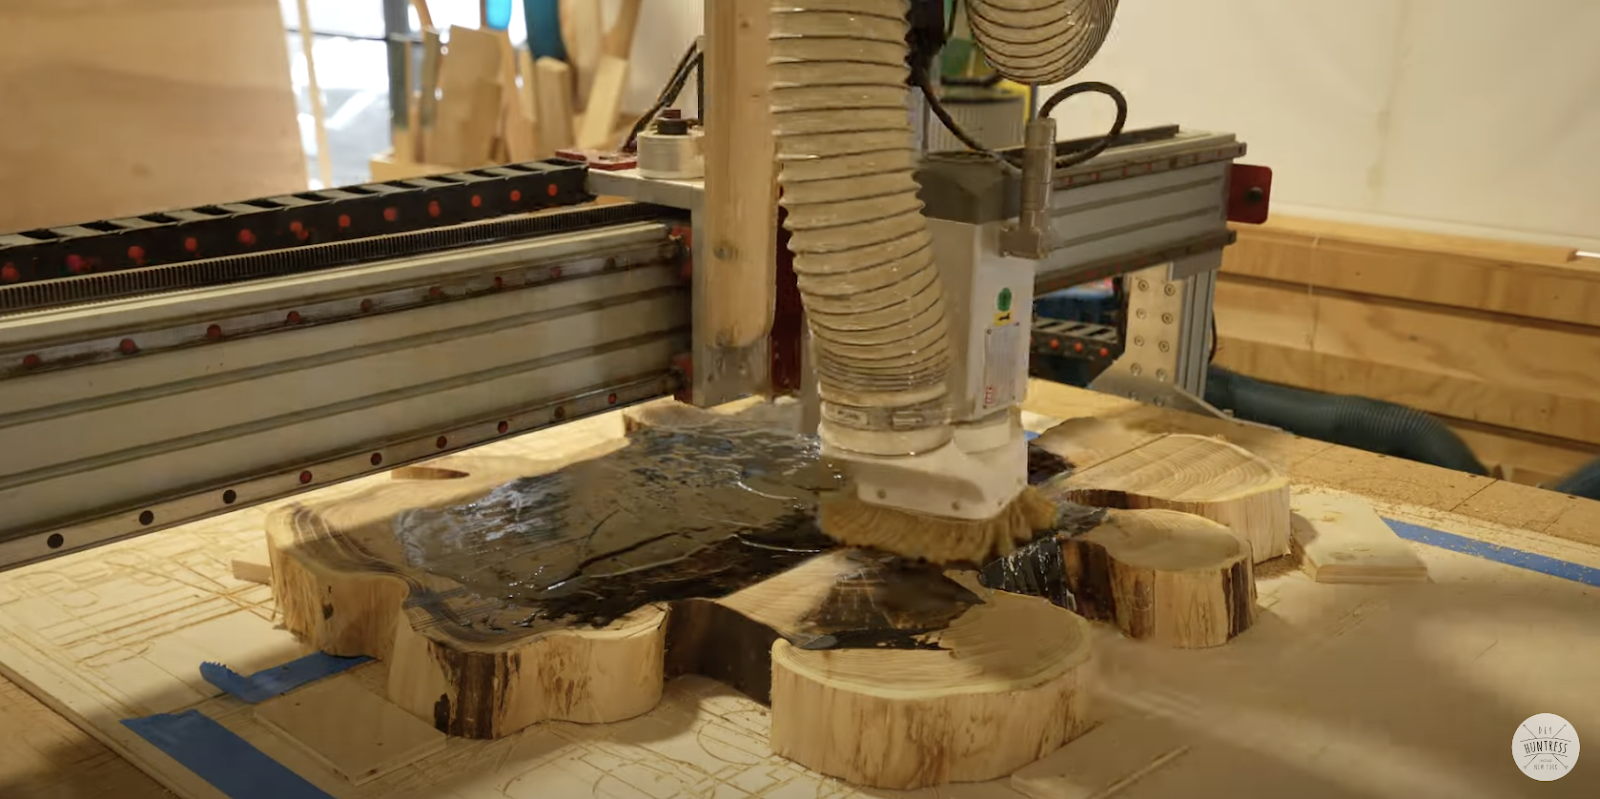
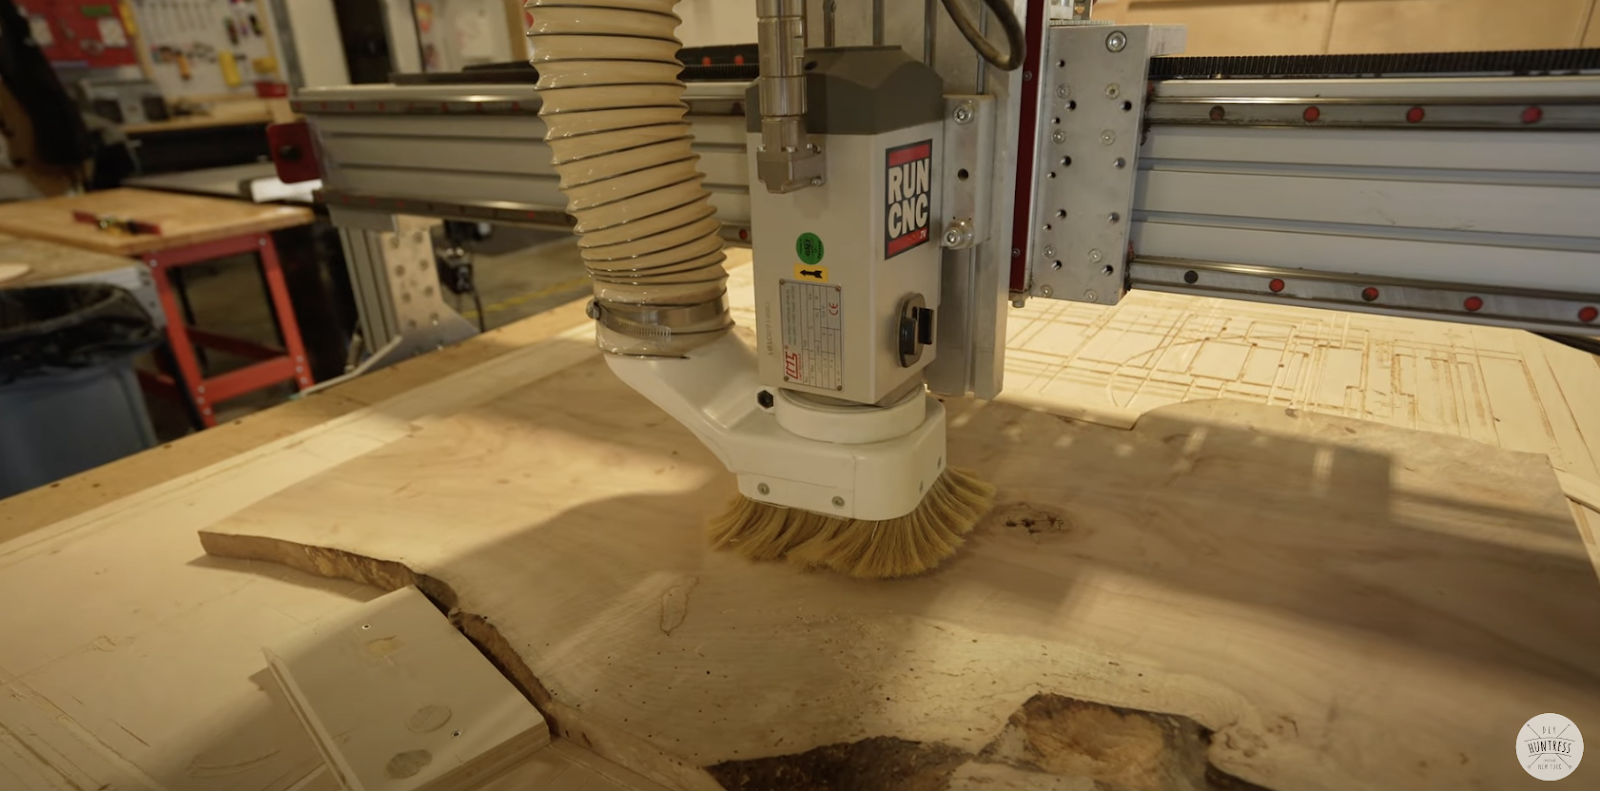
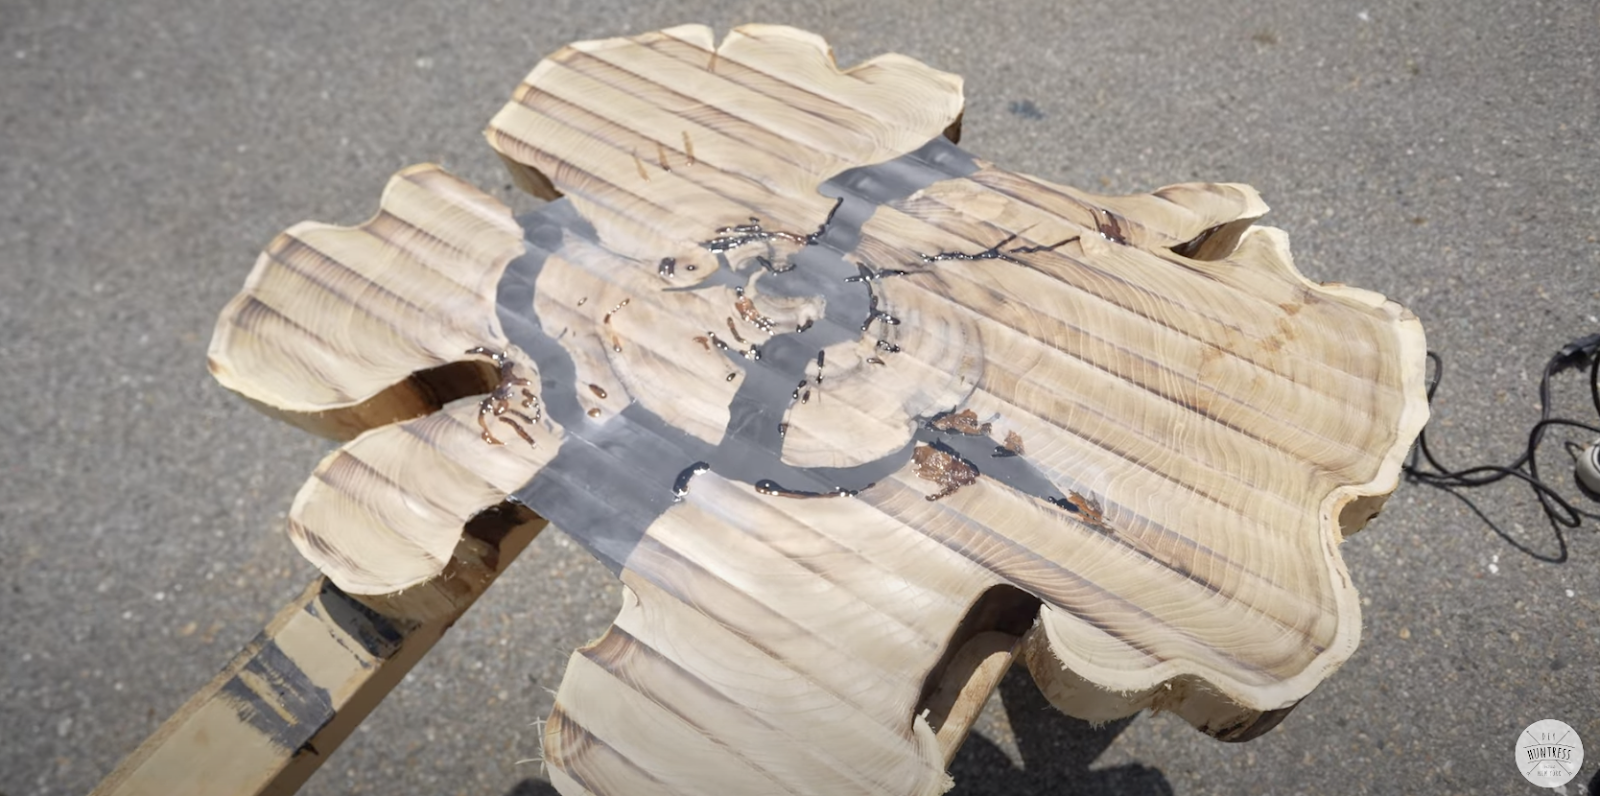
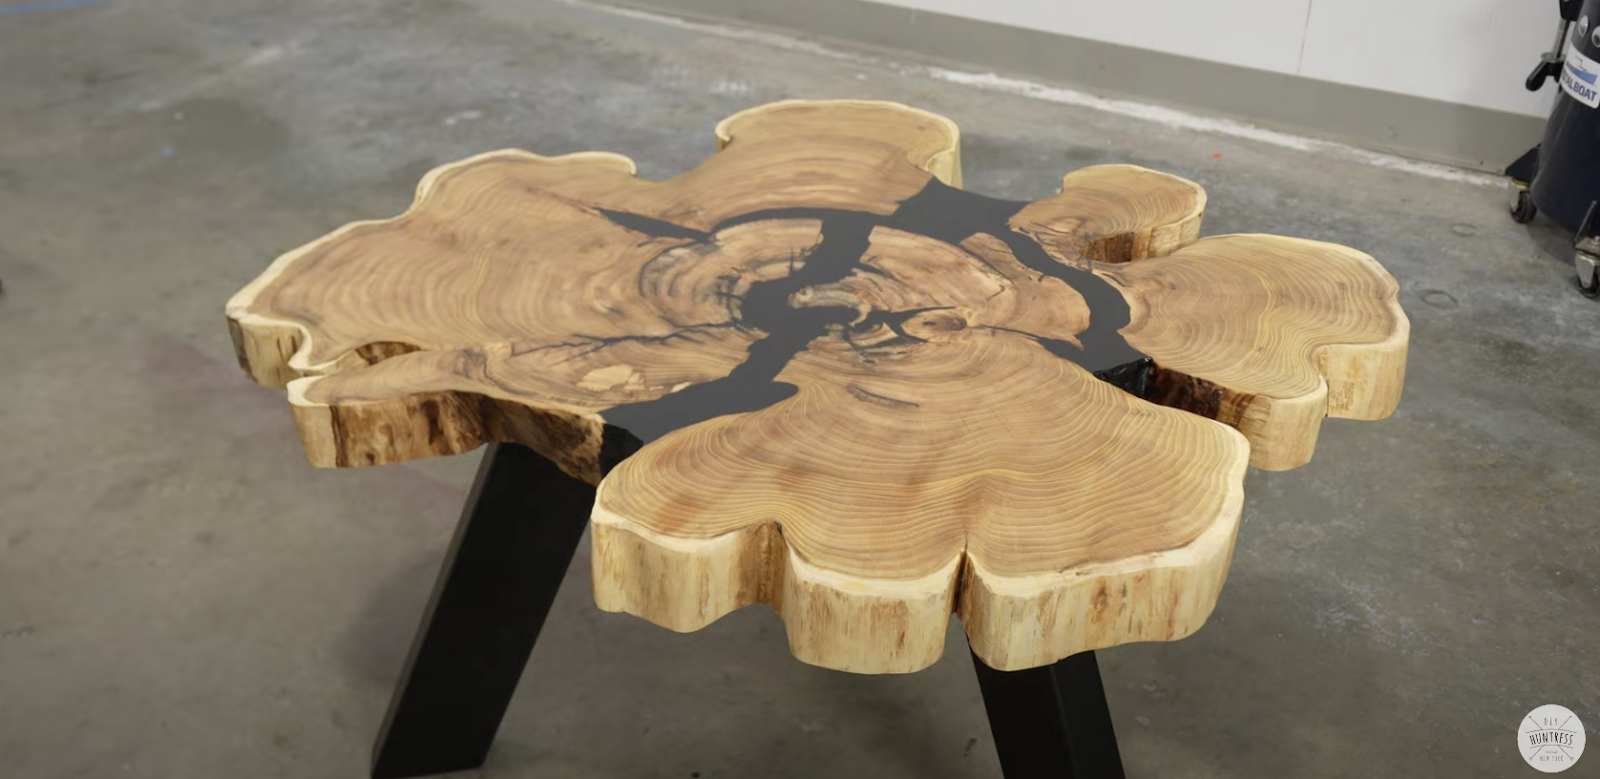
Once I got it lifted off of the melamine it was off to the CNC to flatten it. Dad got to call in his CNC card early so I called in mine to avoid spending the rest of the day sanding. And yes, I did carry it by myself…
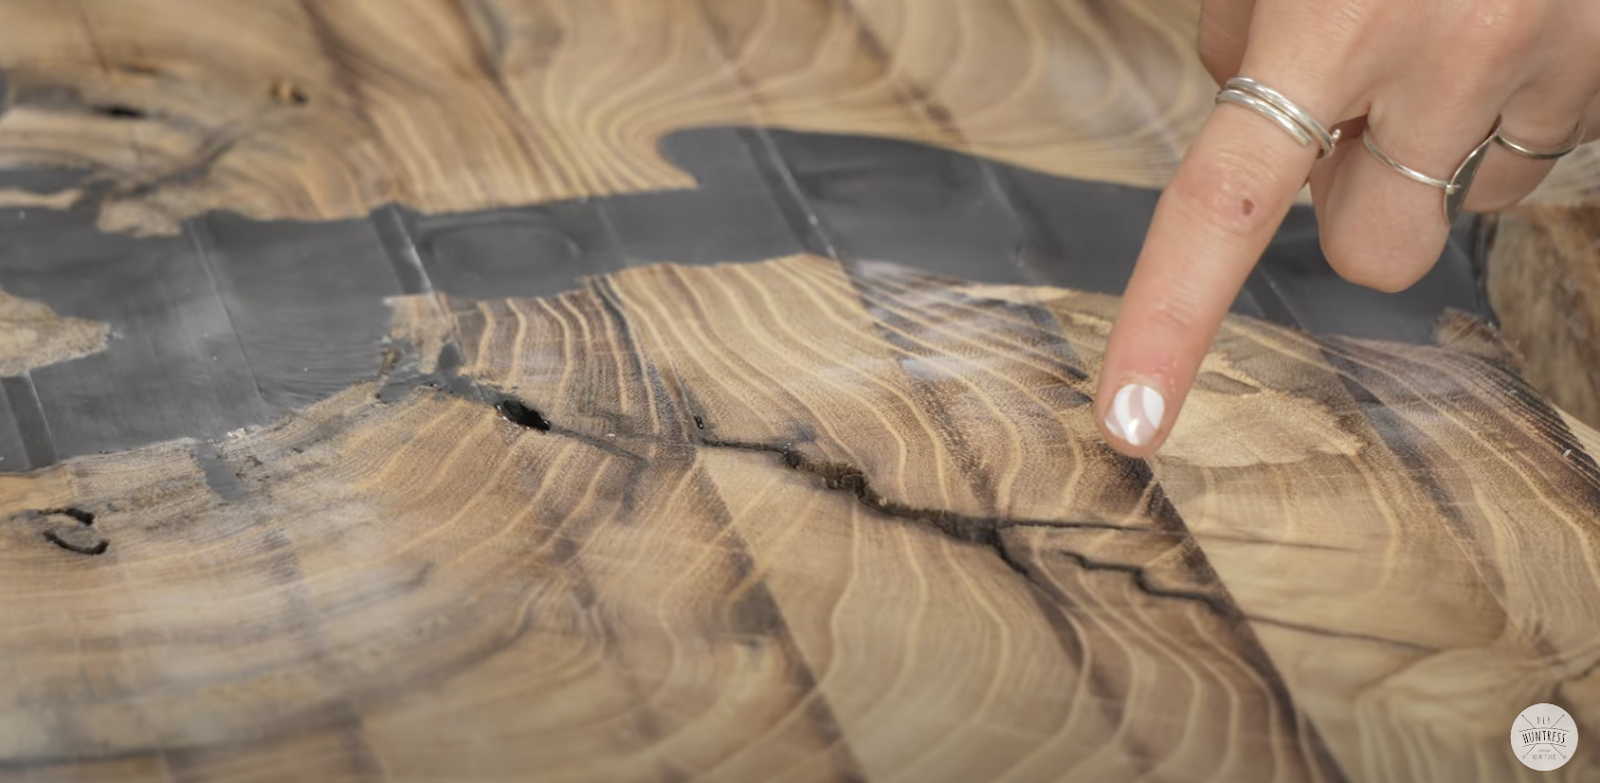
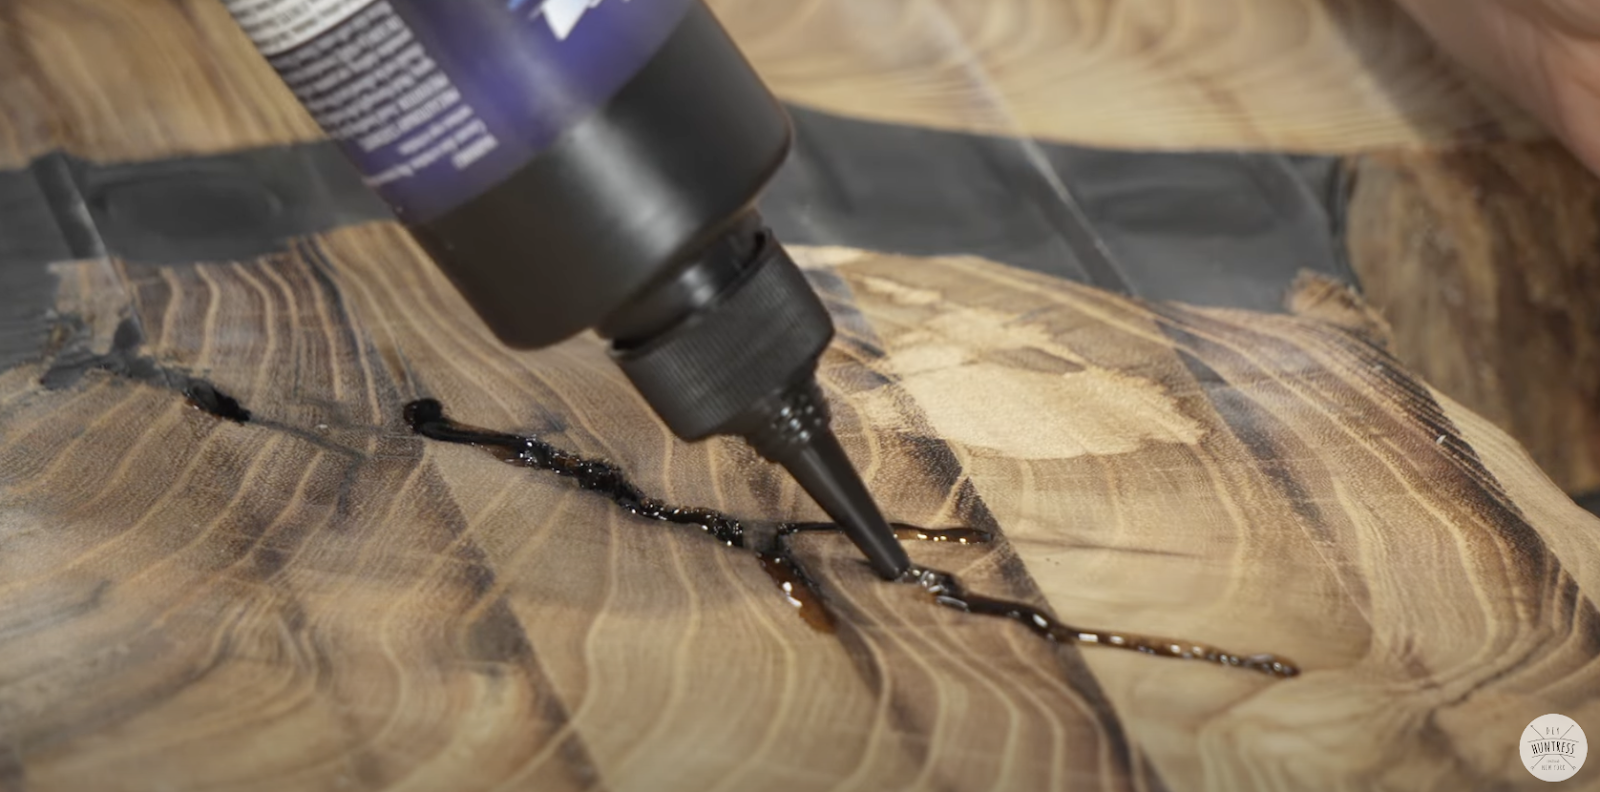
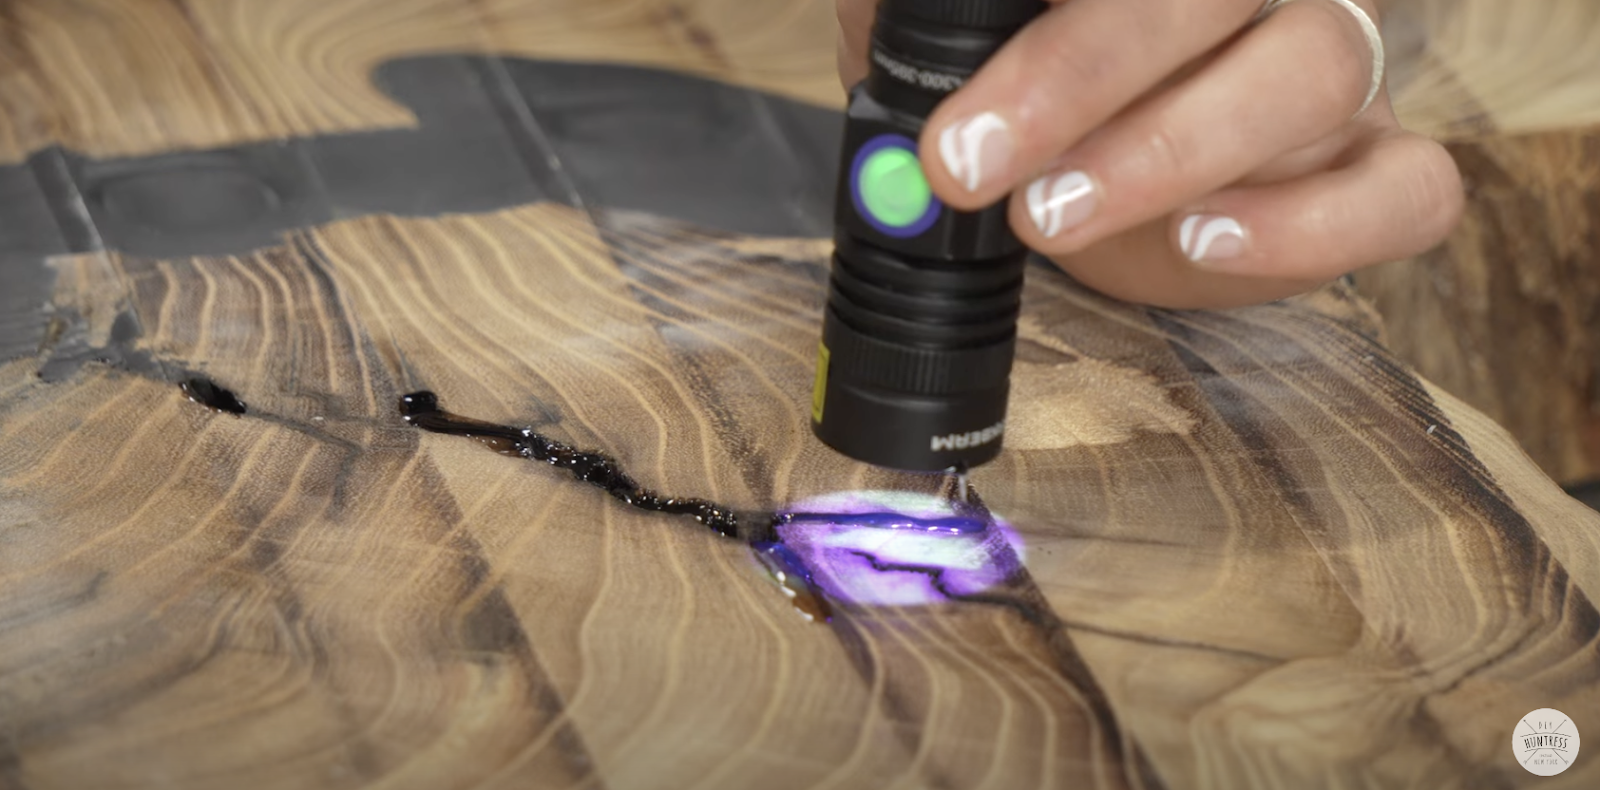
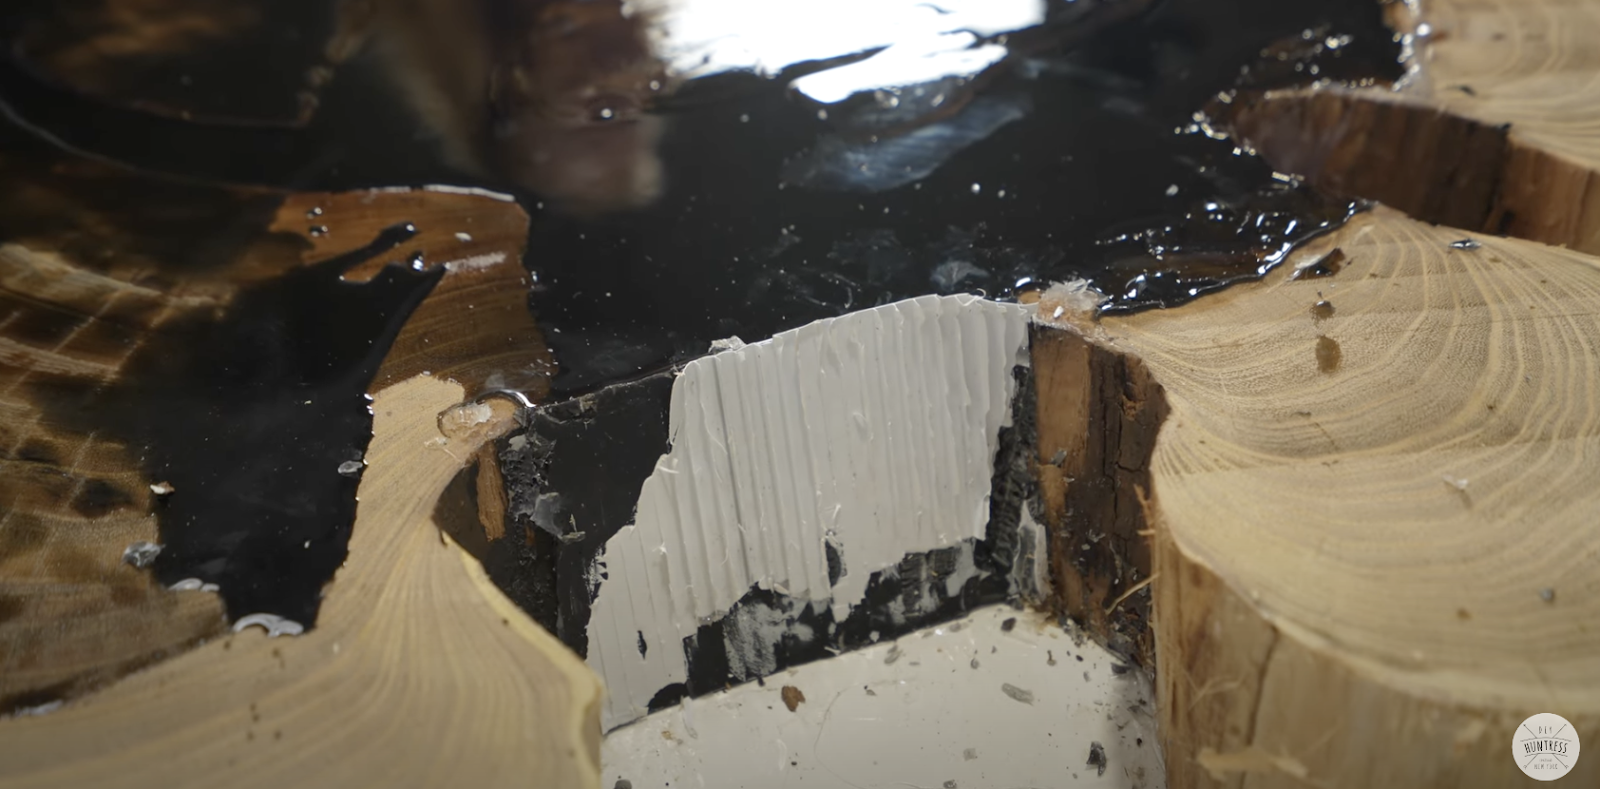
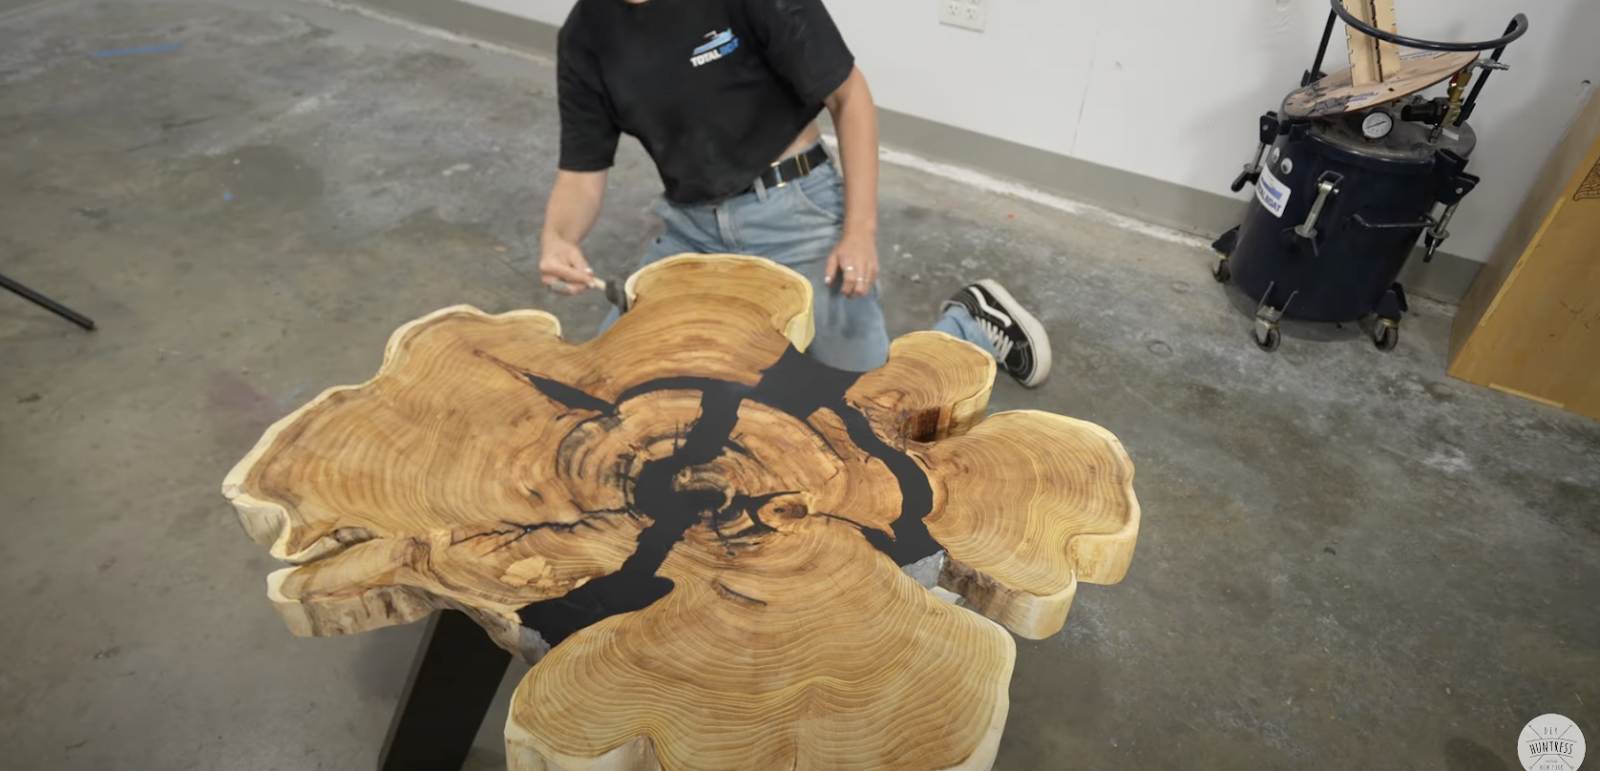
It was at this point that I realized that I liked the way the underside of the table looked much more than the side I had originally planned to be the top. However there were some voids where the epoxy hadn’t filled in. So I went back in with the UV Cure Resin to fill all of those nooks and crannies. I also needed this to cure before I could sand and finish it so UV Cure Resin for the win.
It was definitely panic mode for me at this point.
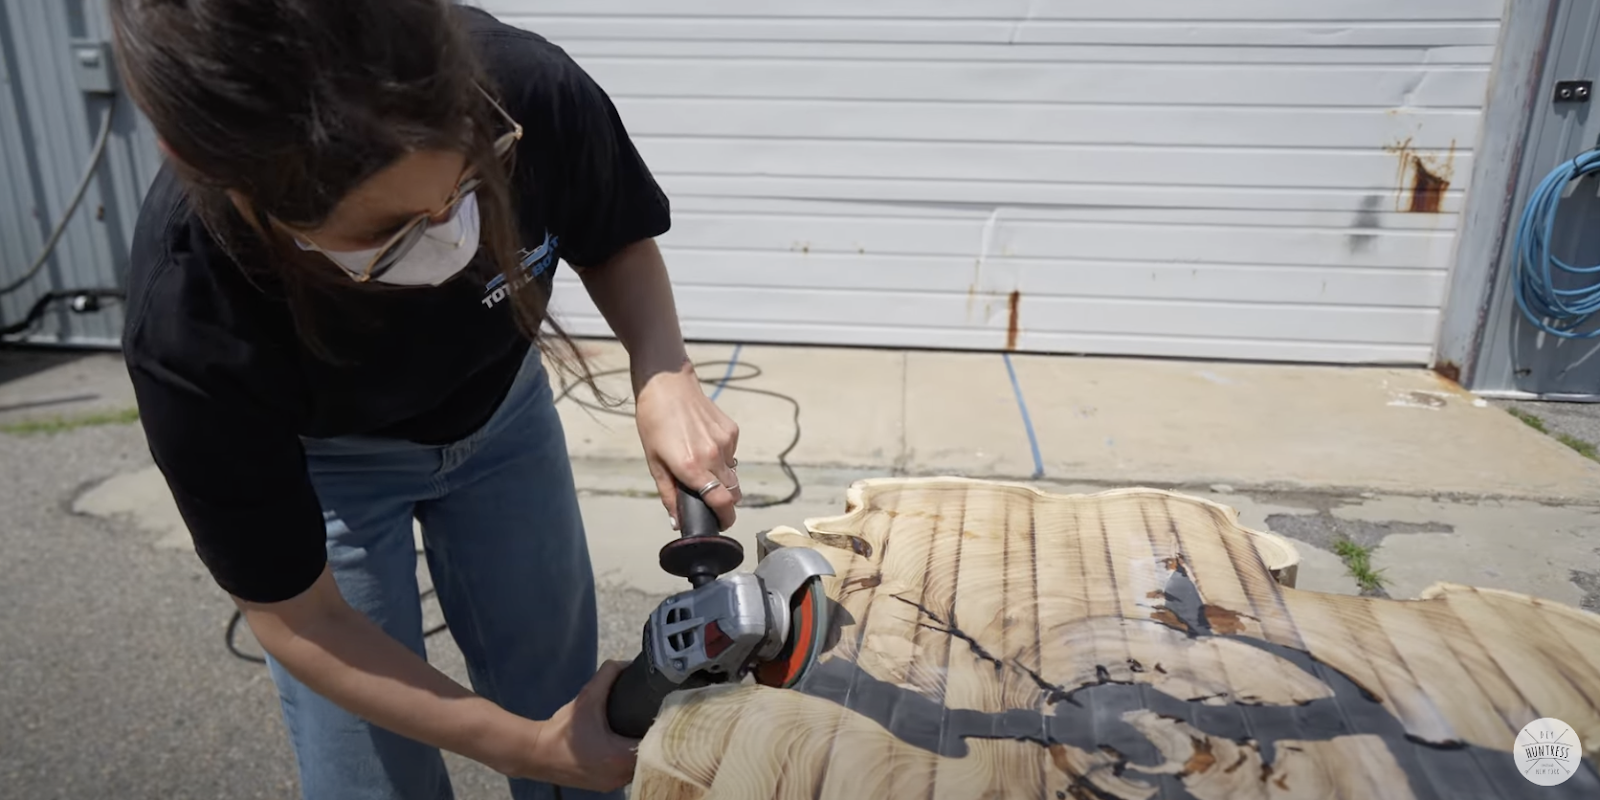
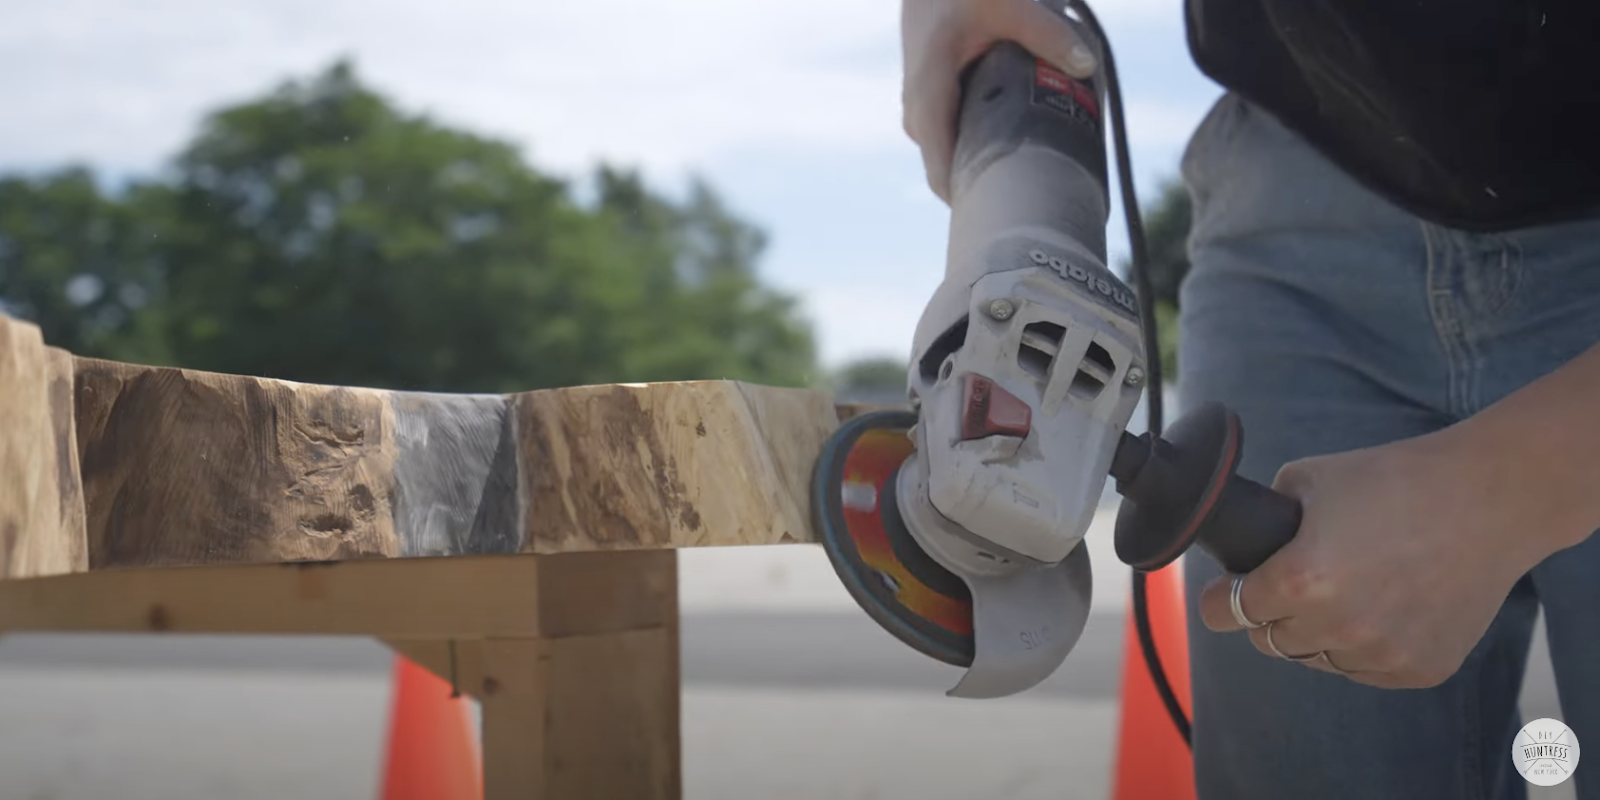
I wasn’t loving how straight the epoxy edges were looking so I went in with an angle grinder to make those spots look a bit more organic.
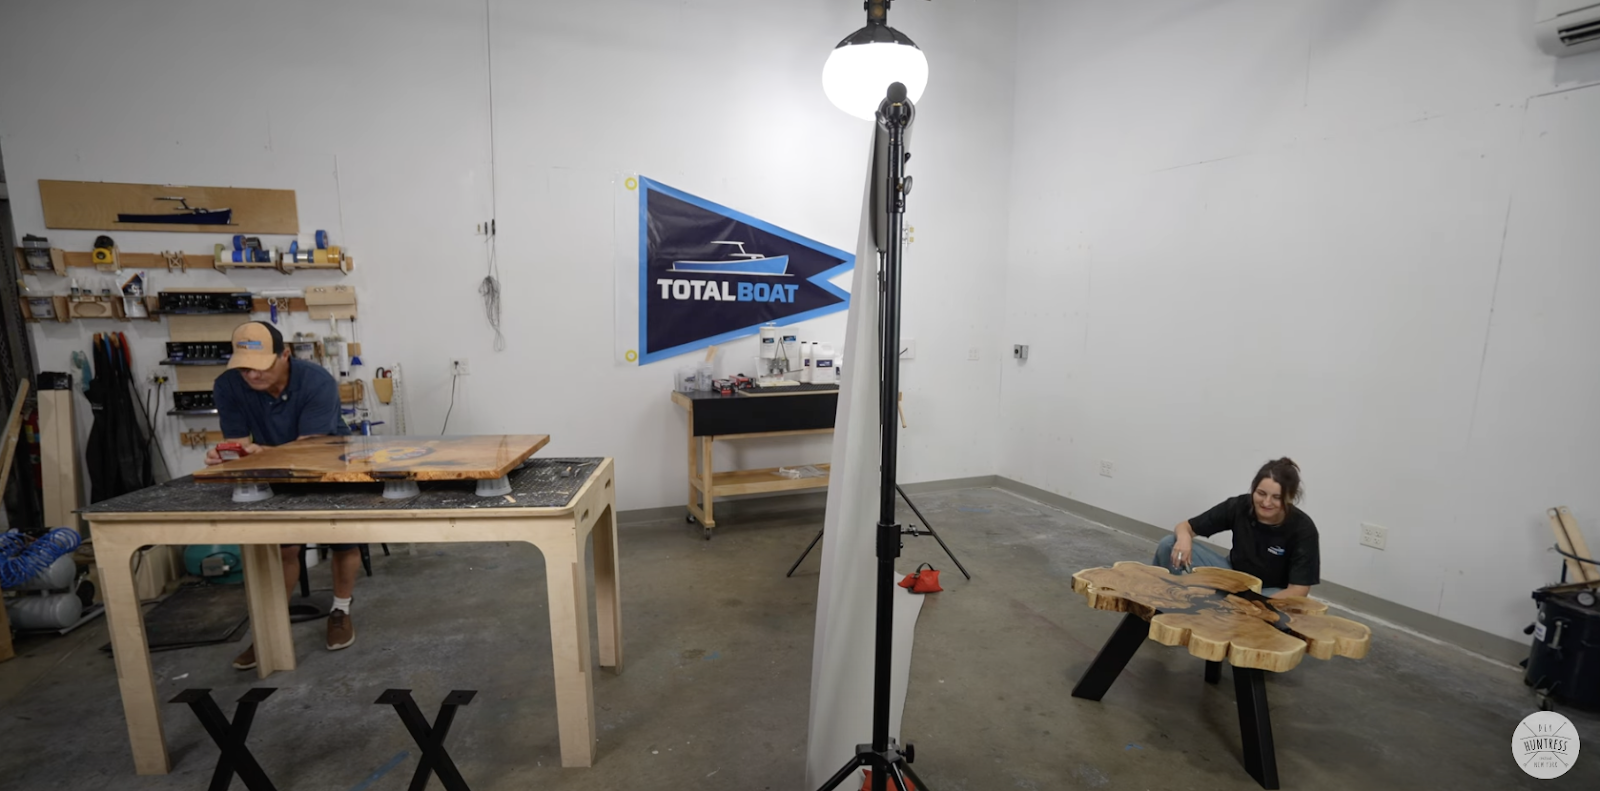
With an hour and a half left to go I still had to sand my table, get a coat of finish on it and attach the legs…while my dad was gloating that he was already done.
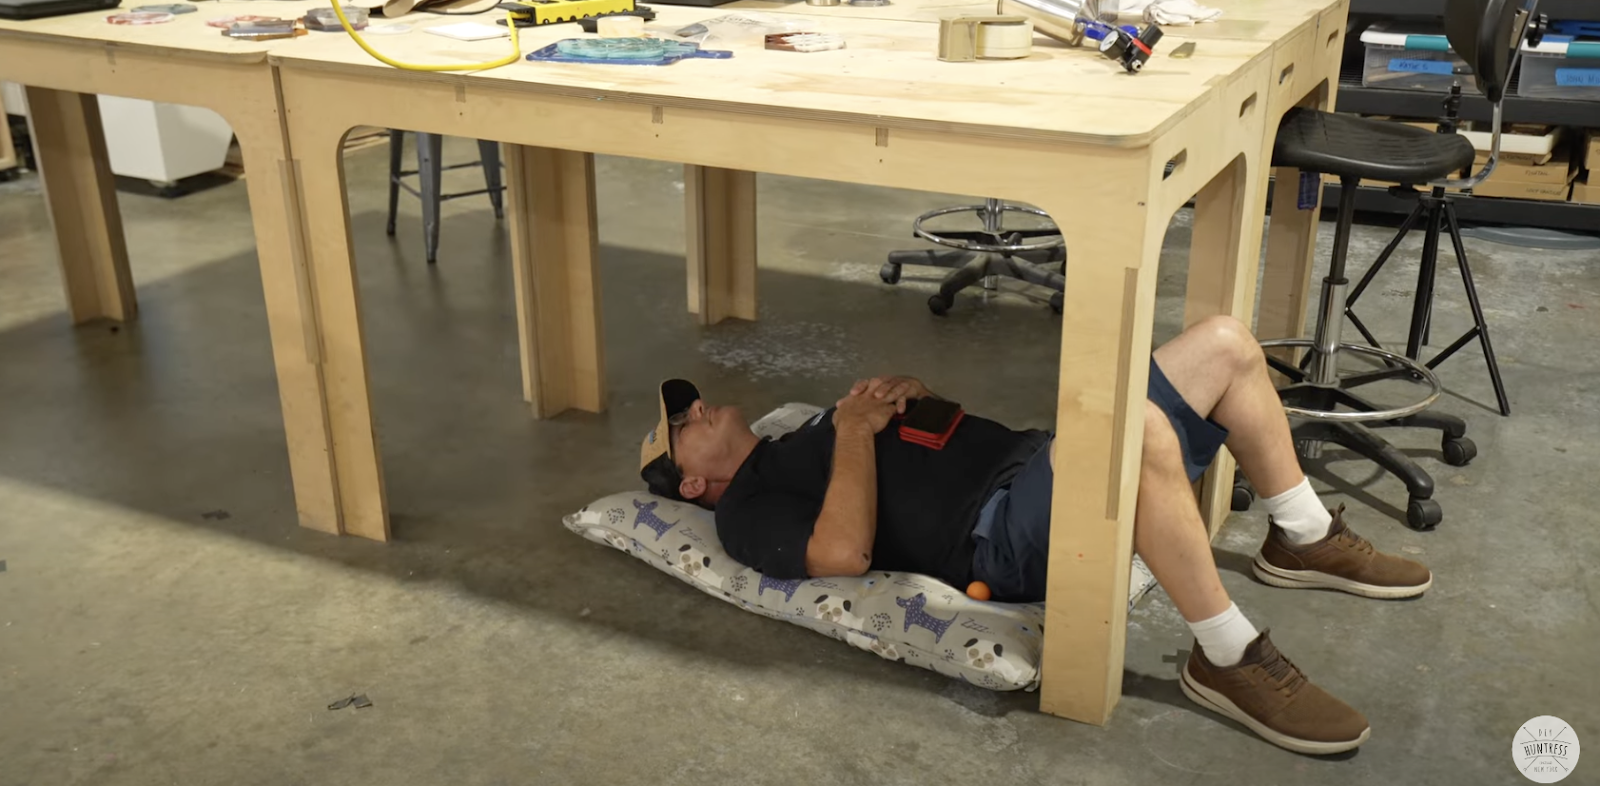
Like literally, he was napping under the table.
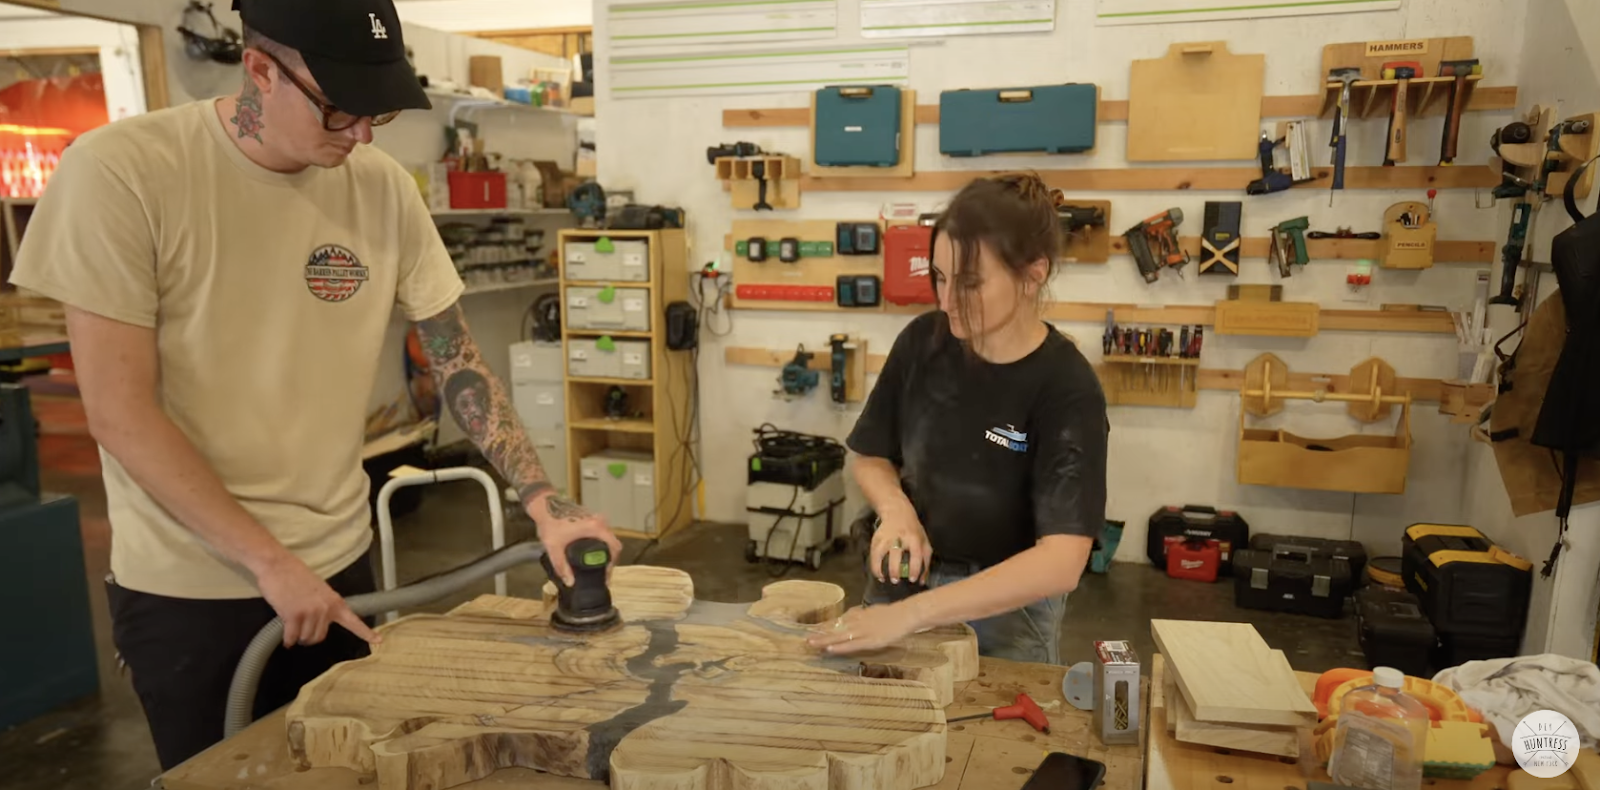
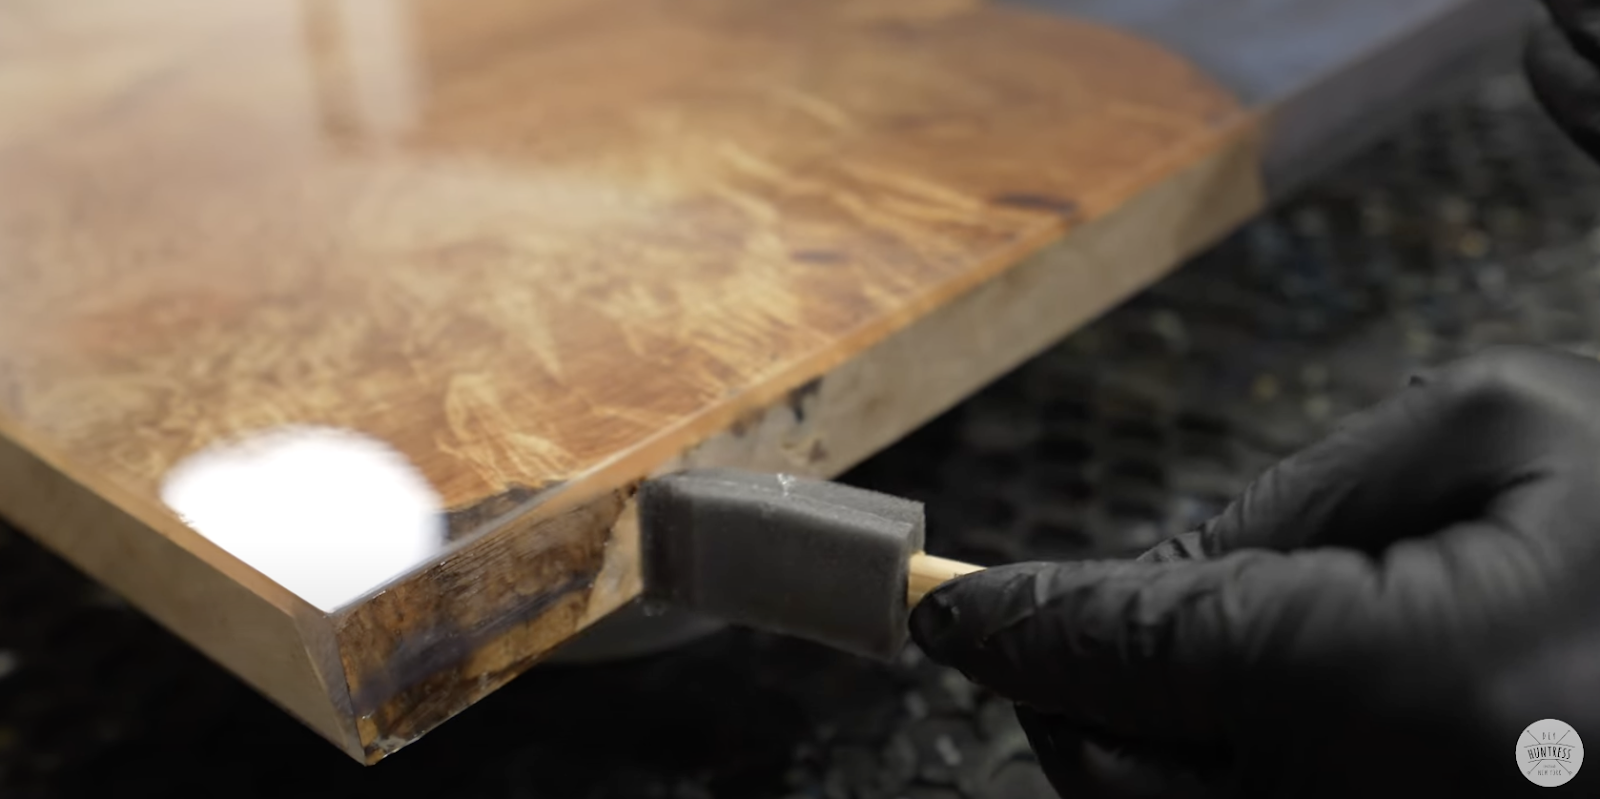
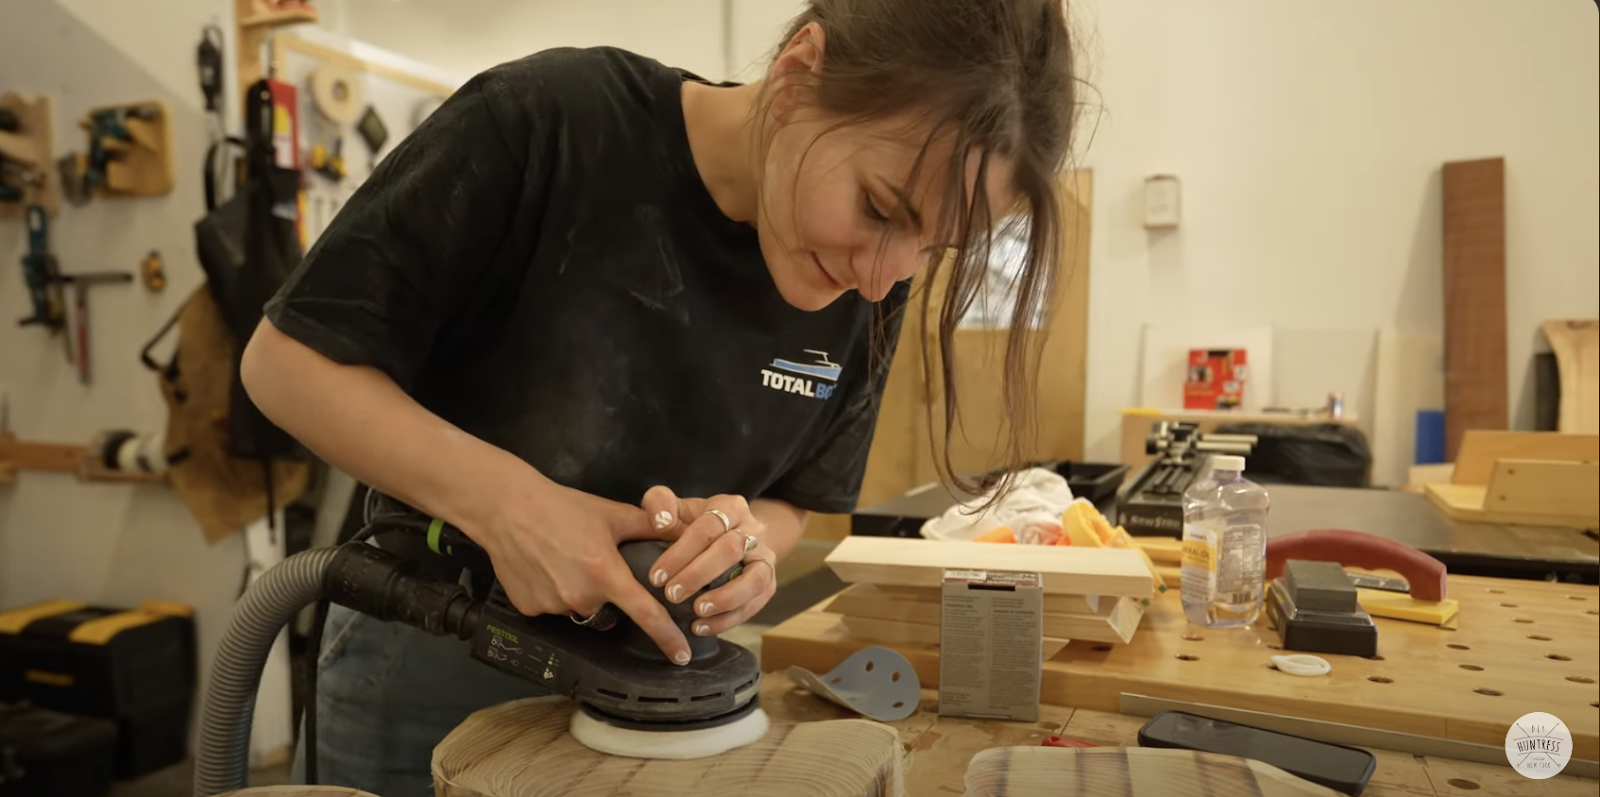
My dad had lots of help on his project so it was time for me to call in some help. Justin, thank you for the assist with the final sanding.
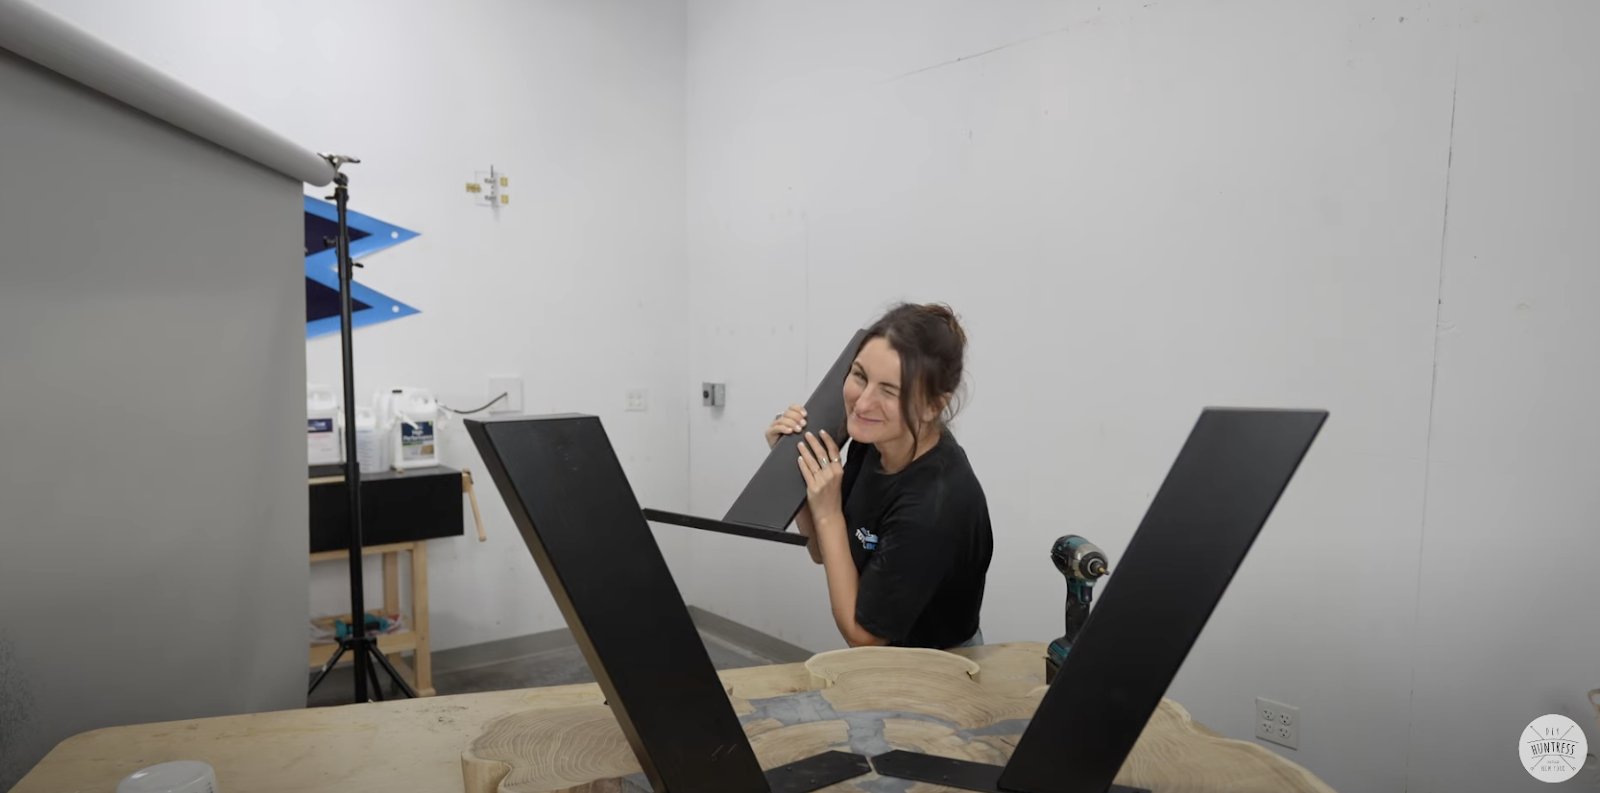
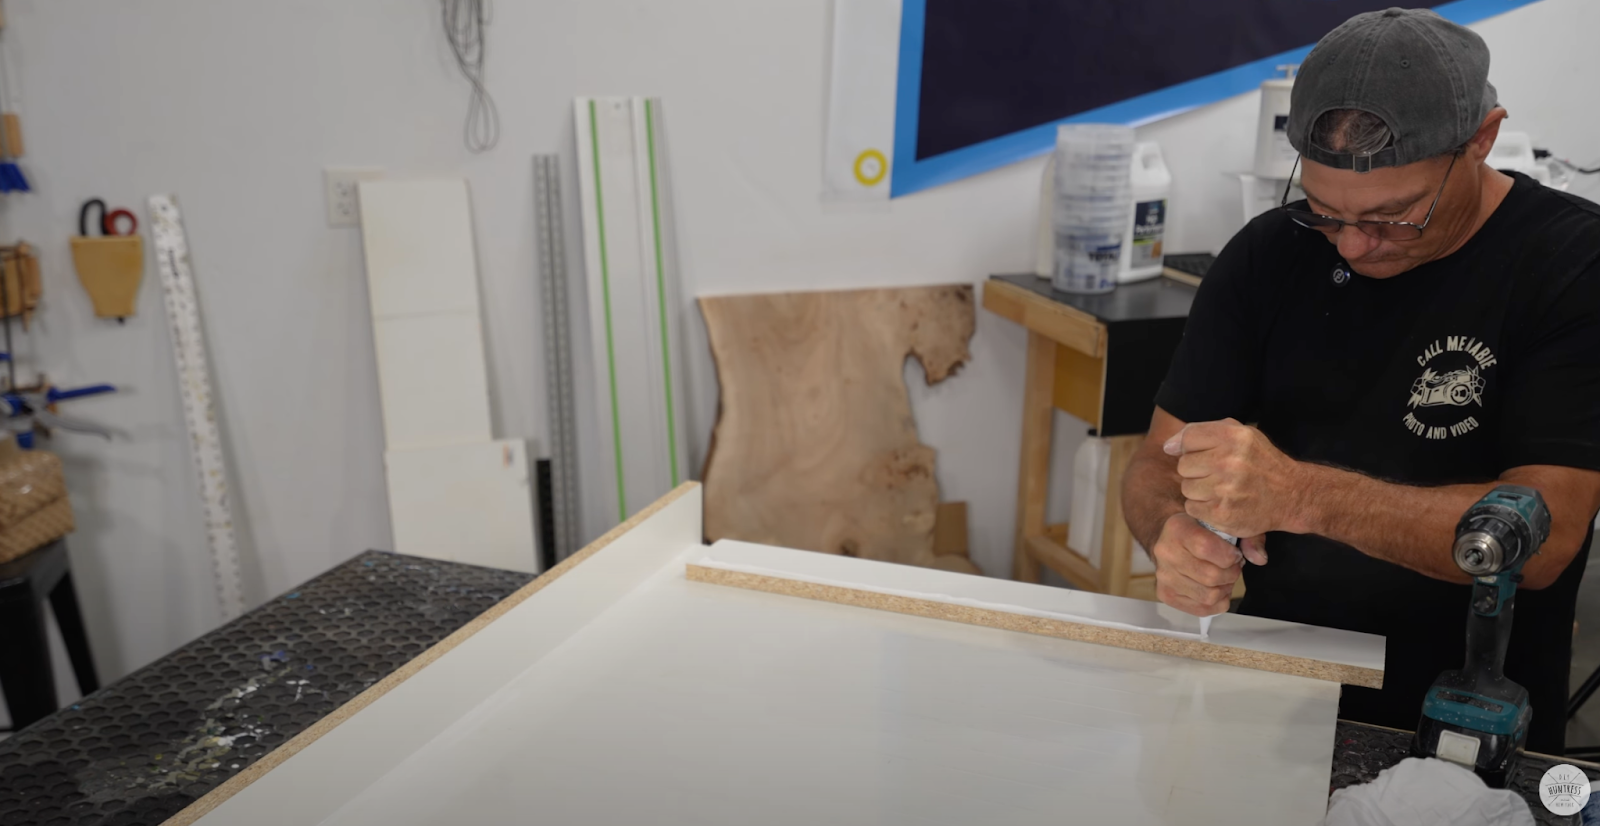
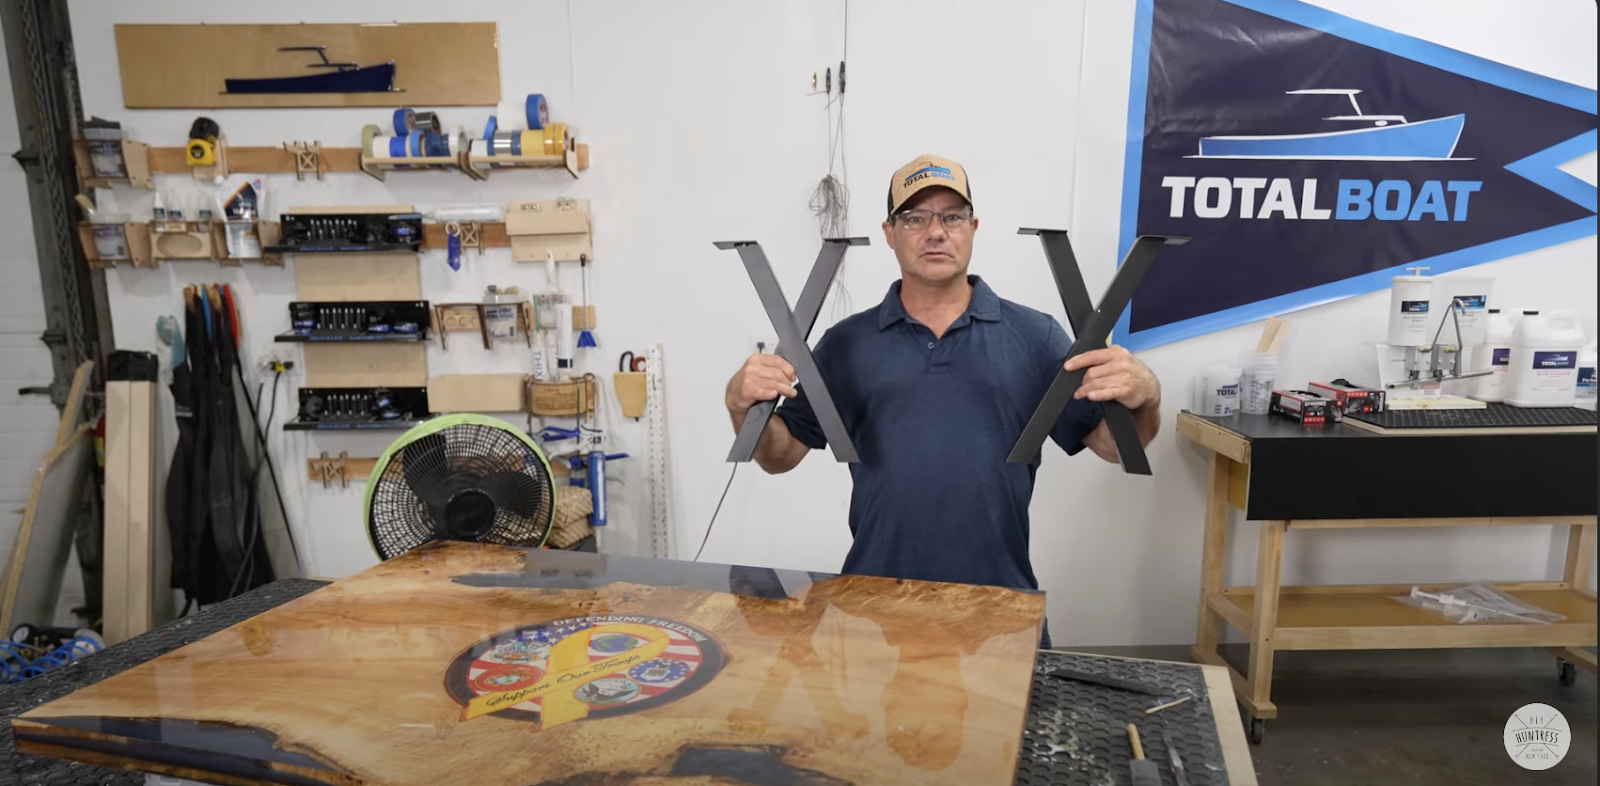
Nice legs right??
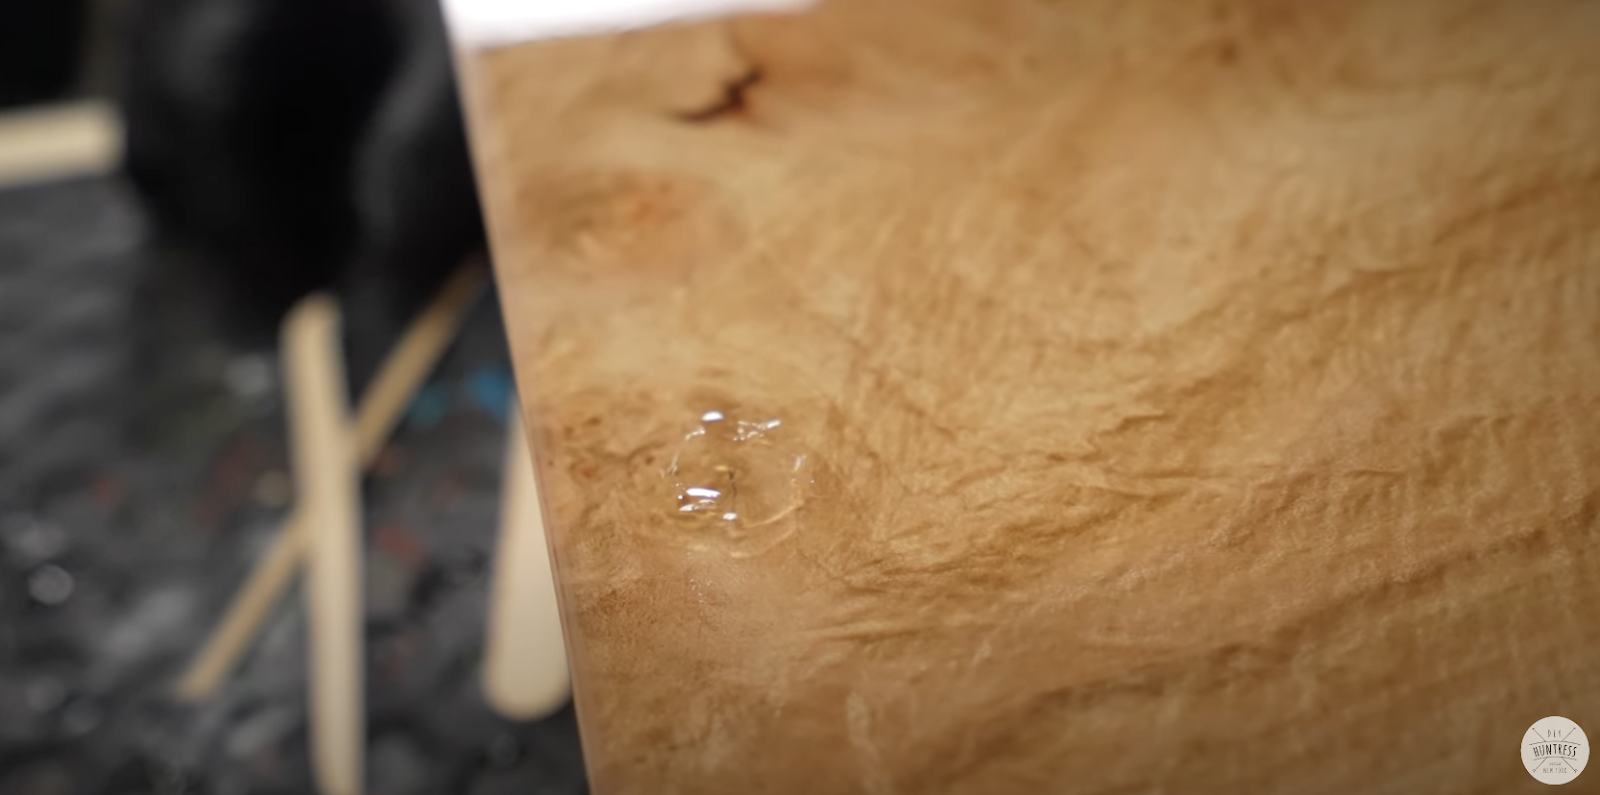
With about two minutes to spare I applied Halcyon Finish to my table. Why can I never finish a project on time?
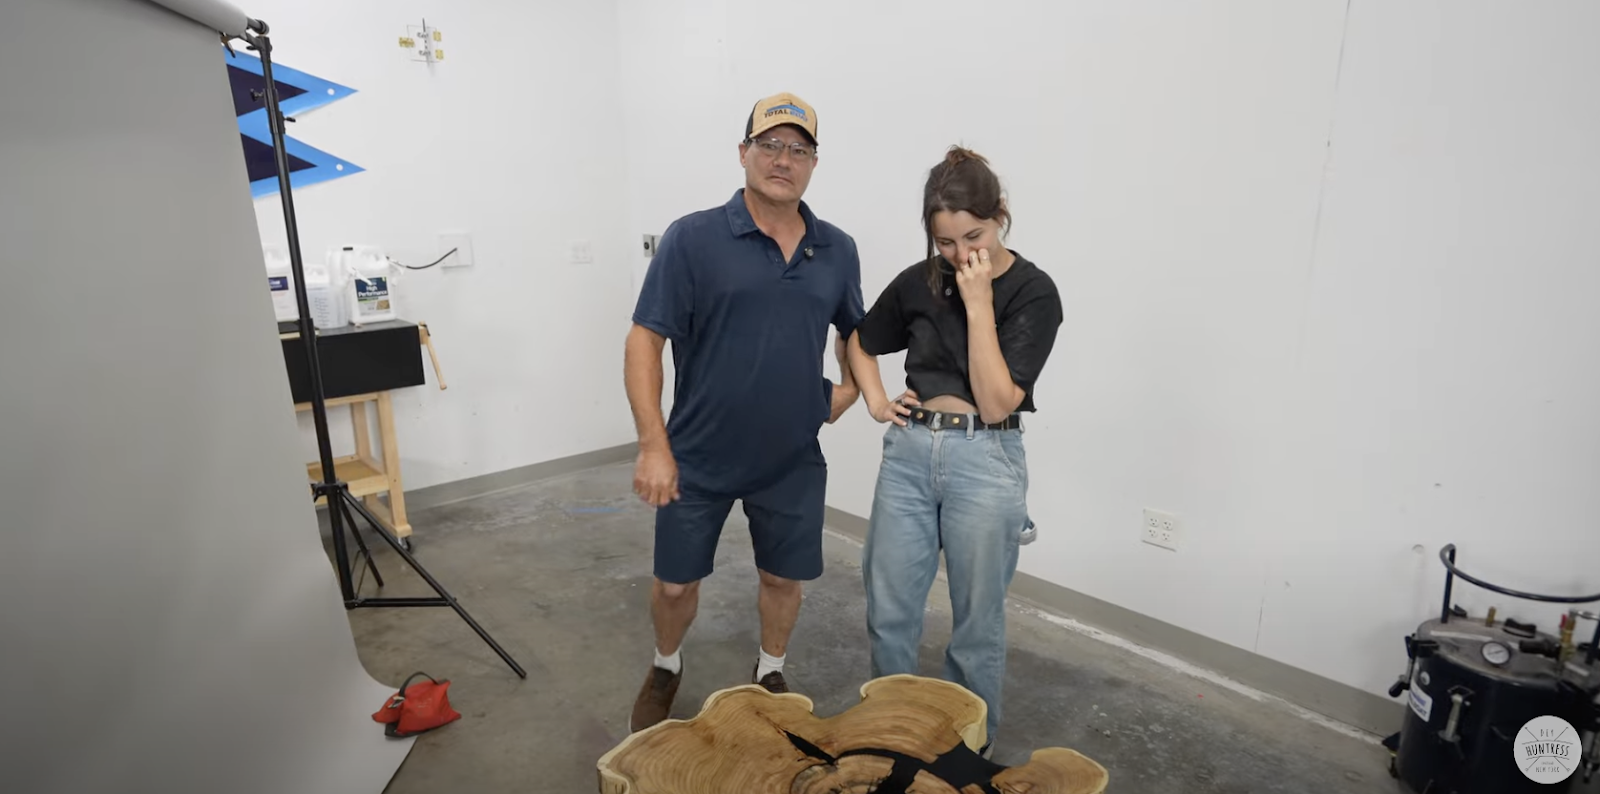
The Reveal
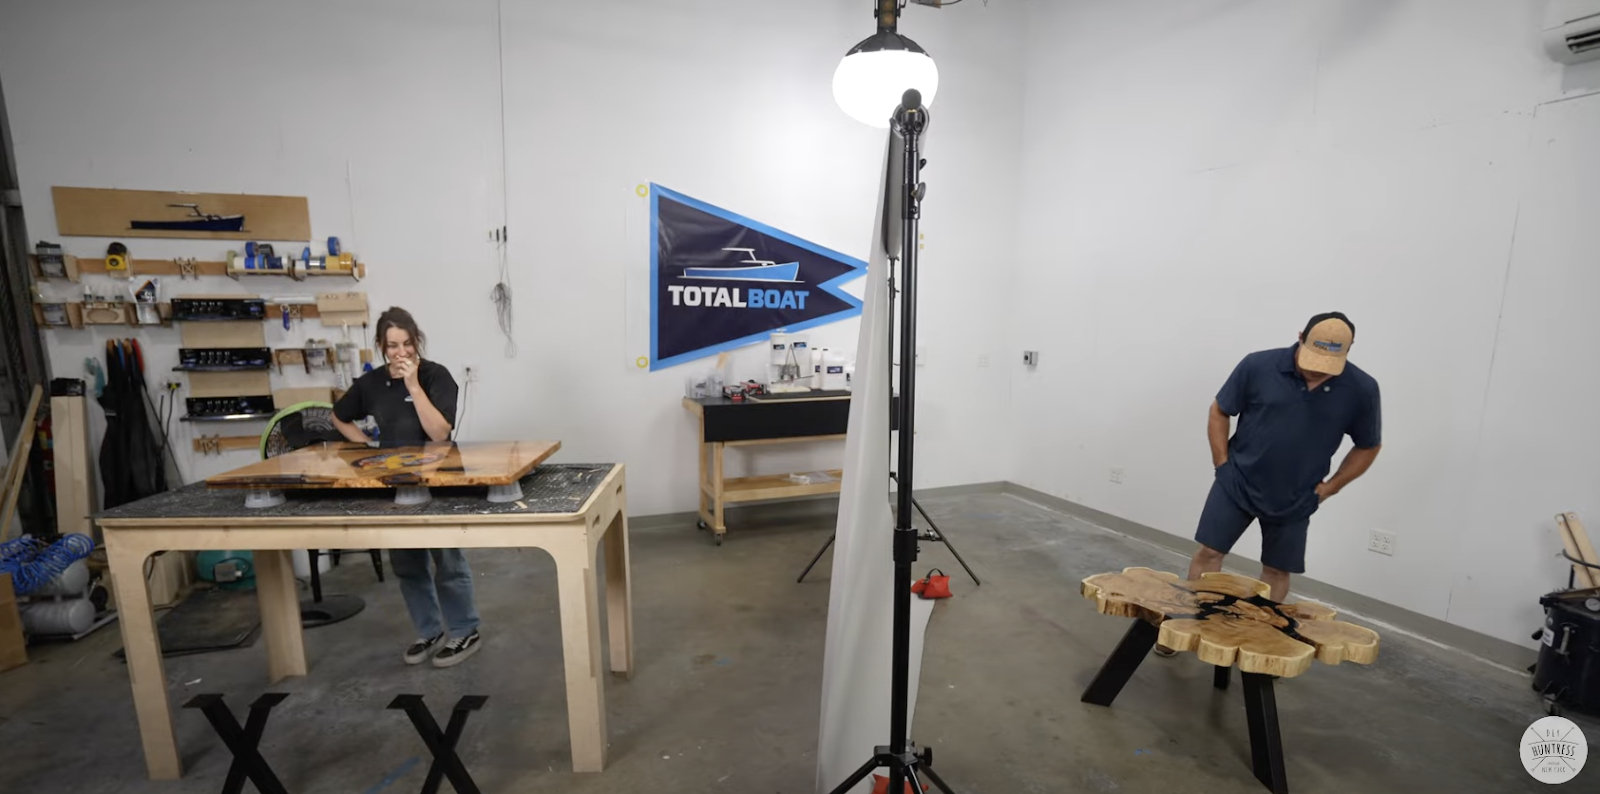
Don’t we love how at our stop time I still have a brush in my hand and my dad is on his phone waiting around?
Before voting could commence we had to check out each other’s projects.
I was genuinely impressed by my dad’s build. I can’t believe this was his first resin pour, and it was so creative. I know being a military dad is super important to him and he truly poured all of his love into this piece.
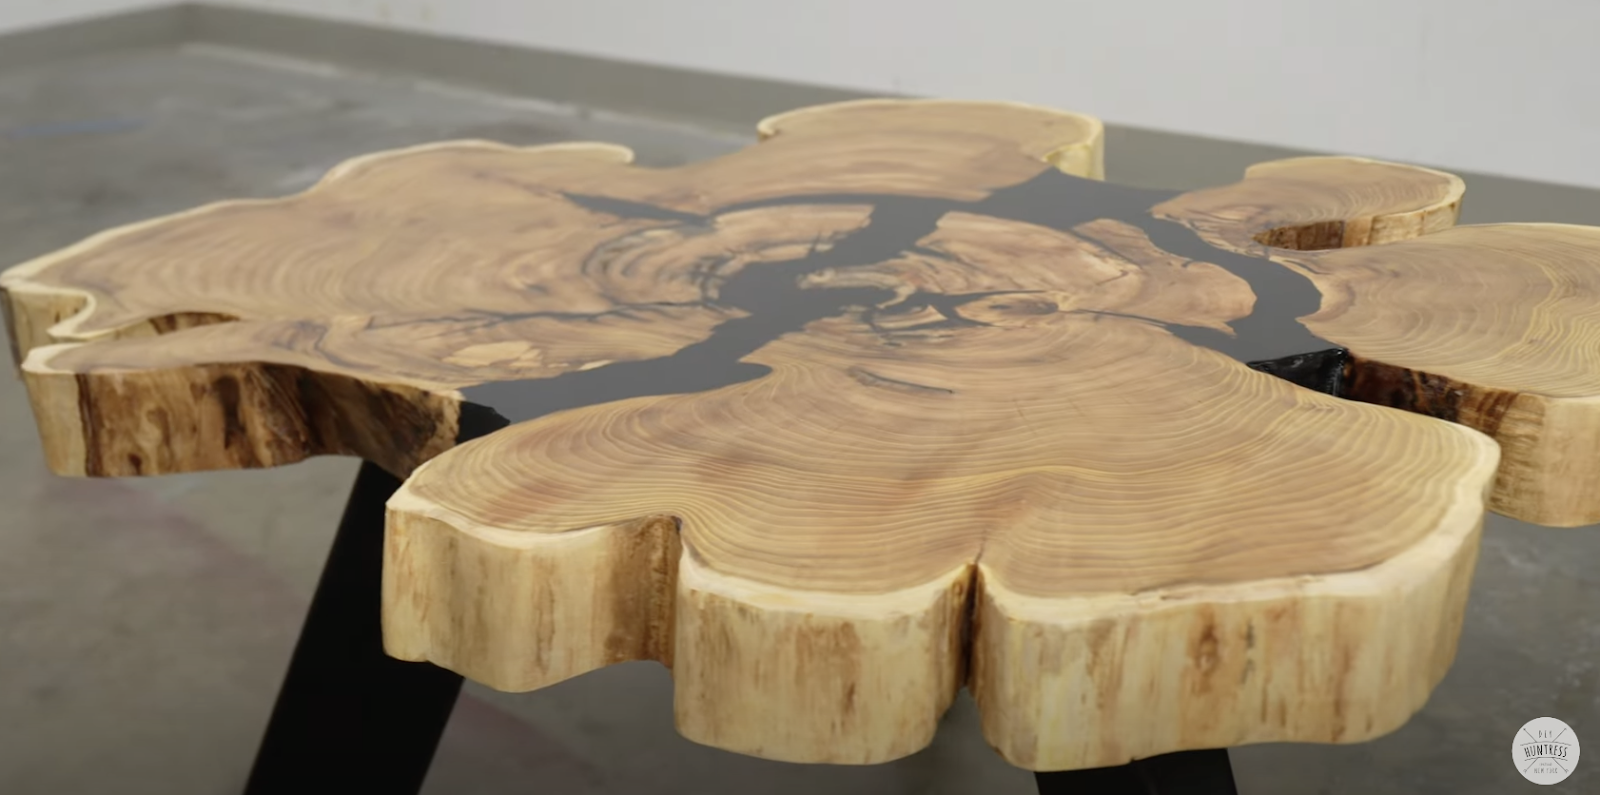
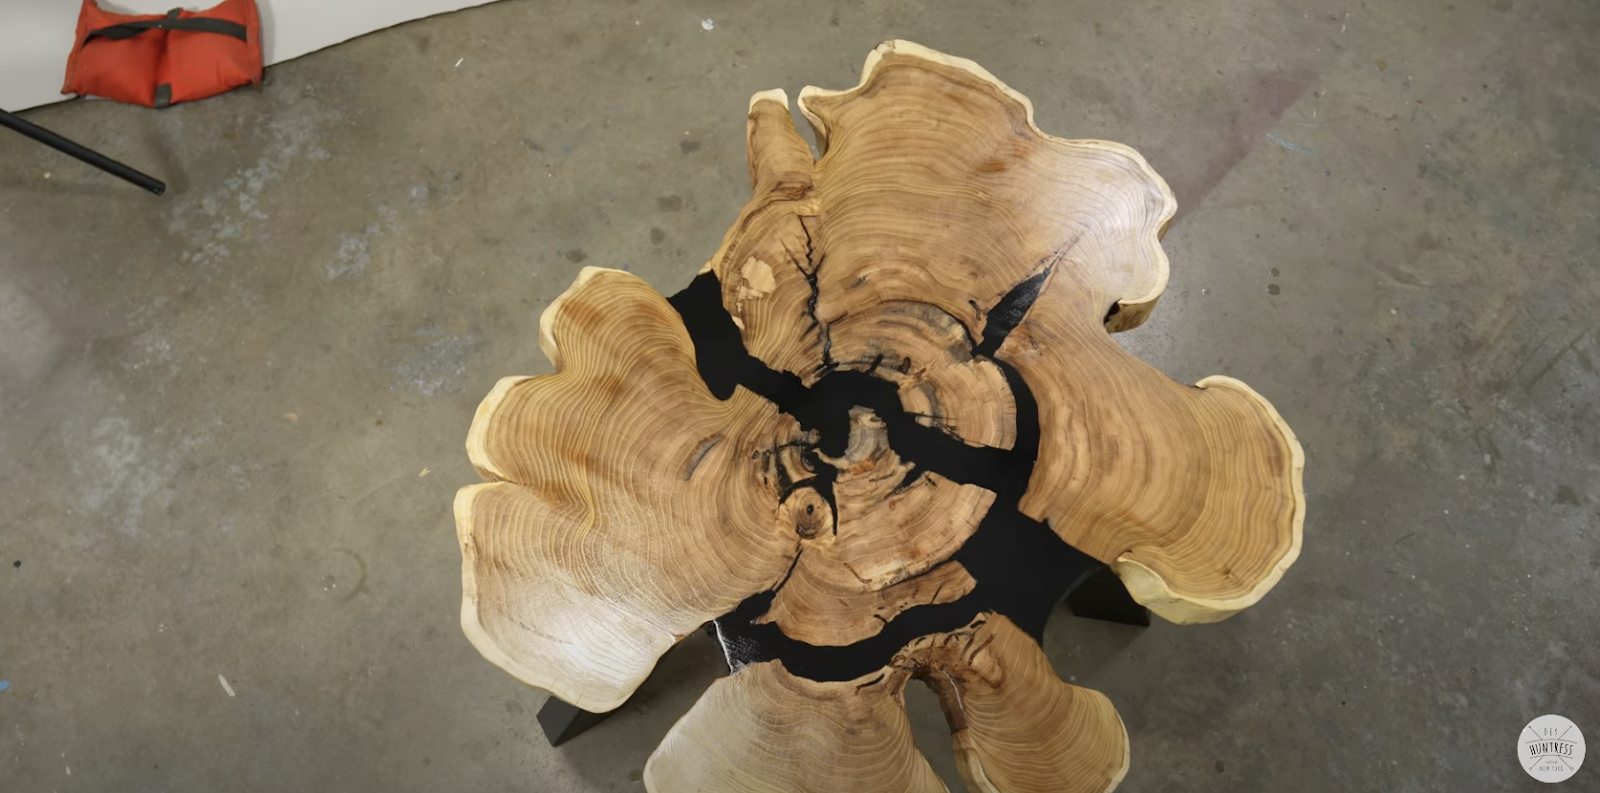
Although I legitimately didn’t think I would have a table at the end of the day it really did turn out pretty awesome. We both agreed the woodgrain really looked so cool on my table. But mostly I love how different our two projects turned out.
This project was so fun. It was awesome to get to do this competition with my dad, and so cool to be at Total Boat Headquarters where we were able to get help on all of our epoxy related questions. I’m so proud of my dad for making his first epoxy piece and absolutely crushing it.I think it would be super cool to do a project like this again and Total Boat said we could come back so I think we’ll have to make it happen. But most importantly, who do you think won?? Let me know because the winner gets treated to a steak dinner. Well, until the next project, happy DIYing friends!
Save this for later
I hope you enjoyed this project! If so, make sure to Pin It for later!