This post and photos may contain Amazon or other affiliate links. If you purchase something through any link, I may receive a small commission at no extra charge to you. Any supplies used may be given to me free of charge, however, all projects and opinions are my own.
Have you ever wanted to engrave with your Cricut machine? Today we’re going to look at Cricut engraving fonts. These are fonts that work well with the Engraving Tool for engraved projects. These filled fonts are great for use in Cricut Design Space as Cricut currently has no fill option. So, grab some of these hatched or lined fonts for use with the Cricut engraving tool.
Learn all about the Engraving tool and the different blanks you can use it on here.
How to Find Cricut Engraving Fonts
If you’ve ever tried engraving with your Cricut machine, you may have ended up with fonts that were just a thin outline. Those are more for drawing or pen lines. They do work for engraving but they may be difficult to see on your surface.
The fonts we’re going to look at today are all filled, hatched, or set up so they have a thicker look to your engraving making it stand out more on your blank. You can actually see all these different fonts and where to find them by clicking play on the video below:
Can’t watch the video or missed some of the information? You can also follow along below!
Finding Fonts for Engraving on Any Website
Regardless of what font website you prefer, you can search for fonts that will work with the Cricut Engraving Tool. I even found fonts in Cricut Design Space that work for engraving. Even if you don’t want to search font websites you can find fonts right in Design Space that will work with this method.
What to Search For to Find Engraving Fonts
There are a few different things you can search for that could bring up the type of fonts we’re looking for. Here are a few tips and tricks for finding Cricut engraving fonts:
- Search the word “engrav” – I’m leaving off the E and I-N-G so the search will pull up both “engrave” and “engraving”.
- Filter out any search results for just fonts.
- Remember we’re looking for fonts that have some kind of fill line in them. We want to find fonts that have several lines so they look more significant on our engraving.
- Other words you can look for to help find fonts that would be great for engraving are “filled”, “hatched”, “hatch”, and “line”.
- You can find fonts that have the inside of the letters filled with lines or other shapes.
- You can also find fonts that are just thicker on the outline but still have the center open.
- Another tip is to click on a font you like the look of and often there are other fonts recommended that are similar to the font you’re looking at. I’ve found a lot of my fonts that way.
Links to Creative Fabrica Fonts Used:
I’ve found a lot of fun fonts on different font sites like Creative Fabrica and Font Bundles. Here are links to a few of my favorites:
You can see how to use ANY font in Cricut Design Space here.
Finding Engraving Fonts in Design Space
If you don’t want to look on other sites, you can also find Cricut Engraving Fonts in Design Space itself. I went through Design Space and picked every font that I thought would look good engraved. I’ve included a list of them below.
Design Space Font Names:
- Karley Sketch
- BFC Pepperminty
- Citation
- DJ Jer
- FF Archian Boogie Woogie
- ITC Abaton STD Regular
- Mustache
- Zaragoza
Both the Design Space and Creative Fabrica fonts may or may not have a fee associated with them. I did not pay attention to that when I was compiling my list of best engraving fonts.
Engraving Fonts onto Metal Sheets with a Cricut Machine
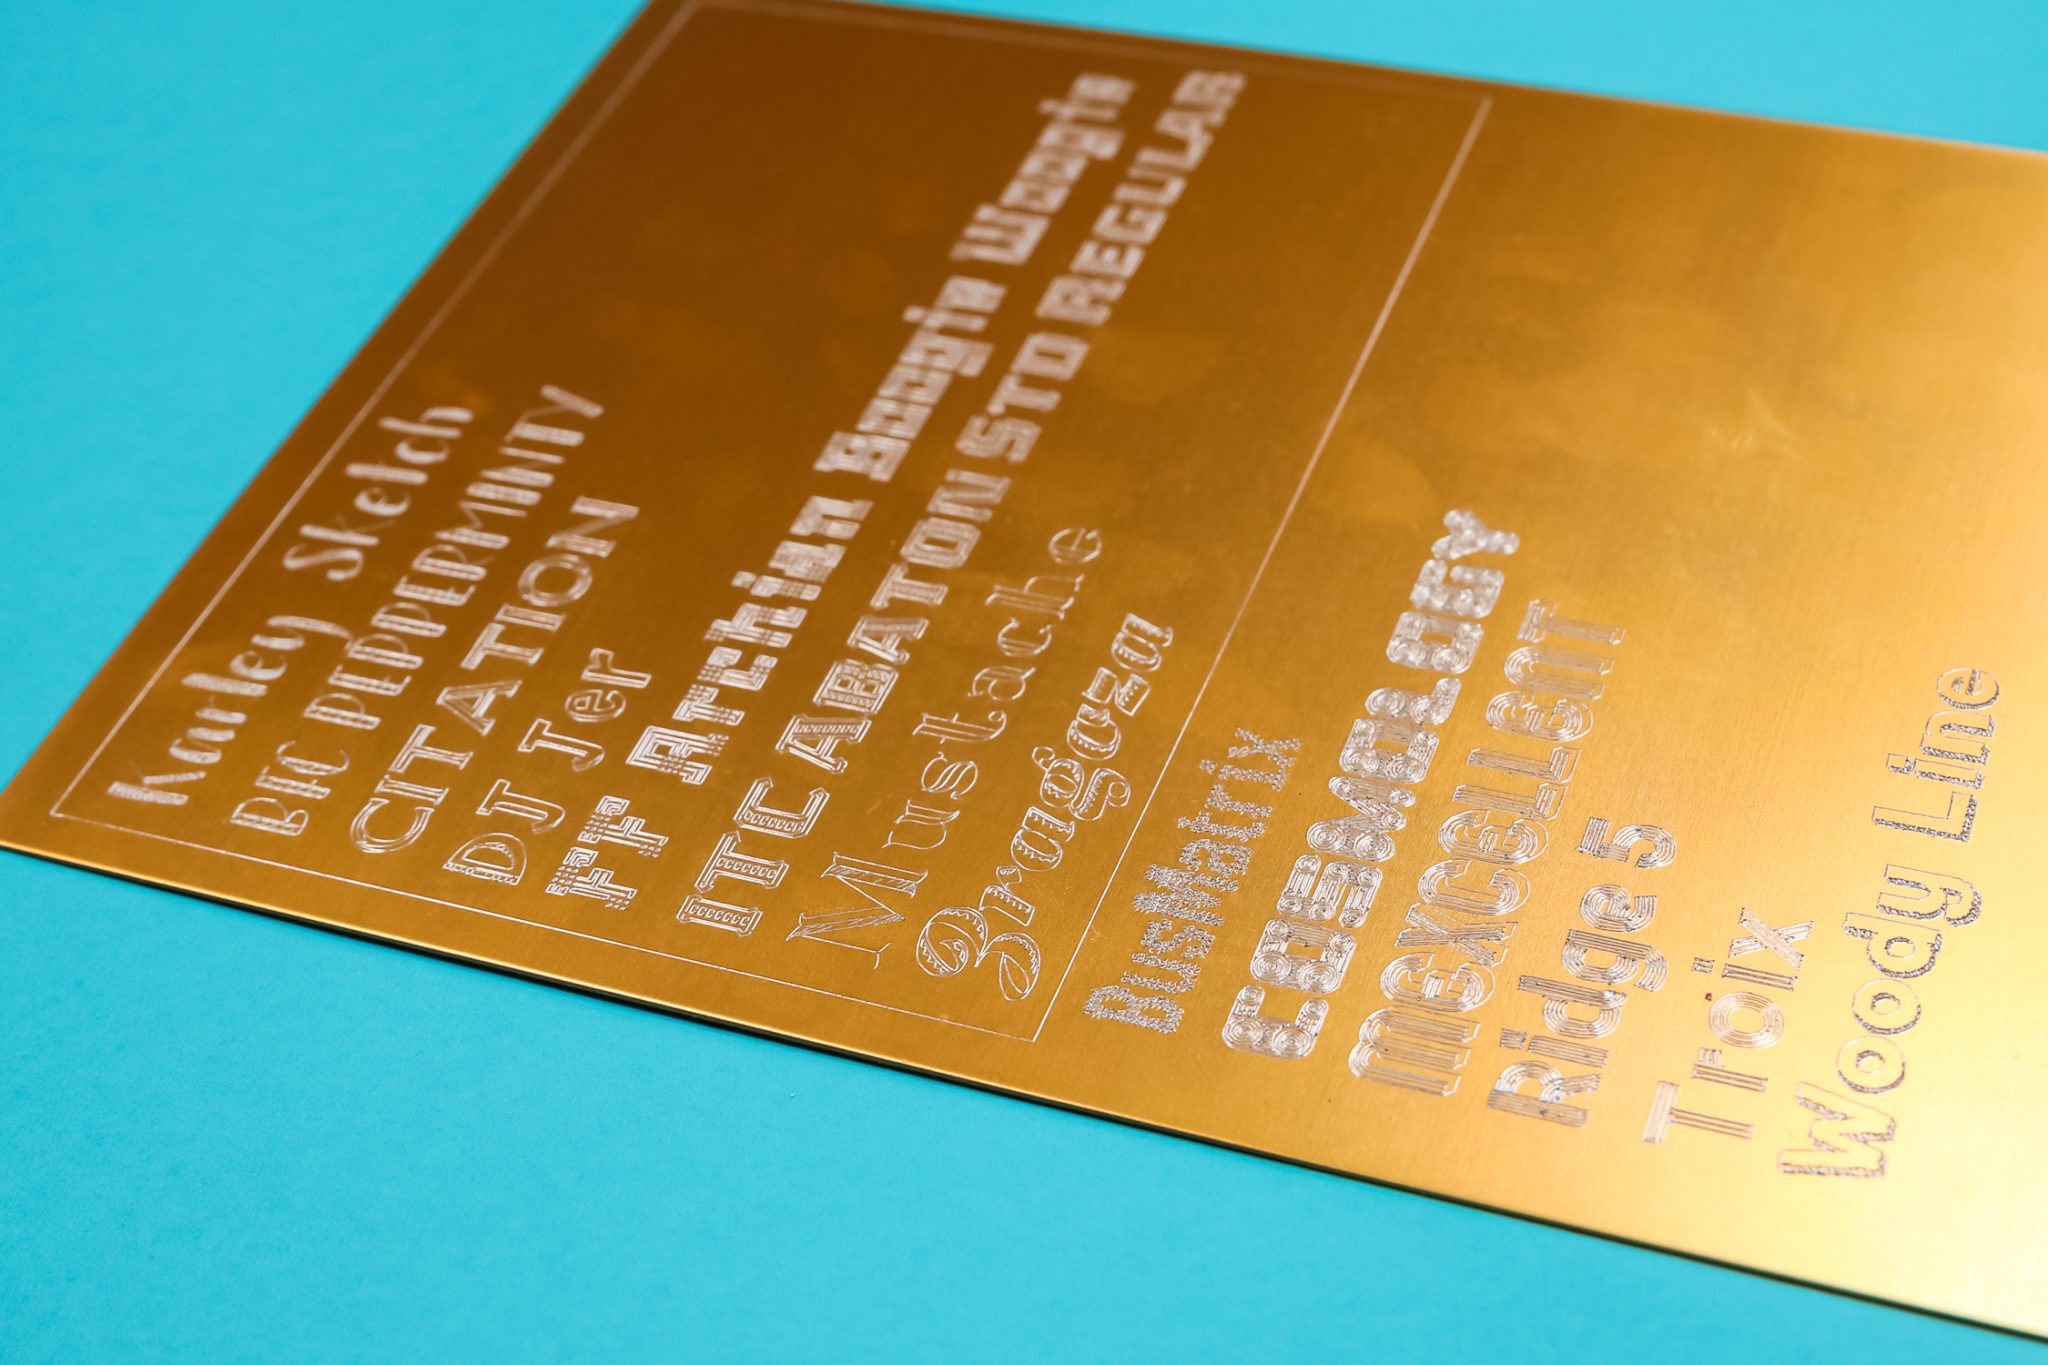
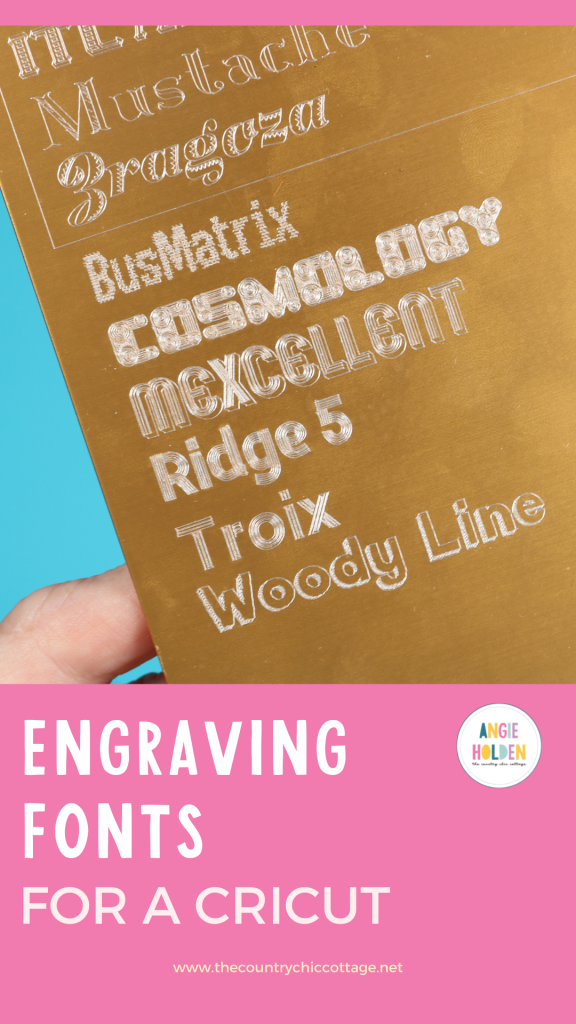
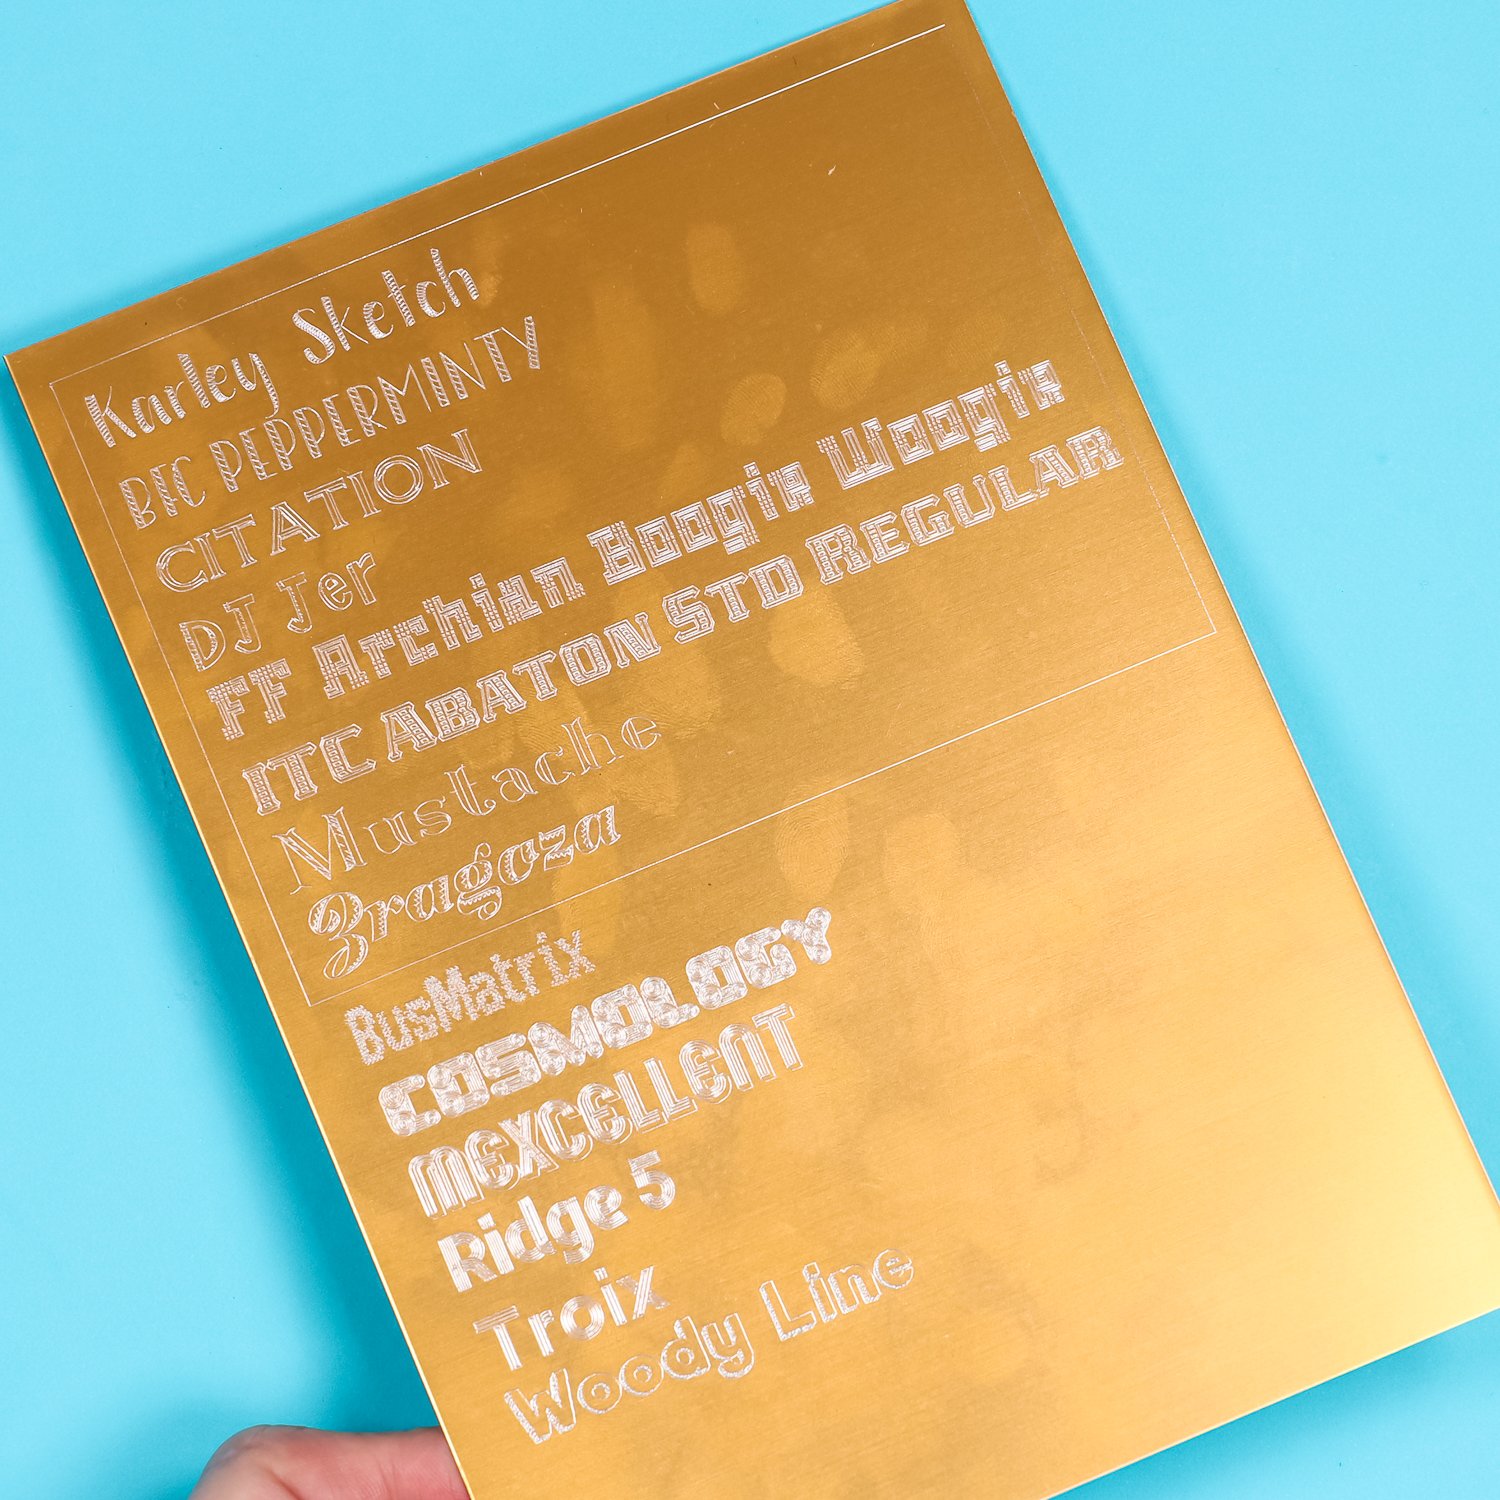
I thought it would be helpful to have a reference sheet so I typed each font name on the Design Space canvas. This will make it easy for me to see how the fonts look engraved when it comes time to make engraved projects.
I put a box around the Design Space fonts so it’s easy for me to remember the fonts I can find within Design Space. The other fonts on the reference sheet are fonts I found on the Creative Fabrica website.
When creating engraving projects, you do have to change the setting on the canvas. Click on the text and then under Operation below the Draw menu you’ll see there is an Engrave option.
This option will only show up if you have Maker or Maker 3 selected. The Engraving tool only works in the Maker machines. If you want to use an Explore, you will have to trick the machine and use a tool that is not Cricut brand. You can see how to do that here.
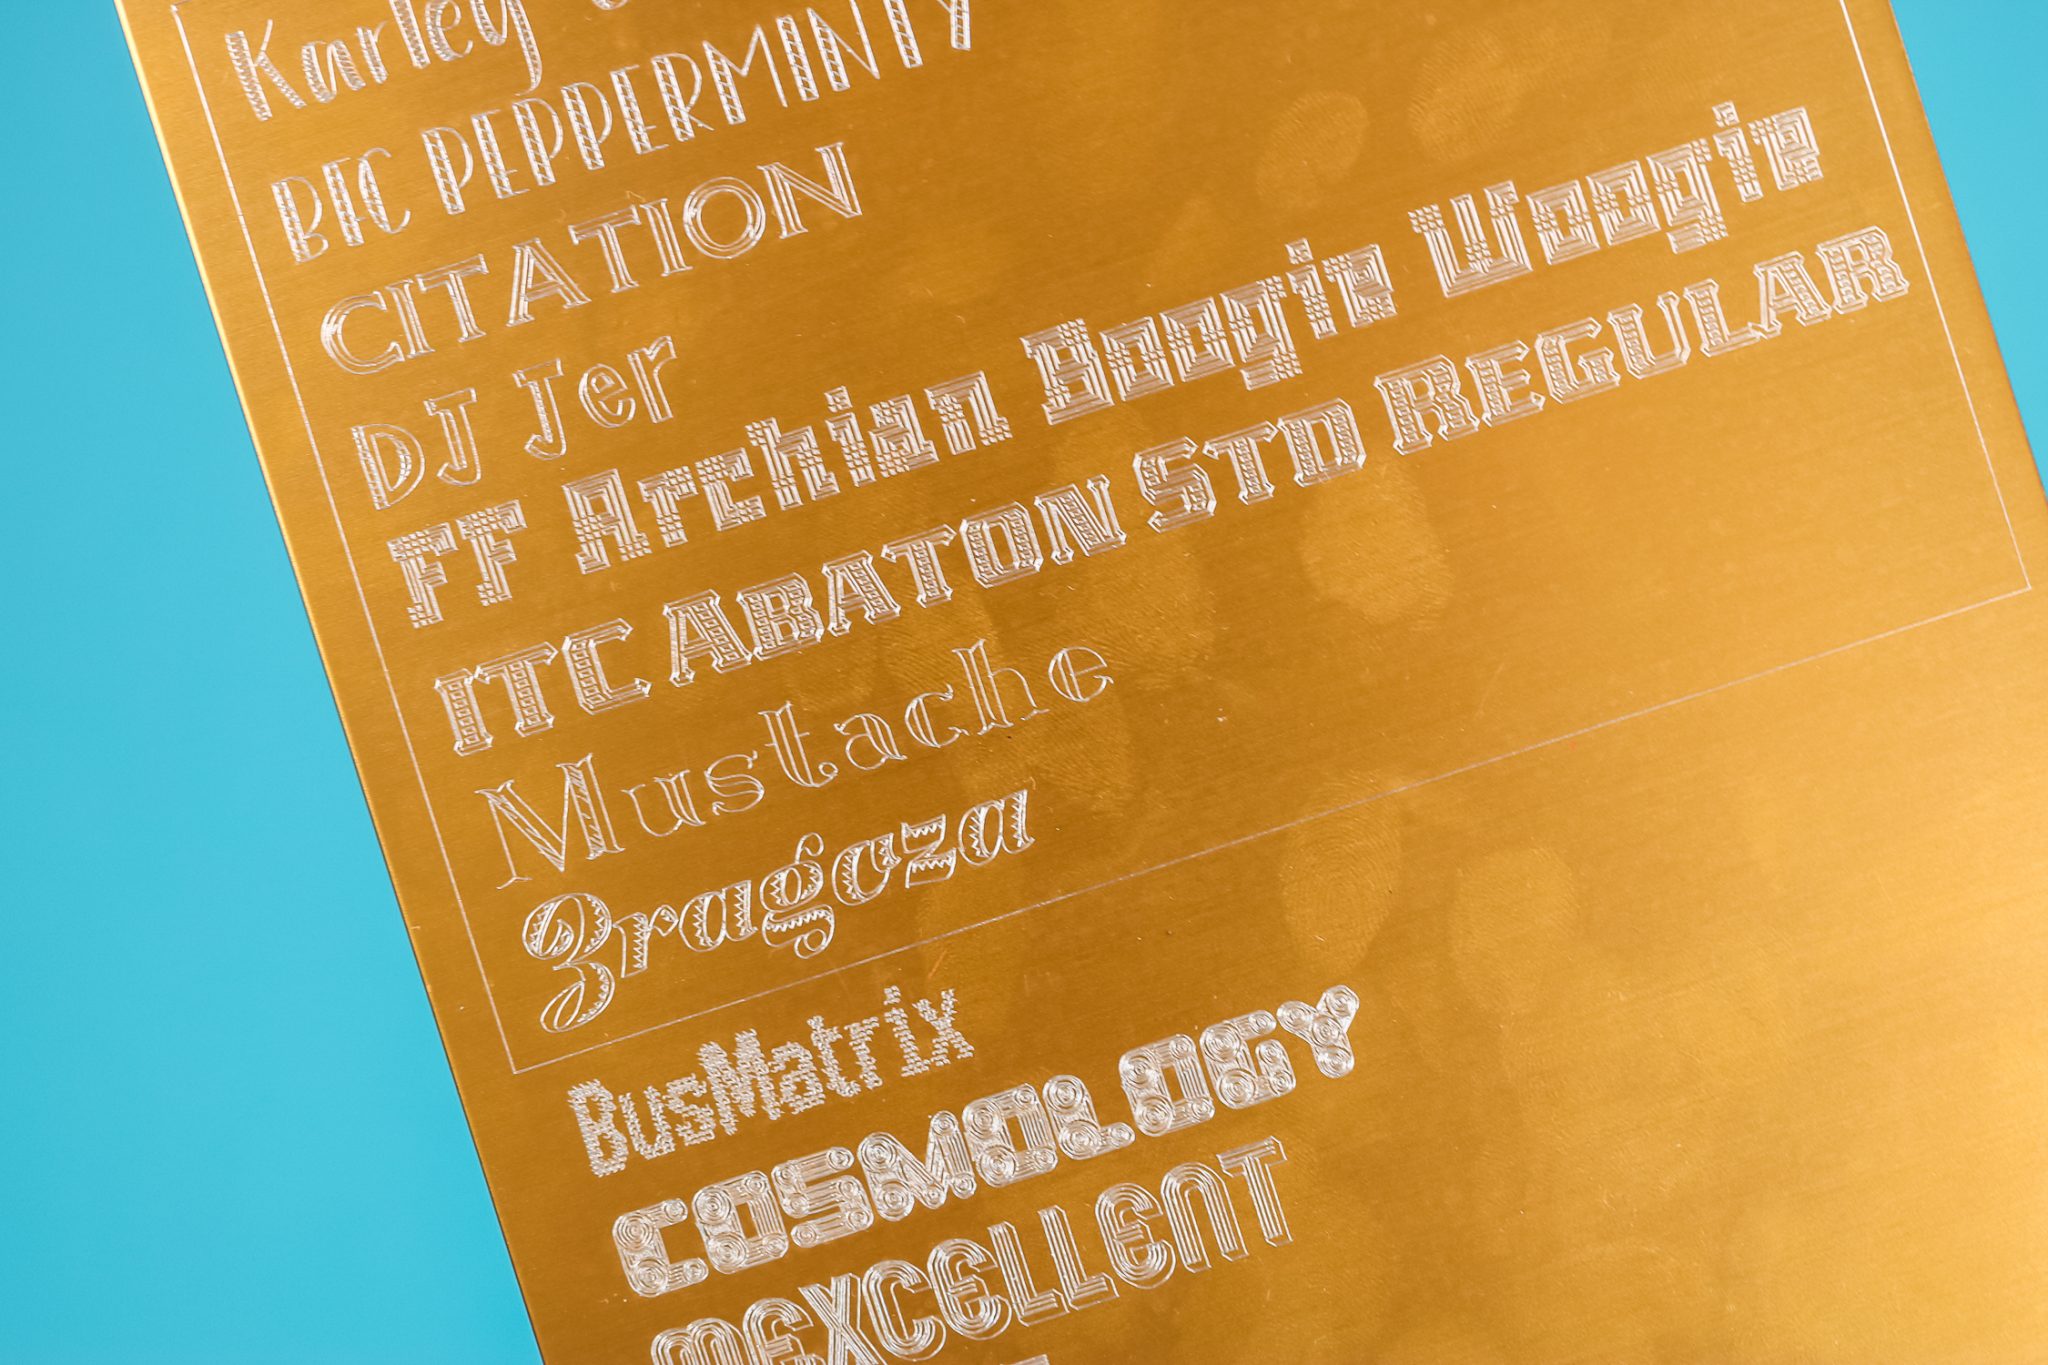
By engraving each font onto the metal sheet I can see exactly what the font looks like and I can use it as a reference for future projects. With the fonts on the metal sheet, you can see how much more they stand out than a font that just has a single line. This gold metal sheet is intended for engraving and you can buy it here.
A sheet like this, which you can reference at any time, is great to have. Now that I have my reference sheet and I know which font I want to use, I can put one of these fonts to use and actually make a project.
How to Make an Engraved Christmas Ornament with Cricut
I’ve decided to use the engraving tool to create a customized Christmas ornament. Follow the steps below for any engraving blank to create something amazing!
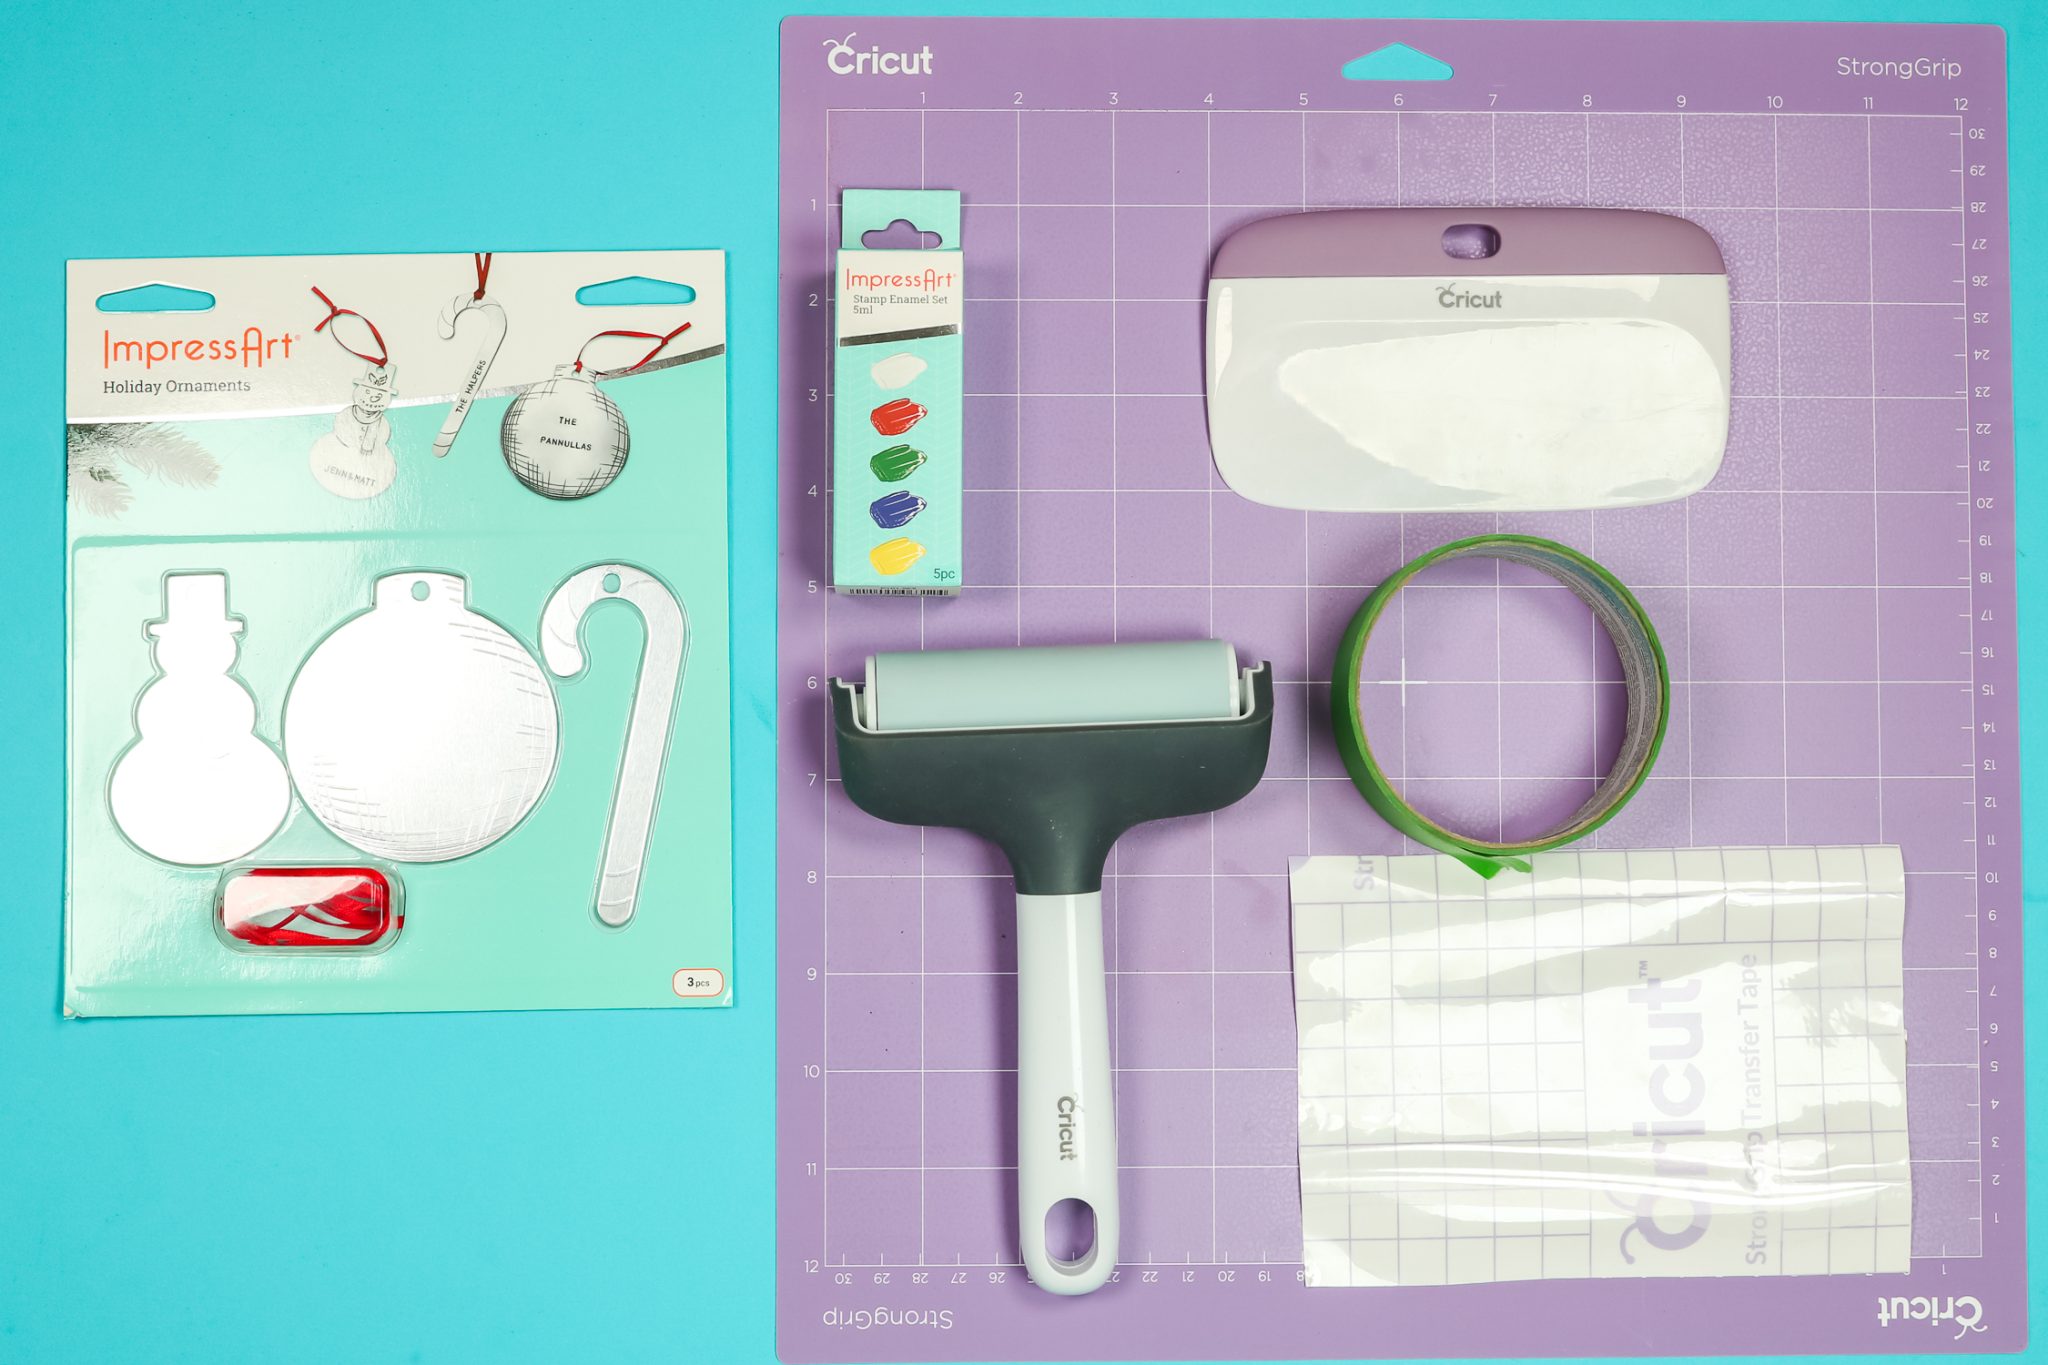
Supplies Used to Create an Engraved Christmas Ornament
Can I Engrave with Other Cricut Machines?
You can engrave with Cricut Explore machines. The process is similar to using a Maker but not exactly the same since you can’t choose the Engrave Operation. If you want to try this project on an Explore machine, you can learn more about how to do that here. Currently, engraving does not work with the Cricut Joy.
Remember, using tools that aren’t by Cricut does void your warranty, so use them with caution.
How to Make an Engraving Design in Cricut Design Space
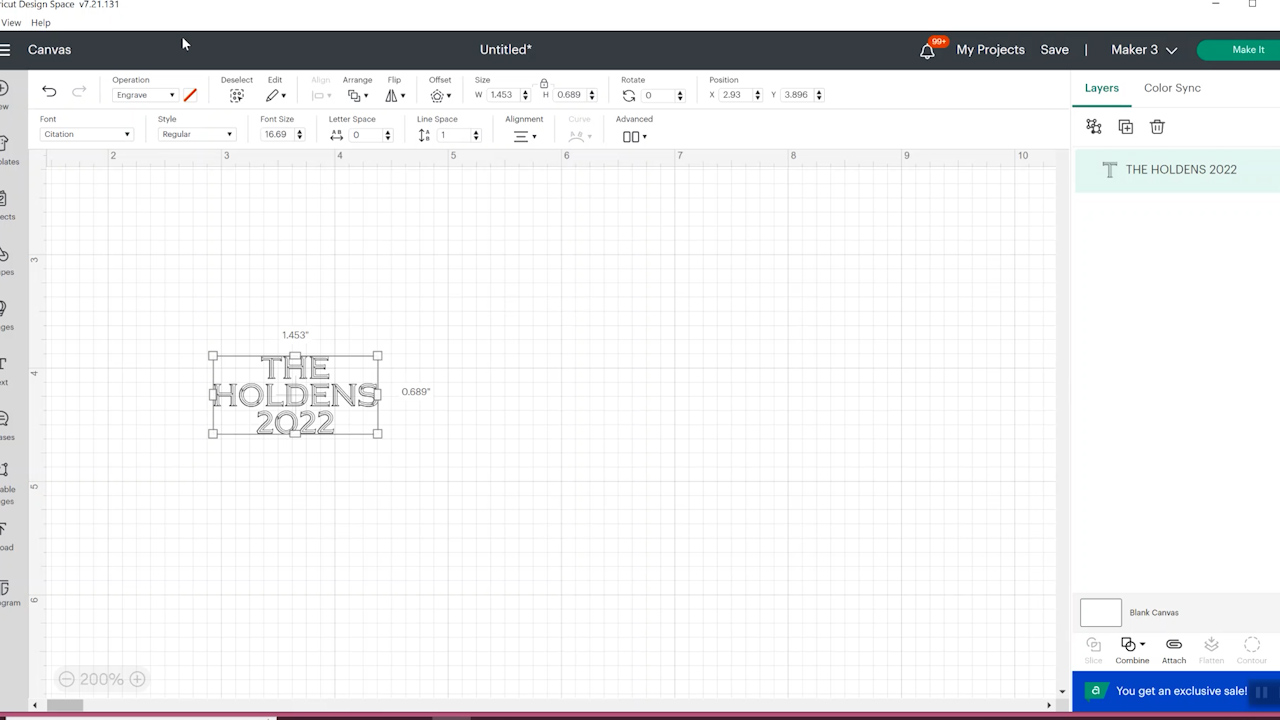
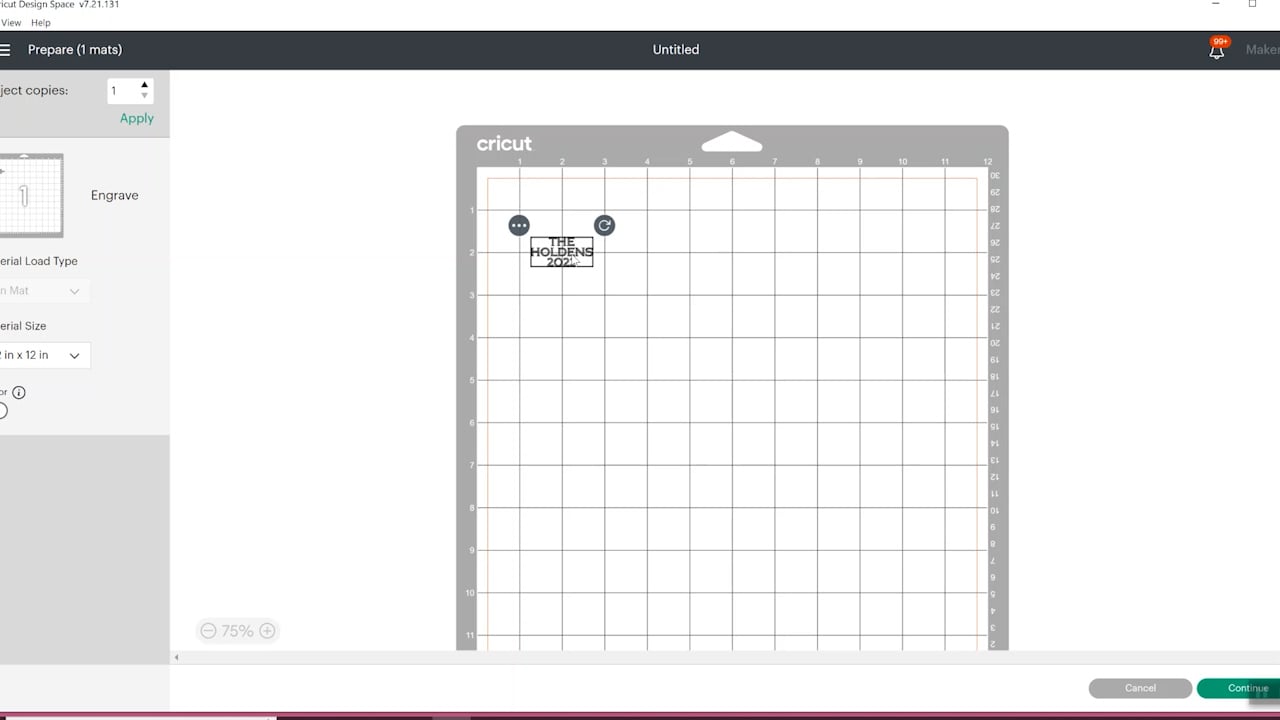
I chose the font Citation. This is a Cricut font so you don’t need to download anything to make the project I’m making. I just typed “The Holdens 2022” onto the canvas and sized it to fit the ornament I’m using.
Make sure if you’re using more than one design or text box that you attach them together so they stay placed correctly onto your blank. Confirm that you’ve changed your operation to Engrave. Then click Make It.
How to Locate Your Design onto the Blank
On the mat screen in Design Space, you will want to locate your engraving design exactly where your blank is on the mat. To do that, you’ll need to have your blank on the mat, let’s walk through how to do that.
How to Apply Engraving Blanks to Cricut Cutting Mat
There are a couple of different options you can use for applying an engraving blank to your cutting mat. I’ll talk about both of them below.
The option I’m using includes using a StrongGrip mat and StrongGrip Transfer Tape. To begin, take a piece of StrongGrip Transfer Tape that is larger than the blank and place it onto the cutting mat shiny side down.
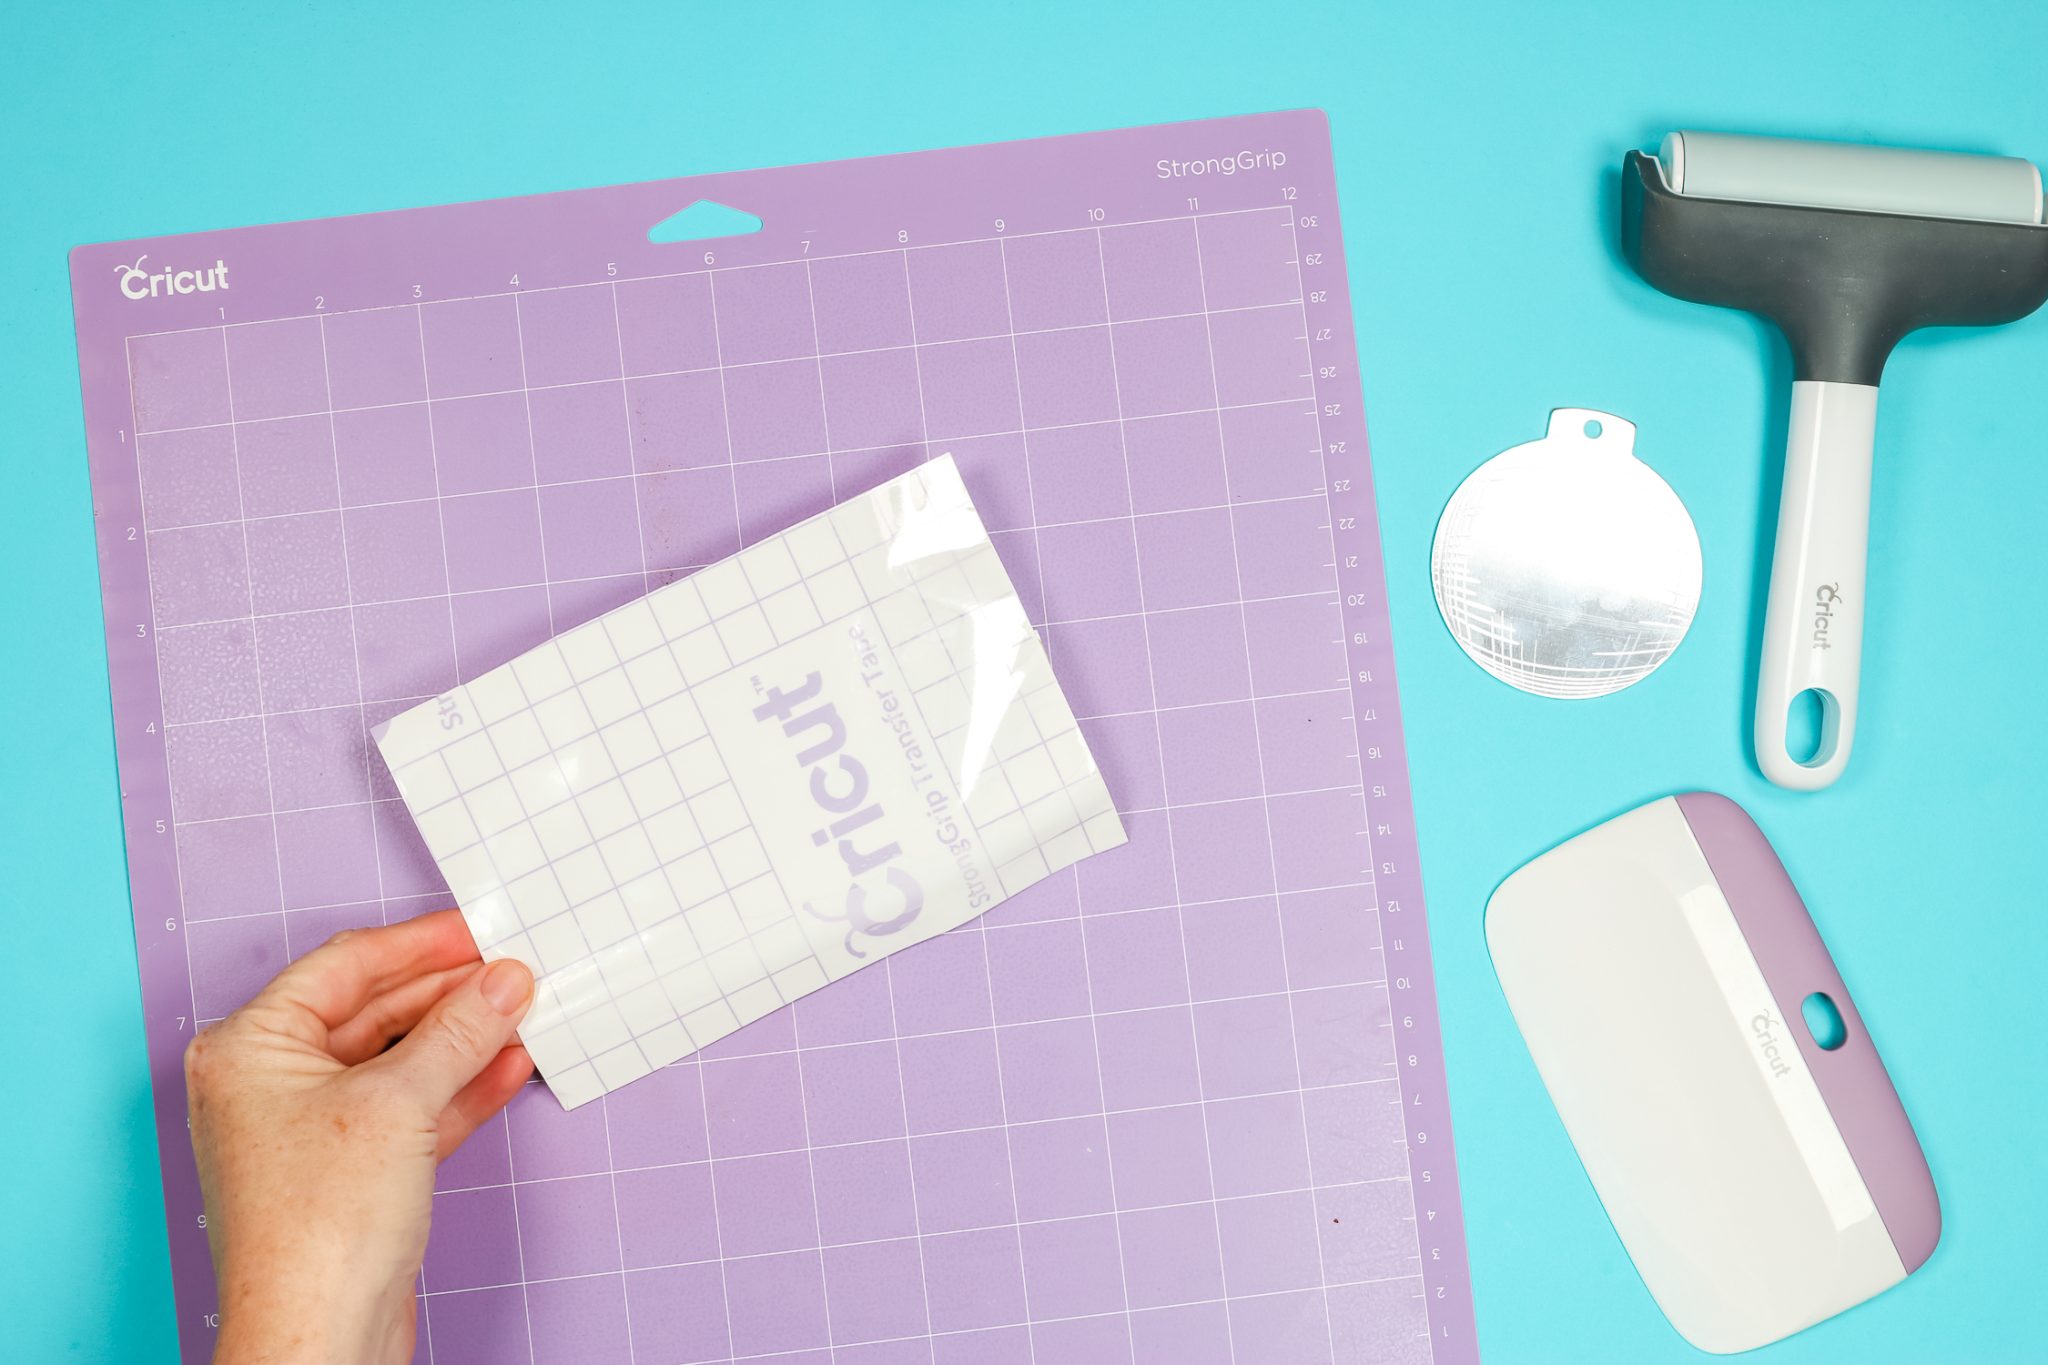
I want the non-sticky side of the transfer tape stuck down to the adhesive on the cutting mat. Use a scraper tool or your brayer to smooth out the transfer tape. Then peel back the liner to expose the adhesive side of the transfer tape.
If your blank has a protective film on the front you need to remove that before engraving.
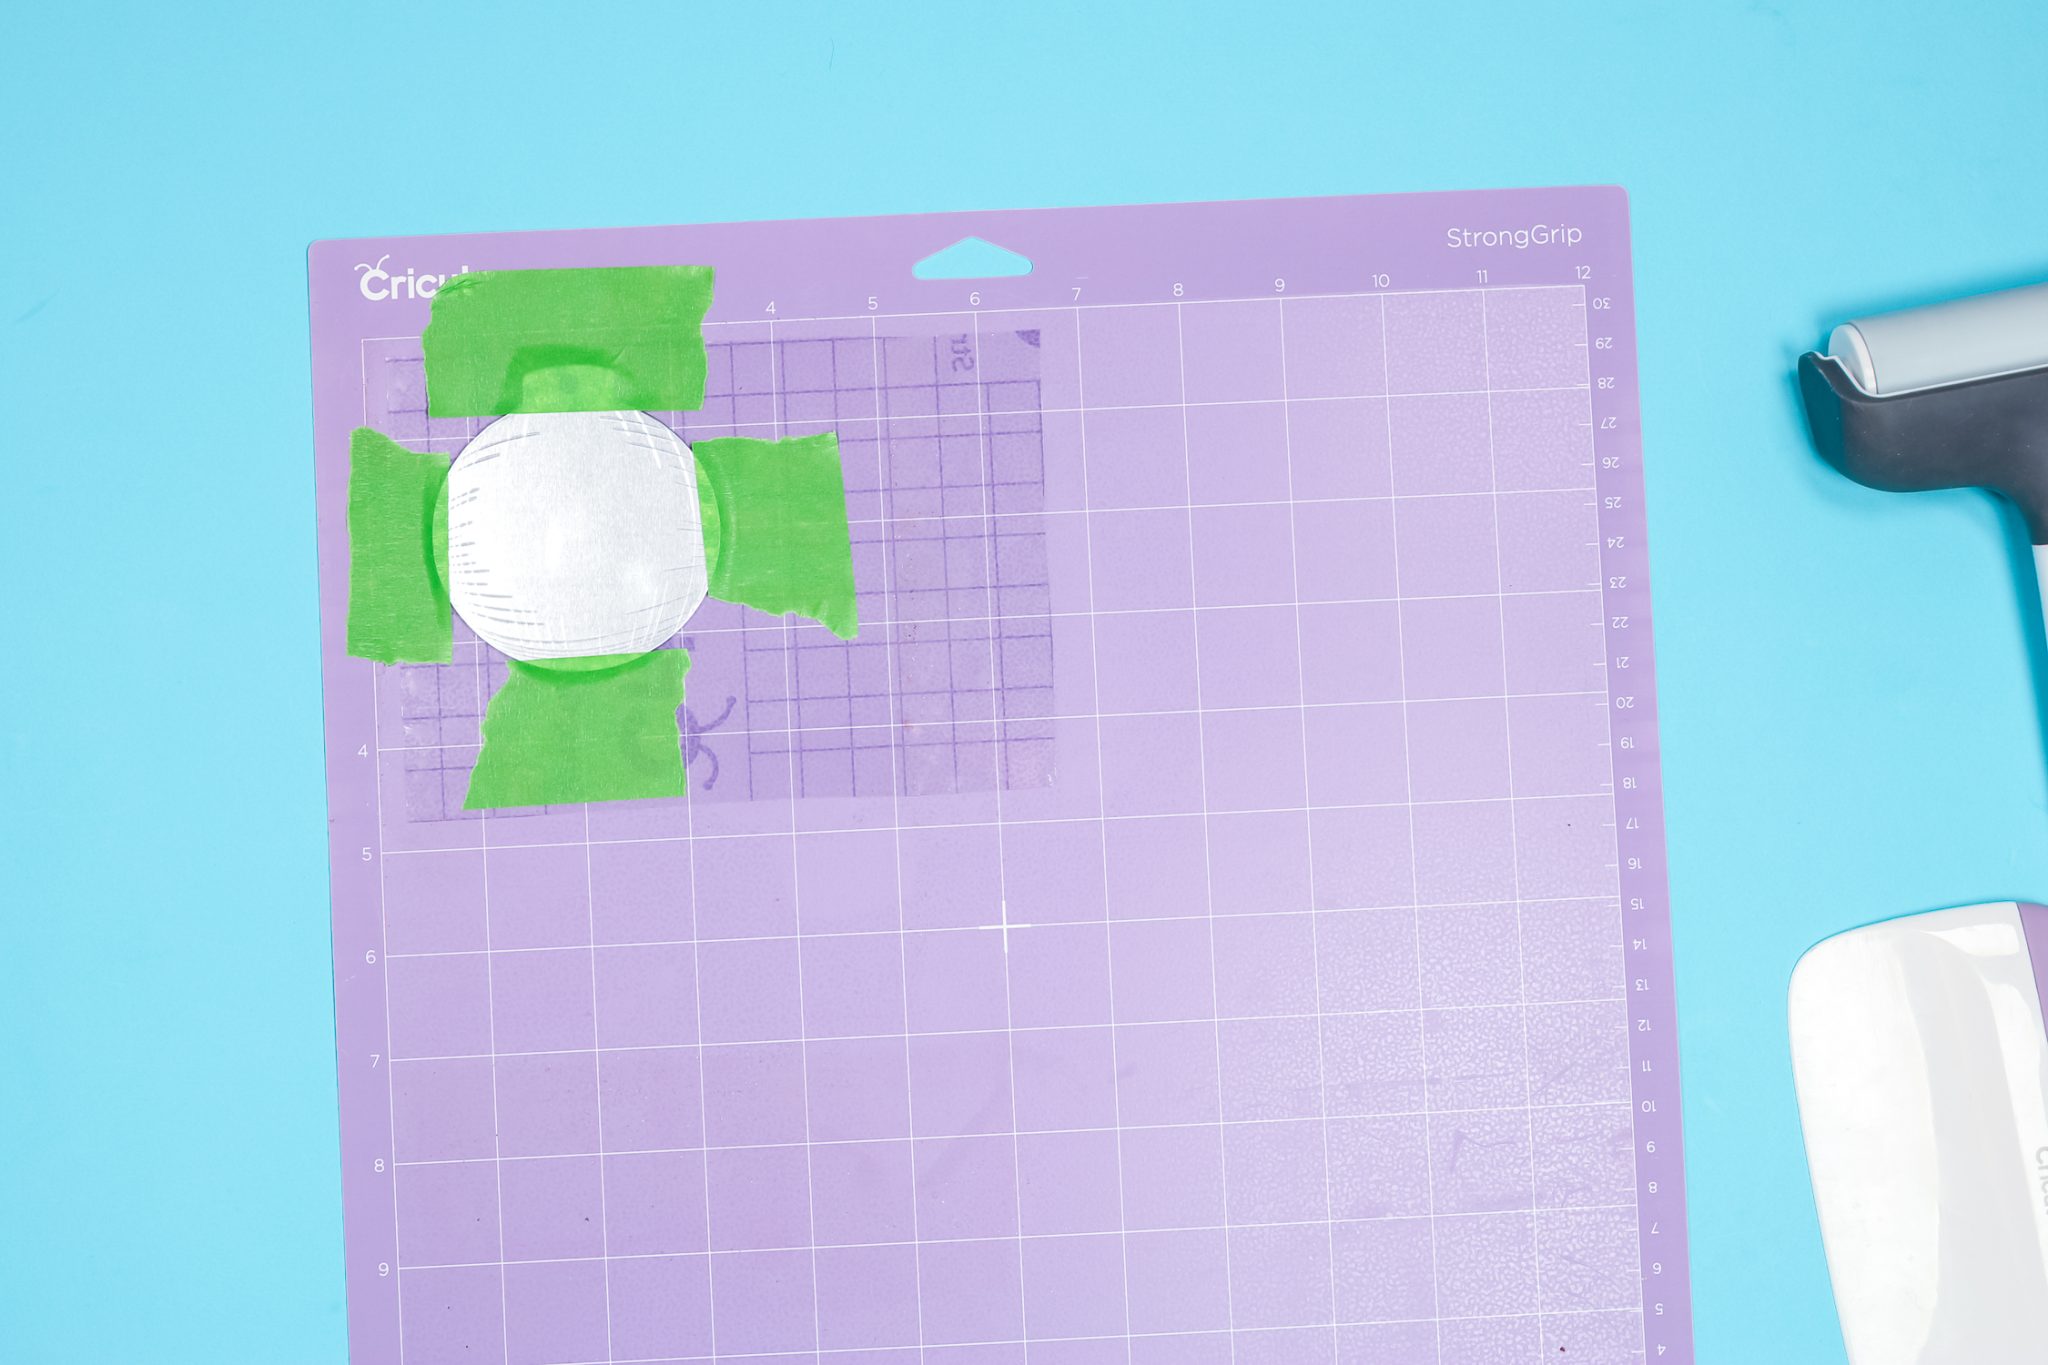
Next, we’re going to place our blank right on top of the transfer tape. I find it’s easiest to center the blank on the cross line of the measurement. So for instance here I’m lining it up on the center line between the 2 and 2. Now when I am in Design Space I know right where to place my design on the mat screen.
I like to use my brayer to make sure the blank is really stuck down to the transfer tape before engraving. Usually, the StrongGrip Transfer Tape holds my blanks really well and works great, especially for smaller blanks. This allows me the ability to engrave closer to the edges of those blanks since I don’t need to tape the blank in place.
Since this is a larger blank I am going to use tape around the edges to hold it in place.
Technically for this process, I wouldn’t need to use both the Transfer Tape and the regular tape but I wanted to show you that you can use both, especially if you’ve had any problems with your blanks moving while you’re engraving.
If I’m using tape, I generally place it on four sides if at all possible. It may not always be possible with some blanks and some designs. So now you have a couple of different options depending on what you have at home and the method that you want to use for your engraving blank.
How to Locate Engraving Designs on the Mat Screen
Now that the blank is on the mat, we can move the design to where the blank is on the mat screen in Design Space.
You can place your design wherever you want it on the blank. I am centering my design but you can move the design anywhere you want it to be. From the mat screen, wherever you place the design is where the Cricut will engrave.
Engraving with Cricut Maker
Now we can connect our machine, add our engraving tip, and move the star wheels all the way to the right. I chose aluminum sheets as my material and now we can start engraving.

Allow the machine to engrave and when it’s finished unload the mat from your machine. Now that the ornament has been engraved we can remove it from the mat and look at the engraving.

Here’s that engraving still on the mat. You can see that the font looks great on this ornament. Before removing the ornament from the mat I like to use a piece of tape to remove any metal fibers from the ornament. Go over the entire engraved design and burnish the tape over it to pick up those fibers.
Rub your finger over the design. If it feels rough, go over the design as many times as needed to remove the fibers. The design may feel rough but it shouldn’t feel sharp anywhere. My ornament had a protective film on the back so I removed that. Keeping the protective film on the back of the ornament prevents any adhesive from sticking to the ornament.
Applying Stamp Enamel to Engraved Ornaments
I think my engraving turned out really well. I thought it would be fun to try adding stamp enamel to the engraving. I’m adding red stamp enamel because it’ll match my tree and I’m going to add a red ribbon to the top of the ornament.
It doesn’t take a lot of enamel. I spread the stamp enamel over the engraving. My ornament had engraving around the sides so I spread the enamel over that area too.

You only need to leave the enamel on for like 30 seconds. After about 30 seconds, wipe it off and it should fill all the engraved lines with the stamp enamel.

This step isn’t mandatory but it does help the engraving pop off the blank more.
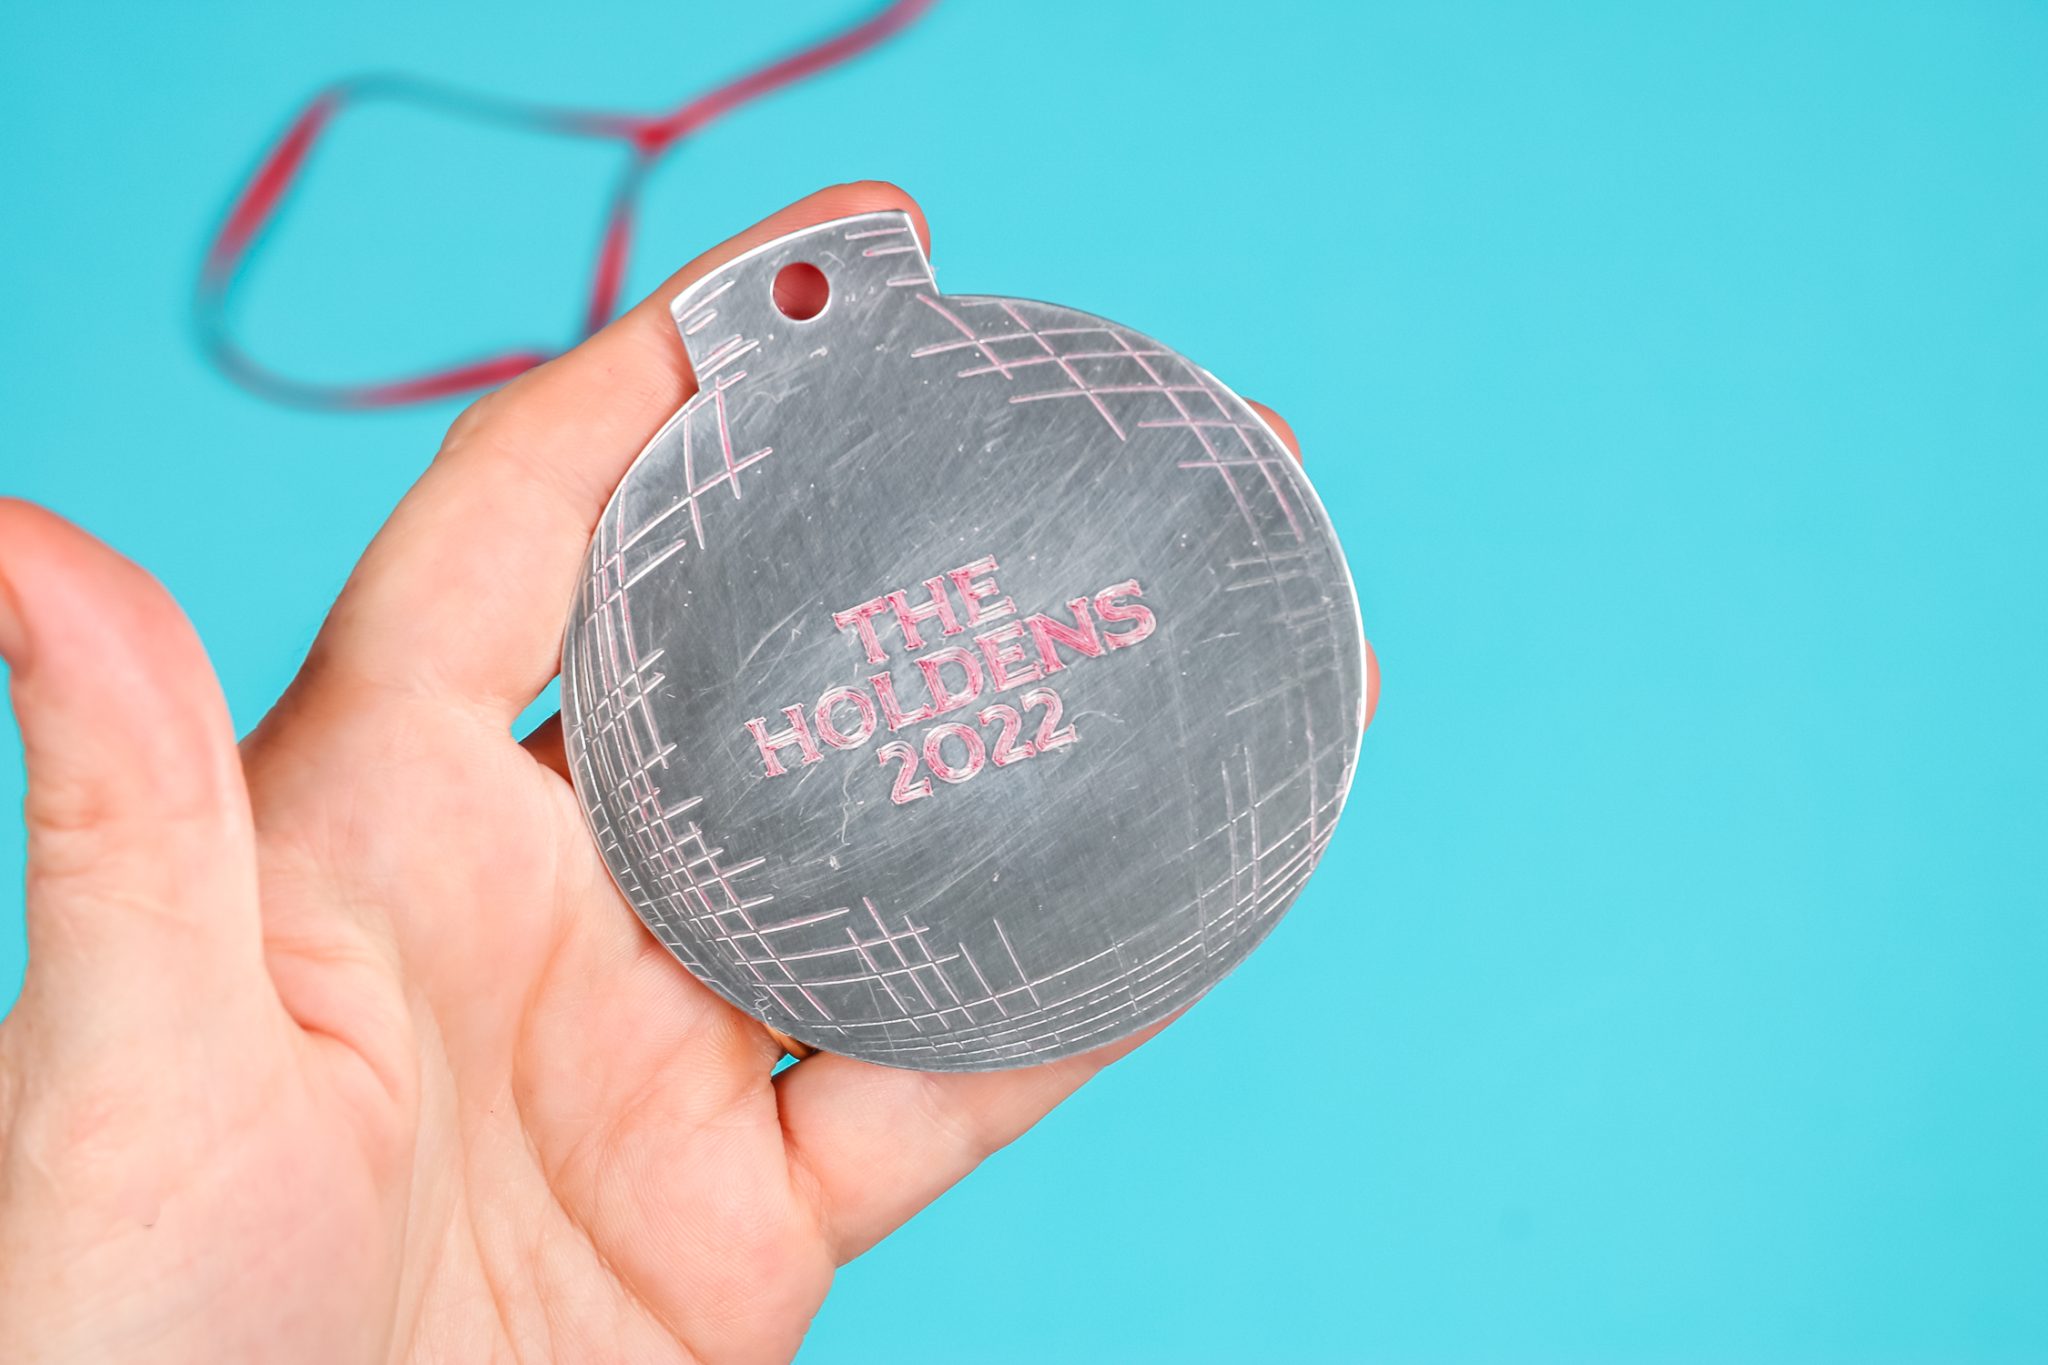
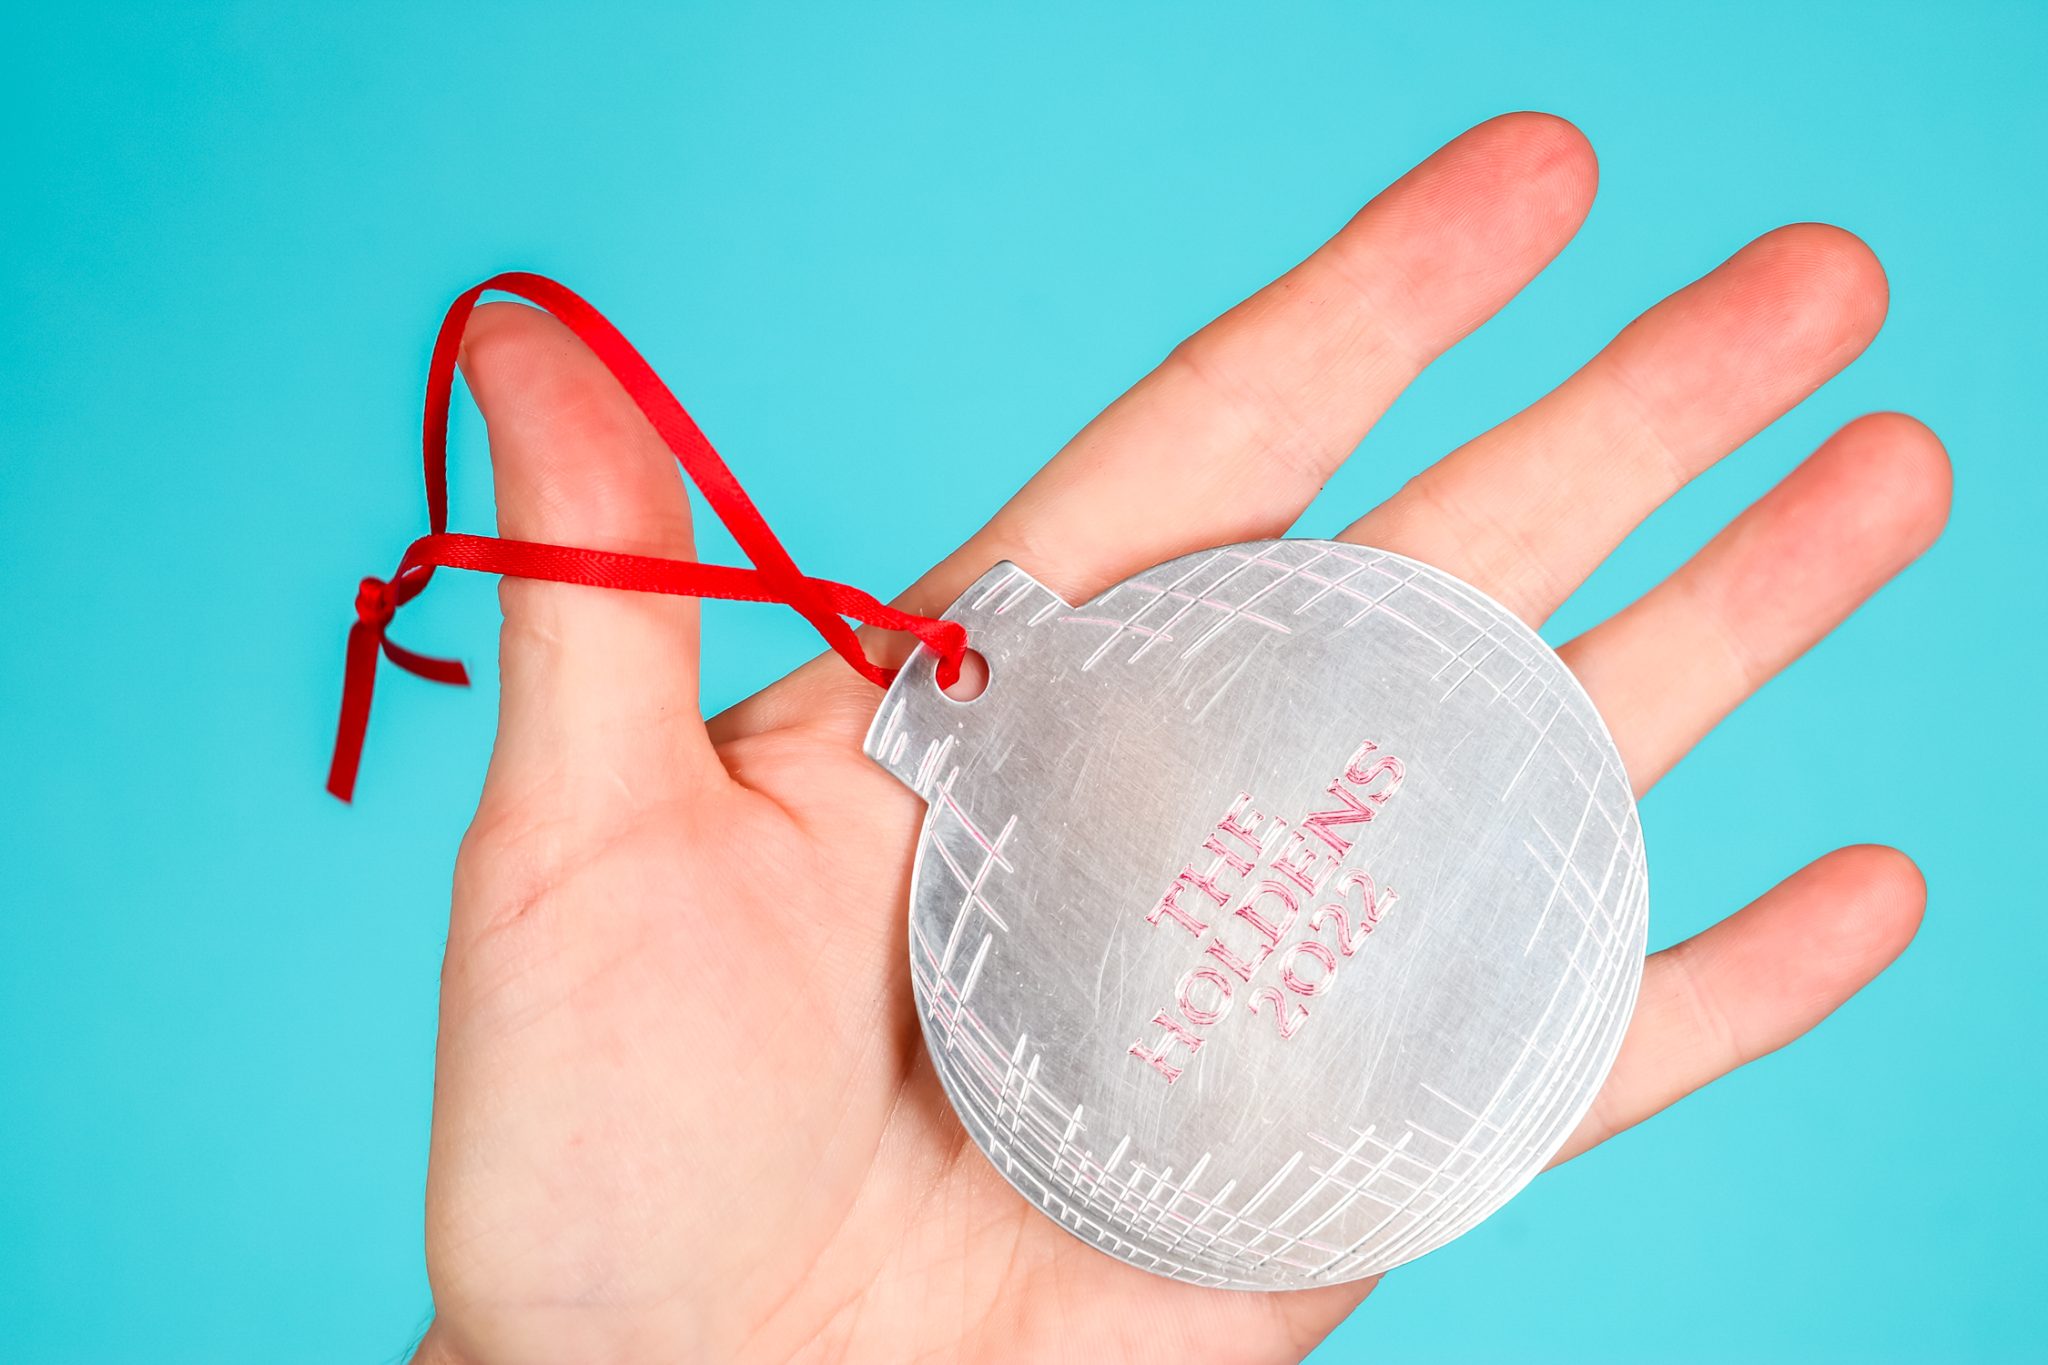
To finish off the ornament I added a thin red ribbon and now I have a personalized engraved ornament.
Final Thoughts on Cricut Engraving Fonts
I think creating projects with the Engraving Tool and Cricut Engraving fonts is so fun. I chose to make a Christmas ornament for my project but there are so many blanks you can engrave for projects all year round. Now that you know how and where to find these engraving fonts you’re going to want to engrave all the things.
Remember, if you choose to use an engraving tip with a Cricut Explore machine that will void your warranty so use that with caution. With the Maker machines, there are Engraving Tools that are made by Cricut that do not void the warranty of the Maker machines.
I hope I’ve answered any questions you had about finding Cricut engraving fonts and how to make an engraved project. If you still have questions, leave them in the comments below and I’ll answer those for you!