This post and photos may contain Amazon or other affiliate links. If you purchase something through any link, I may receive a small commission at no extra charge to you. Any supplies used may be given to me free of charge, however, all projects and opinions are my own.

If you’ve been in Cricut Design Space recently, you’ve likely noticed Cricut has made some changes. Some of those changes are to the Cricut Layers Panel. These changes include button changes as well as the ability to rename your layers. I think you’re going to love that feature! Read on to see all of the changes and how to use them.
Keep reading to learn all about the changes to the Cricut layers panel and, if you’re new to Design space, check out my beginner’s guide here.
Changes to Cricut Layers Panel
With the update to Design Space, I thought it would be a good idea to look closely at each of the changes. I also have a post all about the changes to the weld feature, you can find that here. You can watch me go through these different features by pressing play on the video below:
Note – I am on a PC. These features may look different if you are using a Mac but should be fairly similar. They will also look different if you are using a mobile device.
What’s New in Cricut Design Space Layers Panel for 2022?
Let’s jump into Design Space and see how the layers panel is different. If you’re brand new to Cricut, I have a 1-hour crash course for you here that is a great place to start.
Where is the Layers Panel?
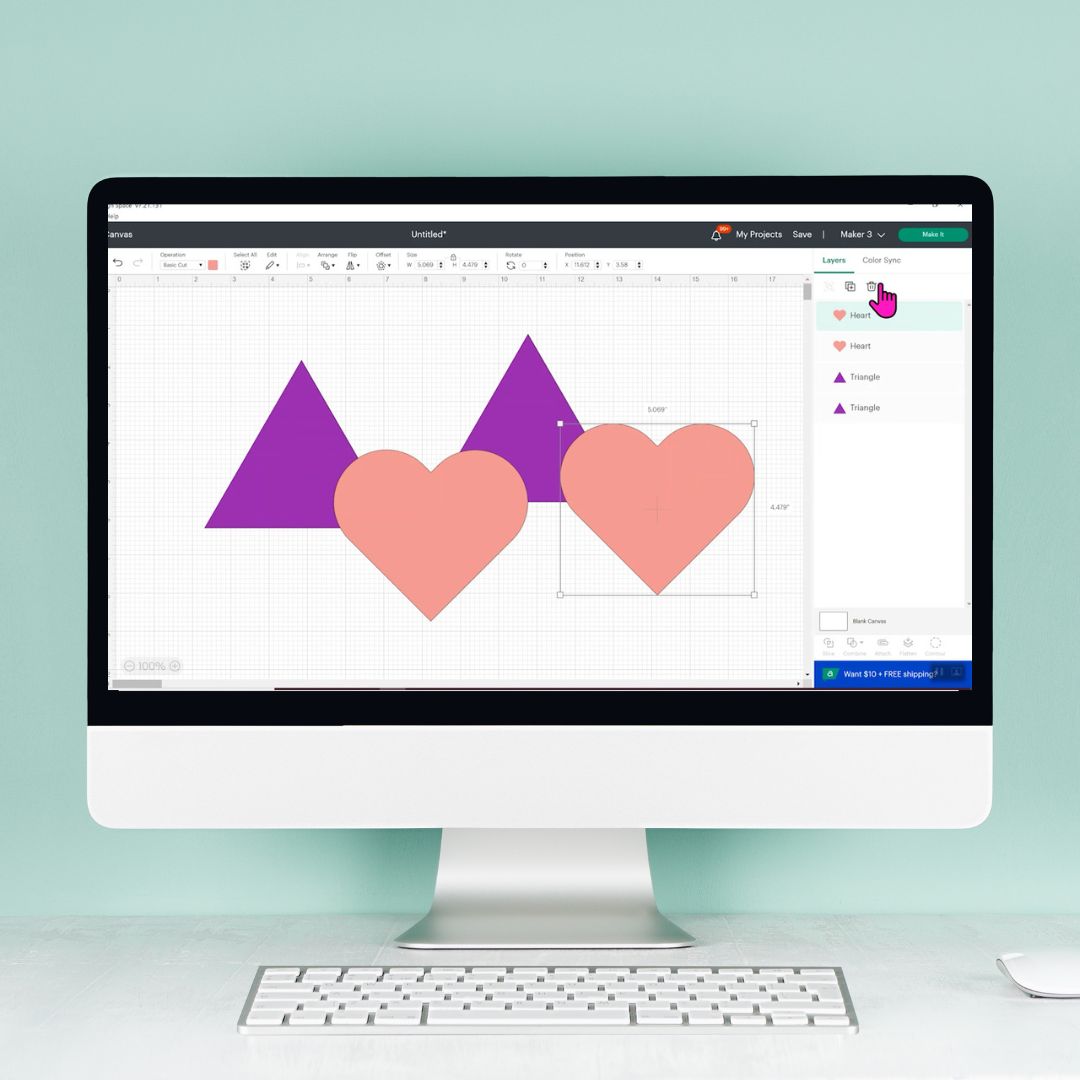
The Layers Panel is what you see on the right side of the screen in Design Space. All of the elements on your canvas will be added to that panel. Depending on how they’re set up they will come in as individual images, groups of images, or attached images.
Changing Layer Names in Design Space
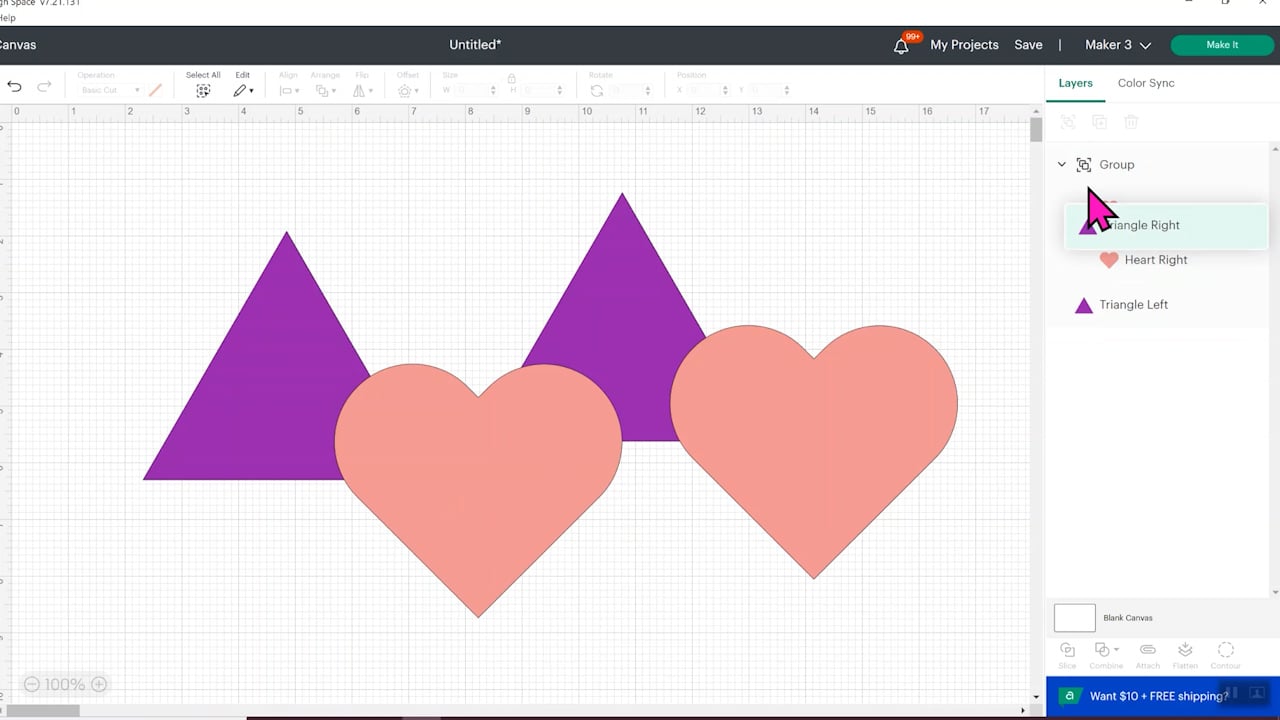
Each element in the layers panel will have a name and a new feature that I love is the ability to change the name of those layers. Double-click on the name of the layer to open up the box to type in a new name.
This is especially great if you have multiple of the same element on your canvas. Now you can change the name to help you differentiate those elements. For instance, on my canvas, I can change my layer name to “heart left” and “heart right” to help me know which one is which if I want to make any changes to those elements.

Top Tool Bar in Cricut Layers Panel
At the top of the layers panel, you’ll see 3 different options. If you haven’t selected any elements on your canvas, these options will all be grayed out.
If you select a single element on your canvas, you’ll see that you have a duplicate and delete button active. You can select either of these options and you’ll either duplicate or delete whichever elements you have selected.
The first tool will only be available if you have more than one element selected. This is the group/ungroup tool. With multiple elements selected, when I click that button, it will group those elements together. If I click it again, it will ungroup the elements. This button works with two or more elements selected.

Layers in the Cricut Layers Panel
Under those top tools, you’ll see all the layers of your project. You can click on any of those layers to pick it. To select multiple layers, click one and then hold down the shift key and click on another and both of those layers will be highlighted.
This is also where you can change the name of the layer by double-clicking on the name.
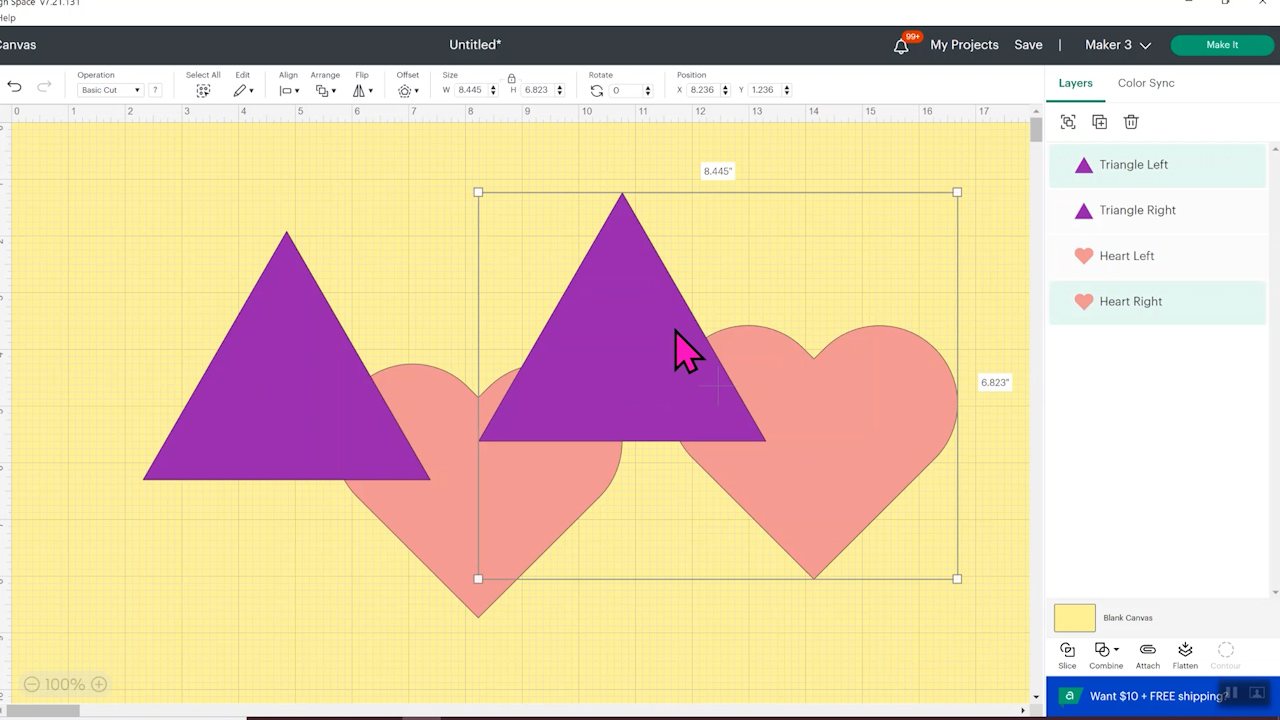
As a refresher – whatever element is at the top of your layers panel will be the front element on your canvas. You can move the elements around from front to back by clicking on them and dragging them around in the layers panel.
If you have any groups or attached elements in the layers panel, clicking and dragging an element into that selection will add it to the group/attachment. The same goes for removing elements from an attachment or group. Clicking and dragging it out of that will put it into its own layer.
Note – this is not a new change but at the bottom of the layers panel you’ll see you have a blank canvas option. If you click on that, you can change the color of your canvas. Sometimes having a different color background can help you see elements better or help you visualize your finished project better.
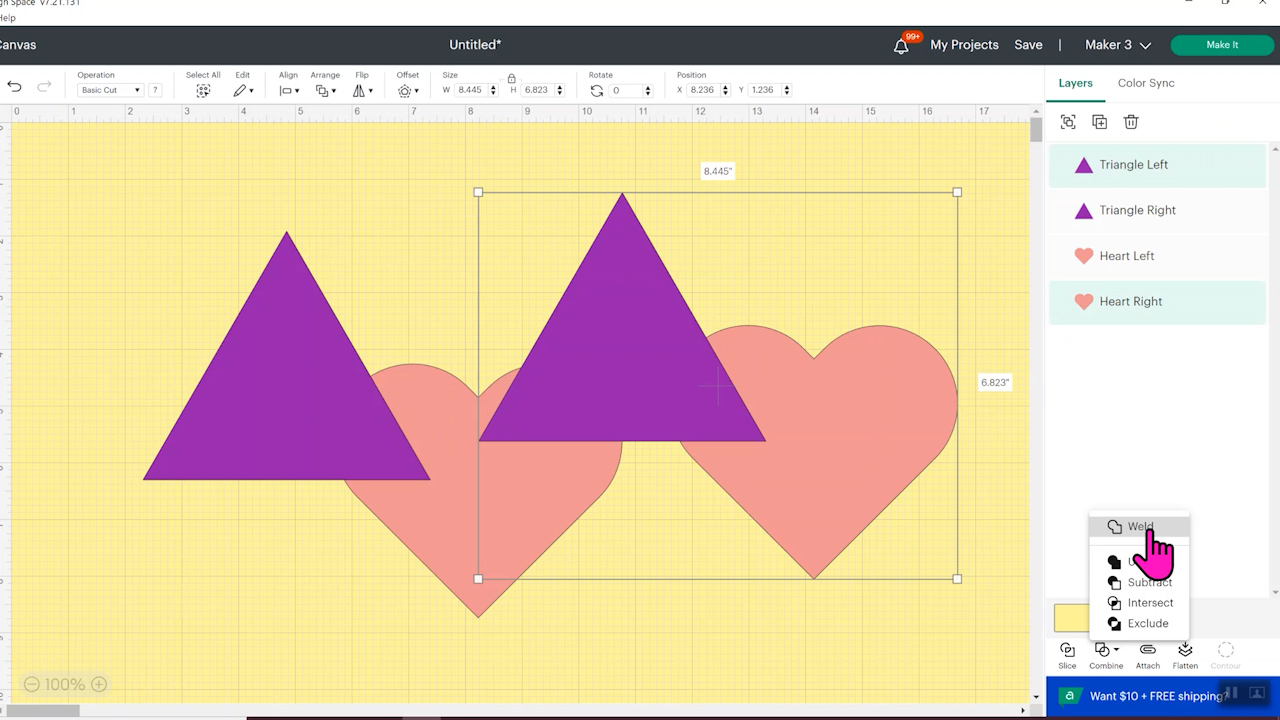
Bottom Tool Bar
The bottom toolbar had some changes as well. Again, if you don’t have anything picked all these will be grayed out. If I just pick one element the first three will always be grayed out but if I pick more than one, you’ll start to see some of the options. These options aren’t new
Remember that the first tool for slice is only if you have exactly two elements picked.
If you’re wondering where weld went just click on the combine tool and you’ll see weld is there with other features. You can see my full video on the changes to the weld feature here.
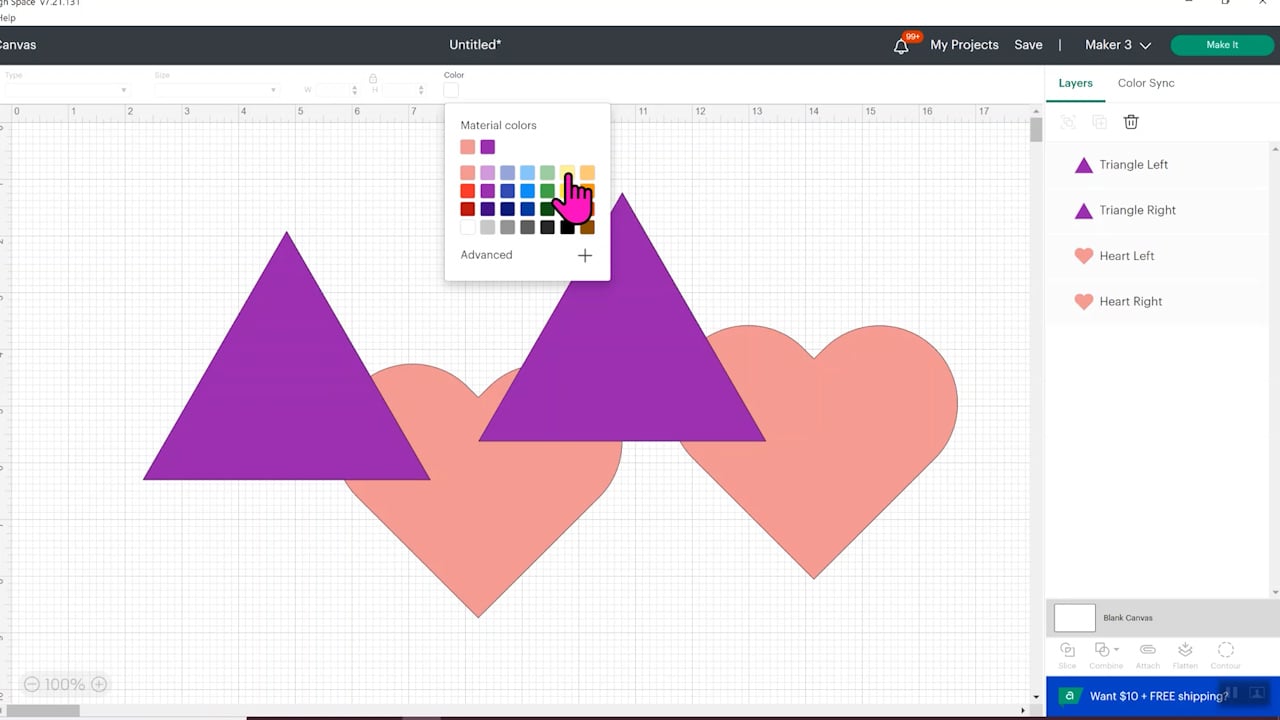
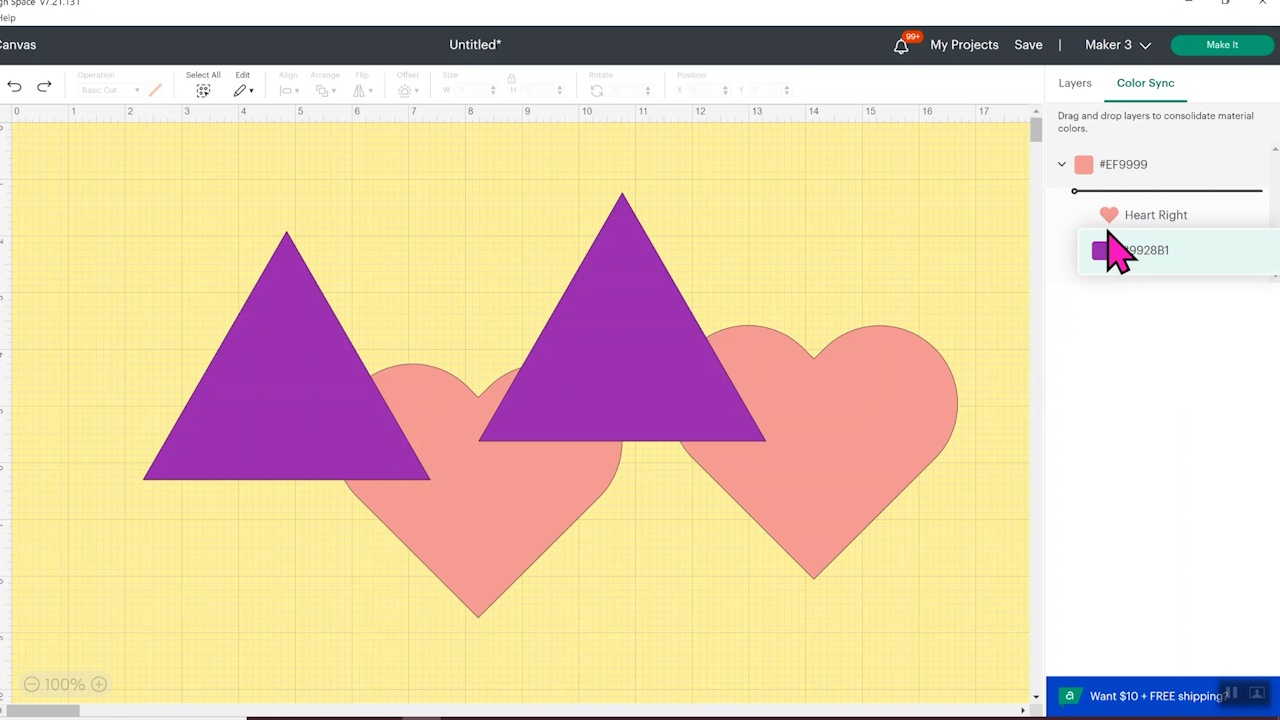
What is Color Sync?
Color Sync is another tool in the layers panel. This isn’t a new feature but if you haven’t used it before, you can quickly change the color of different layers by dragging them into another color. This will work for the entire color group or individual elements.
I really like this when I’m working with uploaded projects because sometimes I don’t want to cut 4 different colors of green. I’m fine having all the green elements in one color so I can quickly move everything those elements into the green and change them in one quick click.
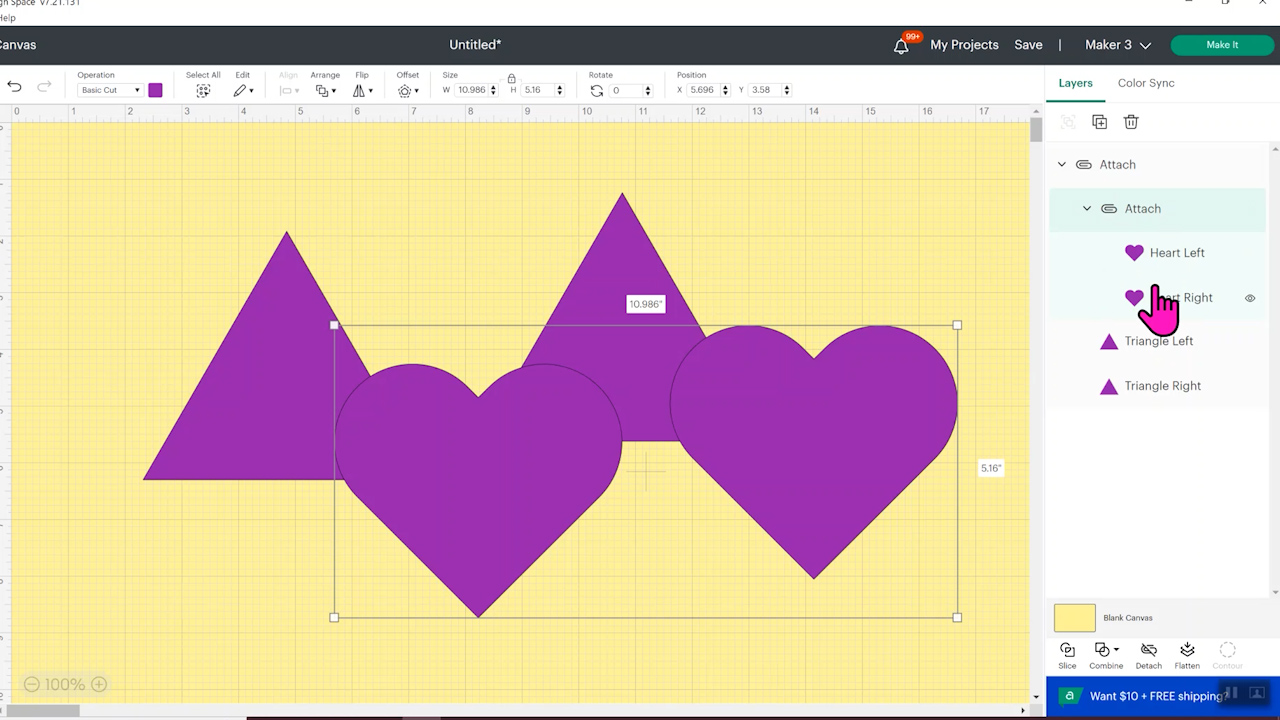
Working with Attached Elements
One more thing to remember is when you’re working with attached elements in the layers panel. If you drag any elements into an attached element, everything will change color to the color of that attached element and that layer will become part of that attached element.
Dragging and dropping even groups into an attached element will bring that piece into the attached layers. This will change the color and lock the position into the attachment.
Final Thoughts on Cricut Layers Panel – 2022 Update
Hopefully, this has helped you understand the changes in the Design Space Layers Panel. Some of the features are new and some aren’t, they’re just in a new place. I don’t know about you but I always appreciate a refresher, especially when it’s tools I don’t always use.
Color sync is actually one of those tools I always forget about and then I kick myself later because a project would have been much faster if I had remembered to use it.
I really like the ability to change the name of the layers in my project. No more clicking multiple elements trying to find the correct one you want to move or change.
If you have any questions about the changes to the Design Space Cricut Layers Panel feel free to leave them in the comments and I’ll get those answered for you. Have a great day and thanks for being here!