This post and photos may contain Amazon or other affiliate links. If you purchase something through any link, I may receive a small commission at no extra charge to you. Any supplies used may be given to me free of charge, however, all projects and opinions are my own.
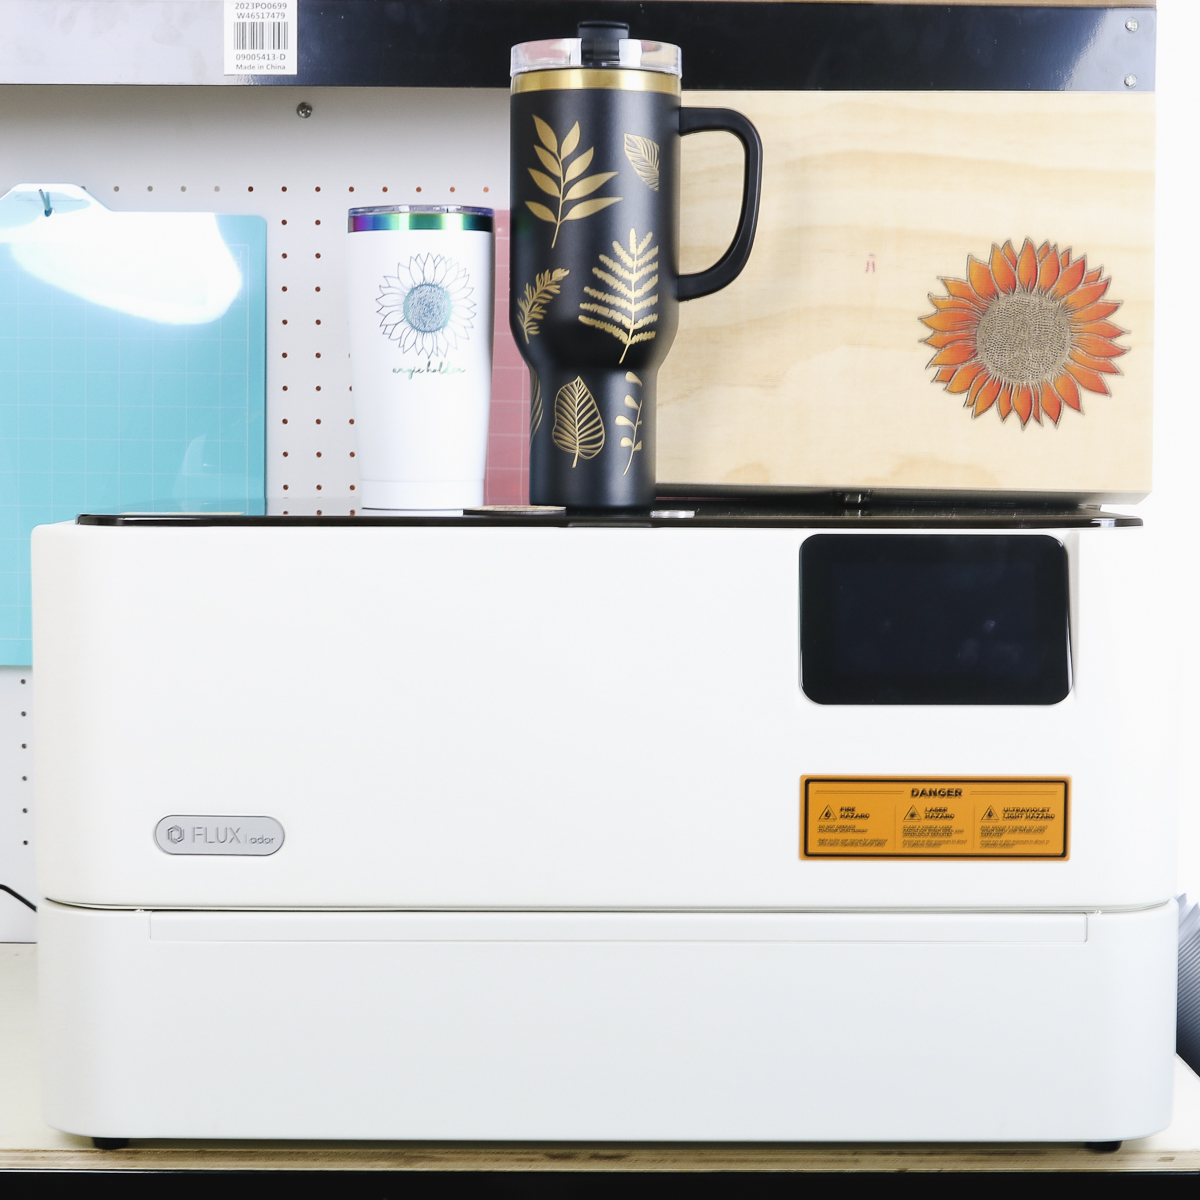
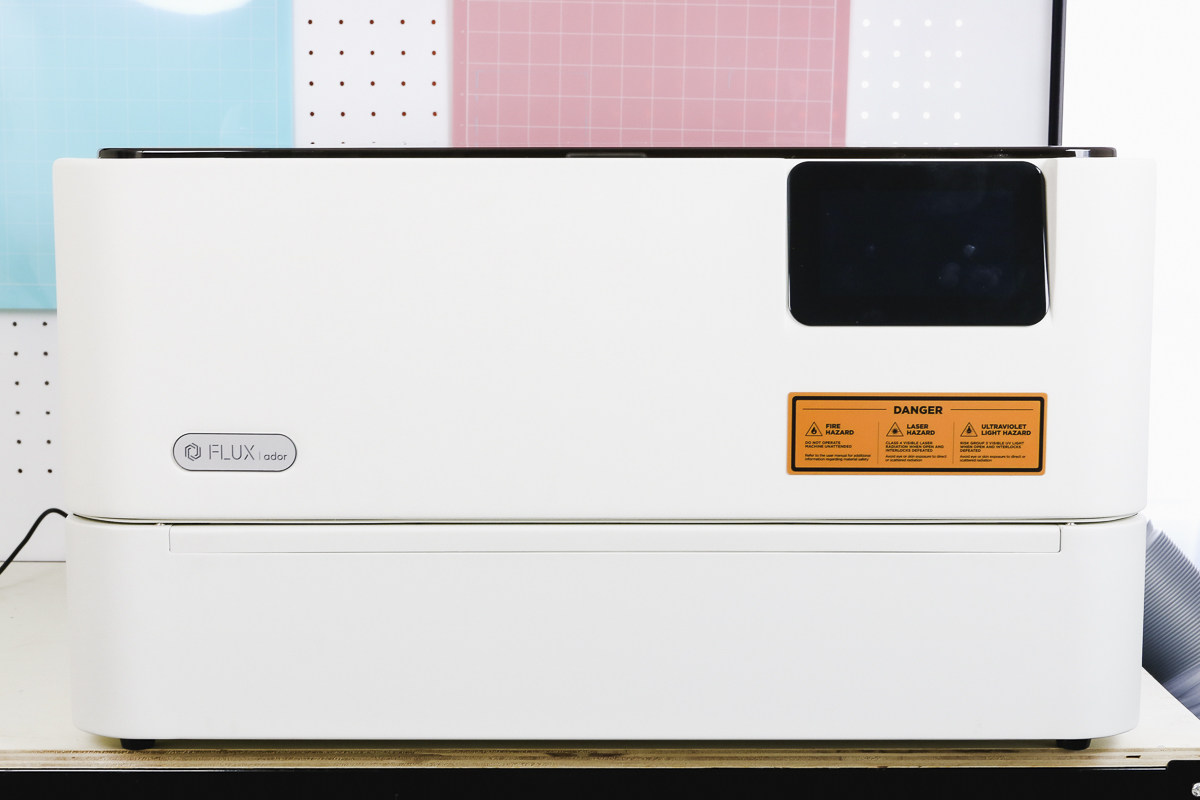
The Flux Ador laser is the world’s first printing laser and is new to the market in the United States. Let’s put it to the test and take a look at the features.
The Flux Ador has been available overseas for quite some time so you may have heard of it before. If you want to learn more about lasers and which one might be right for you, my Laser Ready course is a free resource that can help.
I recently reviewed the xTool M1 Ultra which is another laser that has printing capabilities. I will occasionally compare the two because I own them both.
You can watch me set up this laser and make a few projects by pressing play on the video below.
Table of Contents
Flux Ador Laser
I’m going to set up the Flux Ador and make a variety of projects to help you decide if this is the right laser for you.
Supplies Used
What Comes in the Box?
When you purchase the Flux Ador it comes with everything you need to get started.
Inside the box you’ll find the laser itself and other supplies:
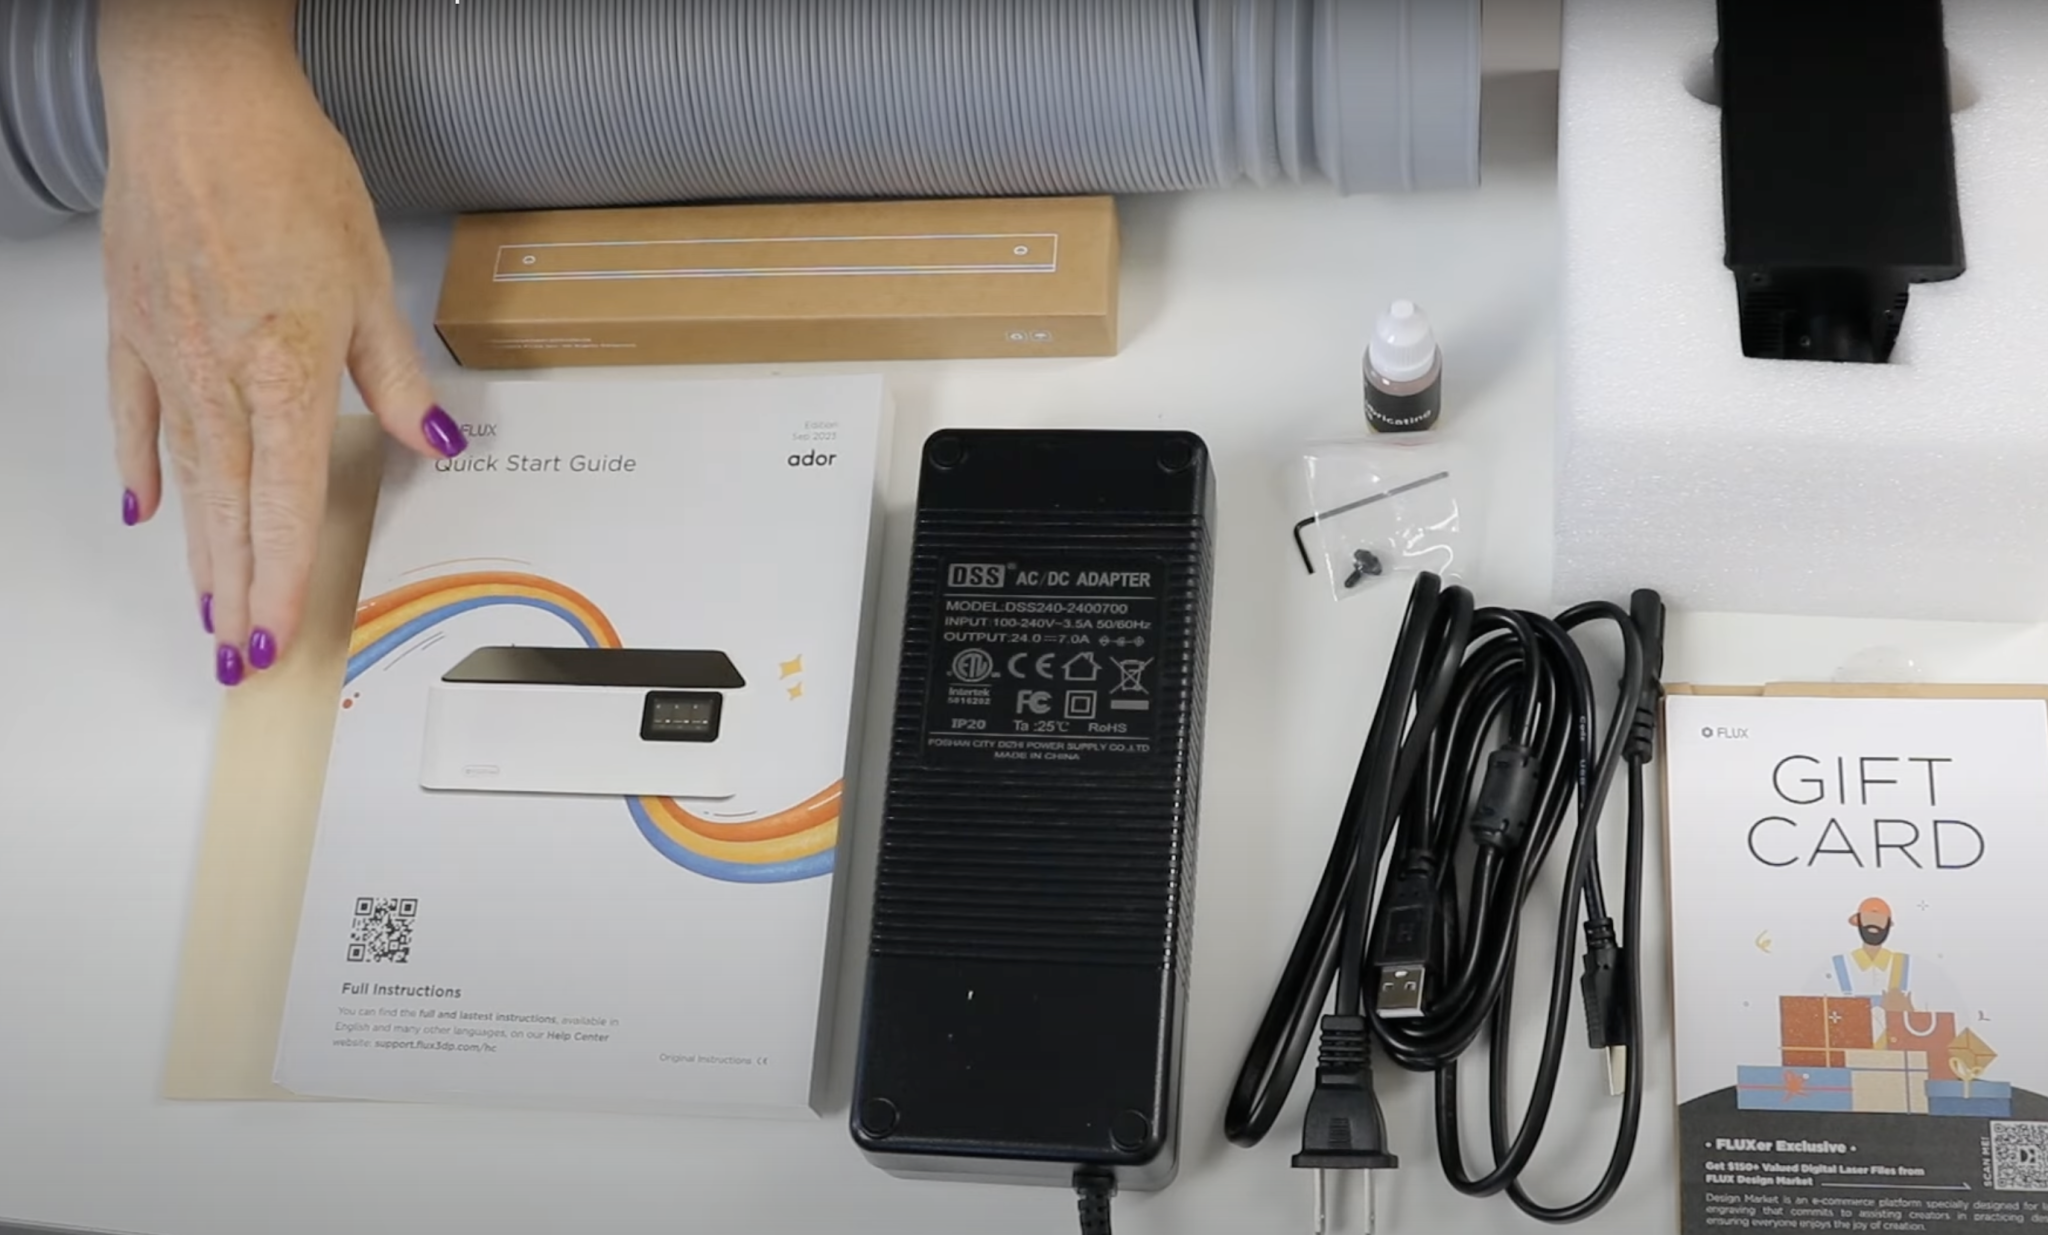
- Quick Start Guide
- Sample Material
- Power Cord
- USB Cable
- Triangular Prisms
- Vent Hose
- Oil
- Allen Wrench
- Laser Head
- Flux Design Market Gift Card (The Flux Design Market Gift Card will allow you to choose designs so you can get started creating right away.)
When you purchase the Flux Ador you will choose either the 10-watt or 20-watt laser head. I am using the 20-watt later head for my projects.
Laser Setup
The laser accessories will come inside the laser so you will open the laser lid to remove everything including the packaging materials.
You need to remove all packing materials and any packaging tape before beginning the setup process.
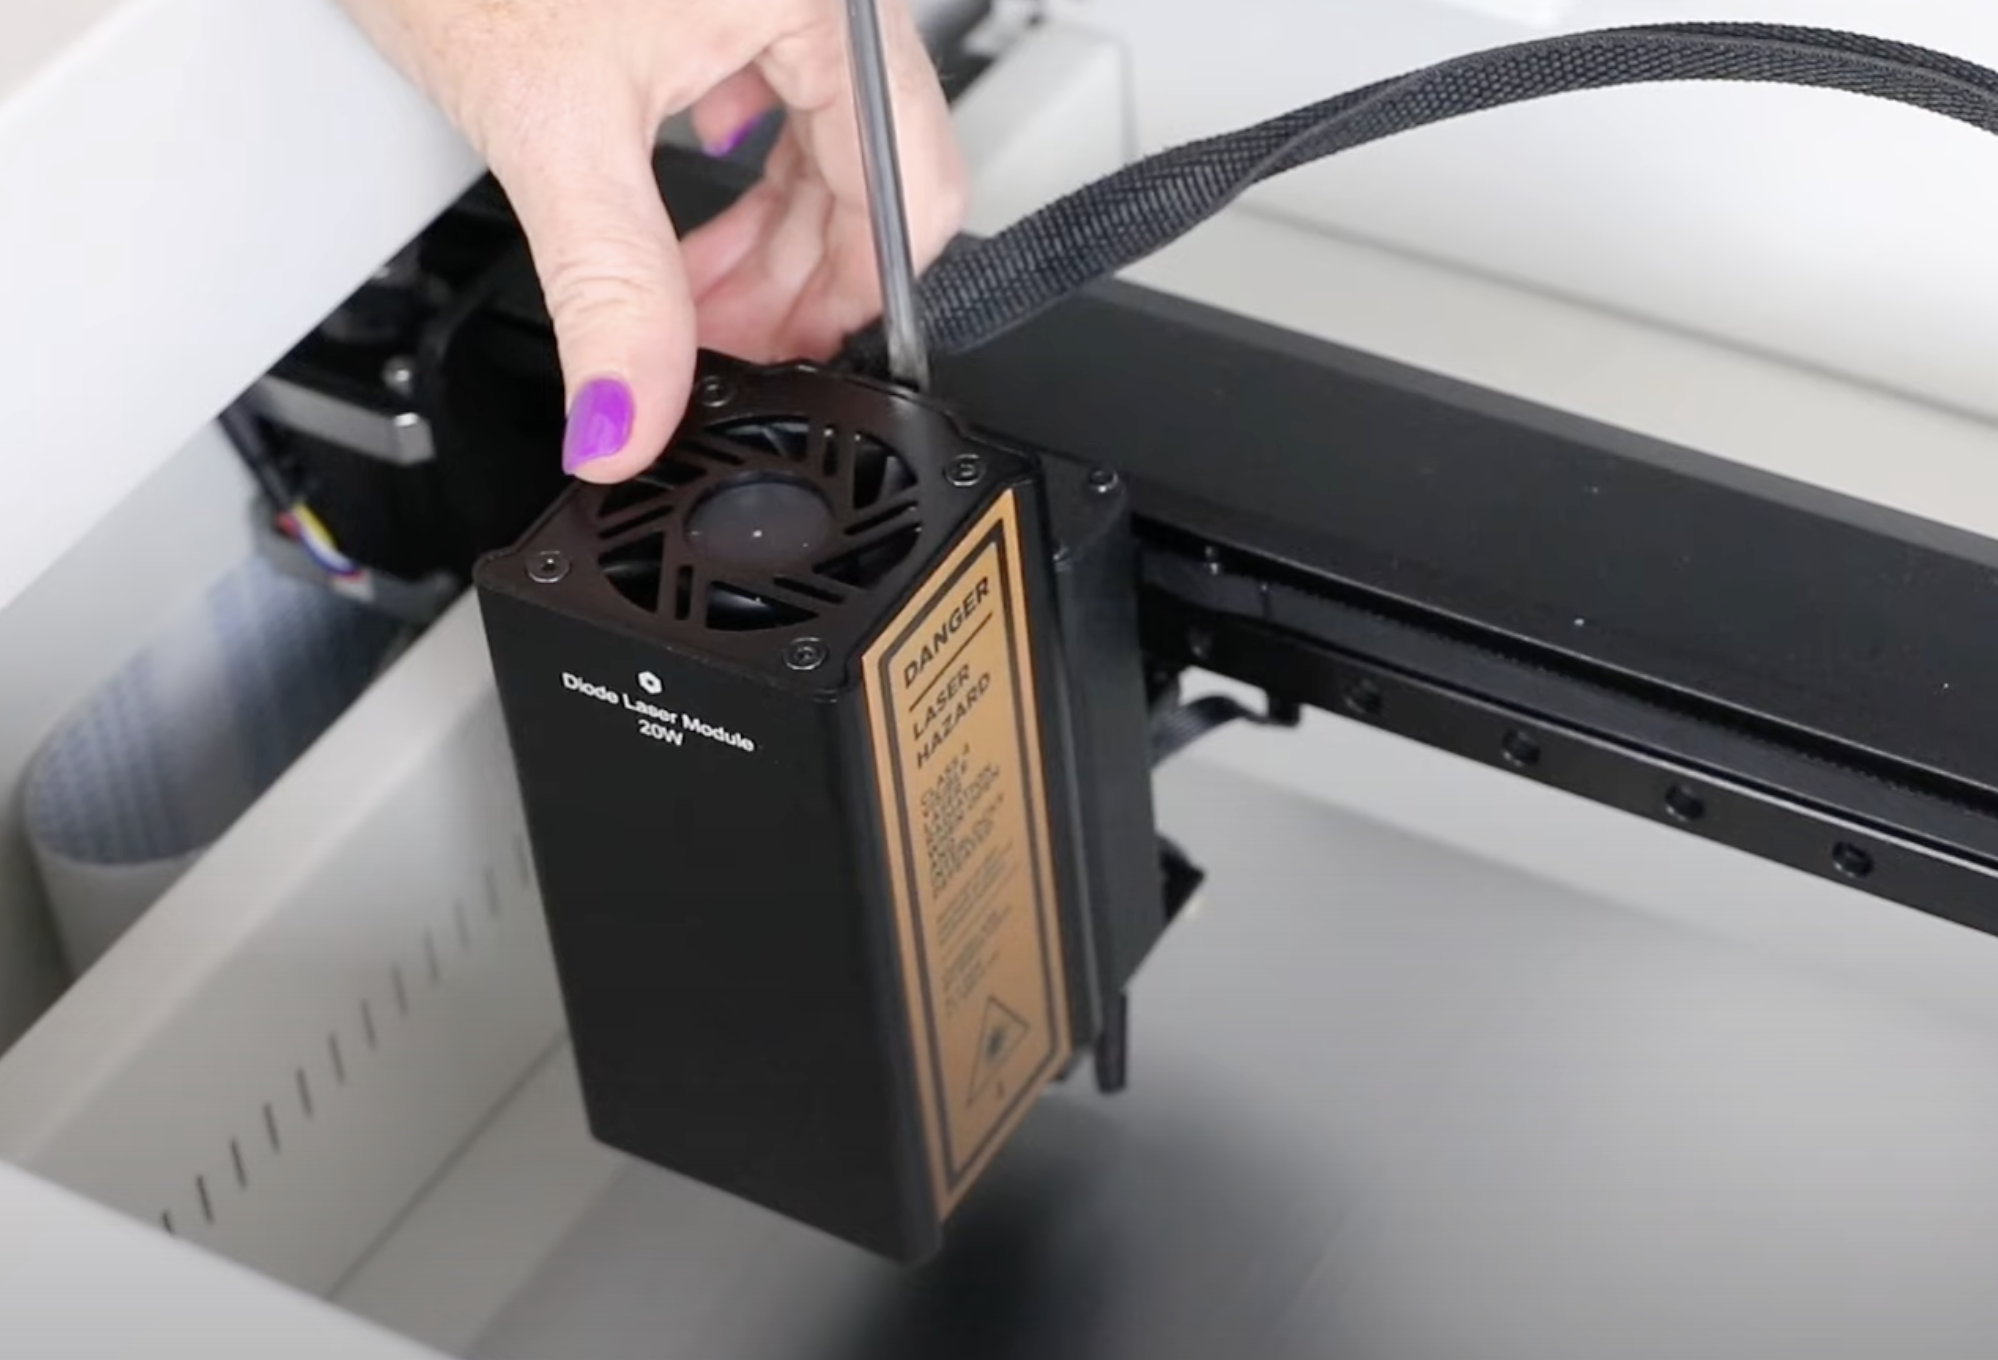
First, we want to attach the laser head to the laser. Remove the screw on the top of the carriage.
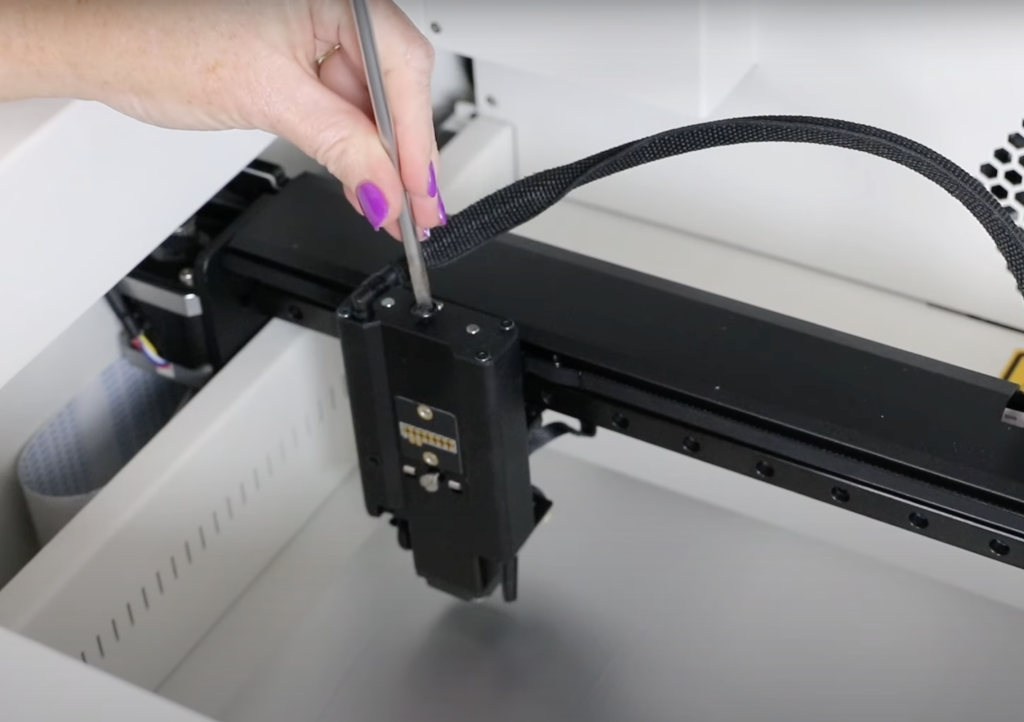
Line up the laser module with the screw on the surface. Slide it down into place and then replace the screw and tighten it down. The process will be the same every time you change the module.
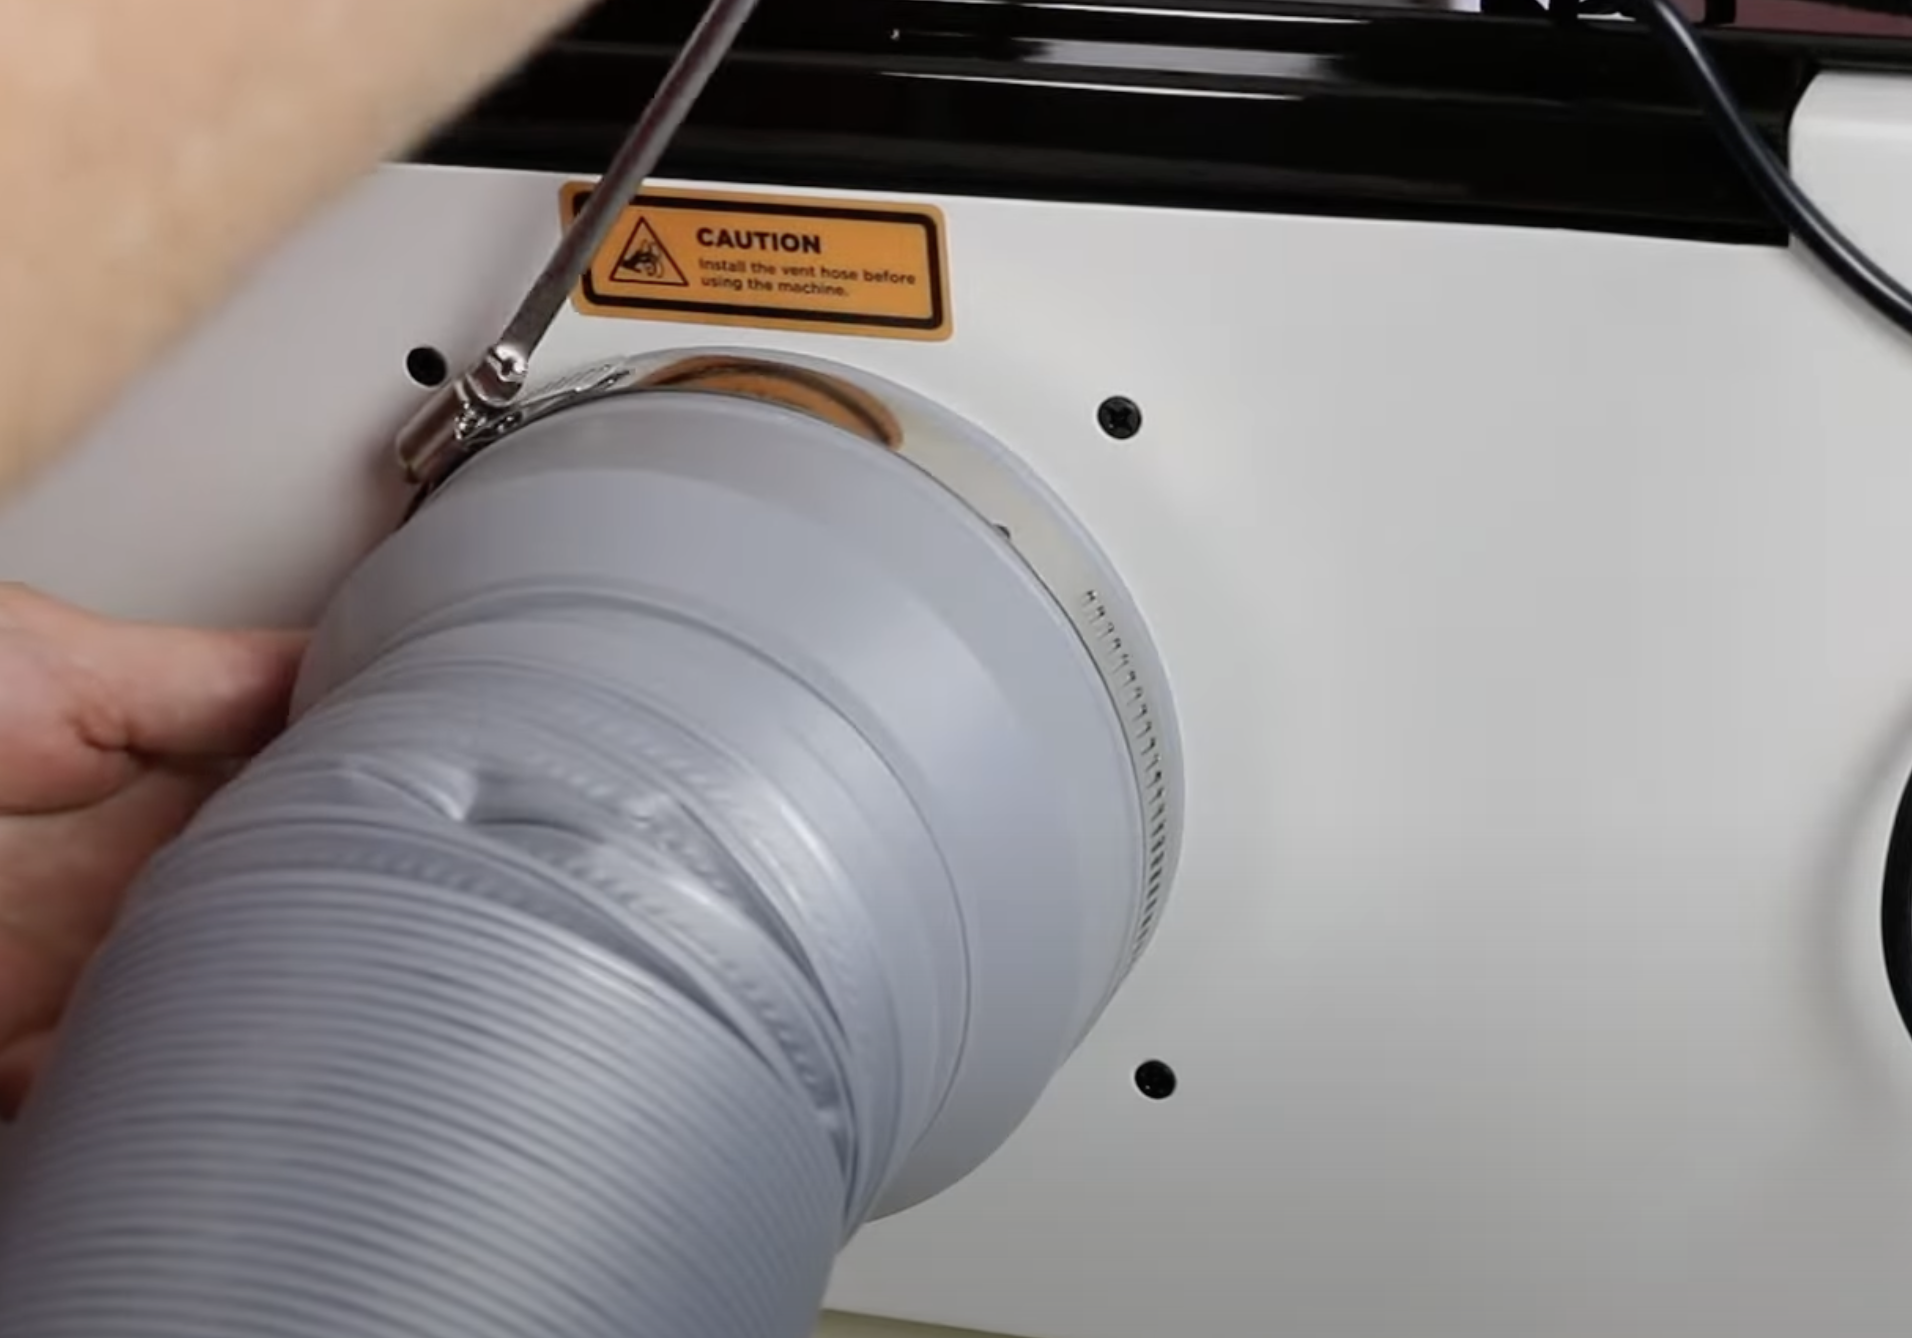
Add the power cord to the back of the laser and then attach the vent hose with the attached clamp.
Plug the laser into a power outlet and turn it on. The power switch is on the back of the machine.
When you power the machine on it may take a few minutes for the display screen to start up. This is normal.
Choose your language and the first thing it will have you do is review the laser safety precautions.

You will want to perform a machine test when it comes up on the screen. Click the arrow to start the test.
On the screen, you’ll see the setup process that I just walked you through. If you have any questions about the process, the laser itself will walk you through each step.
When that is done, run a homing test. Press the home button and this will make sure that the laser moves to the home position like it’s supposed to.
Auto-focus Feature
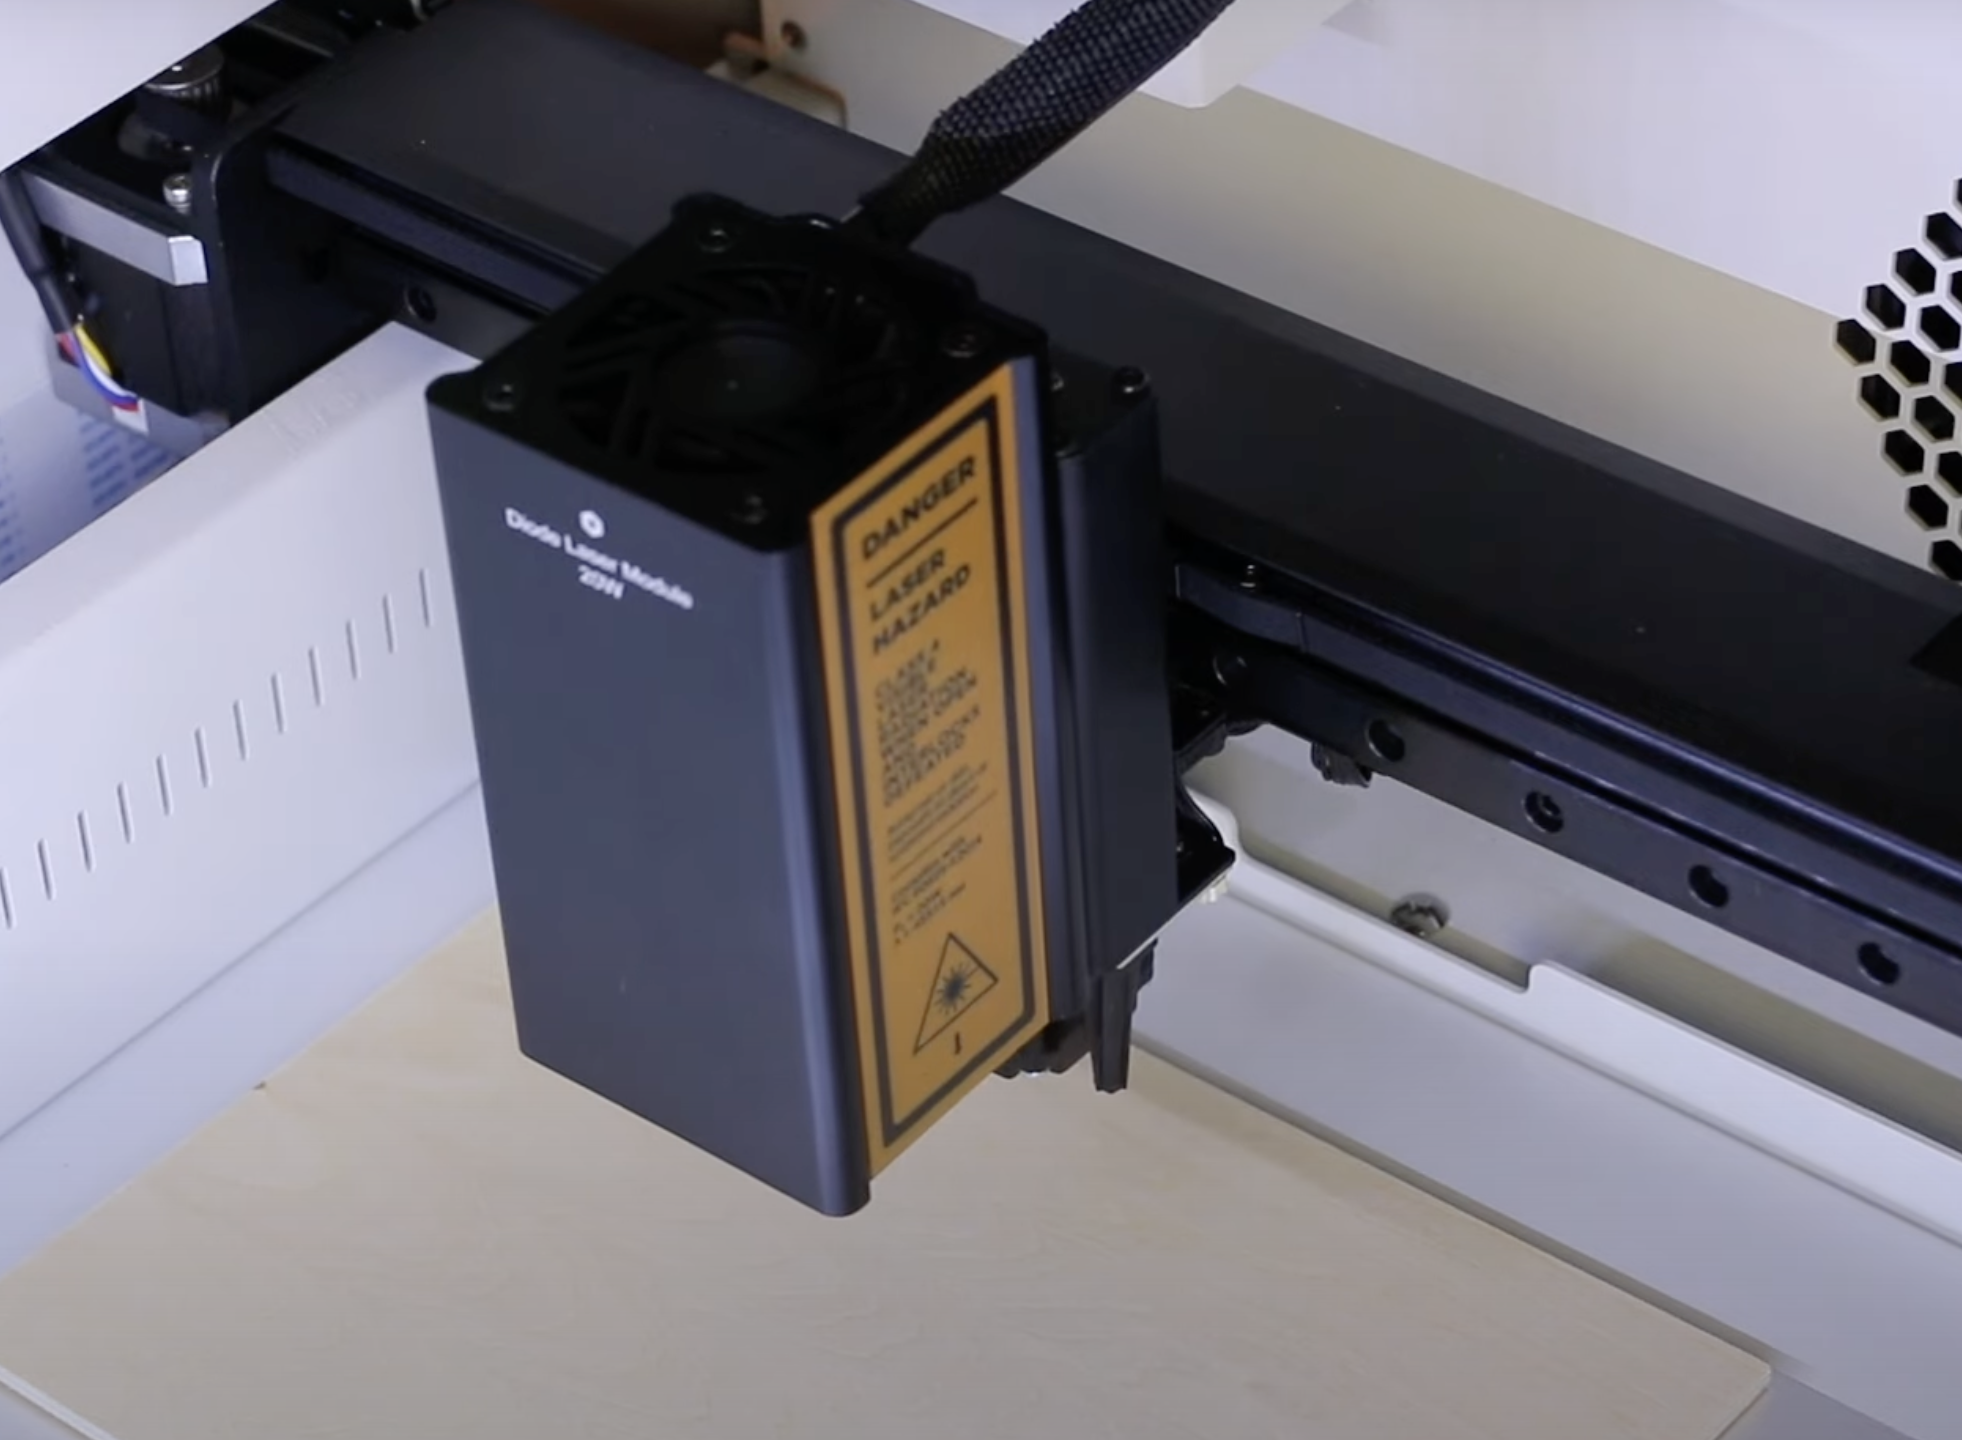
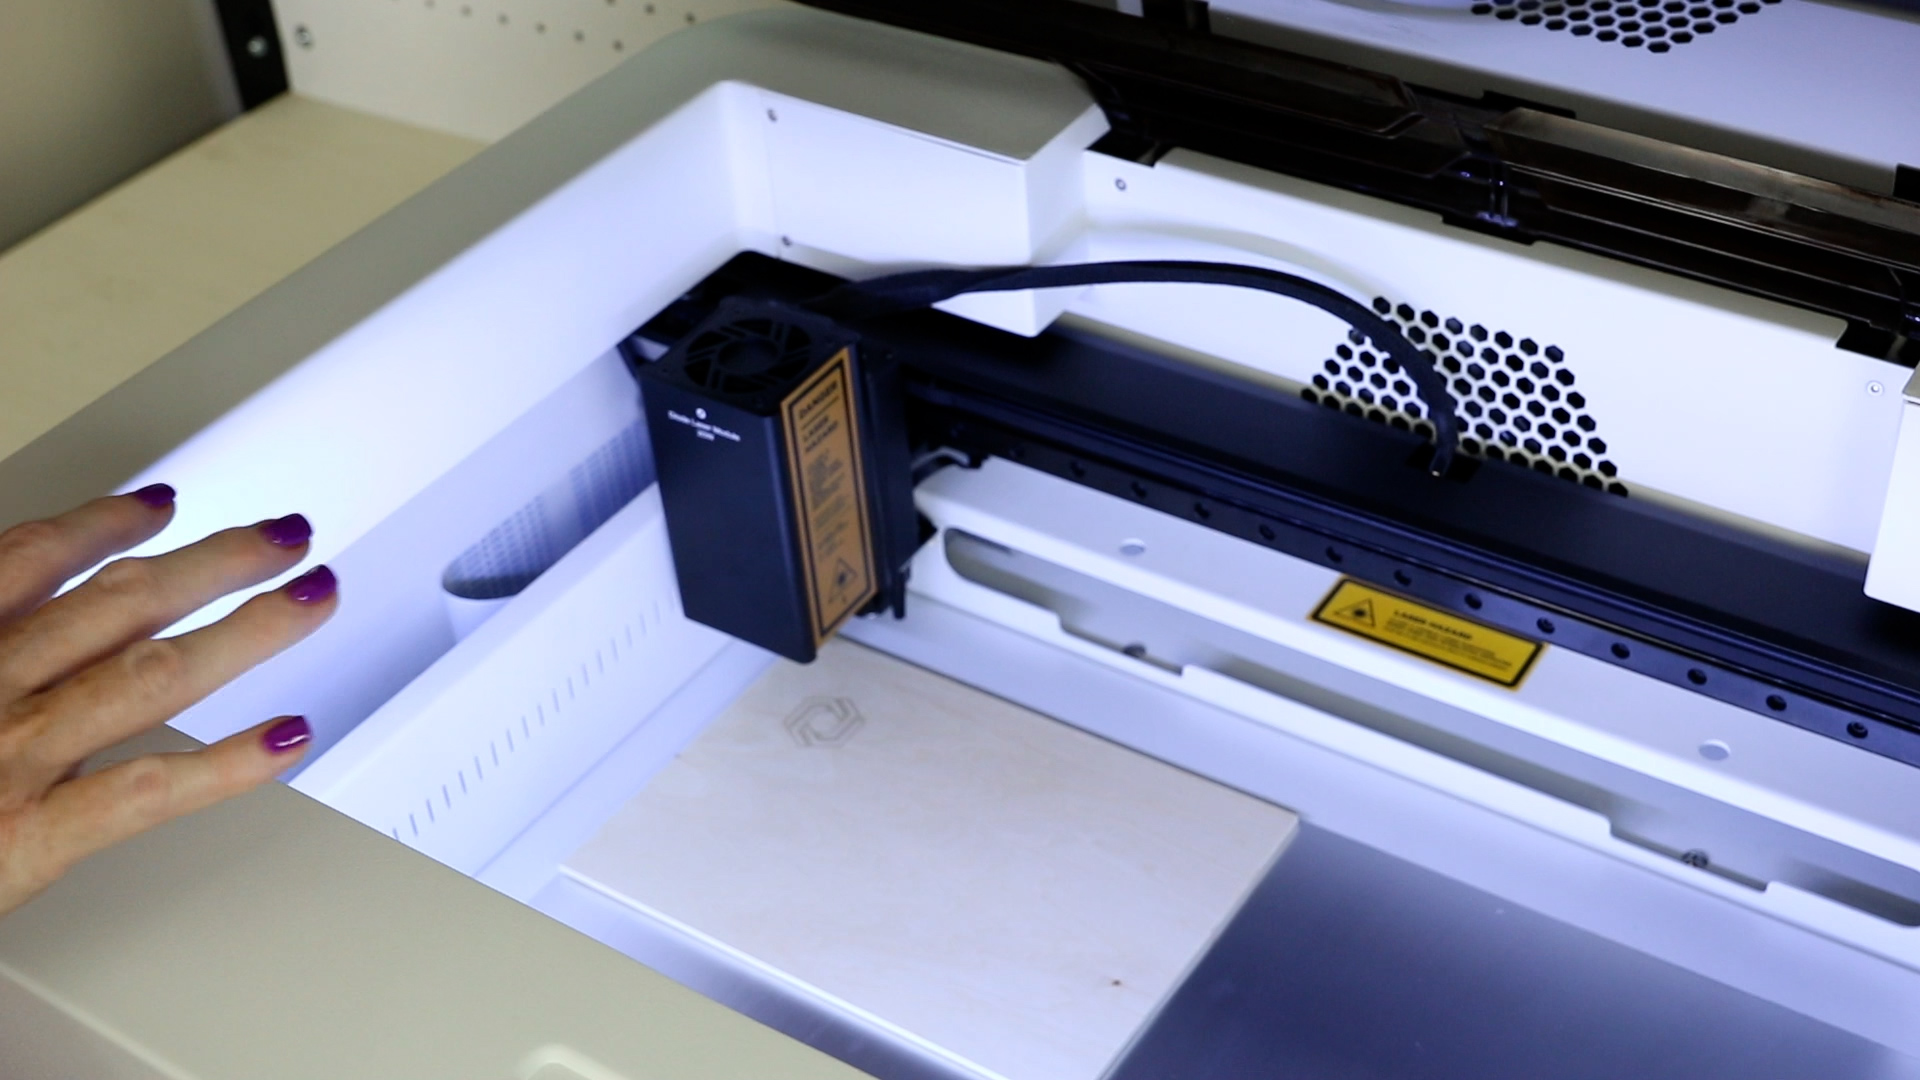
To test the auto-focus feature open the lid and add the test material to the laser in the upper left-hand corner.
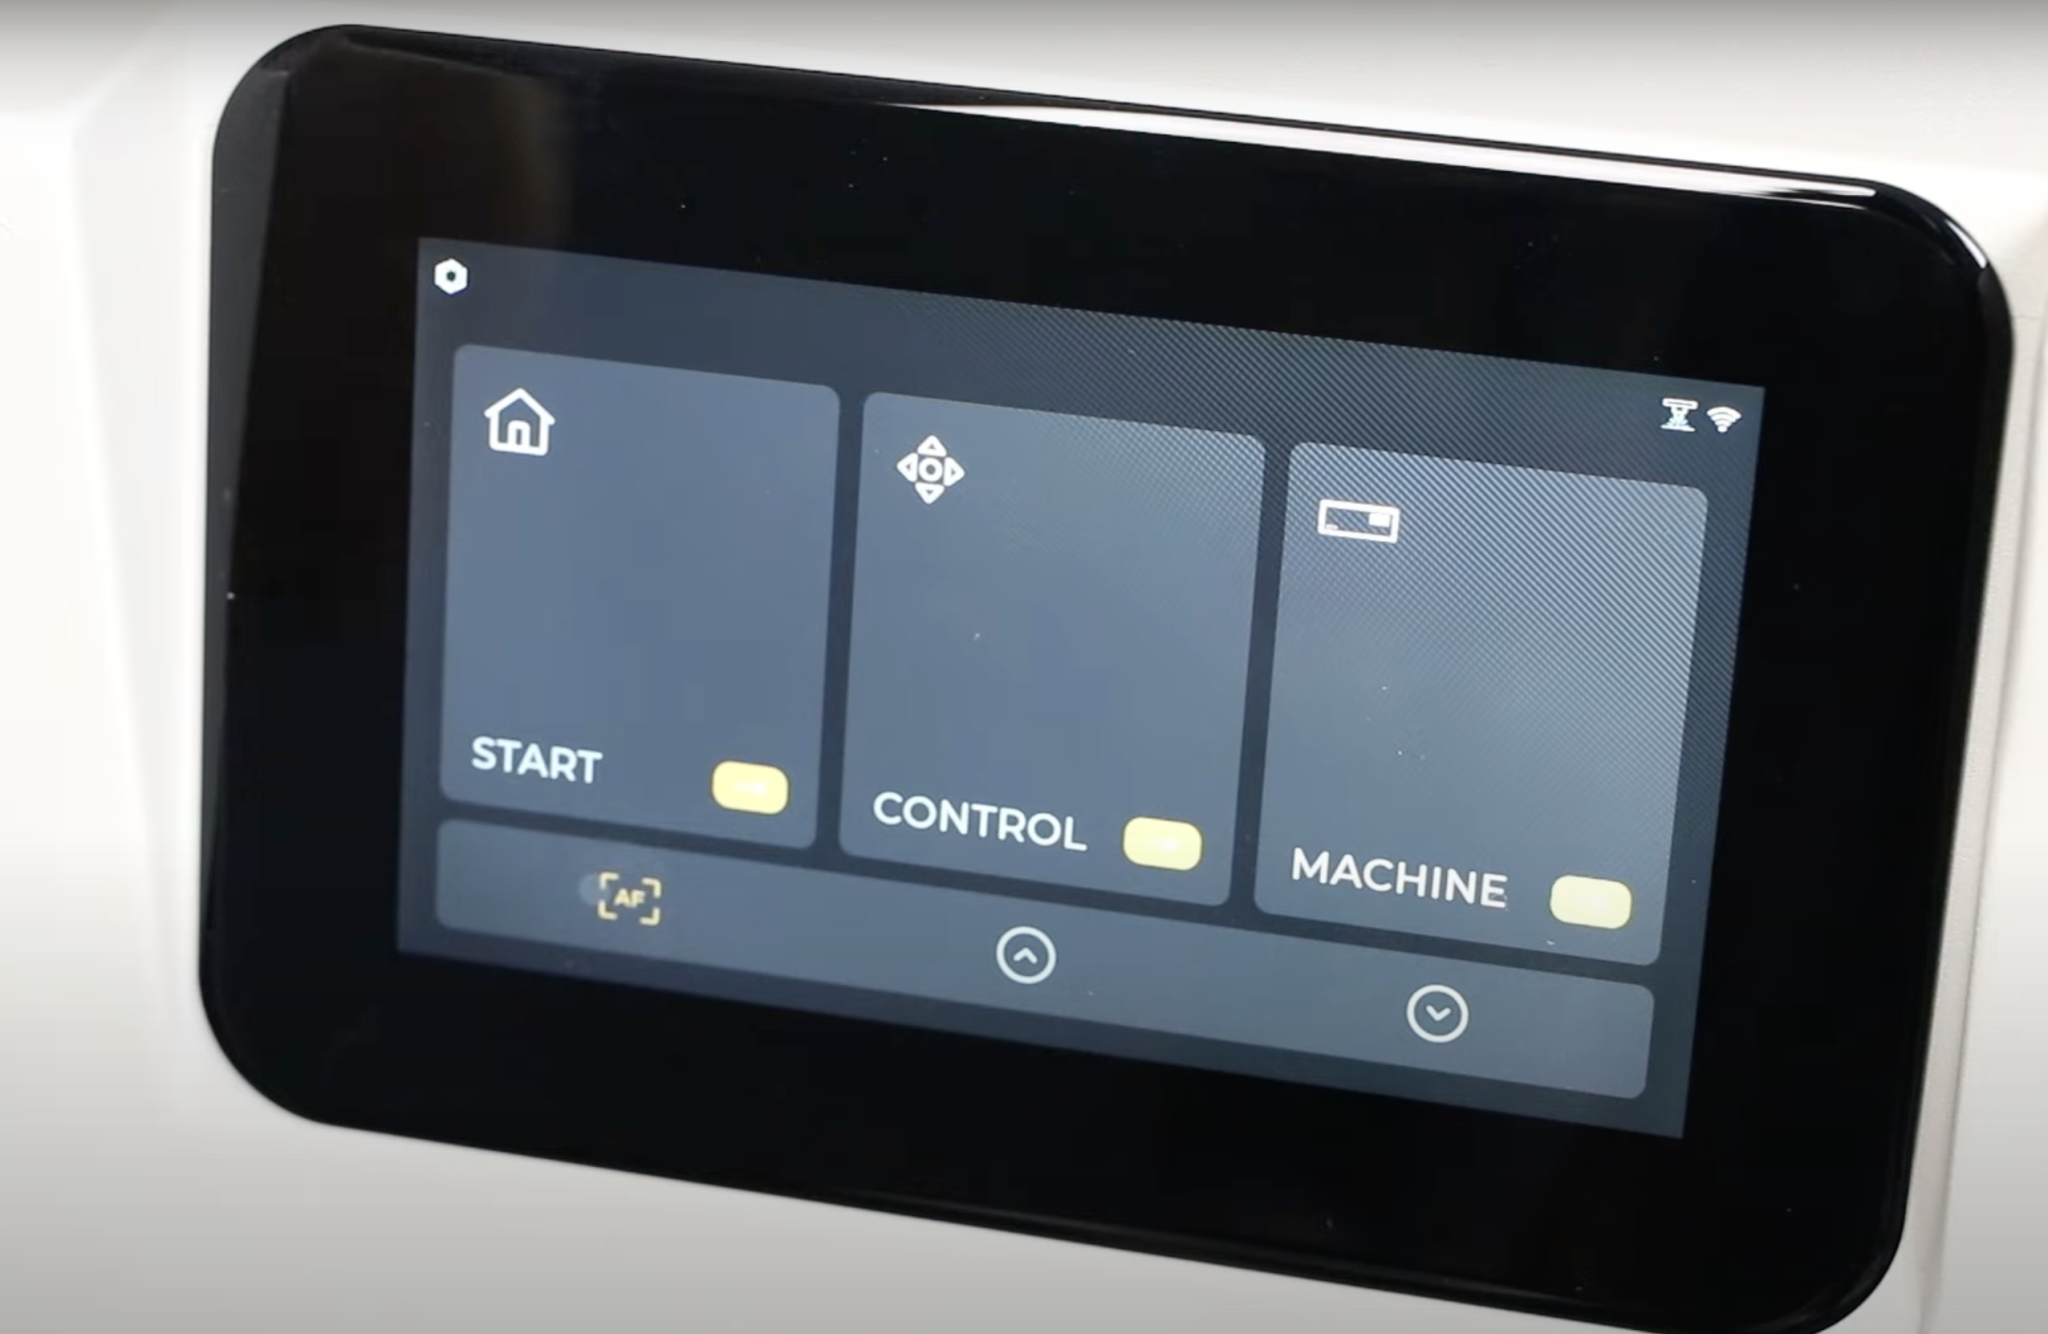
Move the laser module so it’s over the test material and then press the AF button on the touch panel for three seconds.
The laser head will move down to touch the material. This is the auto-focus.
Laser Safety
Laser safety is very important. Always have a fire extinguisher and/or fire blanket on hand when operating a laser.
The lid on the Flux Ador is dark which makes it hard to see the laser when it’s working but it does protect your eyes from the laser.
If you open the lid, the laser will stop which is another safety feature. You can stop the laser at any time with the emergency stop button on the side of the laser if you see something going wrong or if you see a fire.
As with any laser, you need to vent it when it’s cutting. You can either vent it outdoors or purchase an optional air filter accessory to operate it indoors.
Always use laser-compatible materials. Some materials can be toxic when cut with a laser. Know your blank before you begin to cut.
I have a full laser safety tutorial and encourage you to review it before you begin.
Test Project
With the test material inside close the lid and press the start button on the touch screen. The laser will find and load a file and it will start a test.
Note – with the laser closed you really can’t see the inside very well. If you look closely you can see it but this lid is darker than all my other lasers.
When it’s done, open the lid and check the test project. Mine turned out perfect.
After the test project, the laser will walk you through WiFi connection and the rest of the setup on the touch screen.
To continue to use the laser, download the Beam Studio software. There are a variety of functions on the front screen that you can use with your machine. Now the machine is set up and ready to operate.
Swapping Laser Heads
Swapping the laser head in the Flux Ador is really easy.
To make the swap, simply remove the screw from the top and slide the laser up and out of the housing. Add the new module by sliding it into the housing and replace the screw.
Flux Ador Laser Features
Let’s look at some of the features of the Flux Ador laser.
- First of all, there are two different laser head options you can choose between. You can select a 10-watt diode laser head or a 20-watt diode laser head. These laser heads you would use for cutting and engraving wood, acrylic, etc. The 20-watt is more powerful which would allow you to cut thicker materials and get deeper engravings.
- You can also purchase a 2-watt infrared head that works for things like engraving metal.
- Another option is the Print Head module. This is an additional purchase that will give you the ability to print with the laser, including printing on wood as I will show you in this review.
- The working area of the Flux Ador is about 16.9 inches by 11.8 inches. With the additional riser base, there is a pass-through option that would allow you to increase the length to however long you want.
- With the use of the riser base, you also get the honeycomb tray. Without the riser, you have to use the triangular prisms.
- With the 20-watt laser head, you have a 10-millimeter maximum cut thickness. You can engrave thicker, especially with the riser base. With the riser base, you can engrave blanks close to 5-inches thick
- There is an optional rotary assembly that gives you the option to engrave things like tumblers. I will be testing that today as well.
Built-in Features
The Flux Ador has features built into it as well.
- There is an auto-focus feature and there is a camera inside the laser that allows you to see where the materials are inside the laser.
- The camera is on the front panel inside the laser which is a good position because you can have the lid open and still use the camera.
- Another built-in feature is the air assist. I am a huge fan of air assist on a laser and the fact that this one is built in is a winning feature for me.
- I am really impressed with the touchscreen on the front of the laser. It made the setup process really easy and you can also see the progress of your project right on the display.
- I am using Beam Studio which is the Flux software to operate my laser. However, if you use LightBurn you can use it with this laser. You will need an additional cable to use LightBurn. I don’t use LightBurn so I will not be testing that feature.
How to Cut and Engrave Wood with the Flux Ador Laser
The first project I am going to make is a small wood piece I can use as a magnet
Step 1: Add Material to Laser
First, we need to add the triangular prisms. These prisms have magnets so they will stay in place where you put them. I am going to add two and then place the material on top of it.
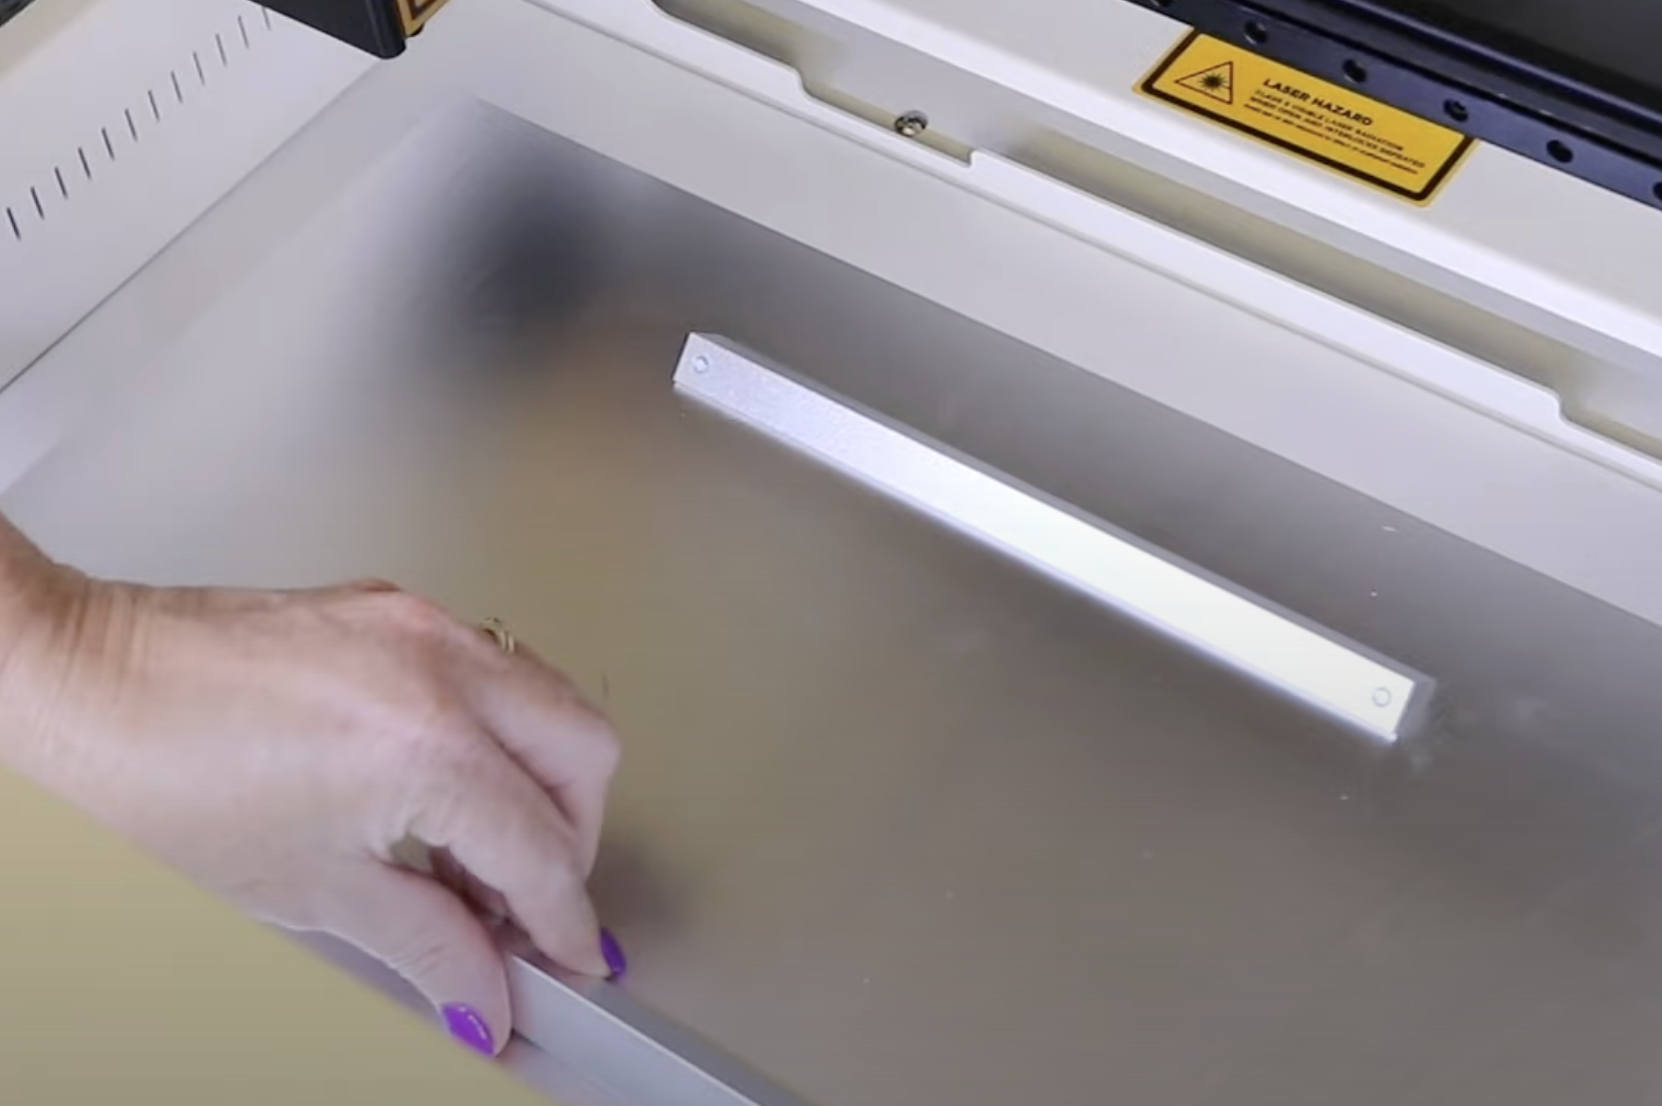
Place the wood on the triangular prisms so it’s in place.
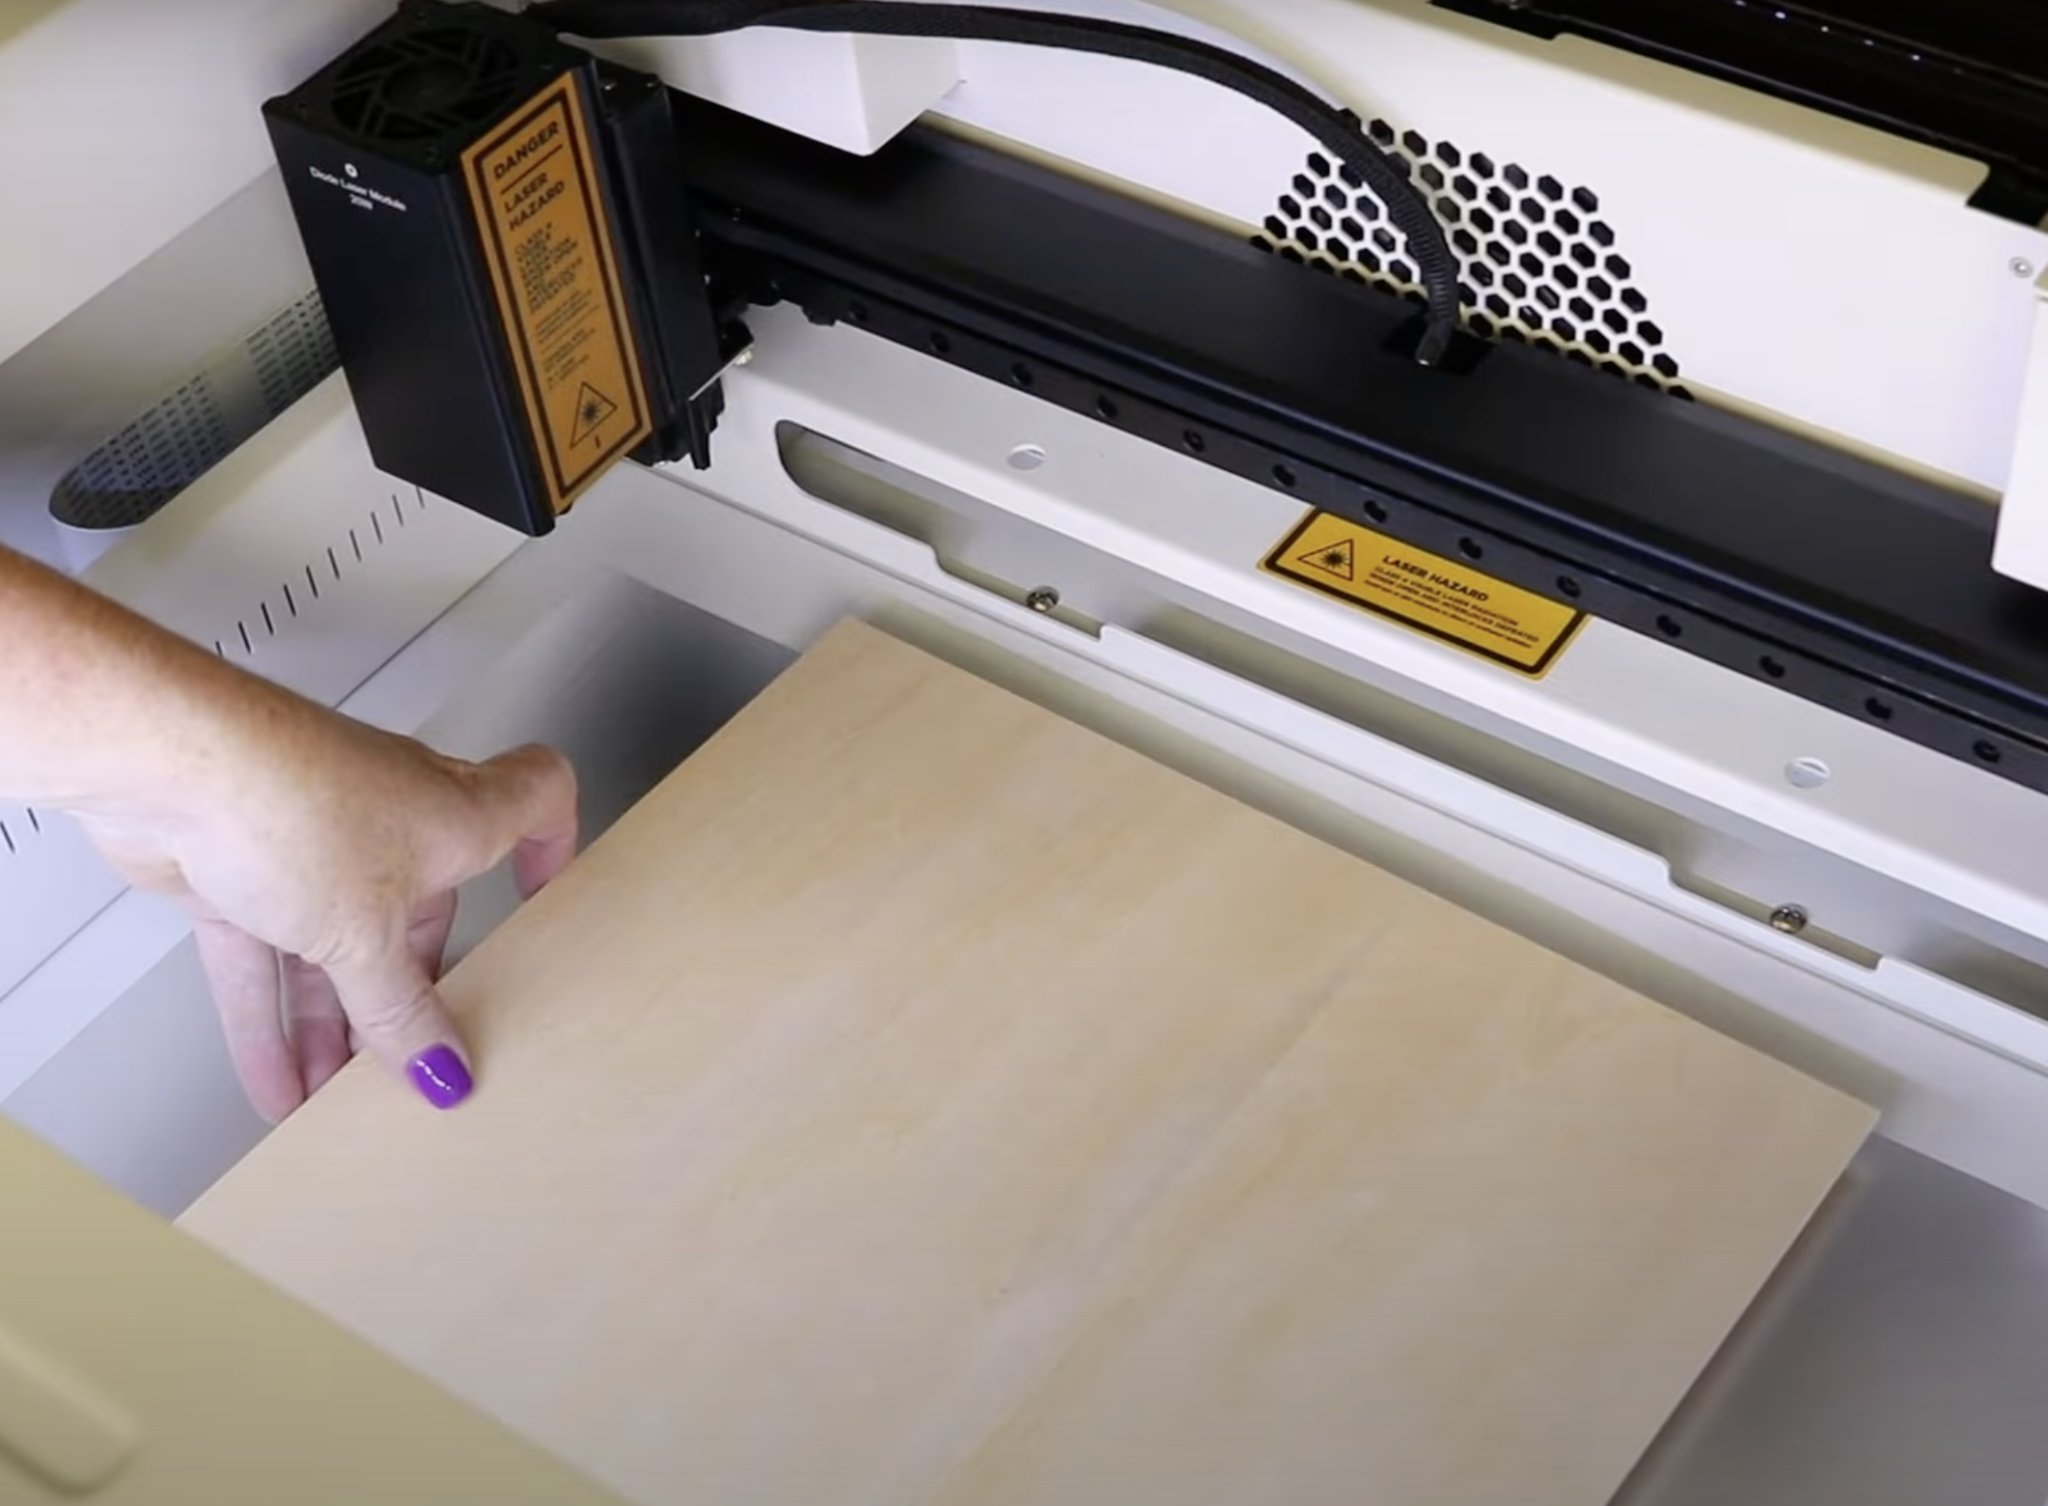
With the wood in place, close the lid and then head to the computer to open Beam Studio.
Step 2: Design Project
I am using my own file for this project.
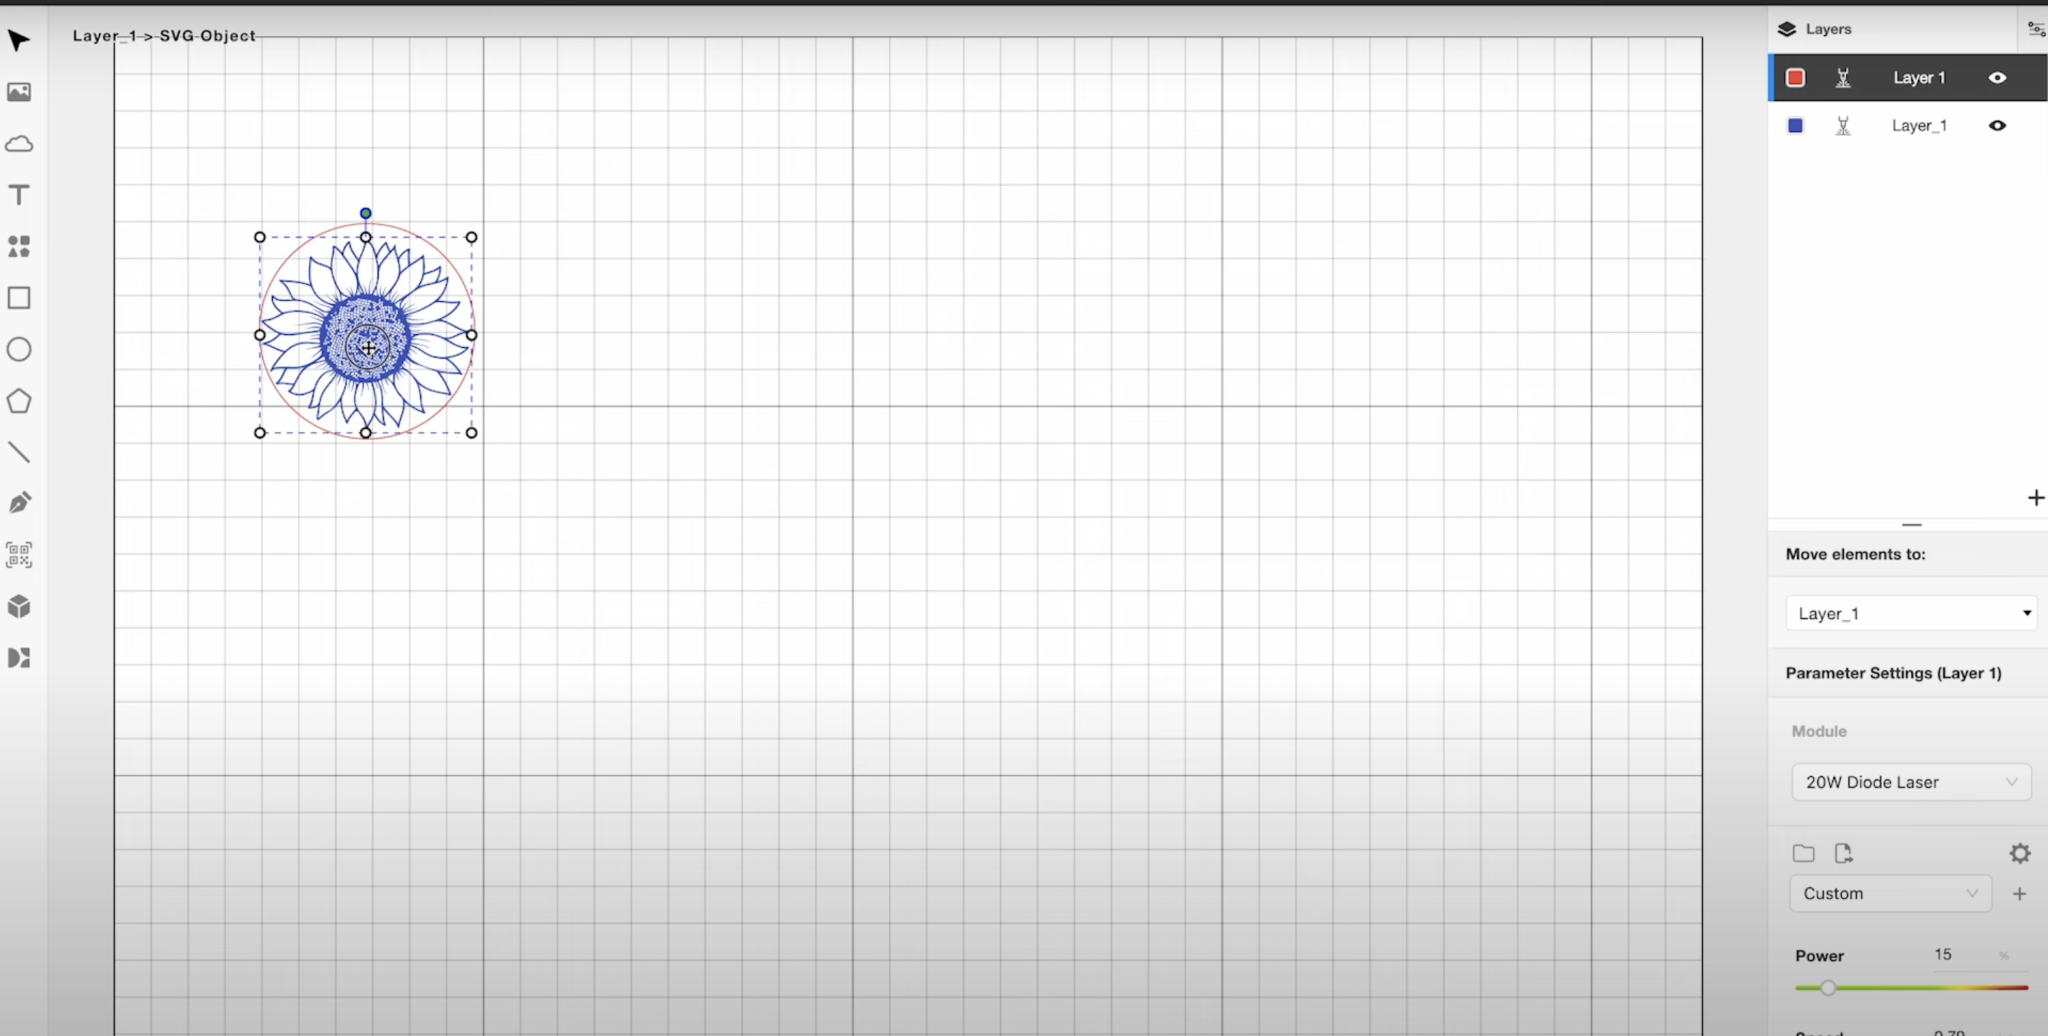
- Click image on the left-hand side and locate the file on your computer. I am uploading an SVG file.
- Because I want to cut and engrave I will select Layer and it will upload my image.
- On the right side of the screen under Module, select the laser you’re using. I am using the 20W Diode Laser.
- I am making a small magnet with this design so I’m going to begin by resizing my design.
- I wanted the first layer to be the engraving layer so I selected wood engraving.
- The next layer will be the cut layer so I am going to add a layer and then draw a circle slightly larger than my design.
- I can relocate the circle so it is around the sunflower and resize it so it’s the correct size for my design. Make sure the cut layer has been changed from engrave to cut.
If needed on each layer, I can click the Settings button and see the exact sizes of the layers. There are other options including offset, array, nesting, converting to path, etc. I am going to keep it simple and just engrave and cut a wood circle.
Step 3: Preview Image and Auto Focus
Click the camera button to get a preview of the wood inside the machine and where the design will be located. You can move the design at this time if needed.
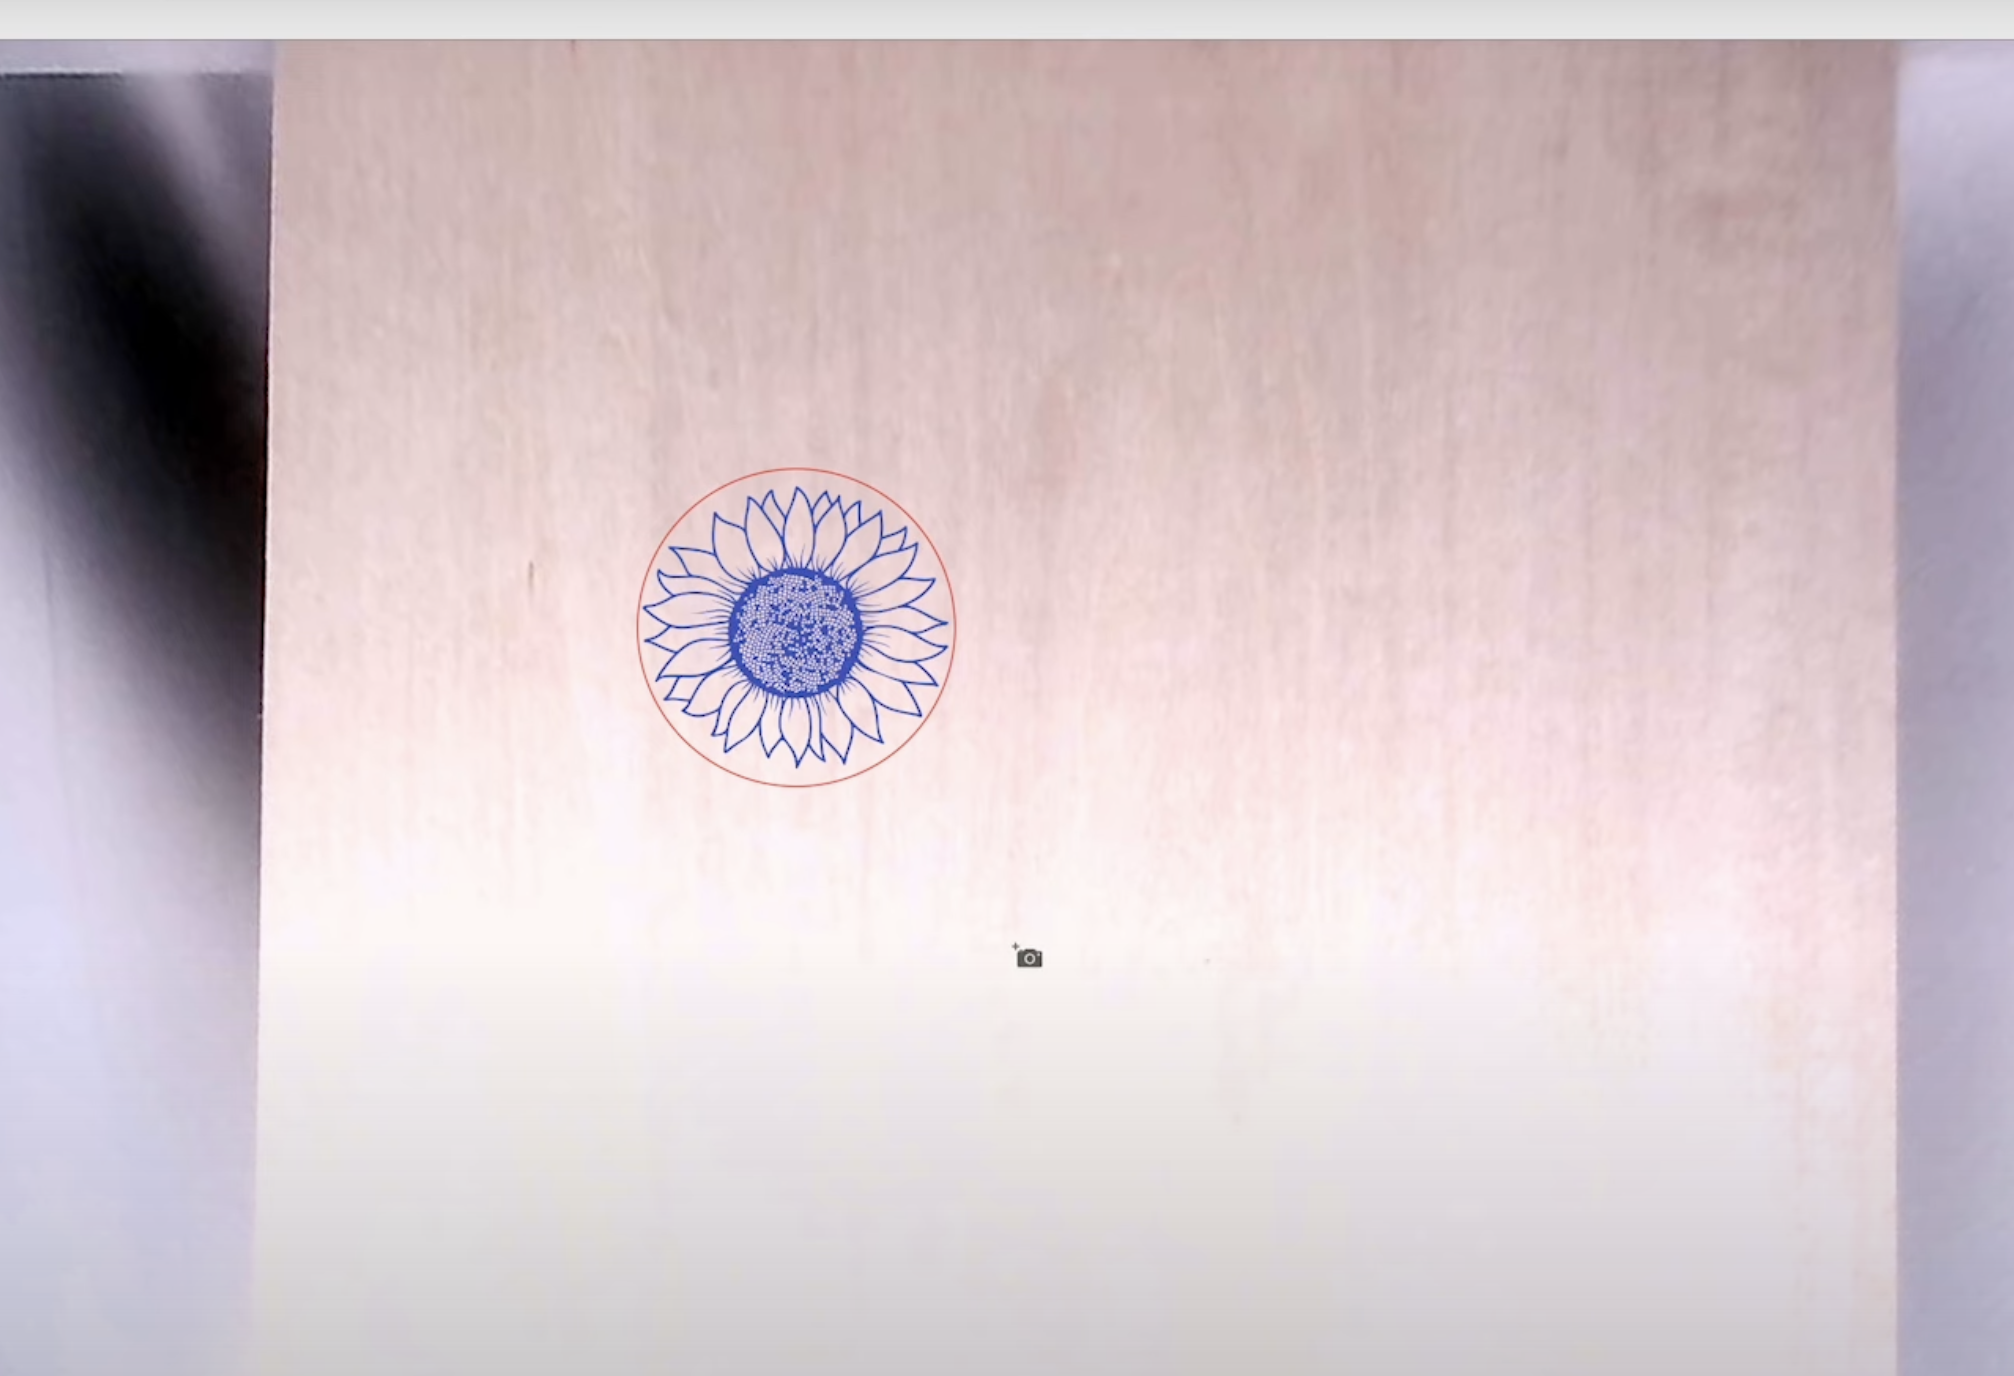
Raise the laser lid and move the laser module so it’s over the wood. On the front of the laser press the AF (auto-focus) button for about 3 seconds and the machine will find the material and auto-focus on it.
With the laser bed on the screen, check the layers and make sure they’re in the order you want them to be. You want the engrave layer to be the first layer and the cut layer to be the second layer.
Step 4: Start the Laser
With the design set up correctly, close the lid on the laser and click Start inside Beam Studio.
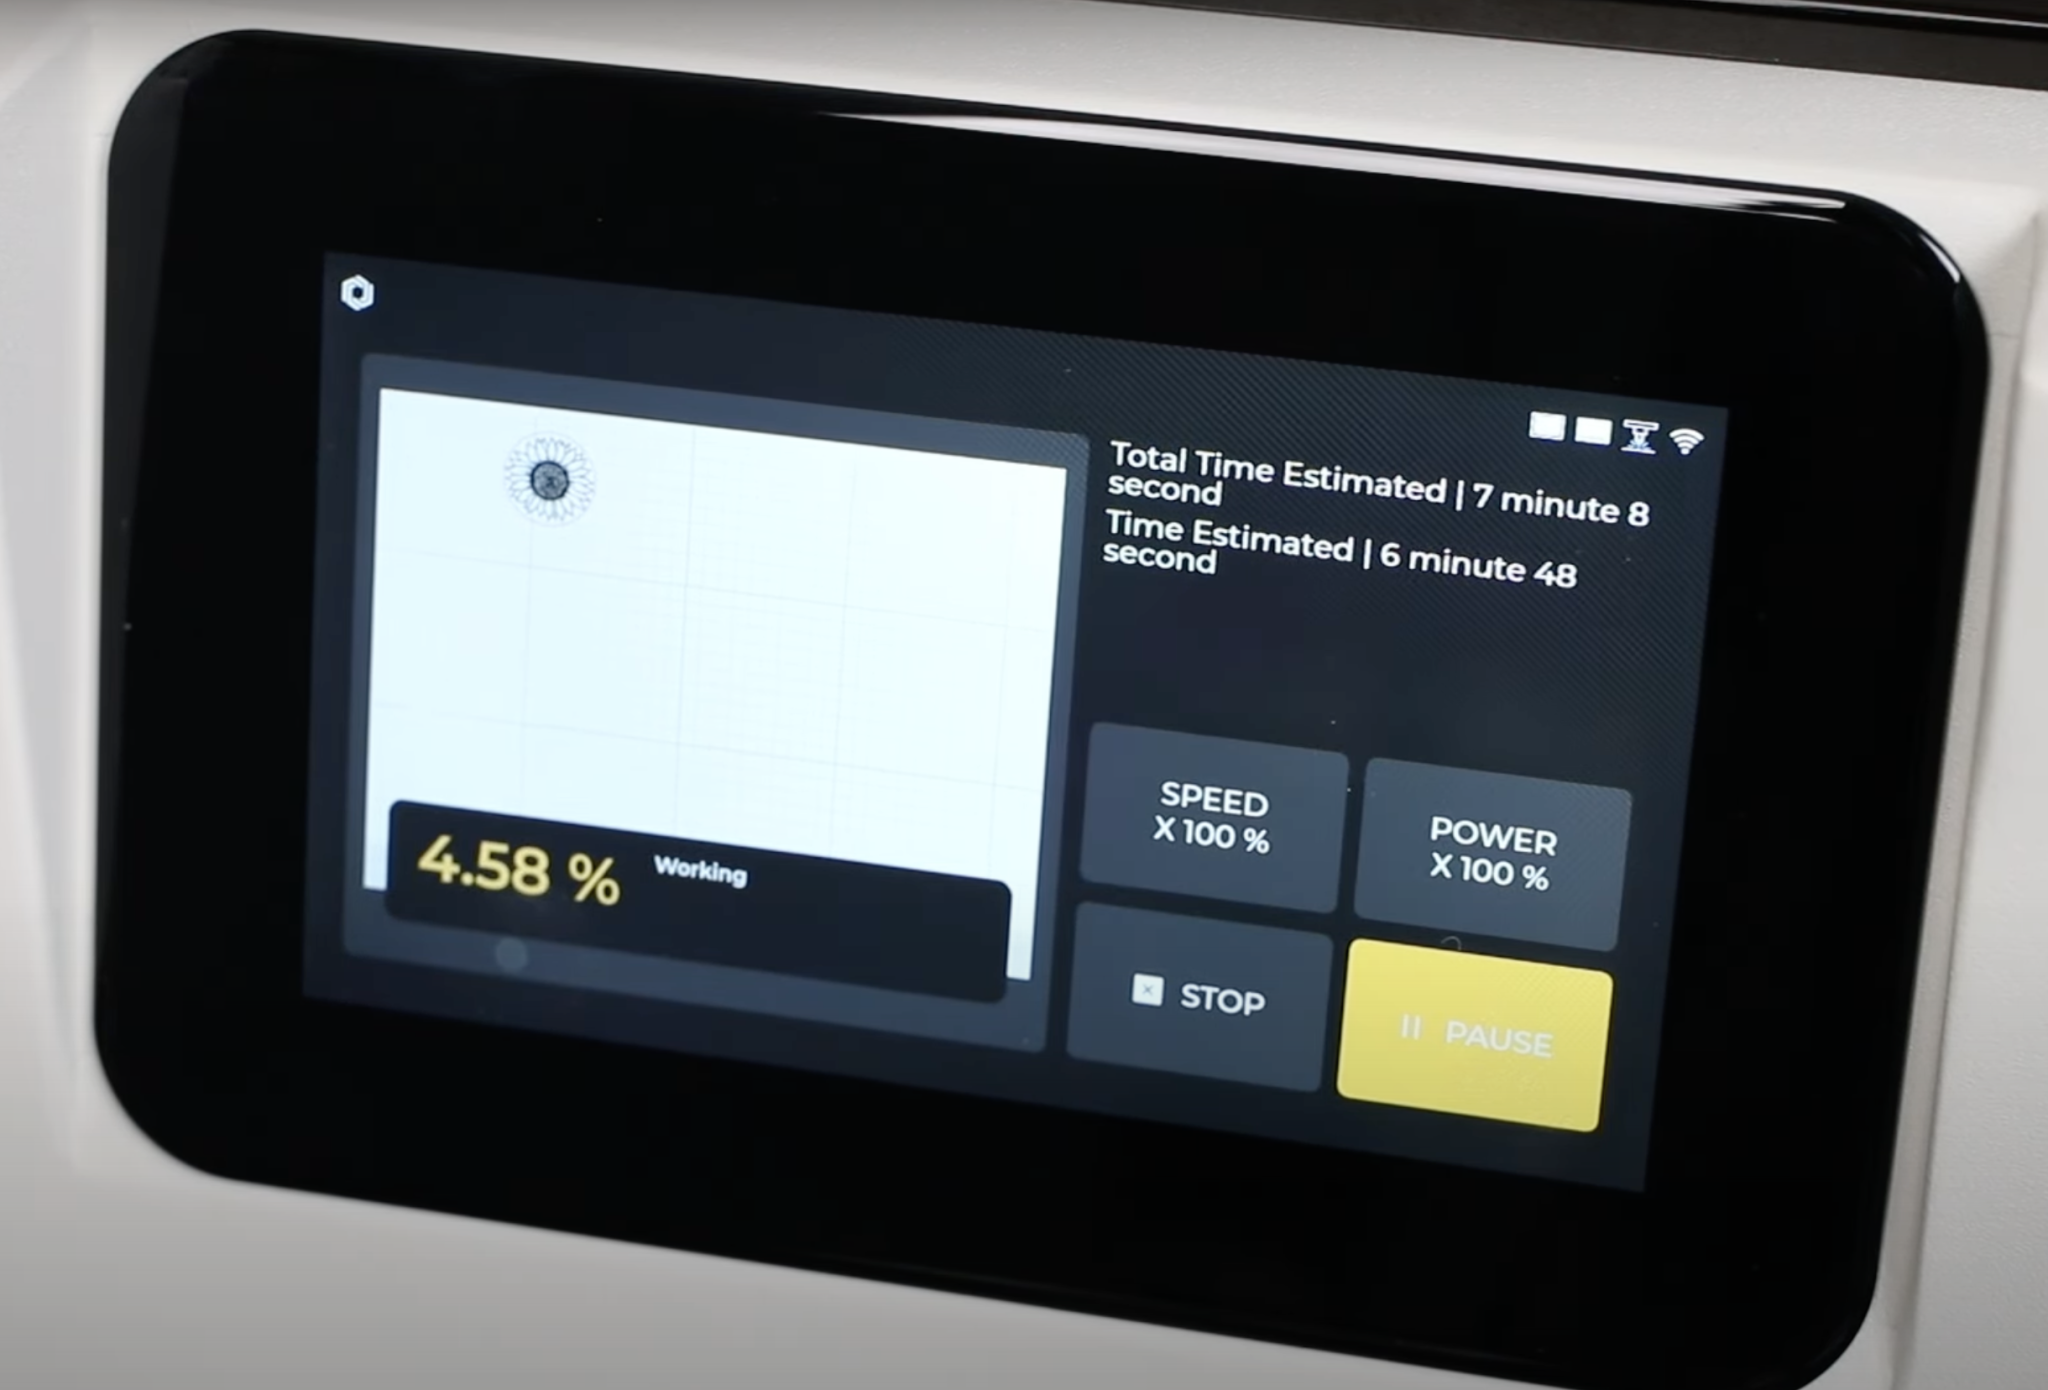
You can watch the progress on the computer or on the front panel of the Flux Ador laser. I love that I can stand by the laser and see exactly how much time is left in the project and I can pause or stop the process if I need to.
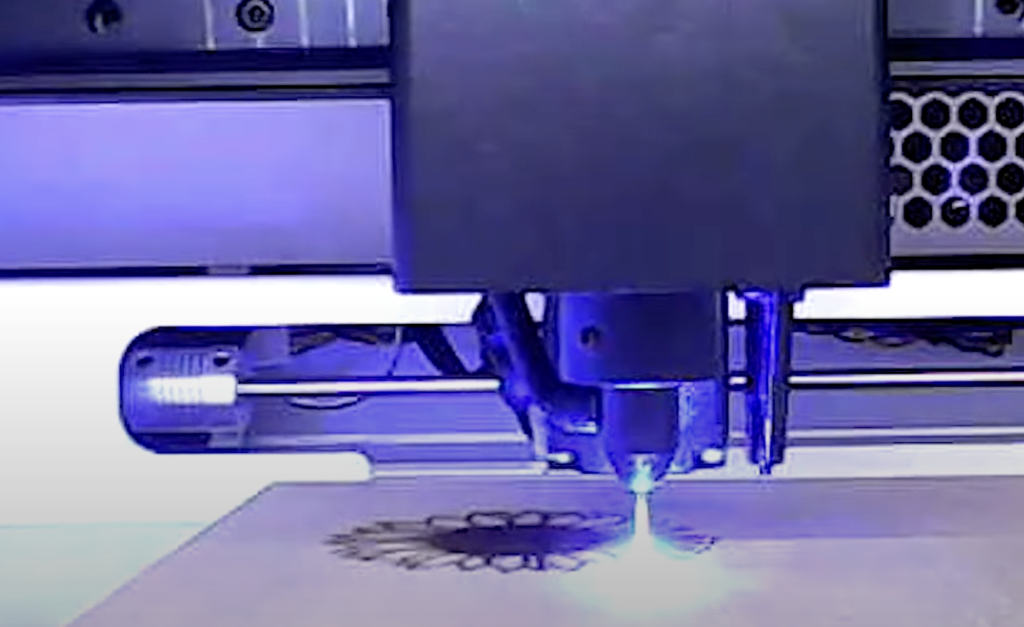
Because the lid of the Flux Ador is so dark I was unable to get any photos or video of the laser while it was working.
I added a small video camera inside the laser and was able to capture the laser working. Never look directly at a laser while it’s working.
Step 5: Reveal Finished Project
When everything is finished, all that is left to do is open the lid and remove the project from the machine.
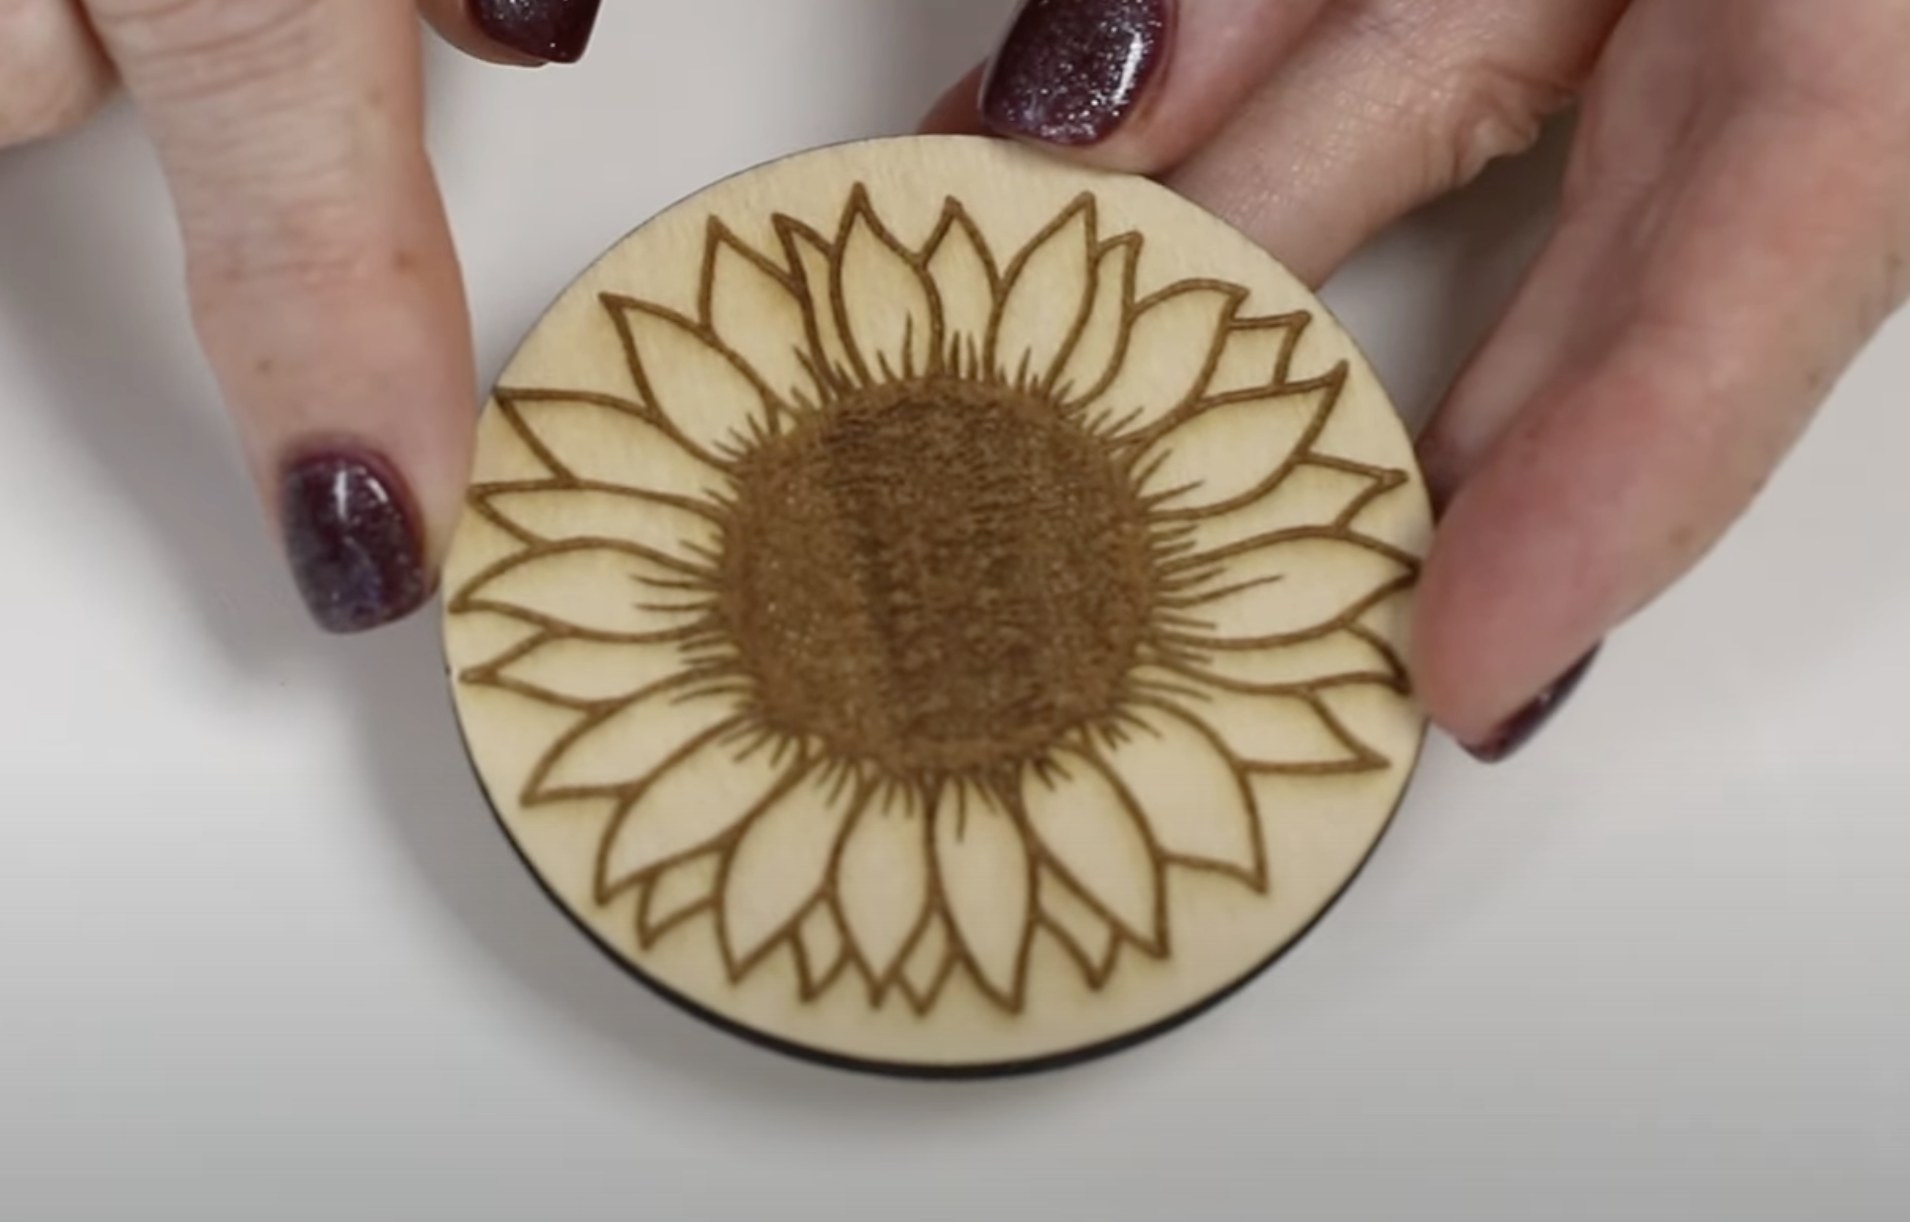
The Flux Ador laser did a great job both engraving and cutting this wood. The file turned out awesome. It’s hard to tell in the photo but the middle has a texture to it and the laser did a great job with that detail.
Change the laser head for the 2W Infrared head before starting this project. Then we can engrave a small jewelry charm.
Step 1: Add Charm to Laser
Now that we have the laser head changed, add the metal jewelry piece to the laser.
I placed the metal piece on top of a piece of wood because this gives more contrast between the blank and the laser bed making it easier for the software to see it.
Move the laser head directly over the blank and press the AF button on the front of the laser for 3 seconds to auto-focus.
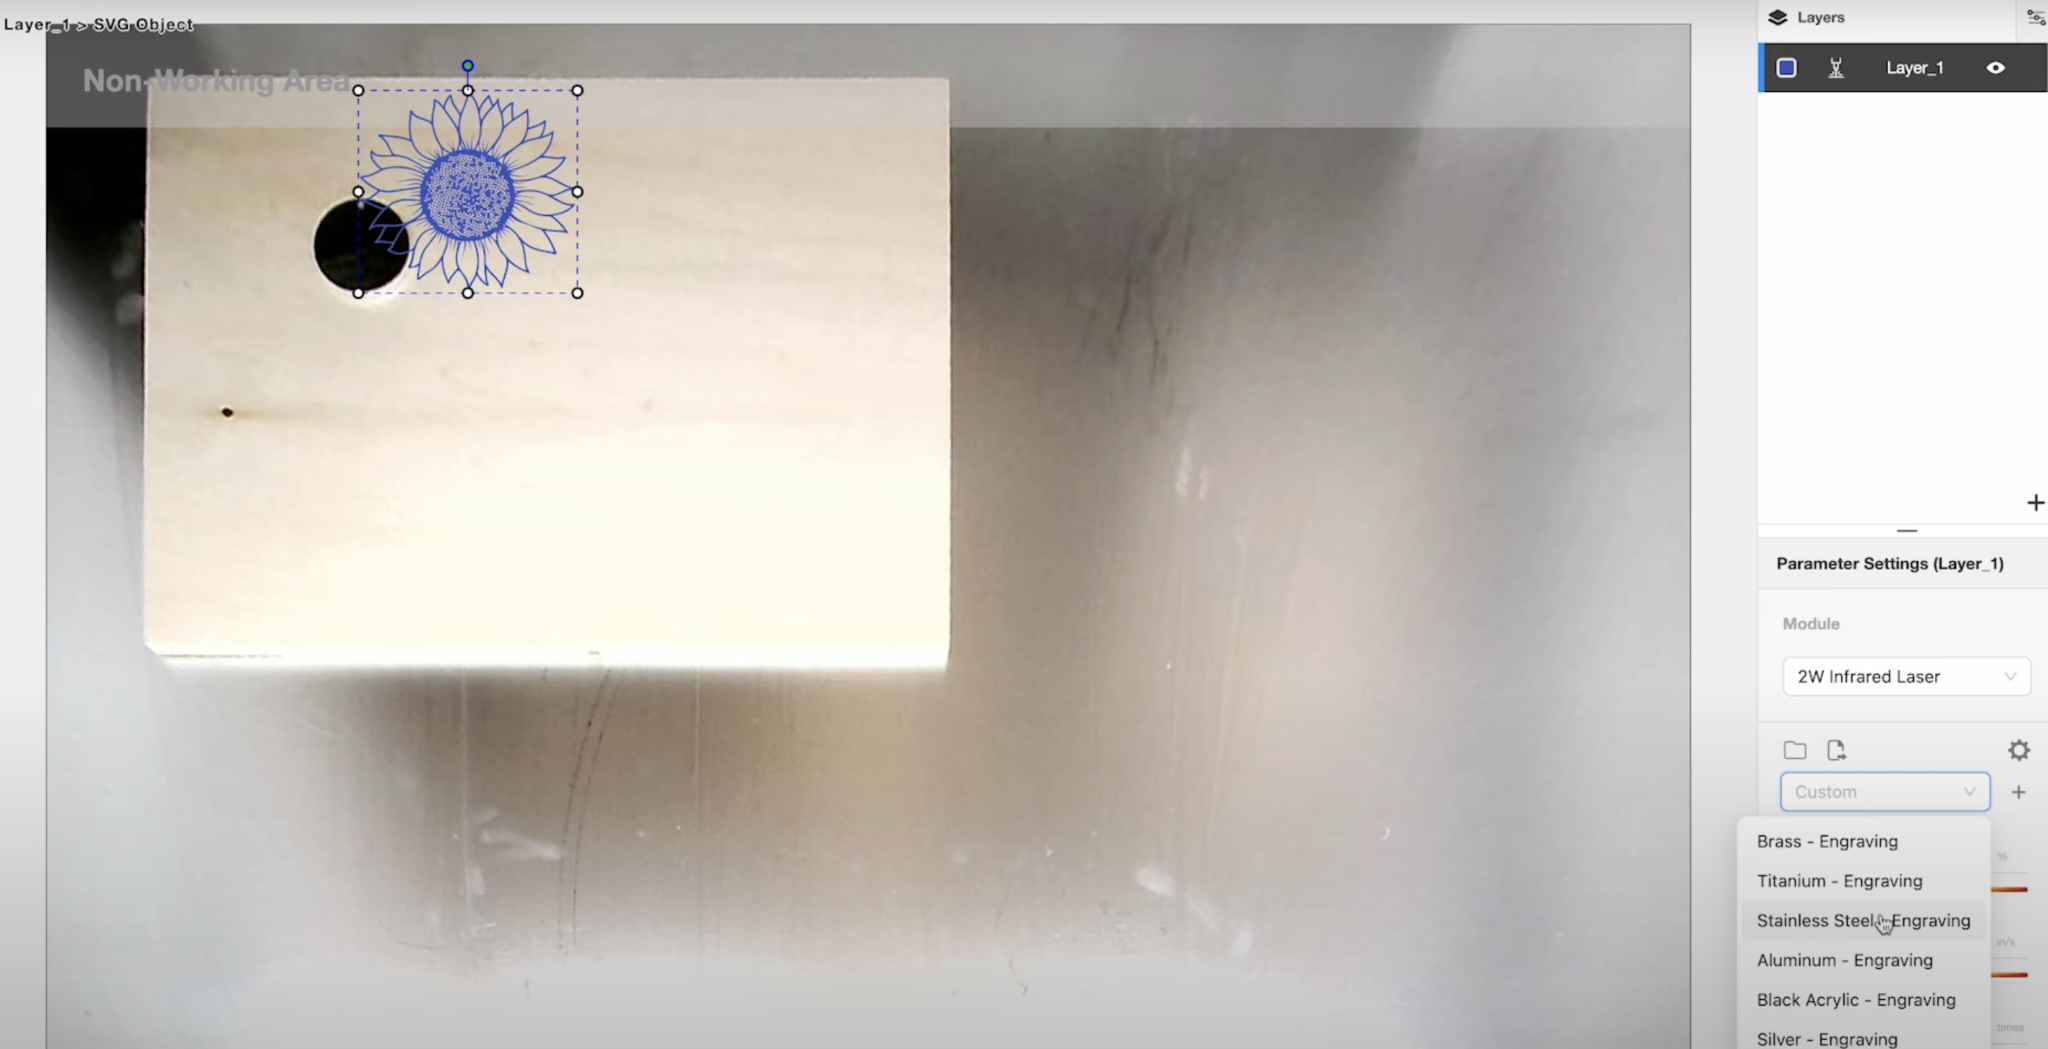
Note: The non-working area inside the laser is larger with the 2-watt infrared laser head. Make sure your blank is not in that non-working area.
Step 2: Add Design to Beam Studio
I’m using the same design for this project but I am only doing the engrave layer.
To make it easier to see the design on the dark silver blank, you can change the color of the layer. The color does not matter because we’re engraving this blank.
Resize the design so it fits right on the jewelry charm and then we’re ready to engrave.
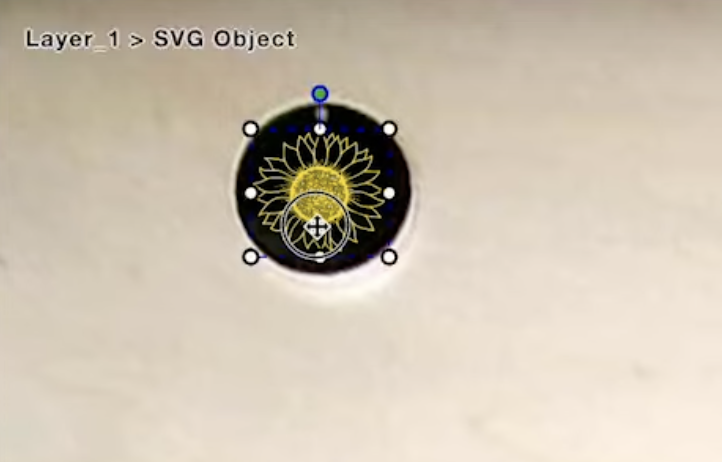
Step 3: Start Laser and Engrave
Close the lid on the laser and click the Process button to begin.
Note: Anytime you change the laser head you’ll get a notice to run some type of calibration.
Once the process is complete, lift the lid and remove your charm from the machine.
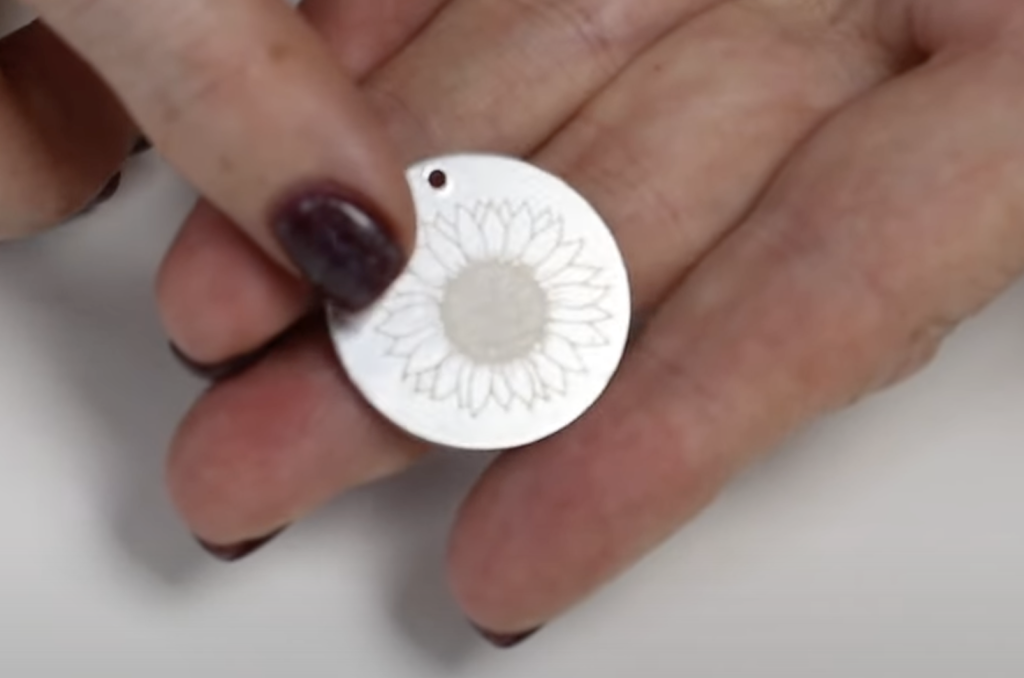
The 2-watt infrared laser did a great job on this small stainless steel charm. You may notice that the design is a little off-center, I think doing more calibration will help solve that problem in the future.
Add the Riser to the Laser
For my next project, I am going to use the rotary accessory. To use the rotary accessory, you need to have the riser base added to the laser.
To add the riser, remove any laser or printing module that’s installed in the laser.
Use a screwdriver to remove the metal base inside the Ador and then you can remove the base by lifting the laser to slide it out.
Place the riser base on the table and set the laser on top. There are holes in the riser base and the legs of Ador will fit inside the holes.
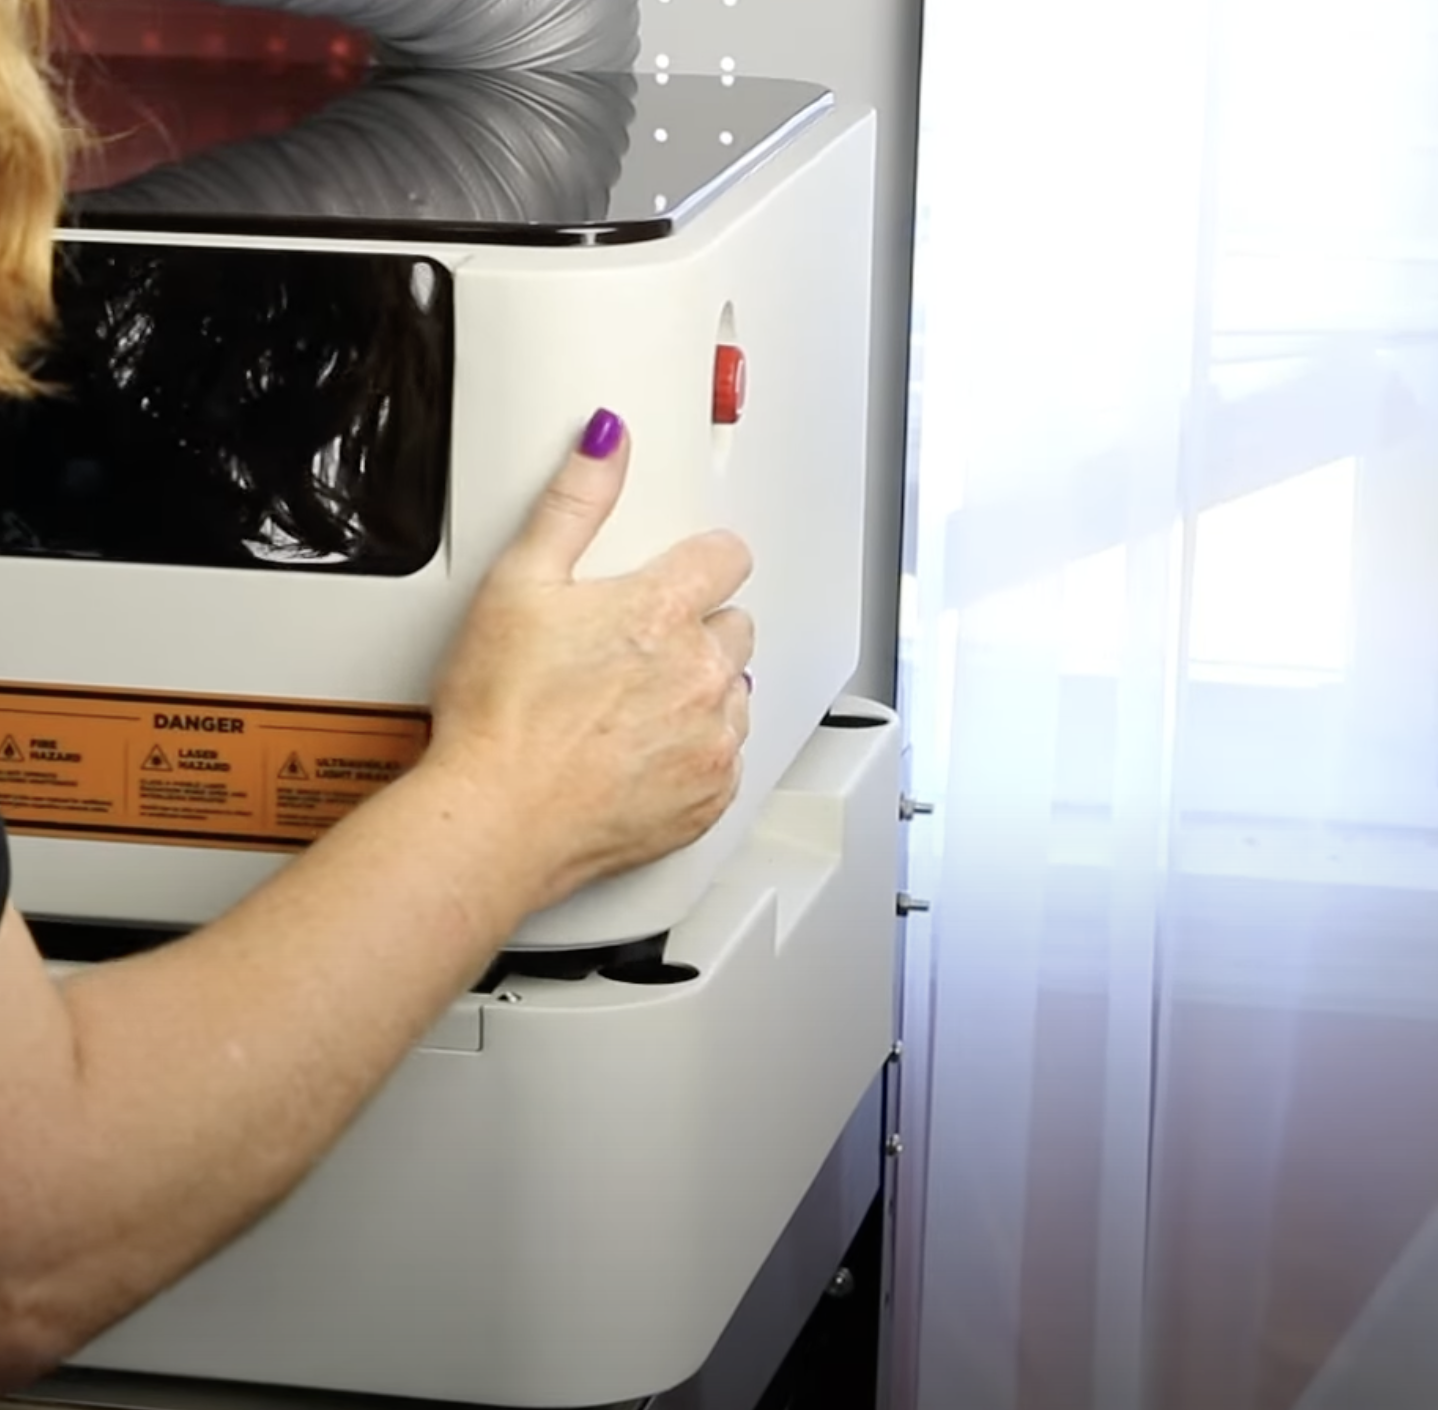
There is a height indication inside the base, you want it on the same side as the touchscreen. Once you have this installed, you’re ready to use the laser with the rotary accessory.
Inside the riser, there is an indicator for the height on the side. Place the honeycomb tray inside the riser base and match it to the height of your blank. Make sure the tray sits on the pins in all four corners.
You can use the honeycomb tray and riser base at any time, even if you’re not using the rotary accessory.
Flux Ador Laser Rotary Accessory
Let’s look at all the pieces that come with the Rotary accessory. The large piece is the roller assembly and the smaller piece is the secondary support. This piece supports the end of the blank you’re using.
Note – the small level did not come with the rotary accessory but I do recommend having one on hand.
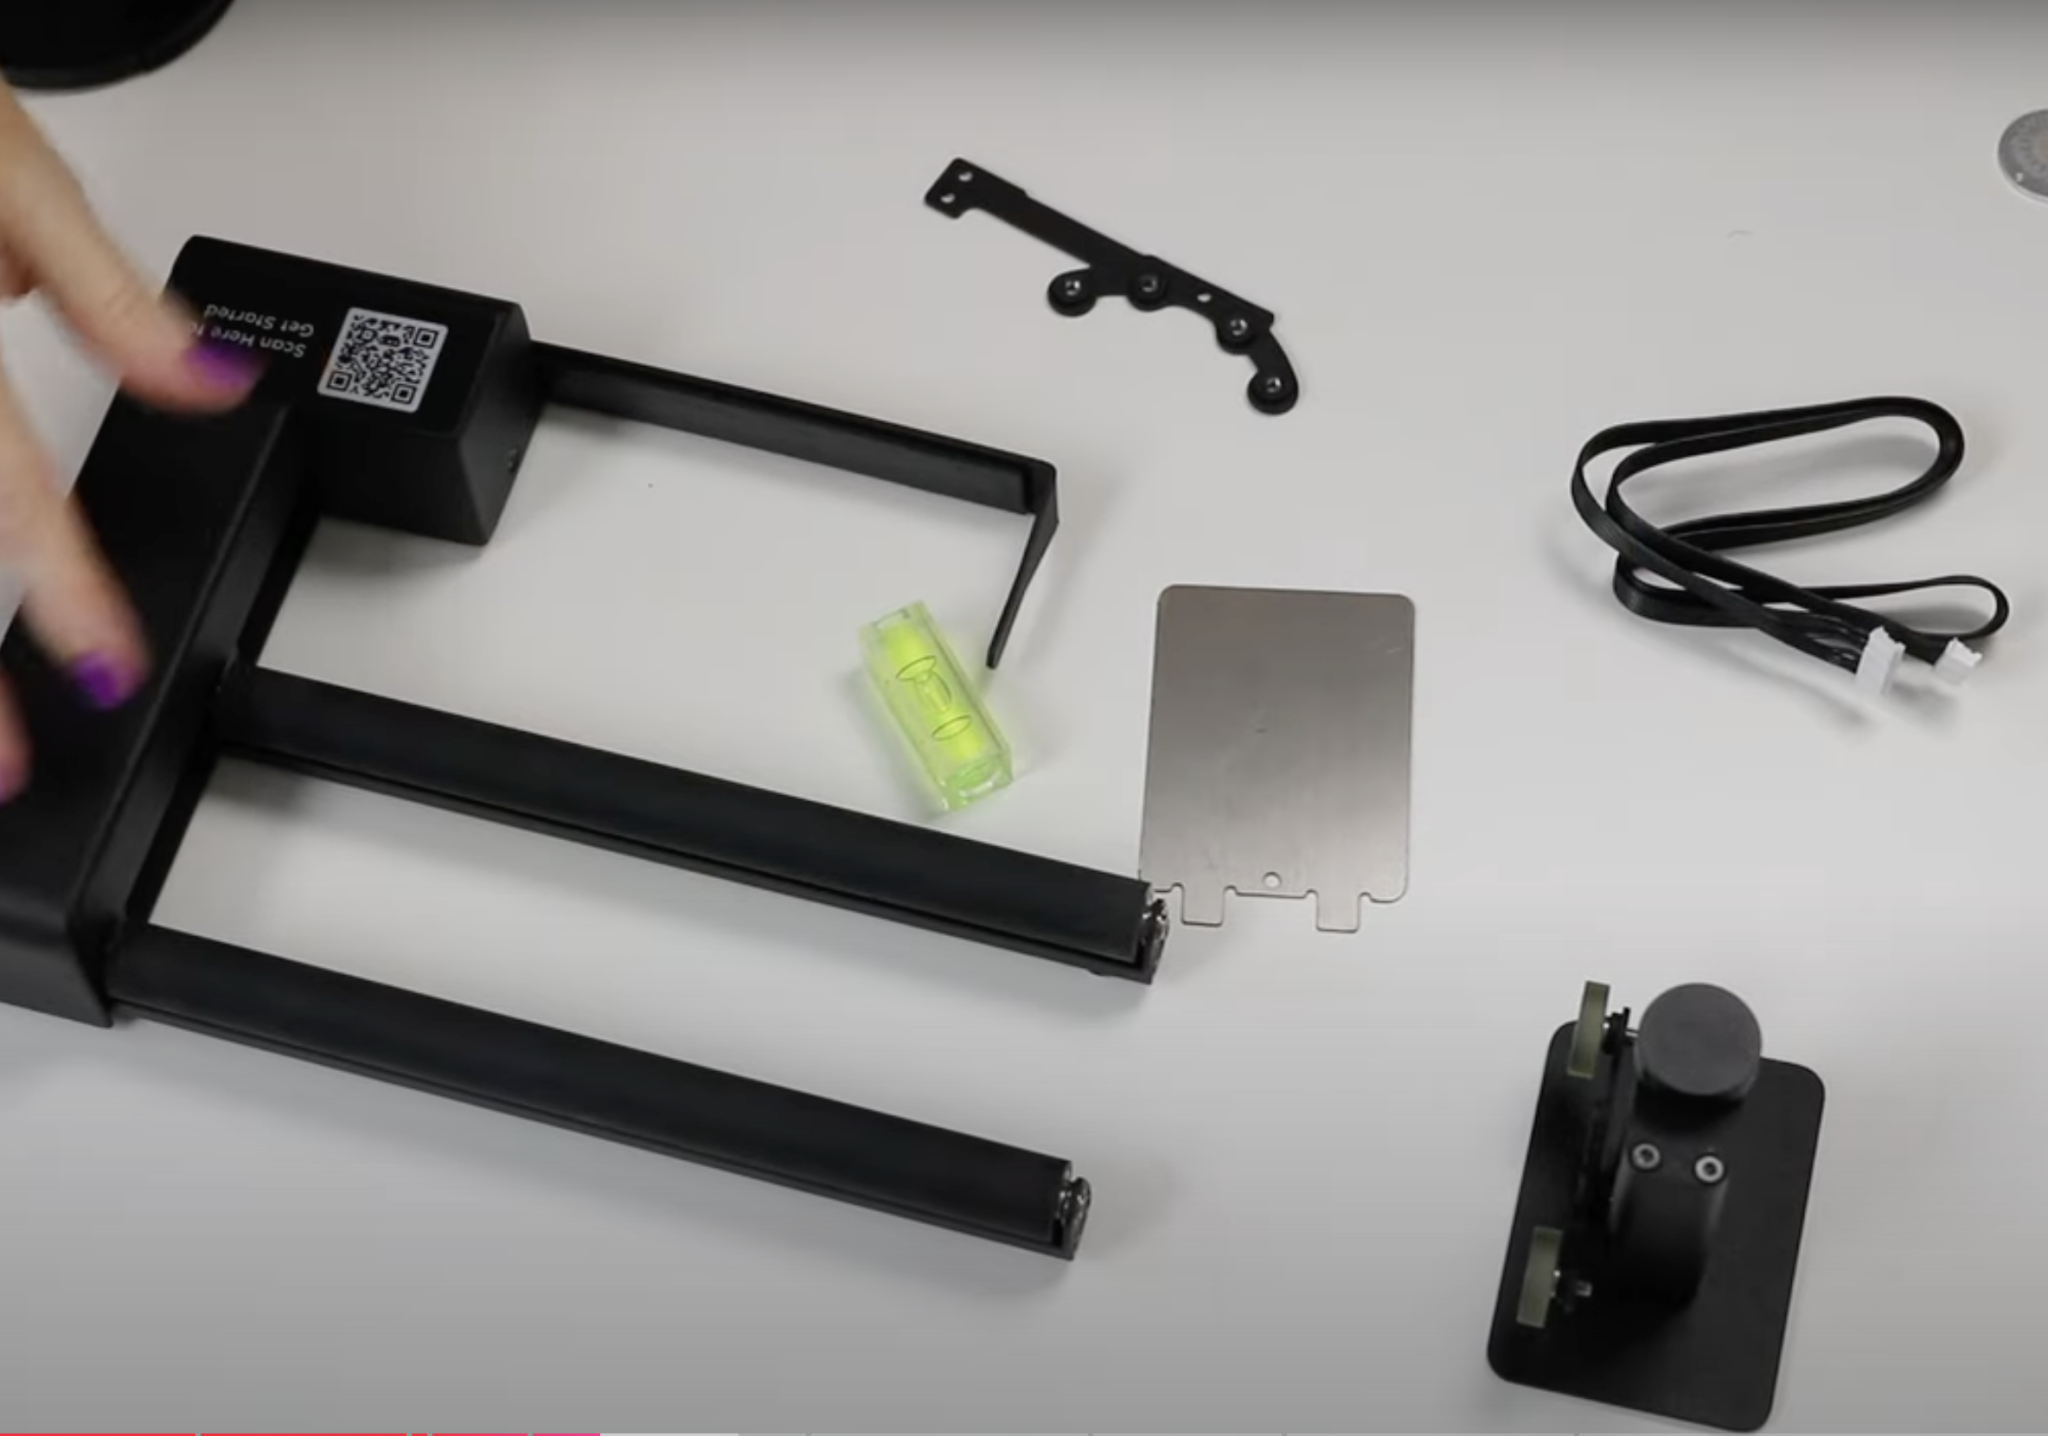
There is a bracket that has magnets along it and another small piece that will allow you to change the secondary support for blanks like wine glasses.
There is a small metal plate that you’ll use if you’re using the printing module, a cord for attaching the rotary accessory to the laser, and an Allen wrench.
How to Add a Tumbler to the Rotary Assembly
If you’re using a straight cylindrical object, you would only need the roller assembly. If you’re using a blank that is tapered, you’ll need both the roller accessory and the secondary support.
To adjust the roller assembly press the button on the side and you can widen or narrow the rollers to fit the object.
To adjust the secondary support you will need the Allen wrench. You can move the wheels closer together or further apart as needed.
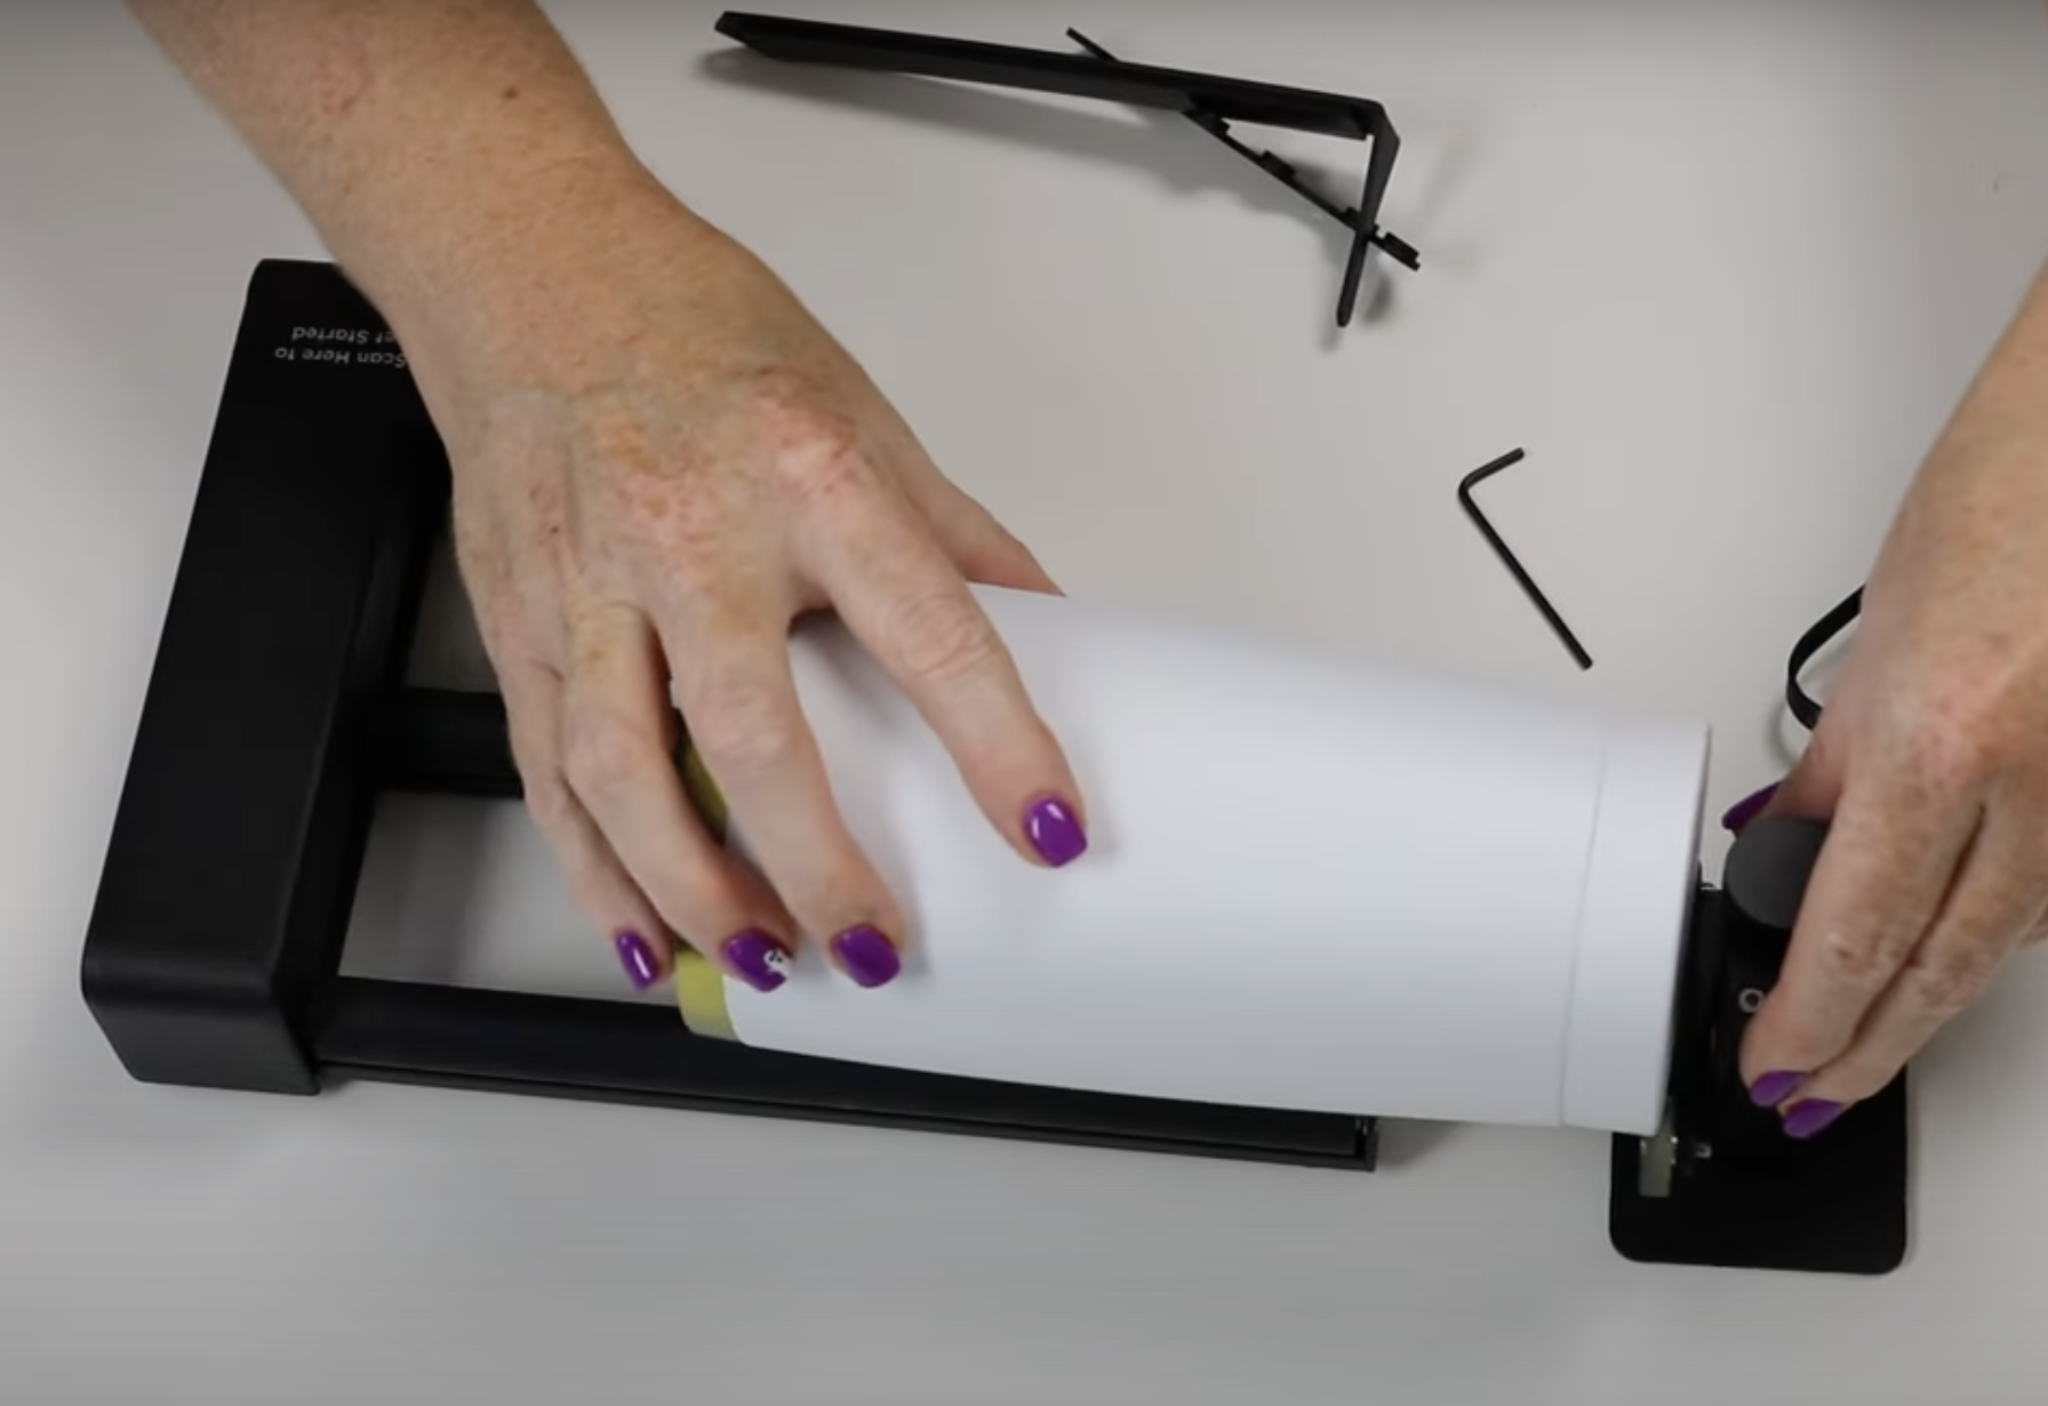
With the tumbler in place use the level to make sure everything is straight. Adjust the roller assembly as needed to level the tumbler. Or use the screw on the secondary support to raise or lower the other end.
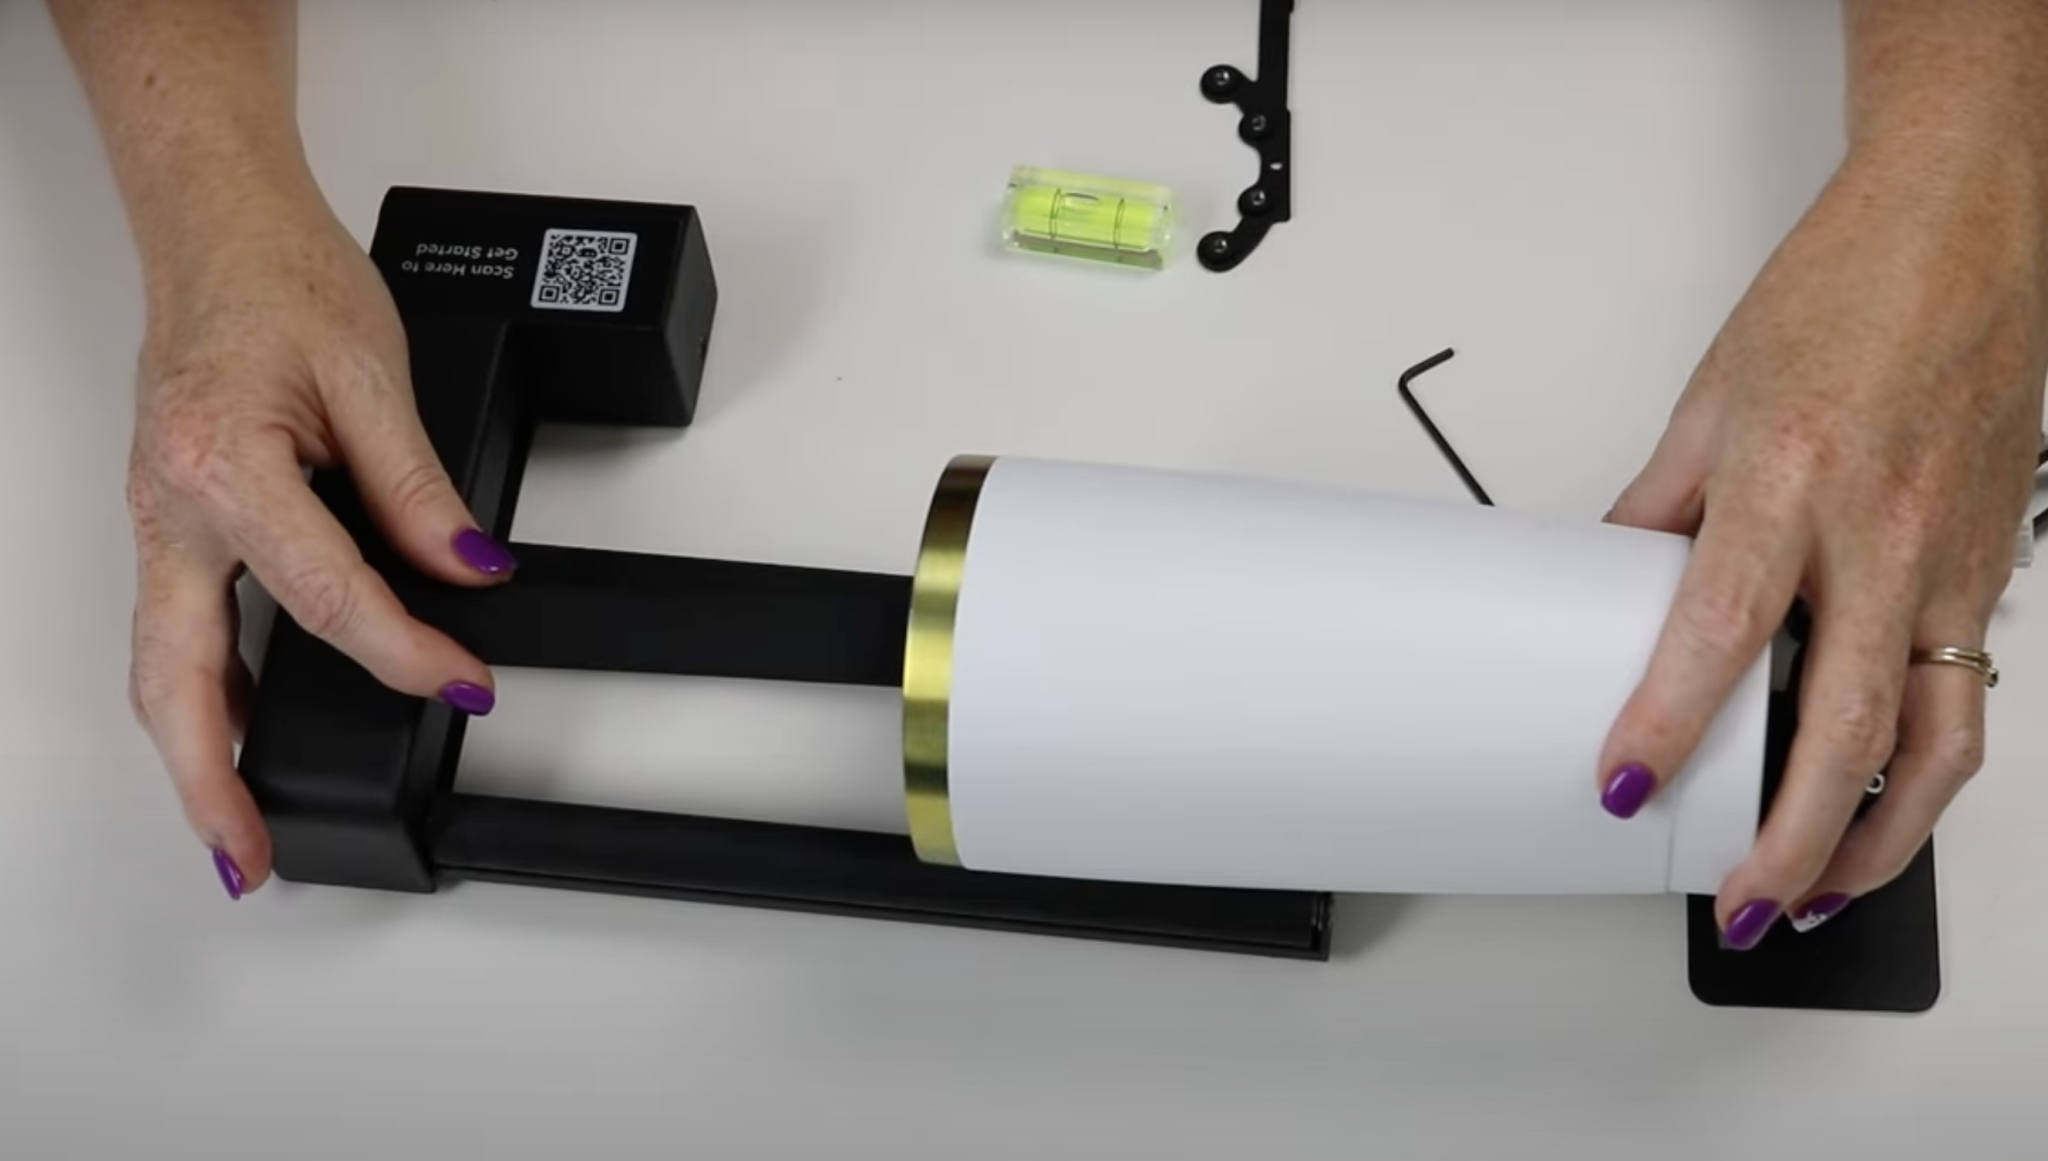
Add the bracket to the rotary assembly. I found with this tumbler it works better to move the tumbler toward the end of the rollers.
The magnets on the bracket hold it in place on top of the roller assembly. Adjust the tumbler and bracket as needed to get everything lined up correctly.
To check that it’s working correctly, turn one of the rollers and watch the tumbler to make sure it looks right. You will have to make adjustments for each blank. Test every blank before you begin to get the best results.
How to Add the Rotary Assembly to the Laser
To use the rotary assembly in the laser, you need to attach it with a cable. Add the cable to the laser following the instructions for the rotary assembly.
The plugin is between the laser and the riser base underneath the machine. The instructions recommend using a mirror to guide you. I used my phone camera to get the cable plugged in. The good news is, you only have to do this once. In the future, you can push the cord out of the way, you don’t have to disconnect it.
The other end of the cable attaches to the rotary assembly. Place the rotary assembly on the honeycomb tray and reinstall the laser head you’re using. I am using the 20-watt diode laser head for my projects today.
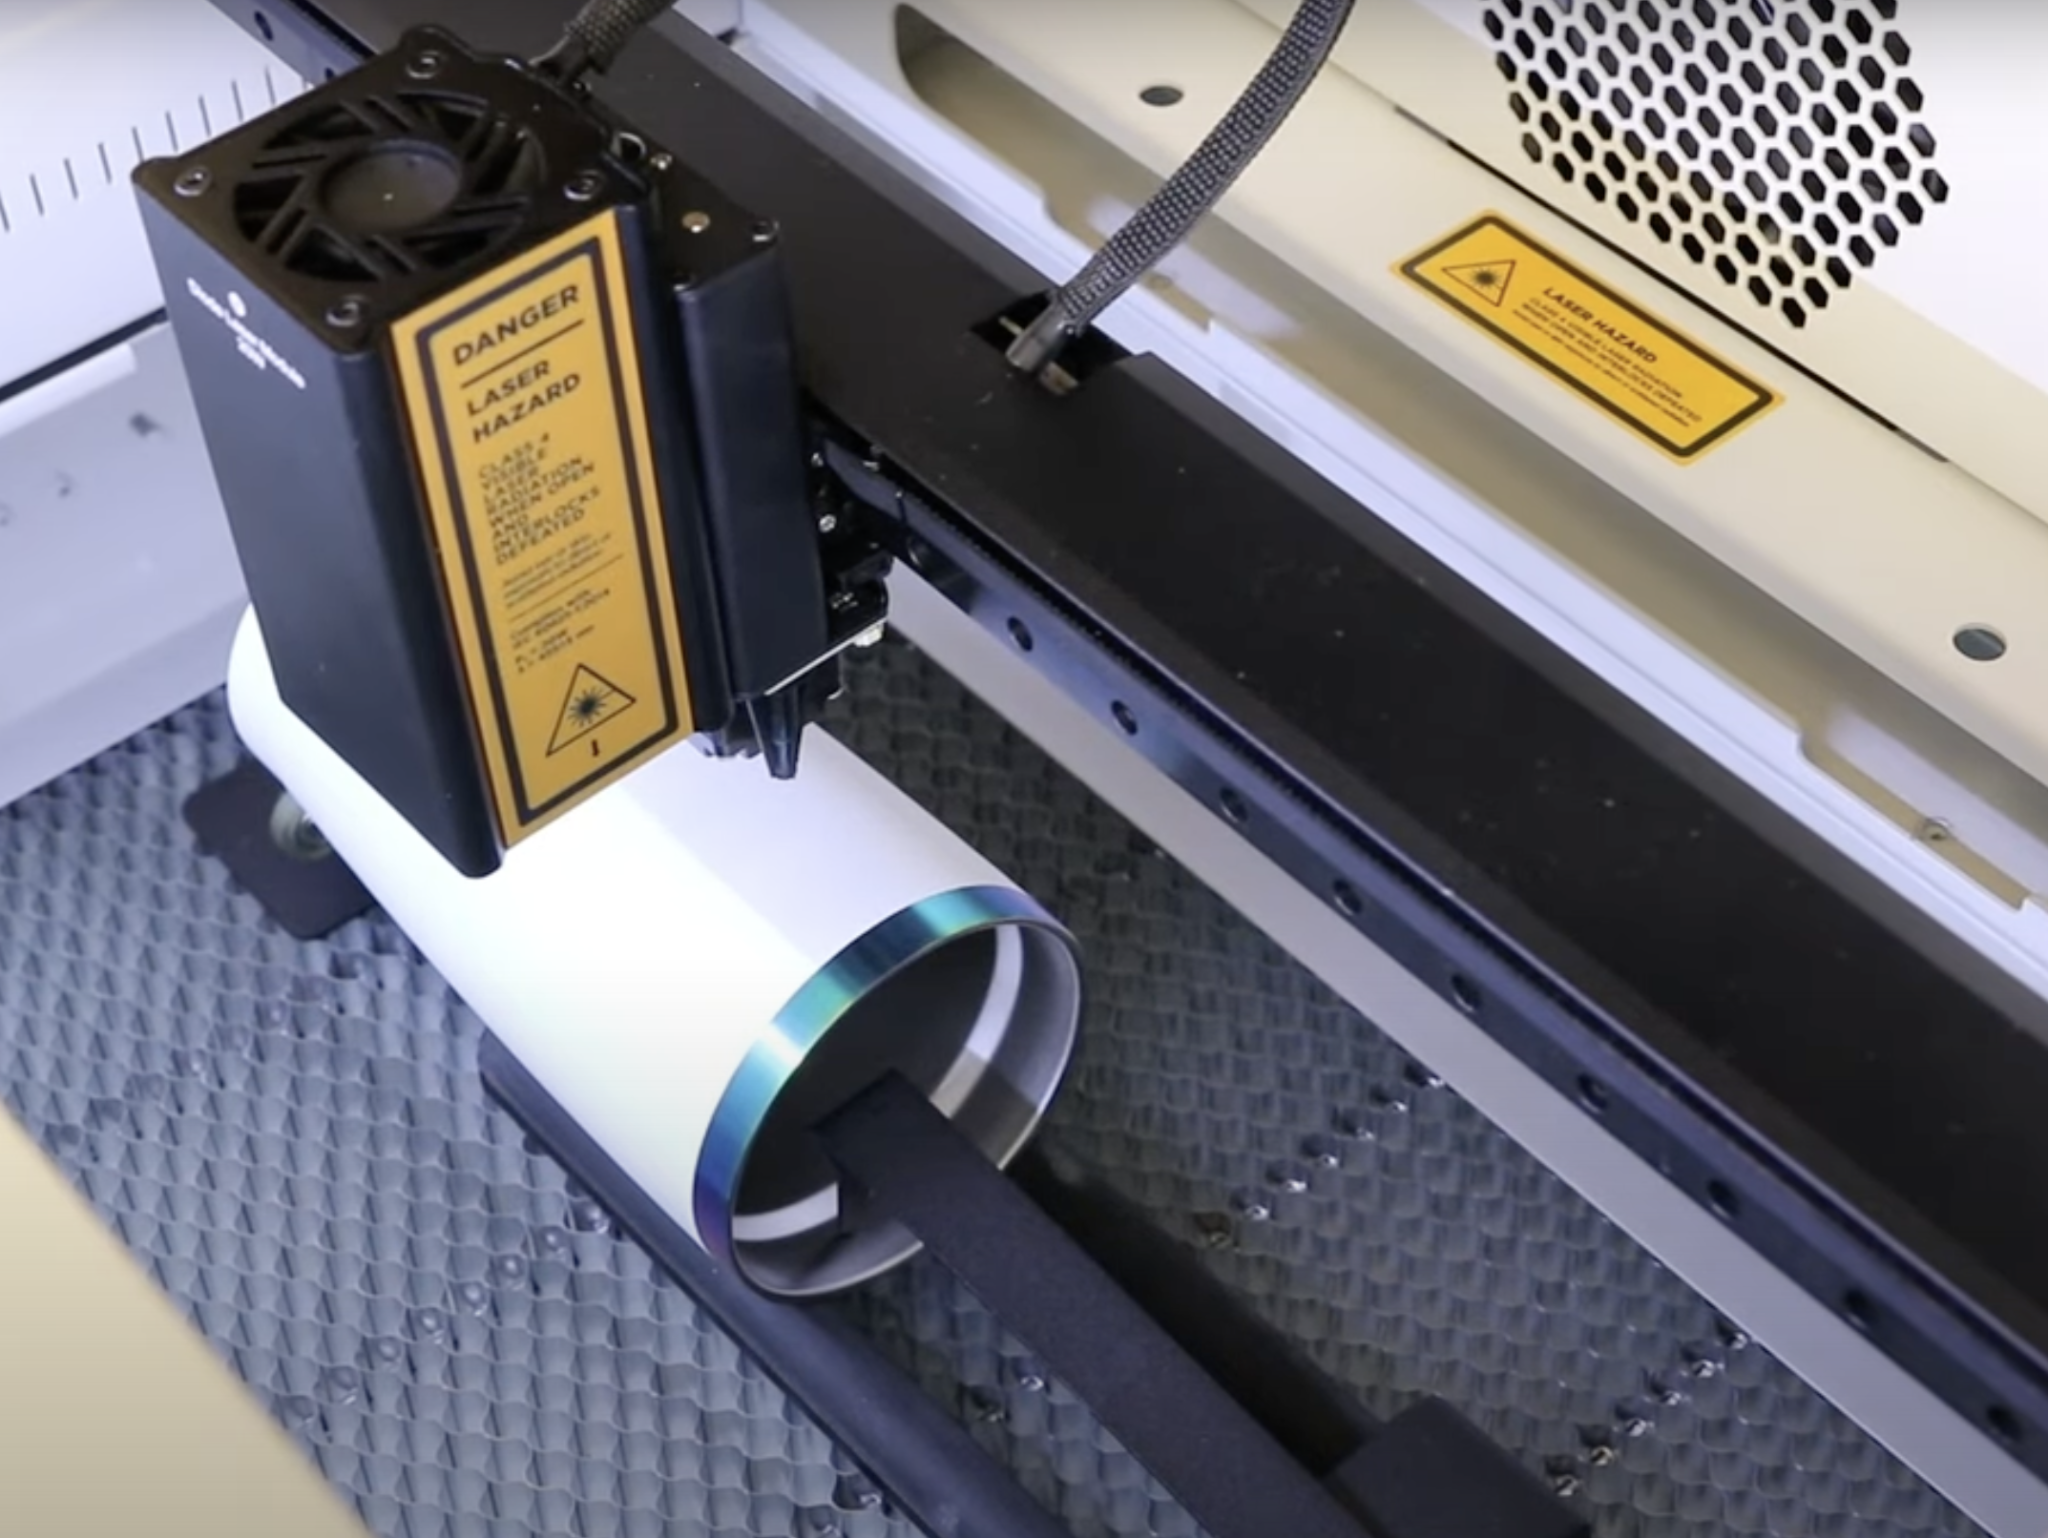
Double-check that the laser head does not hit the blank. Adjust the laser head using the front control panel. If you need to, move the honeycomb tray down to give the laser head room to move.
How to Engrave Tumblers with the Flux Ador Laser
Now that you have the riser base and the rotary assembly, we can use the laser to engrave a tumbler.
Step 1: Install Tumbler and Auto Focus the Laser
Add the rotary assembly and tumbler inside of the laser. Repeat the steps for making sure the tumbler is level and that is doesn’t move when rotated.
Then move the laser head over the part of the tumbler you want engraved. Hold down the AF button so the laser can auto-focus.
Step 2: Add Design to Beam Studio
I am using the same sunflower design I have used on the other projects. I am going to add text to the design using the text button in Beam Studio. Choose the font you want and then move the text where you want it on the design.
I added my name and centered it under the sunflower. Make sure the text and sunflower are on the same layer.
To use the Rotary tool, click Edit, Document Settings, and turn Rotary to on. If you wanted to use the pass through, you’d select that here too. Click Save and then click the camera to get an inside view of the laser with the tumbler inside.
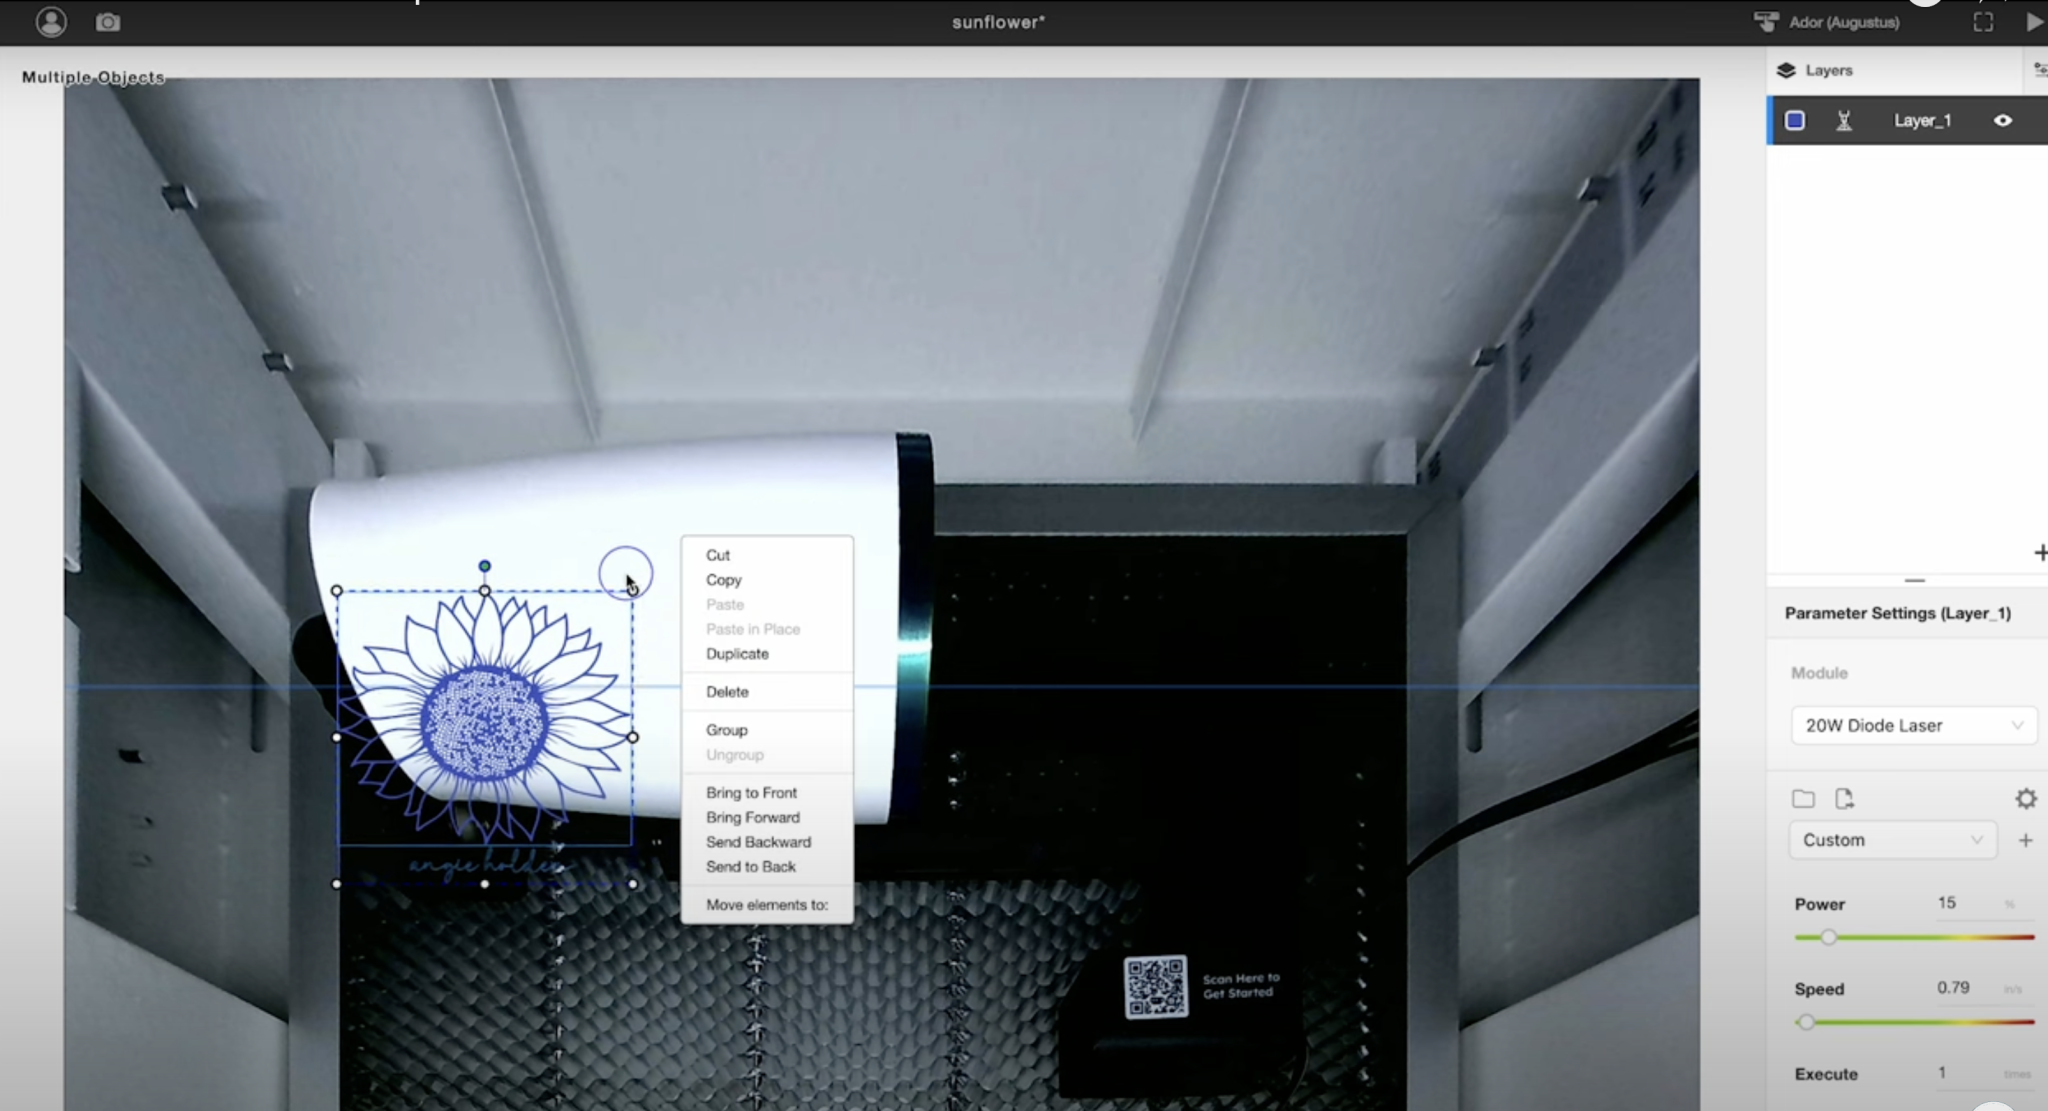
The camera inside the laser is a fisheye lens and it will distort the tumbler. Here I can select both pieces of the design and rotate it so I can locate it where I want on the tumbler.
Depending on where the blank is located inside the laser the distortion will change. I moved mine so the top edge was not distorted so I could make sure the design was straight.
Another option is to use the Frame button in Beam Studio. The laser head will move Home and then it will show you where it’s going to engrave on the tumbler.
You do need to tell the laser where the center of your tumbler is. Because I was able to get the top end of my tumbler straight I could easily find the center. If you needed to you could add a piece of tape to the center of the tumbler to help you line it up exactly.
Move the line in Beam Studio to the center of your tumbler.
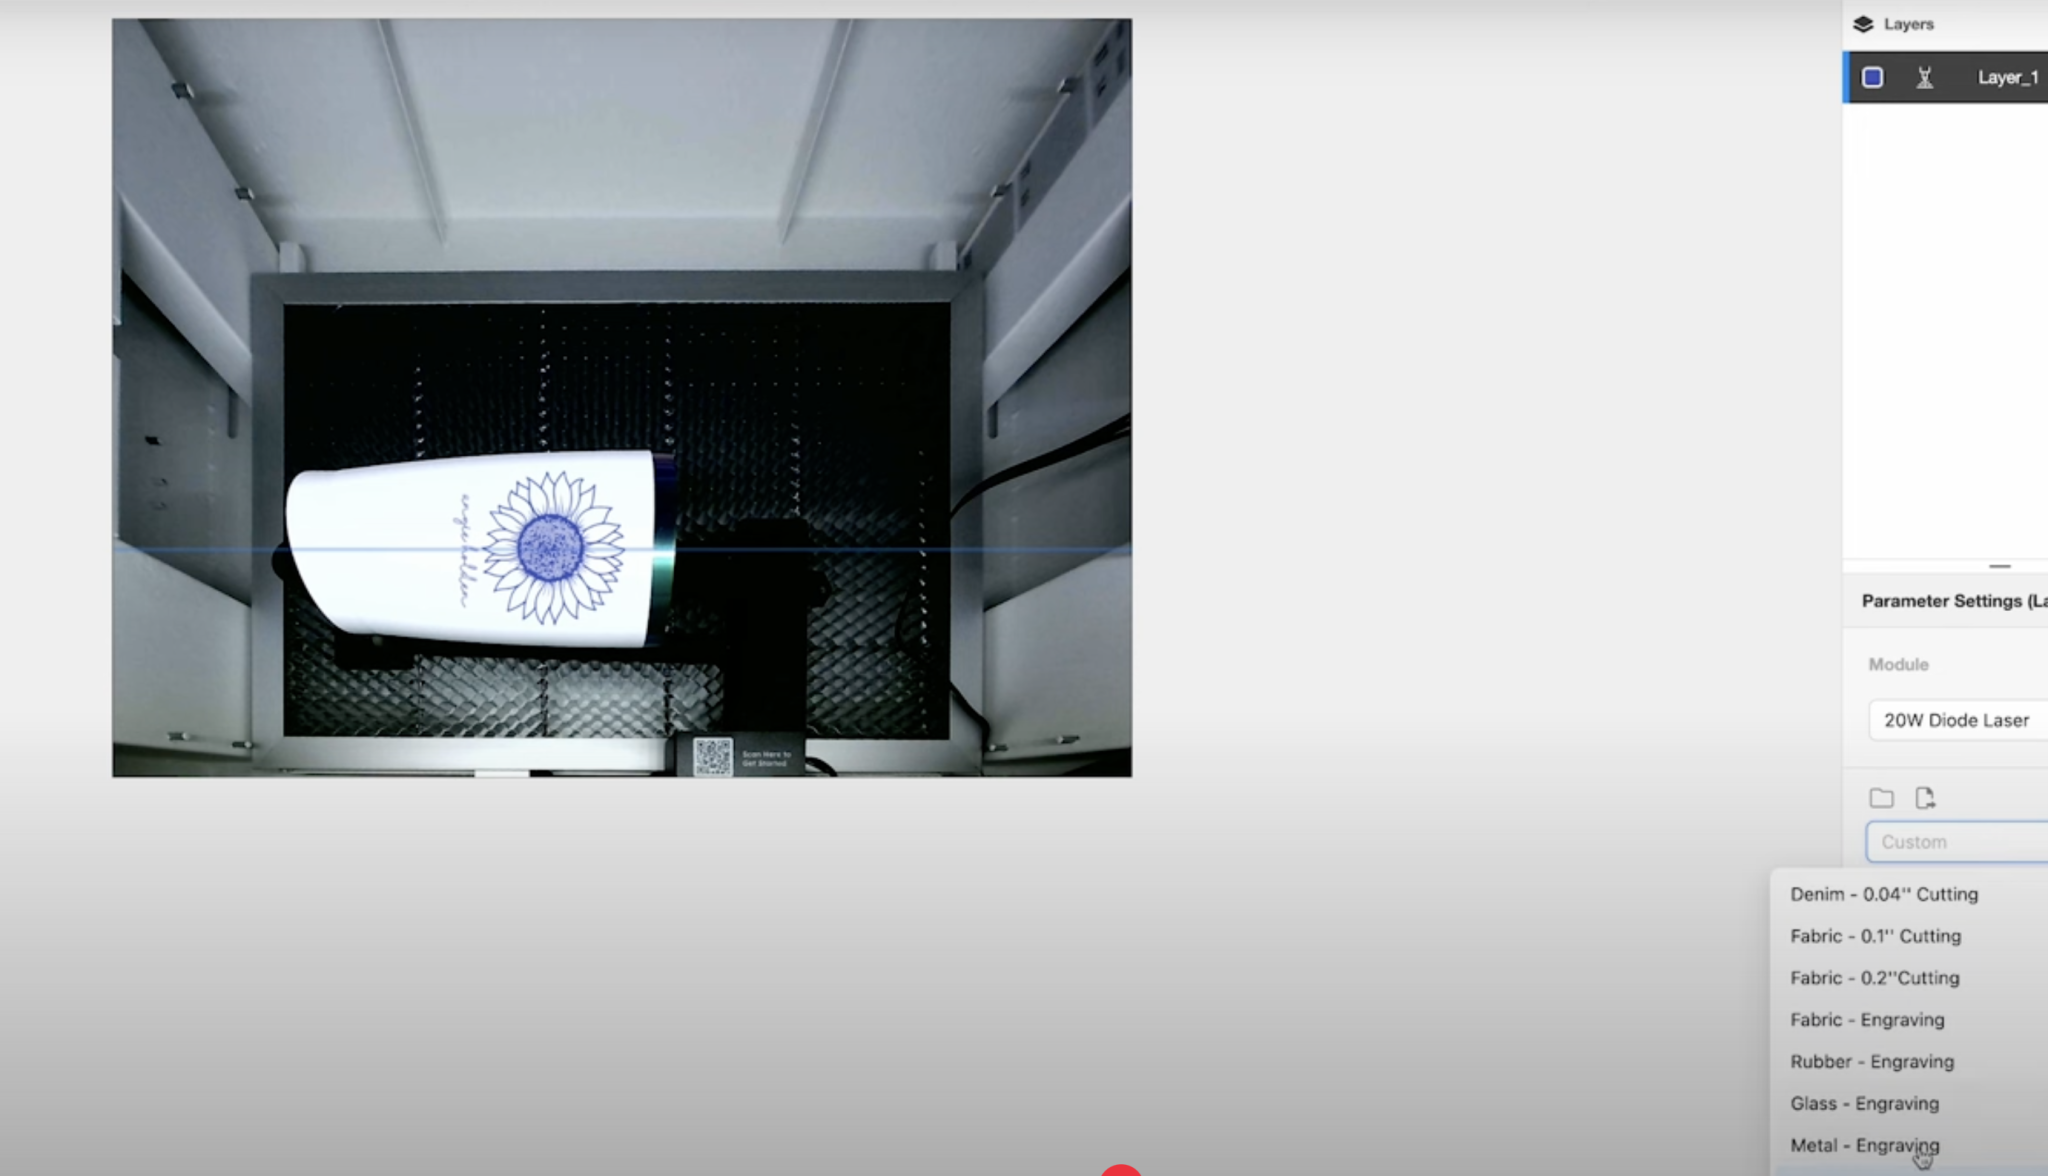
Step 3: Engrave Your Tumbler
When you’re happy with the location, make sure the settings are correct. I am using the 20W Diode laser and am doing metal engraving.
I am trying a Power of 65 and a Speed of 4 for this tumbler. With everything set up correctly, click the Play button in Beam Studio to start the process.
When the laser is complete, lift the lid and remove the tumbler.
You may need to clean the tumbler because it may have charring on it.
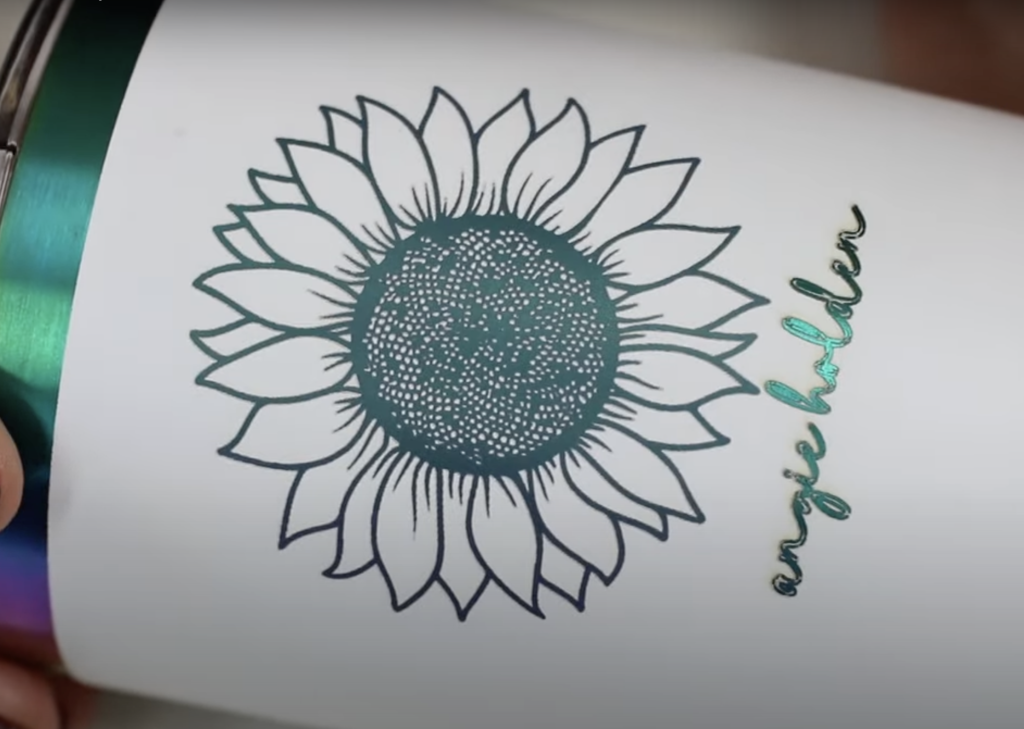
After cleaning the tumbler it looks great. This tumbler has a holographic under it and that is exposed when the white is engraved away.
These settings worked great with this tumbler and I love the way the holographic looks with the white.
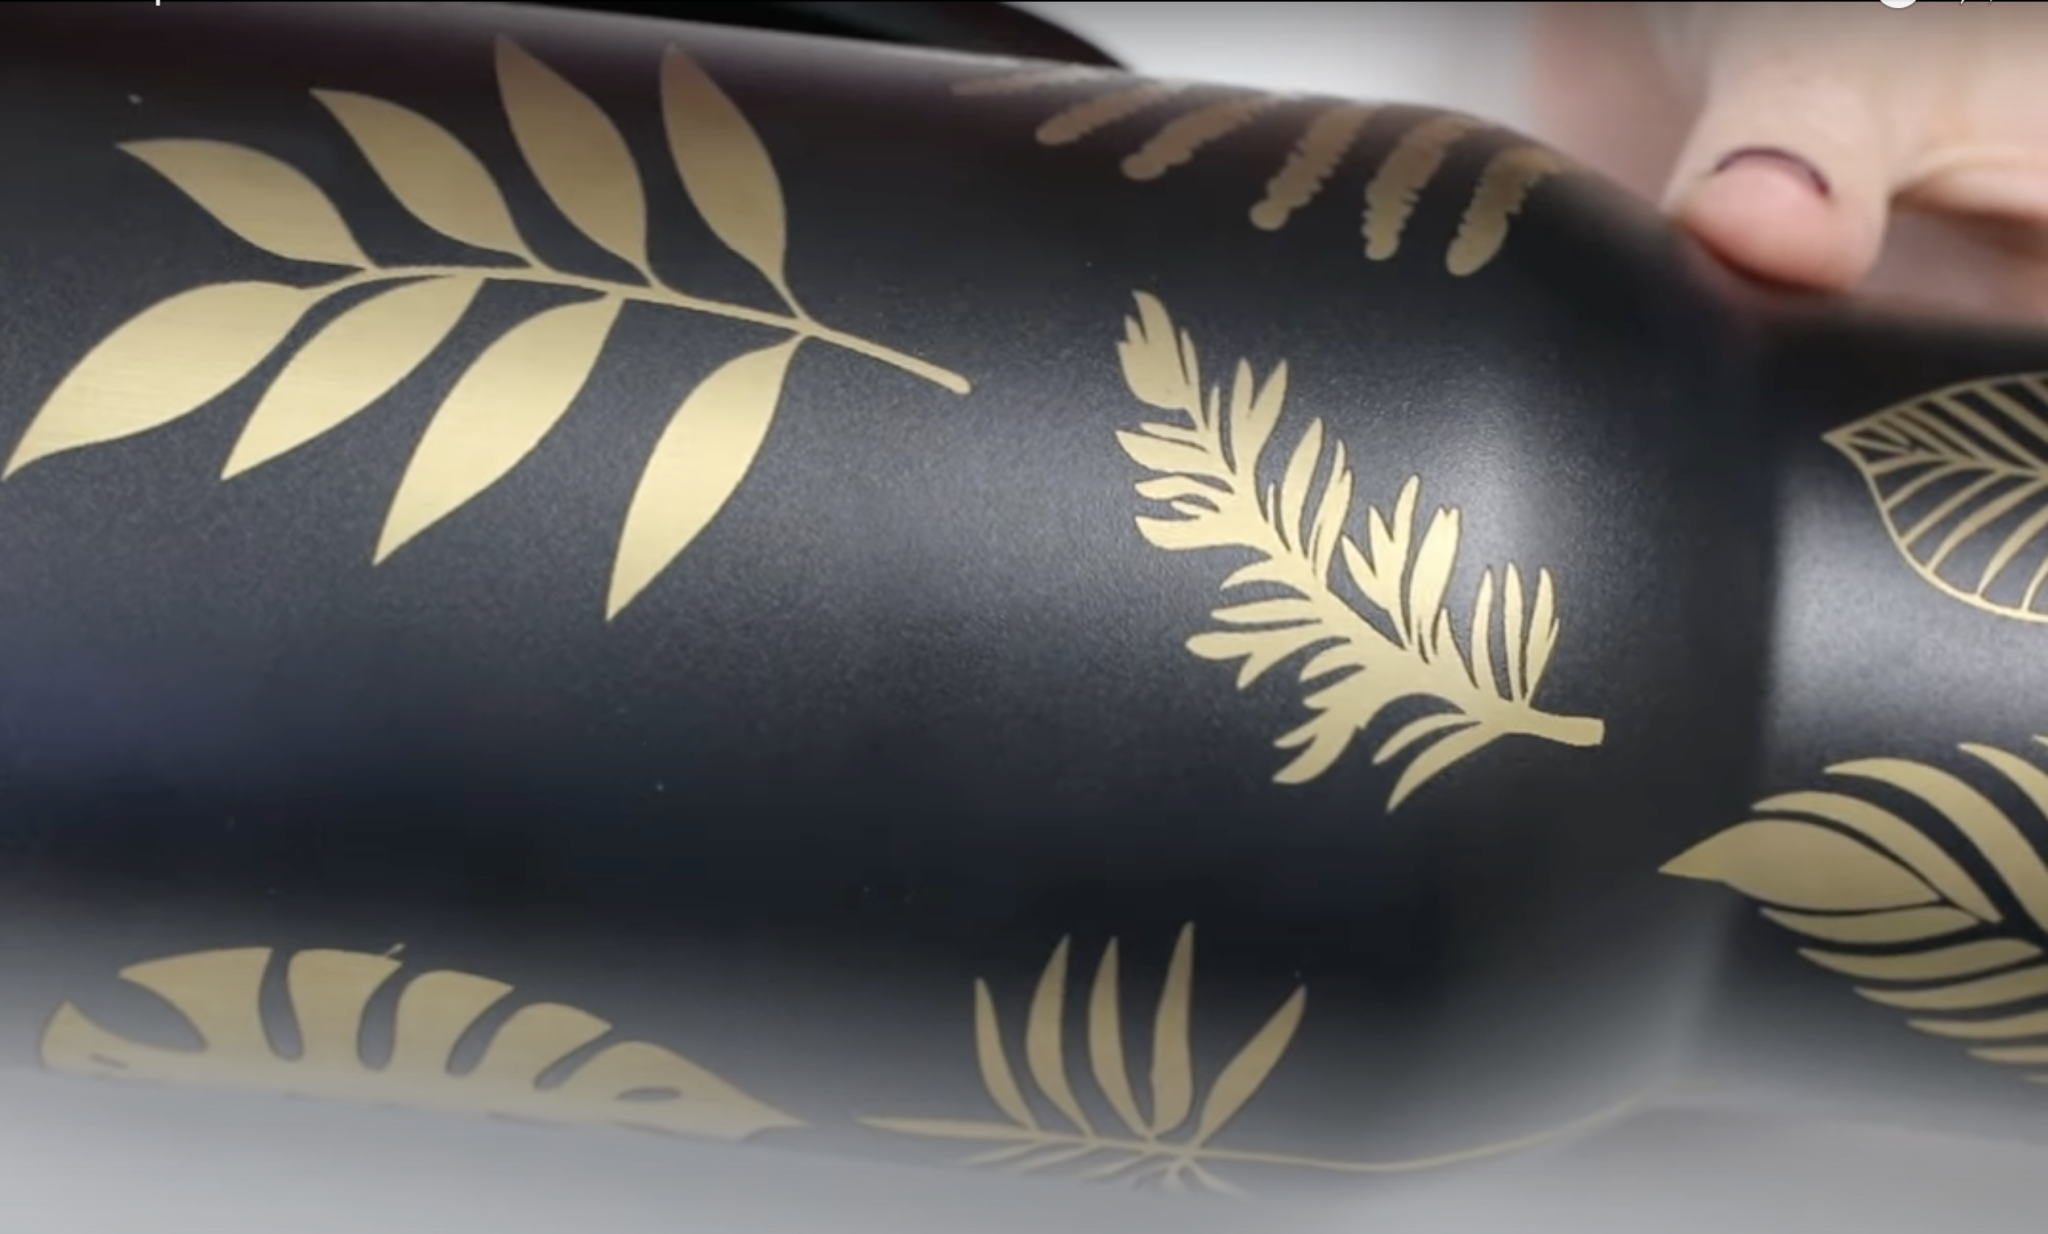
The second tumbler I made is black with gold undercoating. This tumbler is 40 ounces, I wanted to test how the rotary assembly would do with a larger tumbler and it worked really well.
I did have to work to get the surface level and the settings right but it is possible even with larger tumblers.
How to Use the Flux Ador Print Module
Next, I am using the Print module and the laser head for engraving.
Step 1: Install Print Module
Switch the laser head for the printing module the same way we changed the other laser heads.
NOTE: Anytime you install a new module for the first time, you will have to calibrate it by following the on screen instructions.
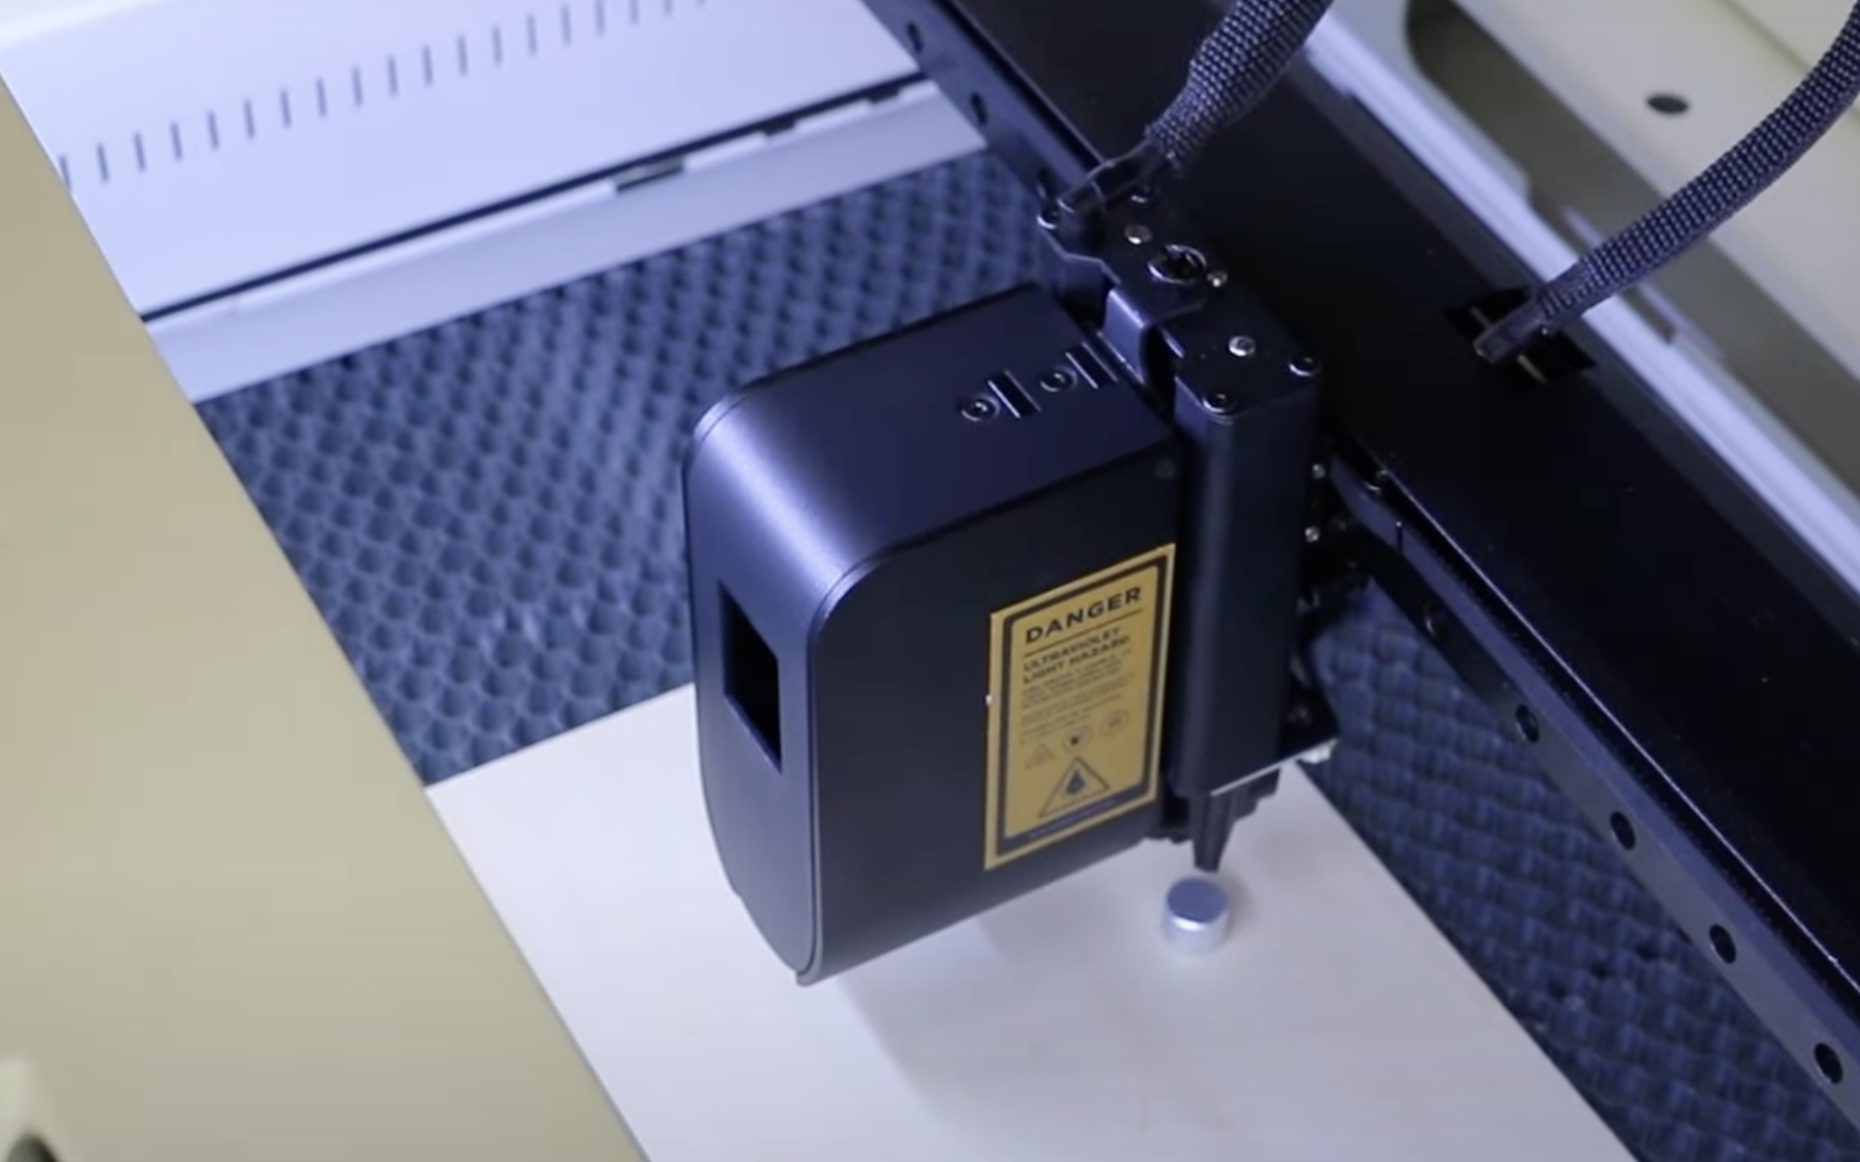
NOTE: A print test is NOT required every time but it a good test for your first time using this module.
To run a print test, I am using a scrap piece of wood placed on the honeycomb tray at its highest setting.
Step 2: Auto Focus the Print Module
The printer module comes with a small focus block. You need to use this focus block when doing the auto-focus.
Place the focus block on the wood then line up the probe with the print block and press the auto-focus button. The front display will pop up a caution to remind you to have the focus block installed. When it’s done auto-focusing you can remove that block.
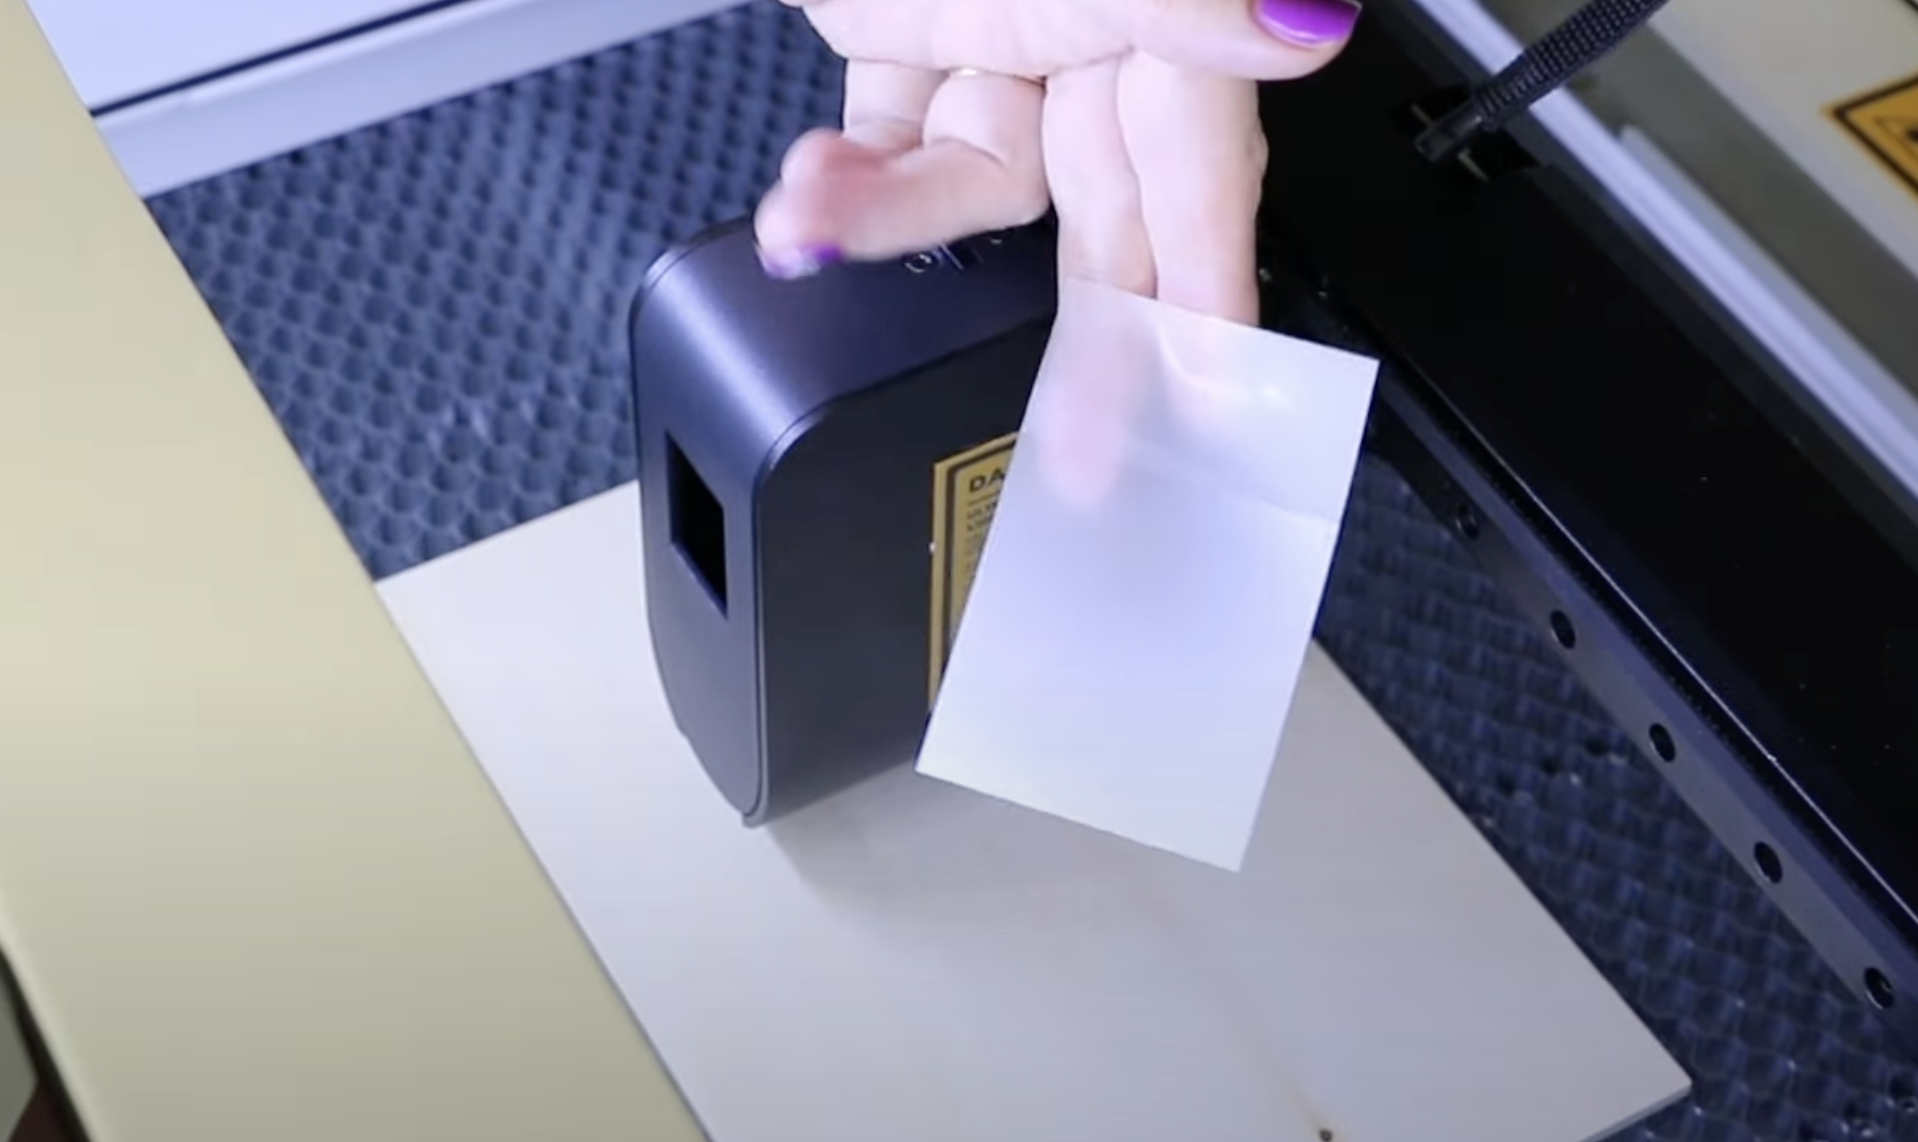
With the printing module, you will also receive priming stickers. Place the sticker away from where you will print, the Ador will prime the print head on this sticker first.
Step 3: Install Print Cartridge
To use the printer module you’ll load each color individually. This is a four-color CMYK system, I am using Magenta for the test.
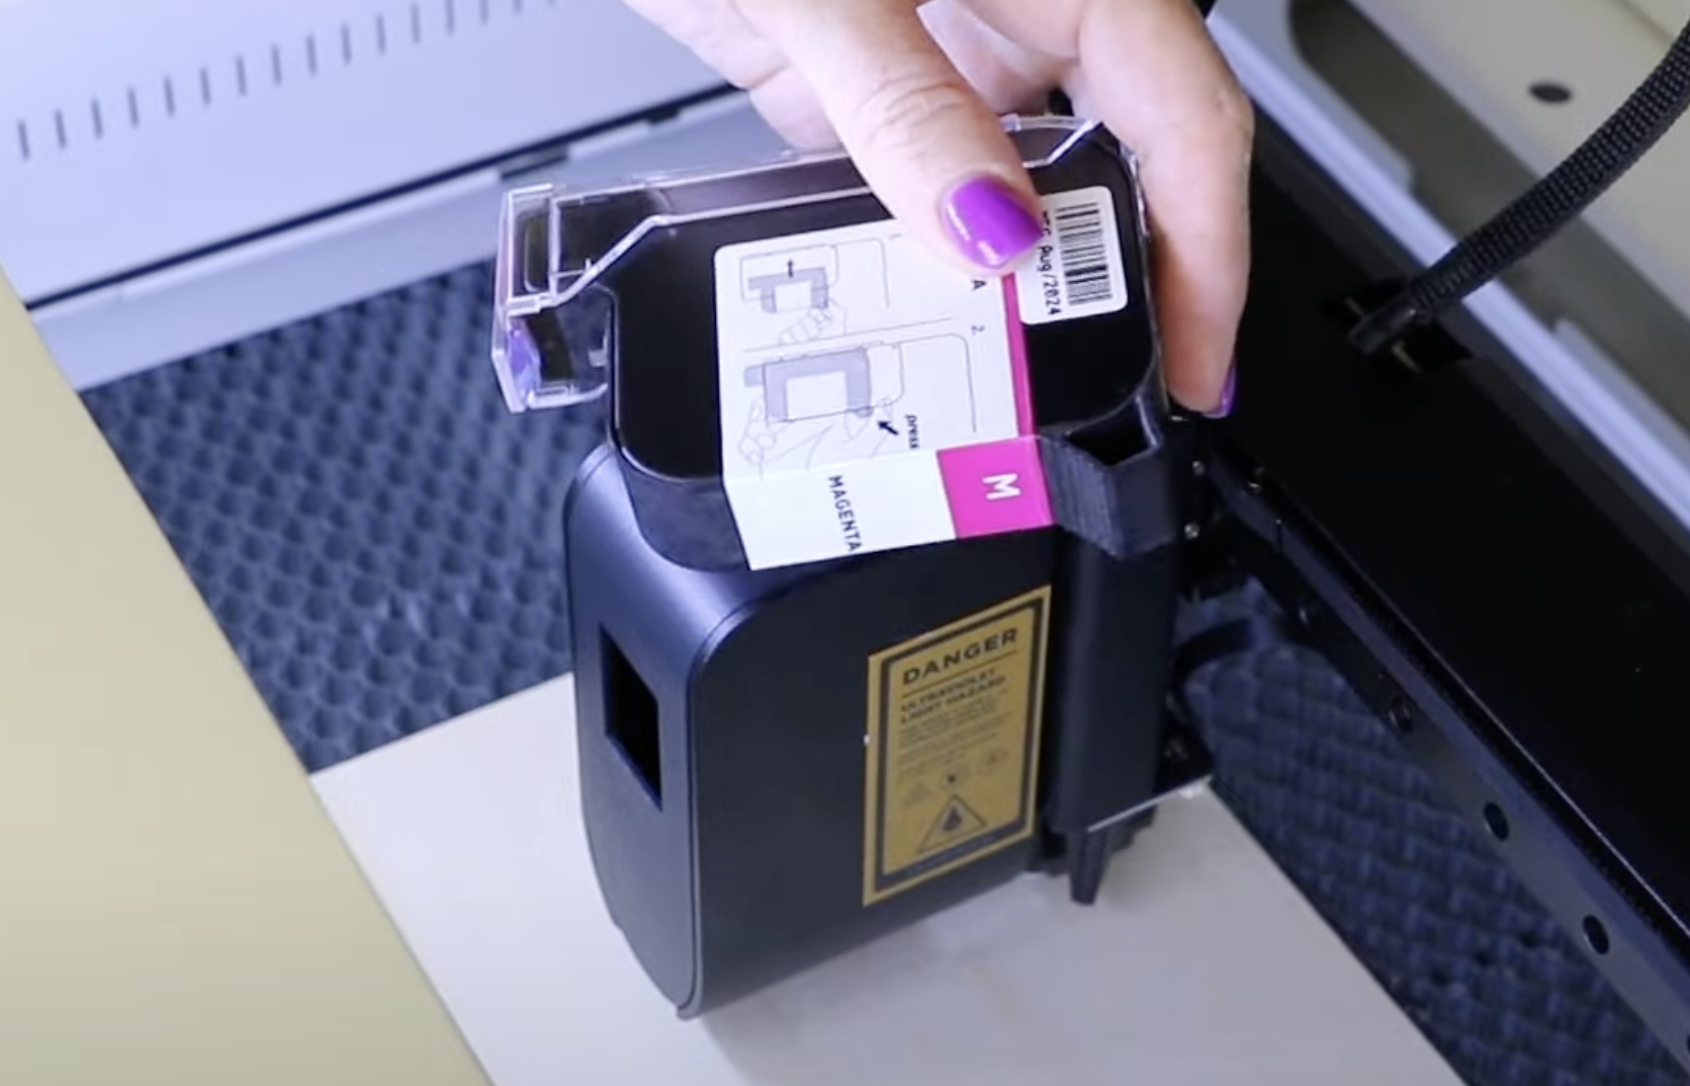
Remove the ink cartridge from the box, shake it gently, and remove the protective clip. Clean the print head with a lint-free wipe and 99% alcohol. A lint-free wipe comes with the printer cartridge. Clean the cartridge in one direction swiping it a few times.
Open the front of the carriage, add the ink cartridge into place, and close the carriage. The front cover should close completely.
Step 4: Set Up Your Design
Within Beam Studio there is an example file, locate the design on the scrap wood, and move the priming image over the priming sticker.
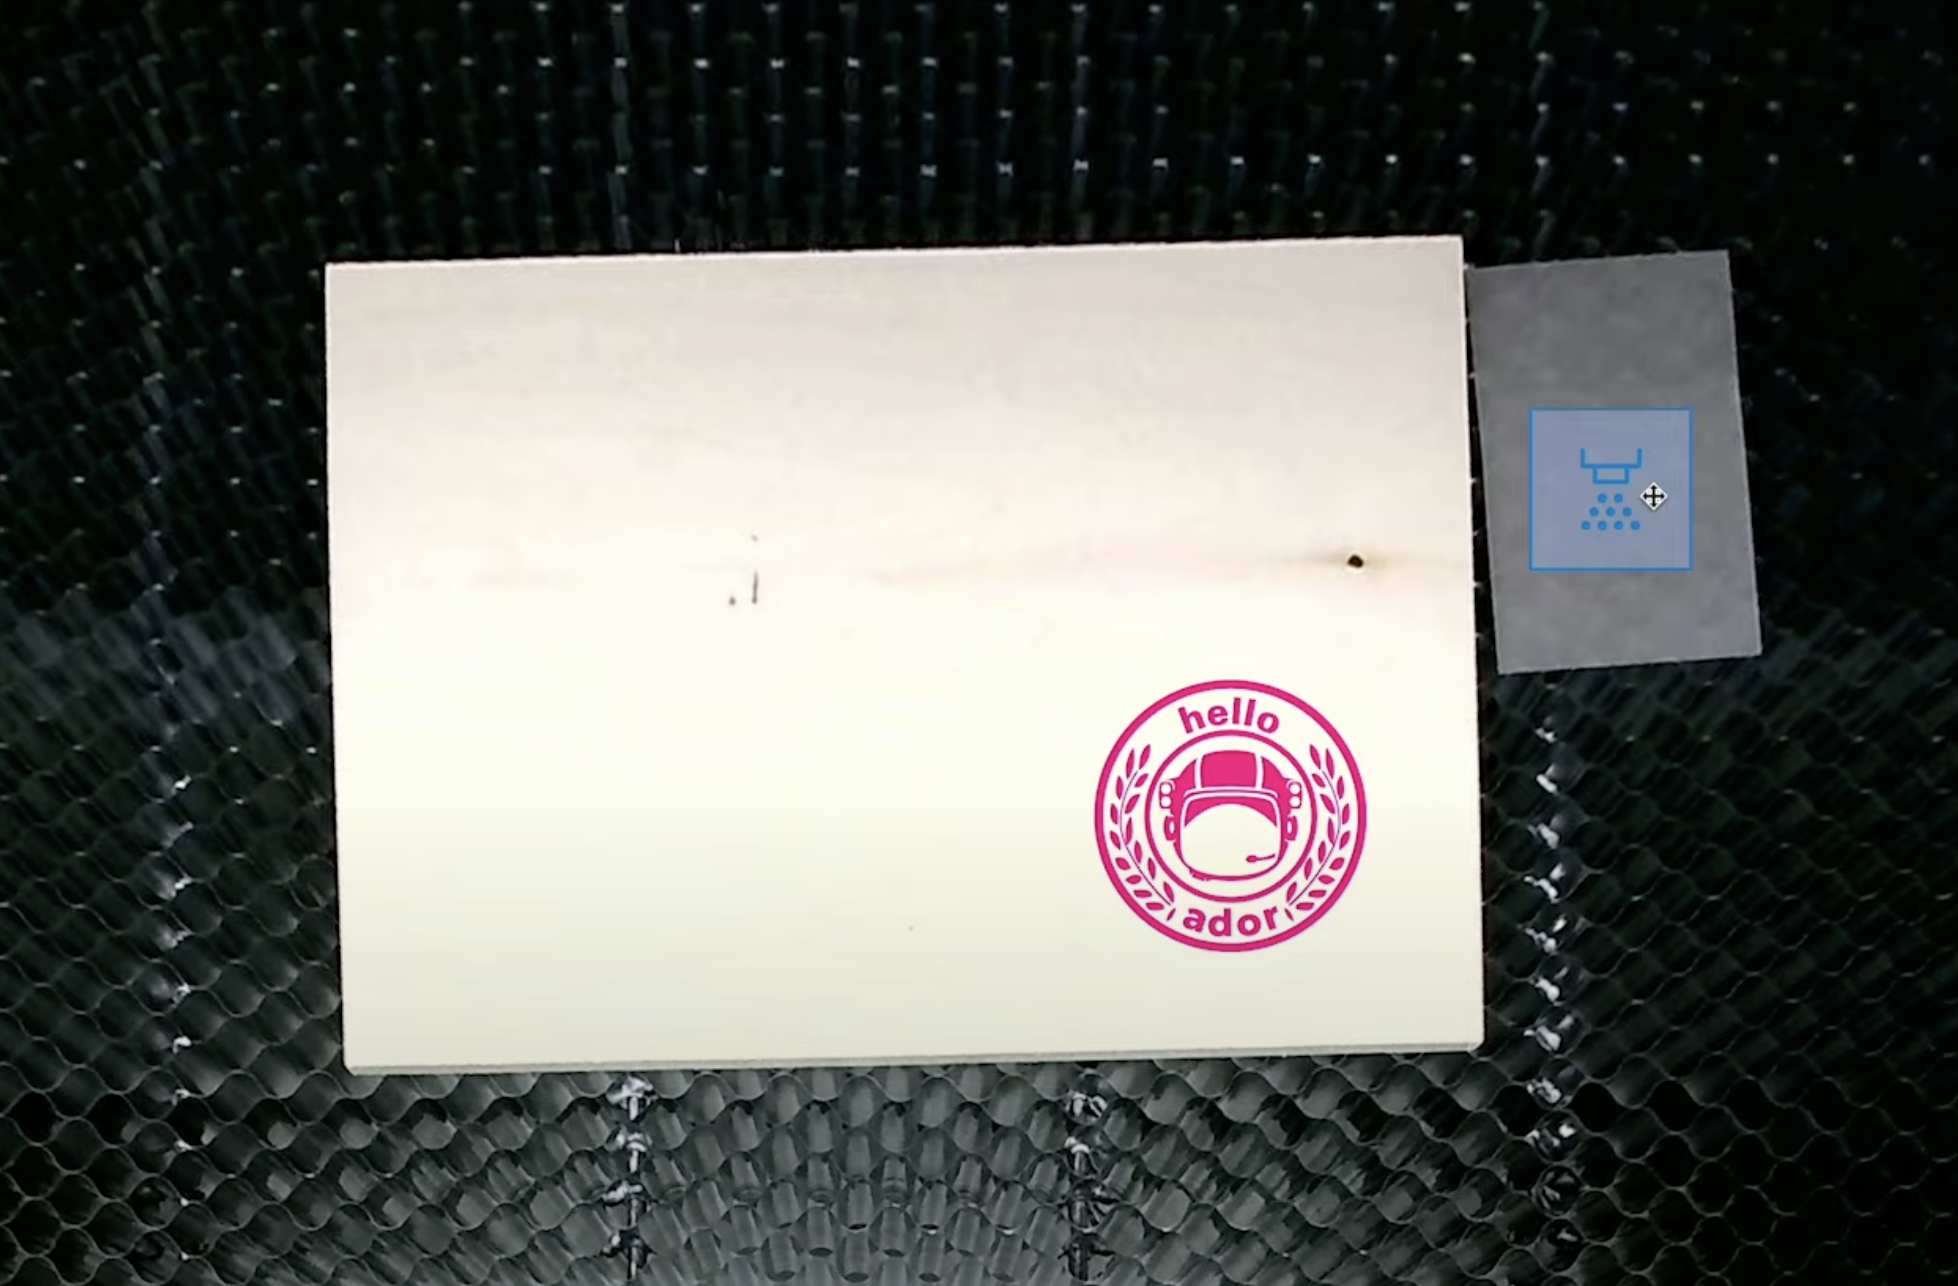
Close the door to the laser. First, the Ador will do a test on the priming sticker and then it will print onto the wood.
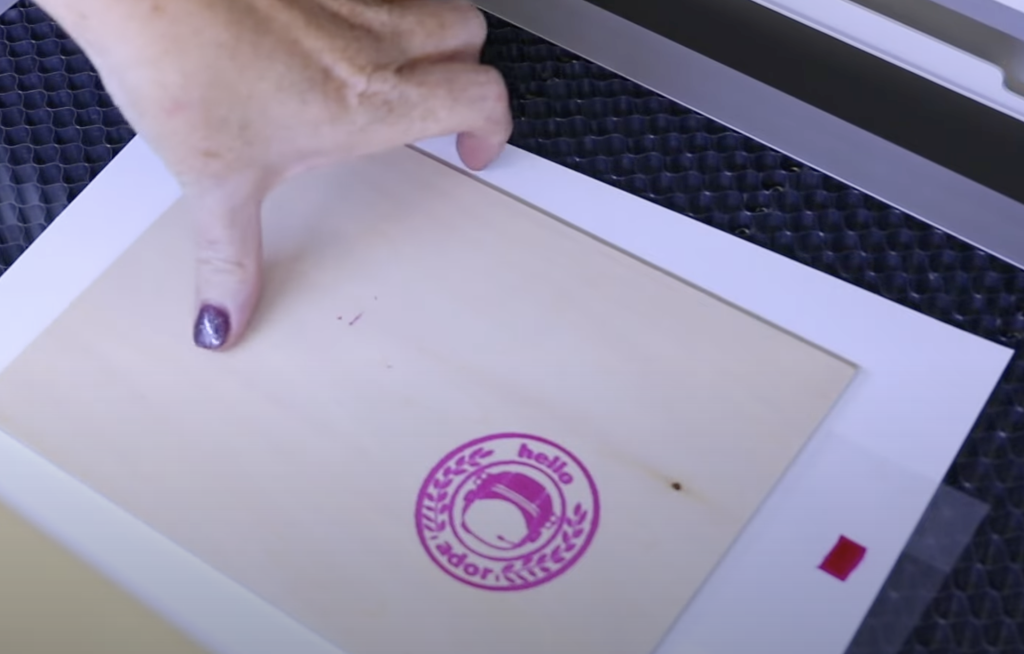
With the example done, I can remove everything from the laser bed and make my first printing on wood project.
How to Print and Engrave on Wood with the Flux Ador
I am going to print and engrave on a large wood box that is very thick.
Step 1: Add Material to Laser and Auto Focus
I moved my honeycomb tray to the very bottom level and placed the box on top.
Place the focus block on the box, then adjust the printer head to sit above it, and press AF on the front of the laser to auto-focus. Remove the block and take a picture of the box inside the laser.
Add a priming sticker to the top of the box as well.
Step 2: Design in Beam Studio
I am going to use the same design I’ve used for the other projects and change the module to the printing module. You will have to upload a PNG file for this project to get the printing to work.
Resize the design to fit where you want it on the blank and move the priming design so it is over the priming sticker.
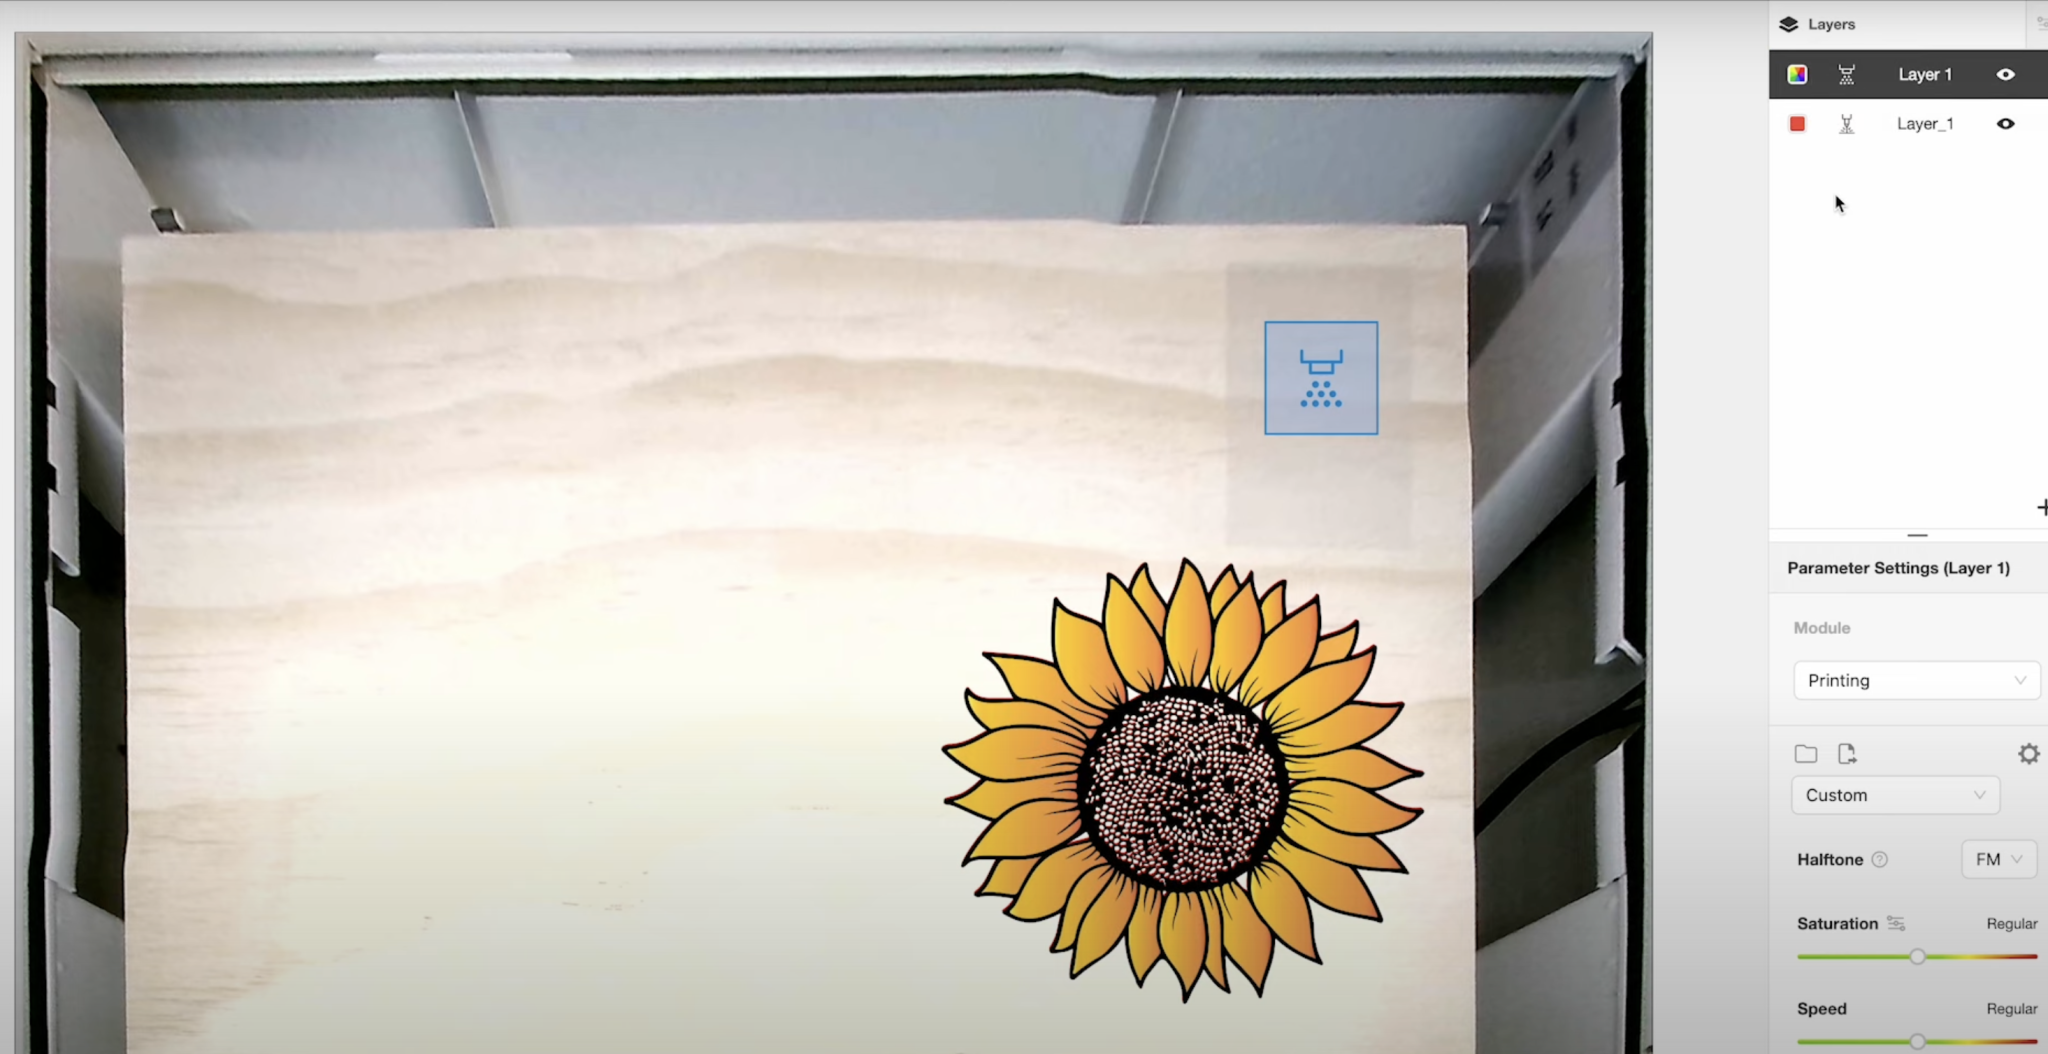
After printing I want the laser to engrave around the design. Add a layer, import the SVG file, and change it to engrave on wood.
Rearrange the layers so that the print layer is first and the engraving layer is second. To ensure the engraving is the right size click the first layer and resize the width to a set size. I set mine to 5 inches, repeat the process for the second layer, and then center them on top of each other.
Step 3: Send Design to Laser
Click play to send the design to the laser. You will need to change out the color cartridges for each different color. The front panel will prompt you to change the printer cartridge and when you need to change to the laser head.
When the printing is complete, change to the laser module and remove the inked piece of paper. Remove the ink cartridge and put it back in the original packaging with the protective cover on it.
Be careful to not bump the box while you install the laser head.
Auto-focus again and then close the lid and click Continue. Make sure the laser is vented out a window or use the air purifier.
When the engraving is complete remove the box from the laser.
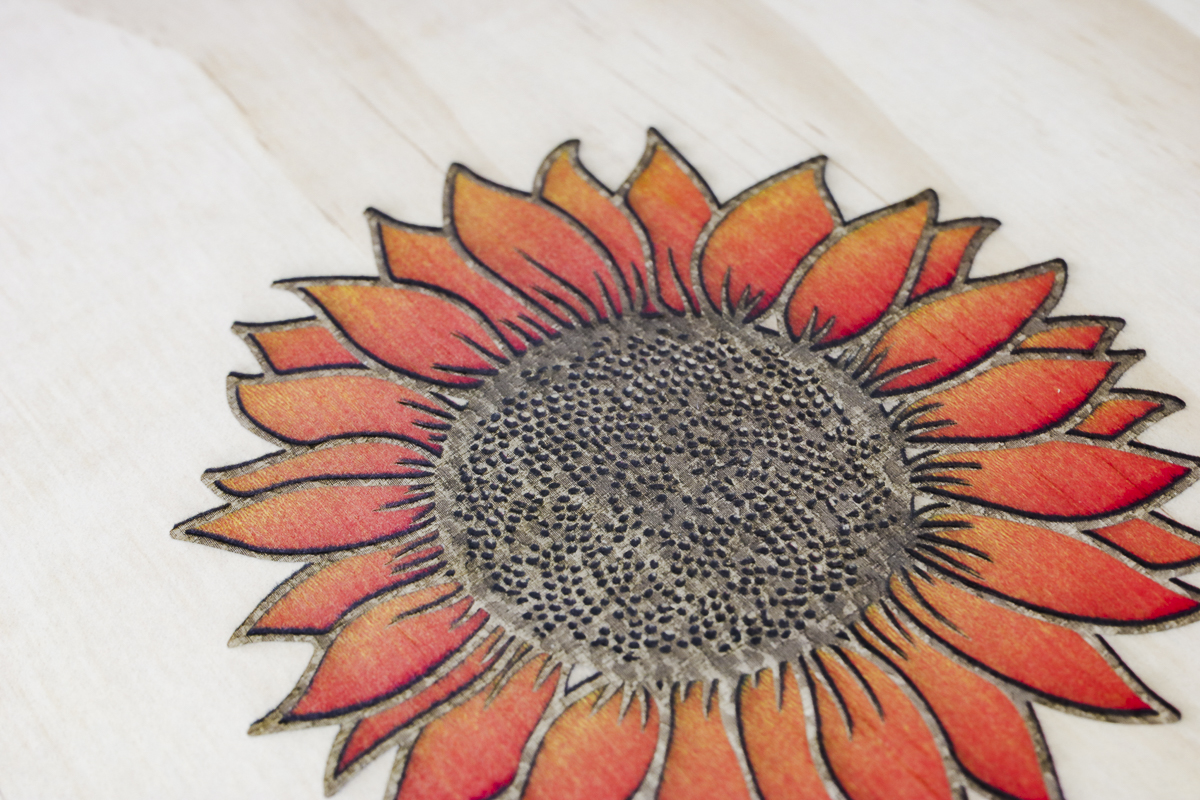
This box was fairly tall and the printing and engraving turned out beautifully. You can see the engraving detailed the center of the sunflower really well.
Even though all four colors were printed at different times the color looks really good and the engraving around the outside is lined up with the petals perfectly.
This is a great option for adding color to an engraved wood project.
Note – When changing the cartridge out ink got on the wood box in an area that isn’t part of the design. This is not noted in any documentation for the laser or the printer module. I would add a piece of paper under the printer module when changing out the cartridges to prevent ink from getting in unwanted areas.
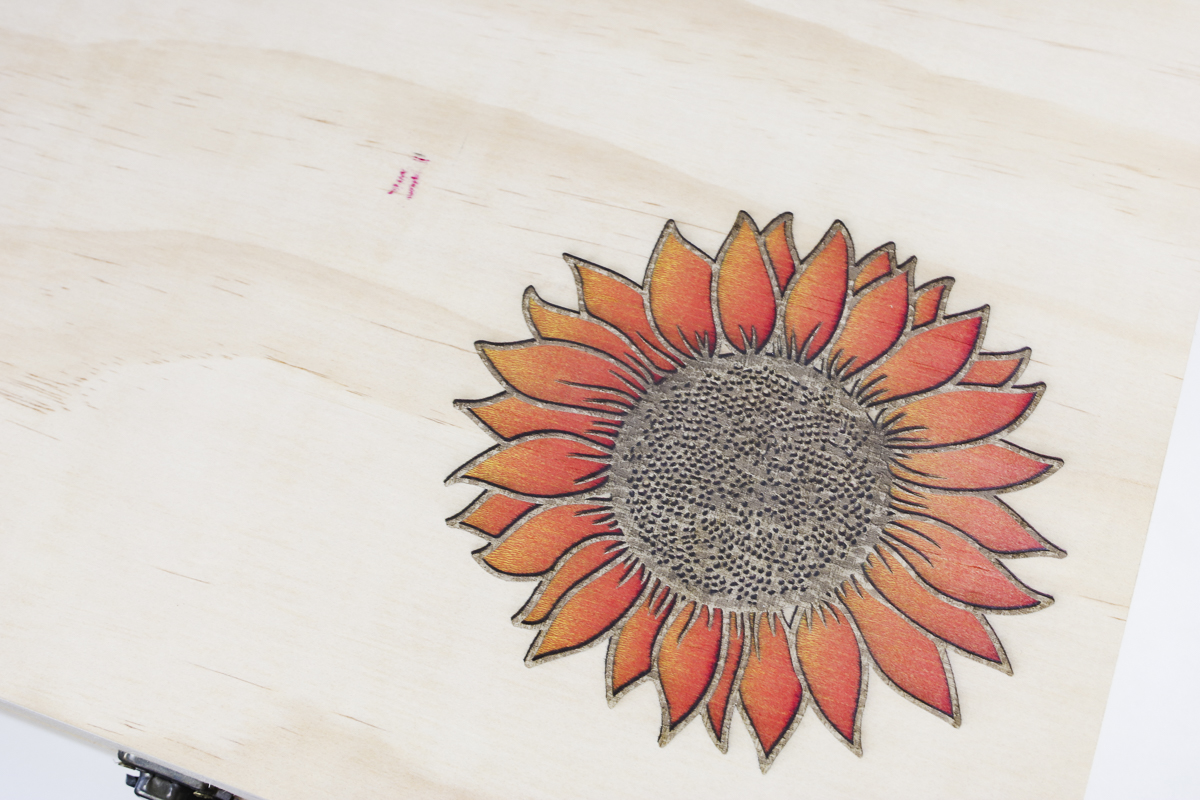
I like that I can print and engrave designs with this laser. If you wanted, you could also print and then cut with the laser as well.
Flux Ador Laser Pros and Cons
Now that I’ve made several projects with the Flux Ador laser let’s look at the pros and cons.
Before I talk about the pros and cons I want to point out that the first laser I was sent I could not get the print module to work. I worked with the company to troubleshoot what was going on and nothing worked. They ended up sending me a new laser and things worked exactly as they should.
Working with their customer service was a good experience but I wanted to point out that this is the second laser that was sent to me.
Flux Ador Pros
Let’s look at the pros of this laser.
- First, it is a very good laser and is extremely well-built. Its metal construction makes it nice and heavy, and it feels really sturdy.
- I’m a big fan of air assist and it’s definitely a pro that it comes with it.
- The modules are easy to swap out and it did well with cutting, engraving, printing, and engraving on metal.
- The biggest pro for me is the front control panel. It is very convenient to have a display panel there showing exactly what you’re doing, how much time is left, and when things need to change. The display panel also made the setup process so easy.
- I love that you can add a rotary accessory and the riser base. With the riser base, you have the pass-through option that allows you to use even larger materials.
- I am not usually a fan of triangular prisms and unless you purchase and use the riser base that is the only option with this laser. The ones that come with the Flux Ador have magnets on them to hold them in place and they work really well. If you have to have triangular prisms, these are the ones to have.
Flux Ador Laser Cons
- While the laser itself is really sturdy, I am not a fan of the lid. I think it is flimsy. It was actually part of the problem with the first laser I received. I think it was likely damaged in shipping because it would not stay open but even with this new laser, I am still not a fan of the lid.
- The hose that attaches to the back to ventilate the machine is extremely flimsy and I sort of crushed it once. It does go back into shape pretty easily but I worry about it crushing and cutting off the airflow.
- While I like the riser base, it is very tall which can make it difficult to work with on a standard-size table. If you’re using the laser with the riser base I recommend an adjustable table or one that is shorter to make it easier to access the inside of the laser.
- The lid is very dark which makes it hard to see what is happening inside. This is great for eye safety but not great to be able to see if something is going wrong. I like to be able to see if I need to stop the laser while it’s working if my blank moves or if something else unexpected is happening.
- I didn’t have issues with the software but there is a learning curve and it appears to be a new software so I hope to see improvements over time.
- If you use LightBurn, you need to purchase an additional cable to use that software and you need to keep it plugged in at all times. If you use LightBurn, I would research how to use it before purchasing to make sure it’s what you need.
- A small con is that when you boot up the machine it takes several seconds for the front panel to light up and start. You may think the machine hasn’t started but it has. There is a light on the button on the side that comes on when the laser is powered on.
- I am not a fan of rotary accessories with rollers. I prefer ones that have a chuck as they fit a wider range of materials and require fewer adjustments to work correctly. While I was able to engrave a 40oz tumbler, it took a lot of testing and adjustments to get it setup correctly.
- Attaching the rotary assembly cable to the laser was challenging. The instructions say to use a mirror and that was frustrating. I actually had someone hold the laser up and plugged it in that way and it was a better experience for me.
- The final con is the camera and the location of the camera. Because it is a fisheye lens the blank can be distorted which can make locating the designs more difficult. The more I used it the more I got used to it but it can be difficult, especially for someone new to laser crafting.
Flux Ador Laser Review
Overall I think the Flux Ador laser is really good. I love how well-built it is and the options for different heads including the printing module. Being able to print on wood opens up the range of projects even more.
If you’re looking for something that has a print capability along with cutting and engraving, this laser might be the right laser for you.
When I had to contact customer service, they were very helpful and my experience was positive.
Make sure to review the pros and cons of this laser before making a purchasing decision. Your needs may be different than mine.
The touch screen makes using the laser very easy and user-friendly. I think it’s a great laser for beginners because the setup is so easy.
I hope I’ve answered any questions you have about the Flux Ador laser. If you have any additional questions, leave them in the comments and I’ll be happy to answer them for you.

