This post and photos may contain Amazon or other affiliate links. If you purchase something through any link, I may receive a small commission at no extra charge to you. Any supplies used may be given to me free of charge, however, all projects and opinions are my own.
Cricut recently released new Print Then Cut size maximums, and they are amazing. They can, however, be a little bit confusing. Today I am sharing free templates to help you get the maximum Cricut print and cut sizes every single time.
If you haven’t seen the new Print Then Cut sizes, I’ve shared a full guide to the larger sizes that you should check out first.
Maximum Cricut Print and Cut Sizes
Printable sticker sheets, printable HTV, and other printable items are materials we don’t want to waste. Because once we cut them we can’t run them through the printer again we want to make sure we’re using as much of the sheet as possible.
You can actually watch me go through these free templates for new Cricut Print Then Cut sizes and see how to use them by clicking play on the video below.
How to Get the Free Templates
These templates are really helpful for maximizing the use of your printable material. I have templates for each Print Then Cut size so no matter what size your printer can print I have a template for you!
You can download the templates here for free. Click that link and then enter your email address and the templates will be sent to you.
How Do the New Sizes Compare to the Old Sizes?
Let’s look at how the old Print Then Cut sizes compare to the new sizes. Previously the maximum paper size you could use with Cricut Print Then Cut was 8.5″ x 11″. With the new larger sizing, you can print on a variety of different-sized paper.
Even the 8.5″ x 11″ paper size has a larger printing area now.
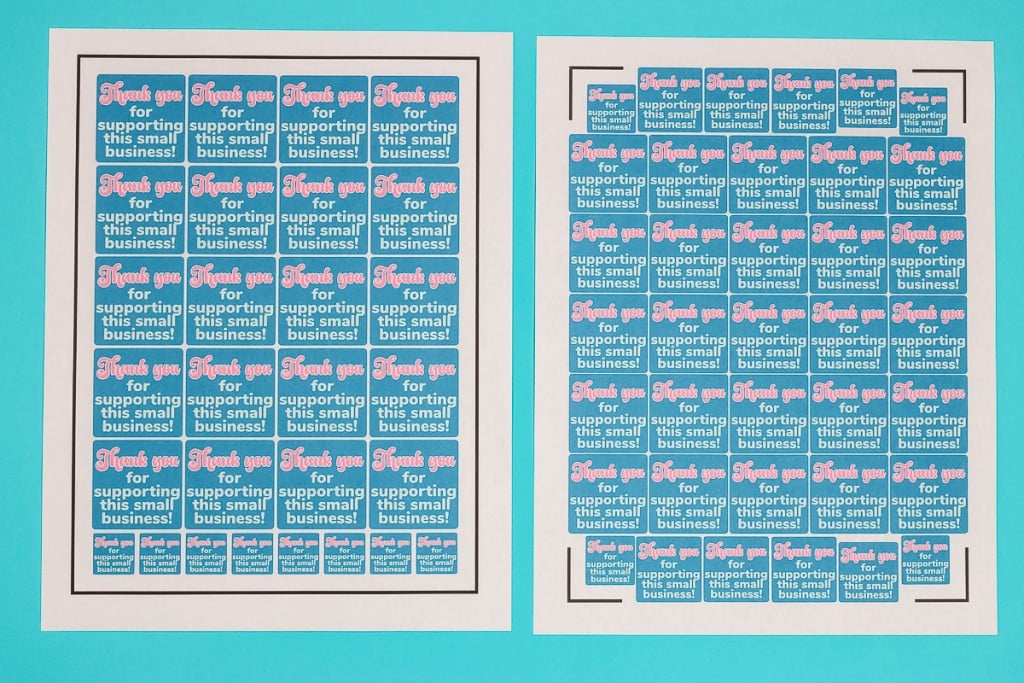
In this photo, you can see the old 8.5″ x 11″ version on the left and the new 8.5″ x 11″ version on the right. This is a full-page sticker sheet. The traditional Print Then Cut maximum size is a rectangle of 6.75″ x 9.25″.
The new maximum size allows you to print from side to side and top to bottom. There is an area in each corner that is not printable. That is why the templates are so handy. You can use them to find the maximum Cricut print then cut sizes.
In reality, the printable width is the same as it used to be. Previously we had to have the black box all the way around the printable area for the Cricut sensors to read.
Now, because we only need the four corner markings, we can print all the way from side to side and top to bottom except in those corner areas. If you want to get maximum Print Then Cut sizes and utilize your full sheet, these templates are the way to do that.
What are the Black Marks?
In both the new and old Print Then Cut options, you’ll notice there are black markings on the print. These markings are what the Cricut sensor reads to locate the design so it knows where to cut. These markings are necessary and required for the Cricut to be able to cut the images correctly.
How to Find Larger Cricut Print Then Cut Sizes
If you are in Design Space and are not seeing the larger Print Then Cut sizes, that may be because you don’t have the right version of Design Space.
As of the writing of this post, these larger sizes are only available in the Beta version of Design Space. Eventually, these should be available in the Live version of Design Space but right now they’re not.
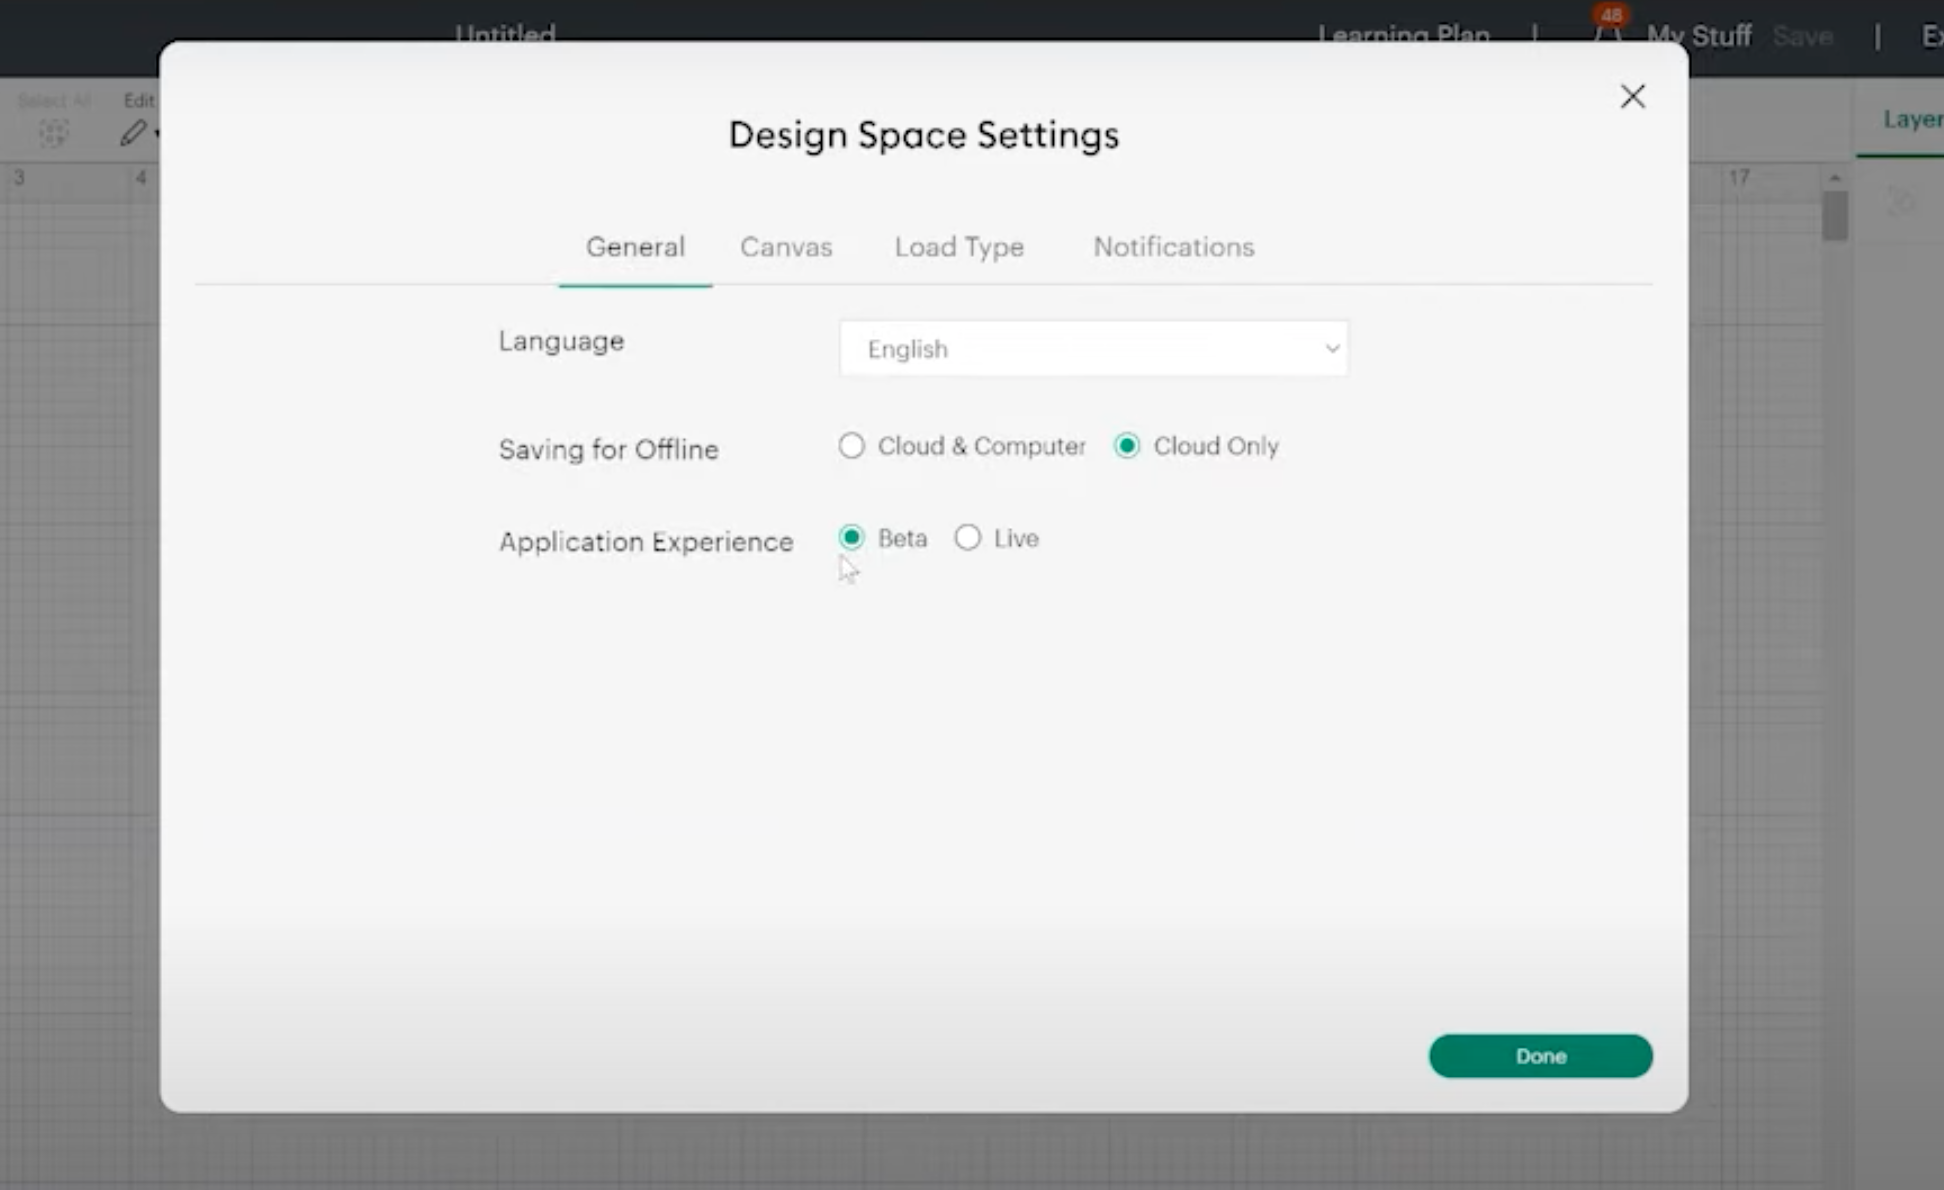
To change your Design Space to Beta, click the 3 lines in the upper left corner of the Design Space screen and then click on Settings. In General, you can change the Application Experience from Live to Beta.
If you are in the Beta version and are not seeing the different Print Then Cut sizes, make sure that the machine you have selected is a Maker or Explore machine. Print Then Cut is not an option if Joy is the machine you have selected.
How to Use Templates for New Cricut Print Then Cut Sizes
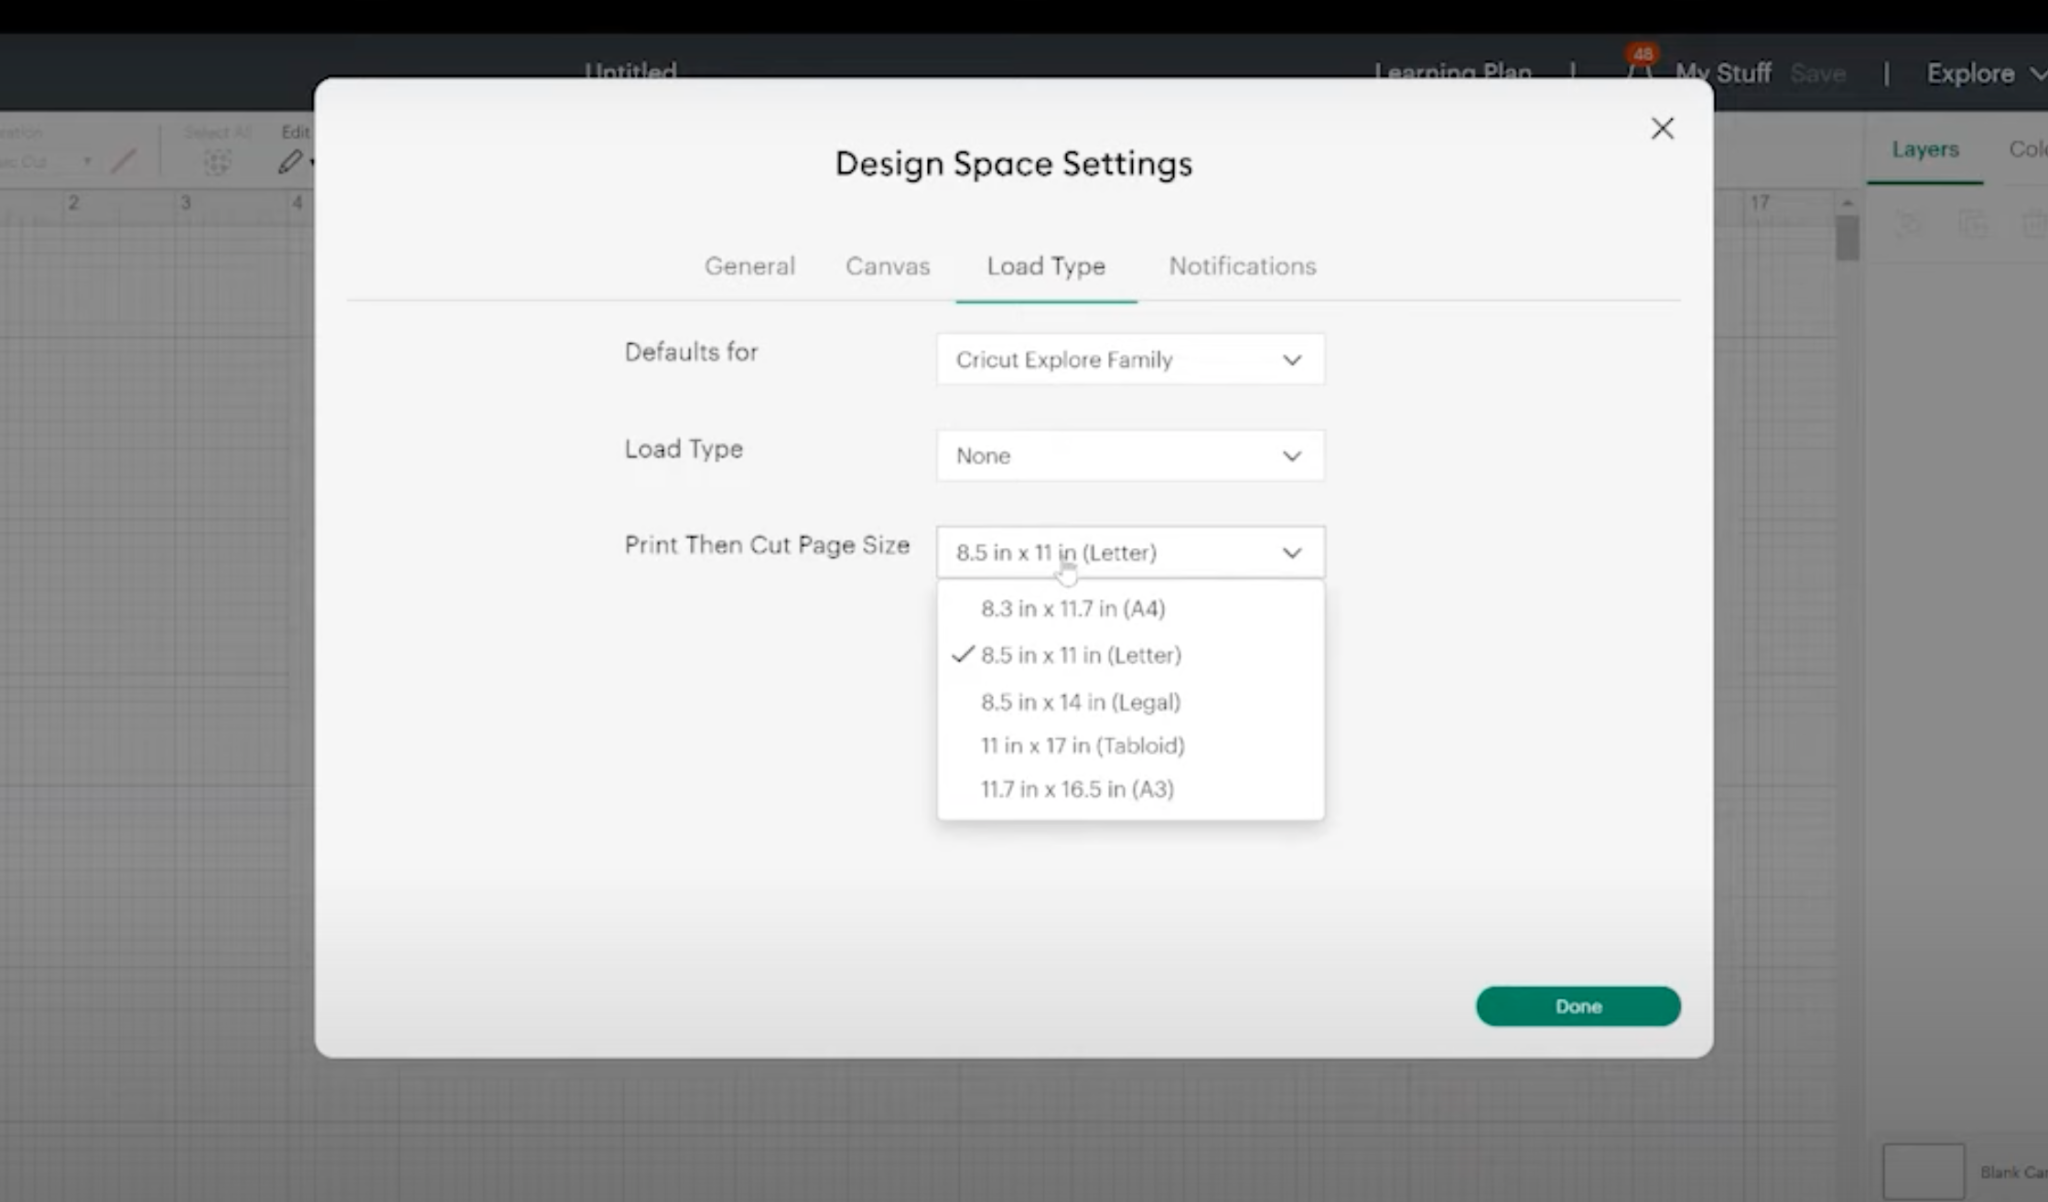
I am using the Beta version of Design Space. Under Settings and Load Type, I am choosing the paper size of 8.5″ x 11″ letter. I have templates for each of the five different sizes available but for this example, I am using the 8.5″ x 11″.
If you’re using a different size material, choose that size and the template that corresponds with that size to use.
Upload Templates into Design Space
Now that we have the templates downloaded to our computer we need to load them into Design Space. Uploading the Print Then Cut Templates is similar to uploading other designs and images.
Click upload on the left side of the Design Space canvas, select the template from your computer, and click open.
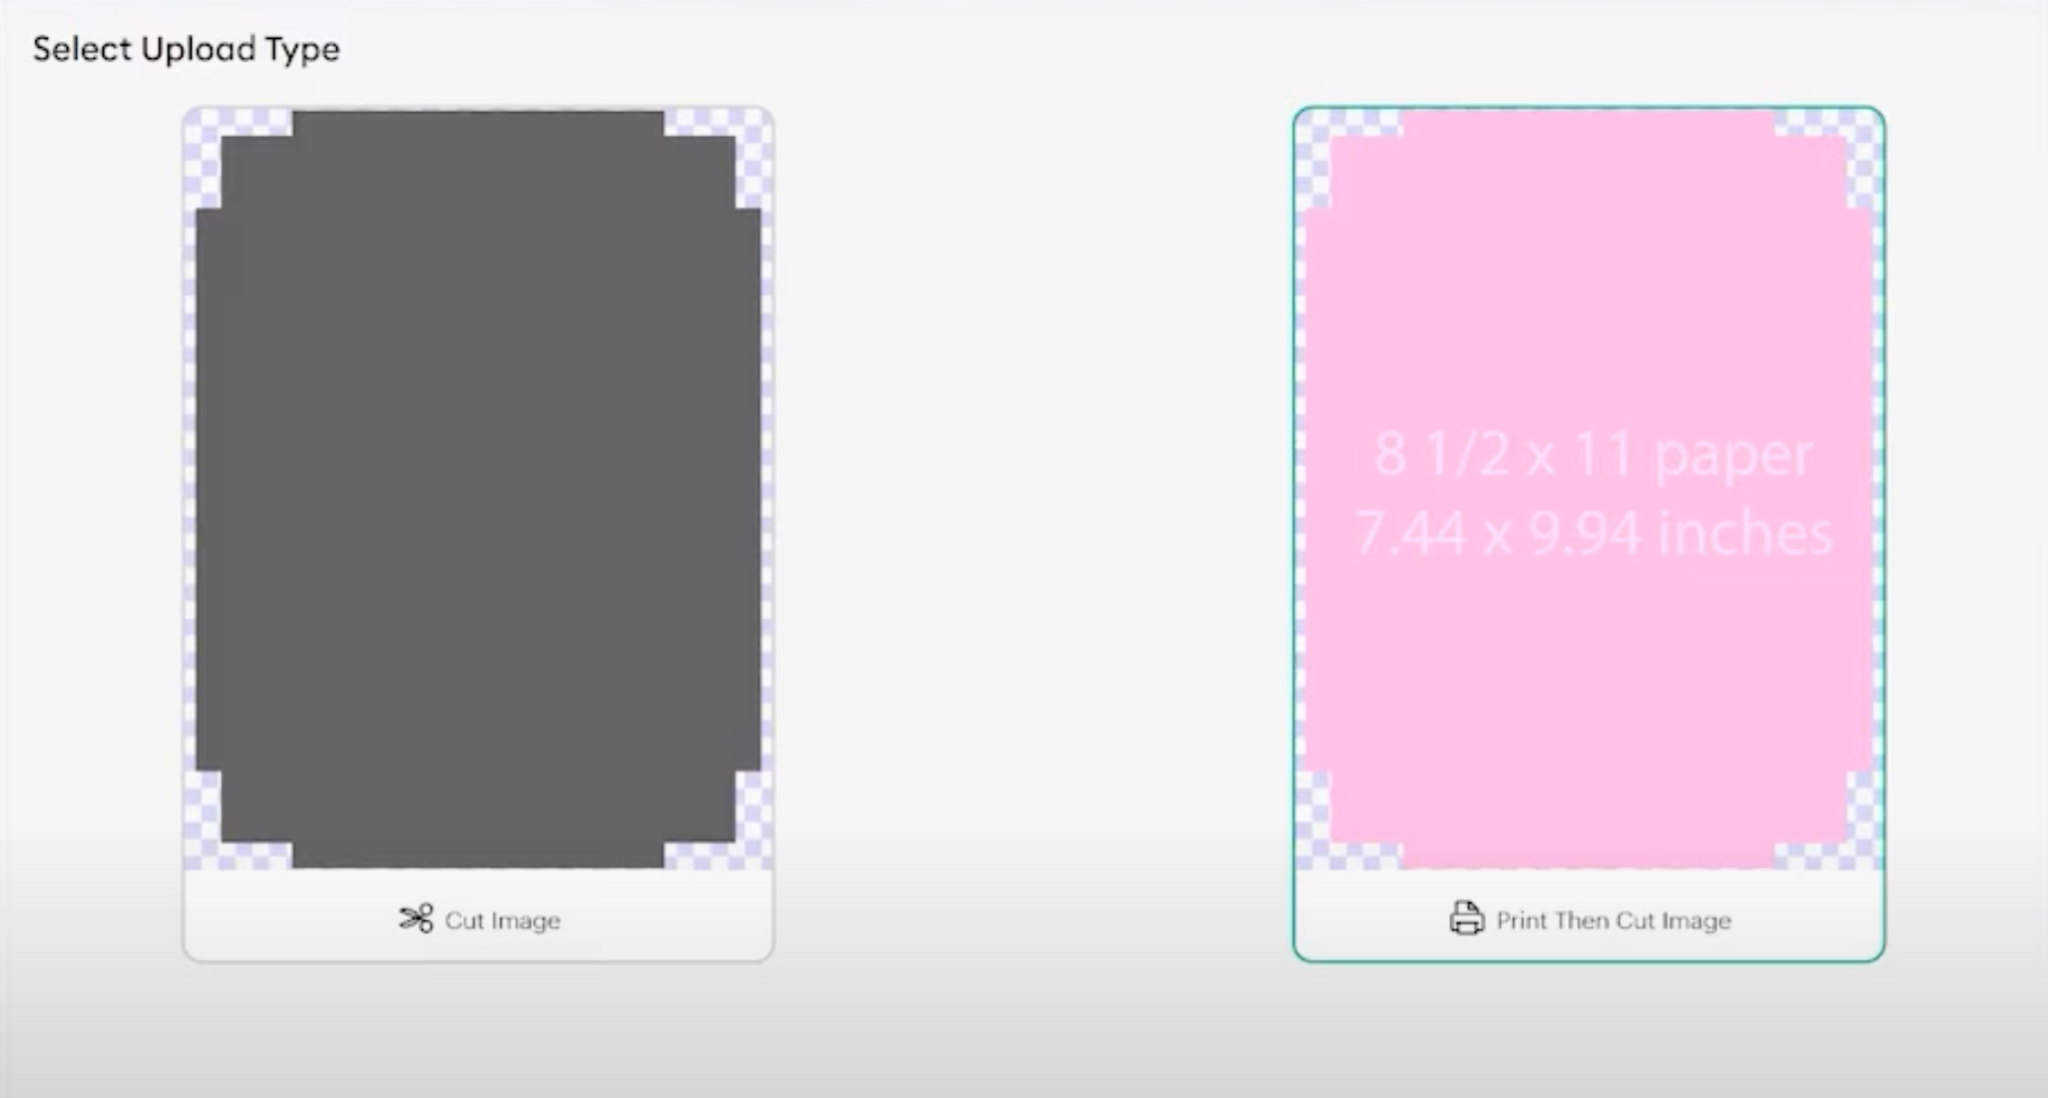
I usually select Complex and then click Continue The background around the template should be checked. Click Apply and then Continue. Last you do want to upload this as a Print Then Cut so the dimensions on the image are viewable.
With the template uploaded, we can pick it and then click Add to Canvas.
I want to note that the templates come in a little large. You will need to adjust the size on the canvas screen to make sure it is sized correctly.
How to Change the Template Size
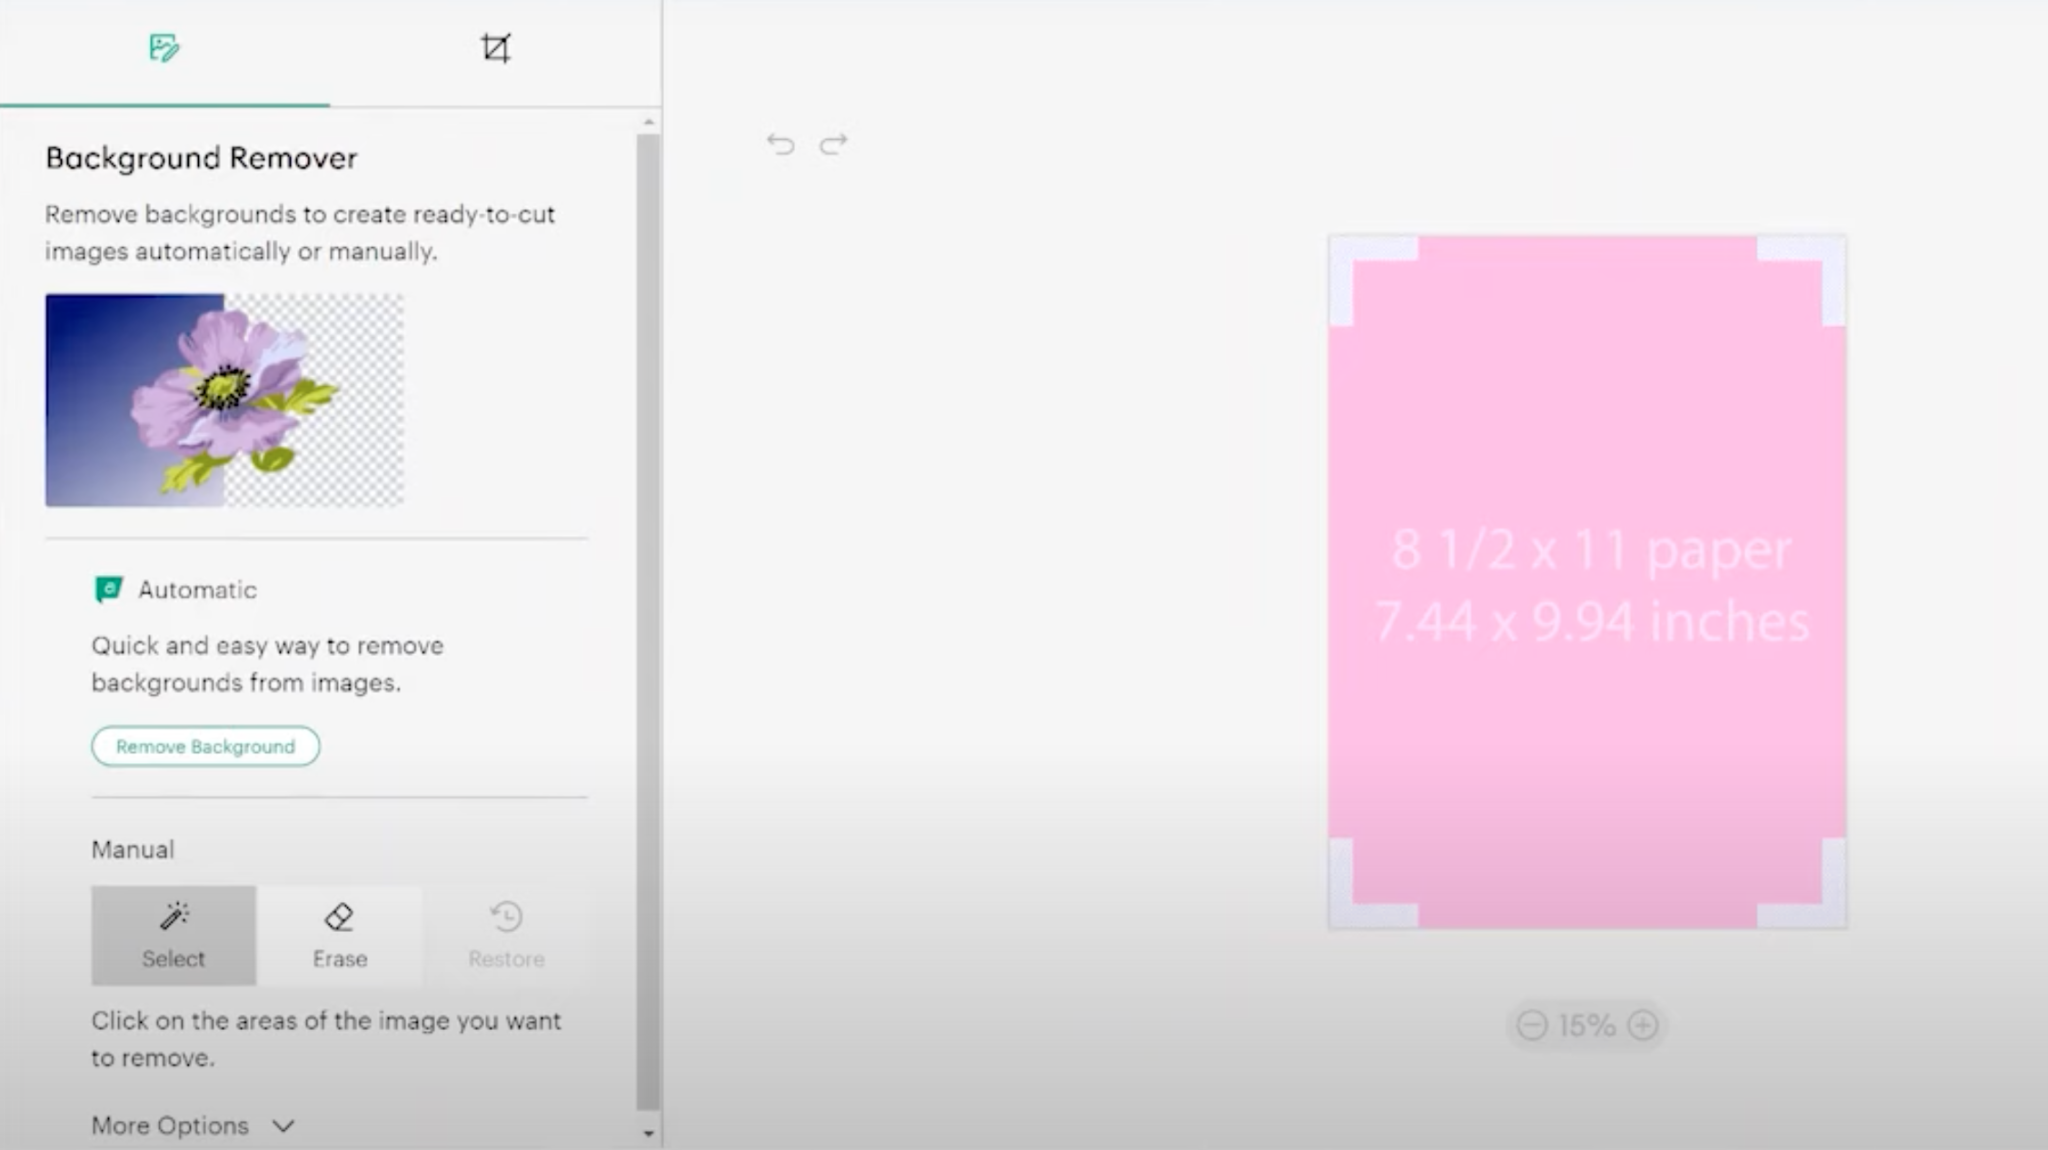
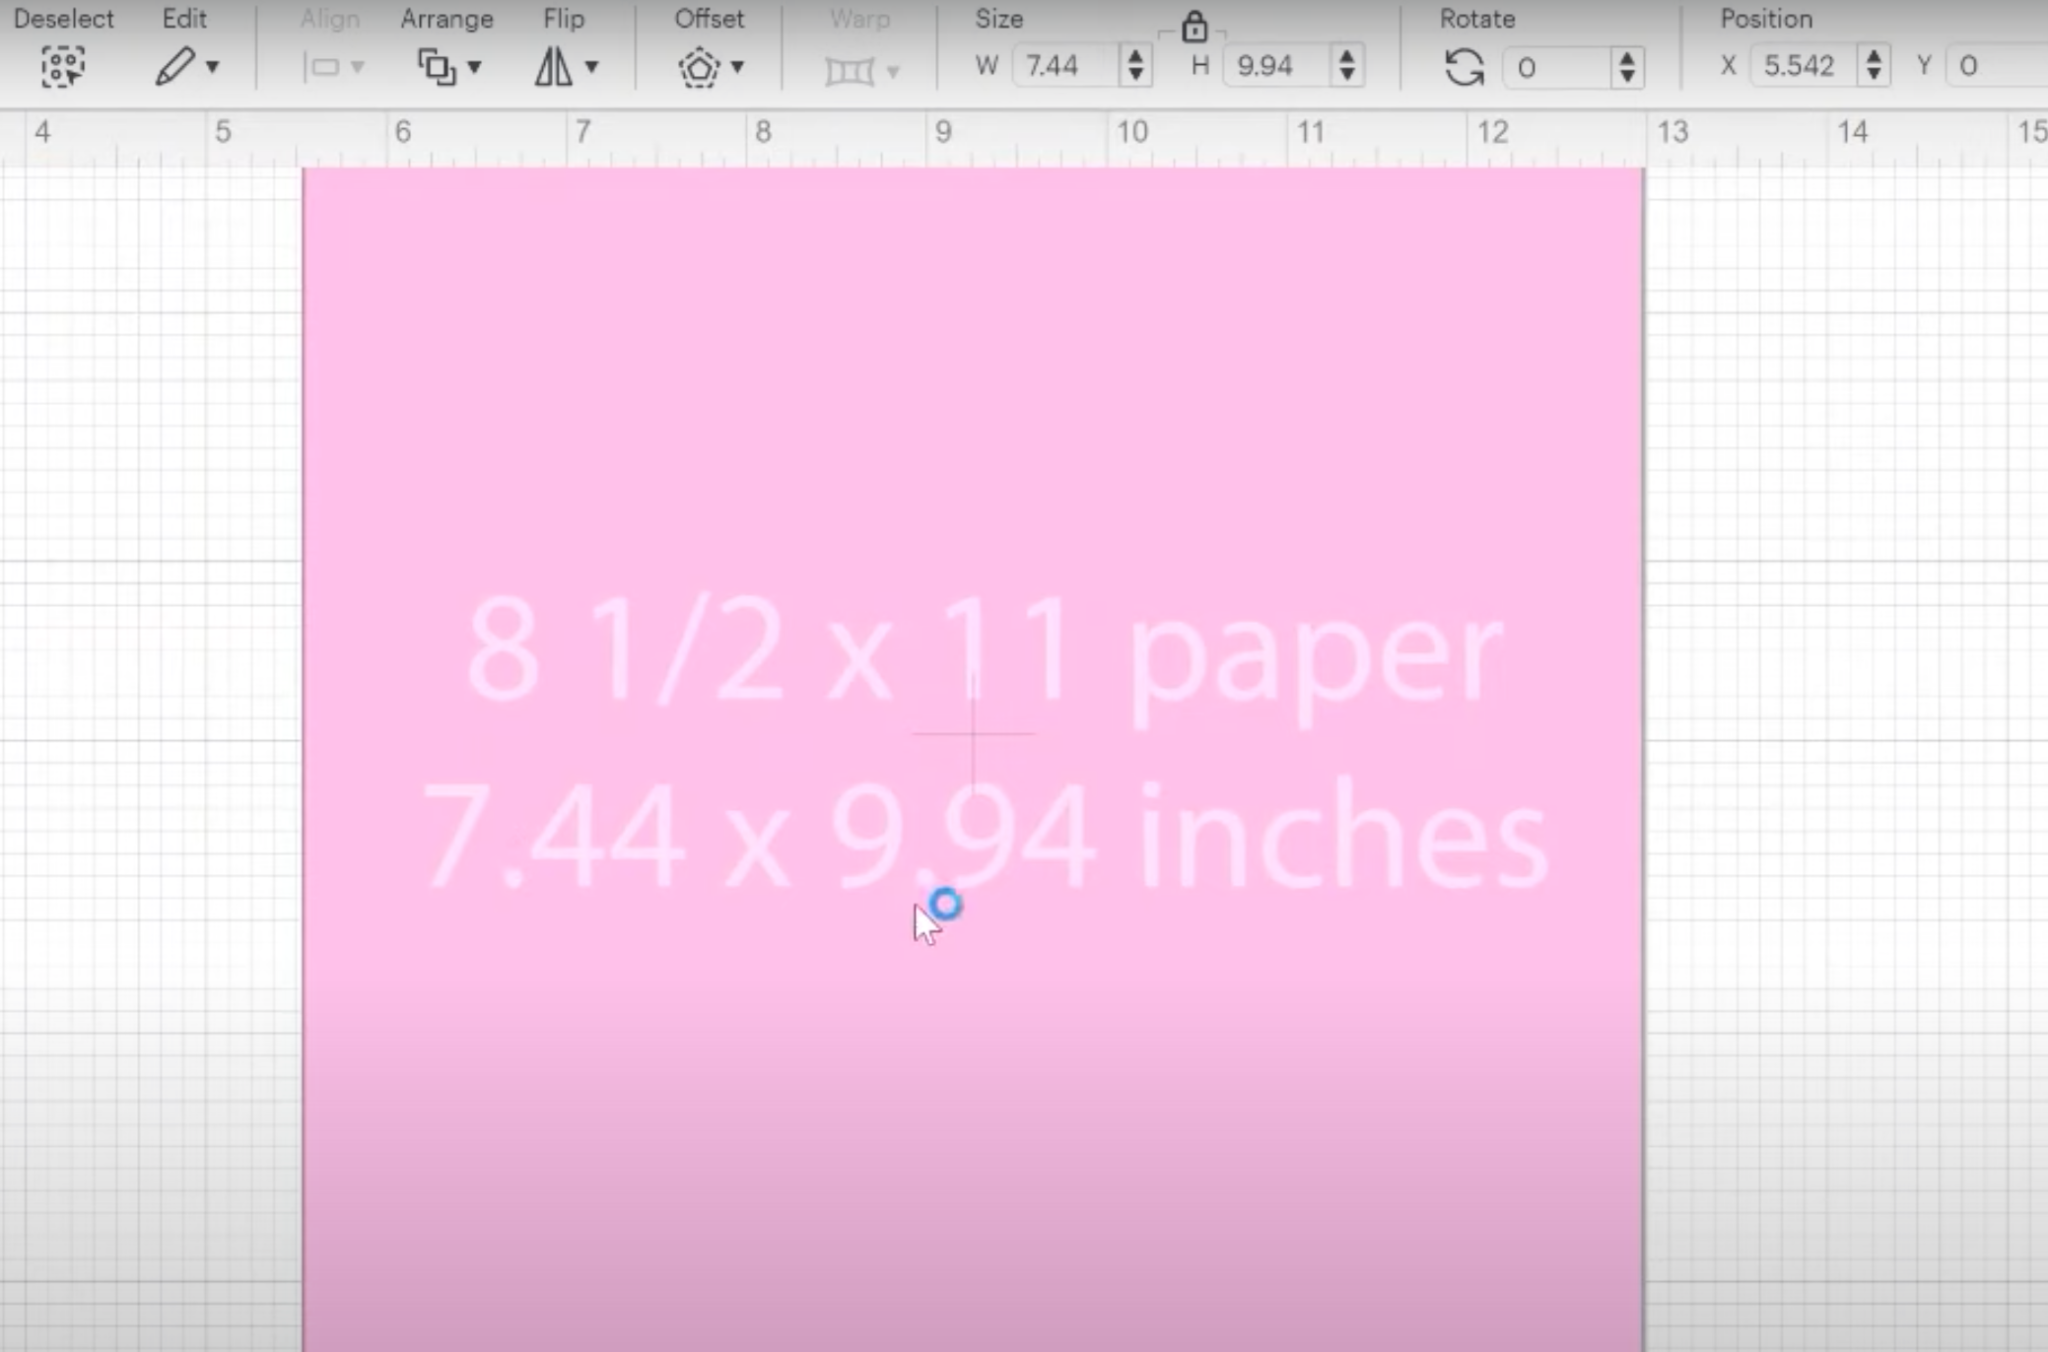
To change the template size on the Design Space canvas you want to click the template and then in the top toolbar adjust the size to match the measurements on the template.
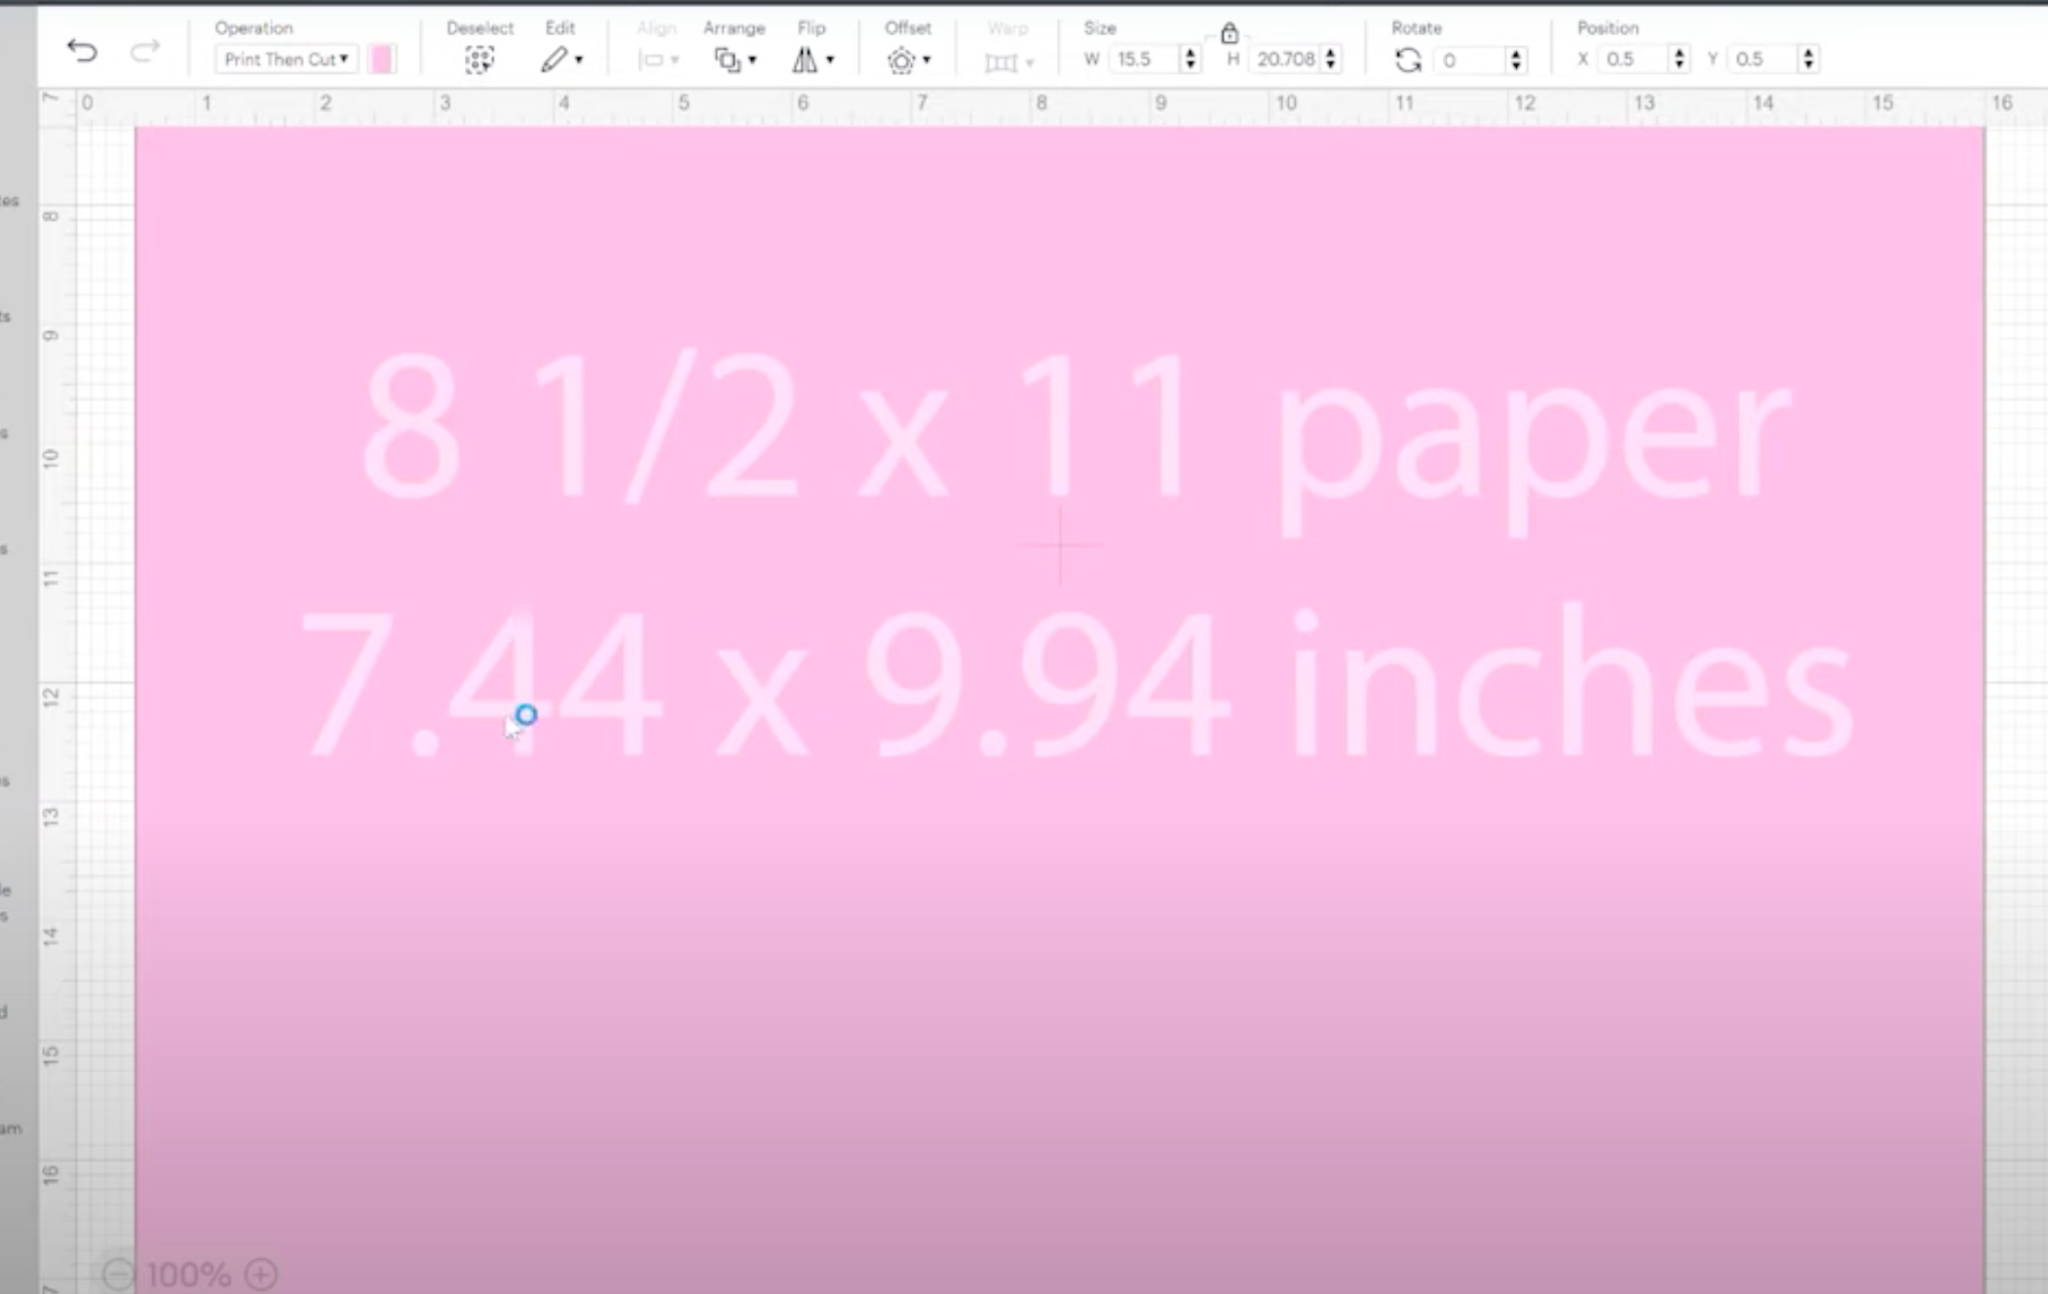
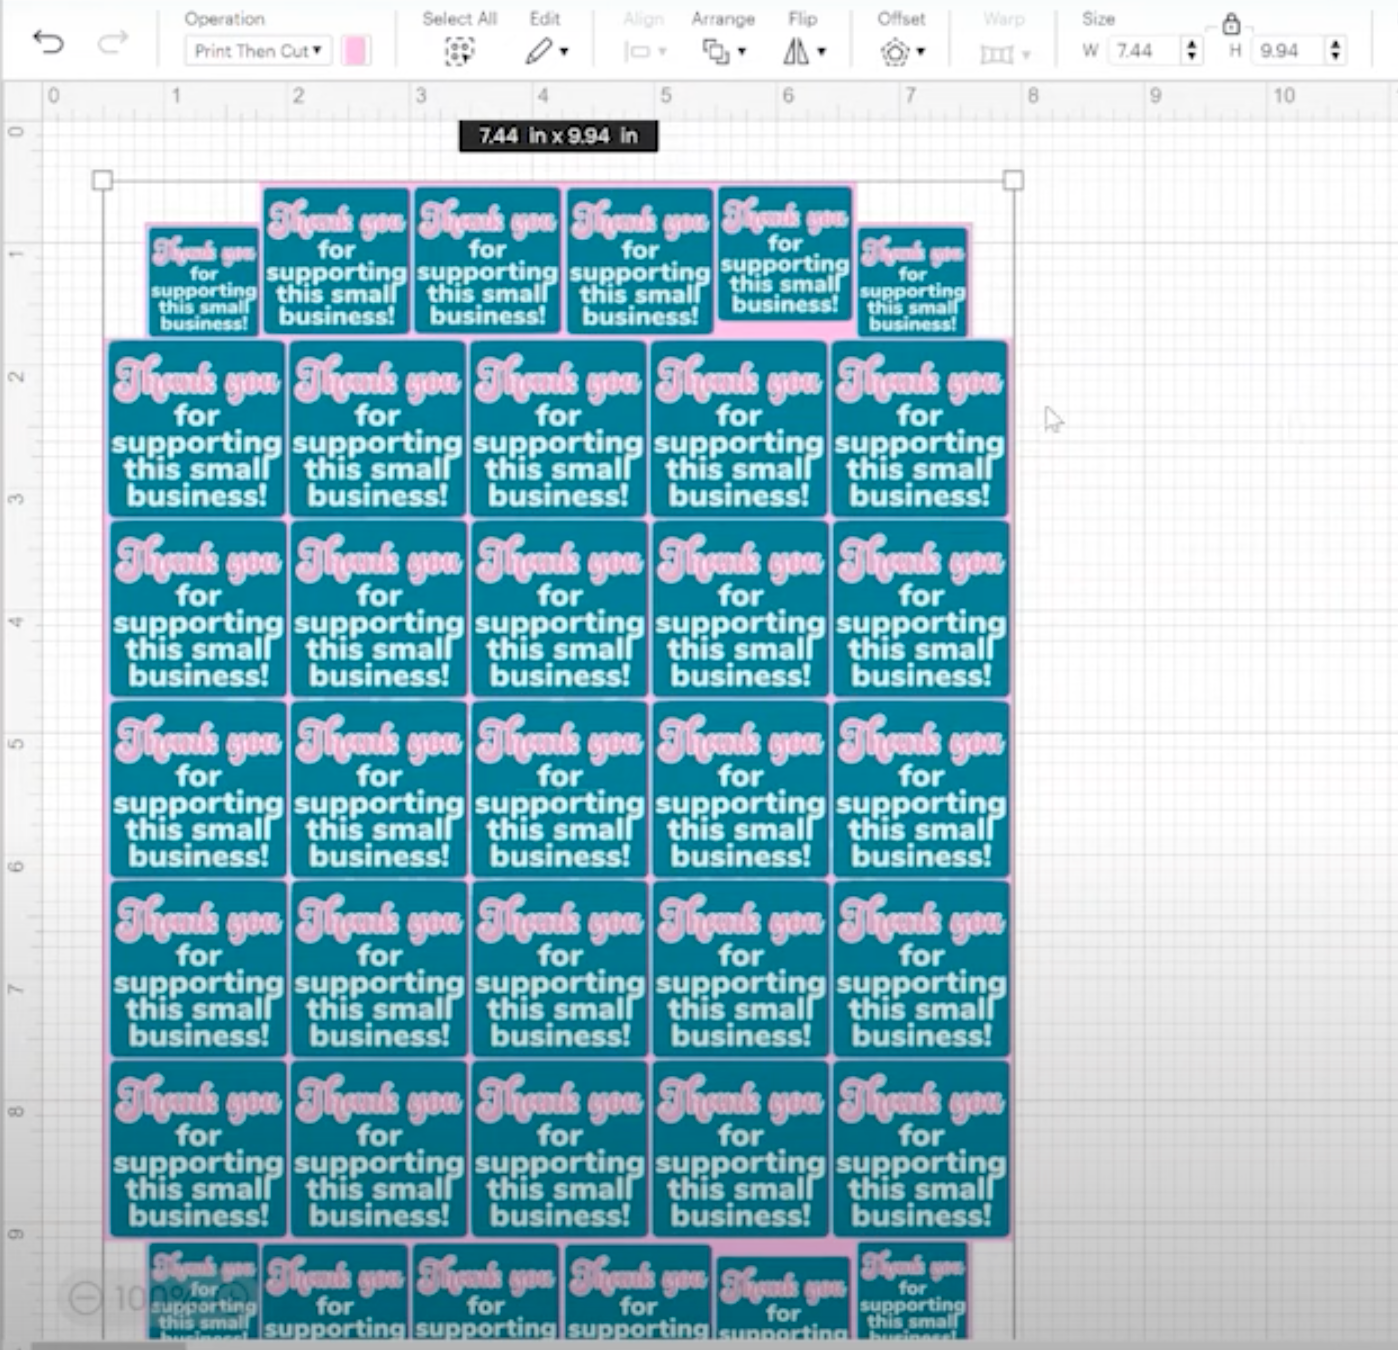
For the 8.5″ x 11″ template, we want the width set to 7.44″ and the height set to 9.94″. Once you have the measurements in the top toolbar set to the same that you see on the template itself, you can start using the template.
Adding Images to Print Then Cut Template
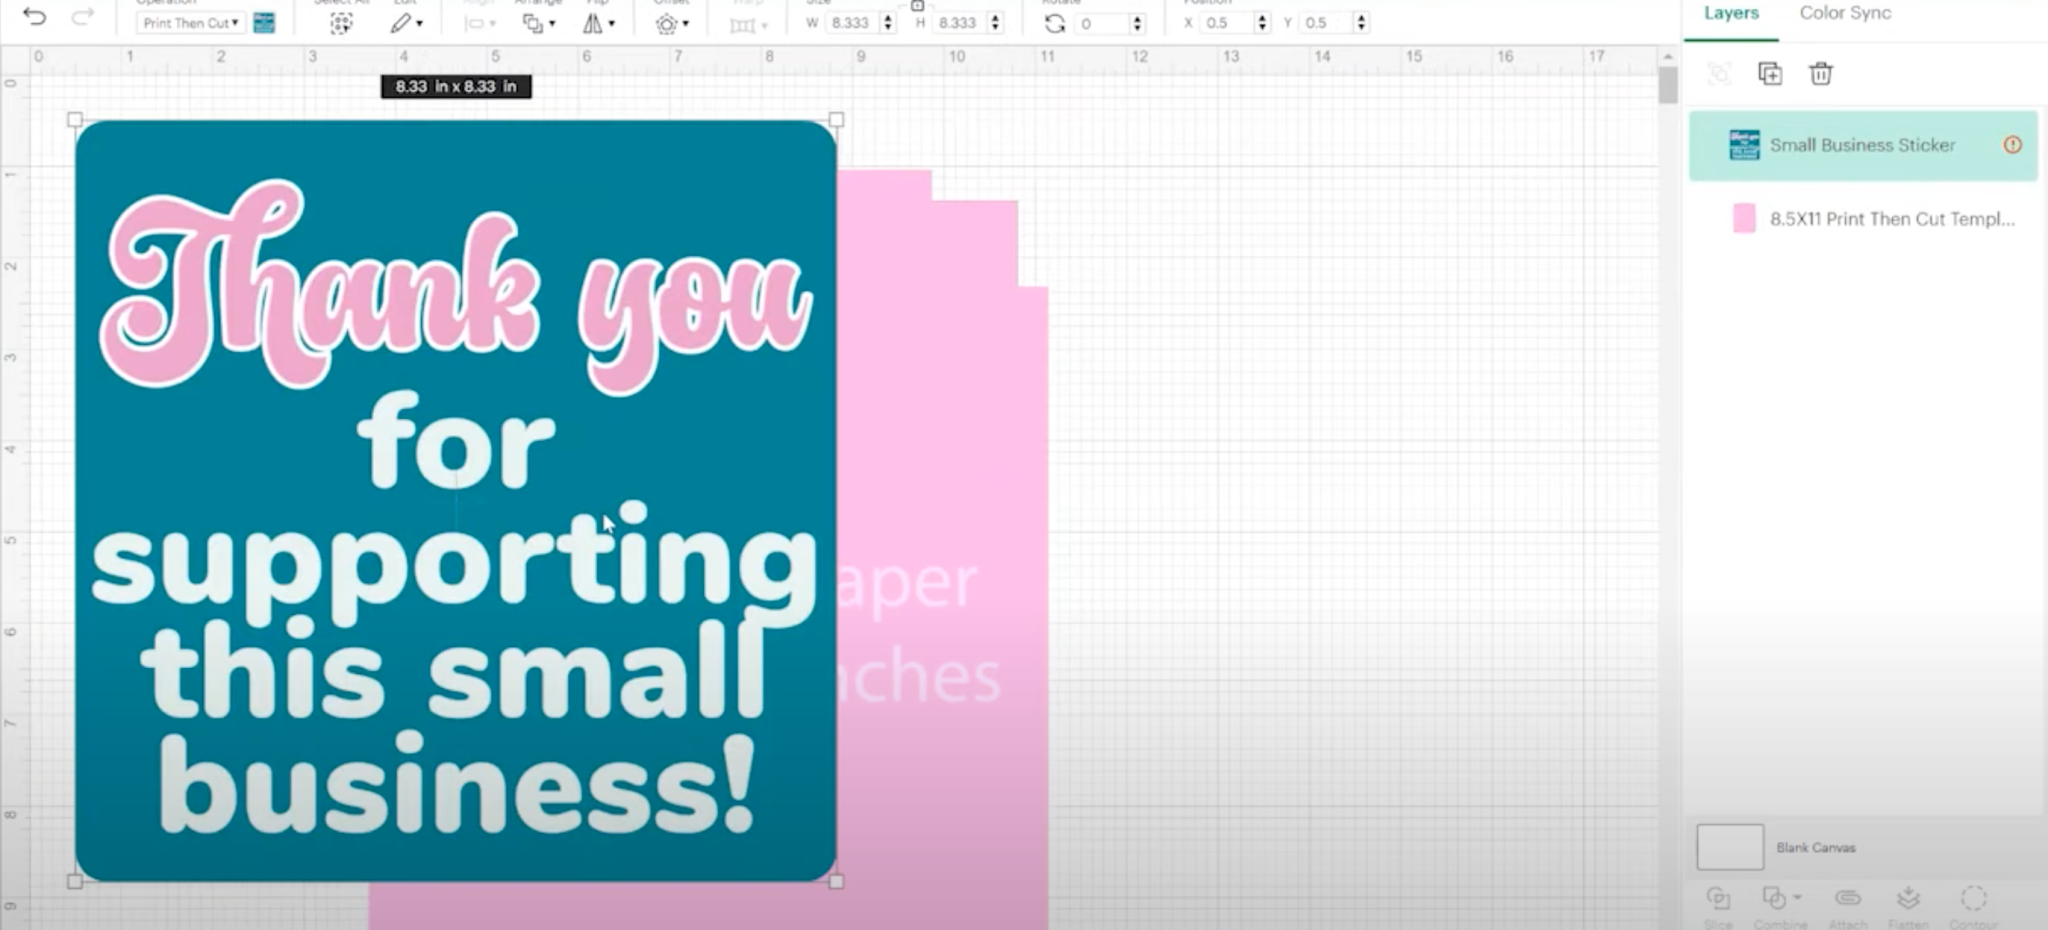
For this example, I am going to fill up the template with this Small Business image. You can download this image free here if you want to try it out and you’re welcome to use it in your Small Business.
If you’re using the free sticker, make sure you download it then upload it into Design Space and then add it to the canvas. You can resize the image to whatever size you want it to be and you don’t have to have them all set the same size.
We want to make sure that the template is the bottom layer so you can see where the stickers are located as we add them to the template.
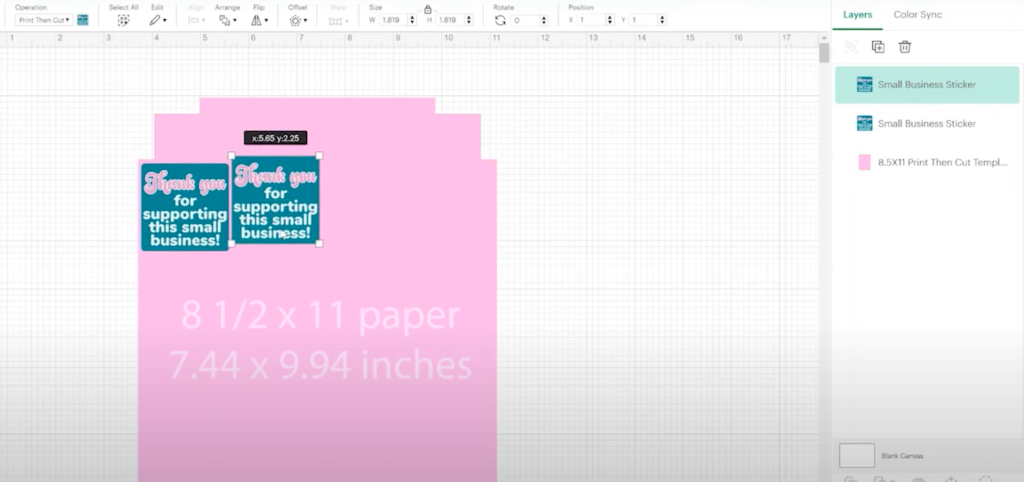
I am going to duplicate the sticker and continue to arrange them on the sheet. Remember, they don’t all have to be the same size. They don’t even have to be the same image but for this example, I am using one image.
Continue to duplicate and arrange the stickers however you want, just make sure you don’t go outside the template lines when arranging them.
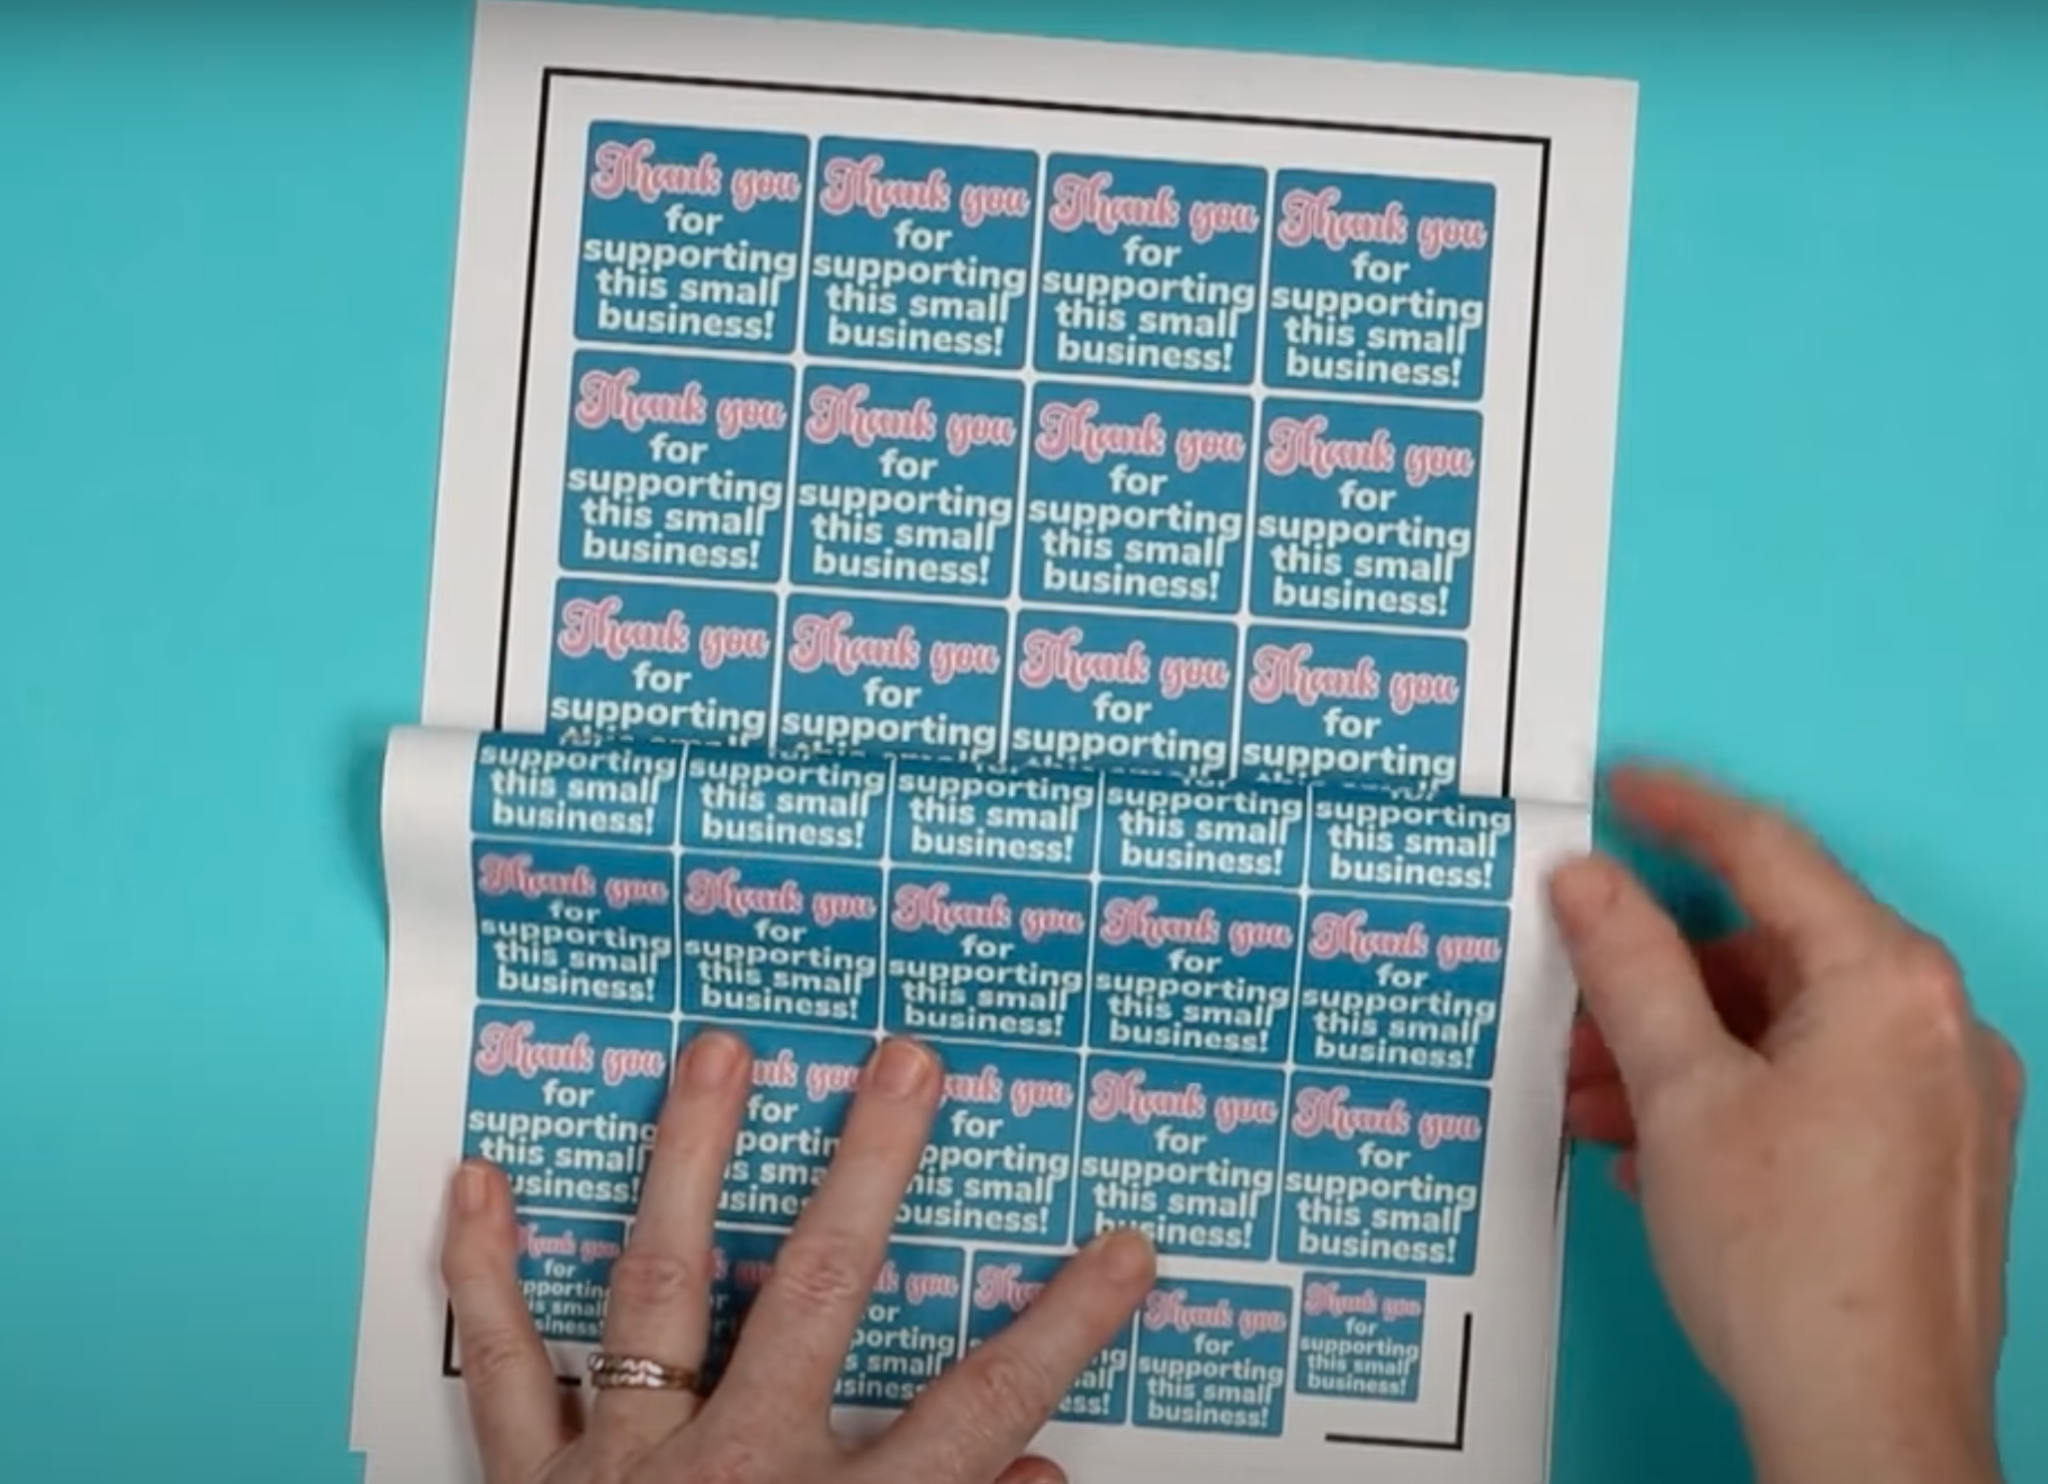
Printing a Full Sheet for Print Then Cut
Now that I have the whole template full of stickers we’re ready to print. Note in the photo below that you can slightly see the pink template all the way around the stickers.
With the template full we no longer need the template layer. Find that layer in the layers panel and you can choose to either hide the layer or delete the layer from the canvas. You could also use the guide option to make it a guide.
From here, if I just click Make It, Design Space doesn’t know how to lay out the images for Print Then Cut. This is what happens if you just click Make It.
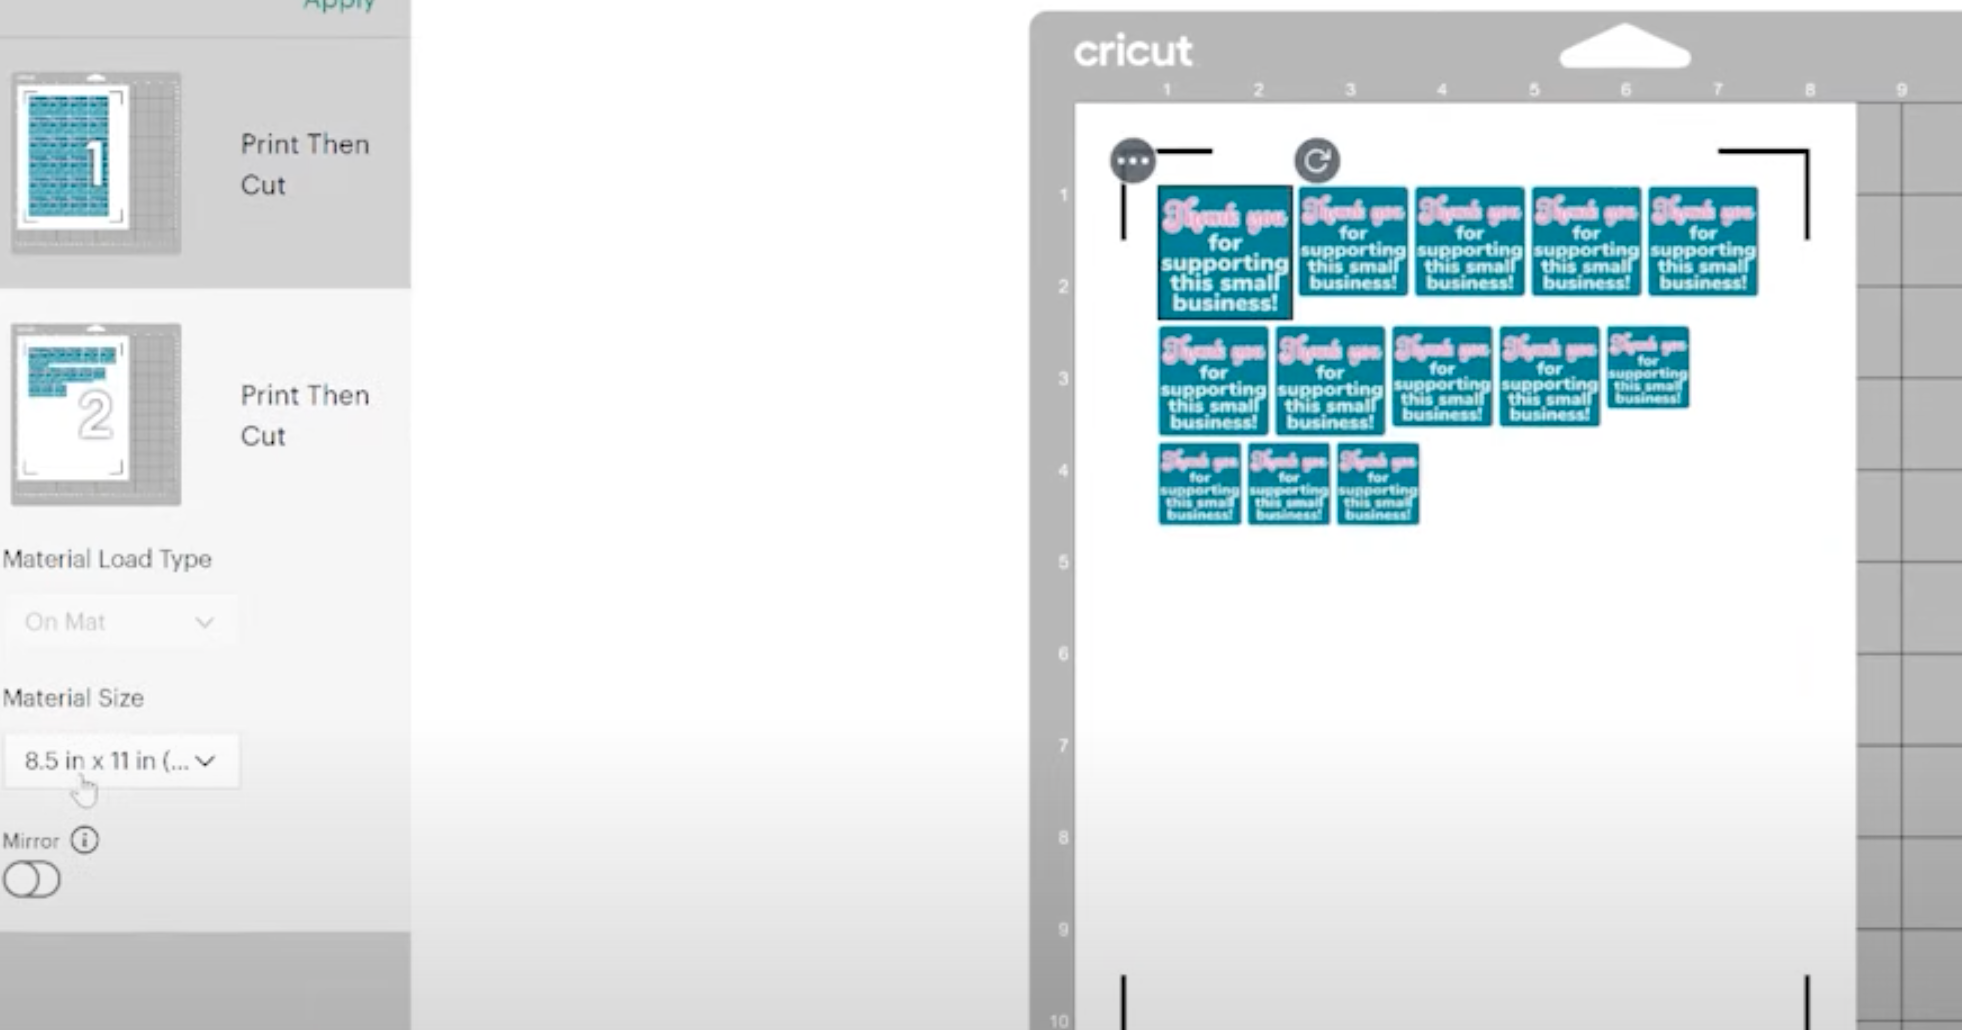
You can see that by default Design Space is laying the images out in rows. Let’s look at how to prevent this from happening.
How to Attach Print Then Cut Images
In order to keep the stickers laid out how we have them on the canvas we need to select all of the layers and then click Attach at the bottom of the layers panel.

With the images attached, Design Space will see them as one layer. You want to make sure you are not attaching the template layer when you do this.
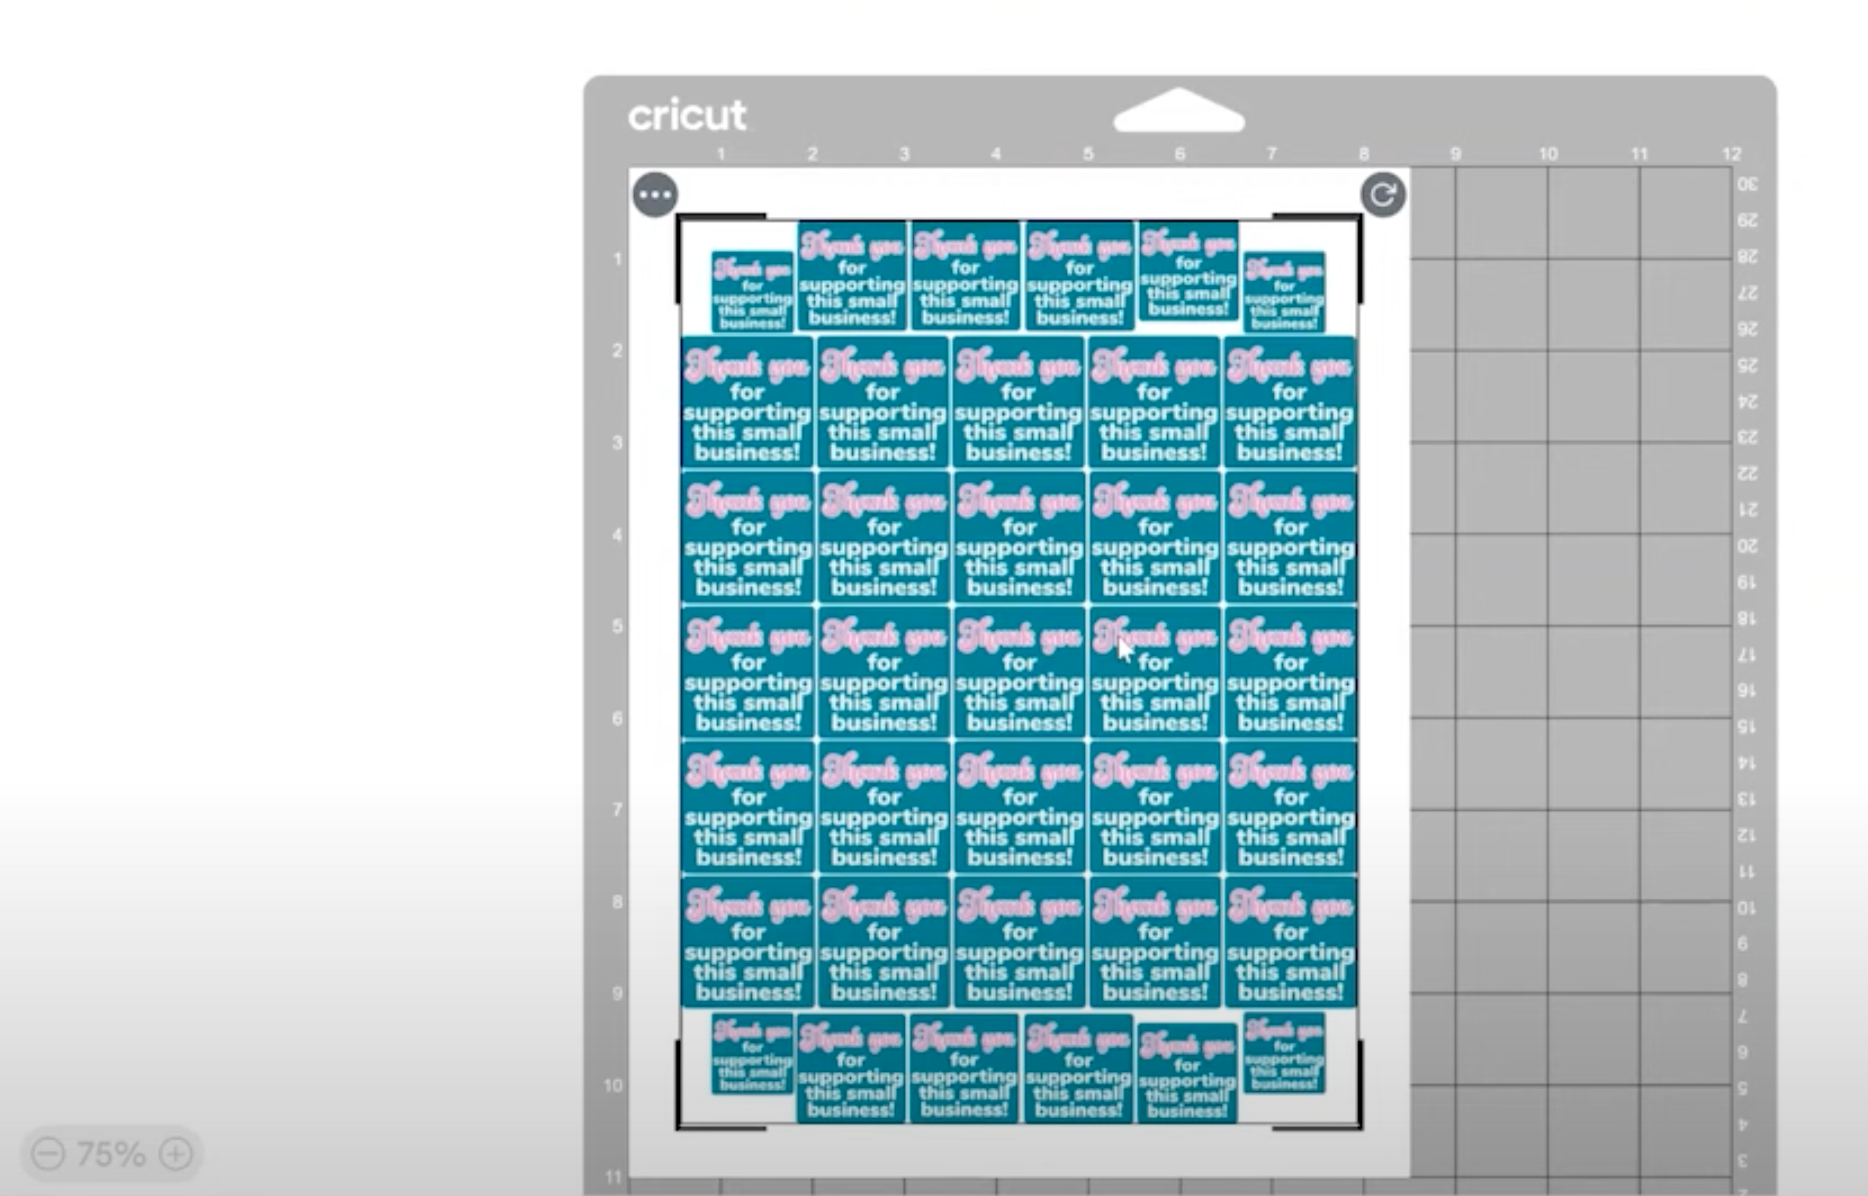
Now you can see with the stickers attached they’re laid out exactly right on the mat screen in Design Space.
On the mat screen, with a Print Then Cut image, there is a dotted border around the sticker sheet.
This dotted line represents the maximum Print Then Cut size for this size of paper. If I had the template here, it would be the exact same size as that dotted line.
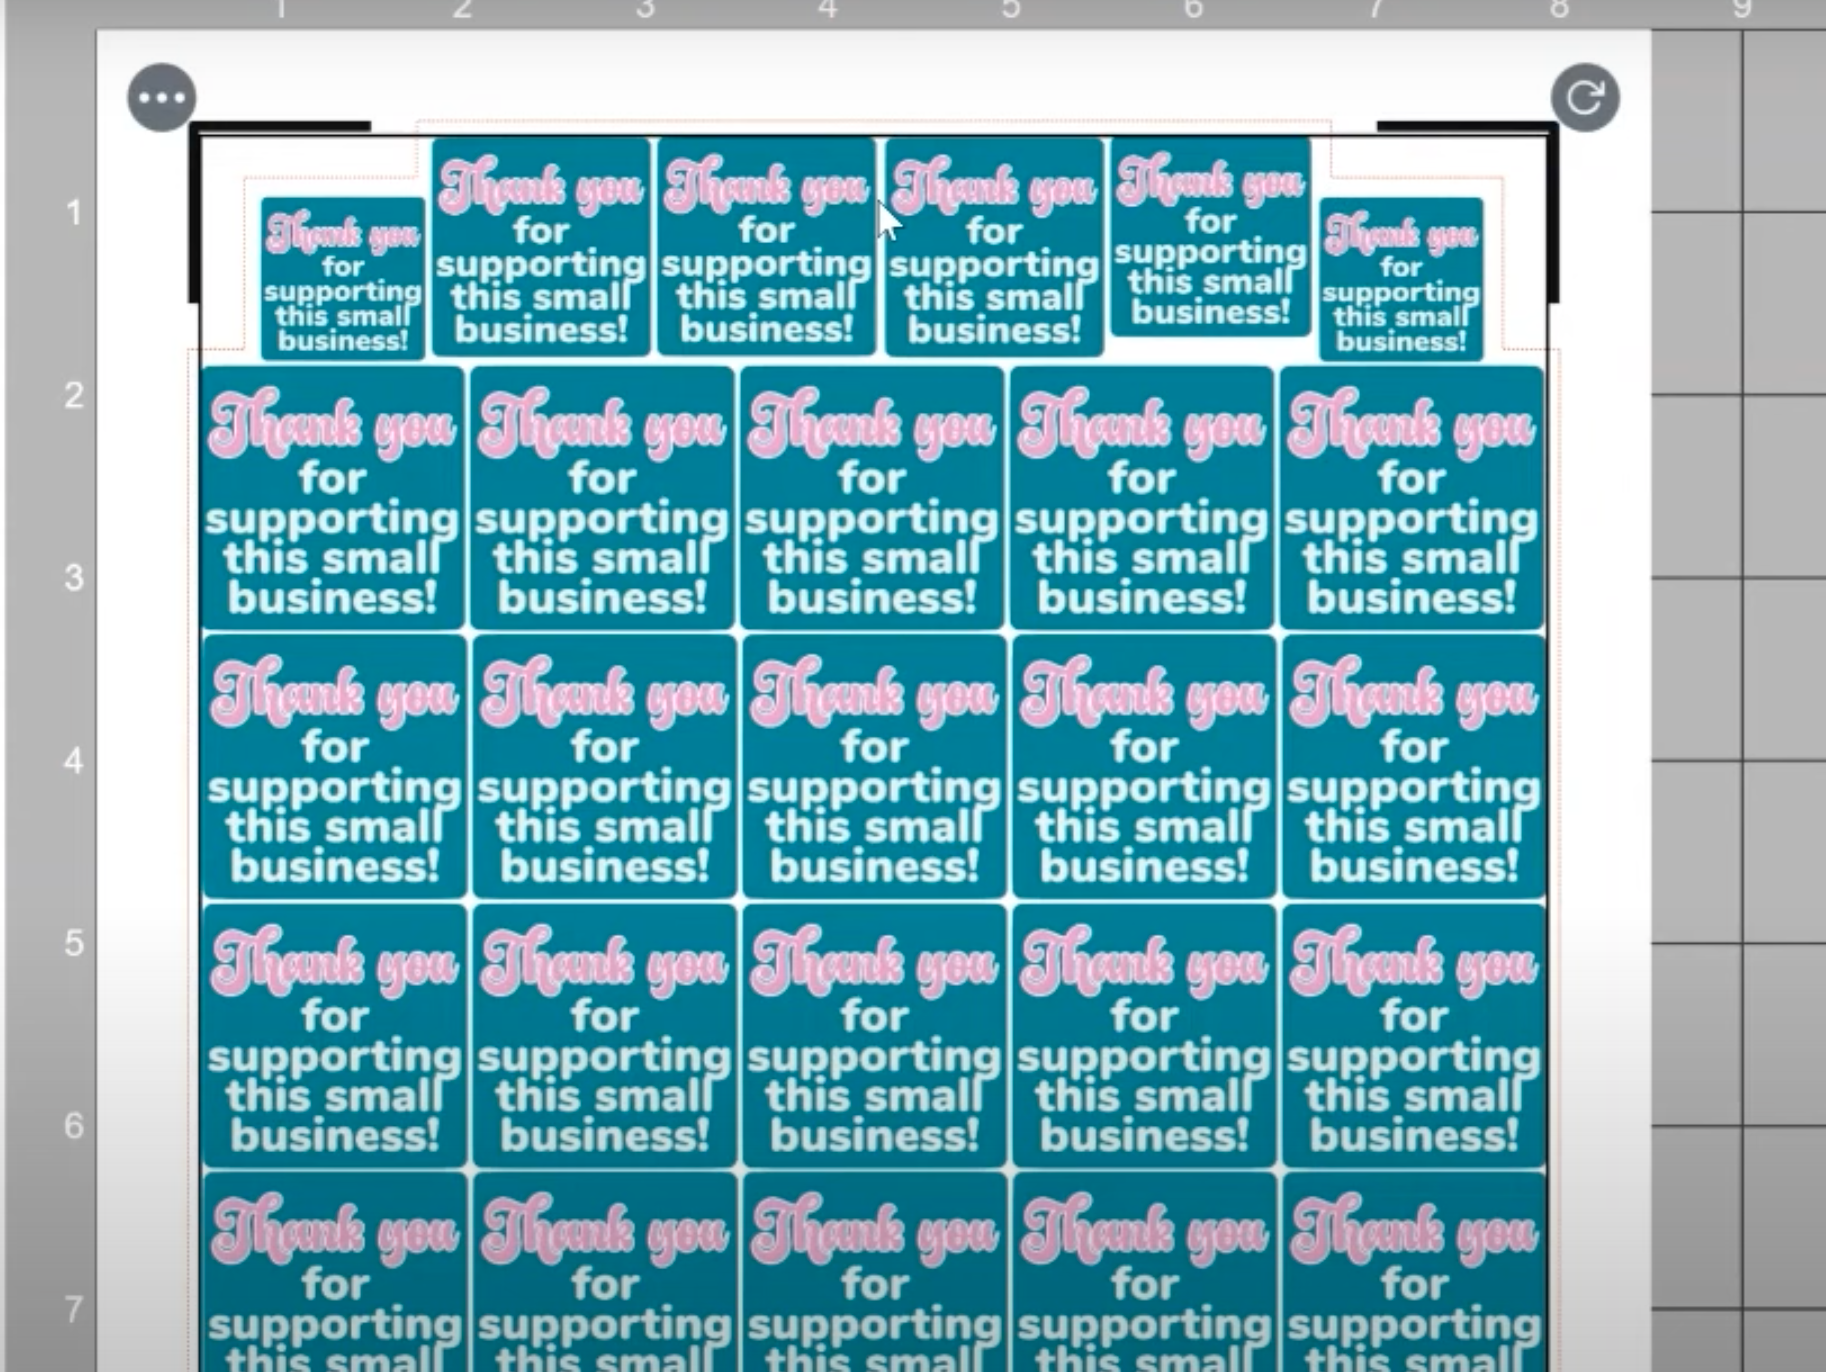
If you choose to not use the template, you will be able to see on this screen where the boundaries are.
How to Use Larger-Sized Print Then Cut Templates
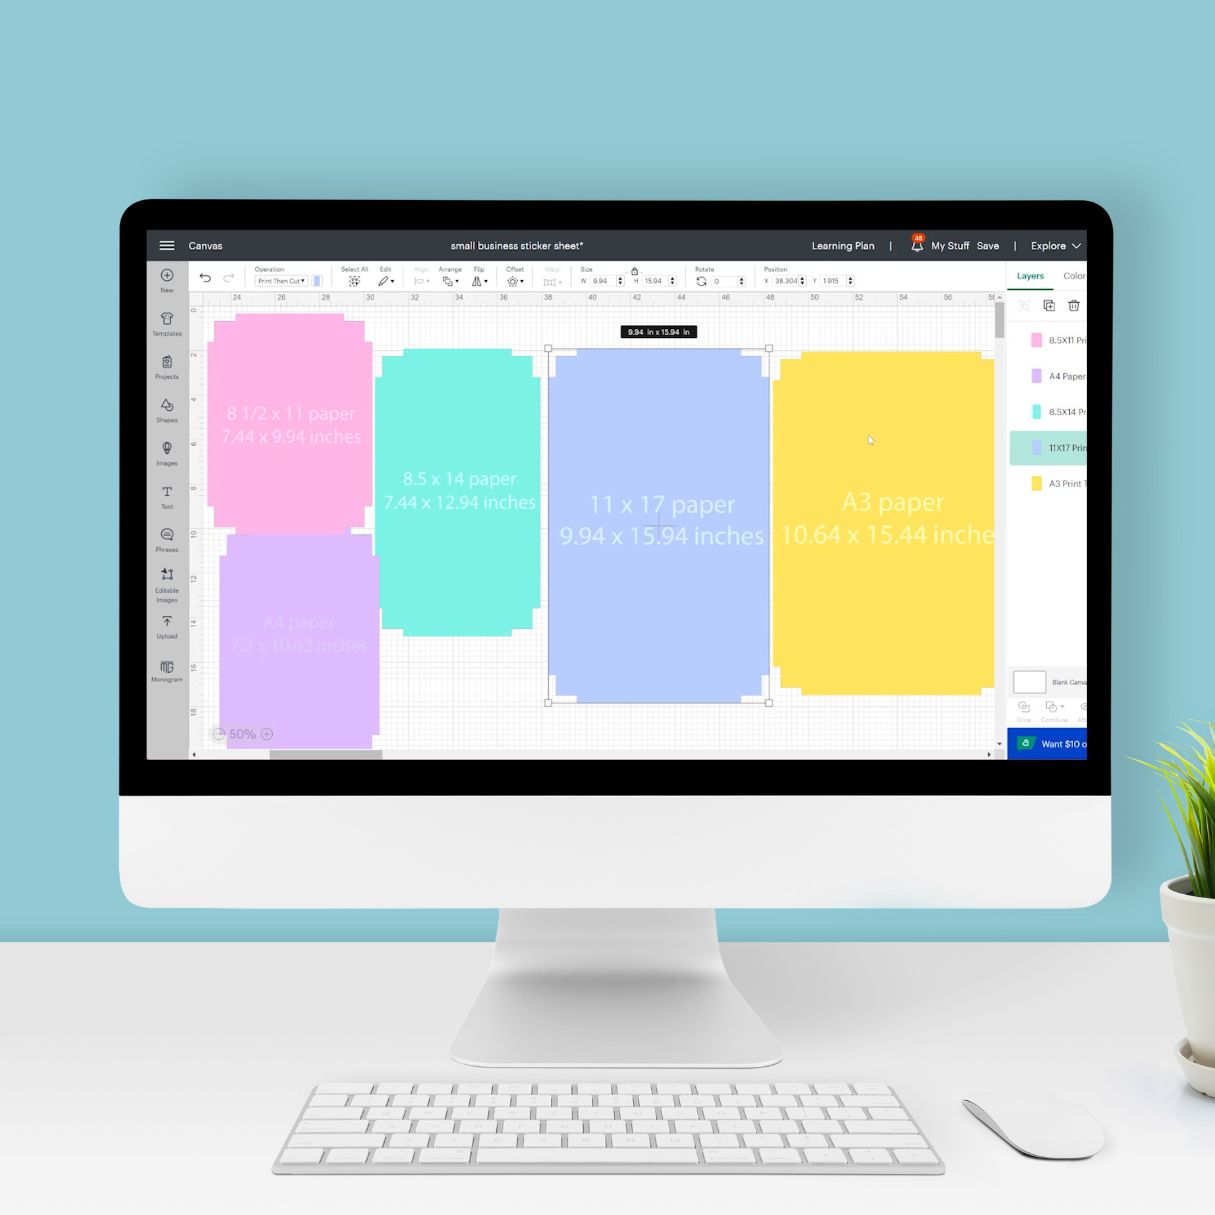
I have included templates for all the new Print Then Cut sizes. You will be limited on which ones you can use depending on your printer.
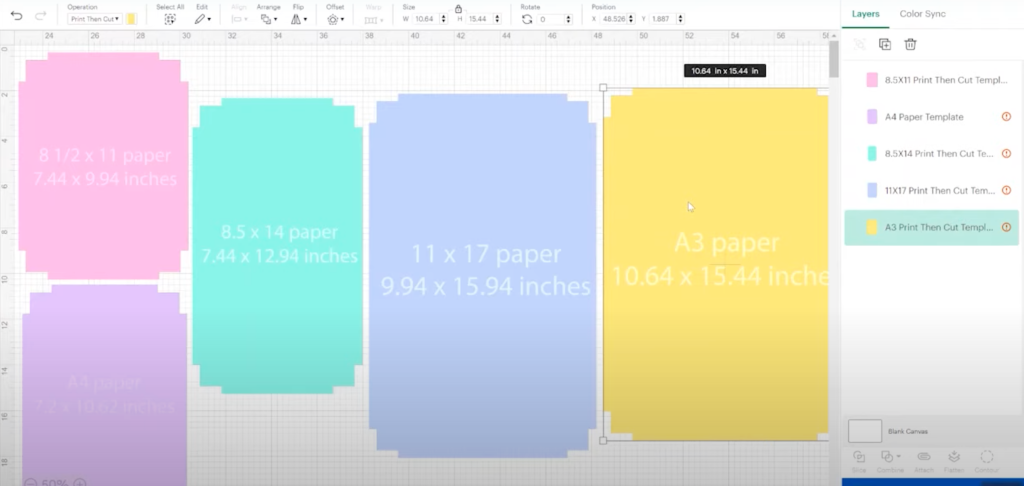
In the photo above, you can see I have all of the templates on my Design Space canvas. If you look to the right, in the layers panel, you can see that 4 of the 5 templates have an error icon next to them.
If you see these errors, that is because your image is larger than the Print Then Cut size you have selected. You can eliminate the errors by changing your Print Then Cut page size.
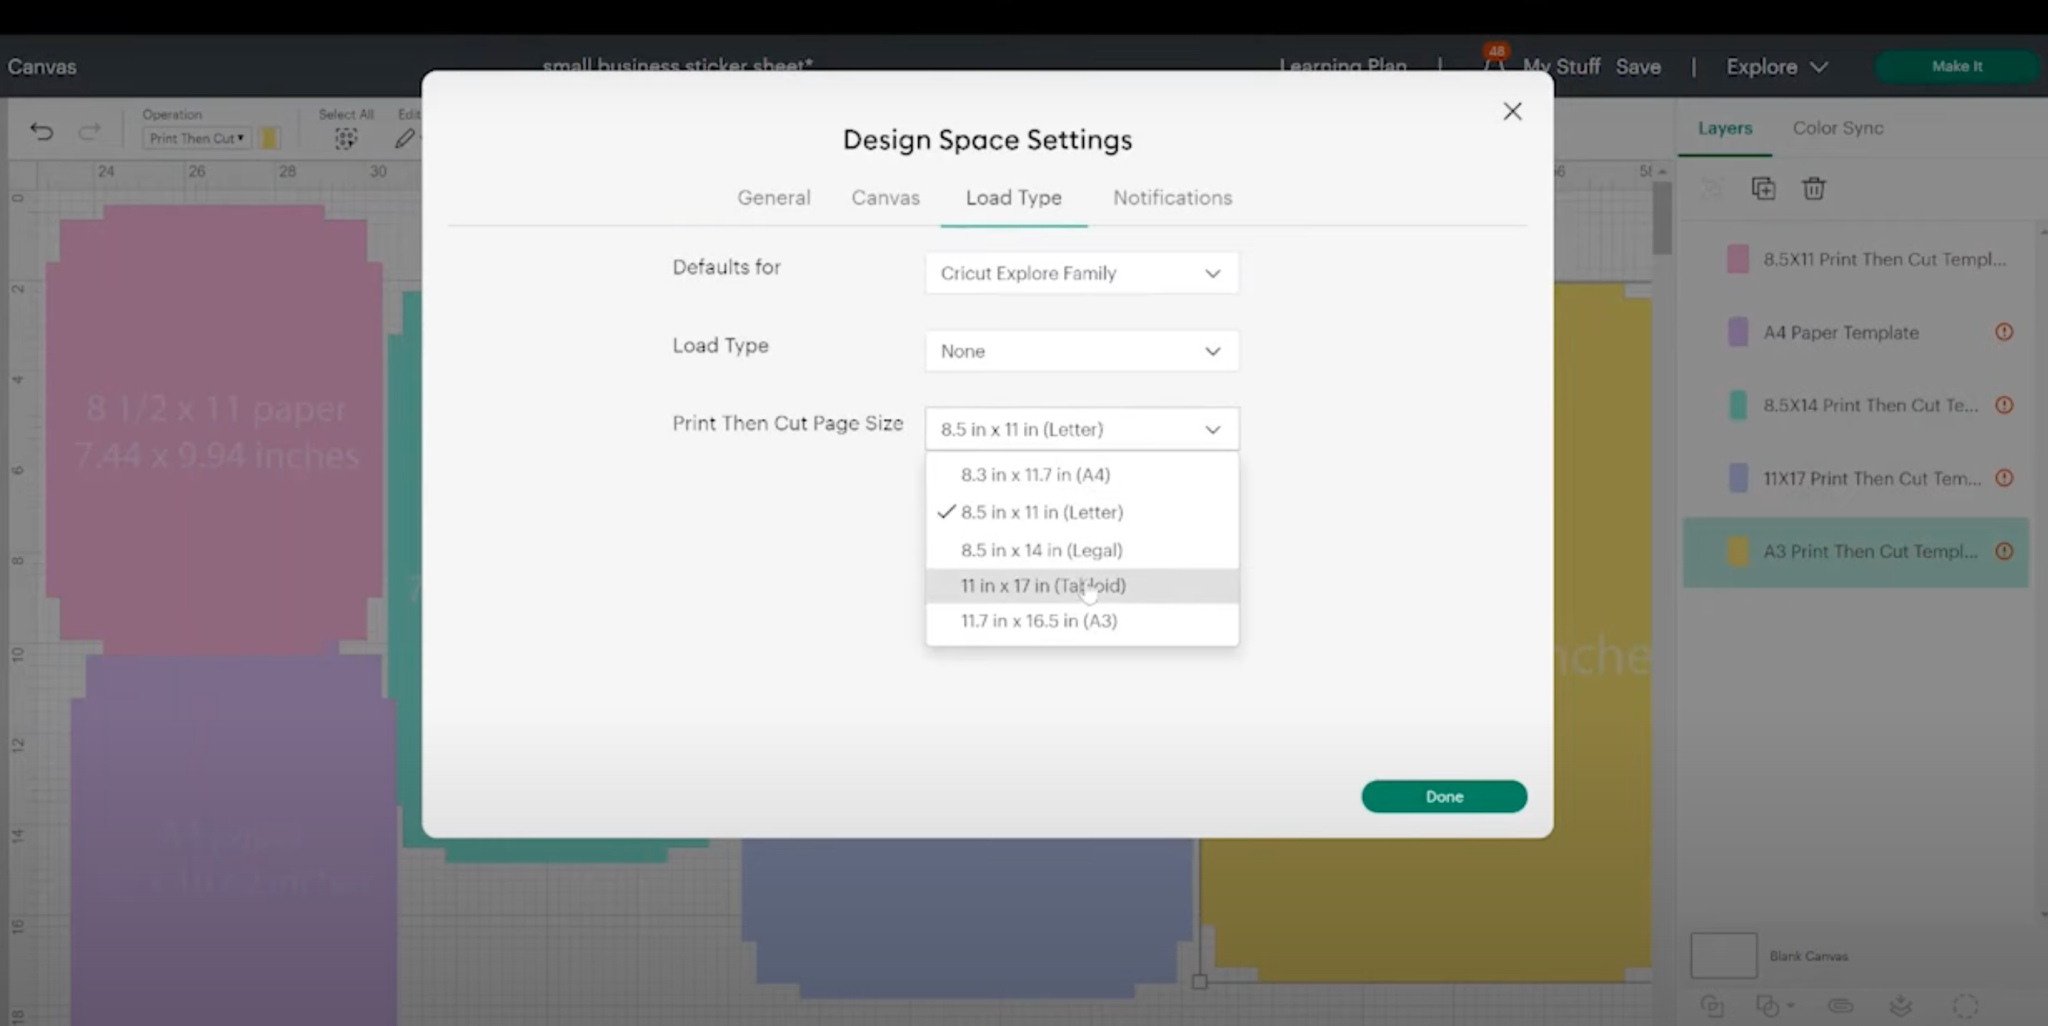
To change the Print Then Cut page size you can either click on one of those error icons in the layers panel or go back to the settings and then Load Type and change the paper size there.
Remember, your paper size is determined by what size your printer is able to print.
My Printer can print up to the 11″ x 17″ (Tabloid) size but not the 11.7″ x 16.5″ (A3) size. By choosing the correct size for my printer, you can see in the photo below that the error has gone away for all templates except the A3 size.

If you’re seeing an error and you don’t think you should be, double-check that your template size is set exactly the same size as is shown on the template image.
If that is correct, make sure your Print Then Cut page size is set correctly. These options should fix errors that are showing up.
IMPORTANT: Do not let Cricut Design Space auto-resize the templates! This will make them the incorrect size!
Final Thoughts on Free Templates for New Cricut Print Then Cut Sizes
Now that we’ve looked at how to use the free templates for new Cricut Print Then Cut sizes I hope you’ll find them easy to use. Using the free templates will allow you to create full-page Print Then Cut prints to help you maximize your printable materials.
I love these new sizes. Even with a regular 8.5″ x 11″ sheet of paper, we have a larger print area than before! What will you make first?
If you have any questions about how to use the free templates for new Cricut Print Then Cut sizes, leave them in the comments and I will answer them for you!