This post and photos may contain Amazon or other affiliate links. If you purchase something through any link, I may receive a small commission at no extra charge to you. Any supplies used may be given to me free of charge, however, all projects and opinions are my own.
Today I am so excited to introduce you to the brand new Glowforge Spark craft laser. Glowforge Spark is a diode laser that is even smaller than Glowforge Aura making it perfect for crafters brand new to laser crafting or those who are looking to add the ability to cut designs on demand at craft shows and other events.
Glowforge is offering a special right now for people who pre-order Spark and I’ll talk about that more later. Please note that Glowforge sent me this laser early to create content.
If you’re brand new to lasers and want to learn more about them and what type might be right for your crafting needs, my free Laser Ready course is a great place to start.
You can watch me walk through the whole process of unboxing my Glowforge Spark and making my first project by pressing play on the video below.
Laser Safety
Before you continue with this post, I have a video about laser safety and I highly recommend you watch that before you start making projects with your Glowforge Spark.
One of the most important things to know is that you should never leave your laser when it is operating. Because Spark is a Diode laser it does go a little slower so projects can take a long time to complete. Make sure you have the time to stay with your laser the entire time before you begin.
Keep a fire extinguisher and a fire blanket within reach in case any small fires start. You can turn your Glowforge Spark off at any time by unplugging it. It will also stop if you lift the lid.
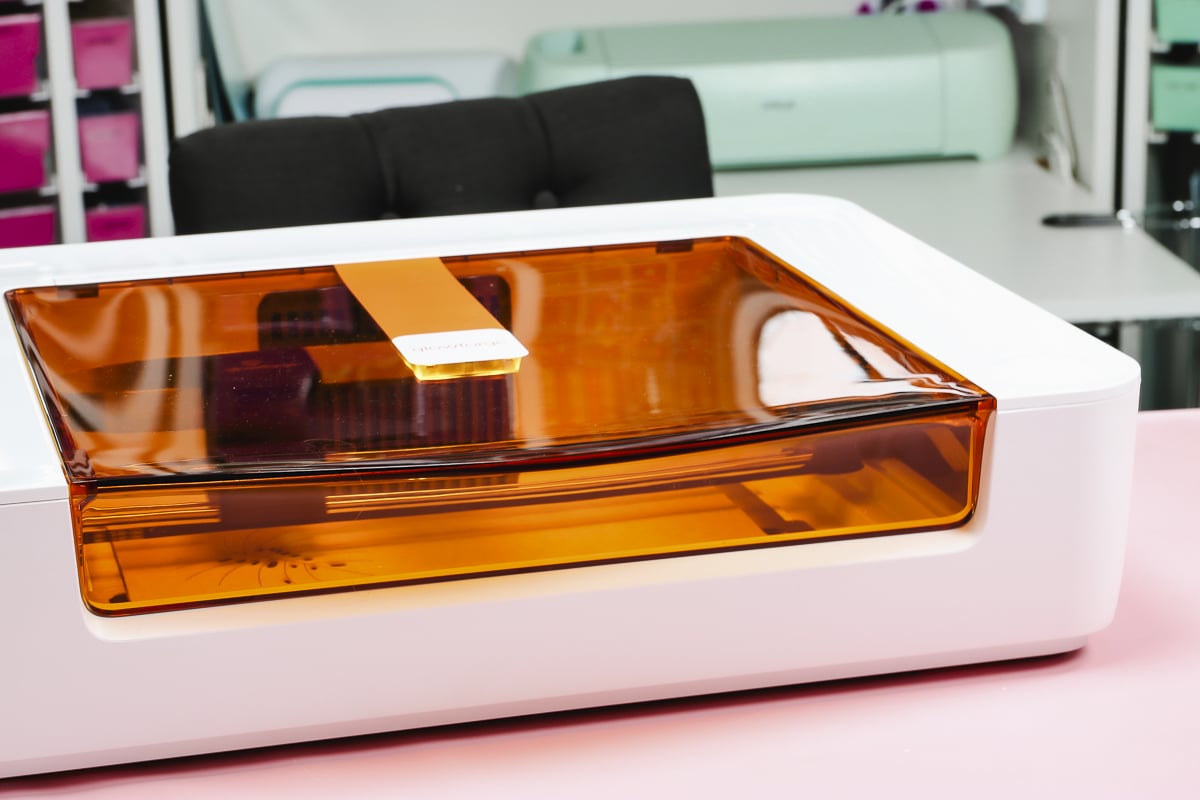
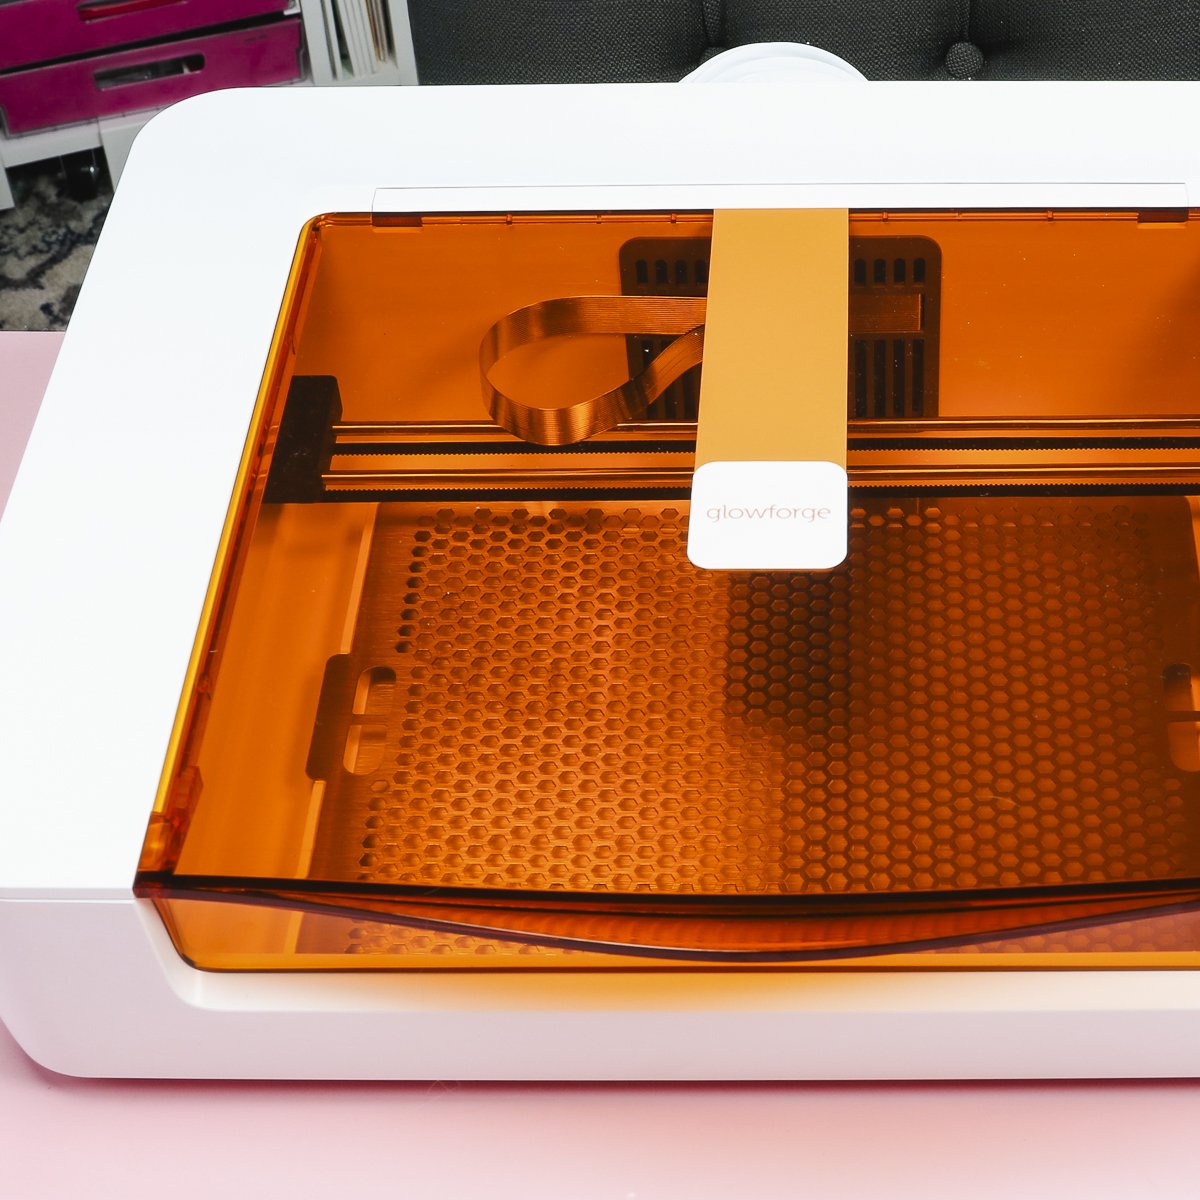
You should never look directly at a laser when it’s cutting. Glowforge Spark has an orange lid that will protect your eyes and the laser will shut off if you lift the lid. I am a big fan of this safety feature.
You also need to make sure you vent your laser properly. We’ll talk more about that as we go through the unboxing process. However, you can vent the Spark out of a window or purchase an air filter separately.
Never cut materials that are not safe to use in a laser. The fumes from these can be toxic. See the materials section for more information.
Glowforge Spark Specifications
The Glowforge Aura was released many months ago as a beginner laser alternative. You could say that Glowforge Spark is the little sister to Glowforge Aura. There are a lot of similarities between these two lasers including how they look and many of the materials they can cut.
What does the Glowforge Spark do?
Glowforge Spark can engrave, score, and cut different materials just like Glowforge Aura. I have a list of those materials later in this post if you are wondering about a specific material.
Glowforge Spark Power Rating
Both the Spark and Aura are 6-watt Diode lasers which means they aren’t as powerful as the bigger lasers and take longer to make projects. The Spark is also slower and has less capability than the Aura.
How Big is Glowforge Spark?
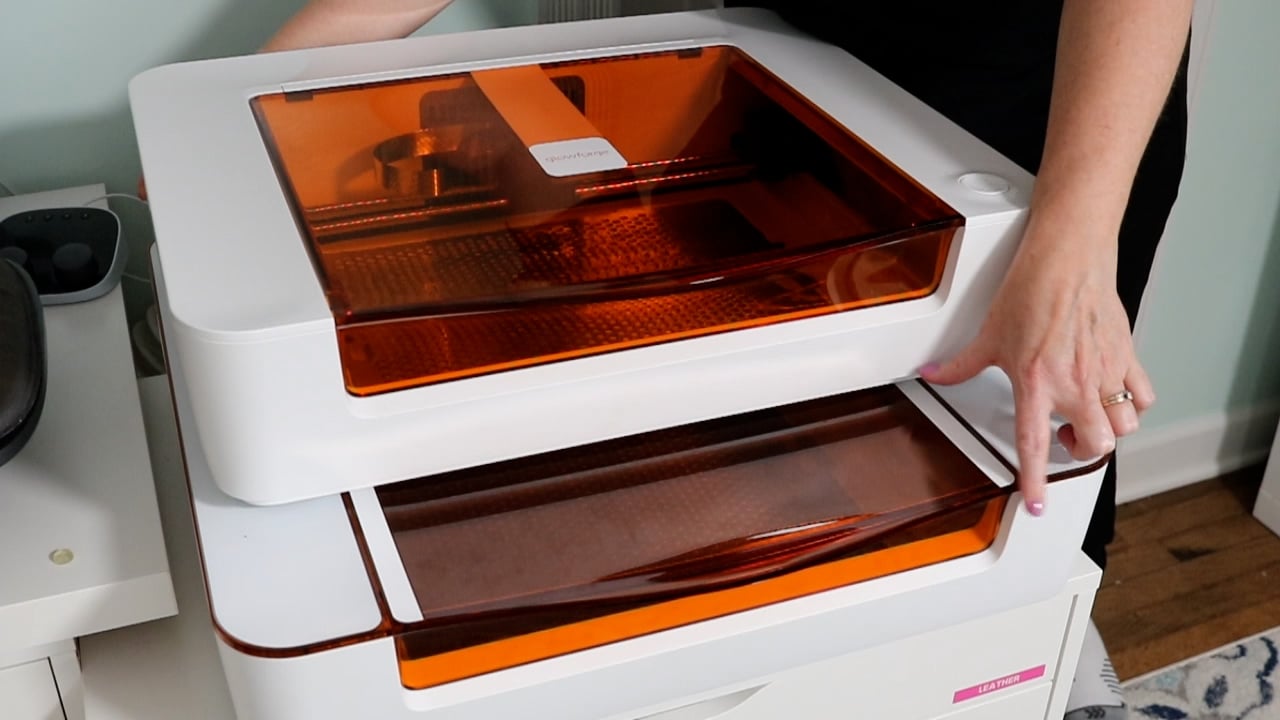
Spark is smaller than Aura by quite a bit. When it comes to width it is close to the same as the Aura and the overall height is similar as well.
The depth from front to back however Spark is significantly smaller. It is also very light. Aura is still a small laser but the overall size can make it awkward to move around.
Glowforge Spark is very easy to move as needed making it perfect if you need a laser you can take with you.
What are the Size Restrictions of Glowforge Spark?
Both the Glowforge Spark and Aura have a maximum cutting thickness is 1/4 inch. For engraving the maximum thickness is 3/4 inch. The engraving thickness is more than the cutting because you can remove the honeycomb tray and place items to be engraved on the bottom of the laser.
You will want to make sure that your laser head itself never touches your materials.
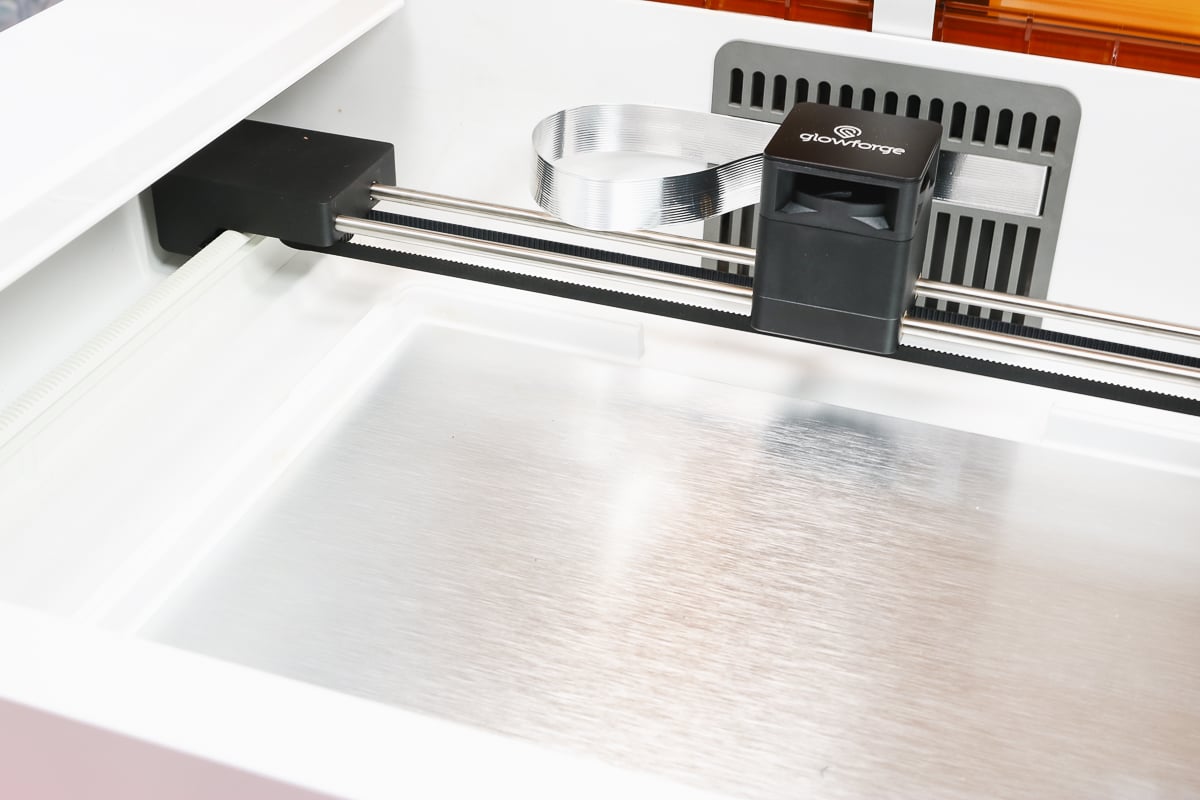
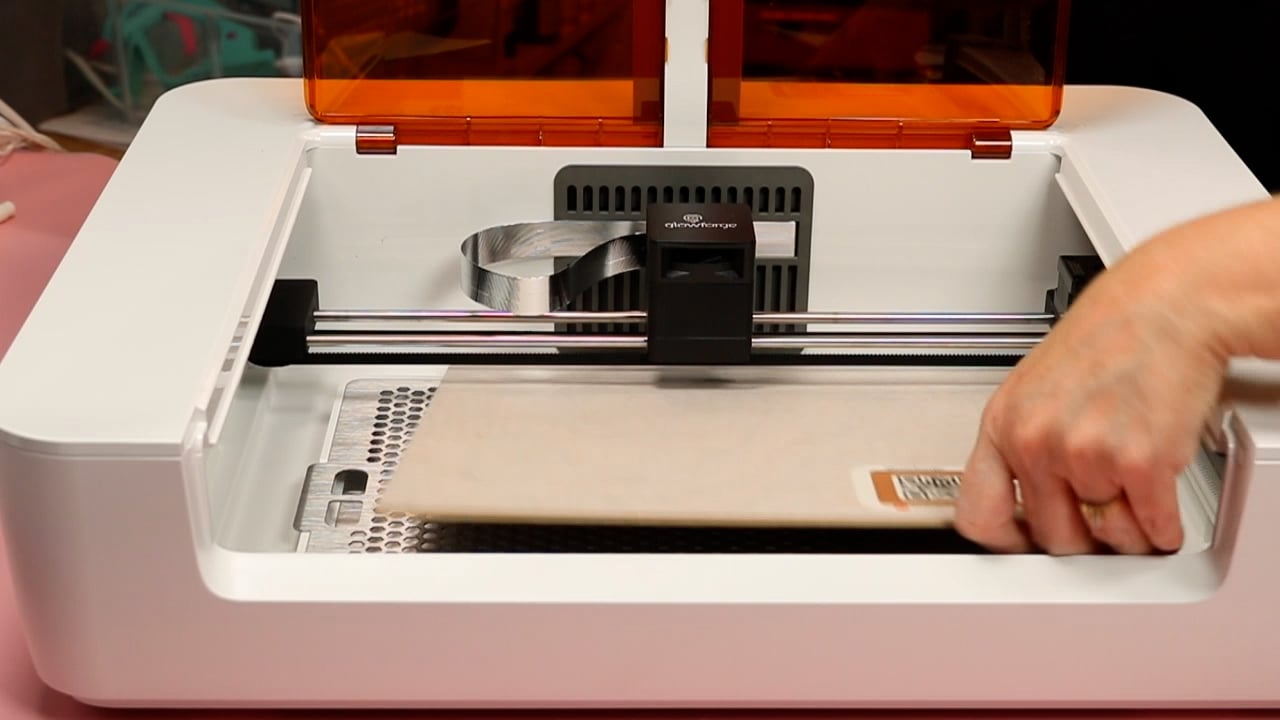
For thinner materials that you place on the tray, you can place a material that is 12″ x 12″ but the maximum size that can be cut or engraved is 9″ x 12″. This is smaller than the Glowforge Aura.
With engraved projects where you are removing the honeycomb tray, your total material size would need to be no more than 9″ x 12″ because the material has to sit down in that area. Again this is smaller than the Glowforge Aura.
Does Glowforge Spark Have a Pass-through Slot?
The main difference between the Glowforge Aura and Glowforge Spark is that the Spark does not have a pass-through slot.
You are limited in size to what can fit inside the laser. With Glowforge Aura, you can cut projects that are 12″ wide but very long because you have the pass-through slot, so there is no real limit on the length of what you can cut.
What Materials Can I Cut with Glowforge Spark?
You can cut any material with Glowforge Spark that you can with the Glowforge Aura.
Spark is a Diode laser which means it has limitations on what it can cut. You should always use laser-ready or laser-approved materials when using a laser.
Diode lasers cannot cut clear materials like acrylic. They can also have problems cutting white or blue materials. Keep this in mind when planning your laser crafting projects.
There are also materials that release toxic fumes when they’re cut with a laser and you should never cut those materials with your Glowforge Spark.
Glowforge Proofgrade Materials
You can cut a wide variety of materials with the Glowforge Spark but Glowforge Proofgrade materials are a great place to start and are all laser-compatible. These materials are all already tested in Glowforge Lasers so the settings are tested and proven and you can easily find them right within the Glowforge program.
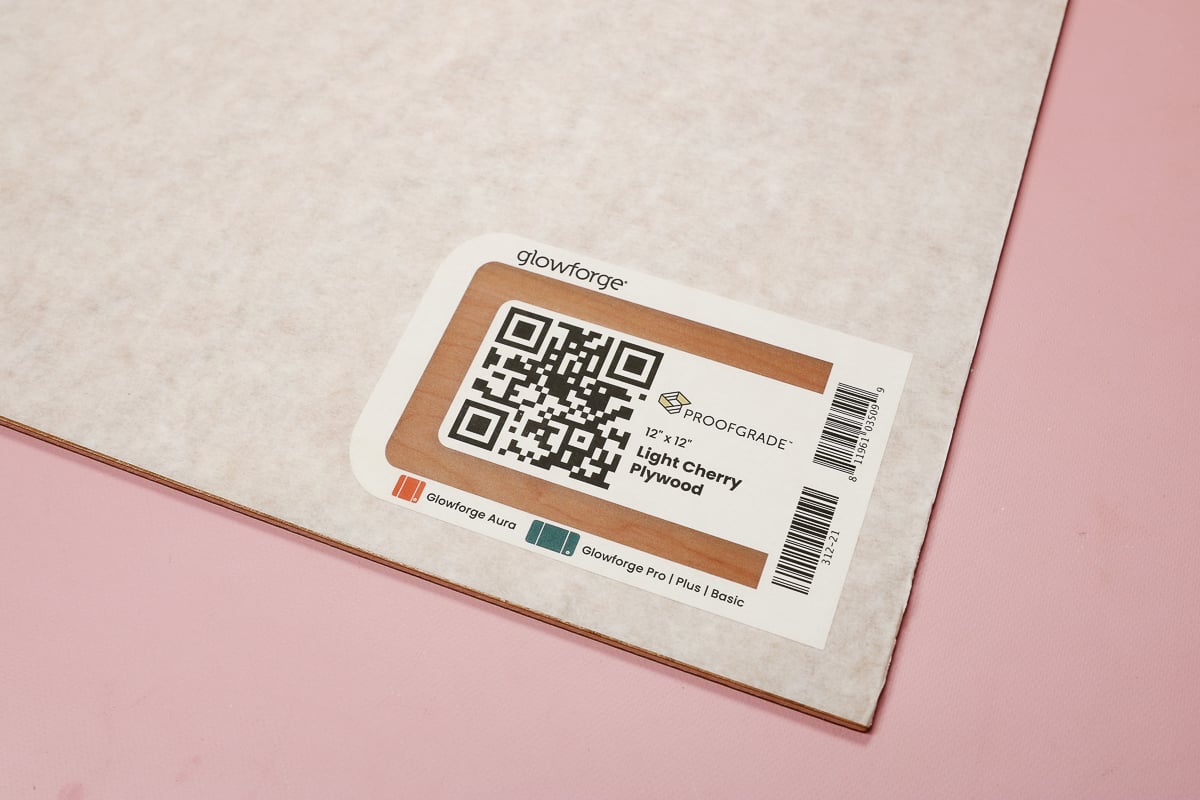
Proofgrade materials also already have masking applied to both the front and the back which helps prevent burning or charring on your actual project.
They also all have a QR Code sticker on them. When you place Proofgrade materials into your laser, you can see that QR Code on the screen and your laser will scan it and automatically select that material and the correct cutting, scoring, and engraving settings for it.
Any Proofgrade materials that can be used in Glowforge Aura can be used in Glowforge Spark. These include wood, leather, and even some iron-on type materials.
Other Materials
You do not have to use the Glowforge materials in this machine. When you are picking other materials here are a few things to look for:
- Always make sure the material says it is laser compatible or laser ready.
- All materials MUST be compatible with a diode laser!
- For cut settings, you will need to try the presets in the Glowforge software. There will probably be some trial and error to find what works. You can use the Glowforge community for research or to ask questions.
- Settings for the Spark are different than any other machine that Glowforge makes. You cannot go by settings that someone else used for a material if they used another type of Glowforge machine.
Some materials can damage and ruin your machine! Please look at each material carefully before using in your laser!
Here is a brief list of materials that can be cut or engraved with this machine:
- Iron-on (laser-safe ONLY)
- Stickers (laser-safe ONLY)
- Leather (no chromium)
- Acrylic (3 mm max)
- Wood (3 mm max)
- Cardstock
- Paper
- Fabric
- and so much more!
For cardstock, paper, and fabric, you may have some trial and error with settings and the fire risk may be increased.
NOTE: For materials that are not proofgrade, you may need to add a masking if one does not come on it from where you purchase.
Materials You CANNOT Use
There are some things that the Glowforge Spark will not cut and there are some materials that will even damage your machine. Some of the materials below are also toxic when cut with a laser. Ensure that any materials that you use DO NOT fall on this list.
Here are the materials to AVOID using in this machine:
- Clear acrylic
- Any clear, white, or even blue materials can be an issue
- Leather that contains chromium
- Carbon-based materials
- PTFE or Teflon based materials
- PVC based materials (most adhesive vinyl and iron-on products would fall into this category)
- PVB based materials
- Beryllium Oxide
Unboxing Glowforge Spark
Now that we’ve talked about how Glowforge Spark compares to Aura and some safety concerns let’s open up our Glowforge Spark.
What is Included in the Box?
Inside the box, you’ll find the Glowforge Spark itself. Under the laser there is another thin box, make sure you find that box and open it. That box contains a piece of Proofgrade material so you can easily make your first project. You’ll also find the honeycomb tray that you’ll want to add to your laser for cutting thinner materials.
Next, you’ll open the lid of the laser and here you’ll find another box along with some packing materials. Inside the box, you’ll find the hose for venting your laser and the plug.
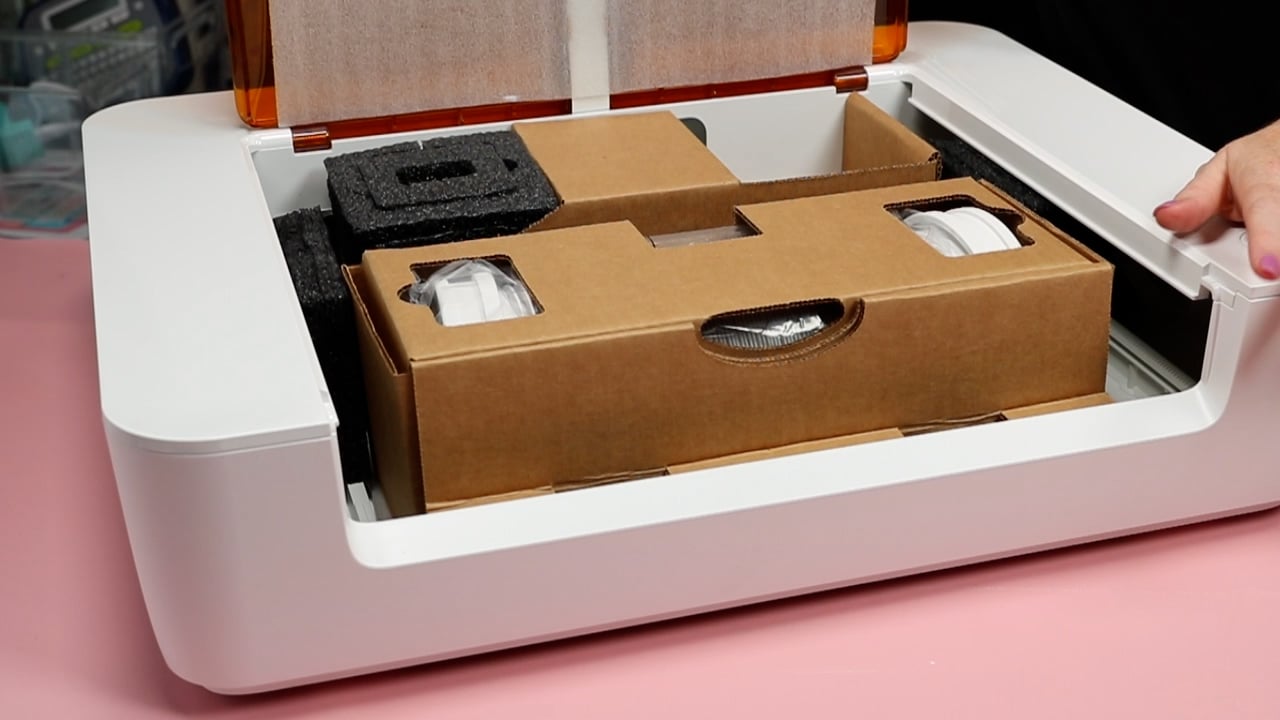
With that box removed, you’ll see the packing materials behind the bar inside the laser. You need to be very careful when removing this material because on the left, inside the foam section of the packaging is the laser head itself. You need to remove that carefully so you don’t damage the laser.
With the packaging removed, you’ll set the laser on top of the box on the rod and it attaches with magnets so just make sure it’s lined up correctly.
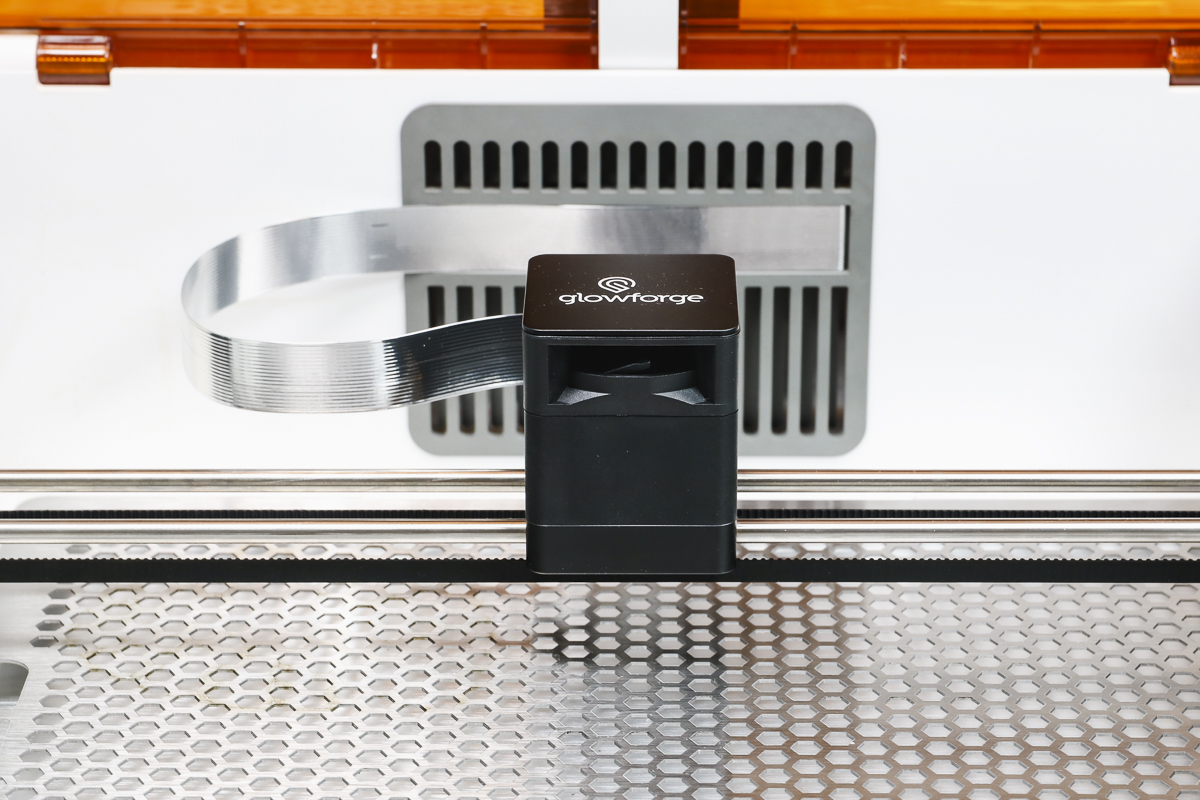
Make sure you remove all packaging materials inside the Glowforge Spark. Next, you can gently push the bar back and add the honeycomb tray to the bottom of the laser.
How to Properly Vent Glowforge Spark?
All lasers need to be vented. You can either vent out a window or use the Glowforge filter. The filter is an additional accessory but with it, you don’t need to set your laser up near a window.
Make sure the hose is attached tightly to the back of the laser.
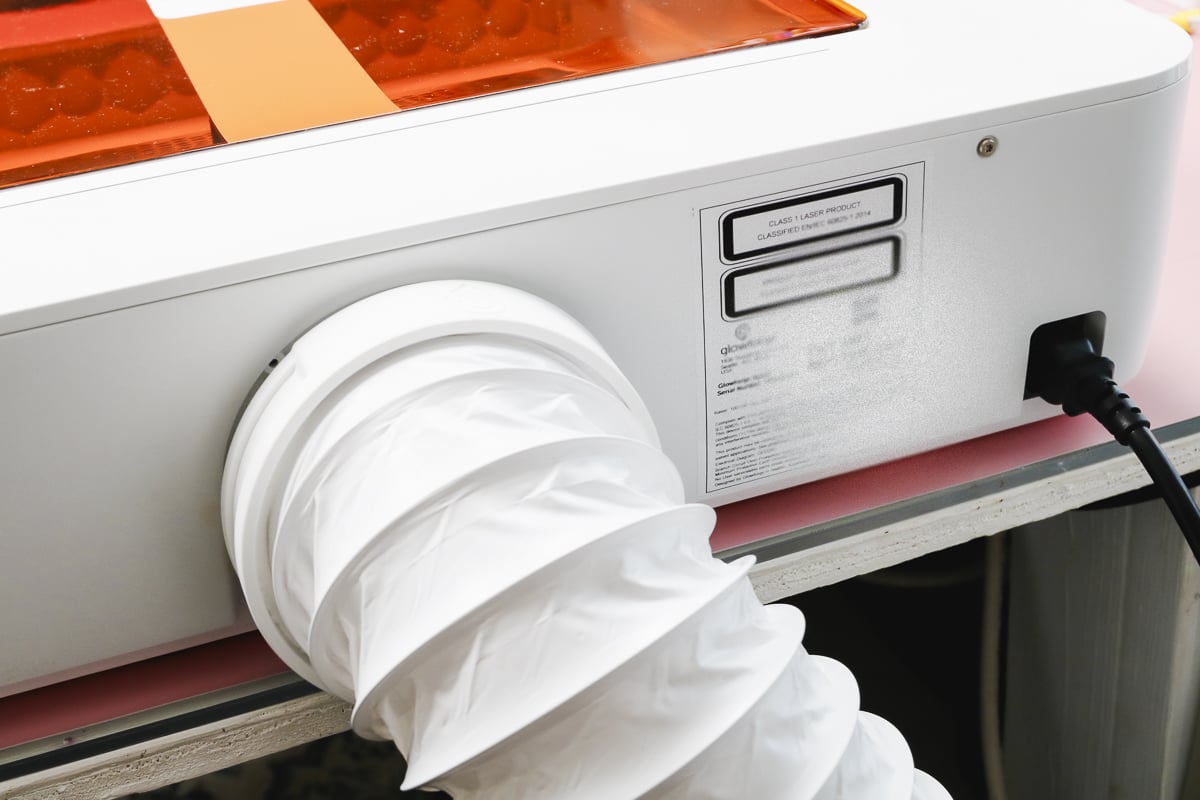
If you’re venting to the filter, you’ll attach that end of the hose the same way to the hole in the top of the filter.
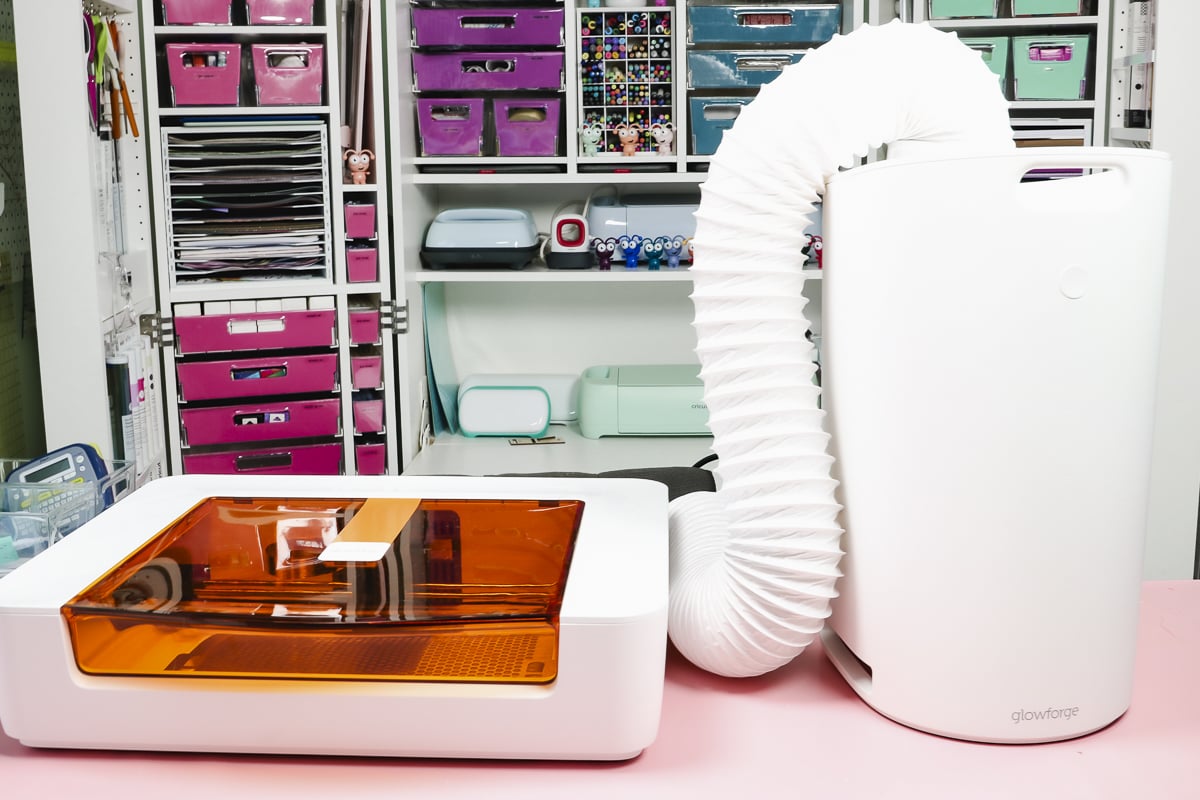
If you’re venting out a window, I recommend using cardboard or something that will allow you to block any of the debris from floating back into your work space.
How to Set Up Spark
Now we’re ready to set up our Glowforge Spark. You will need your computer at this stage.
Go to setup.glowforge.com and here you may be prompted to download some setup software. That software will put a program called Glowforge Wi-Fi Setup on your computer. Follow the steps from there.
These steps include plugging in the Glowforge Spark. You turn Spark on and off by plugging it in and unplugging it. Glowforge Spark is considered a printer so you’ll connect it to the Wi-Fi and use that Wi-Fi to connect to your computer.
What Software Does Glowforge Spark Use?
Once you’re Spark is connected to the Wi-Fi, it’s ready to go. The application will direct you to app.glowforge.com and that is where you use your designs.
In the right-hand corner, you should be able to pull down your list of printers. You can see that I have both the Glowforge Aura which is offline and the Glowforge Spark which is now connected and ready to be printed to.
Both the Glowforge laser and the filter need to be plugged in and then they should automatically connect to each other. When you select the laser you are using you should see that it has the laser + filter listed.
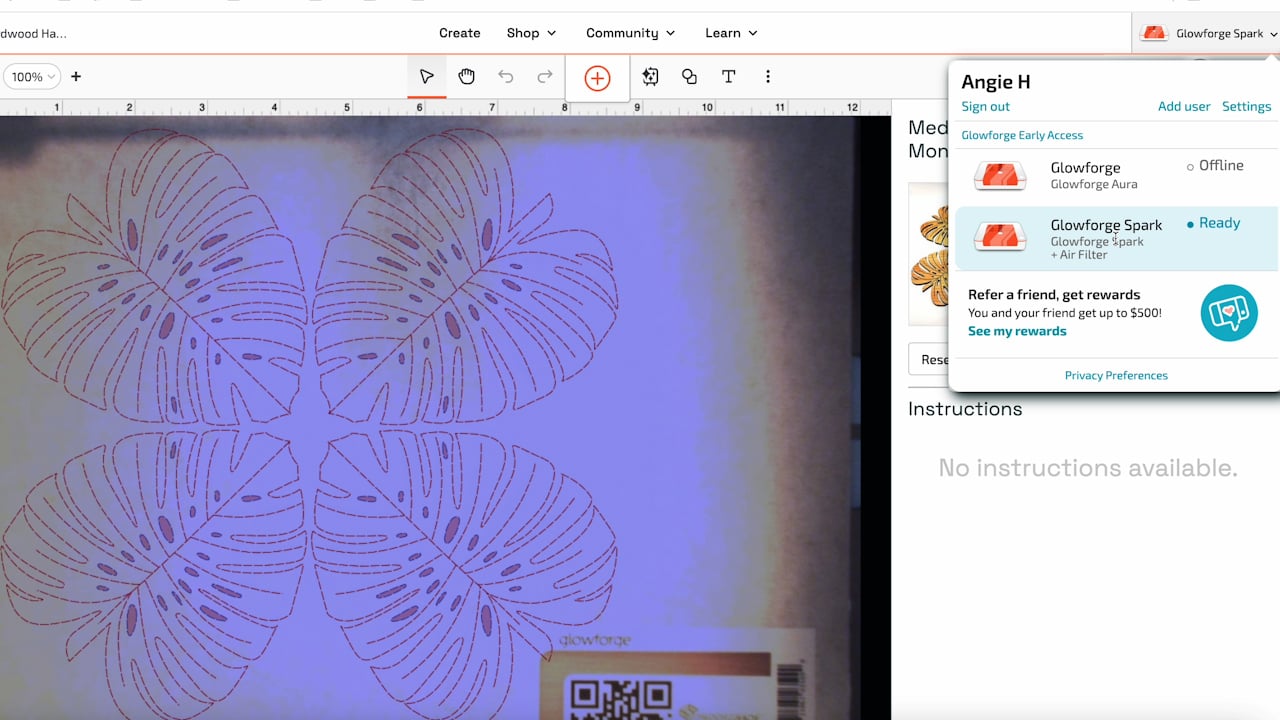
I have other tutorials on uploading your own designs to your Glowforge and how to make other projects so I am not going to go into all of that in this post.
How to Make a Wood Coasters with the Glowforge Spark
NOTE: When you have your project set up and click to start the project you will hear the filter kick on automatically. This can be loud!
Step 1: Choose Your Design
I mentioned that you can upload your own designs into the Glowforge app but they also have designs within the app that you can use. Some designs are free if you have a premium subscription. When you first link your Glowforge Spark, you’ll also have free sample projects you can use.
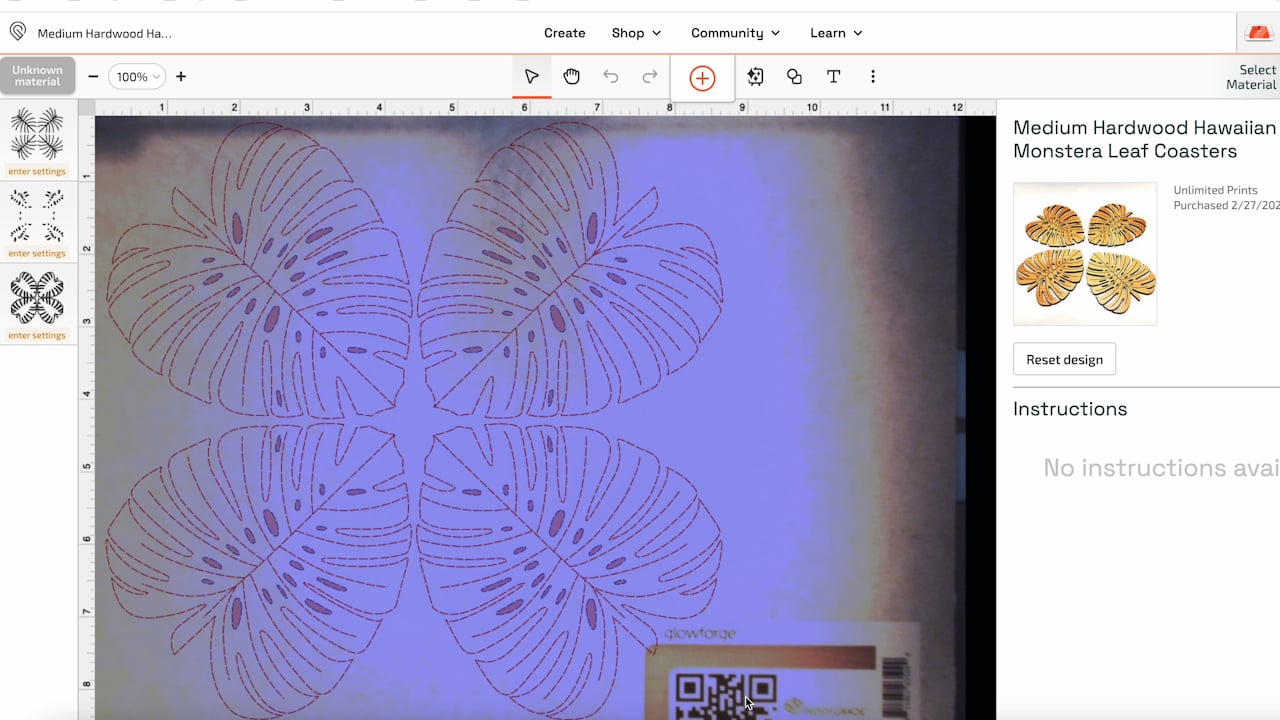
I chose the Monstera Lake Coasters for my first project.
Step 2: Confirm Material Type
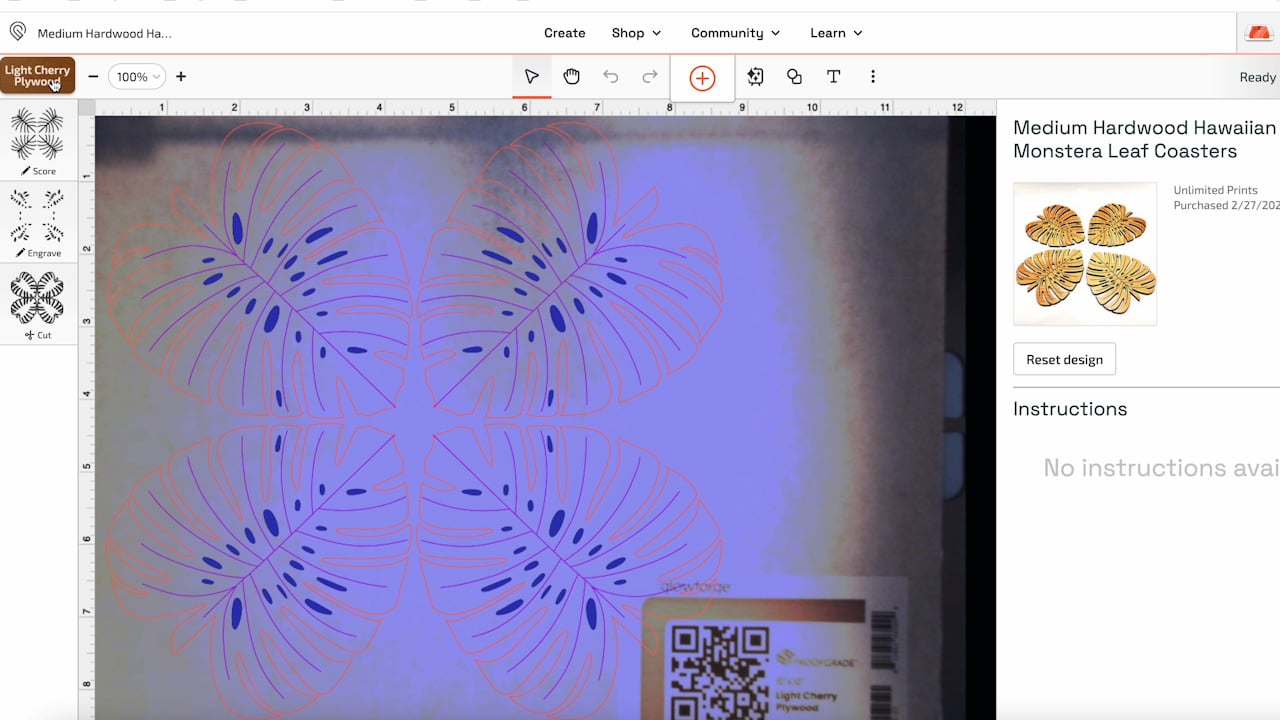
I am using a Proofgrade 12″ x 12″ sheet of light cherry plywood for my project. Glowforge Spark can’t cut a project that is 12×12 but this piece of material does fit inside the bed of the laser. With the material inside the laser, I can use the app to locate the design right where I want it.
In the upper left corner, you should see your material if you are using proofgrade materials. If it says “Unknown Material”, it may mean the camera cannot see the QR code well enough to scan it. To fix this simply lift the lid and adjust the material so the QR code is easier to read.
Now in the design panel, it says Light Cherry Plywood so it was able to read the QR code correctly.
Step 3: Adjust Layers
On the left-hand side, you can see that this design has 3 different layers. We can adjust each of the layers. So, the top layer I have set to score, the middle layer set to engrave, and the bottom, outside layer set to cut.
I changed the middle layer from a cut layer to an engraving layer so I could show you how all three of these different functions work. To change any of the layers, click on the layer. From there you can click on what setting you want to use.
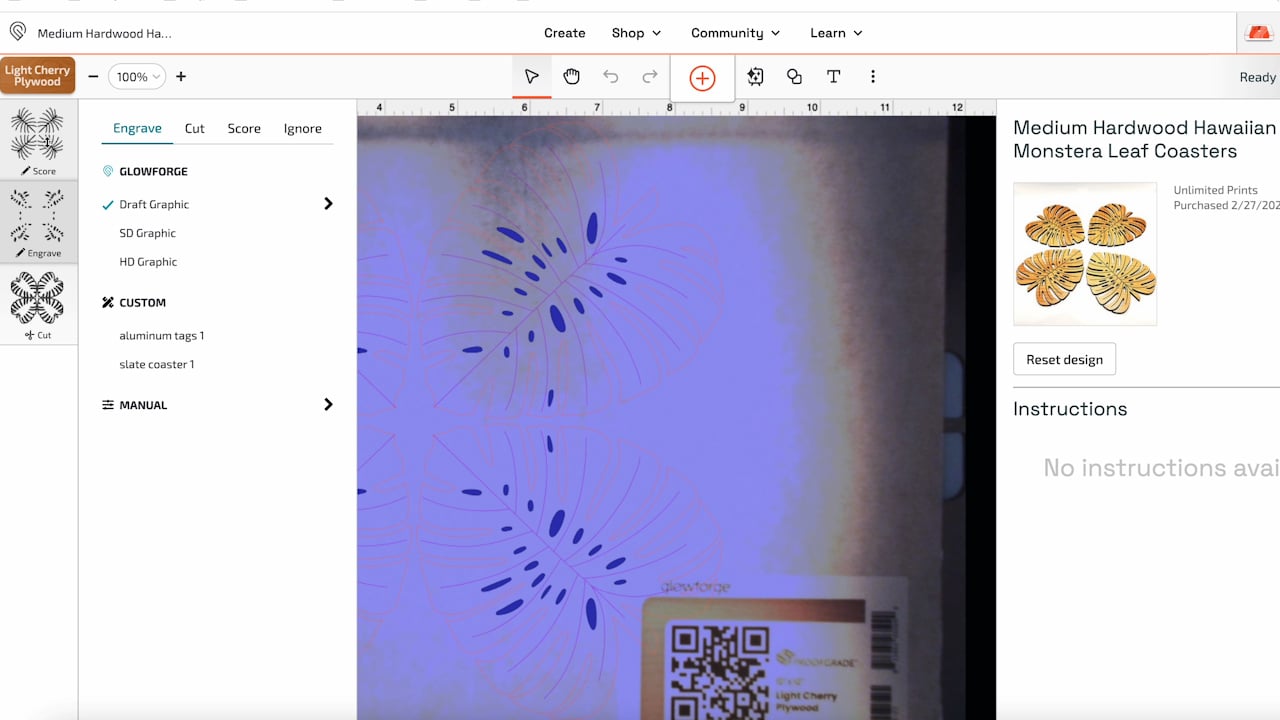
Under the engrave setting, there are a few different options; Draft Graphic, SD Graphic, or HD Graphic. I chose HD Graphic for this project.
Here you can also see that the cut line says it’s a Proofgrade cut because we are using a Proofgrade material. If you’re using a different type of material, you will have to set your own custom setting.
A good source for where to start with these settings is the Glowforge community. Within that community, there are a lot of people testing various materials and it can give you a good starting point.
Step 4: Adjust the Location and Size of the Design
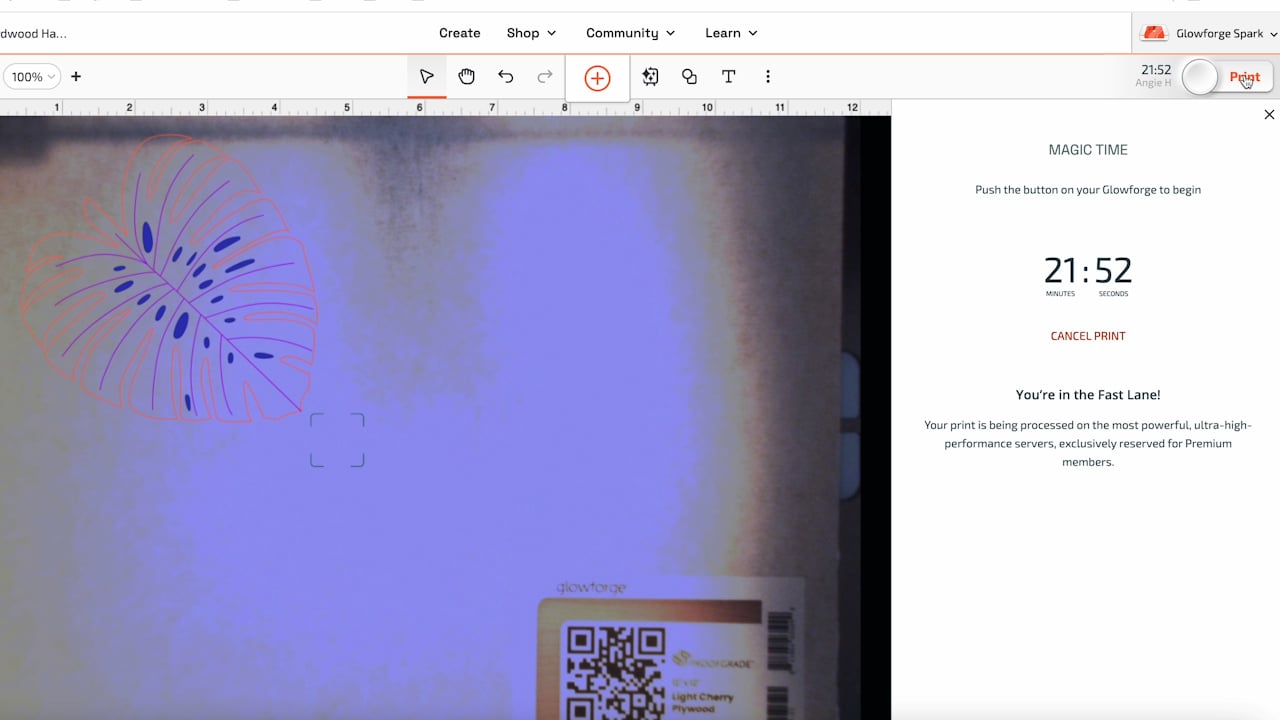
Because the Glowforge Spark has a camera inside it what you’re seeing on the screen is exactly what is inside your laser. I can select the design and resize it or move it around on the material. I can also choose to delete some of the coasters if I want to.
Don’t be concerned about cutting over the top of the QR Code sticker. This sticker is on the masking so you can cut right over the top of it if you need to.
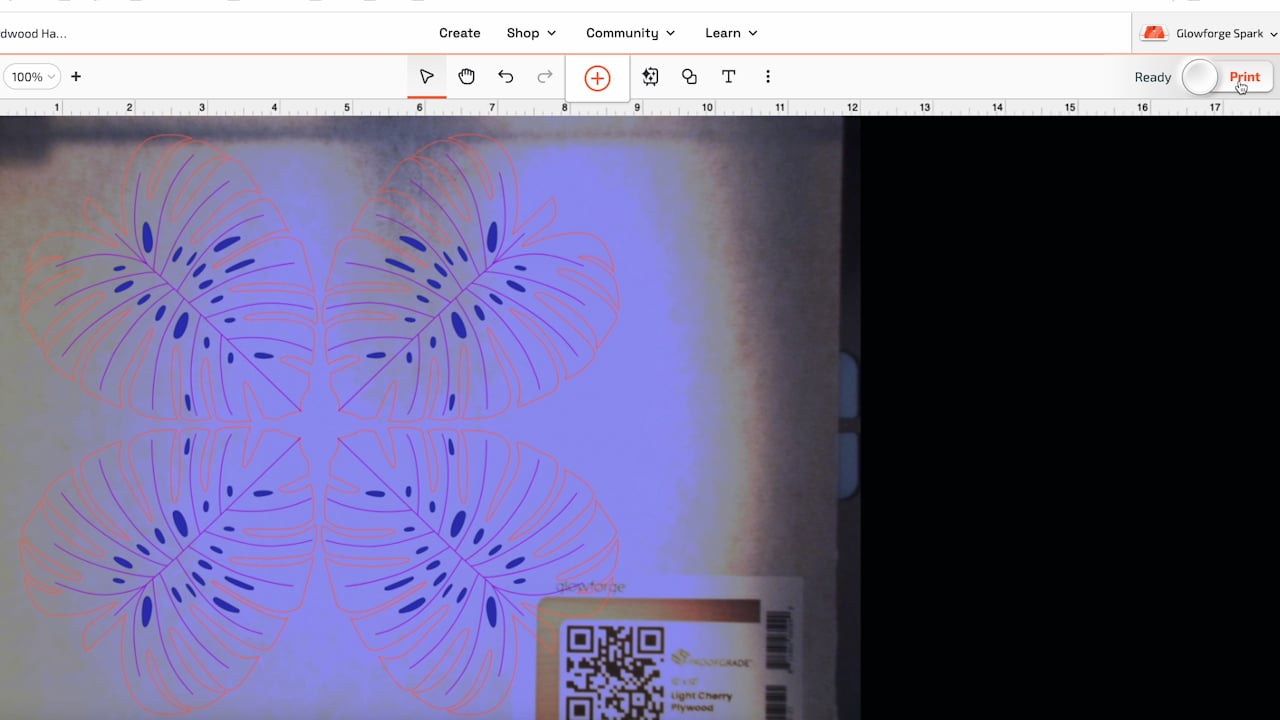
Now that I have everything exactly the size I want it and located where I want it I can send it to my Glowforge Spark to be scored, engraged, and cut by clicking “print” in the upper right hand corner.
Step 5: Double Check the Total Project Time
When we were talking about safety, I mentioned that you need to stay by your laser cutter the entire time it is working. This is because a fire could happen at any time.
You need to look at the total time the project calls for and make sure that you have the time to stay in the room with it the whole time. For this project, to score, engrave, and cut 4 of these coasters it says it will take 1 hour and 27 minutes.
I am going to cancel this print job and then go back and delete three of these coasters so I can make one and show it to you. By deleting three the time decreased to under 22 minutes.
Step 6: Press Start and Allow Glowforge Spark to Work
With everything set up, you’ll see the start button flashing on the machine and you’ll hear both the laser and the filter start working. It can get a bit noisy with both going. Press the button on the machine to start the process.
Because this laser is enclosed and has the orange lid you can watch the whole process safely.
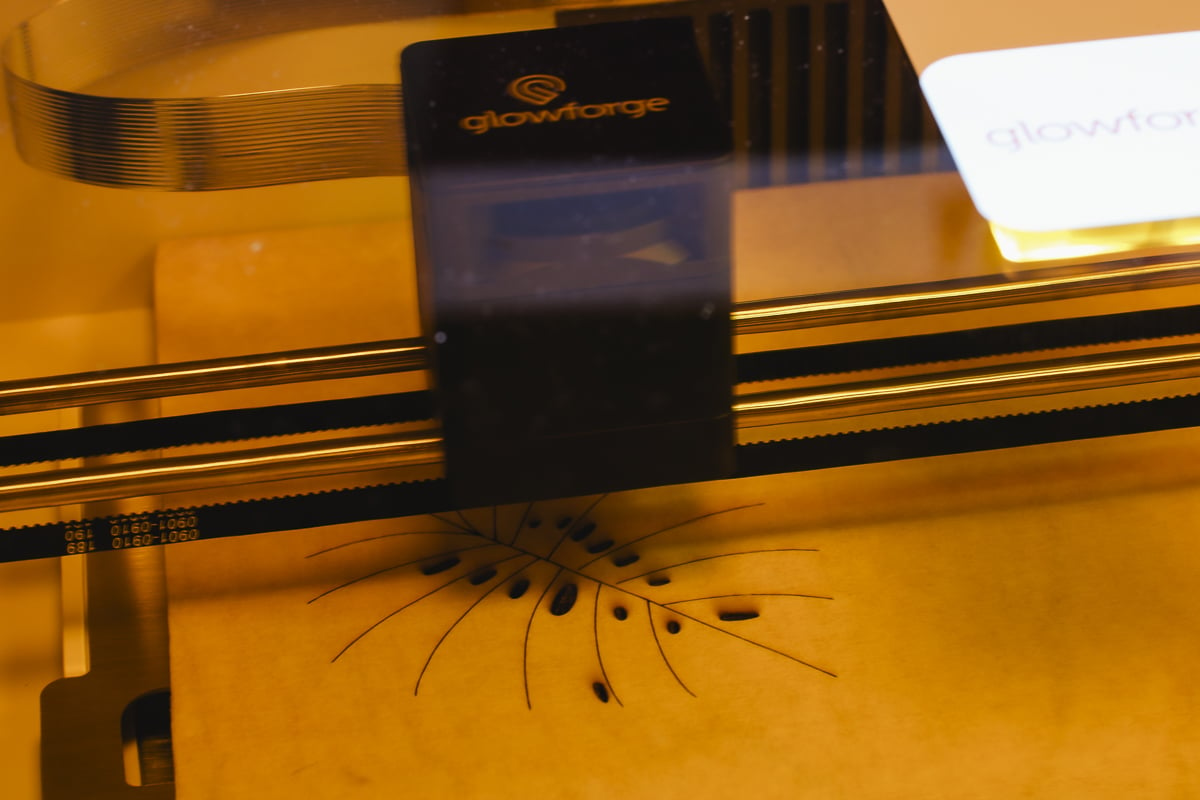
When the printing is done, the Glowforge will tell you it’s done and then you can allow things to cool down, lift the lid, and remove your design. Be sure to wait until the software tells you it is okay to lift the lid!
Step 7: Remove Masking from the Front and Back of the Design
You may see some burn or scorch marks on your project, at this point that is totally fine because both the front and the back have the masking on them.
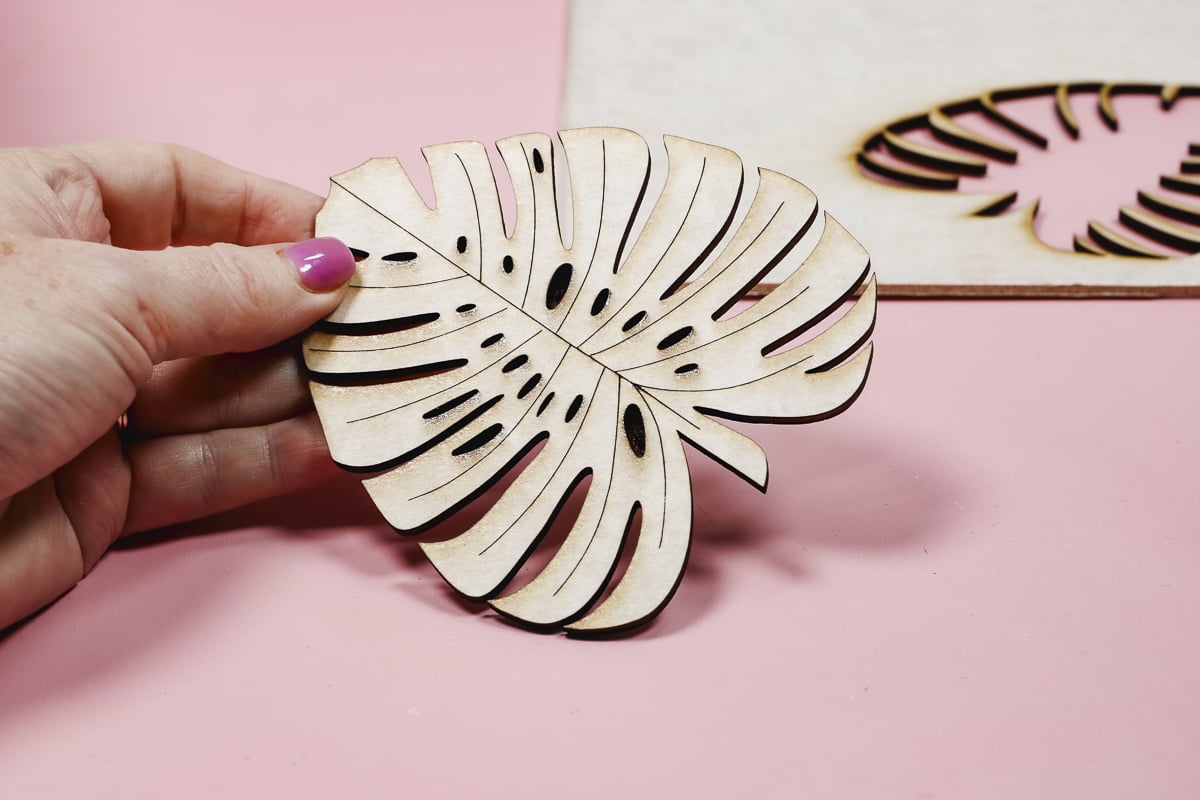
The best way I’ve found to remove the masking is to use a piece Gorilla Tape and stick it to part of the design and peel it back. You should see the masking lift away from the wood. Once the masking is started, it’s usually easy to peel it away in one piece.
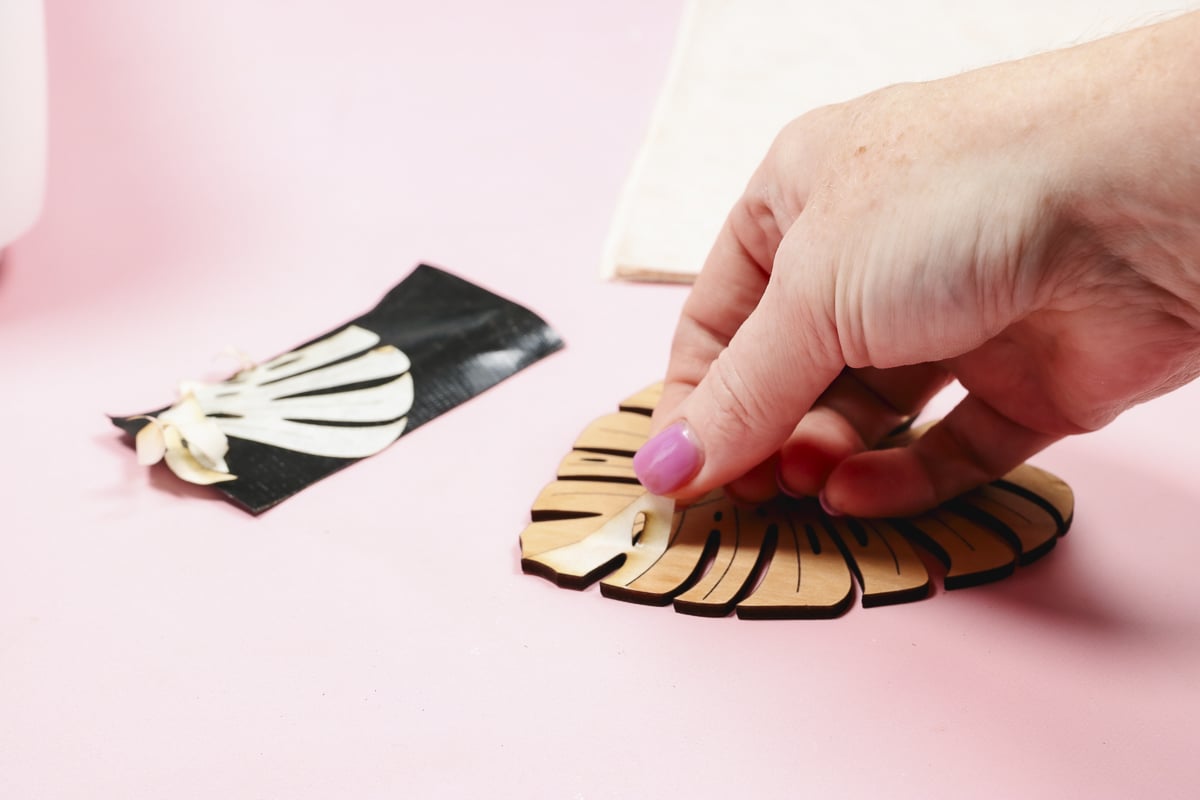
If you have parts sticking, simply move the Gorilla tape to that area and repeat the process. Make sure you remove the masking from both the front and back of the design.
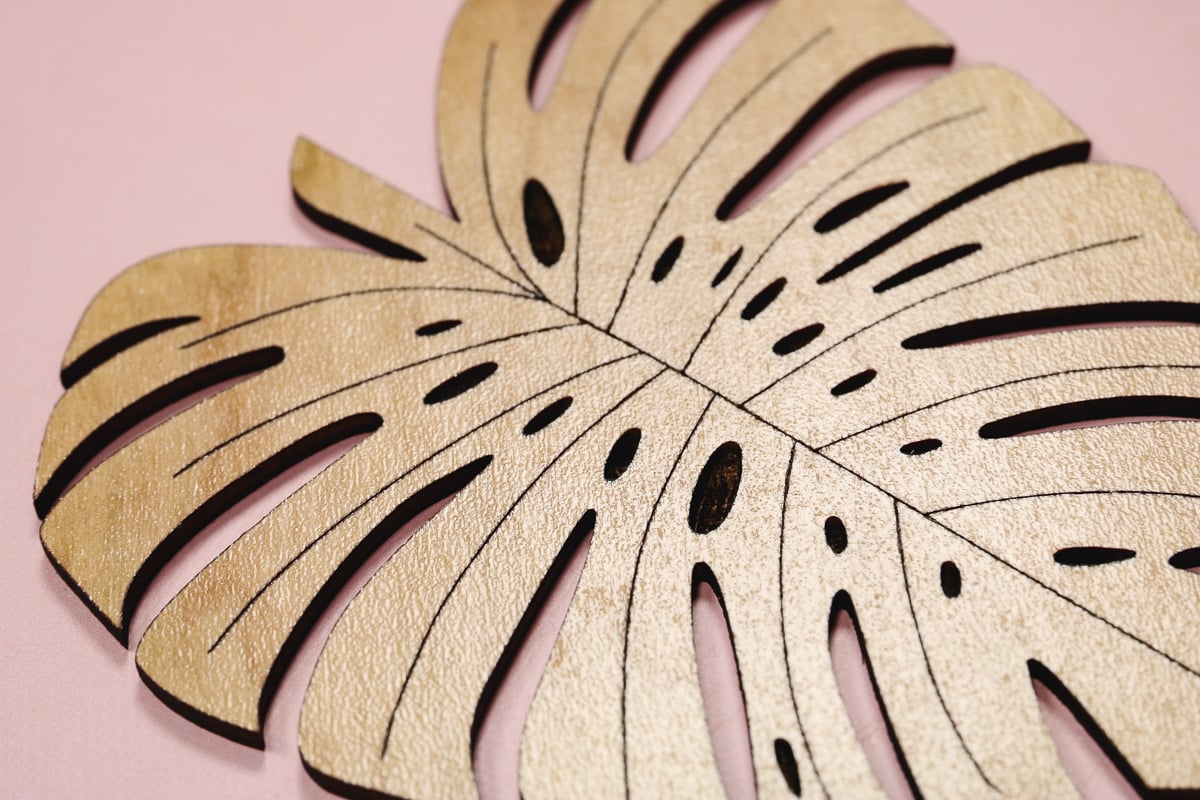
Here is our finished coaster. Didn’t it turn out beautifully? I love seeing projects that use the different functions of the laser.
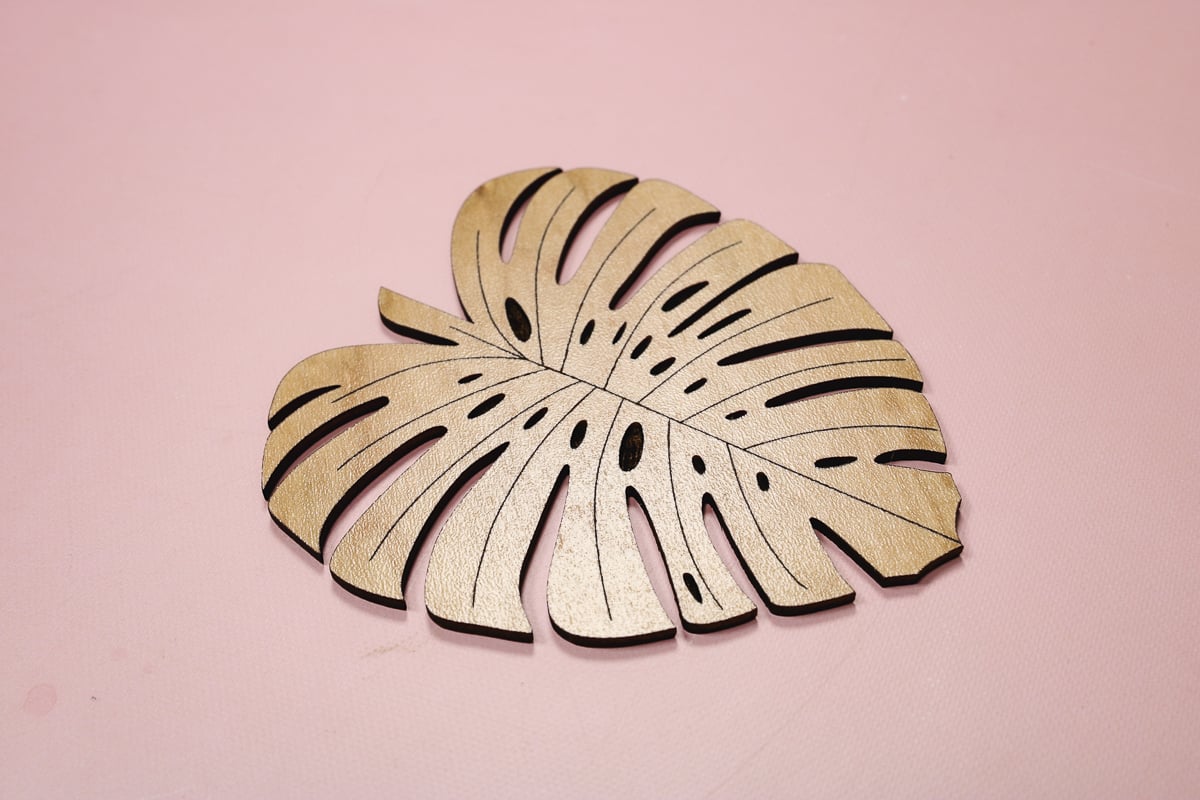
If you look closely, you can see that the score lines are kind of like an etching, they are not very deep. The engraved sections are deeper than the score lines but do not go all the way through. The only areas that are all the way through are the cut lines that we used to cut out the design.
Maintenance for Glowforge Spark
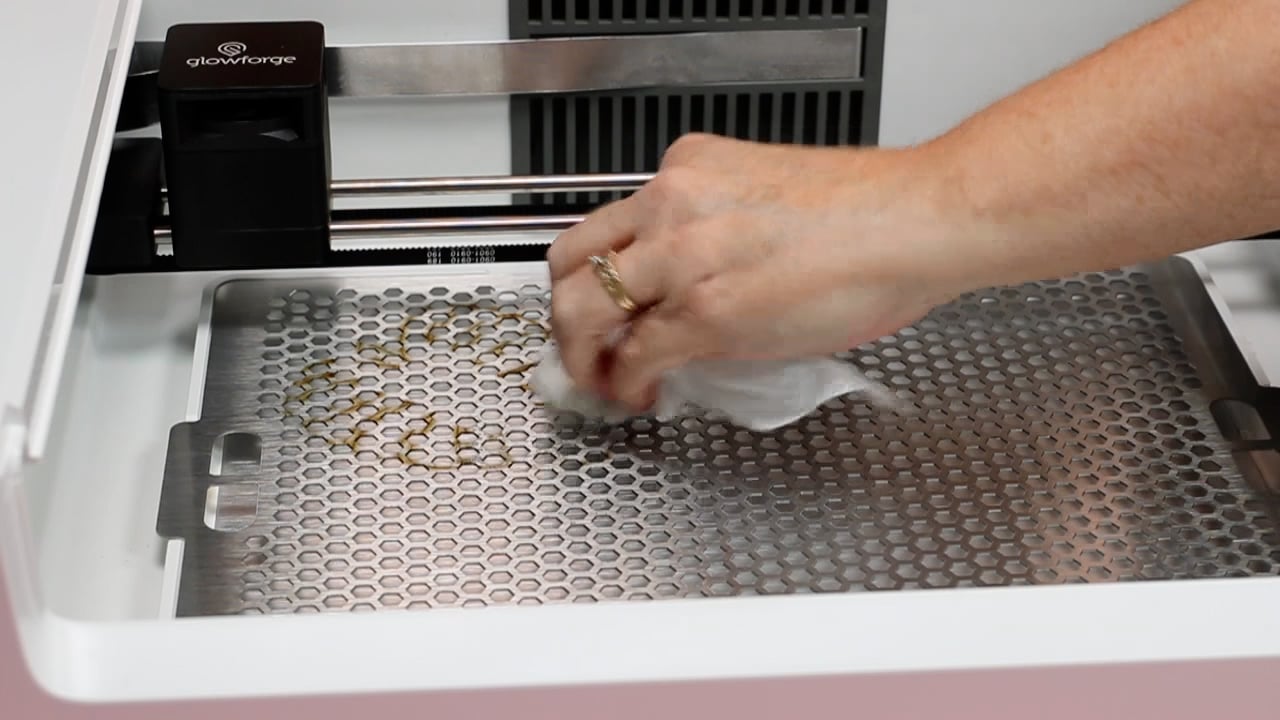
If you notice any bits of material in your machine when your project is done, you’ll want to remove those. Take out the tray and use a small handheld vacuum to get all of those out. You’ll typically see those small bits if you are cutting small elements in your design because those can fall through the holes in the tray.
You may also see brown marks on your tray. Those can be wiped out with a damp cloth or a Lysol wipe. I don’t always do this every time but I do it every 2-3 projects.
After it’s wiped down, leave the lid open and allow the try to dry completely before starting another project.
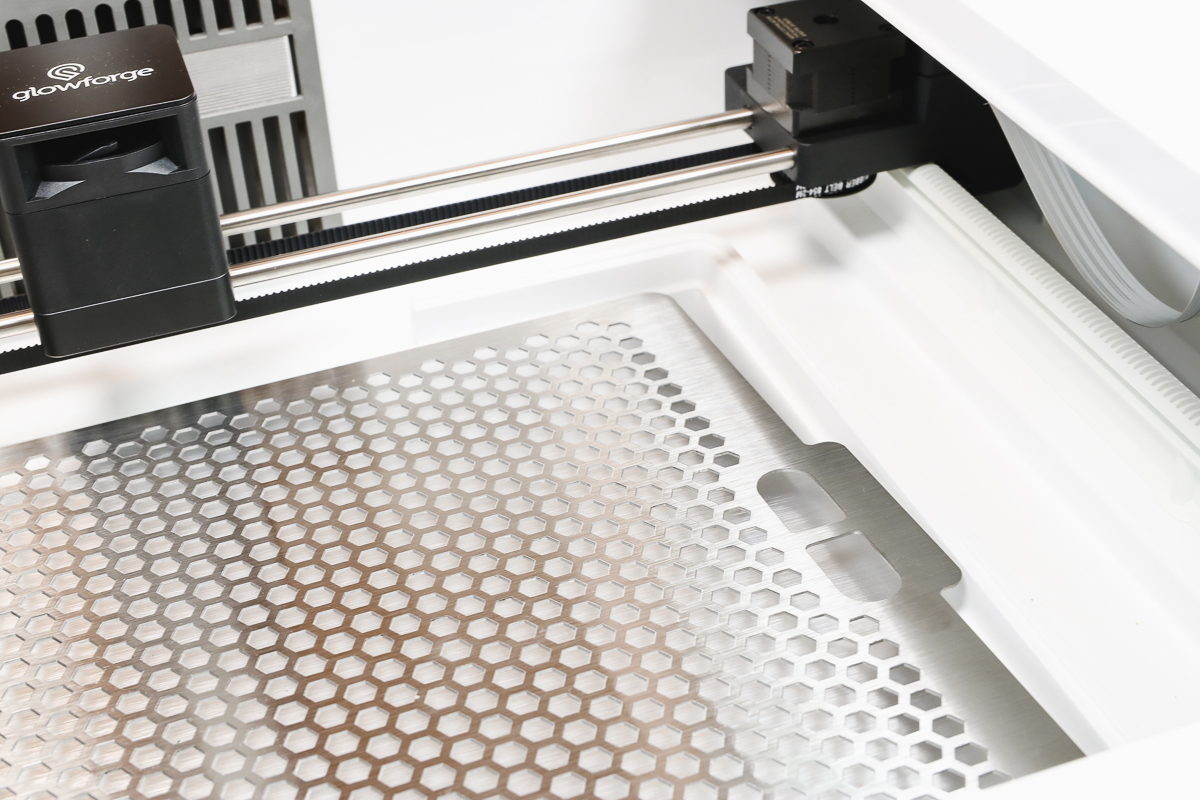
After about 10 hours of printing time, I would suggest using a wipe and wiping down the bar.
If your camera is having issues seeing your material or your view isn’t as crisp, you can use a lens cloth to wipe that down as well.
Is Glowforge Spark the Right Laser for Me?
Glowforge Spark is a great laser for people who are just getting started with laser crafting. It can do a lot of things that other craft lasers can do.
- The size of Spark is great for people who would like the ability to create custom projects at craft fairs.
- The price point of Glowforge Spark makes it a great option for people who aren’t able to invest in a larger laser right now.
- Glowforge Spark is a great hobby crafter laser. It is also a great laser for someone just getting started in laser crafting.
I don’t think Glowforge Spark is the right laser if you need to cut larger projects. It is also not ideal for someone who runs a business that requires speed in making projects. If you need to cut clear materials, you’ll need a laser that is not a Diode laser.
How Much Does Glowforge Spark Cost?
Right now you can pre-order Glowforge Spark here for $599.00 making it significantly less expensive than Glowforge Aura. You can only pre-order Spark at this price on the Glowforge website here.
It will be available at other retailers eventually. The retail price for Glowforge Spark is $699.00. This is still a great price for all this machine can do but if you’re thinking this is right for you why not save $100.00 and pre-order today?
You might want to consider adding the air filter as well especially if you do not want to vent out of a window. Otherwise, you just need the Glowforge Spark and you are ready to start creating!
I hope I’ve answered any questions you have about Glowforge Spark and it’s capabilities. If you have any additional questions, leave them in the comments and I’ll be happy to answer them for you.

