This post and photos may contain Amazon or other affiliate links. If you purchase something through any link, I may receive a small commission at no extra charge to you. Any supplies used may be given to me free of charge, however, all projects and opinions are my own.
If you’ve converted an EcoTank printer for sublimation you may experience clogs. Unfortunately, this is a common issue with converted printers. Today I’m going to teach you how to fix a clog in an Epson EcoTank printer that has been converted for sublimation.
If you’re brand new to sublimation and want to learn how to convert an EcoTank printer to use with sublimation ink, you’re going to love my post all about using an Epson EcoTank printer for sublimation.
Does My EcoTank Printer Have a Clog?
To begin let’s look at how to find out if our printer has a clog. An indication that you have a clog in your printer would be that a print isn’t printing all the colors.
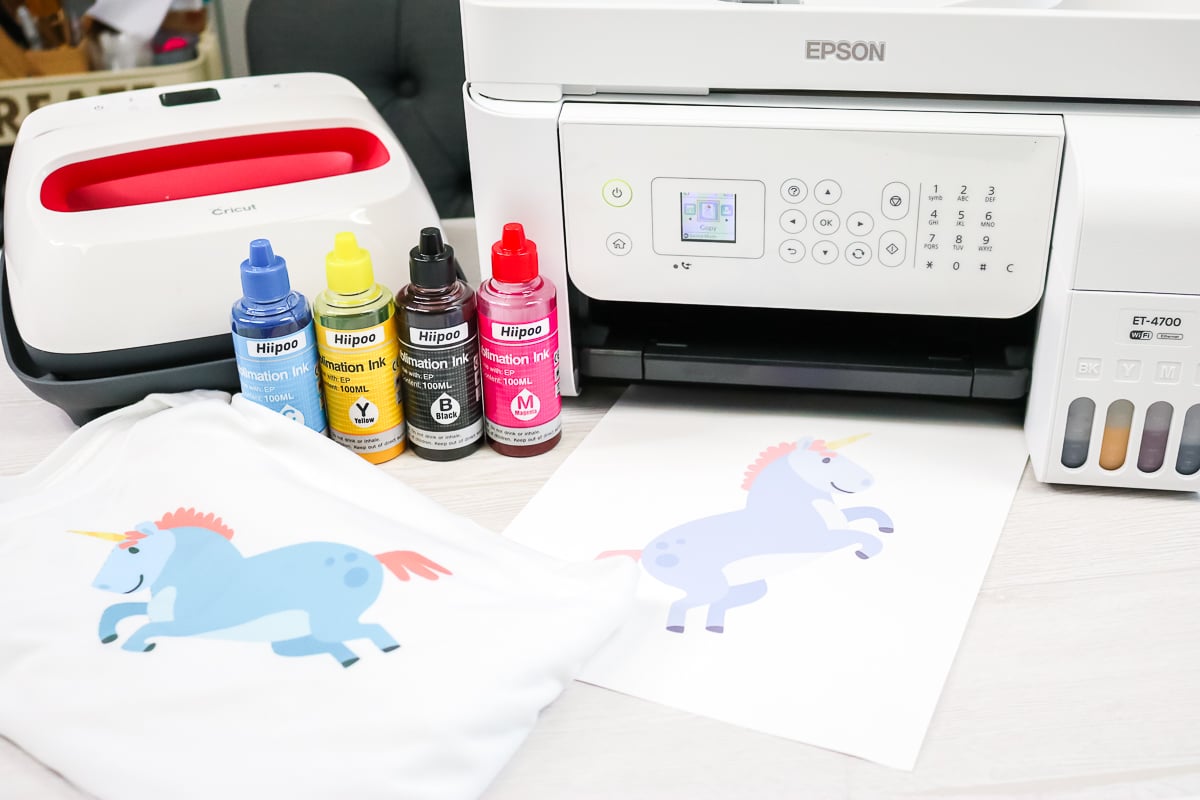
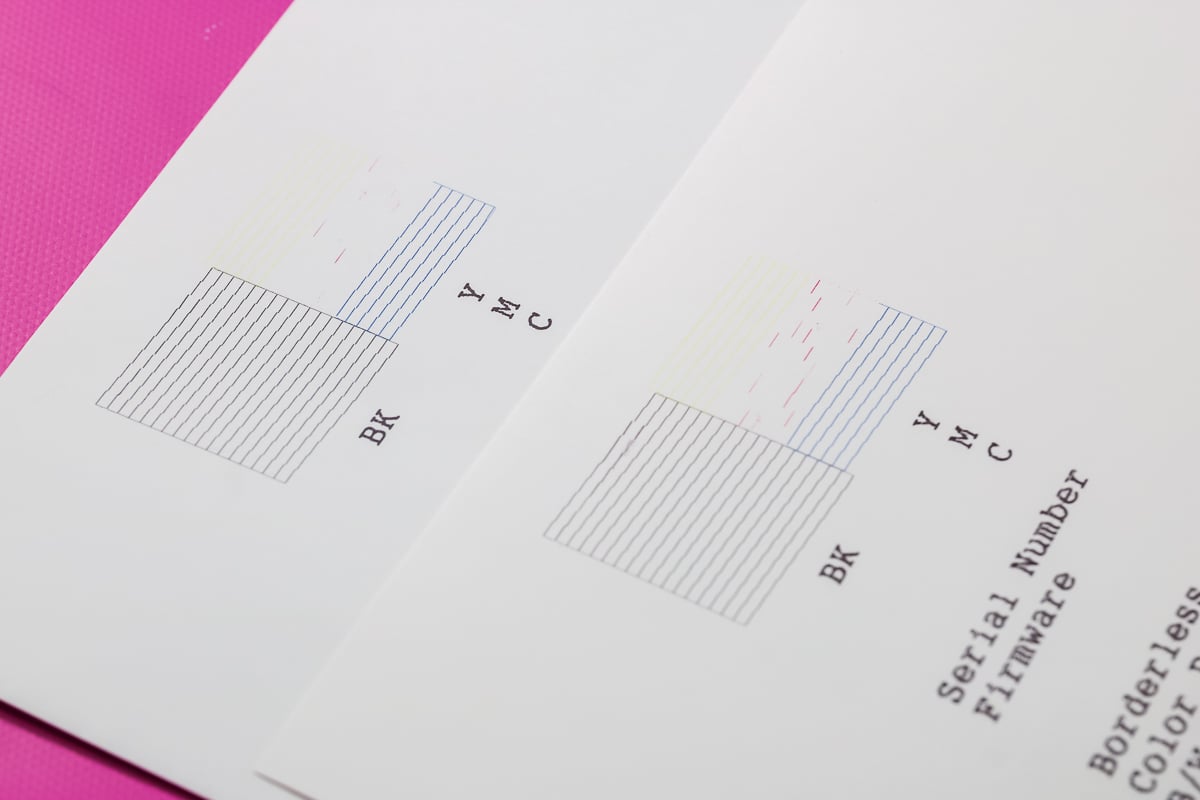
You can see in the photo below that the print on the left is vibrant and colorful. The print on the right is obviously missing some of the colors.
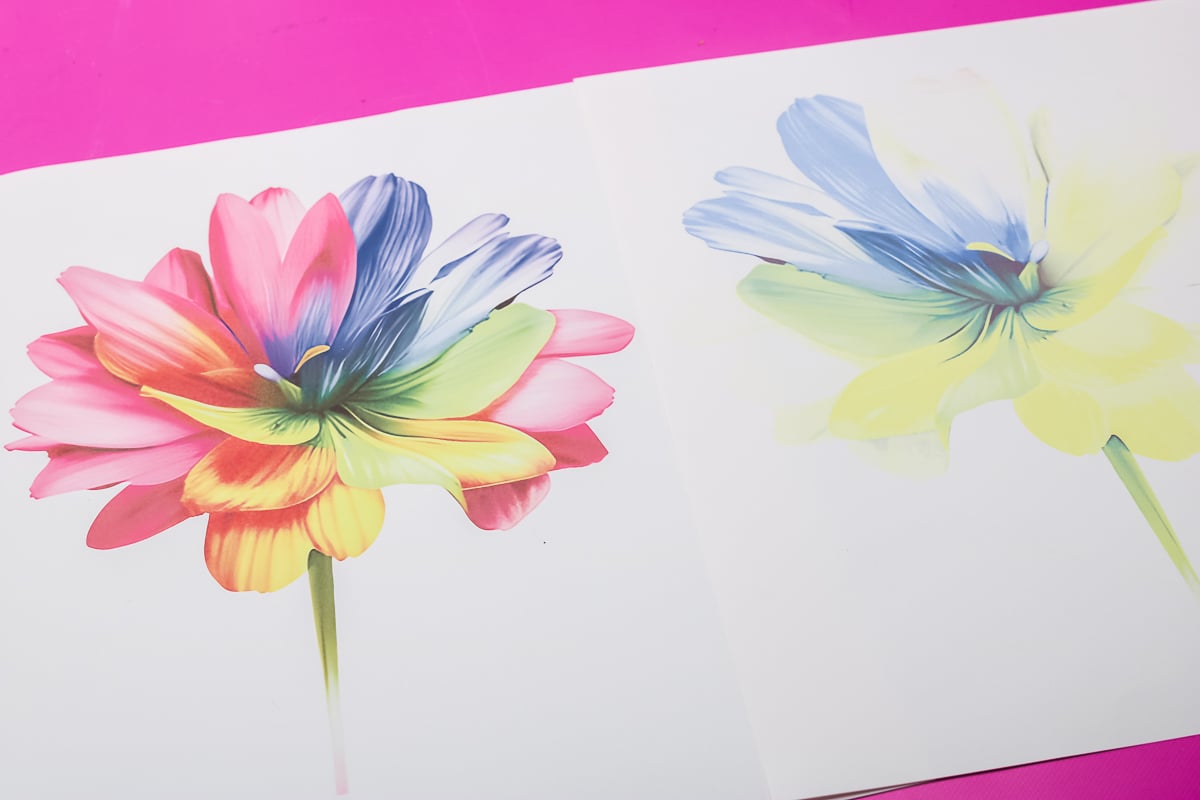
When you notice something like this there is likely one of two things happening. You may be out of a specific color of ink or you may have a clog.
You can actually watch me go through this whole process by pressing play on the video below.
How to Print a Nozzle Check Page
To check if you have a clog, the first step would be to print a nozzle check page.
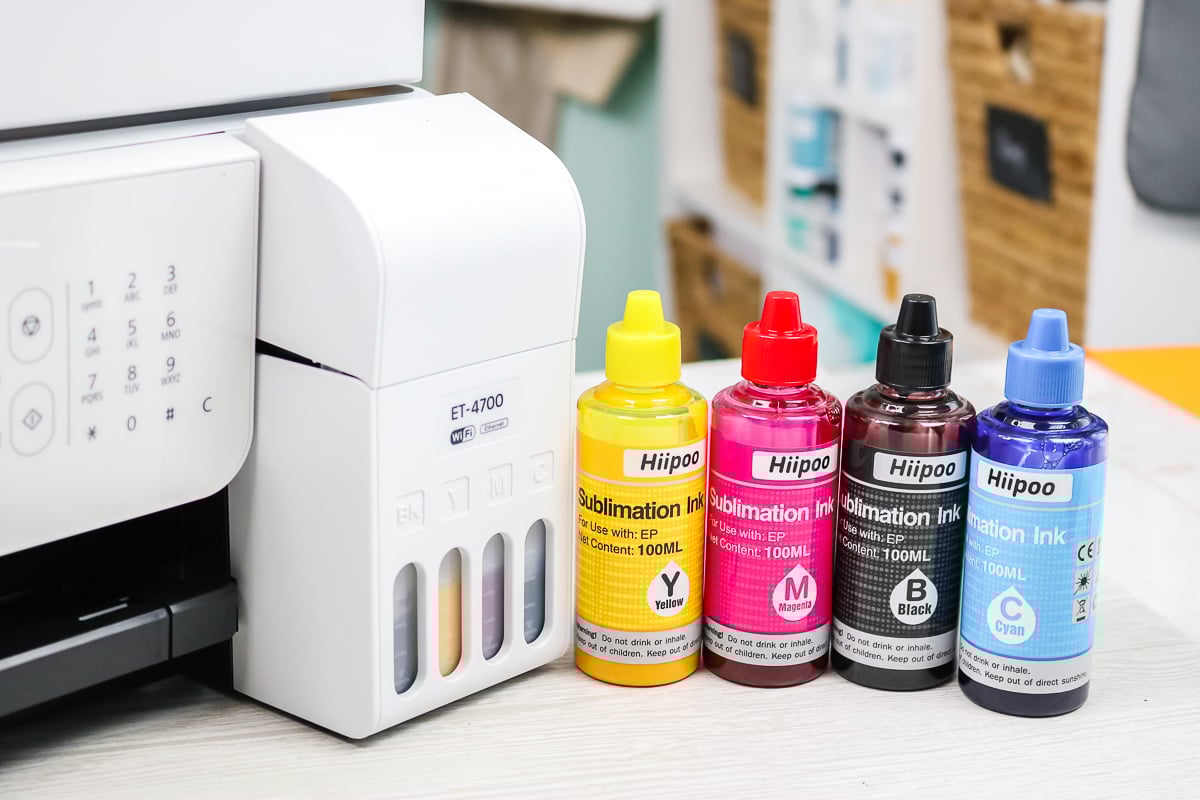
IMPORTANT: Before you do any additional printing you want to make sure your ink tanks have some ink in them. They don’t need to be all the way full but they do need to have ink in them and not be too low on ink.
With an EcoTank printer, you can check the ink level right on the front of the printer. There are windows for each different color of ink. If you can see the ink and it’s not at the add line, you can proceed.
Note – any test pages we print can be printed on regular copy paper because we’re not going to use them for sublimation. We don’t need to use a sublimation paper for this process.
To print a nozzle check page we’re going to look at the screen on the front of the printer and click over to the Settings section. Next, click OK and then click OK on Maintenance. Proceed by clicking OK on the Nozzle Check and then you’ll be prompted to load plain paper and then press the button to print.
Depending on the paper you’re using and what settings you have for your printer you may be told there is a mismatched paper type. We can just click OK and print on the paper in the printer.
Checking for a Clog
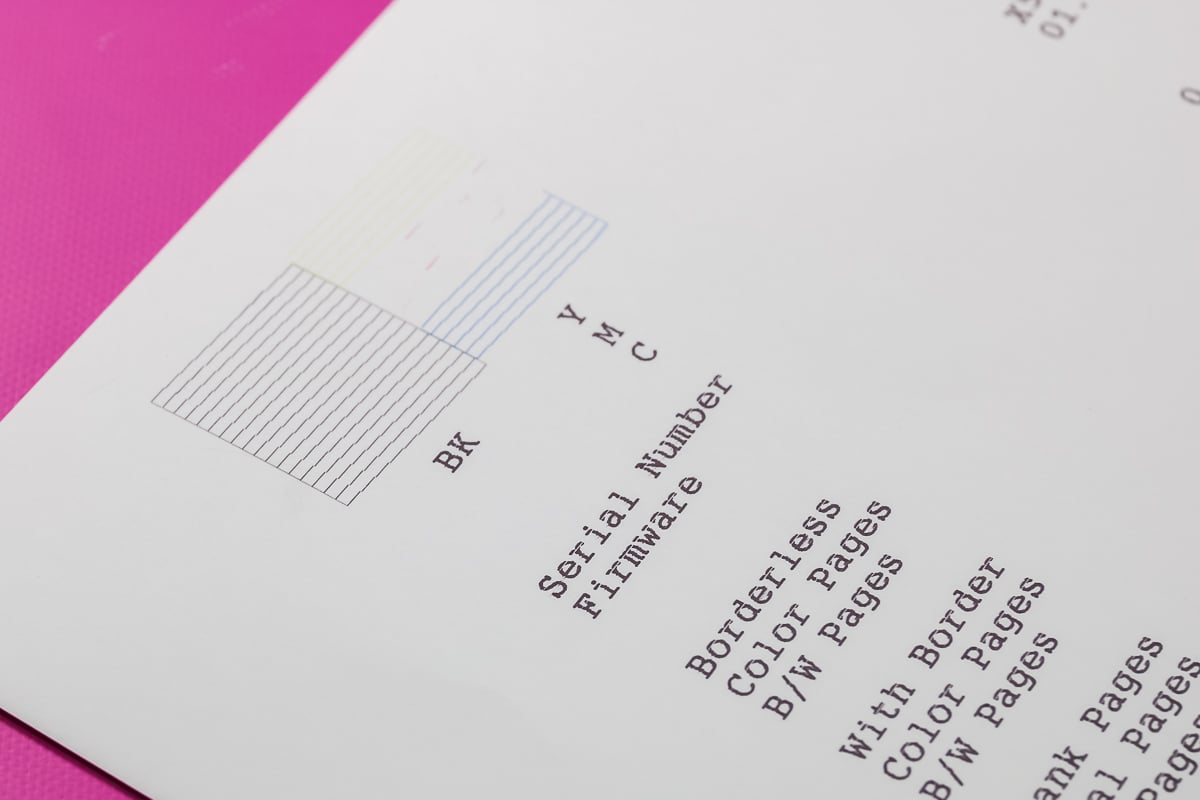
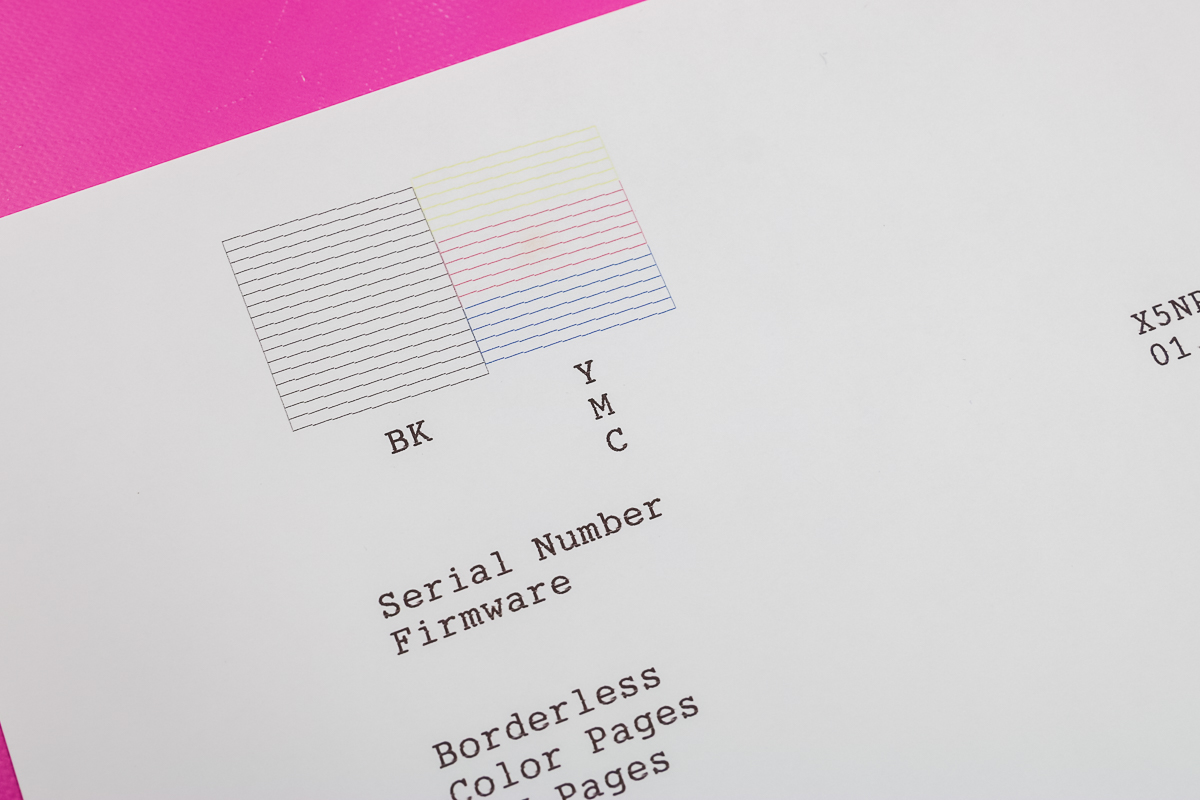
Let’s look at the nozzle check page. Up at the top, you should see a set of lines in different colors.
In the photo above, we can see that all the black lines look good, the blue lines look pretty good, and the yellow lines are fair, but the magenta lines look almost like they’re not there.
Since I know my printer has magenta ink in it appears I do in fact have a clog in my printer.
To check for clogs, always look at your nozzle check page for missing segments or broken lines. These indicate a clog in your printer.
How to Prevent a Clog in Your Epson EcoTank Printer
If you’re asking yourself “How did I get a clog and how can I prevent this from happening again?” Let’s take a look at measures you can do to prevent clogs in your printer from the start.
Printing Regularly
I actually clogged this printer on purpose to make this video. Because I wanted to show you how to fix clogs in a printer over the course of 6-8 months I printed irregularly. I only printed every month to six weeks to give it an opportunity to clog.
I was trying to replicate a user that doesn’t use their printer very often and what might happen in that case.
To be clear, there is no telling when it will happen. You could just once have four weeks between printing and get a clog or you could be like me and it could take six to eight months to get one.
There is no rhyme or reason as to when or why you would get a clog. You can prevent this from happening in the beginning by regular printing. I recommend weekly printing on an Epson EcoTank that has been converted for sublimation.
Using Sublimation Prints after Printing
The good news is you can print images weekly and save them to press later. As long as you keep them in a place free from moisture, dust, dirt, lint, etc, you can use them for months and months later.
I’ve used some of mine up to nine months later so don’t worry about wasting ink or sublimation paper. Go ahead and print images that you want to use and you can use them when you get to it later.
What if You Can’t Print?
One of the drawbacks of using a converted Epson EcoTank for sublimation is that you do need to print regularly. If you are out of town on vacation or something and cannot print, you may come home to a clogged printer. I recommend printing as close as you can to when you are leaving and again as soon as you return.
What Else Causes Clogs?
If you are printing from your printer regularly and are still getting clogs, I recommend checking the humidity levels and environment of your room.
You want to make sure it’s not too humid or too dry because that can affect the ink in your sublimation printer. Check for any vents, fans, air intakes, etc – are they close to the printer? They could dry out the print heads and cause clogs.
How to Fix a Clog in an Epson EcoTank Printer Converted for Sublimation Ink
Now that we’ve talked about how to tell if you have a clog and what may have caused it, let’s learn how to fix a clog in an Epson EcoTank printer.
To see if we had a clog, we did a nozzle check page. We want to review that page for any broken lines or missing segments along those lines. I have some entire lines missing and some lines that are just not complete.
After the nozzle check page prints it will ask you if there are missing segments. I’m going to say Yes by clicking OK. Next, it will ask if you wanna clean the print head. I recommend skipping this step at first.
Cleaning the print head can shorten the life of your printer. I really like to try to not do that step so I am going to scroll down and click No. Instead of cleaning the print head, I am going to print some printer purge files.
Printer Purge Files
First of all, what are printer purge files? A printer purge file is just a full sheet of ink and it’s trying to force the ink through the printer so the clog clears itself without having to do any printhead cleanings which can shorten the life of the printer.
I do have several printer purge files for free here that you can use to print on your printer.
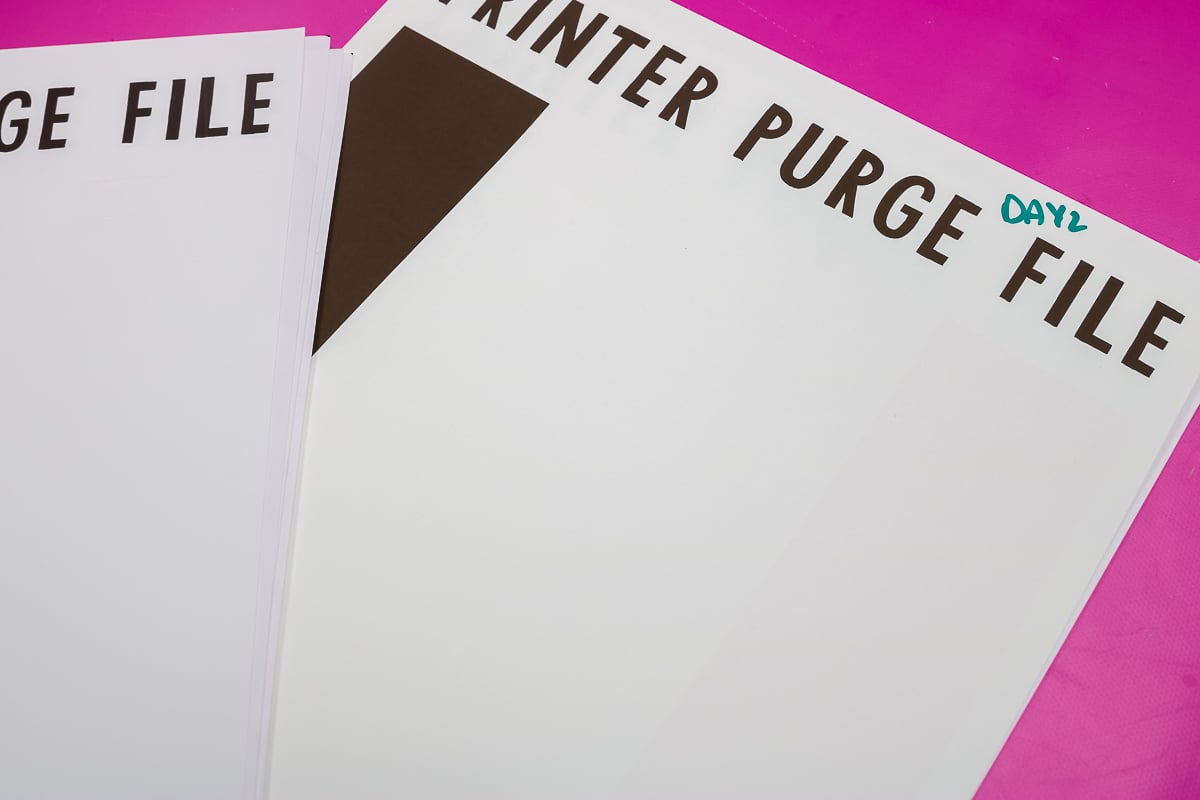
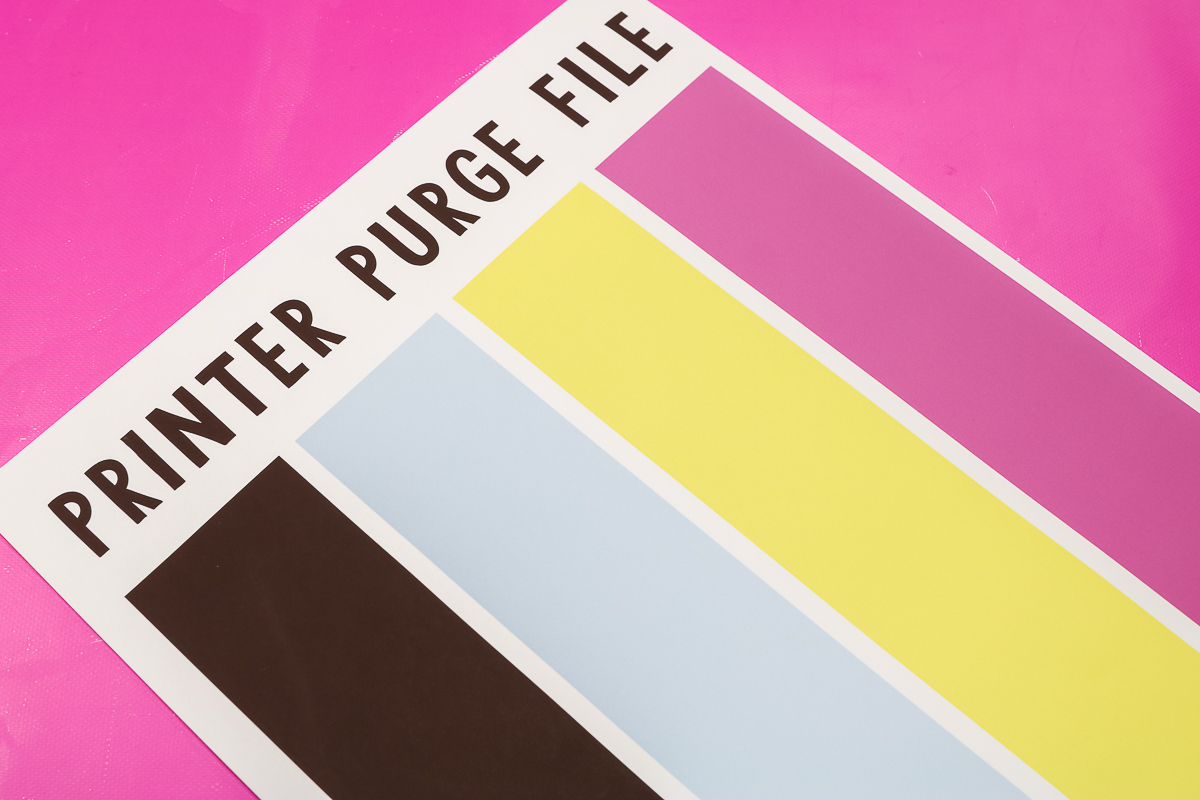
A printer purge file should look like the left in the photo below. This print was printed on a different sublimation printer so you can see all 4 colors.
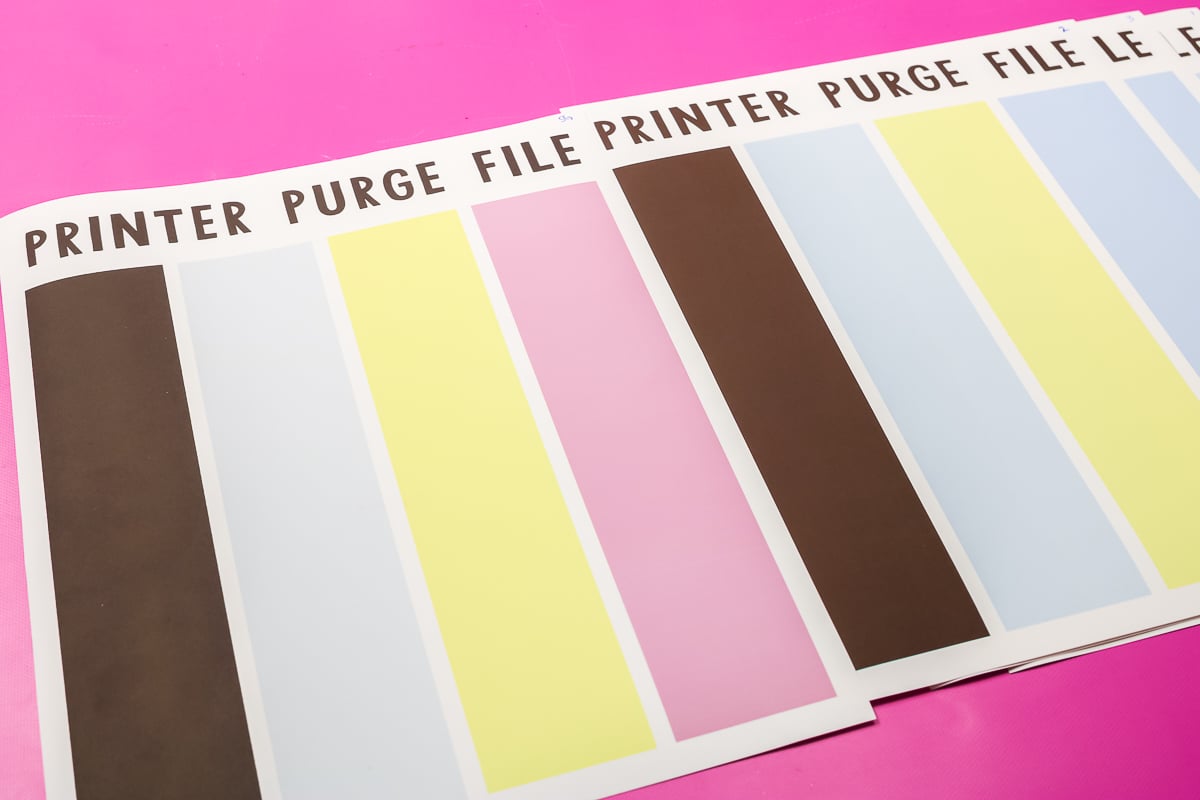
When I printed this same purge file on the clogged Epson EcoTank printer I’m getting a print that doesn’t show the magenta at all. You can see it looks almost the same as the cyan.
Printer Settings
I did want to stop here and note when you are printing your printer purge files, regardless of the one that you print, you do want to print it with the same settings you would use if you were printing regularly.
The settings I use when I print sublimation prints are – matte paper setting, high quality on, and bidirectional or high-speed printing off. Now, in this case, I’m not going to be pressing these so I don’t mirror them. You can mirror them or not mirror them. It’s not going to make a difference with these files.
To ensure your print ends up how you want it, you want to use those same settings when you’re printing your printer purge files.
Full Page Printer Purge Files
You can print these files multiple times if needed. I printed several copies of the four-color printer purge file. Each time the problem was just with the magenta so I am going to move on and print a printer purge page that is all one color, in this case, magenta.
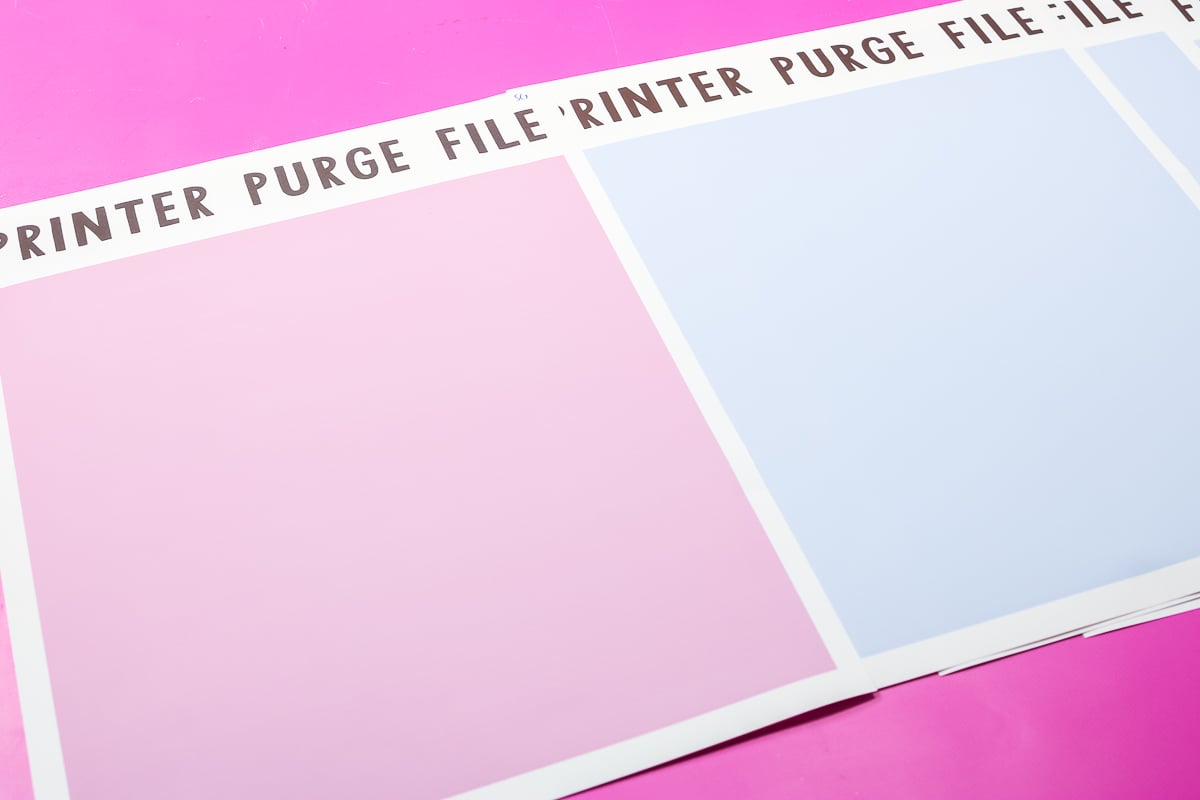
The magenta sheet should look like the page on the left. Out of my EcoTank printer, I am getting a page that looks bluer.
Again, you can print these many, many times. If you want to save your printer life by not doing a print head cleaning, you can print these 10, 20, or more times.
You can also print 10 copies and then wait 24 hours because time can often help the printer. If you don’t have time to wait or waiting doesn’t work, you can move on to perform print head cleanings.
How to Perform Print Head Cleanings
There are actually two different stages of cleaning. The first step is regular print head cleaning.
IMPORTANT: You’ll see there is a power clean option, this is our last resort. This will shorten the life of your printer and we don’t want to do that unless we absolutely have to.
On the front panel, we’re going to scroll over until we get to Settings and then press OK. Click on Maintenance and on there you’ll see there is a Head Cleaning and a Power Cleaning option.
I’m choosing the Head Cleaning option and pressing OK. It will ask you if you’re sure and you’ll press the button to start the cleaning cycle.
This can take several minutes so allow it to run the whole time. My cleaning cycle took 3 minutes to complete. After the process is finished, we want to do another nozzle check to see if the clog has been fixed.
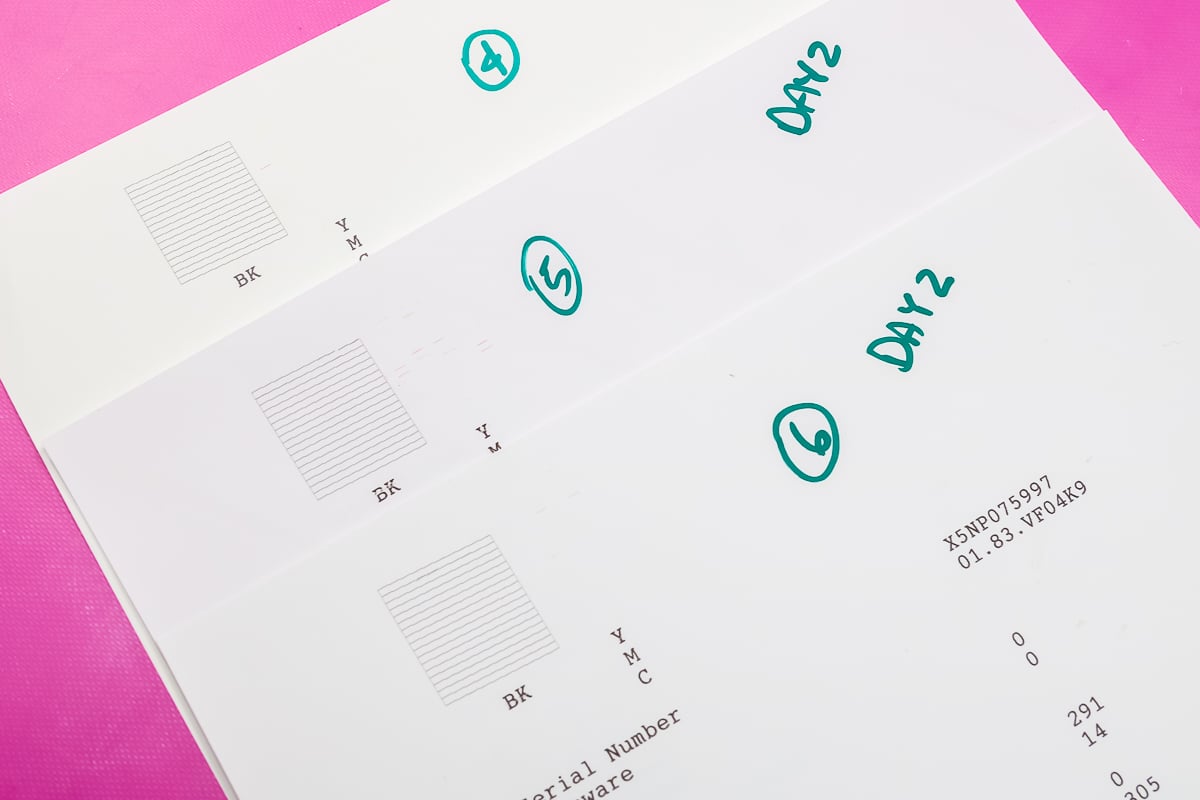
My first nozzle check is on the top and you can see there are way more missing segments in the magenta than there are in the second nozzle check that I just printed.
I am doing some good, but I am not there yet. I’m going to go ahead and run one more regular head cleaning.
NOTE: Purge files and head cleanings use quite a bit of ink. While you’re doing this process, be sure to keep an eye on your ink tanks and your ink levels. Never let your printer run too low on ink.
Air in Printer Lines
In my case, I did another print head cleaning and nozzle check and now only black is coming out. This is obviously not what I want. This whole process can be frustrating. This would be a great time to take a break.
Letting your printer sit for 24 hours can work magic. At this point, there is probably air in the lines of all three colors or somewhere in the printer that is causing the ink not to come out.
I could try printing 20 printer purge sheets to try to push that air through but allowing it to sit for 24 hours often does the same thing.
So what I’m going to do now is stop, wait 24 hours, come back, and print a nozzle check page after my printer has had time to sit, and hope that air has worked its way out.
What is the Process to Fix Clogs in Print Lines?
The process for fixing clogs in print lines is as follows:
Print a Nozzle Check sheet.
Are all of the colors coming out now? If not –
Try the Printer Purge Files.
You can continue these first two steps if you’re seeing improvement from one print to the next. Just repeat nozzle check page and some printer purge files a few times. If you’re not seeing improvement –
Try a Print Head Cleaning.
This is the process I follow. I will often repeat the process multiple times if needed to avoid doing the power cleanings if possible.
There is no set method for how to fix a clog in an Epson EcoTank printer. If you don’t feel like any improvement is happening in the first couple of printer purge pages, you could choose to jump right to a power cleaning if you wanted to see if that would just fix the problem.
My best advice is to be patient. I know sometimes we’re working with deadlines and that can be frustrating but time can often solve problems and protect the life of your printer.
When to Perform Power Cleanings
I think a Power Cleaning should be your last resort and it’s up to you whether you want to do one at any point in time.
Please note – performing a power cleaning will shorten the life of your printer.
I want to show you the process of doing a power cleaning so I am going to perform one at this point. On my printer screen, I am going to click over to Maintenance and press OK. Next, I am going to click Power Cleaning and press OK.
A website will come up for you to go to that will give you information on what a power cleaning does and how to proceed.
To run a power clean, you need to turn off the printer and then check the ink levels. Your printer will need to be at least one-third full as this is going to use a lot of ink.
Next, hold down the power button and help button at the same time until the screen for the power clean appears on the printer.
Press OK to start the power clean. The power cleaning will take several minutes.
The process did have me refill my ink and reset my ink levels. The printer walked me through this process on the screen.
The power cleaning process took about seven minutes and then told me I should wait 12 hours before printing. I am going to allow my printer to sit for 12-24 hours to see if we’ve made any headway on unclogging this Epson EcoTank printer.
Checking Printer for Clogs After Power Cleaning
I waited 24 hours and am seeing some improvement. To check if the clog was fixed after running the power cleaning, I am going to go through the steps we went through before.
To begin, I am going to print a nozzle check page. This time, it came out perfectly. There were no missing segments.
I was excited about this progress so I printed a printer purge file just to see what it would look like and it looked perfect, just how it’s supposed to look. Now my Epson EcoTank printer is ready for printing.
FAQ
Here are a few questions that I regularly get about this process. You can also ask any questions that you may have in the comment section below.
Clogs in Other Sublimation Printers
Clogs don’t only happen on an Epson EcoTank. If you have an Epson F170, or even the Sawgrass Sublimation printer, you can get clogs in those too.
The procedure for unclogging those is fairly similar, however, it might vary slightly. You can definitely try the same procedure that I’ve shown here for those printers if you get a clog in them.
Lines in Your Sublimation Print
If you’re having problems with just lines in your print, you may not have a clog at all. Start with this video for lines then come back to this page if you find it is needed. Checking your printer settings is recommended first for lines in your print.
Printer Purge Files for Other Issues
I do want to say that even if you don’t need them today a printer purge file is a great resource to have on hand. Whether you have a clog or not, it can fix a lot of issues just by running a few of those prints through.