This post and photos may contain Amazon or other affiliate links. If you purchase something through any link, I may receive a small commission at no extra charge to you. Any supplies used may be given to me free of charge, however, all projects and opinions are my own.

Today I’m excited to teach you how to combine two different crafts. I’m going to show you how to use your Glowforge Aura to make sublimation blanks. I’m testing a few different materials to see which ones work for both cutting with a laser and adding a sublimation print onto.
Trying to decide if you need a laser cutter? I have a full review on the Glowforge Aura that can help.
Making Sublimation Blanks with Glowforge Aura
I’m so excited about the possibility of creating my own sublimation blanks. I experimented with several different materials and found some that worked and some that didn’t.
If you have a Glowforge Aura and want to learn how to make your own sublimation blanks, click play on the video below to watch me walk you through the entire process.
I am using the Glowforge Aura for today’s tutorial. Can this process be applied to other lasers? Yes, you would need to adjust your settings and do test cuts first if you’re using a different machine.
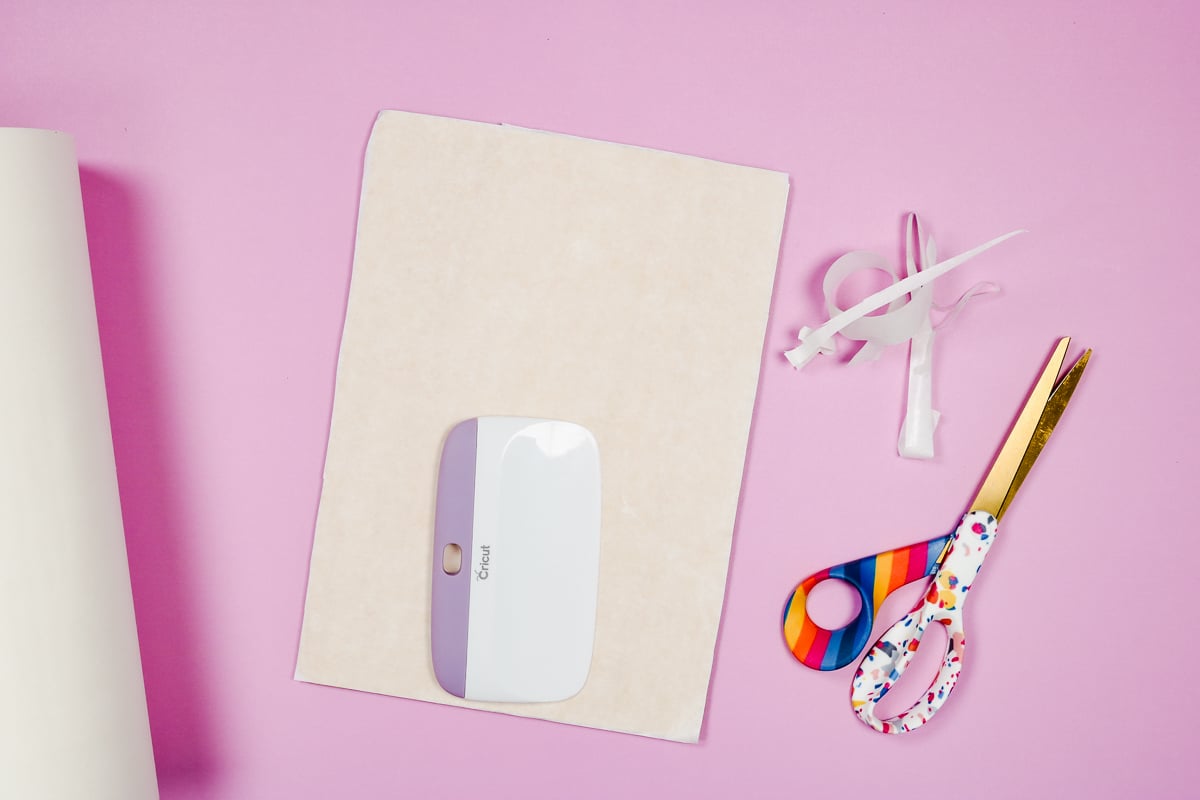
Supplies Used
What Materials Did I Try?
First, let’s look at the different materials I experimented with.
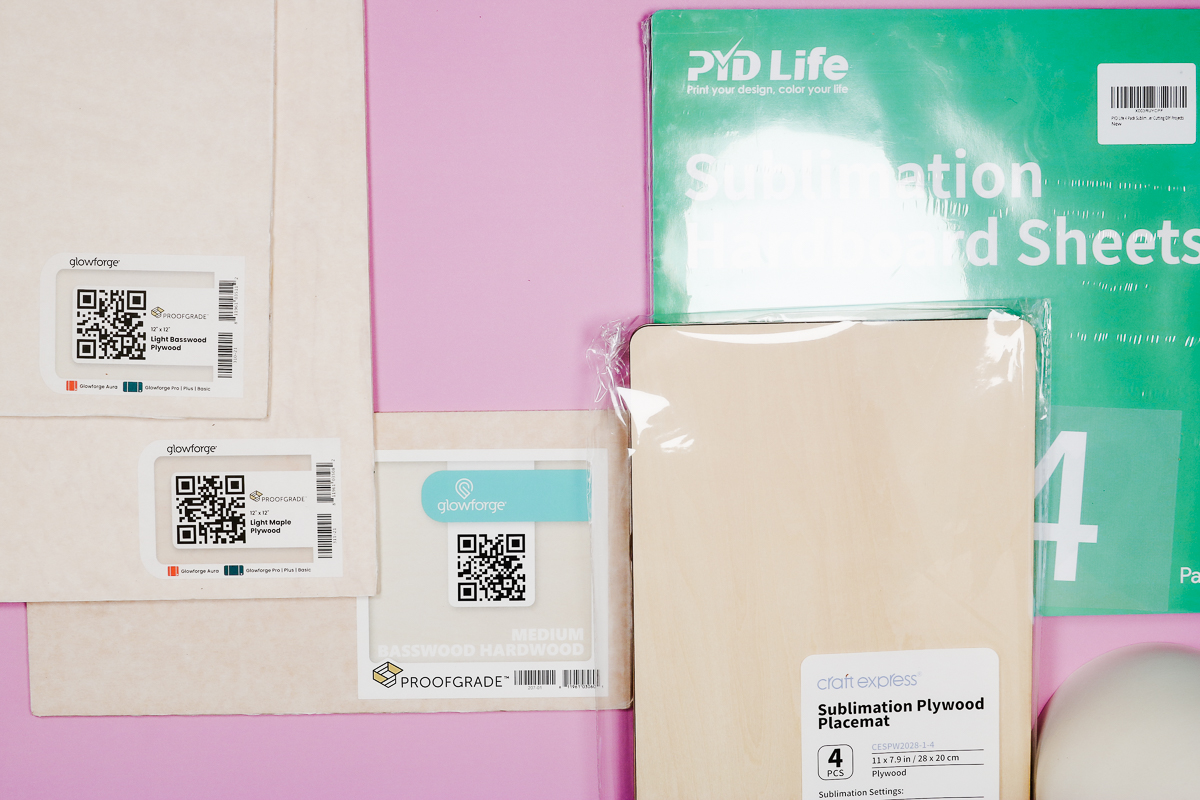
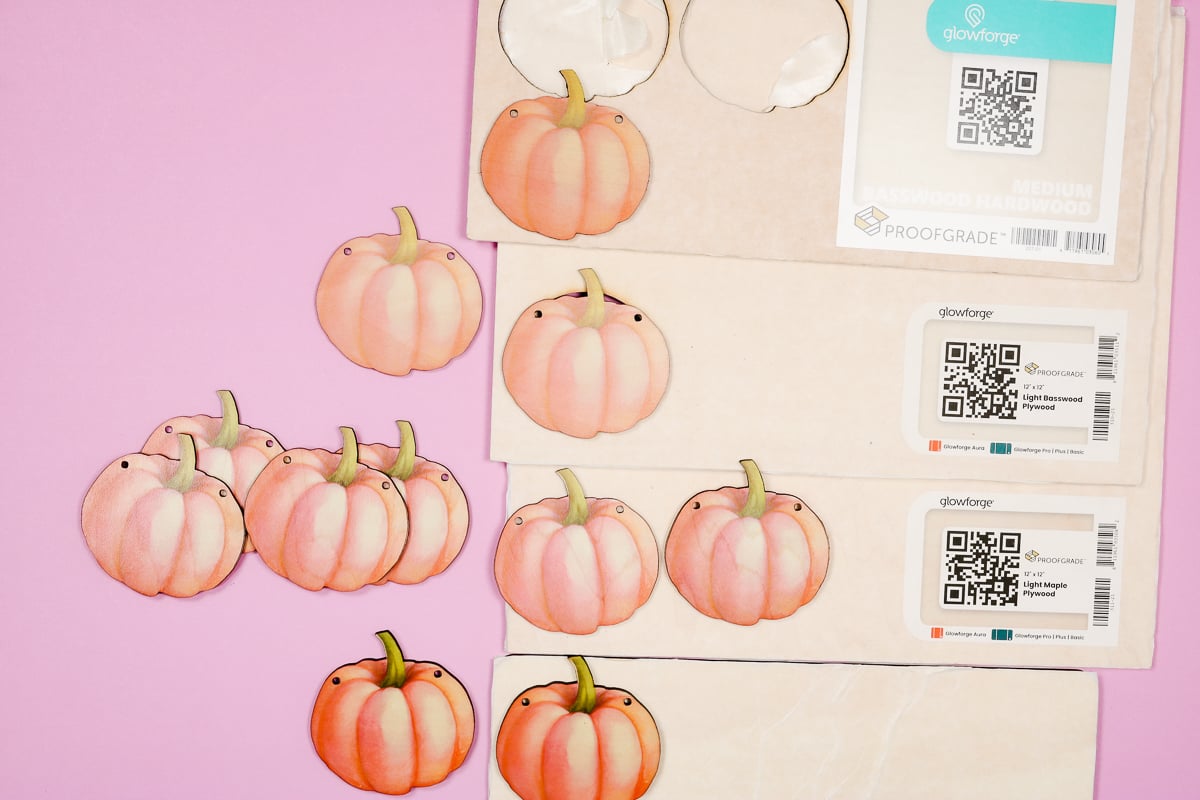
Glowforge Proofgrade Material
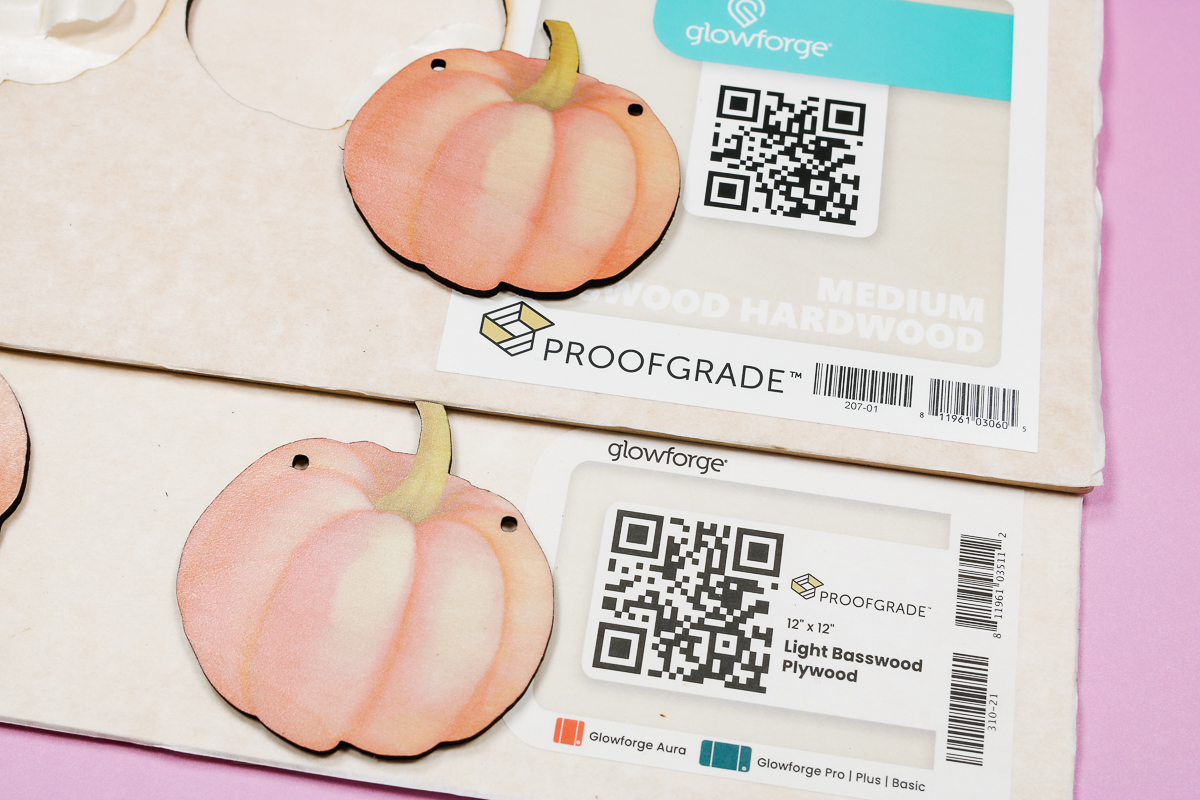
First up are the Glowforge Proofgrade materials. I realized recently that these materials have a poly coating already applied to them on both sides. I’m testing several different versions to see which ones work best. I have light basswood plywood, light maple plywood, and medium basswood hardwood.
I chose these materials because they are light in color. If you’re going this route, make sure you’re using a Proofgrade material from Glowforge. I haven’t found other materials that are made for lasers that have a poly coating.
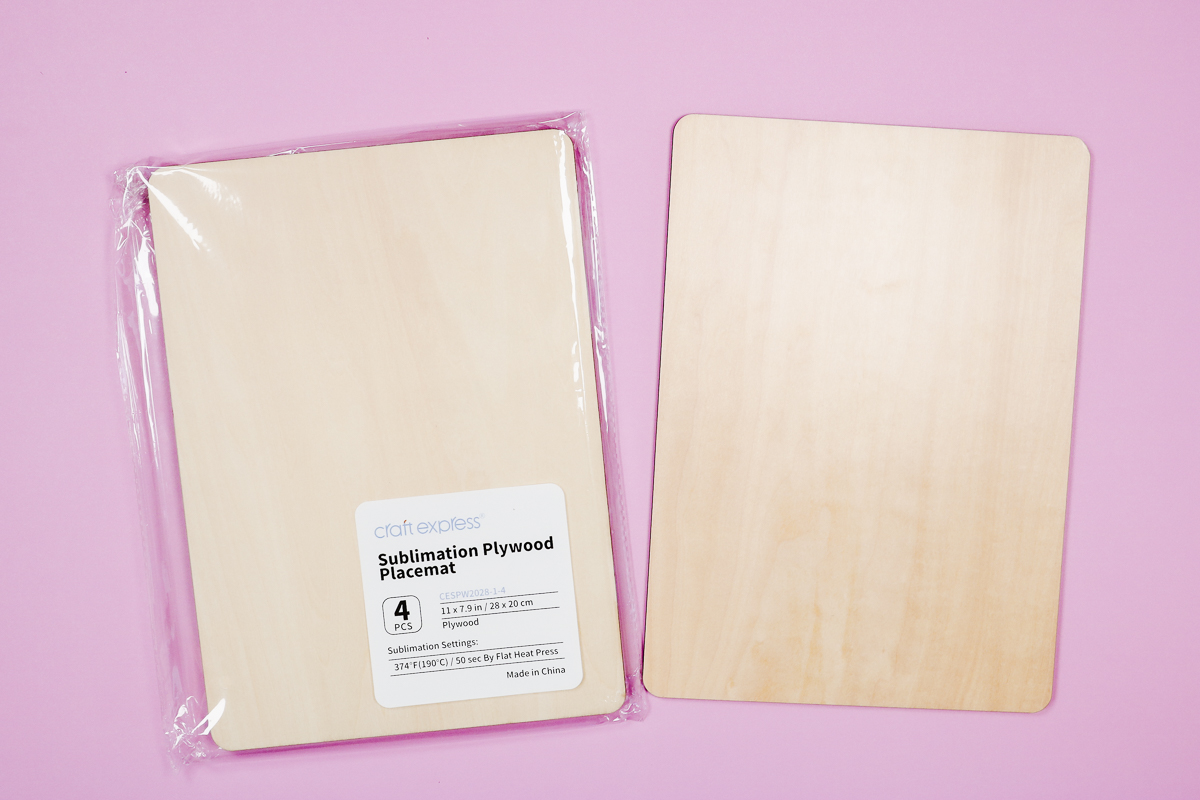
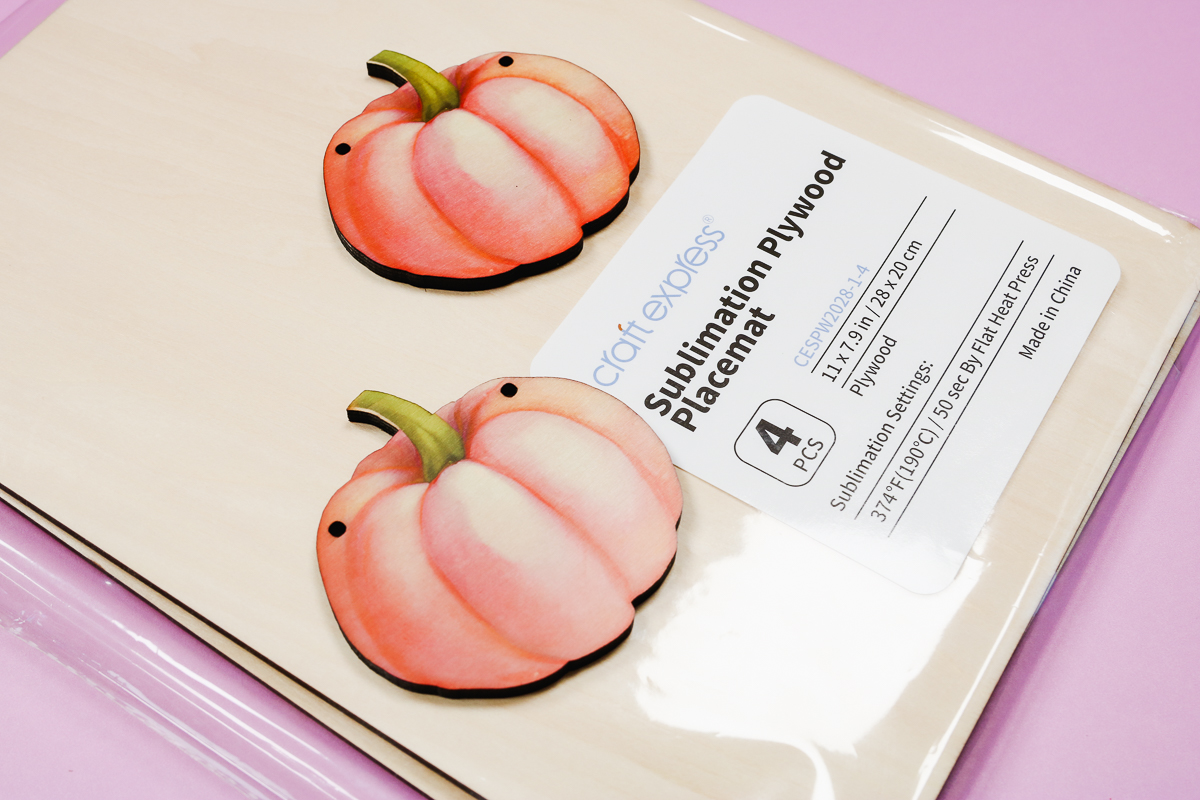
Craft Express Sublimation Plywood Placemat
Next, we have the Craft Express Sublimation Plywood Placemat. This is a large sheet of plywood that has a sublimation coating on one side.
The placemat is thicker but I was able to find a setting with my Glowforge Aura that worked to cut them.
Sublimation Hardboard Sheets from PYD Life
I also tested the Sublimation Hardboard Sheets from PYD Life. I’ve seen these advertised as being able to be cut on a Glowforge.
I tried several different things to get this material to cut on my Glowforge Aura and none of them worked consistently. No matter what settings I tried I could not get clean cuts.
Another thing to remember is that any type of non-proofgrade material like MDF will fill up your filters very quickly.
Using these materials in the Aura can be very expensive. You could waste a lot of material trying to get the settings right and have to change your filters regularly. Both will increase the cost of the project.
As I mentioned above, I was never able to get a good cut with this material so I gave up on it and didn’t proceed to the next steps.
Preparing Materials for Cutting
Before we put these materials in the Glowforge, we need to prepare them for the laser. Let’s look at how to do that.
Preparing Glowforge Proofgrade Materials
If you’re using the Glowforge Proofgrade materials for this project you do not need to do anything extra to prep them. These materials have a protective material on both the front and back to protect the edges.
I did check and both sides of this material are poly-coated so these are great for projects where you want to sublimate both sides of the blank.
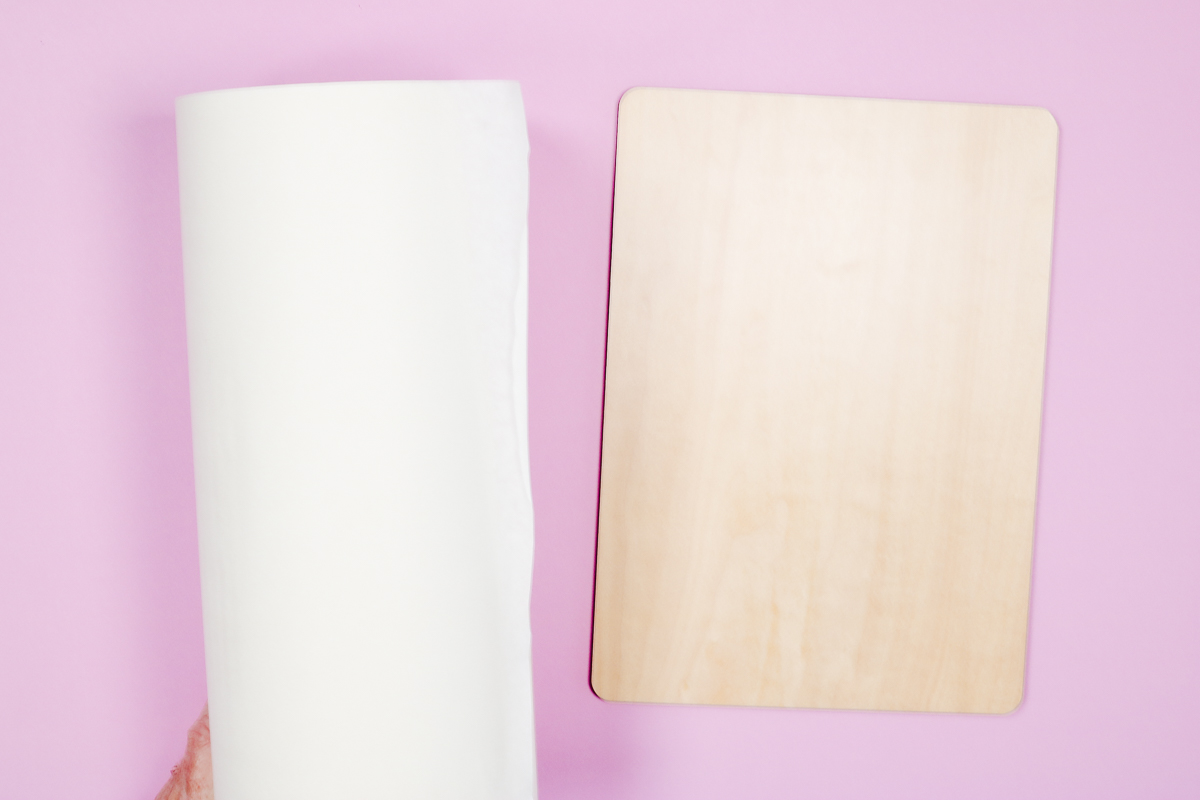
Preparing Non-Proofgrade Materials
If you’re using a different material, you need to add a protective tape to them. I am using a roll of transfer paper that is like a masking tape.
The Sublimation Plywood Placemats I’m using have a smooth side and a side that is a little more textured. The very smooth side is more shiny and is the sublimation side. You can not sublimate both sides of this blank.
How to Apply Masking to Sublimation Blanks
This masking protects your blank from having burnt edges. If you don’t apply a masking material, you’ll have edges that look burned. I prefer to add masking to both sides of the wood board to protect both sides of the material.
Depending on the width of your masking, you may be able to cover the whole blank in one sheet. If it doesn’t cover your material, you can apply in strips to cover the whole area.
Use a scraper tool and apply the tape across one whole side. Use scissors or a craft knife to trim the tape so your laser can see the exact size of the blank.
When you have one side done repeat the process for the other side. Remember, this blank can only be sublimated on one side so you’ll want to keep track of what side is right.
Add Design to Glowforge
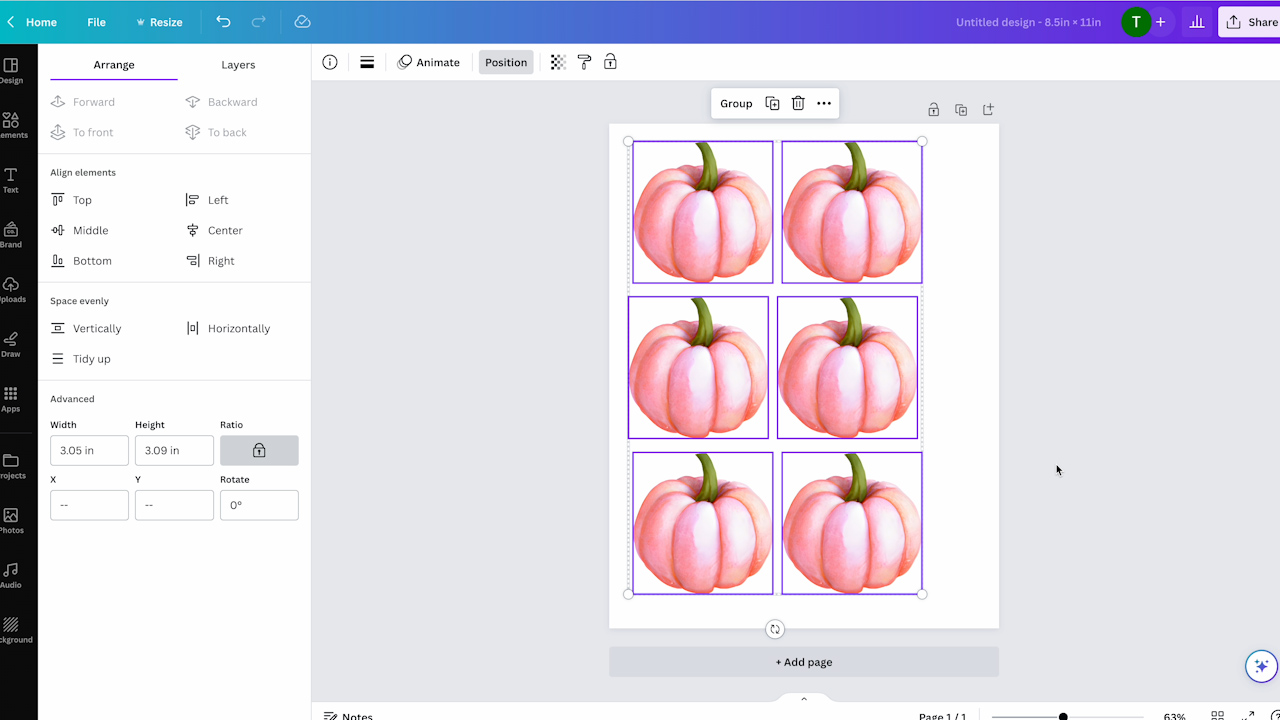
To add the pumpkin design to Glowforge click Create a New Design and then Create a Blank Design. Click Import Artwork and then find the design on your computer.
The best cut files for Glowforge are SVG files. The best files for this type of project are sets that have both the SVG file for the cut and the PNG file for the sublimation print.
Because we are cutting this file and also printing a sublimation print we need to pay attention to the exact size we resize the file to. You can make the project any size you want you just need to know the size so you can use that measurement for the sublimation print.
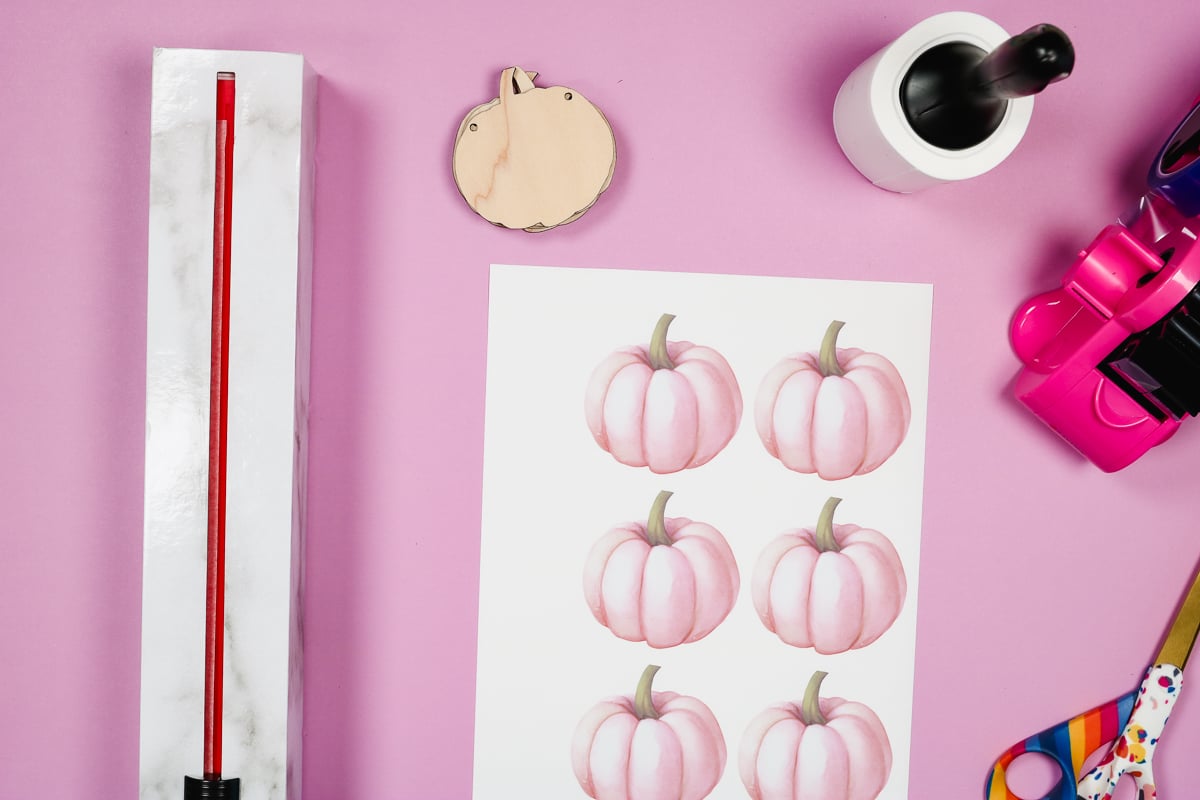
I set my pumpkins to 3 inches wide and then copy and paste for as many copies as I wanted. I am cutting six pumpkin pieces that are all exactly 3 inches wide.
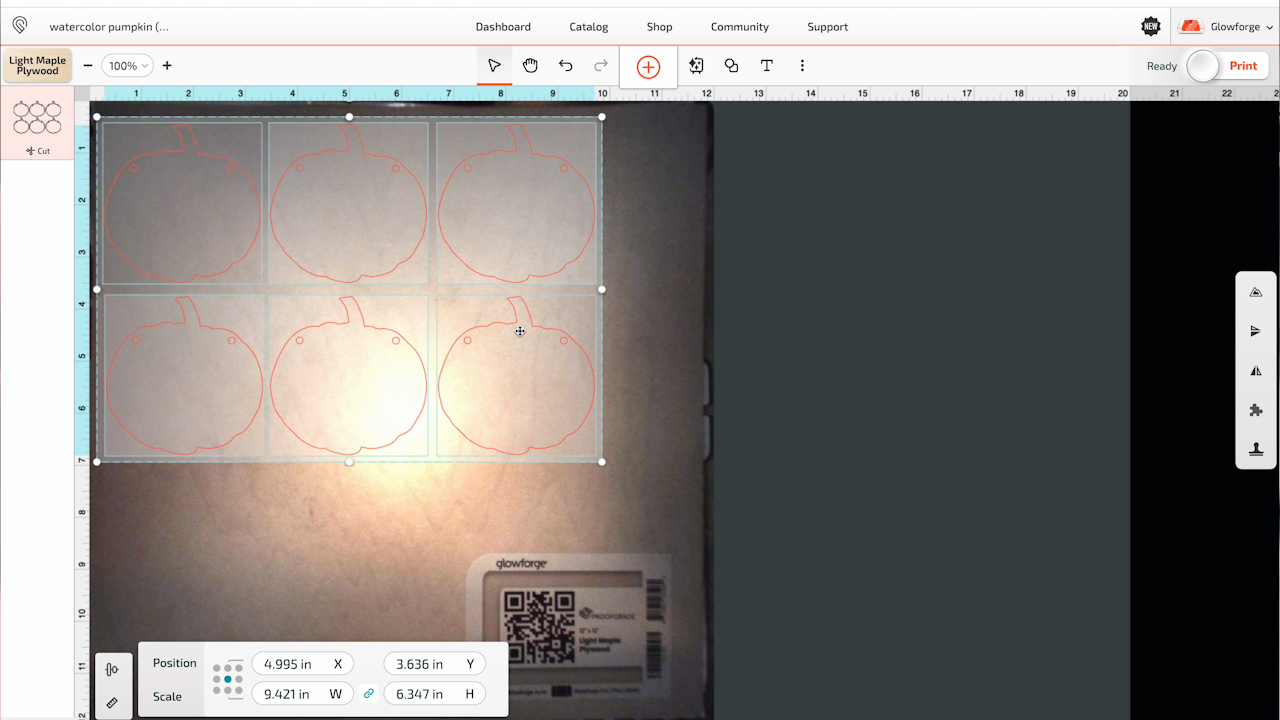
Choose Material Setting
Now that we have the design set up we can choose our material setting.
For Proofgrade materials you don’t have to worry about the settings, you just need to make sure that you have it set up as a cut line.
For the Craft Express Sublimation Plywood Placemats, I used the Thick Basswood Plywood setting.
Send Design to Cut
Now that the design is ready press Print in the Glowforge program. The program will then send the file to your Glowforge and it will start cutting.
This design takes several minutes to cut. Make sure you stay by your Glowforge the entire time.
When it’s done, the program will tell you that the print is done and it’s time to open the lid. Then you can remove the laser cut pieces.
Prepare Blanks for Sublimation
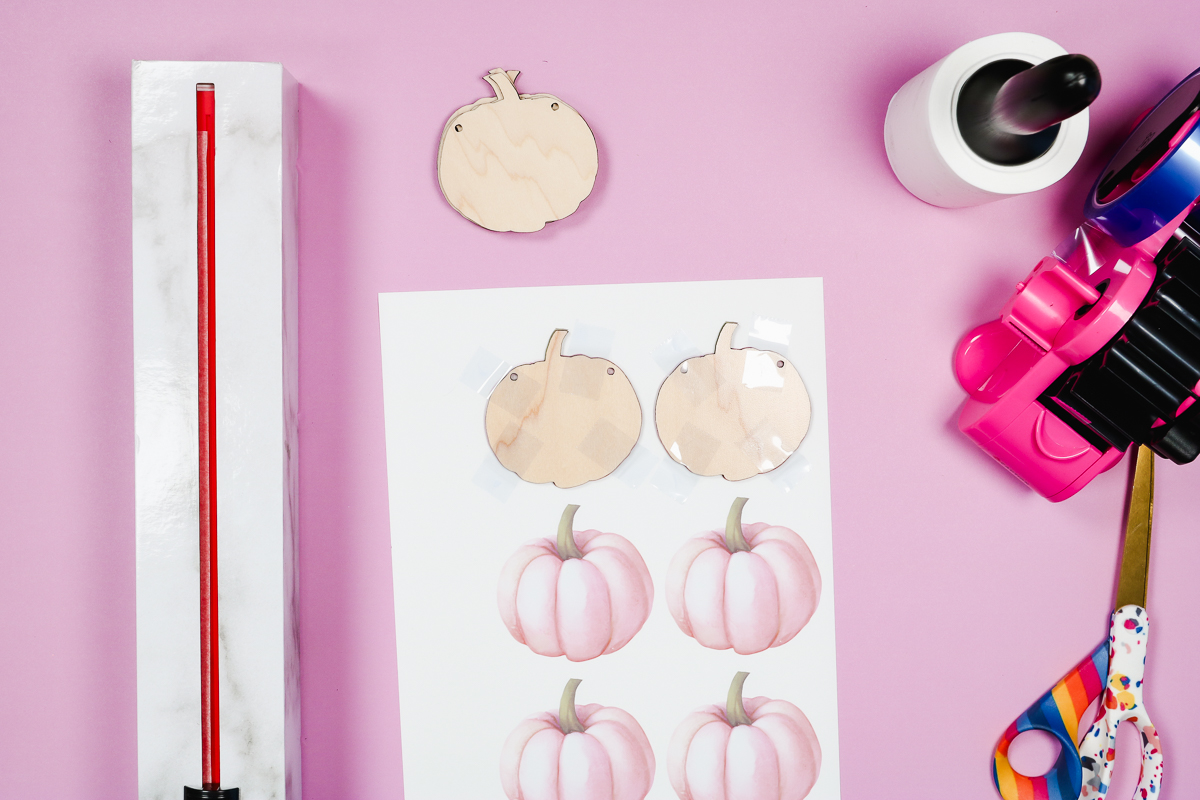
Use a small pick or weeding hook to push the tiny holes out of the banner pieces.
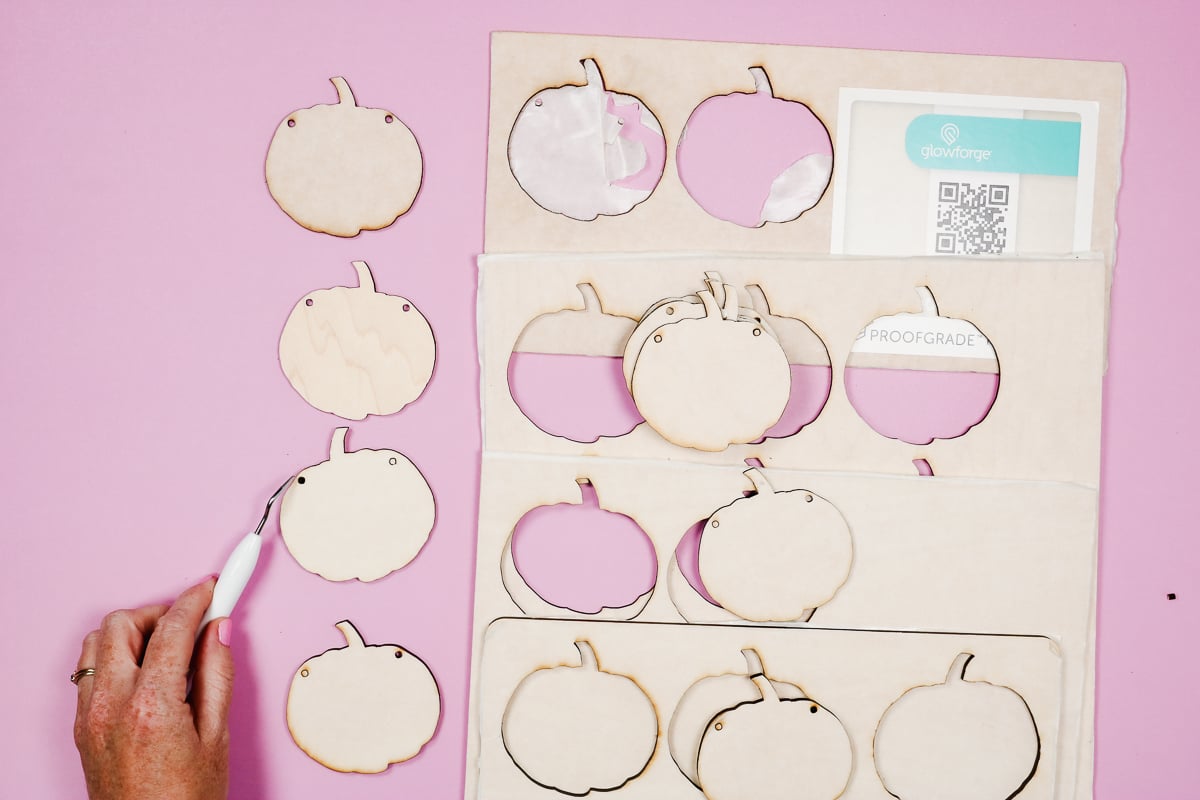
Next, we need to remove the masking from each piece. I’ve found using something like Gorilla Tape is really helpful for getting it started without scratching the surface of the blank.
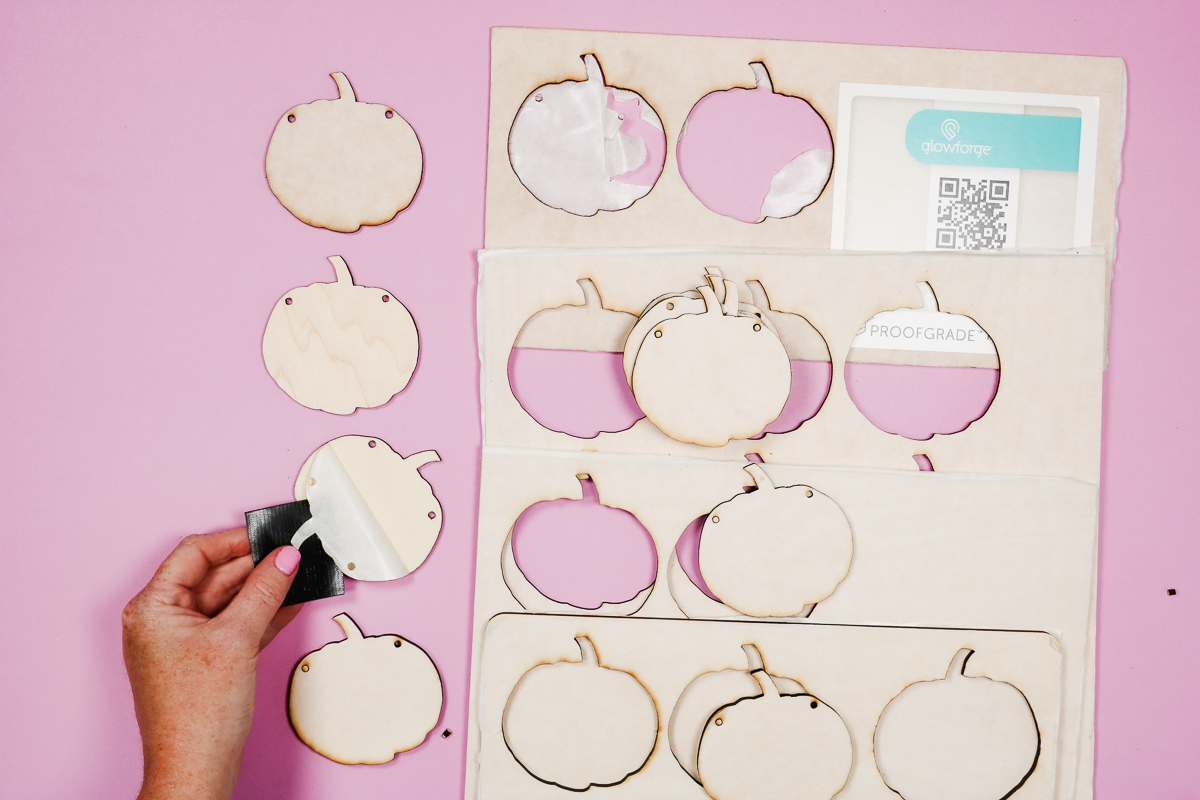
Make sure you remove the masking from both the front and the back of your blank before you apply any heat for the sublimation.
Print Sublimation Design
Now it’s time to set up our sublimation print. I am using Canva today. You can use whatever program you prefer.
Open Canva and click Create a Design, Custom Size, and I am choosing 8.5 inch by 11 inch. This is the size of the sublimation paper I’m using. If you’re using a different size, you can choose that.
Because I am using a design that I have on my computer I’ll click Upload and Upload to Files. From here I will upload the PNG file that matches the SVG I cut on the Glowforge.
Add that file to the canvas and next, we’ll resize it. I recommend resizing the image slightly larger than the sublimation blank we cut on the Glowforge.
My pumpkin sublimation blanks are exactly 3 inches wide so I am going to resize the sublimation image to 3.05 inches wide. This gives me a little room to get it lined up and will ensure the whole sublimation blank will be covered.
Duplicate the image for as many blanks as you have and then align the design on the canvas.
I am using my Sawgrass today. It likes to move designs to account for margins so I like to move everything to the upper left-hand corner.
When you have it set up how you want click Share and then Download. I suggest downloading it as a PNG file, setting the size to about 1.5, and then clicking Download.
Adjust Printer Settings
Because I am using my Sawgrass printer I am using PrintMate to print. Click Add Files and then locate the design on your computer.
I change the size to eleven because that is the size of paper I am using and then set the spacing to zero. That should fit on the paper I’m using and be the exact size I sized the design in Canva.
In PrintMate, I am choosing the Hardboard Sign/Plaque setting and double-checking all the settings.
Make sure Mirror is checked and High Quality is on. In Color Management, select Vibrant and then click Print. This will send the print to my Sawgrass printer.
IMPORTANT: A sublimation print is sublimation ink printed onto sublimation paper from a sublimation printer.
Add Sublimation Blanks to Sublimation Print
Adding these sublimation blanks to the sublimation print is the same as other sublimation projects. This time we are just using sublimation blanks we made ourselves with a Glowforge.
If I had any sublimation blanks that had a lot of brown or burnt areas on them, I wiped them down with a damp cloth.
You do want to clean every blank. Use a lint roller to remove any dust, hair, or other debris.
Line up the sublimation blank on top of the sublimation print. The print is slightly larger than the blank so you should be able to see the print all the way around the blank.
Center the blank as best you can and use heat-resistant tape to hold it into place.
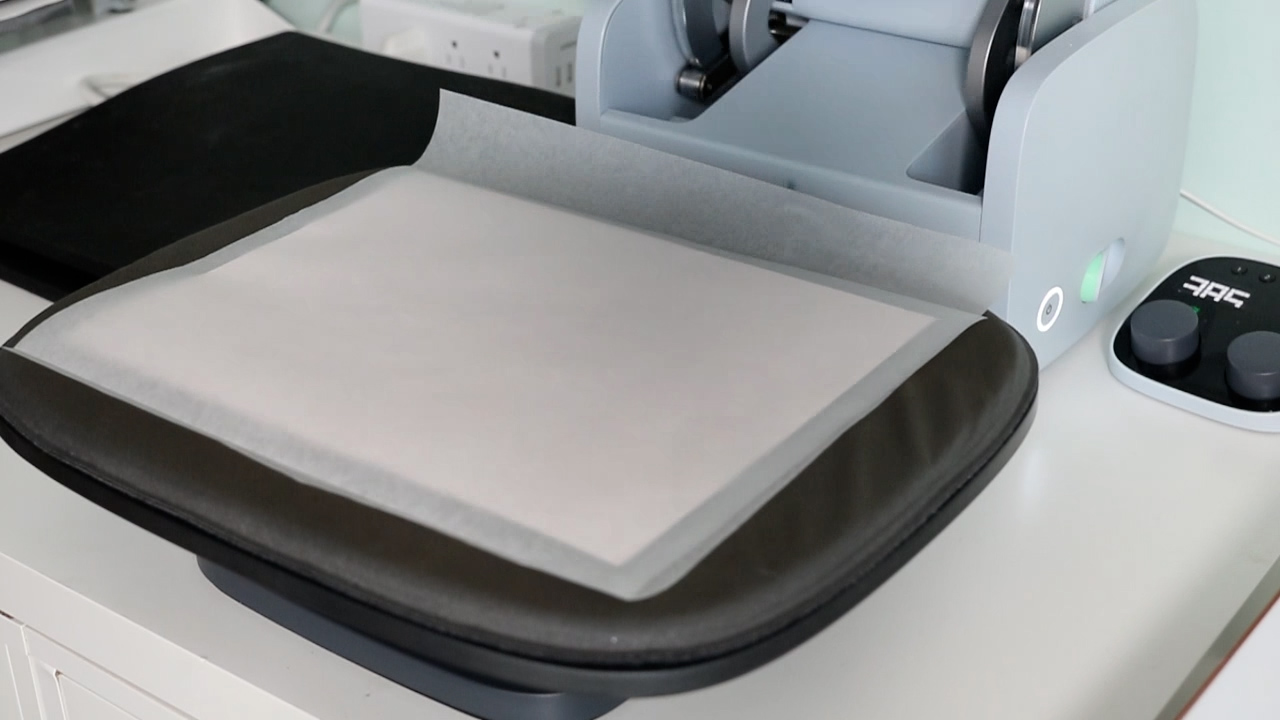
Add Sublimation Blank and Print to Heat Press
I am using the Cricut Autopress for this project and have the temperature set to 385 degrees and the time set to 50 seconds. This setting is the same for all of the materials I’m using today.
Place protective paper on the bottom and then add the project sublimation blank side up. Add protective paper to the top and close the press.
When the time is up, remove the project from the press and remove the blank from the print.
I am going to repeat this process for each of the different materials I’m testing today.
Remove Sublimation Blank from Sublimation Print
Now I have each of the different materials with a sublimation print applied to them. Remove the print from the sublimation blank. You can do this while the project is still hot.
If you want to check the sublimation, use a damp cloth and wipe it across the sublimation print. This would especially be important if your project is going to be exposed to elements or outdoors
If the image wipes off your blank, it is not taking the sublimation print. Because my banner will be used indoors and not near moisture, like steam in a bathroom it doesn’t really matter. I am specifically looking for a vibrant print.
Compare Sublimation Blanks with Sublimation Print
Here you can see all of the different options. I am using the sublimation plywood as my control sample because it is a true sublimation blank.
As we move up there’s Light Maple Plywood, Light Basswood Plywood, and Medium Basswood Hardwood.
I feel like the light maple plywood performed the best of the Proofgrade materials. The sublimation print transferred really well and is very vibrant.
Remember, I am sublimating right onto the wood for each of these materials. They do not have a white side so the wood grain will show through the design because it is a light color. You’ll notice that the different colors in the wood will change the color of any image you use, especially light images.
For comparison, here is the sublimation plywood on the right against the light maple plywood Proofgrade material on the left.
As you can see, the Proofgrade material looks really great, plus it’s easy to cut, which makes it my favorite.
This time on the bottom I have the light basswood plywood and on the top, I have the medium basswood plywood. They did not sublimate as well. The colors are not as vibrant.
I might be able to play with the time and temperature, but I would probably stick with the light maple plywood to get those bright vibrant colors.
Which Materials are Two Sided?
The Sublimation Plywood is not two-sided, when I tested it the sublimation was very light on the back and wiped off with a damp cloth.
The Proofgrade materials from Glowforge are all two-sided. I tested each of them and the back side sublimated as well as the front side did.
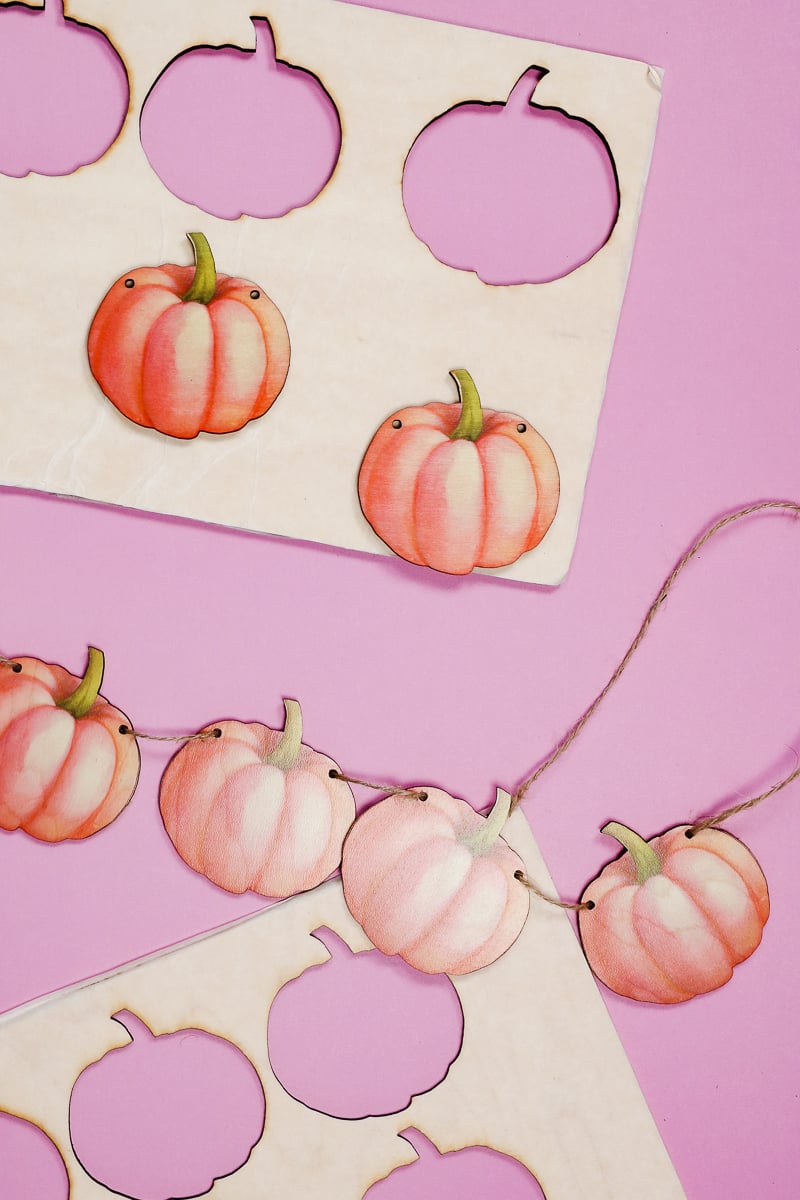
How to Assemble a Sublimation Pumpkin Banner
I am using all of the pumpkins I made with the Light Maple Plywood Proofgrade material for my sublimation pumpkin banner.
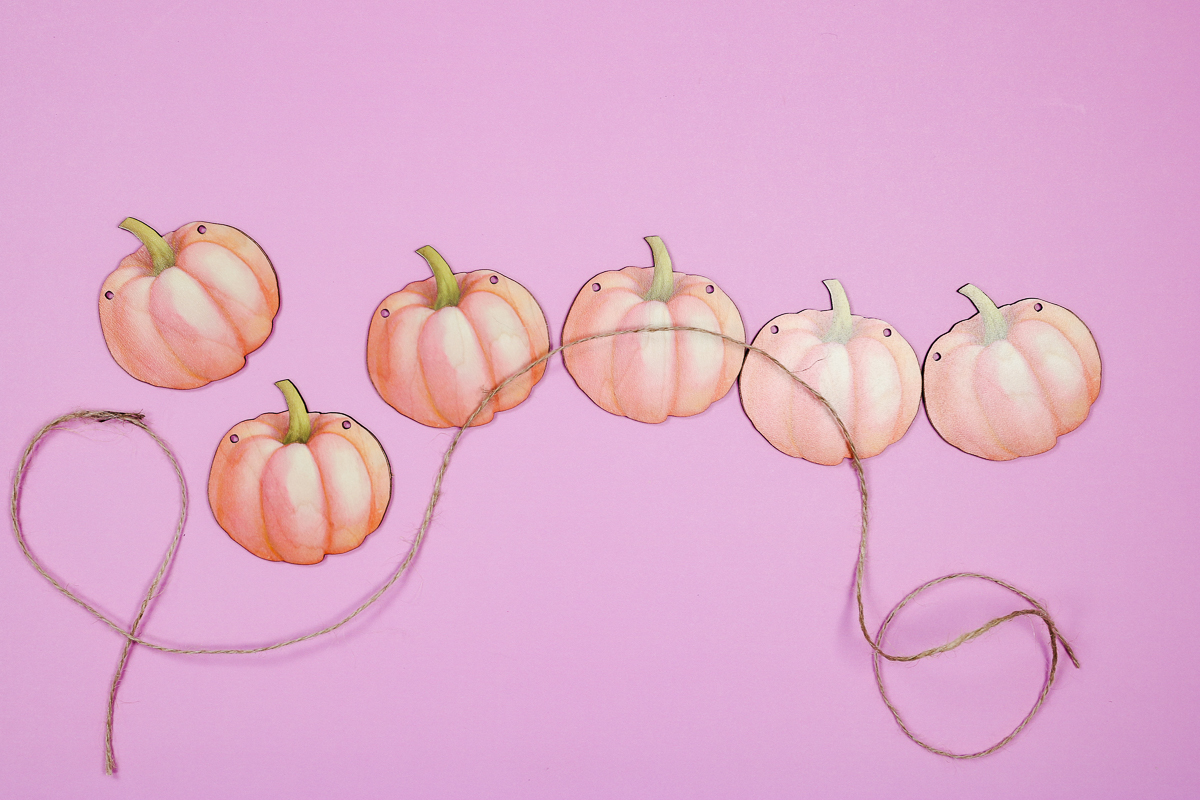
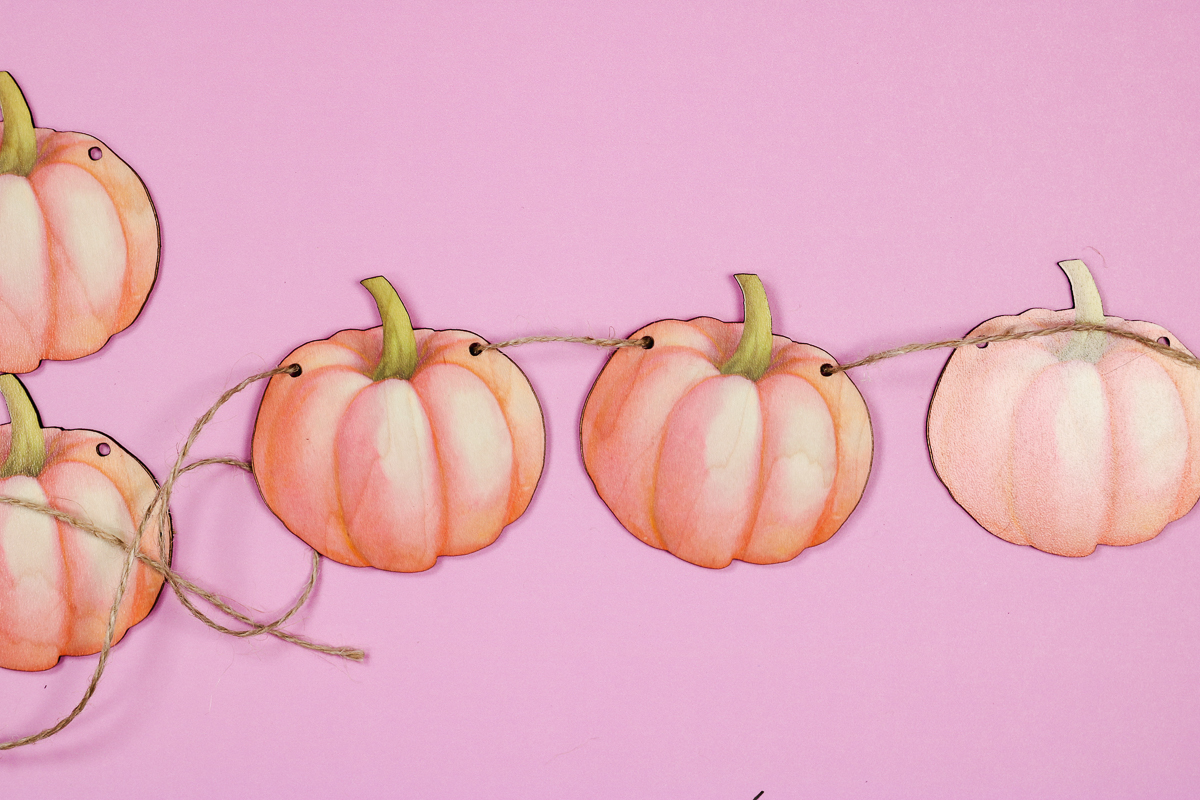
To assemble the banner I am using a thin twine and stringing the pumpkins going in the front on one side and from the back on the other side so the twine crosses the back of the pumpkin.
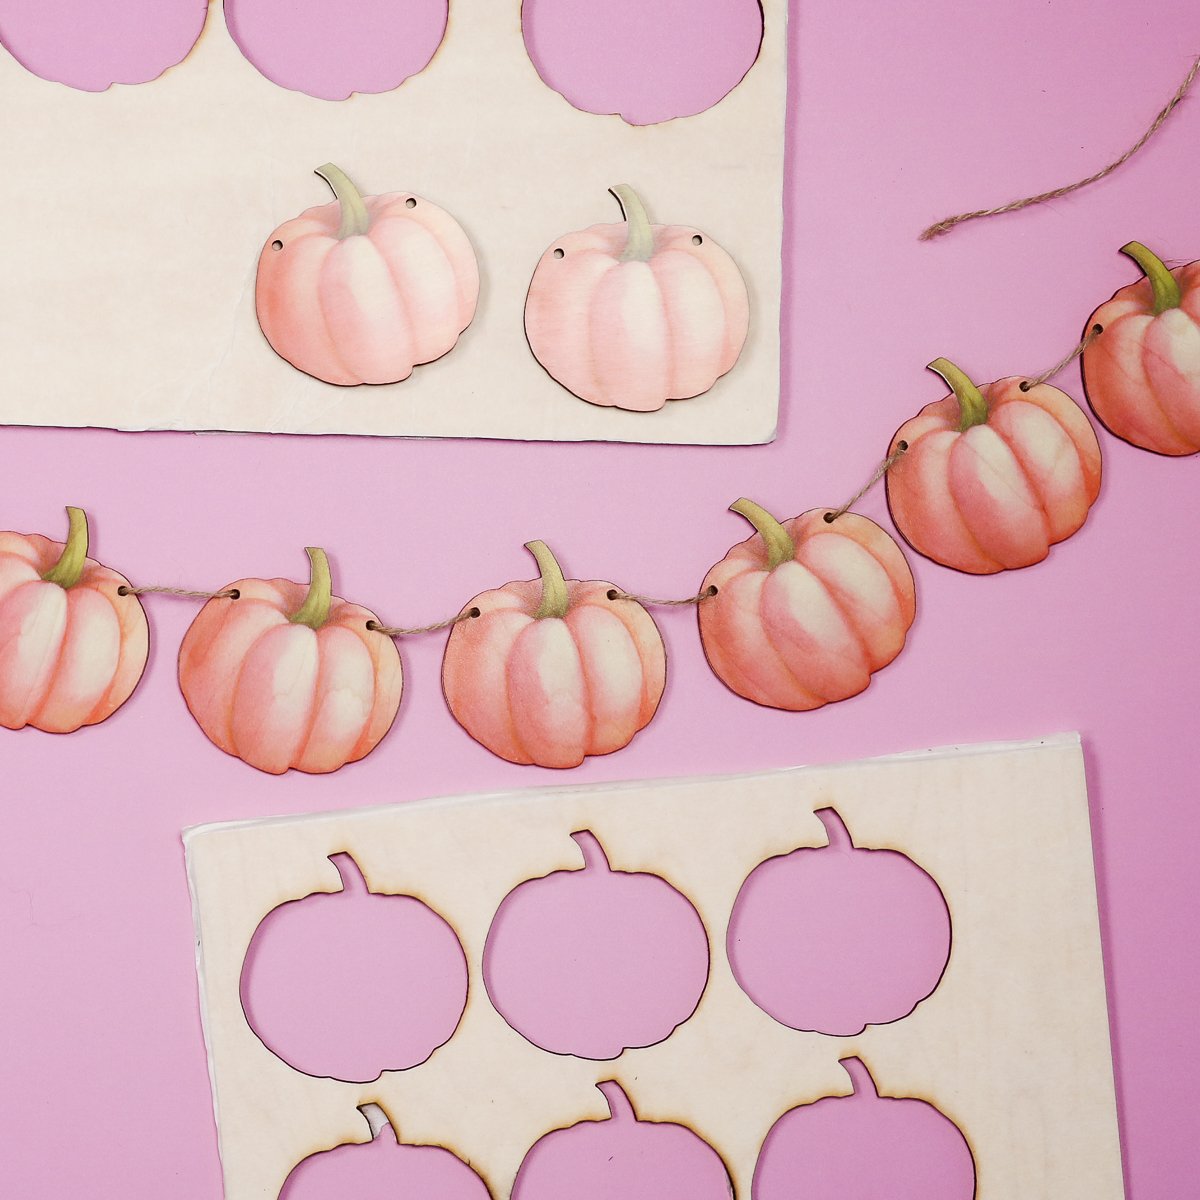
Continue to string all of the pumpkins onto the twine. If you find your twine is separating and is hard to get through the holes, you can use a small piece of tape to wrap around the end like a shoelace.
The length of your banner can be whatever you want. Cut as many or as few blanks as you need and string them onto twine however long you need it.
Final Thoughts on Making Sublimation Blanks with Glowforge Aura
While I was able to find multiple materials that could work for sublimation and cut well with the Glowforge Aura there was a definite winner for me and that was the Light Maple Plywood.
I have found that the Proofgrade materials are easy to cut and do a great job. Since I didn’t have to spend extra time figuring out the settings and I know they can hold up to the heat of the laser they’re my favorite.
I also really like that the Proofgrade materials have poly coating on both sides so you can sublimate the front and the back of your design.
If you prefer to use a material that says it’s specifically for sublimation, the Sublimation Plywood Placemats from Craft Express would be my choice. They cut really well in the Glowforge and on the front side that is made for sublimation the sublimation print transferred perfectly.
The Sublimation Plywood Placemats are thicker than the Proofgrade materials I used. If you need something thicker for your project, that would work well. If you want something thinner, I couldn’t find anything from Craft Express or other sublimation brands that were thinner and would work for sublimation.
The PYD Life material did not pass the test for me. Between having such a difficult time dialing in the cut settings and not having them perform each time and it filling up my Glowforge filter it just wasn’t worth the effort to use it.
If you own a different Glowforge or a different laser cutter, it may cut differently but that was my experience with the PYD Life hardboard.
I hope I’ve answered any questions you have about making sublimation blanks with your Glowforge Aura. If you have any other questions, leave them in the comments and I’ll answer them for you.