This post and photos may contain Amazon or other affiliate links. If you purchase something through any link, I may receive a small commission at no extra charge to you. Any supplies used may be given to me free of charge, however, all projects and opinions are my own.
Are you looking for the perfect sublimation gift? Today I’m going to teach you how to make customized sublimation wind spinners that would make the most perfect Mother’s Day gift. These not only make a great gift, but they’re also perfect to add outside your window or in your garden.
I’m using sublimation prints to make these sublimation wind spinners. If you’re new to sublimation, my beginner’s guide is the perfect place to start.
What is a Wind Spinner?
If you haven’t seen a wind spinner before, you’re going to love them. A wind spinner is a round yard decoration with designs on both sides. As the wind blows by, it spins around showing the designs on all sides.
The spinner blank I’m using comes with a 360 clip so it can spin around indefinitely. It won’t tangle up no matter how long it spins.
How to Customize Sublimation Wind Spinners
To customize a wind spinner with sublimation, you need to have a sublimation blank and sublimation print. With a sublimation blank, we can add any sublimation print to the wind spinner, including photos.
To clarify, a sublimation print is a sublimation image, printed on sublimation paper, from a sublimation printer, with sublimation ink.
You can watch me make these customized sublimation wind spinners from start to finish by pressing play on the video below.
Supplies Needed
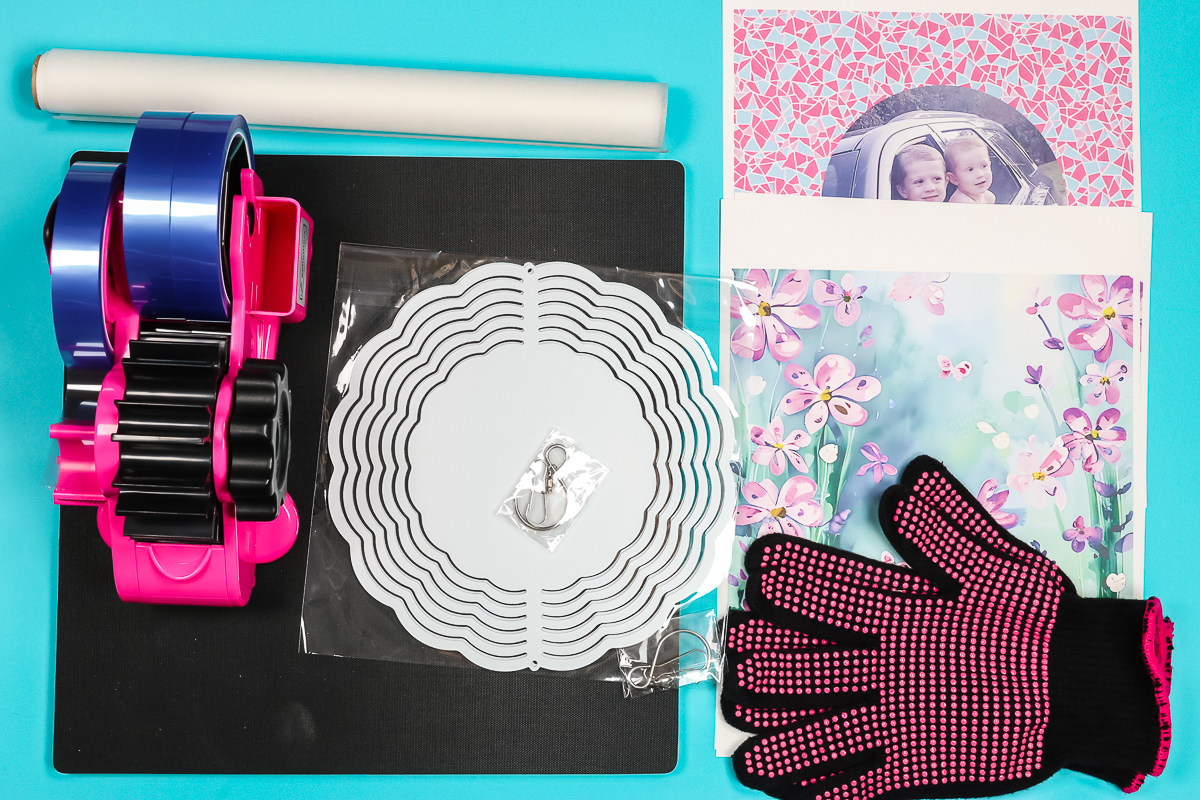
Design Size
I am using an eight-inch wind spinner, I chose that size so I can press the design all at once. My sublimation printer can only print a max of 8.5″ one way and I want to print it without any seams.
You could piece together something on a larger wind spinner if you wanted. They make them quite large which could be fun. If you have a larger format sublimation printer, you can print on that as well.
Even with these smaller sizes, they have a hole in the top and bottom for the spinner hook which means you can connect them to create a larger decoration piece. They do come in a variety of sizes and you can add whatever designs you want on them.
How to Make Customized Sublimation Wind Spinners
To make a customized sublimation wind spinner, press the spinner while it’s flat. Once the design is sublimated onto the spinner, bend the sides to finish the project.
For one of my wind spinners, I am using a geometric pattern with a photo added to the middle. The geometric pattern is included in the supply list for free. You can use a program like Canva to add the photo to the middle to create this look. See how to do that in this post on free sublimation software.
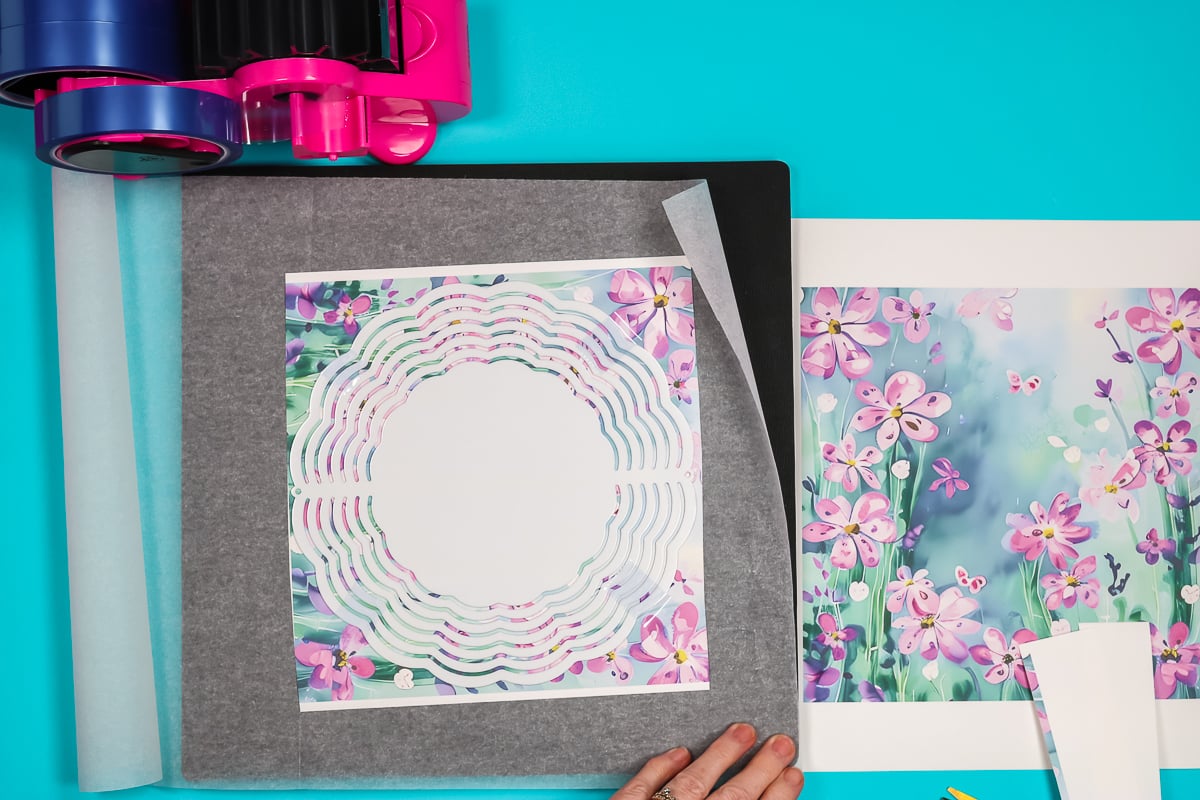
Print Out Designs
Make sure your design is larger than your sublimation blank. Mine is slightly larger on all sides to ensure the whole spinner will have a design.
Once the design is set how you want it, it’s time to print out the design. Make sure you’re printing it on sublimation paper, with sublimation ink, from a sublimation printer. If your design has a photo, letters, numbers, or anything with an orientation, make sure you mirror the image before printing.
Remember, you need a separate print for each side of your wind spinner.
Prep the Sublimation Blank
To begin, make sure you remove the protective film from both sides of the sublimation wind spinner. You do not want to forget this step. As someone who’s forgotten, trust me!
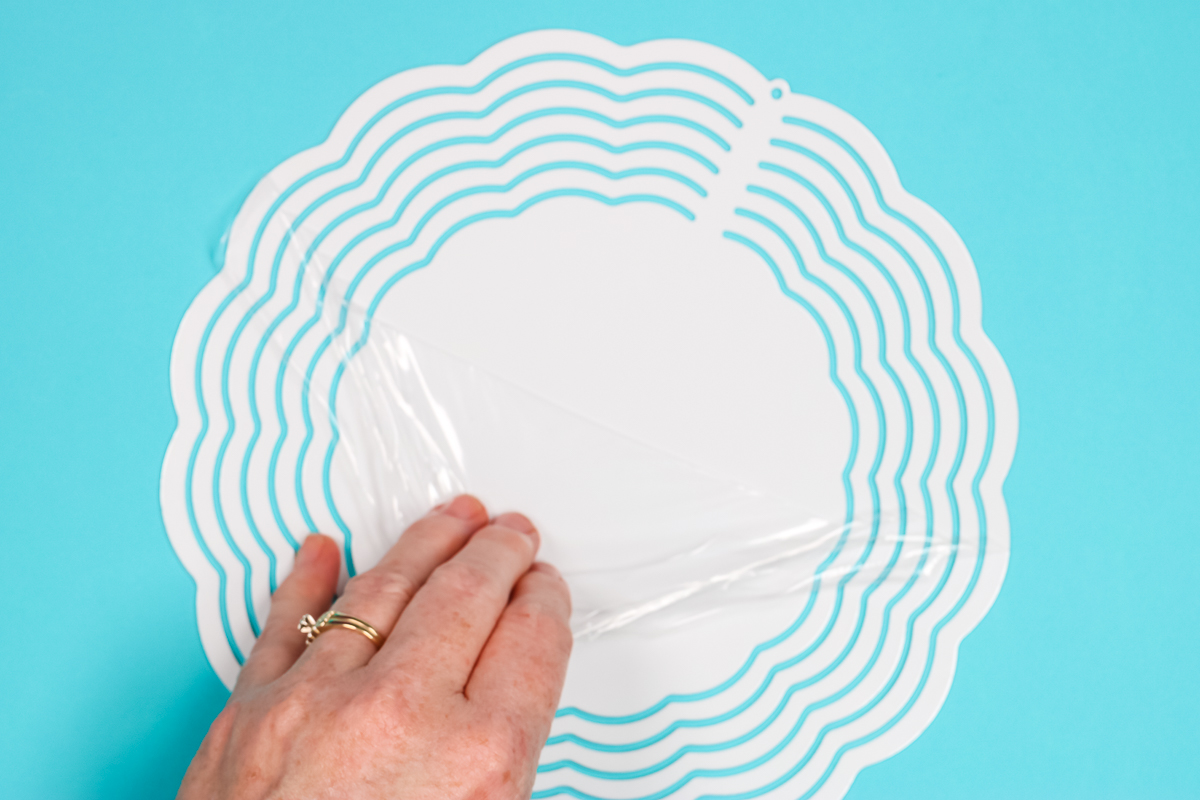
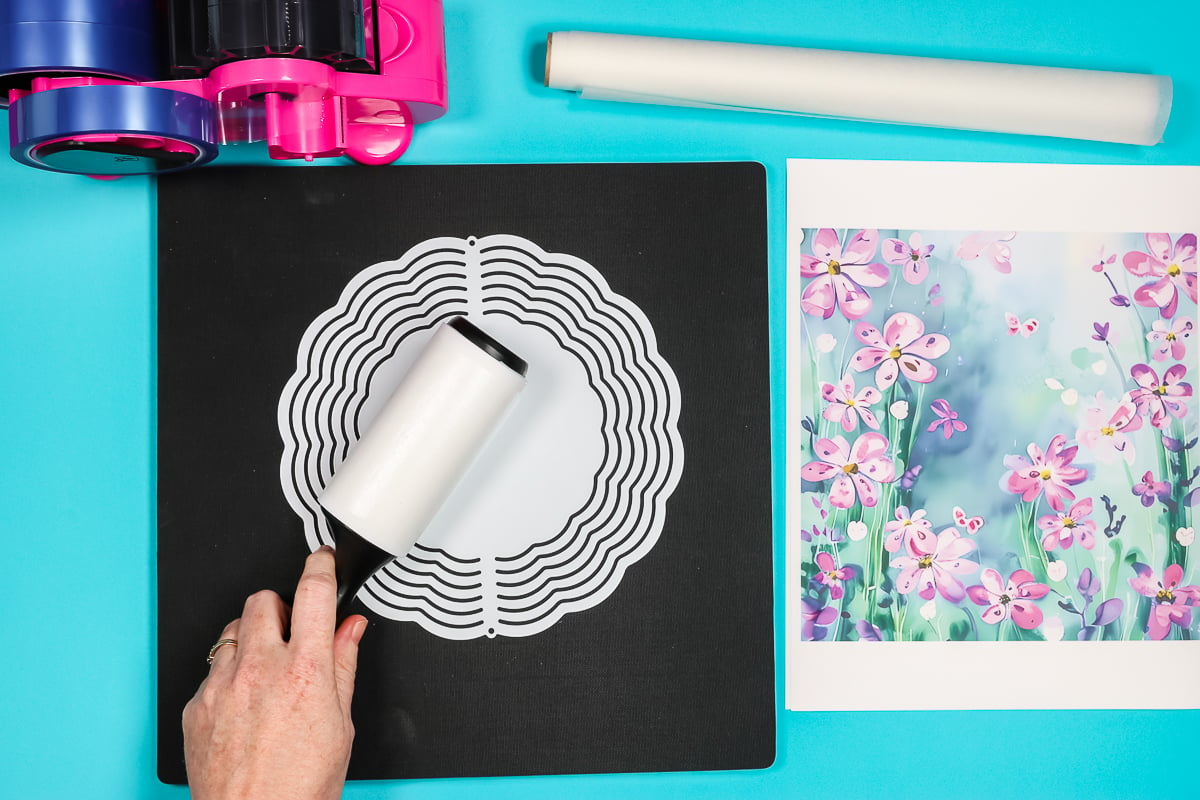
Before adding the print we need to make sure the blank is clean. I like to use a lint roller. You can also use a lint-free cloth and rubbing alcohol. Make sure you completely clean both sides of your blank.
Locate Print on Wind Spinner
Locate where you want your design on the sublimation blank. With the gaps in the spinner, you can see the design so you can get it right where you want it.
Pay attention to where the holes are on your spinner. There isn’t a difference between the top and bottom but there is a top and bottom. You don’t want to locate your design sideways.
I do like to trim away the excess paper. This makes it easier when pressing to make sure the whole design is pressed at once.
When the design is located, use heat-resistant tape to hold it in place. I used 4 pieces to hold my design in place.
How to Press Sublimation Wind Spinners
To press our sublimation design onto the wind spinner, tape it into place and then flip it over so the sublimation paper is on top.
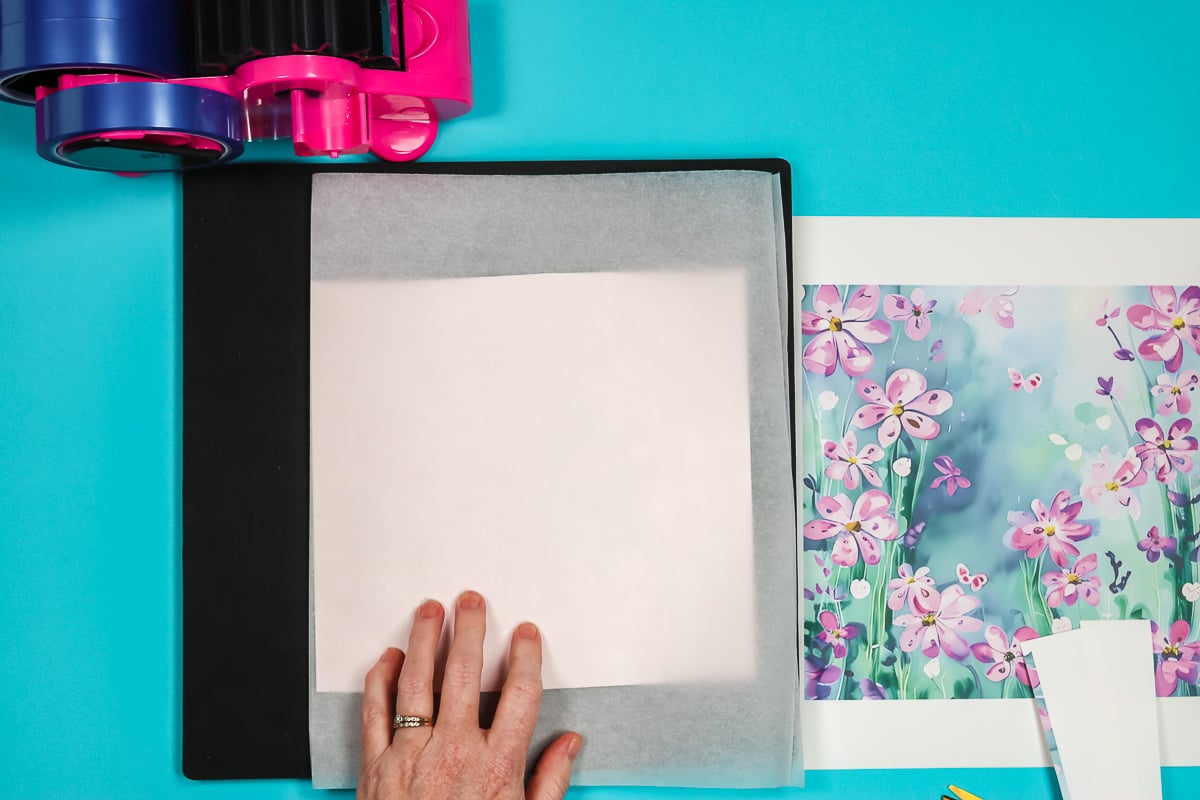
We need to wrap the whole project in protective paper. Make sure you have the protective paper on top and the bottom. Because the spinner has openings, the sublimation print will transfer and you don’t want it to transfer onto your heat source or your mat.
Regardless of if you’re using a heat press or EasyPress, do not skip using the protective paper.
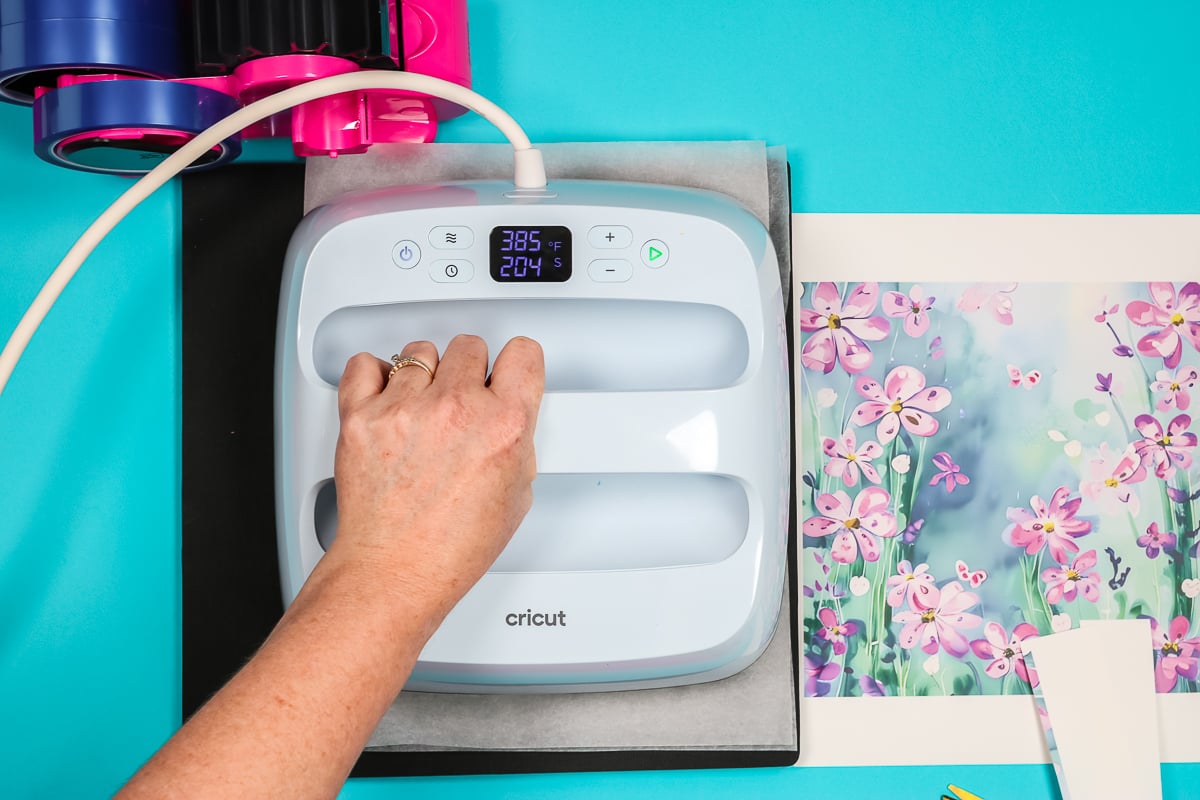
This sublimation wind spinner calls for 385 degrees for 3 minutes and 45 seconds. I recommend medium pressure so I will apply pressure on my EasyPress for the entire time. This is a long time to hold down pressure on the EasyPress. You can use a standard heat press for this project and the time will be the same.
Reveal Finished Sublimation Wind Spinner
When the time is up, lift the EasyPress. Remember, this is going to be very hot. I am using a heat-resistant glove to peel back the sublimation paper.
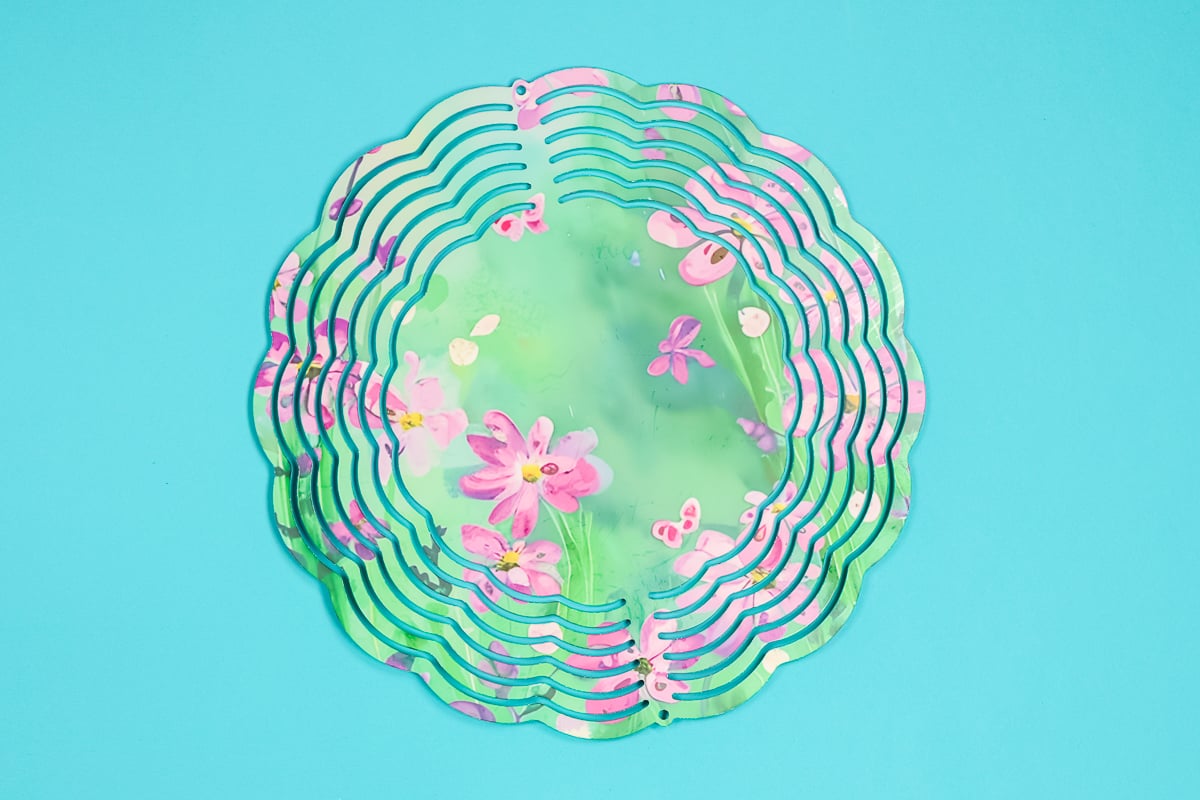
Notice the sublimation ink on the bottom protective paper? Without that paper, all of that ink would have ended up on the heat mat ruining it.

Look at how great this turned out. Now we need to repeat the same steps for the other side.
Do not reuse the protective paper with sublimation ink on it. You’ll need to replace that piece of protective paper. My top sheet didn’t have any ink transfer so I can use that piece again.
For this sublimation wind spinner, I used the same design on both sides. I love how this design turned out. It’s perfect for a garden.
How to Form a Wind Spinner
To form our wind spinner so it will spin in the wind we need to bend it.
You can wait for it to cool down before bending. If you try to bend it while it’s warm, make sure you’re wearing your heat-resistant gloves.

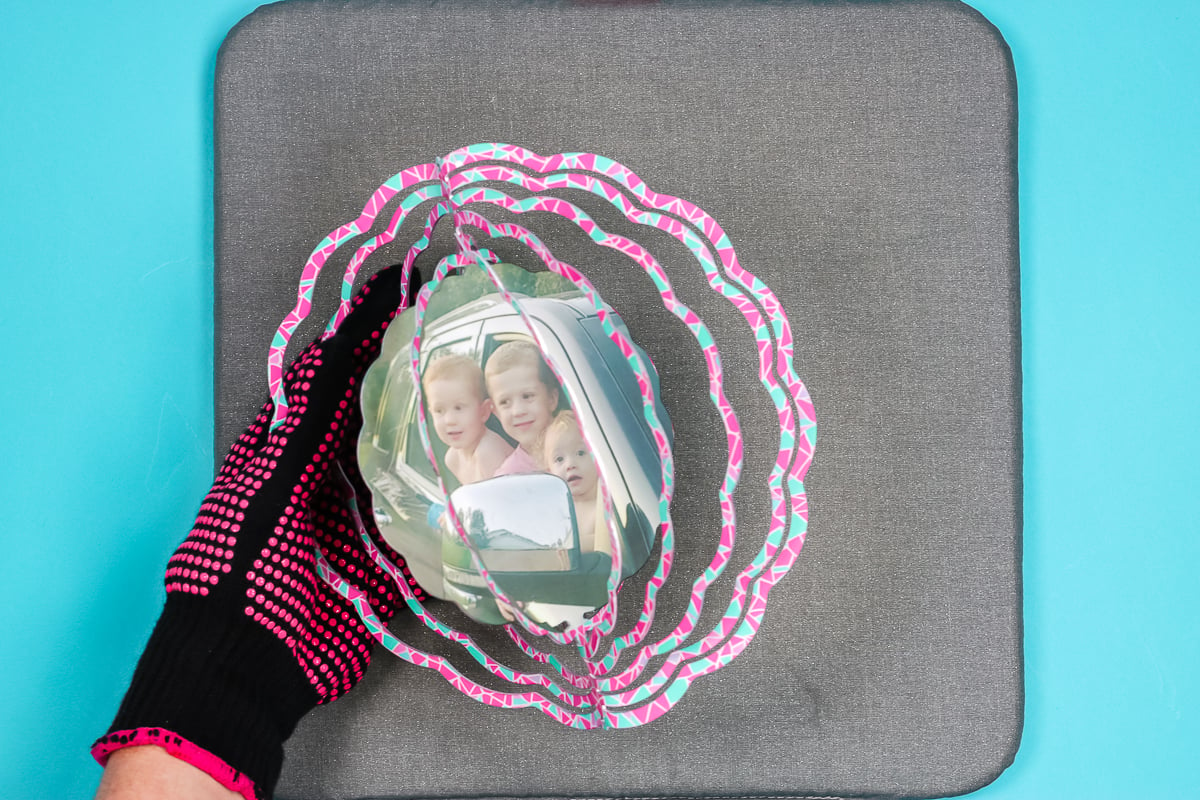
To form the spinner, fan out the sides. To do this, hold the center portion and twist it away from the rings.
You can continue to twist them and fan them out until you get the look you want. It’s totally up to you. I like to have the middle section at about a 45-degree angle from the closest ring.
For my project, each side of the ring bent separately. I can adjust them individually to get the exact look I want.
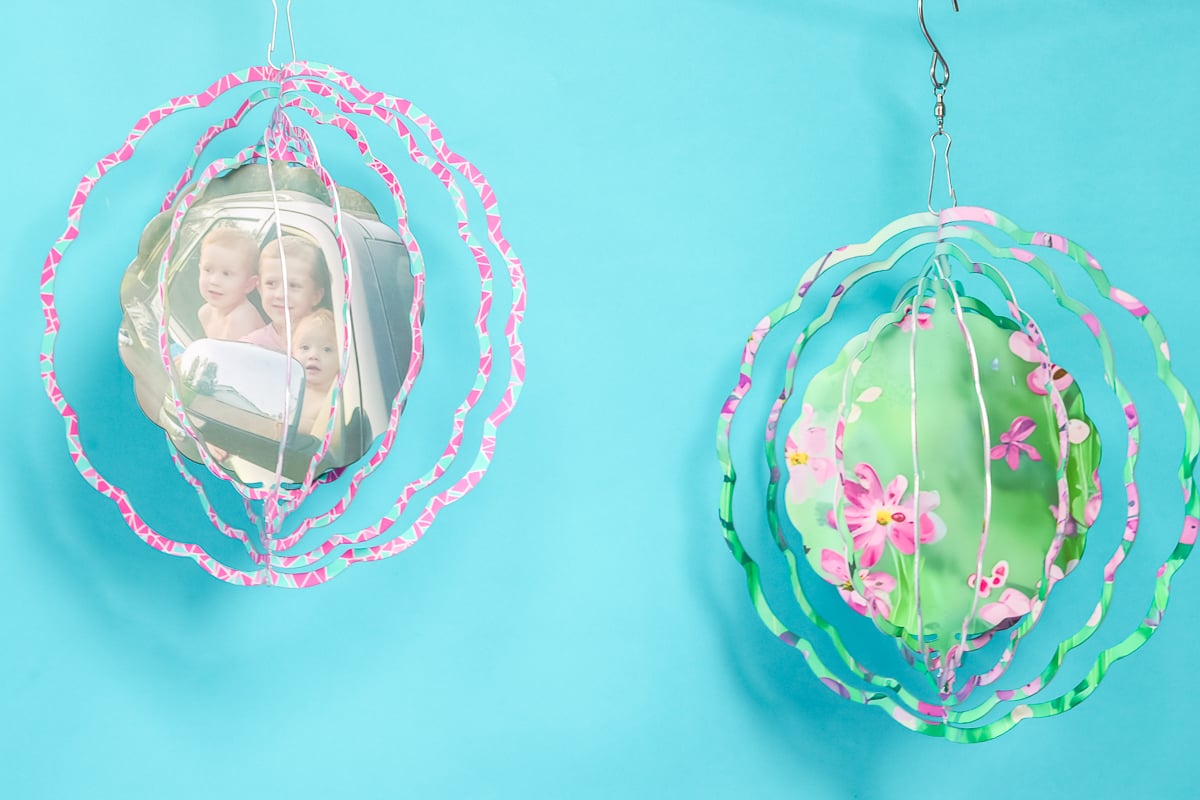
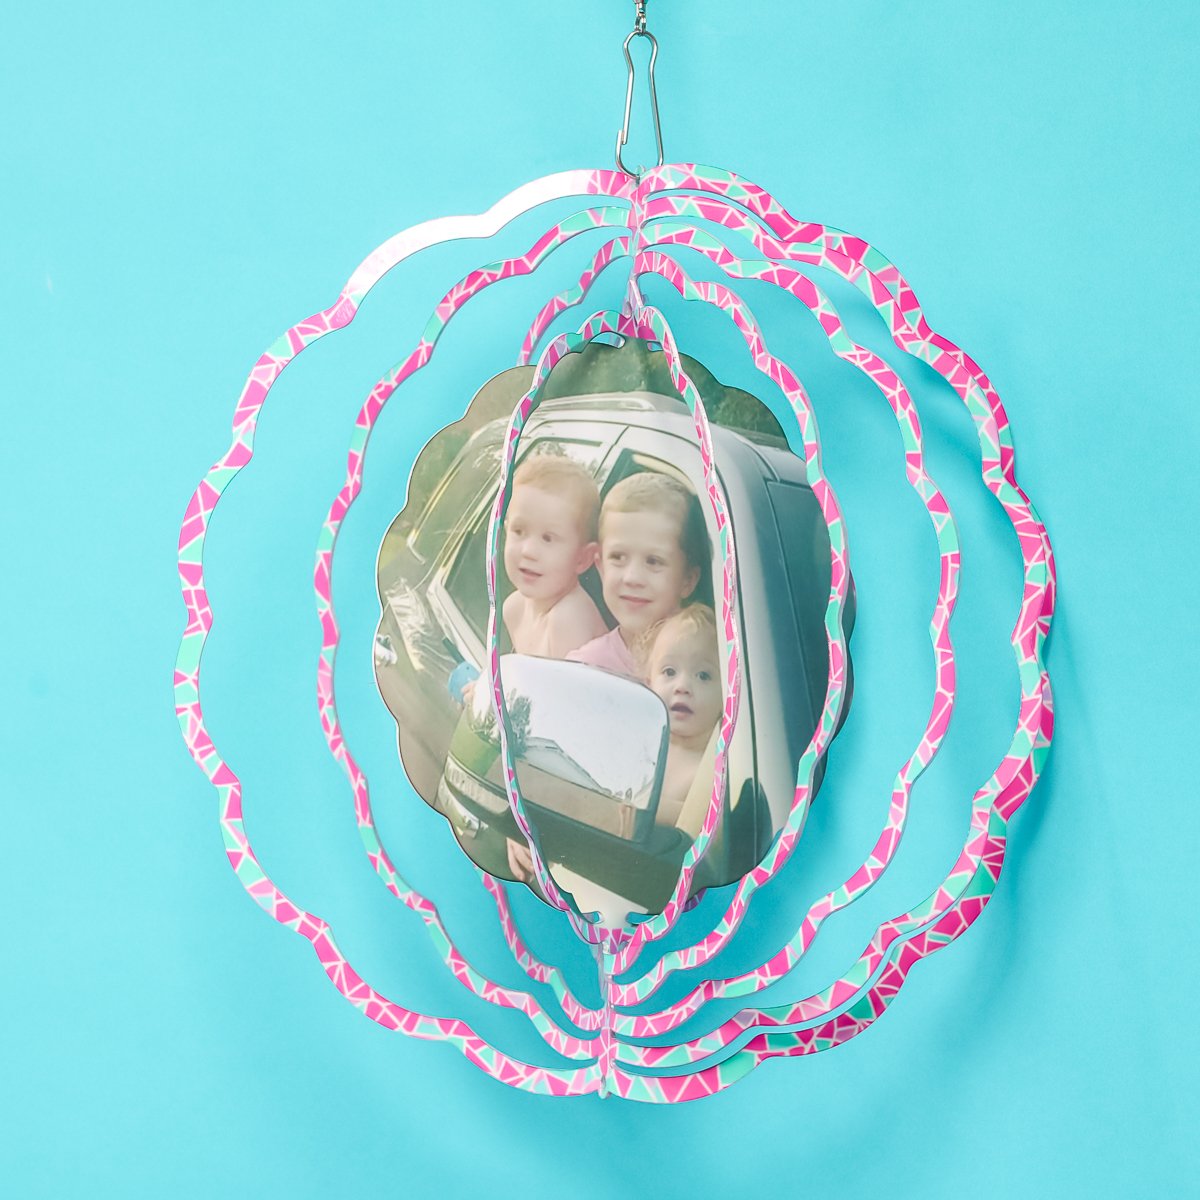
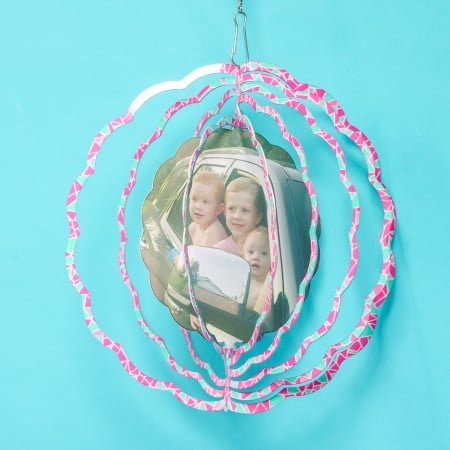
How to Make a Wind Spinner with a Photo
Making a sublimation wind spinner with a photo in the middle is very similar to the other wind spinners. The main difference is that we have to add the photo to the design before printing.
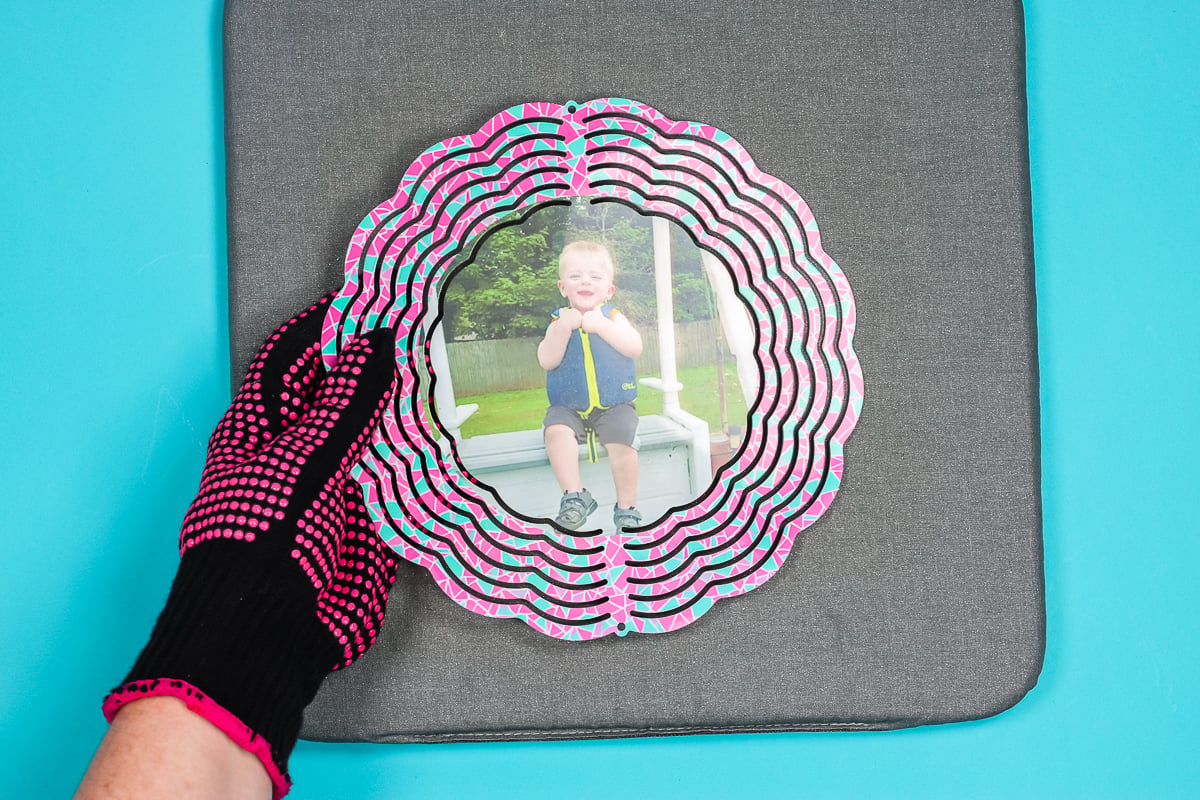
Using a program like Canva you can add a photo to the middle of the patterned design. I love this option because you can add a different photo to each side.

I did have some questions on the video about how I added the photo perfectly to the middle. If you look closely, you can see that the images aren’t just on the center portion of the wind spinner. They do extend onto the rings a little bit but you can hardly even tell.
How could you look at those sweet photos and not smile every time you saw them?
Finishing the wind spinner is the same as the other design. You’ll fan out the rings until they’re how you want them.
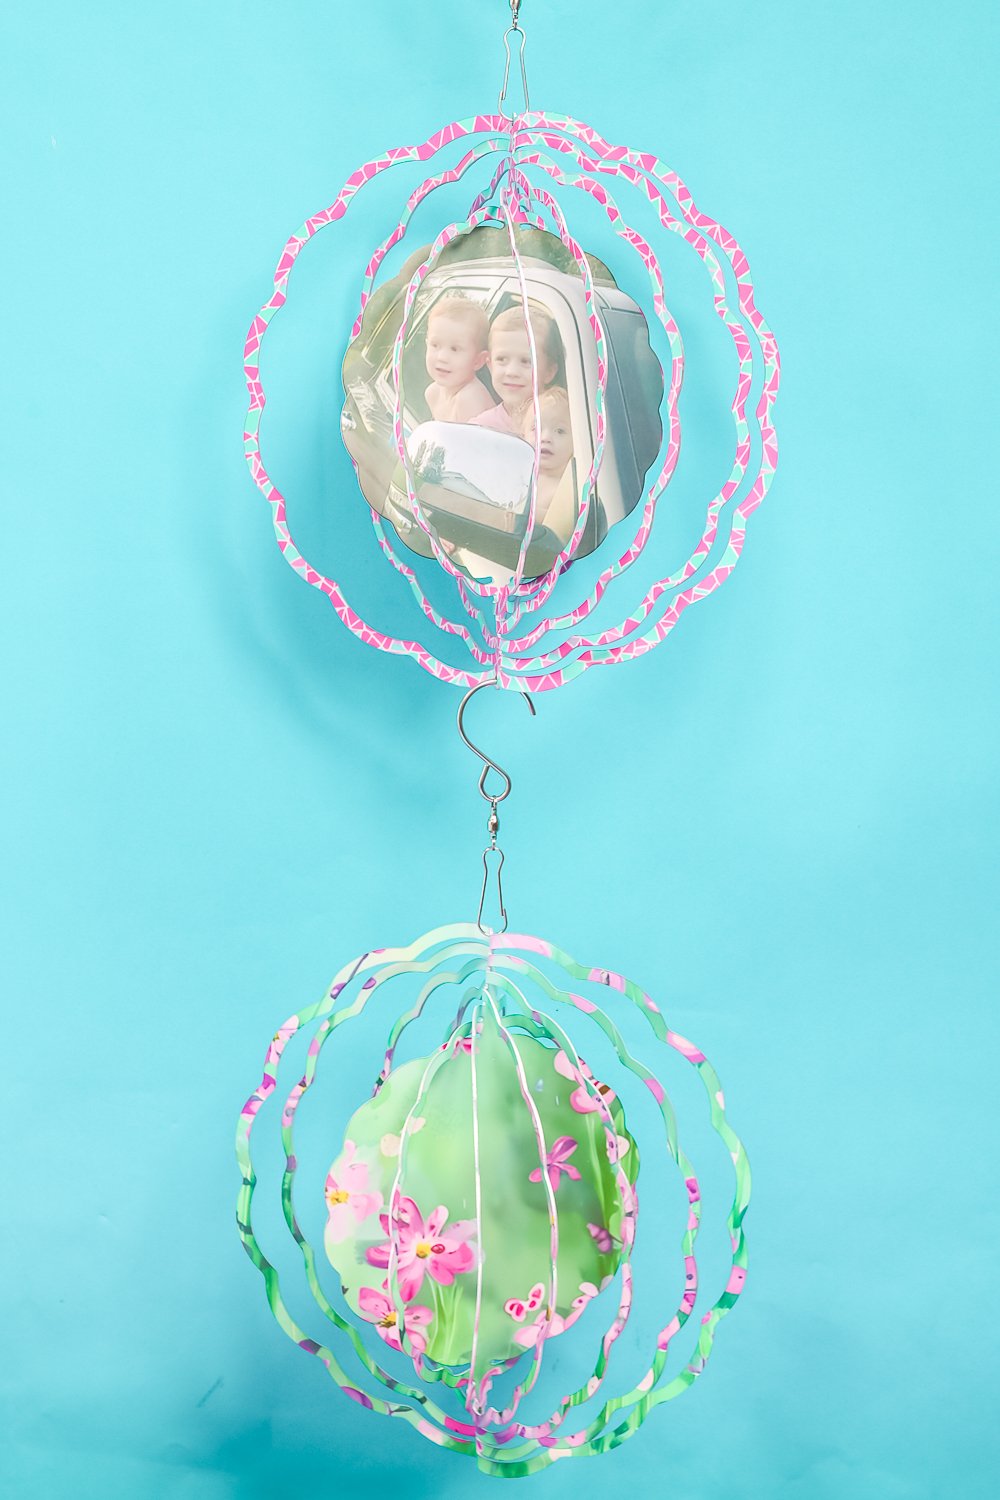
How to Attach the Clip to the Sublimation Wind Spinner
The sublimation wind spinner I purchased comes with a 360-degree swivel clip. The great thing about this clip is you can decide which side you want to clip onto the spinner.
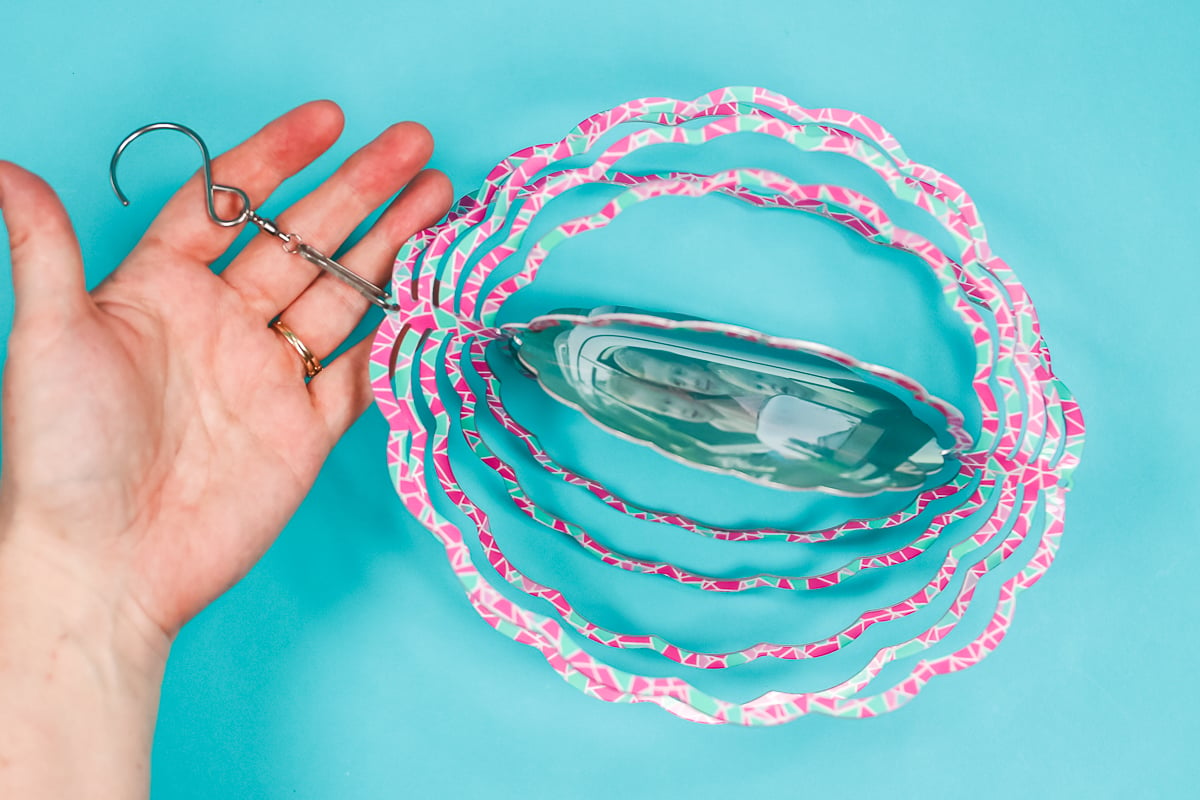
I felt like the clip side being attached to the spinner was the best option. That leaves the hook side to hang the wind spinner. With the hole in the bottom, I can add more designs to make a longer wind spinner.
Final Thoughts on Sublimation Wind Spinners
I really can’t express how much I love how these projects turned out. I am really impressed with how well they sublimated. They were easy to bend into shape and they spin really well on the hanging hooks.
My only concern about the sublimation wind spinners I purchased is the UV coating. The listing does say they’re supposed to be UV coated.
I have not put them outdoors for any length of time. I may find in time I need to purchase a higher quality wind spinner if these start to fade in the UV light. That’s the only thing I’m worried about. I think this is a great sublimation blank.

If you’re ready to try making sublimation wind spinners, I would highly recommend trying this blank.
I had a lot of fun making these wind spinners and think they would make amazing yard decor and gifts. I hope you’re excited to make your own today! If you have any questions about making your own sublimation wind spinners, leave them in the comments below and I’ll answer them for you.
To print the instructions for this project, use the card below!
Are you looking for the perfect sublimation gift? Today I’m going to teach you how to make customized sublimation wind spinners that would make the most perfect gift and yard decor.
Equipment
-
Sublimation Printer
-
Sublimation Ink
-
EasyPress
-
Heat Resistant Mat
-
Tape Dispenser
-
Free Sublimation Designs
Instructions
Print Out Designs
-
Make sure your design is larger than your sublimation blank. Mine is slightly larger on all sides to ensure the whole spinner will have a design.
-
Once the design is set how you want it it’s time to print out the design.
-
Make sure you’re printing it on sublimation paper, with sublimation ink, from a sublimation printer. If your design has a photo, letters, numbers, or anything with an orientation make sure you mirror the image before printing.
-
Remember, you need a separate print for each side of your wind spinner.
Prep the Sublimation Blank
-
To begin make sure you remove the protective film from both sides of the sublimation wind spinner. You do not want to forget this step. As someone who’s forgotten, trust me!
-
Before adding the print we need to make sure the blank is clean. I like to use a lint roller. You can also use a lint-free cloth and rubbing alcohol.
-
Make sure you completely clean both sides of your blank.
Locate Print on Wind Spinner
-
Locate where you want your design on the sublimation blank. With the gaps in the spinner, you can see the design so you can get it right where you want it.
-
Pay attention to where the holes are on your spinner. There isn’t a difference between the top and bottom but there is a top and bottom.
-
You don’t want to locate your design sideways.
-
I do like to trim away the excess paper. This makes it easier when pressing to make sure the whole design is pressed at once.
-
When the design is located, use heat-resistant tape to hold it in place. I used 4 pieces to hold my design in place.
How to Press Sublimation Wind Spinners
-
To press our sublimation design onto the wind spinner we need to have it taped into place and then flip it over so the sublimation paper is on top.
-
We need to wrap the whole project in protective paper. Make sure you have the protective paper on top and the bottom. Because the spinner has openings the sublimation print will transfer and you don’t want it to transfer onto your heat source or your mat.
-
Regardless of if you’re using a heat press or EasyPress do not skip using the protective paper.
-
This sublimation wind spinner calls for 385 degrees for 3 minutes and 45 seconds. I recommend medium pressure so I will apply pressure on my EasyPress for the entire time.
-
This is a long time to hold down pressure on the EasyPress. You can use a standard heat press for this project and the time will be the same.
Reveal Finished Sublimation Wind Spinner
-
When the time is up lift the EasyPress. Remember, this is all going to be very hot. I am using a heat-resistant glove to peel back the sublimation paper.
-
Notice the sublimation ink on the bottom protective paper? Without that paper all of that ink would have ended up on the heat mat ruining it.
-
Look at how great this turned out. Now we need to repeat the same steps for the other side.
-
Do not reuse the protective paper with sublimation ink on it. You’ll need to replace that piece of protective paper. My top sheet didn’t have any ink transfer so I can use that piece again.
-
For this sublimation wind spinner, I used the same design on both sides. I love how this design turned out. It’s perfect for a garden.
How to Form a Wind Spinner
-
To form our wind spinner so it will spin in the wind we need to bend it.
-
You can wait for it to cool down before bending. If you try to bend it while it’s warm make sure you’re wearing your heat-resistant gloves.
-
To form the spinner we want to fan out the sides. To do this we need to hold the center portion and twist it away from the rings.
-
You can continue to twist them and fan them out until you get the look you want. It’s totally up to you. I like to have the middle section at about a 45-degree angle from the closest ring.
-
For my project, each side of the ring bent separately. I can adjust them individually to get the exact look I want.
How to Attach the Clip to the Sublimation Wind Spinner
-
The sublimation wind spinner I purchased comes with a 360-degree swivel clip. The great thing about this clip is you can decide which side you want to clip onto the spinner.
-
I felt like the clip side being attached to the spinner was the best option. That leaves the hook side to hang the wind spinner.
-
With the hole in the bottom, I can add more designs to make a longer wind spinner.
Notes
I really can’t express how much I love how these projects turned out. I am really impressed with how well they sublimated.
They were easy to bend into shape and they spin really well on the hanging hooks.
My only concern about the sublimation wind spinners I purchased is the UV coating. The listing does say they’re supposed to be UV coated.
I have not put them outdoors for any length of time. I may find in time I need to purchase a higher quality wind spinner if these start to fade in the UV light.
That’s the only thing I’m worried about. I think this is a great sublimation blank.
If you’re ready to try making sublimation wind spinners, I would highly recommend trying this blank.
I had a lot of fun making these wind spinners and think they would make amazing yard decor and gifts. I hope you’re excited to make your own today!
If you have any questions about making your own sublimation wind spinners leave them in the comments below and I’ll answer them for you.
Thank you so much for the step by step instructions.
Thank you for your comment. I suggest you subscribe to our newsletter to receive exclusive news and offers.