This post and photos may contain Amazon or other affiliate links. If you purchase something through any link, I may receive a small commission at no extra charge to you. Any supplies used may be given to me free of charge, however, all projects and opinions are my own.
Grab your Testors paints and make some Halloween flower pots. I am using this project as a fun treat container that the kids can help to make themselves. However, you can make these Halloween clay pots in any size that you choose and even use them on your fall front porch. So, grab your paint and make a flower pot or a dozen today!
This blog post is sponsored by Testors, however, all projects and opinions are my own.
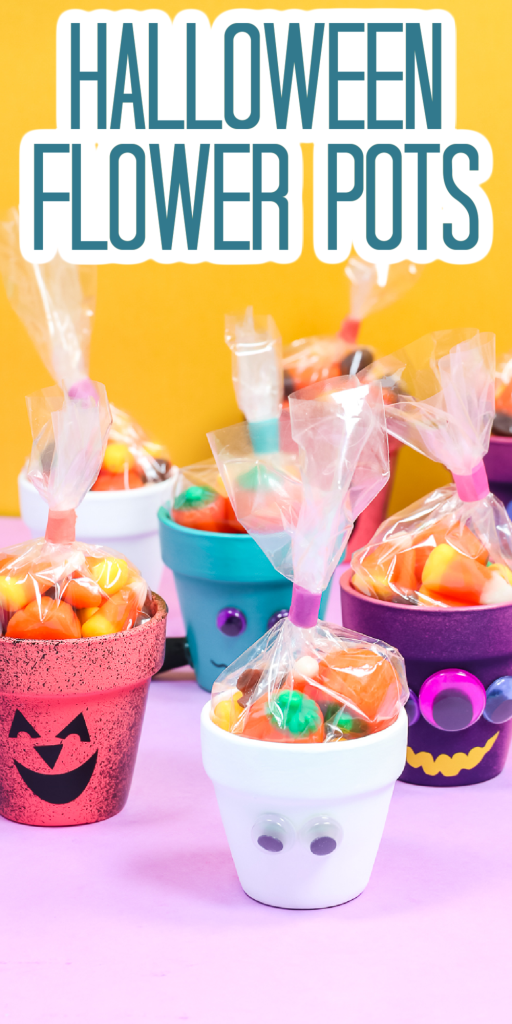
Halloween Flower Pots
Want to watch me paint and make these adorable little terra cotta pots? You can just click play on the video below to watch the entire process from painting to decorating.
Can’t watch the video or missed some of the information? You can also follow along with the how-to instructions below to make your own version of these Halloween flower pots.
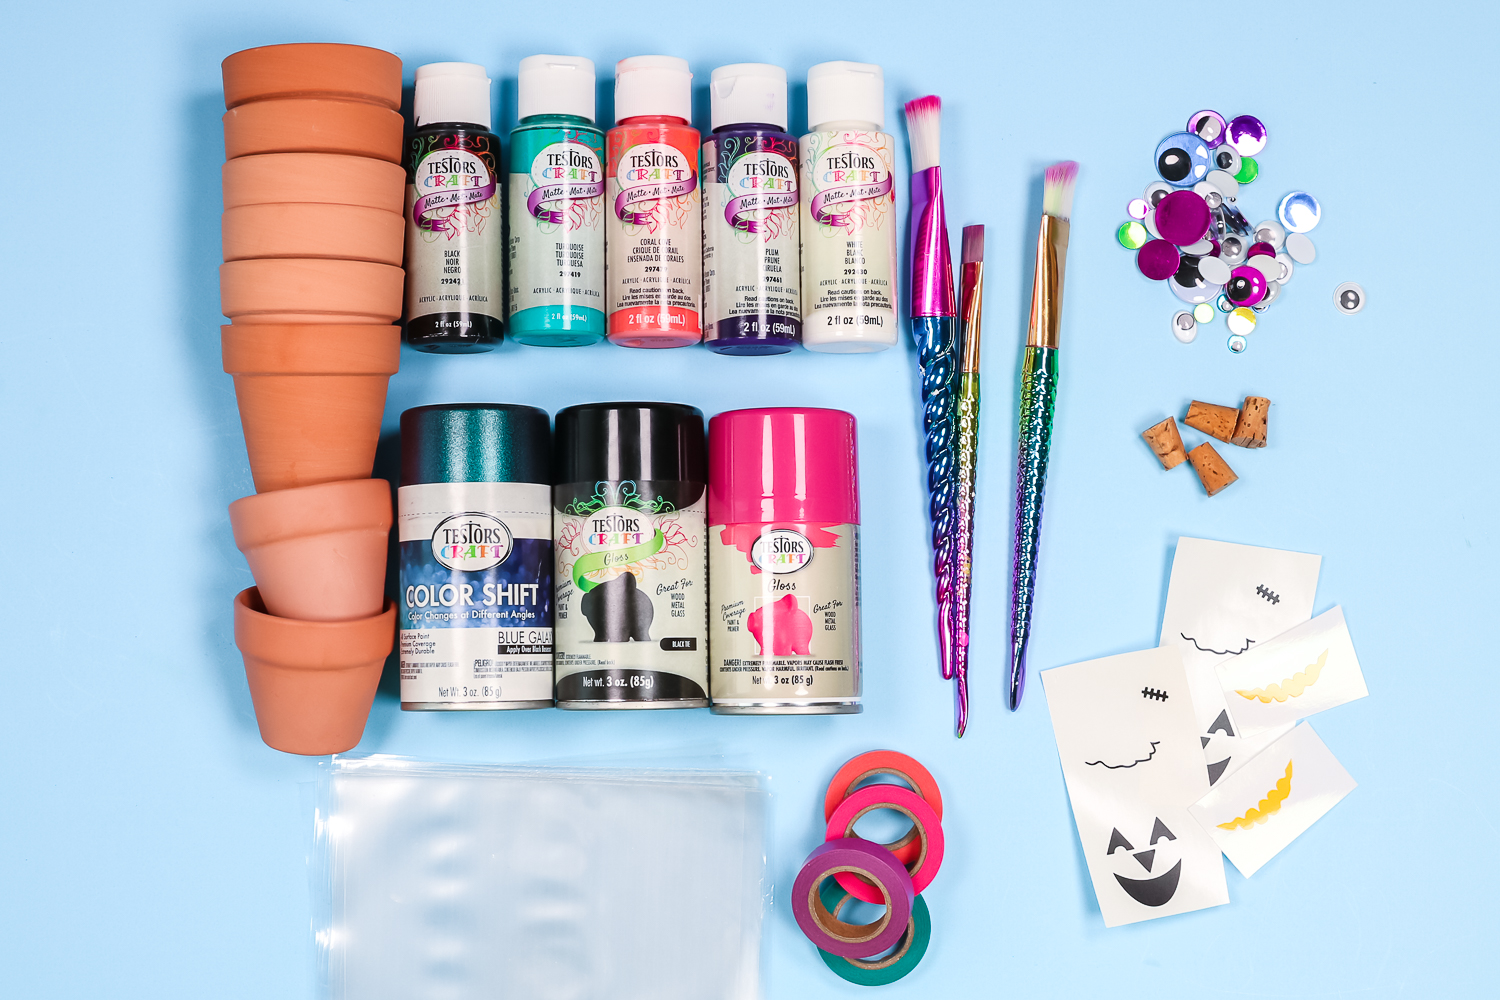
Supplies needed:
NOTE: You can purchase Testors products at Joann, Michaels, Do It Best, or here on Amazon.
How to Make Halloween Clay Pots
Gather your supplies and get started painting and creating your own version of these cute clay pots. You can make exactly the flower pots I have shown or you can let your creativity flow and add other decorations to the outside of these pots.
NOTE: If you are using these as a kids’ craft, either ONLY use the acrylic paints or have an adult on hand to add any spray paint accents.
How to Paint Halloween Flower Pots
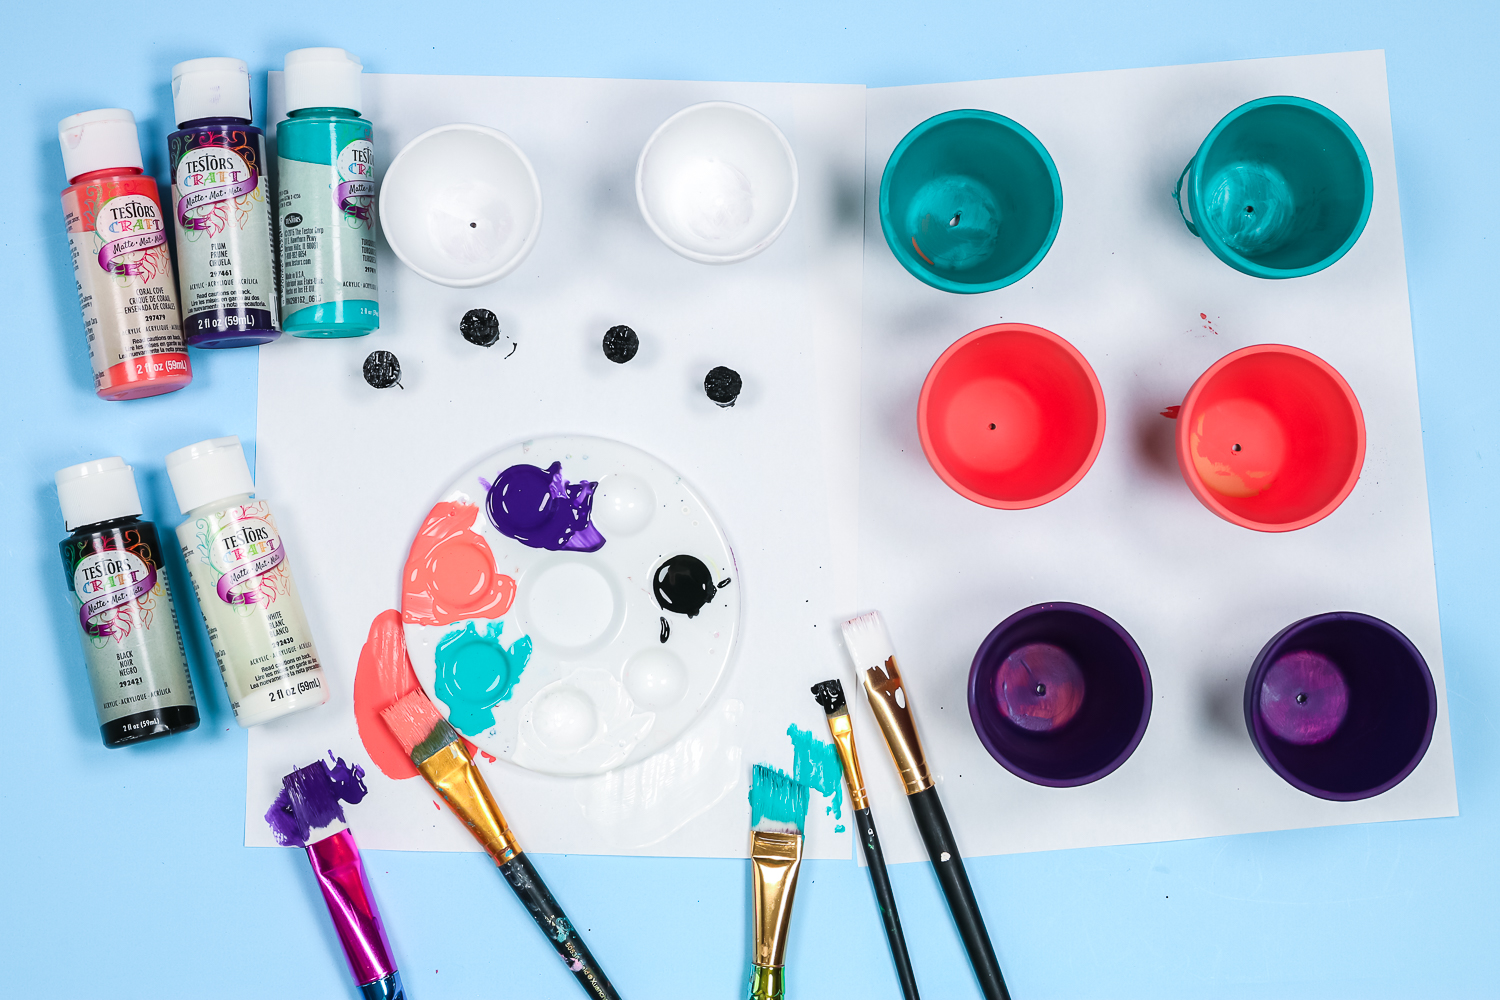
First, you will want to paint your clay pots with acrylic paints. I am using a variety of colors depending on the look that I want for my final project. You will need one to three coats of paint depending on what color you choose for the pot itself. Use a paintbrush to apply the paint and allow it to dry in between coats.
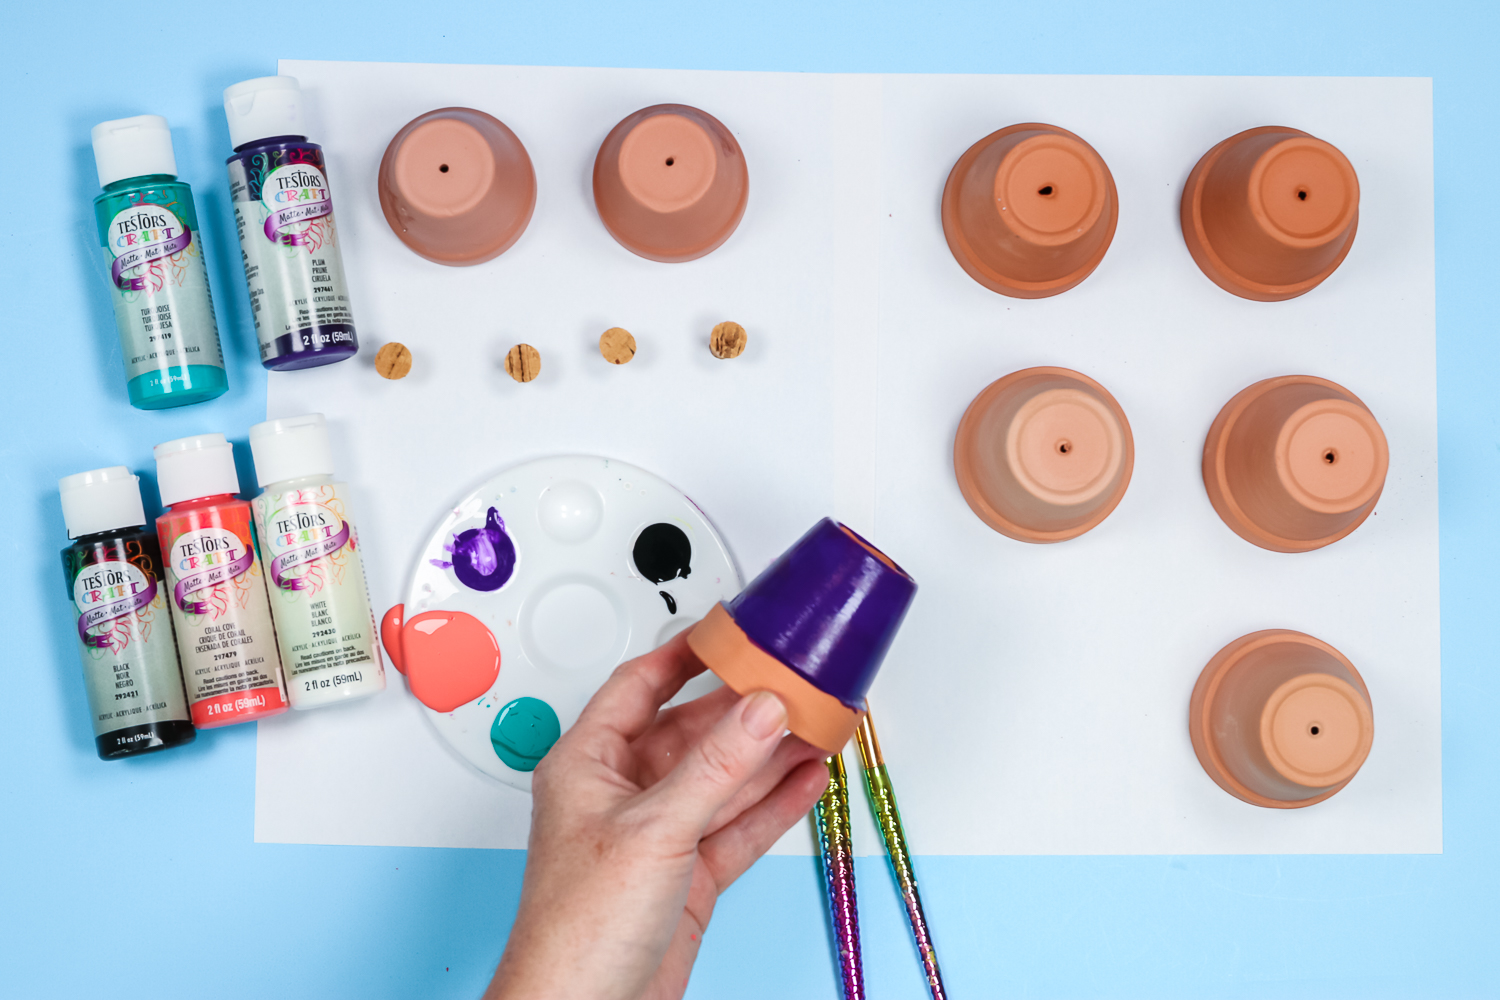
I would paint both the inside and the outside of the clay pots. If these are to be used as treat containers, they will look more finished this way. If these are to be used as flower pots, this will help seal in moisture so your paint lasts longer.
Once you have enough coats of paint to cover your pots, allow them to dry for 24 hours before continuing. This gives the paint time to cure.
Adding Spray Paint Accents
If you would like, you can add spray paint to your pots for a little extra effect. I like spraying them lightly on the sides, back, and a little right on the top and leaving the middle of the front the original color. Alternatively, you would leave them with just the acrylic paint (like the ghost version) or even go over the entire thing with something like the color shift for a cool effect (like the Frankenstein version).
Remember that any spray painting should be performed by adults!
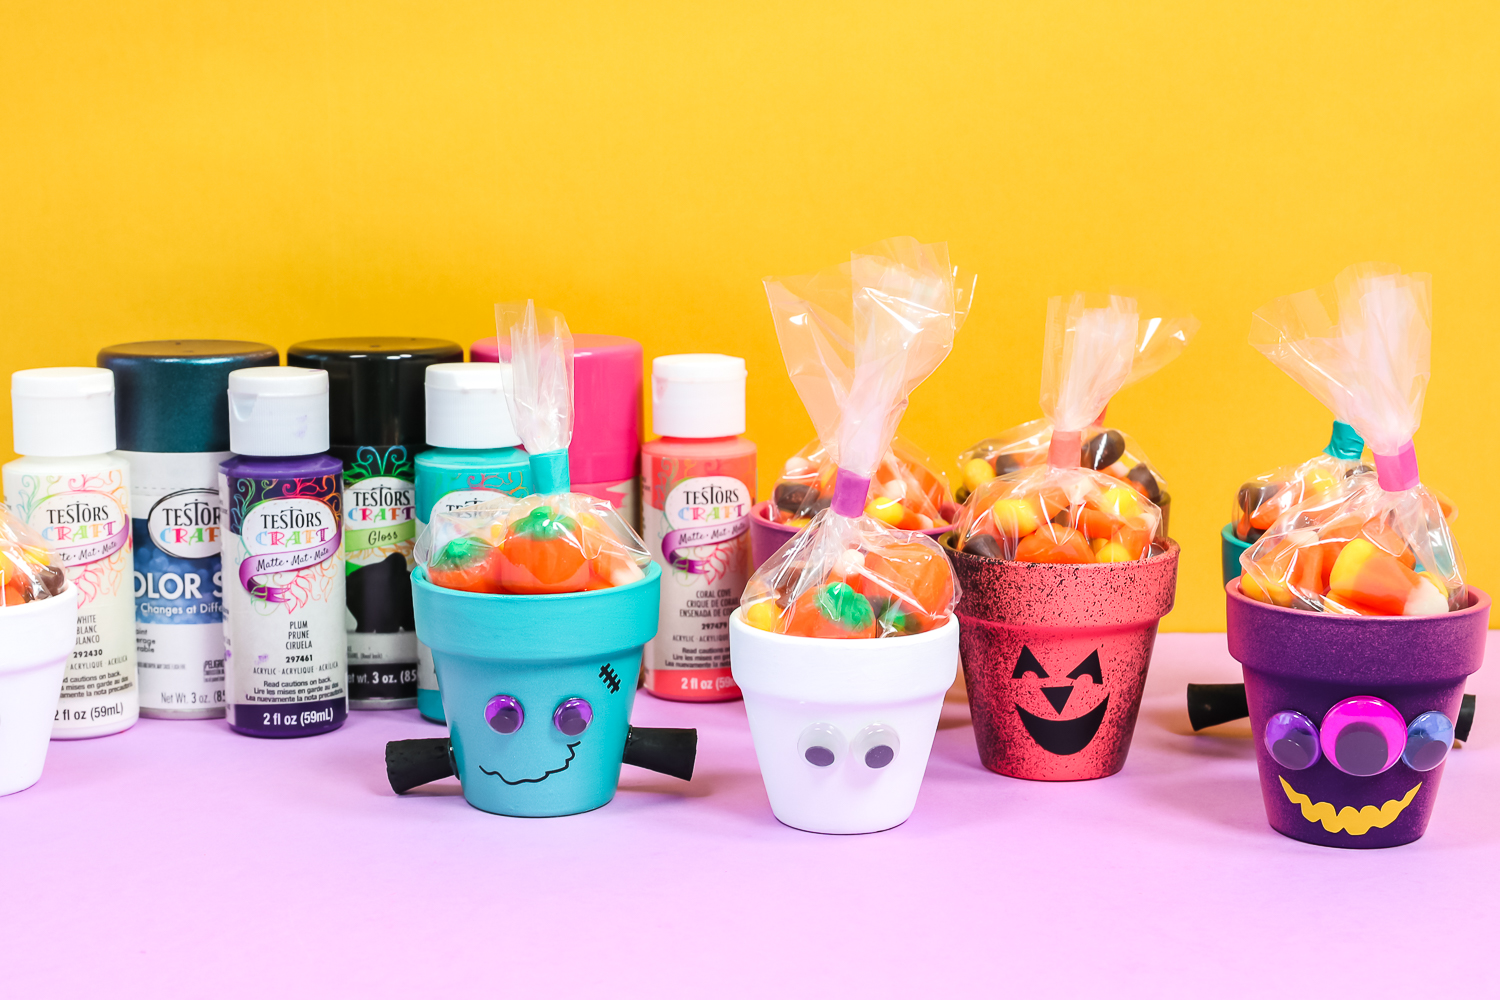
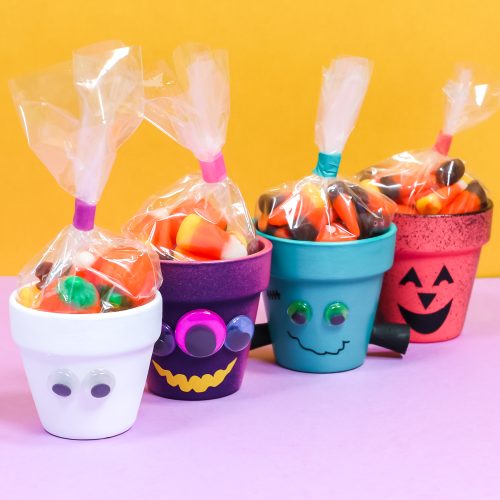
Colors of Paint Used for My Halloween Pots
Here are the specific paint colors that I used for my Halloween flower pots if you want to create exactly the look:
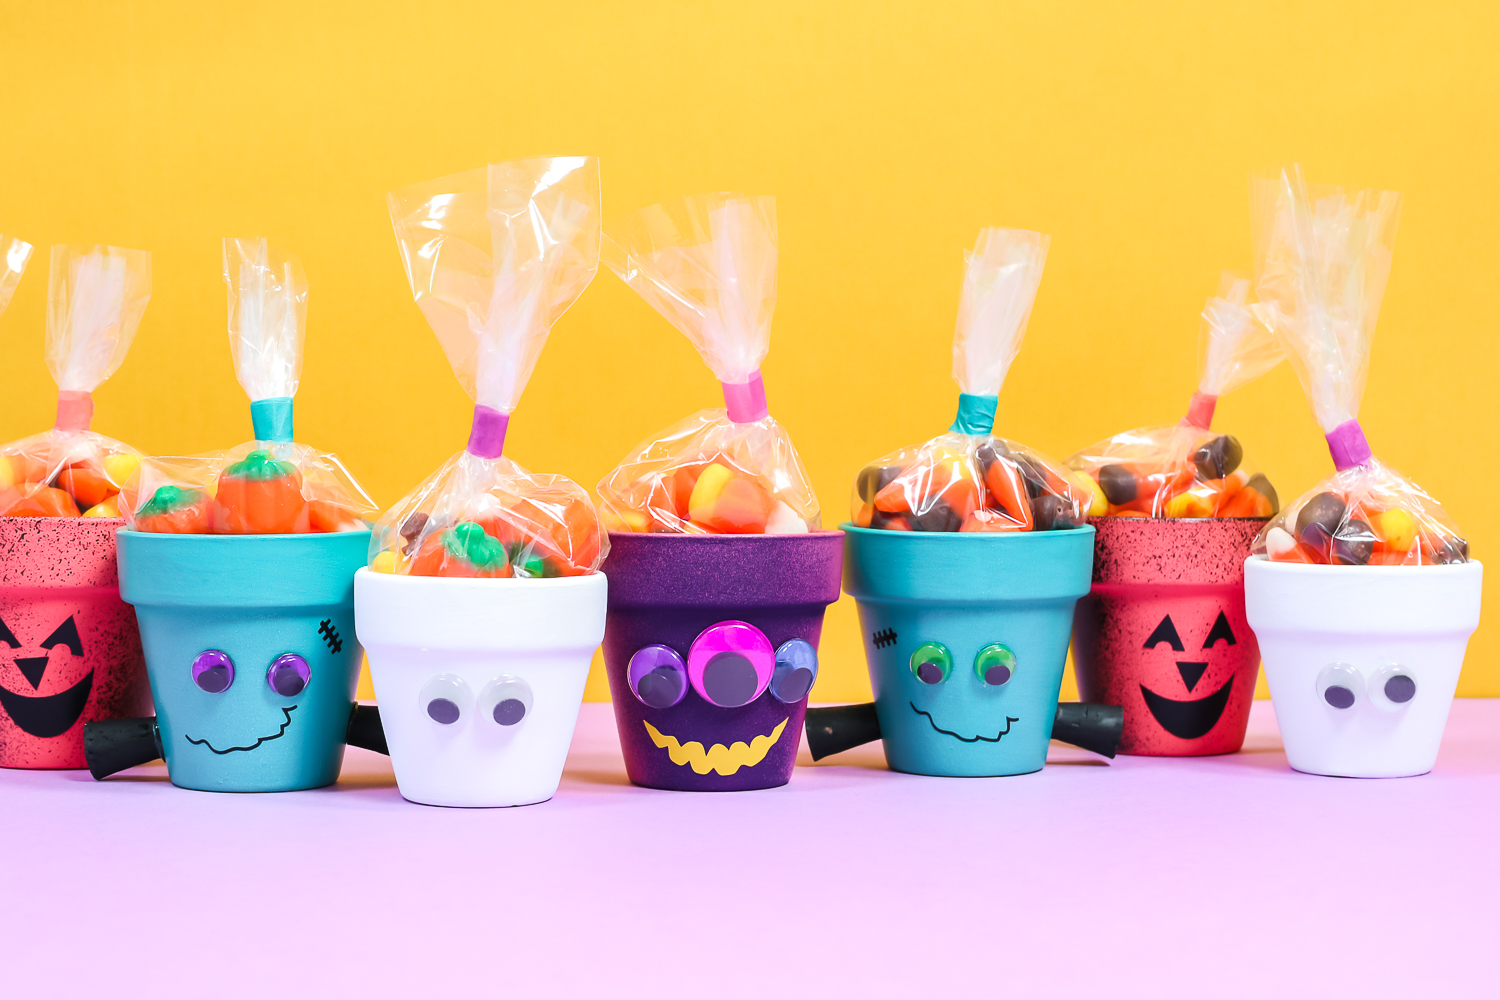
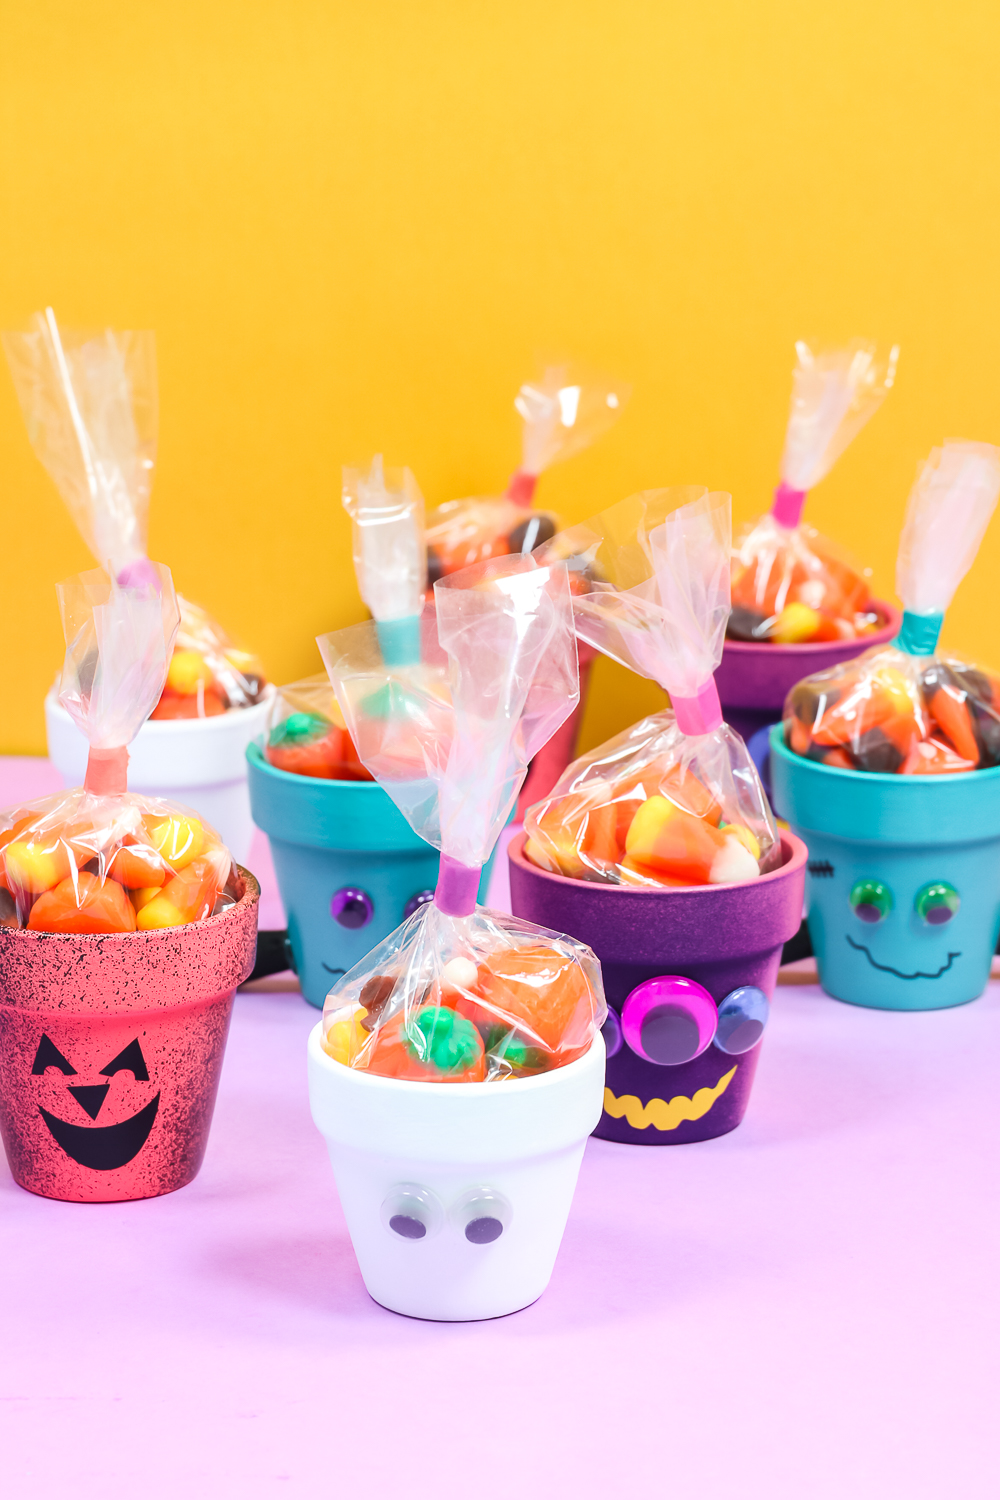
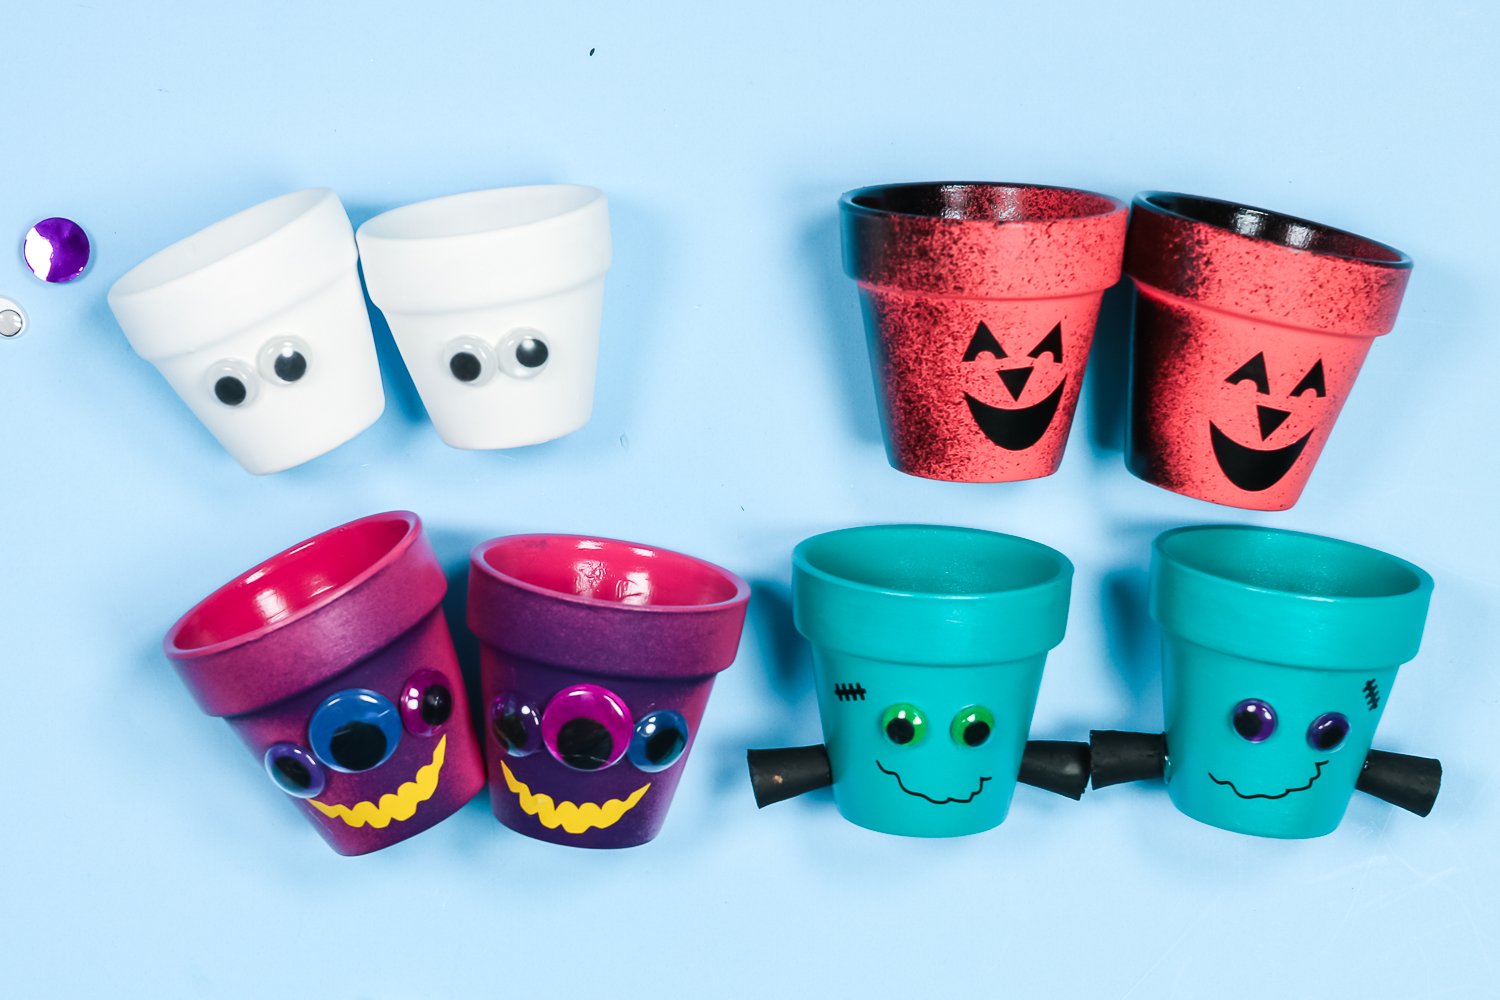
- Ghost – white matte
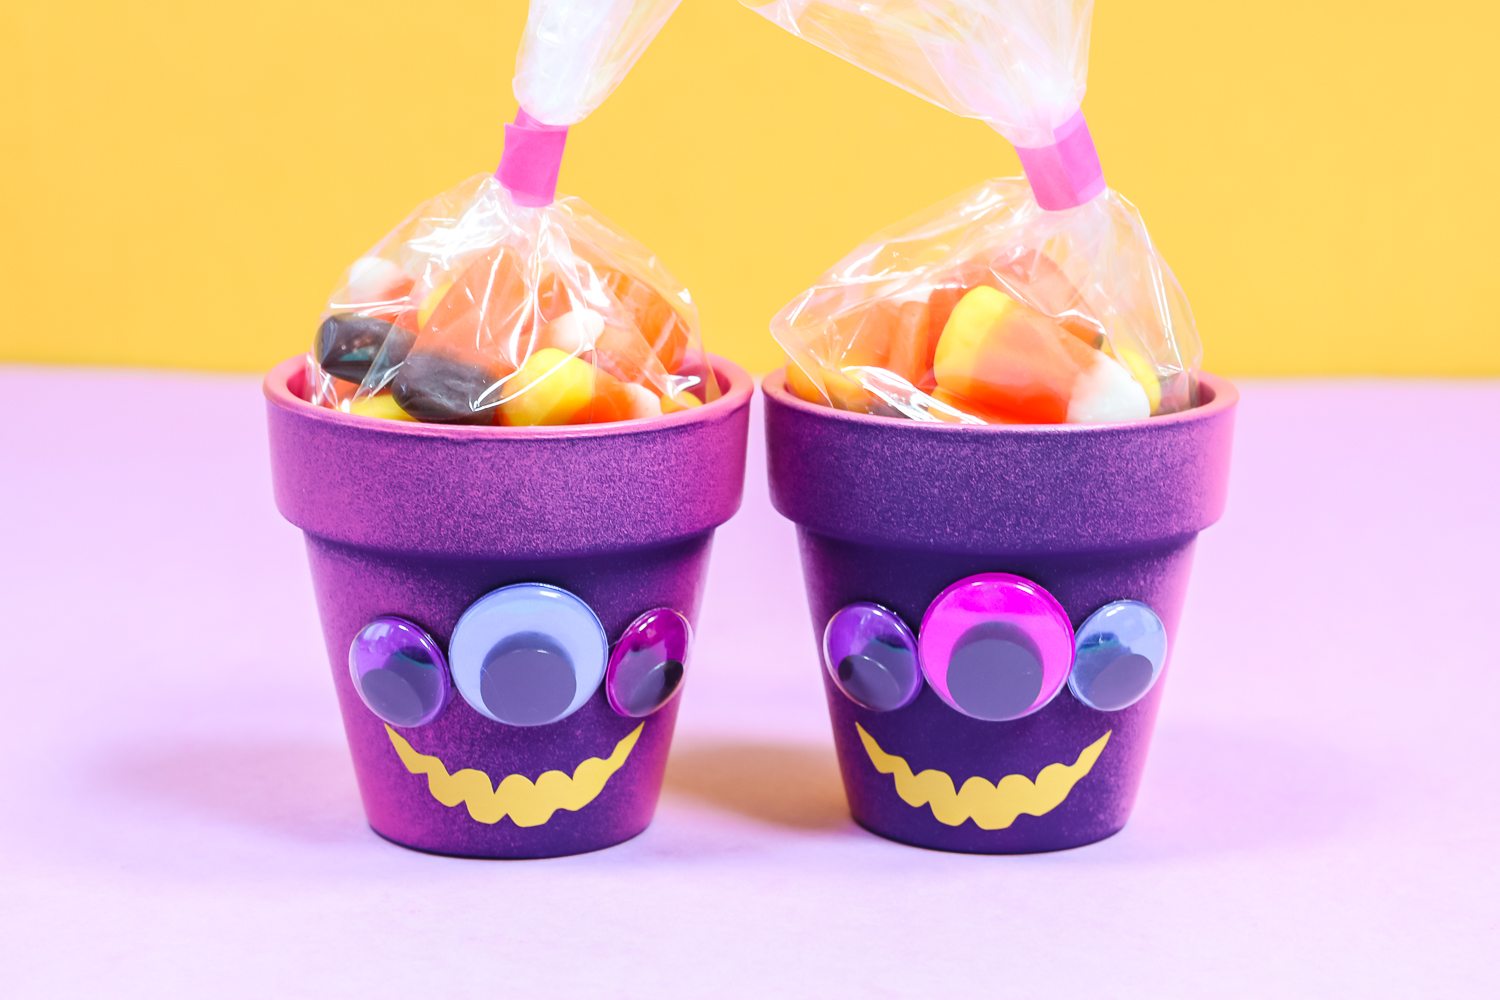
- Monster – plum with blush pink spray paint splatter
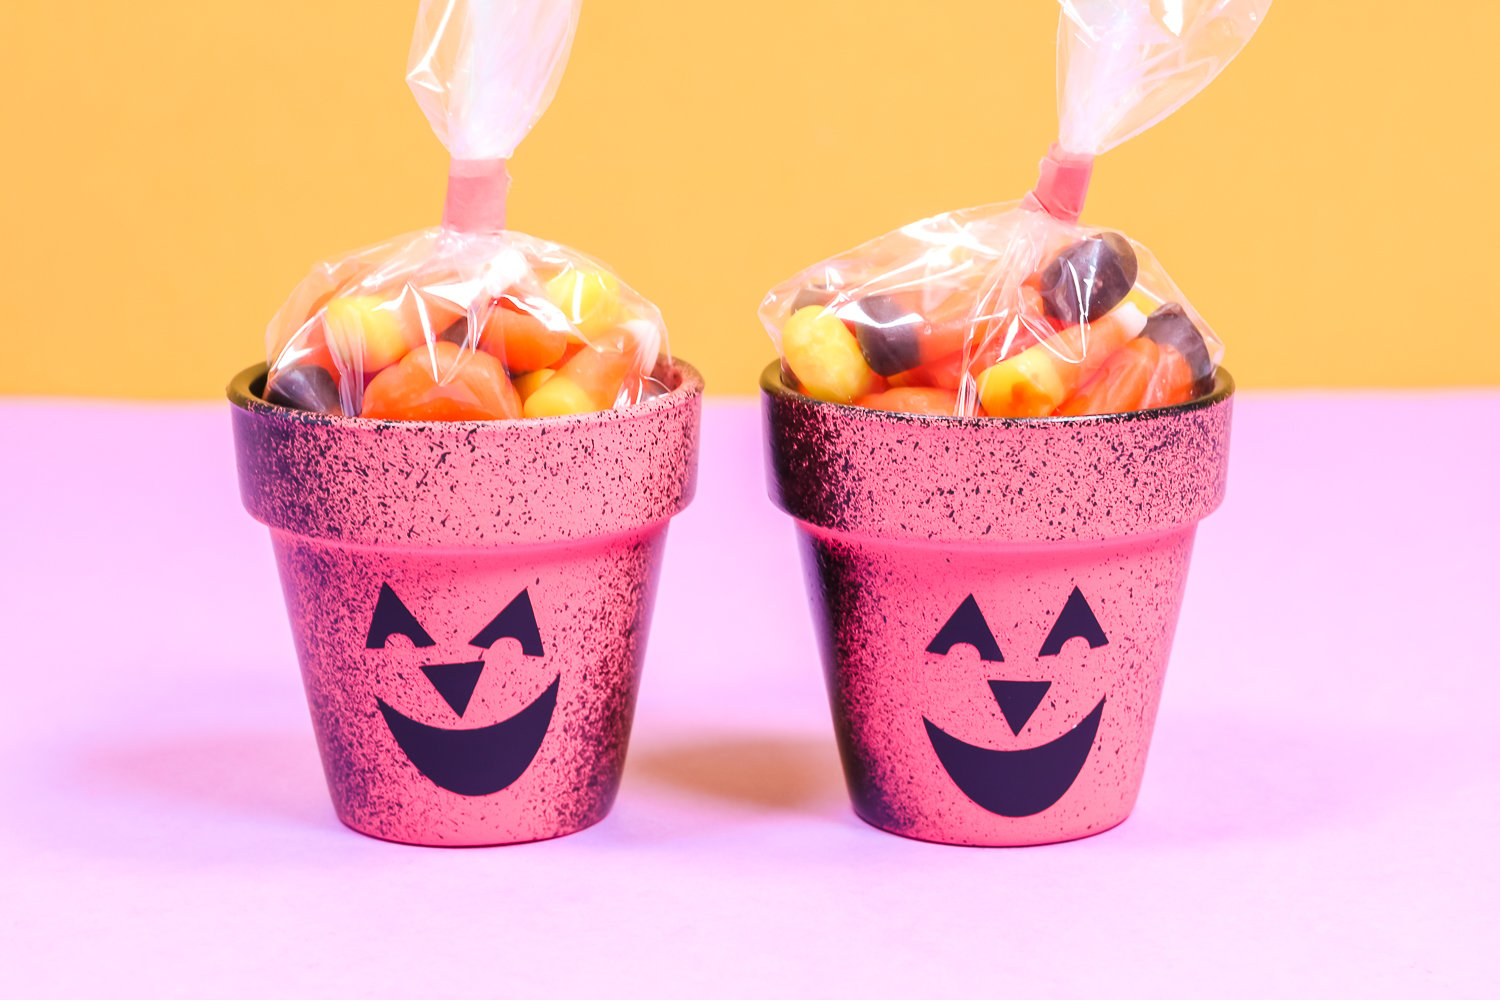
- Pumpkin – coral cove with black spray paint splatter
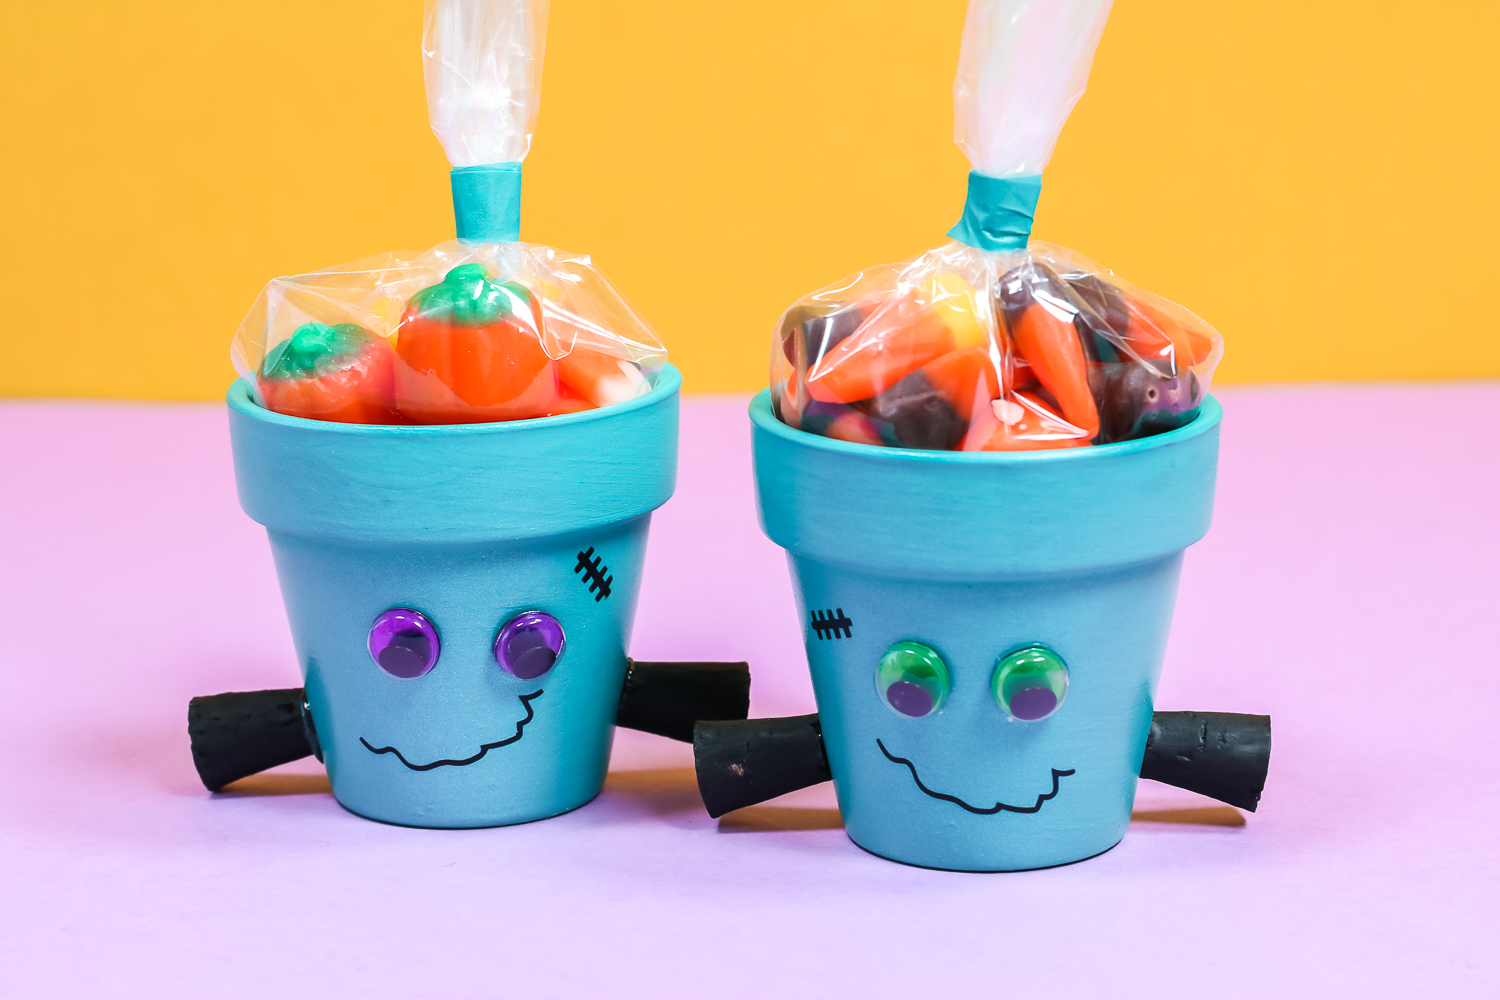
- Frankenstein – turquoise with Emerald Turquoise color shift over the entire pot

Adding Decorations to These Halloween Crafts
Once your paint is dry, you can start adding decorations to your clay pots to make spooky Halloween creations. I am adding google eyes, vinyl cut on a Cricut machine, and even some painted corks to my Frankenstein. You can pick and choose decorations that work for you and let your creativity shine here. For all of my embellishments, I just used a glue gun to secure each piece into place.
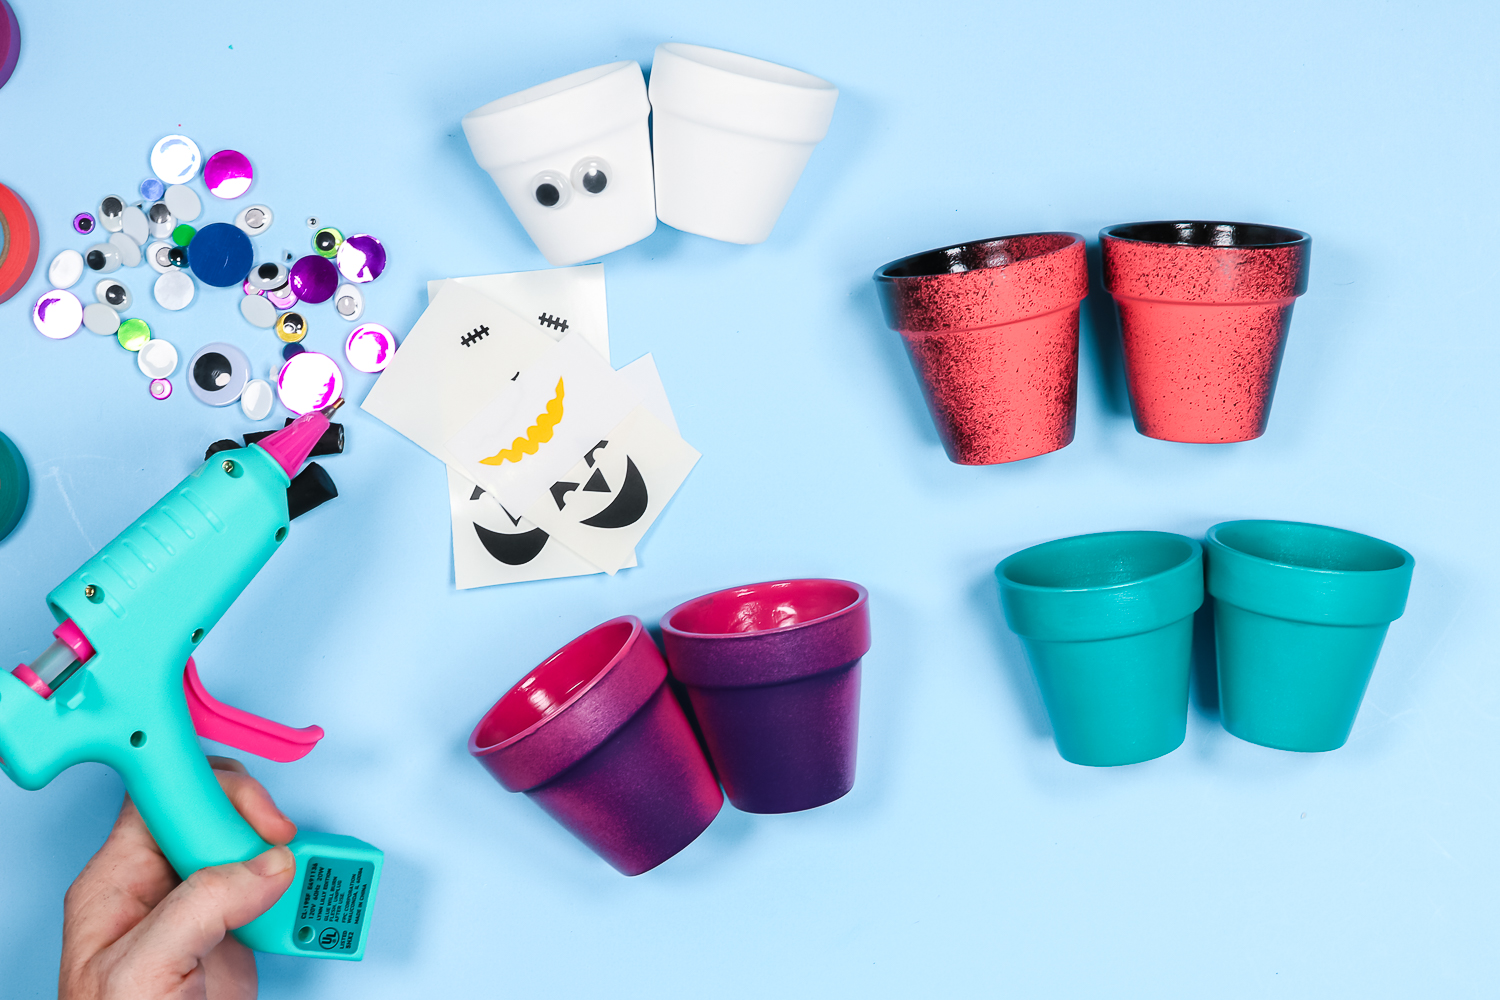
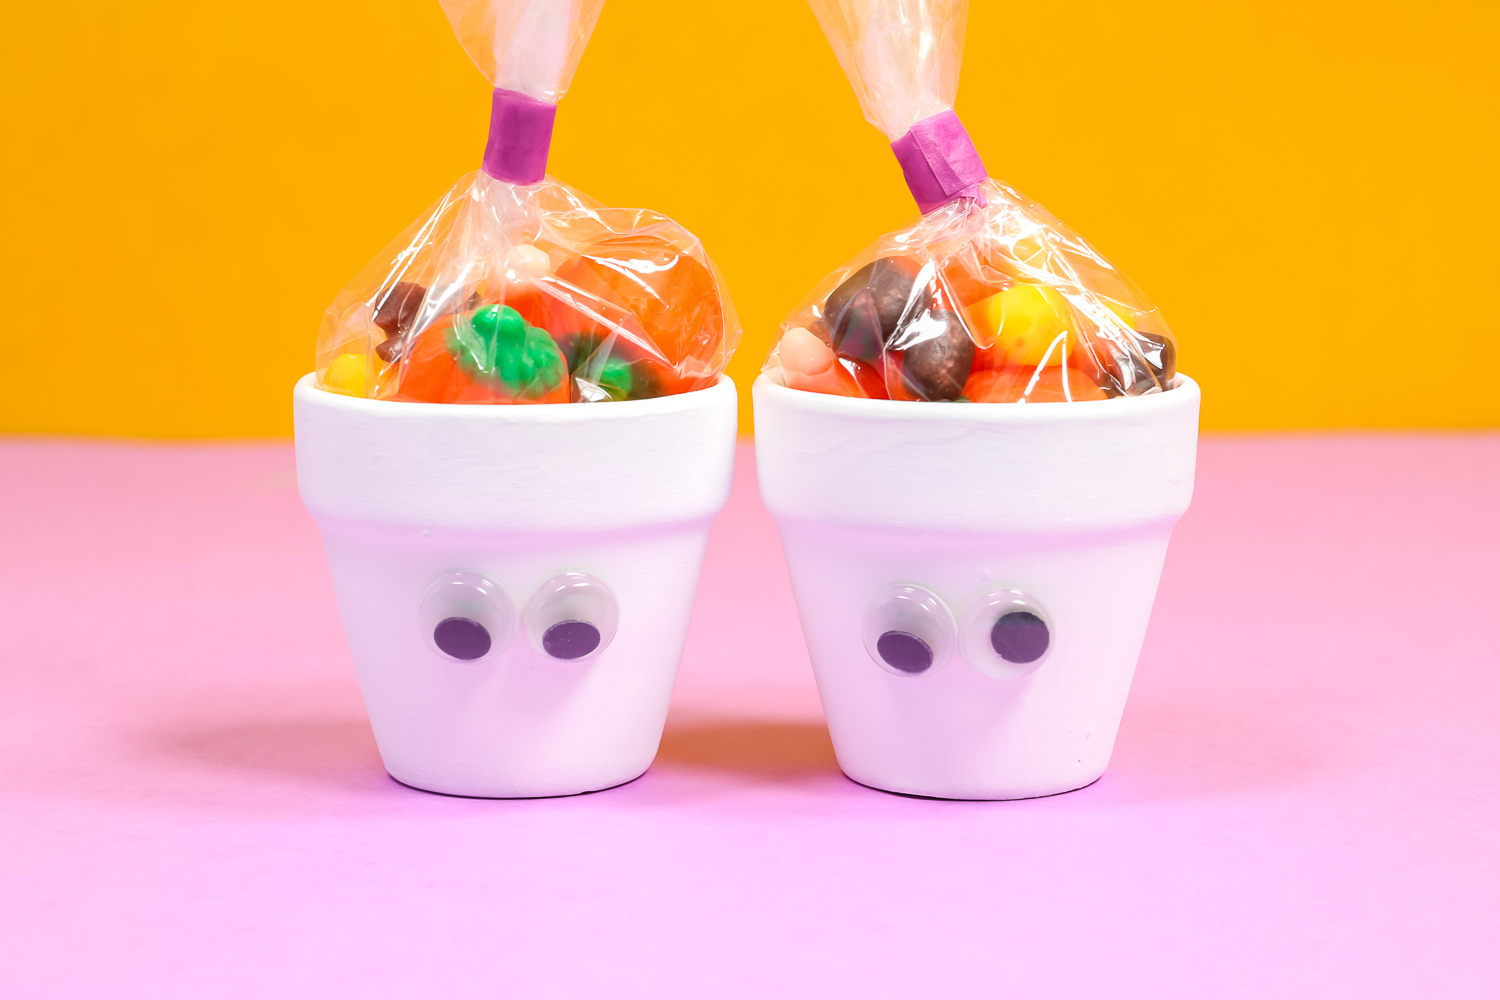
For my ghost, I added just google eyes.
The monster got three google eyes and a fun adhesive vinyl mouth. I like the colorful google eyes for these but you can stick with the white/black eyes if you wish.
For the pumpkin, I just added vinyl cut on a Cricut machine. You can get creative here and add some glow-in-the-dark vinyl to pots like this one.
And finally, for Frankenstein, I added google eyes, cut vinyl pieces, as well as painted corks.
You can pick and choose from these four versions or make up some other versions that are all your own! Let your imagination run wild!
Making Clay Pot Treat Containers
Once your Halloween flower pots are complete, you have a few options. You can add actual plants to them or flowers for your porch. However, I like to use small clay pots and make these into Halloween treats. I add my candy to plastic bags and secure those closed with washi tape and put the bags inside of the pots. These are a fun party favor or a gift for the kids in the neighborhood!
Making This a Fun Halloween Kids Craft
Now that you know how to make Halloween flower pots, all that is left to do is pick the versions that you want to make. I think it is a fun idea to lay out a wide selection of clay pots, Testors paints, and embellishments and let the kids make their own cute crafts for Halloween. You can have an adult on standby if you want to add the spray paint embellishments or just work with acrylic paints for your versions.
All that is left to do is to grab your Testors craft paint and other supplies and get started on this fun and cute Halloween craft idea! I know you will love the final results!
More Halloween Craft Ideas

Make a spooky Halloween wood sign with your Cricut and Testors Craft paint!
This is an easy technique for making your own Halloween signs with our template or even with your own design. Gather your friends and make it a Testors Crafternoon.
Want to print the instructions for these Halloween flower pots? Use the card below!
Halloween Flower Pots
Grab your Testors craft paint and make some Halloween flower pots this fall!
Supplies
- Testors Acrylic Paints
- Testors Spray Paint
- Clay pots use whatever size makes sense for your final project
- Google eyes
- Corks (optional)
- Plastic bags
- Washi tape
- Weeding tools
- Vinyl
- SVG Bundle for Vinyl
Instructions
How to Paint Halloween Flower Pots
-
First, you will want to paint your clay pots with acrylic paints. I am using a variety of colors depending on the look that I want for my final project. You will need one to three coats of paint depending on what color you choose for the pot itself. Use a paintbrush to apply the paint and allow it to dry in between coats.
-
I would paint both the inside and the outside of the clay pots. If these are to be used as treat containers, they will look more finished this way. If these are to be used as flower pots, this will help seal in moisture so your paint lasts longer.
-
Once you have enough coats of paint to cover your pots, allow them to dry for 24 hours before continuing. This gives the paint time to cure.
Adding Spray Paint Accents
Colors of Paint Used for My Halloween Pots
-
Here are the specific paint colors that I used for my Halloween flower pots if you want to create exactly the look:
-
Ghost – white matteMonster – plum with blush pink spray paint splatterPumpkin – coral cove with black spray paint splatterFrankenstein – turquoise with Emerald Turquoise color shift over the entire pot
Adding Decorations to These Halloween Crafts
-
Once your paint is dry, you can start adding decorations to your clay pots to make spooky Halloween creations. I am adding google eyes, vinyl cut on a Cricut machine, and even some painted corks to my Frankenstein. You can pick and choose decorations that work for you and let your creativity shine here. For all of my embellishments, I just used a glue gun to secure each piece into place.
-
For my ghost, I added just google eyes.
-
The monster got three google eyes and a fun adhesive vinyl mouth. I like the colorful google eyes for these but you can stick with the white/black eyes if you wish.
-
For the pumpkin, I just added vinyl cut on a Cricut machine. You can get creative here and add some glow-in-the-dark vinyl to pots like this one.
-
And finally, for Frankenstein, I added google eyes, cut vinyl pieces, as well as painted corks.
-
You can pick and choose from these four versions or make up some other versions that are all your own! Let your imagination run wild!