This post and photos may contain Amazon or other affiliate links. If you purchase something through any link, I may receive a small commission at no extra charge to you. Any supplies used may be given to me free of charge, however, all projects and opinions are my own.
Have you seen the new Cricut Permanent Markers? These were released with Cricut Venture but they also work in all Explore and Maker machines. Today I’m going to test the markers in each machine and on a variety of materials to show you how they work and why I am a huge fan.
If you want to learn more about creating giant projects with Cricut Venture, my full review covers all it can do and more.
Cricut Permanent Markers
You can watch me test the markers in each machine and see how they perform on vinyl, Smart Label, and cardstock by clicking play on the video below.
What Comes in the Box
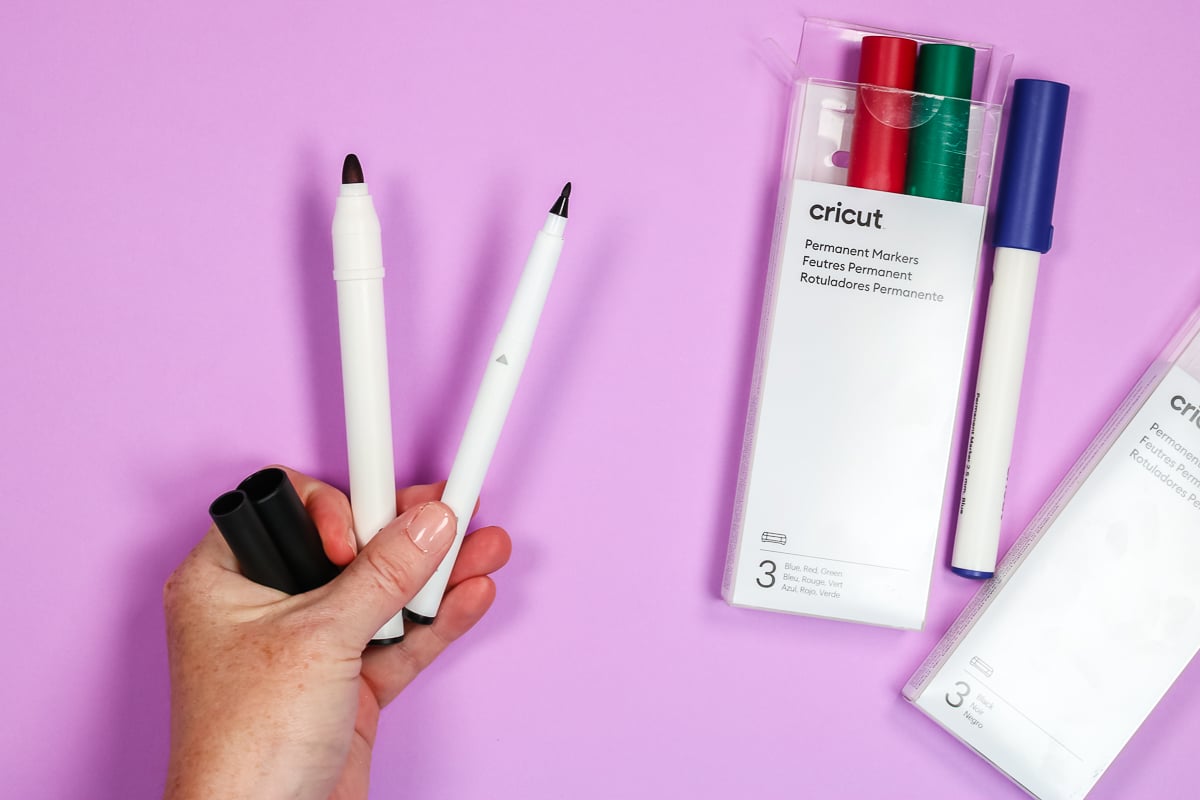
Before we create our projects let’s take a closer look at the markers themselves. Currently, the new Cricut Permanent Markers come in two different packs, a black pack, and a blue, red, and green pack.
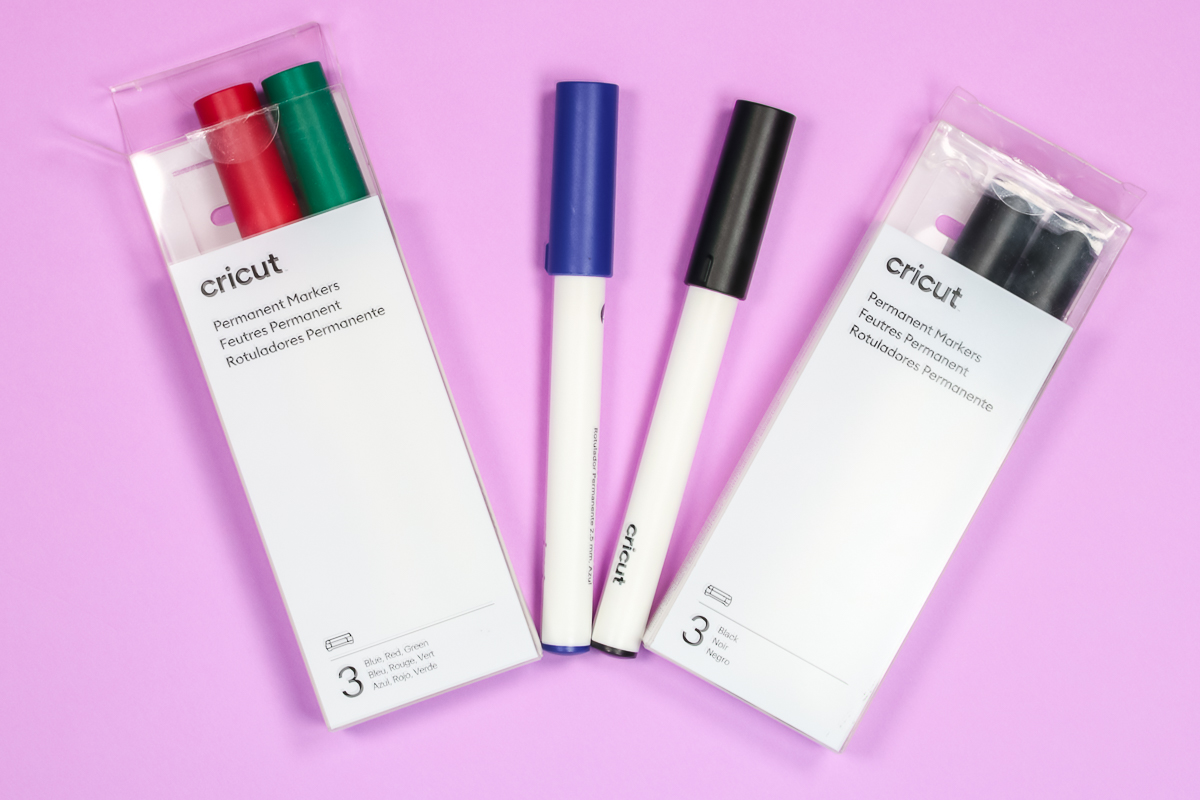
Because I really do love these markers I am hoping Cricut continues to come out with more colors.
These permanent markers are different than previous Cricut markers. As you can see, they are much wider than the markers that have been around for a while.
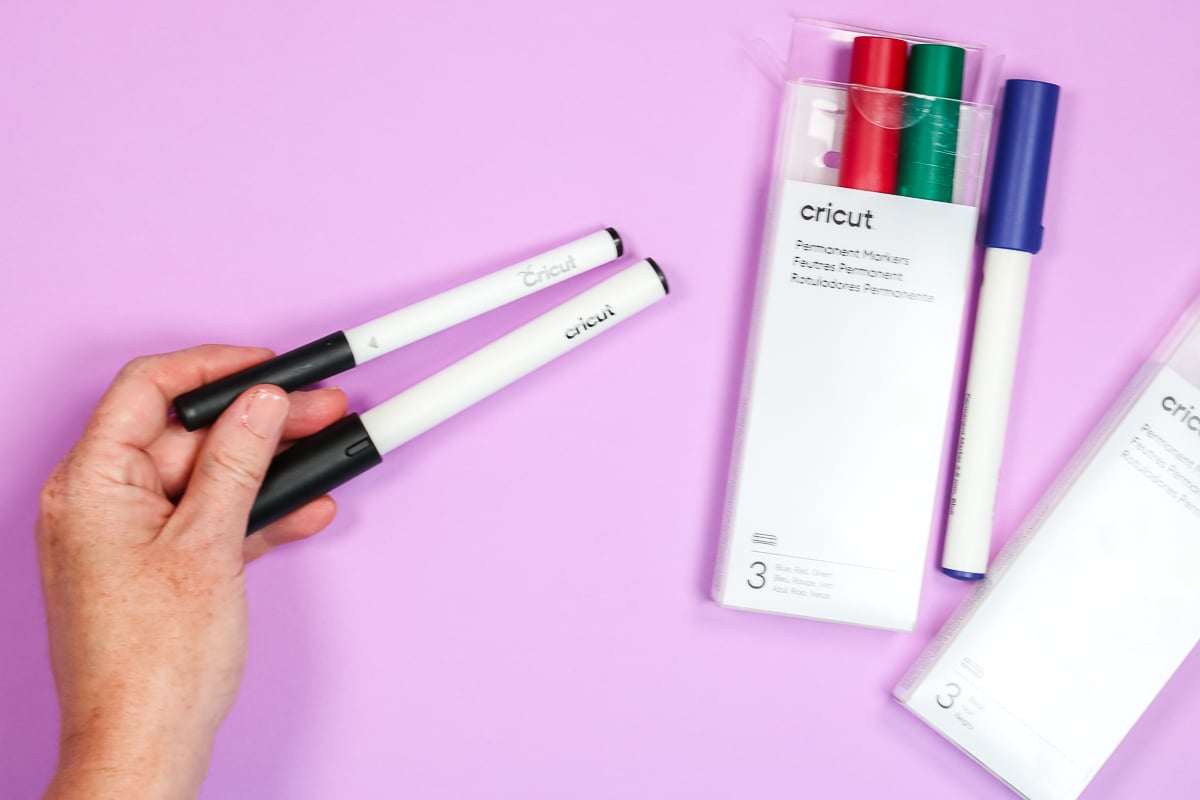
The tip is also much larger than even the previous large tip markers.
Which Machines Do They Work With
Currently, Cricut has only released these new permanent markers to work with Explore machines, Maker machines, and Cricut Venture.
The only machine you can’t use them with is the Cricut Joy. The clamps for Joy are different than the other machines so unfortunately you can’t use them in that machine.
How to Load Cricut Permanent Markers
Because these markers are larger than regular Cricut markers the way you load it into your machine is a little different. To add the permanent marker to each of the machines, you’ll first need to remove the pen adapter from the A clamp.
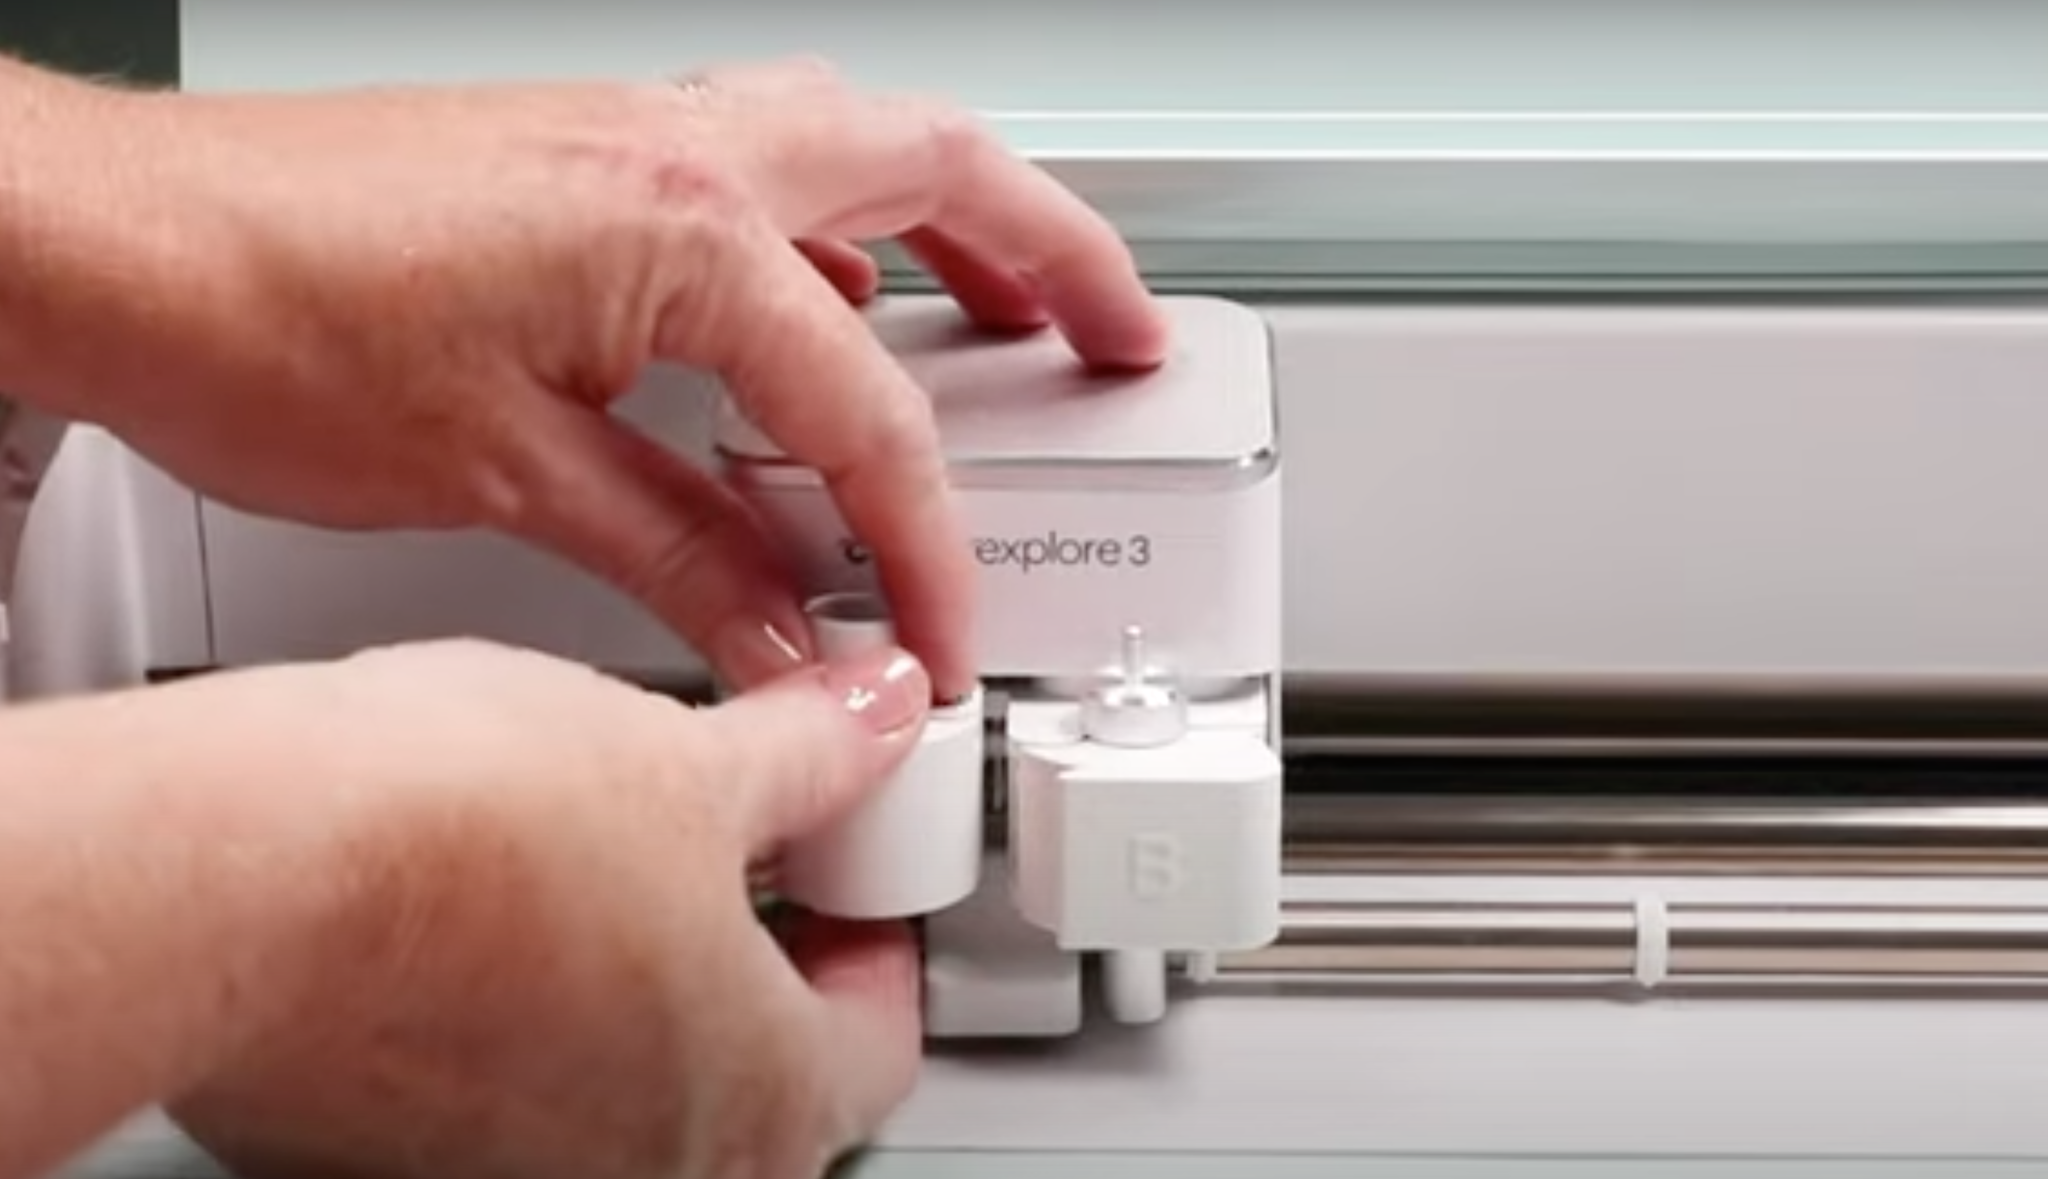
To do that you need to open the clamp and then press the inside adaptor up from the bottom and it should pop right now. This is the same for Maker, Explore, and Venture machines.
To add the permanent marker to the machine, you’ll just drop it into the clamp. Ensure it drops all the way down. The marker has a little rim around it so it will stop without falling all the way through.
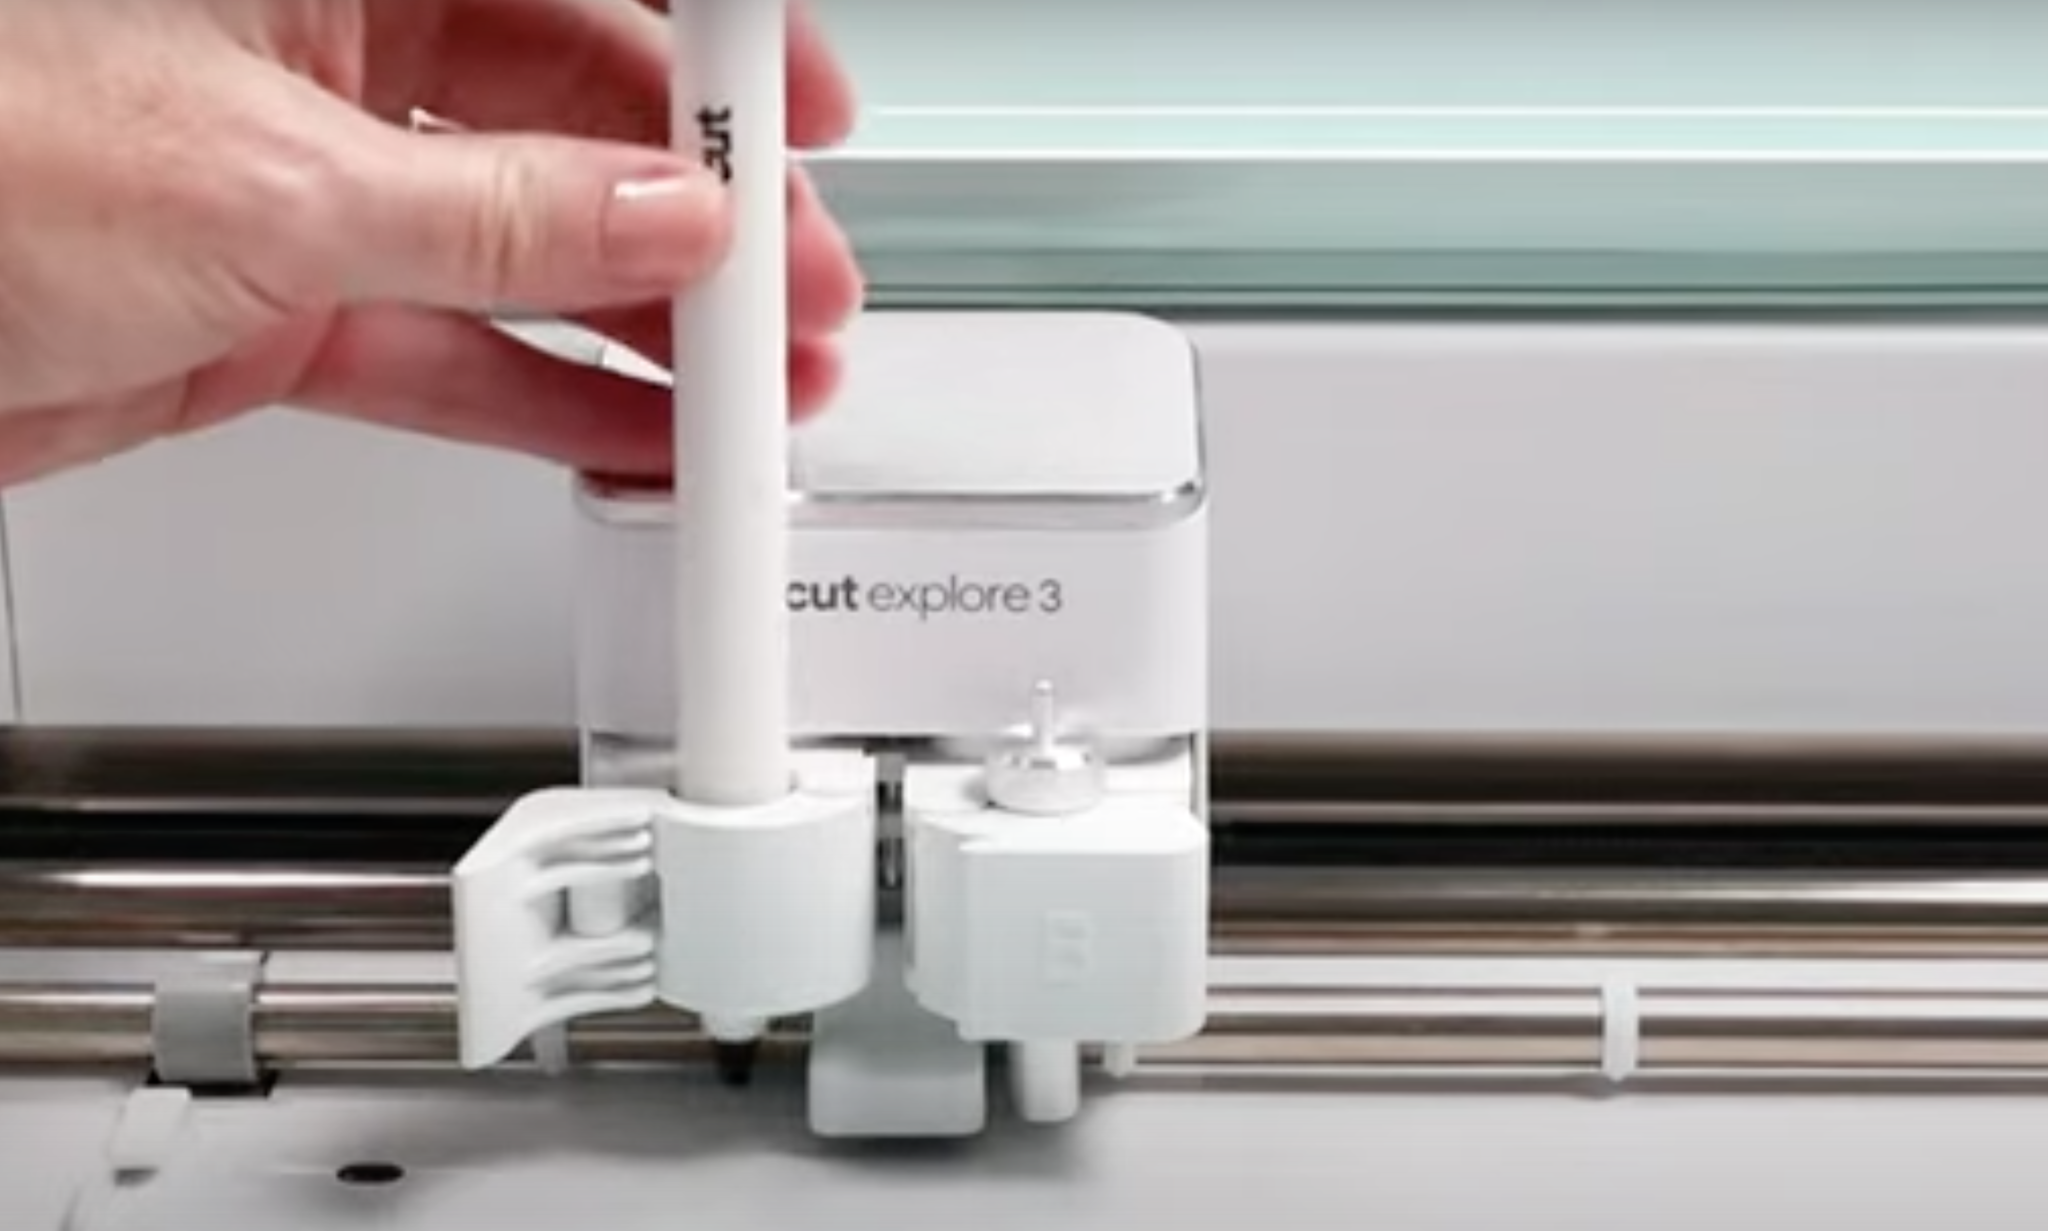
When it’s in place, close clamp A and you’re ready to draw with your Cricut machine. With all of these types of machines, you can have your marker in clamp A and a blade in clamp B. This means you can both draw and cut without having to swap out your tools.
What Fonts Work with Cricut Permanent Markers
You can try any font with these new markers. I had some successes and even a couple of failures and I’ll show you those in a moment so you can learn from my mistake. I recommend any time you’re using a new font or material that you do a test to make sure the font/material combination works with these specific markers.
Supplies Used:
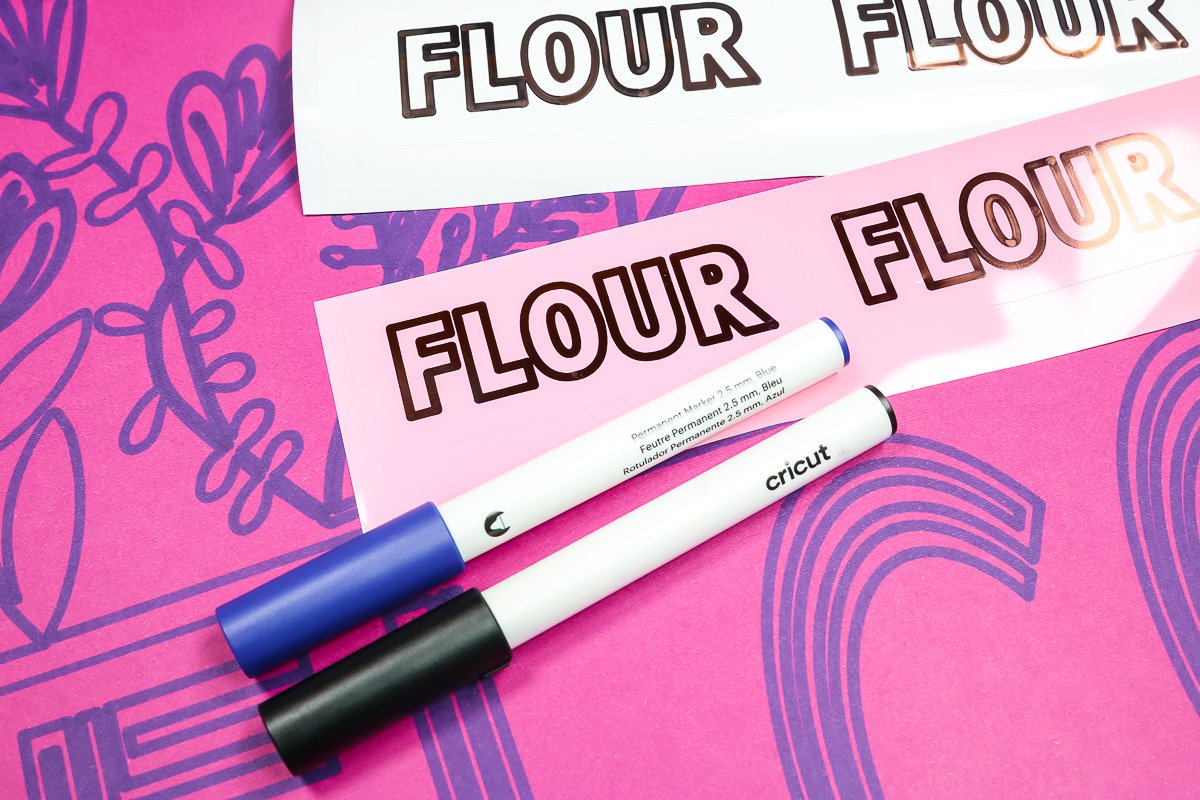
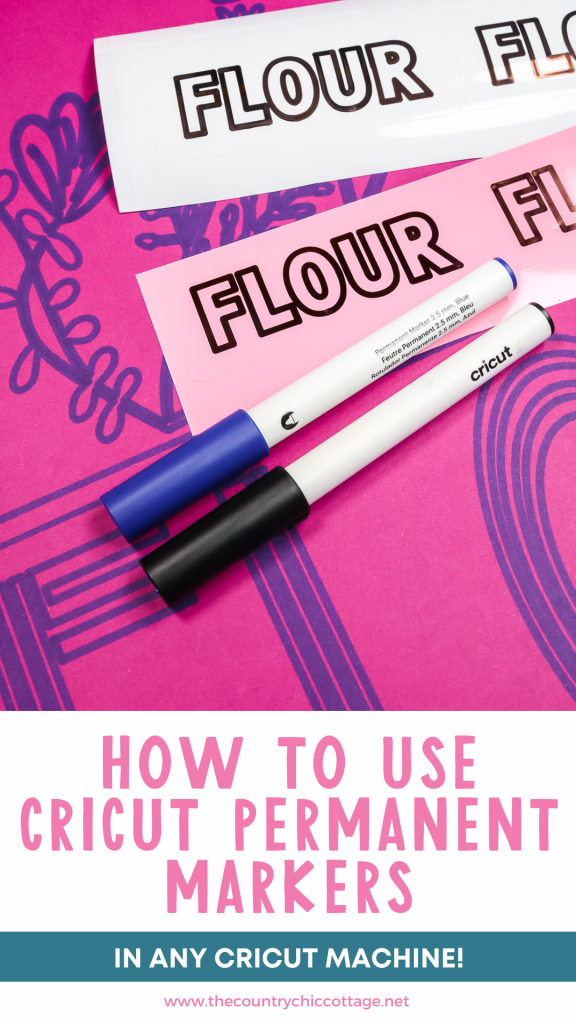
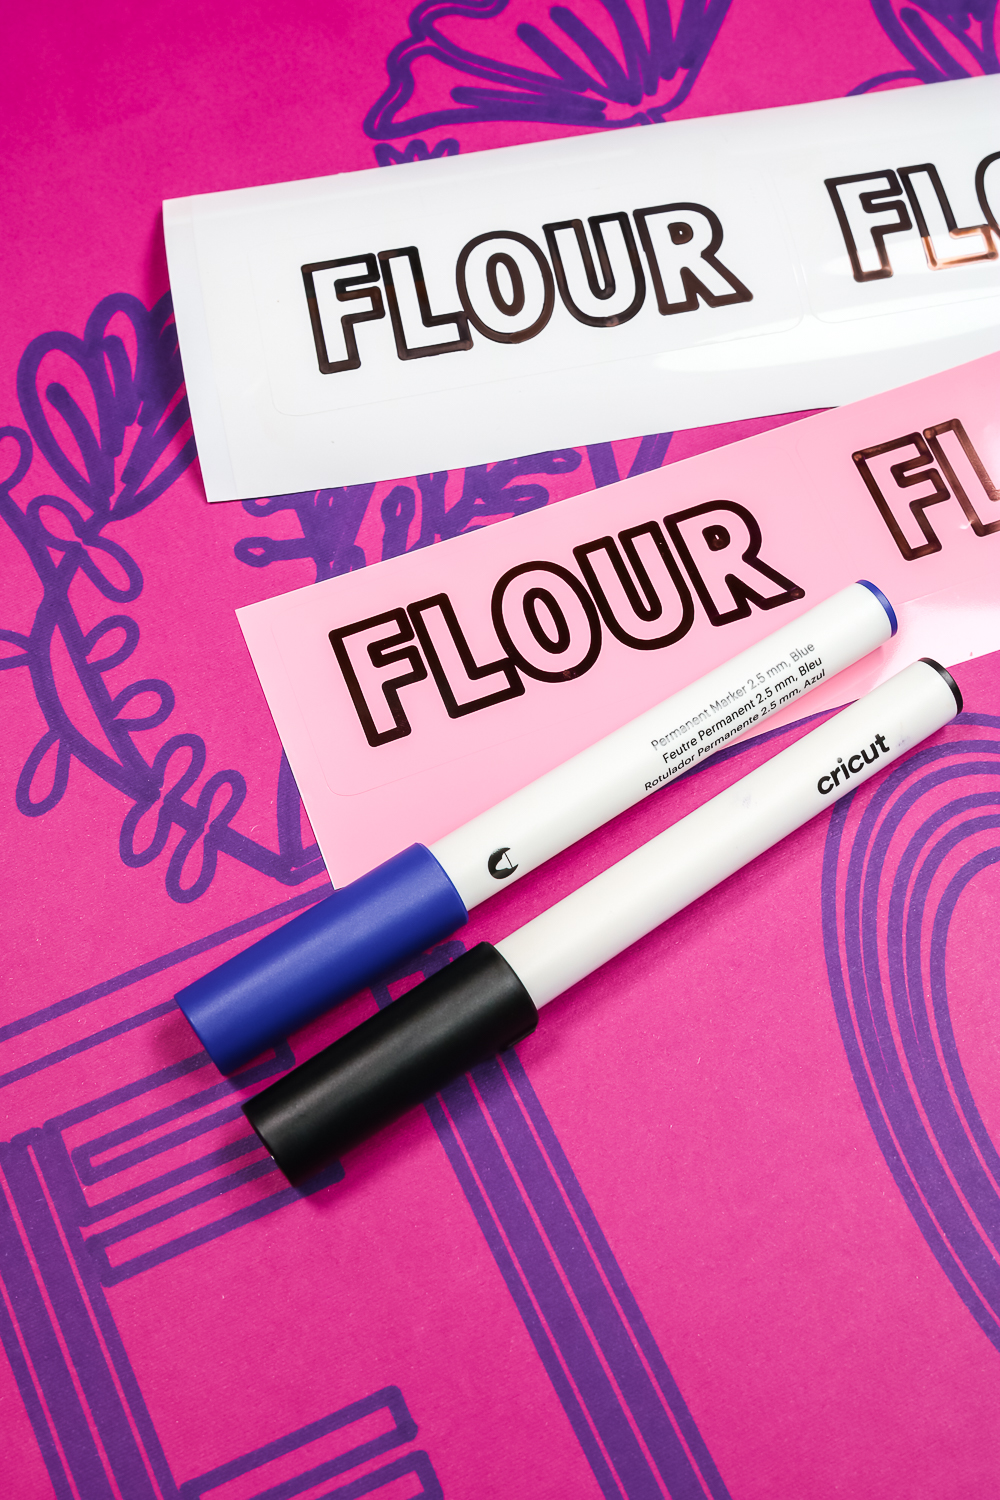
How to Use Permanent Markers to Make Labels
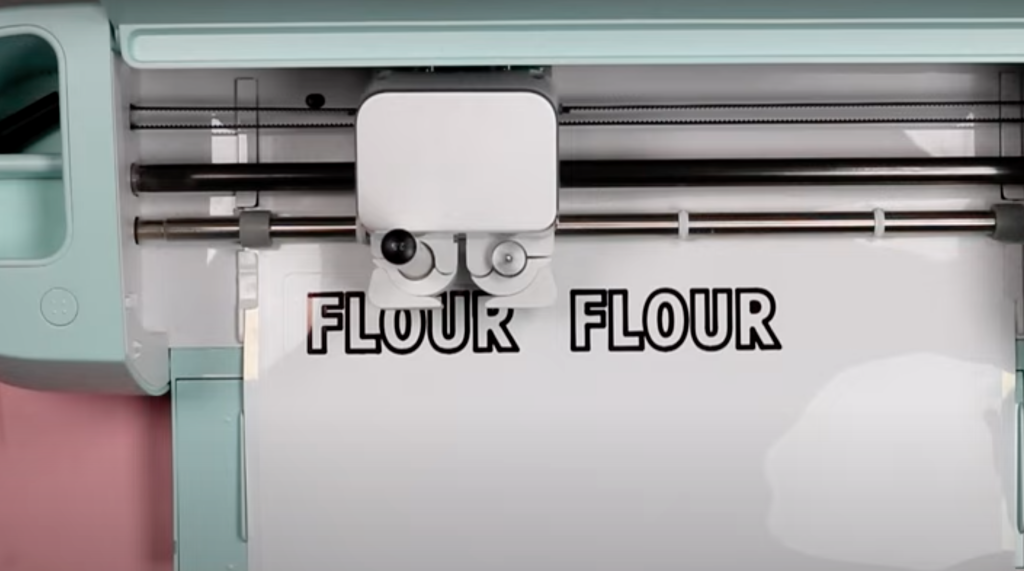
For my first example, I’m going to create a label to show you how the permanent markers work along with the fine-point blade. I’m going to use the same design on both the Cricut Maker 3 and Explore 3.
I am using a Cricut Font and have changed the Operation Type to Draw. This font has an outline look and once I have the size set I am going to add a box around it for the machine to cut out.
Permanent Markers in Explore 3
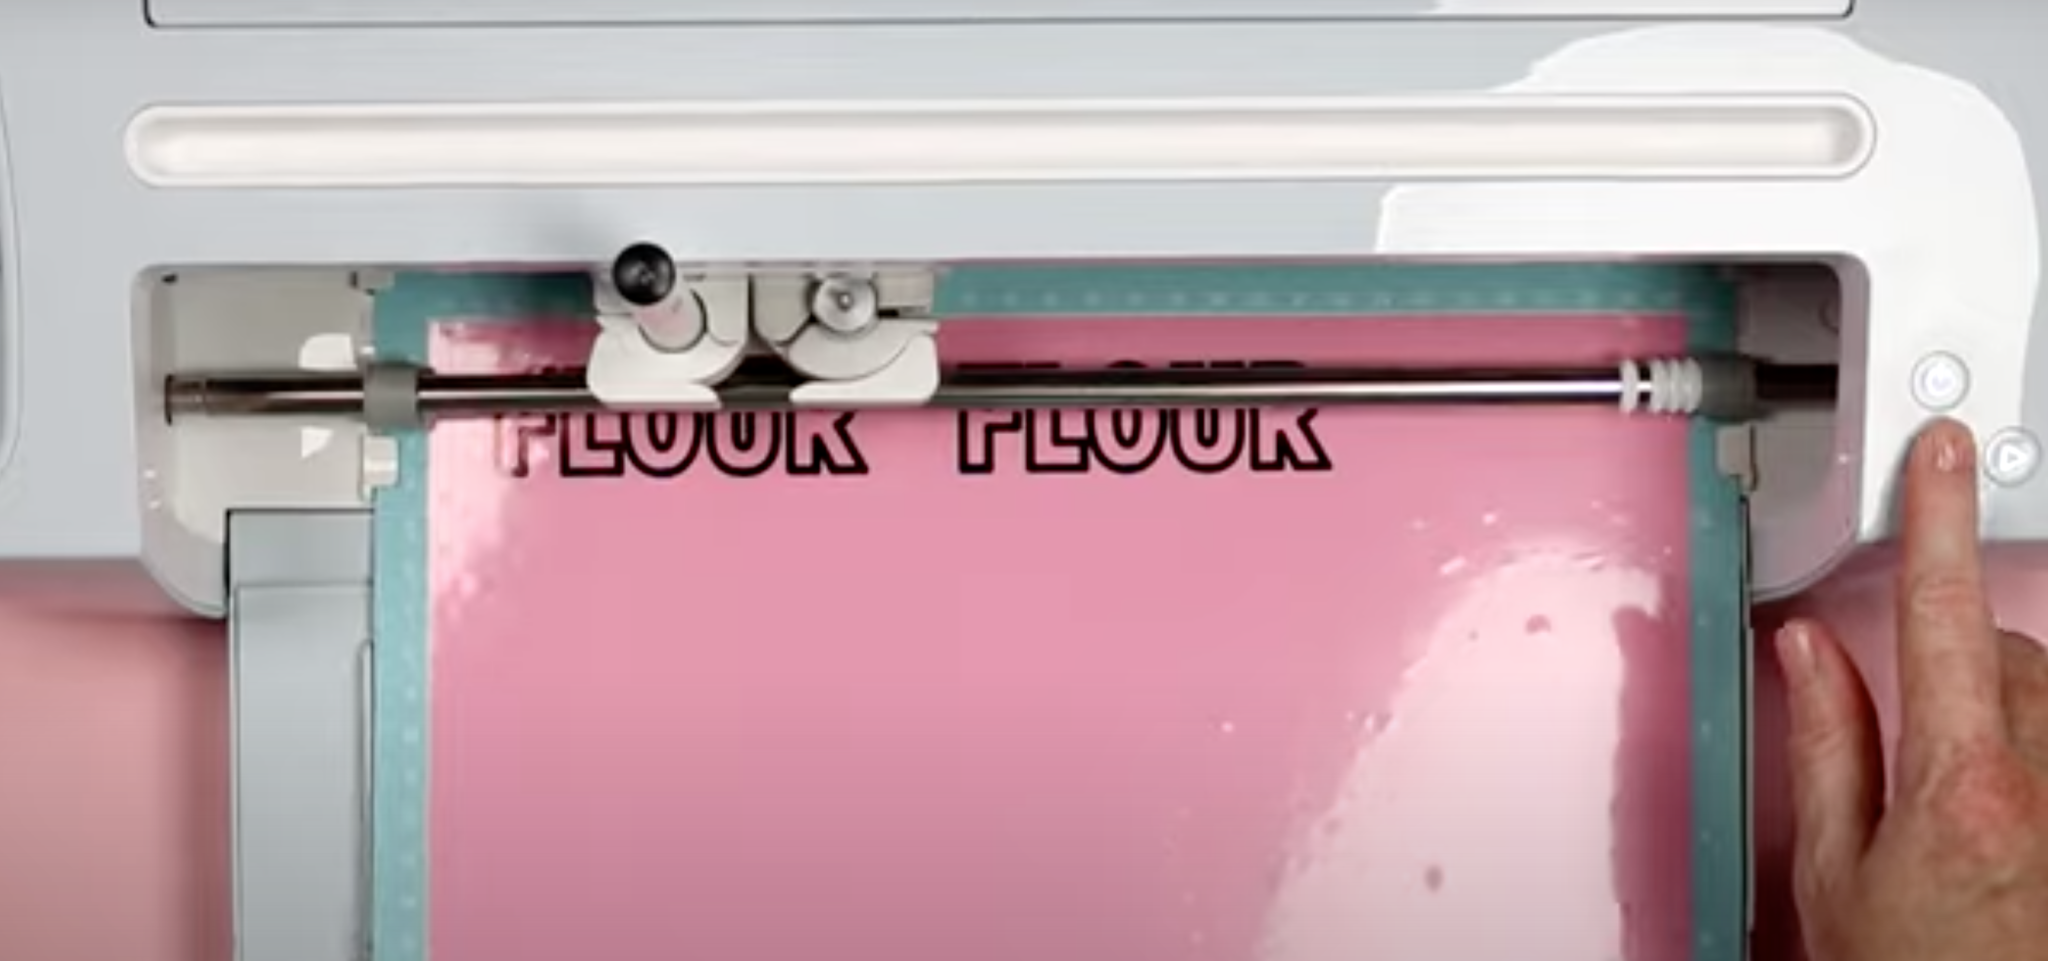
Attach the two layers so the machine knows to cut out the box around the text. With the Explore 3 machine, I’m using Cricut Smart Writable Label material. That means I can cut my design matless.
Follow the prompts in Design Space, load your Cricut Permanent Marker into clamp A in the machine, and then load the material. Press Go and let your machine do all the work. Your machine will draw everything first and then do the cuts.
You can see the marker didn’t smear at all, I am convinced these markers will work on any vinyl as long as the font is right.
Permanent Markers in Maker 3
Next, I am going to use my Maker 3 machine to test the permanent markers with regular permanent vinyl and the same label design I used before.
This material is not a smart material which means it needs to be added to a cutting mat. From there, the process is the same as it was with the Smart Label material.
Once I remove it from the machine, it’s done. As you can see, once again it did not smear at all. It looks amazing, it’s completely dry to the touch and can be applied to any surface I would like at this point.
Permanent Markers with Venture
For this project, I am going to use the giant cardstock that works with Cricut Venture and the SVG file I have for free here. This design uses a font that I love to use with the engraving tip. On cardstock, this font worked perfectly. I did have situations where it didn’t work and I’ll show you those below.
The cardstock I’m using is really big, 24″ x 28″, and is from Cricut. This can be loaded into Cricut Venture on a mat and then Venture can draw on it just like other Cricut machines.
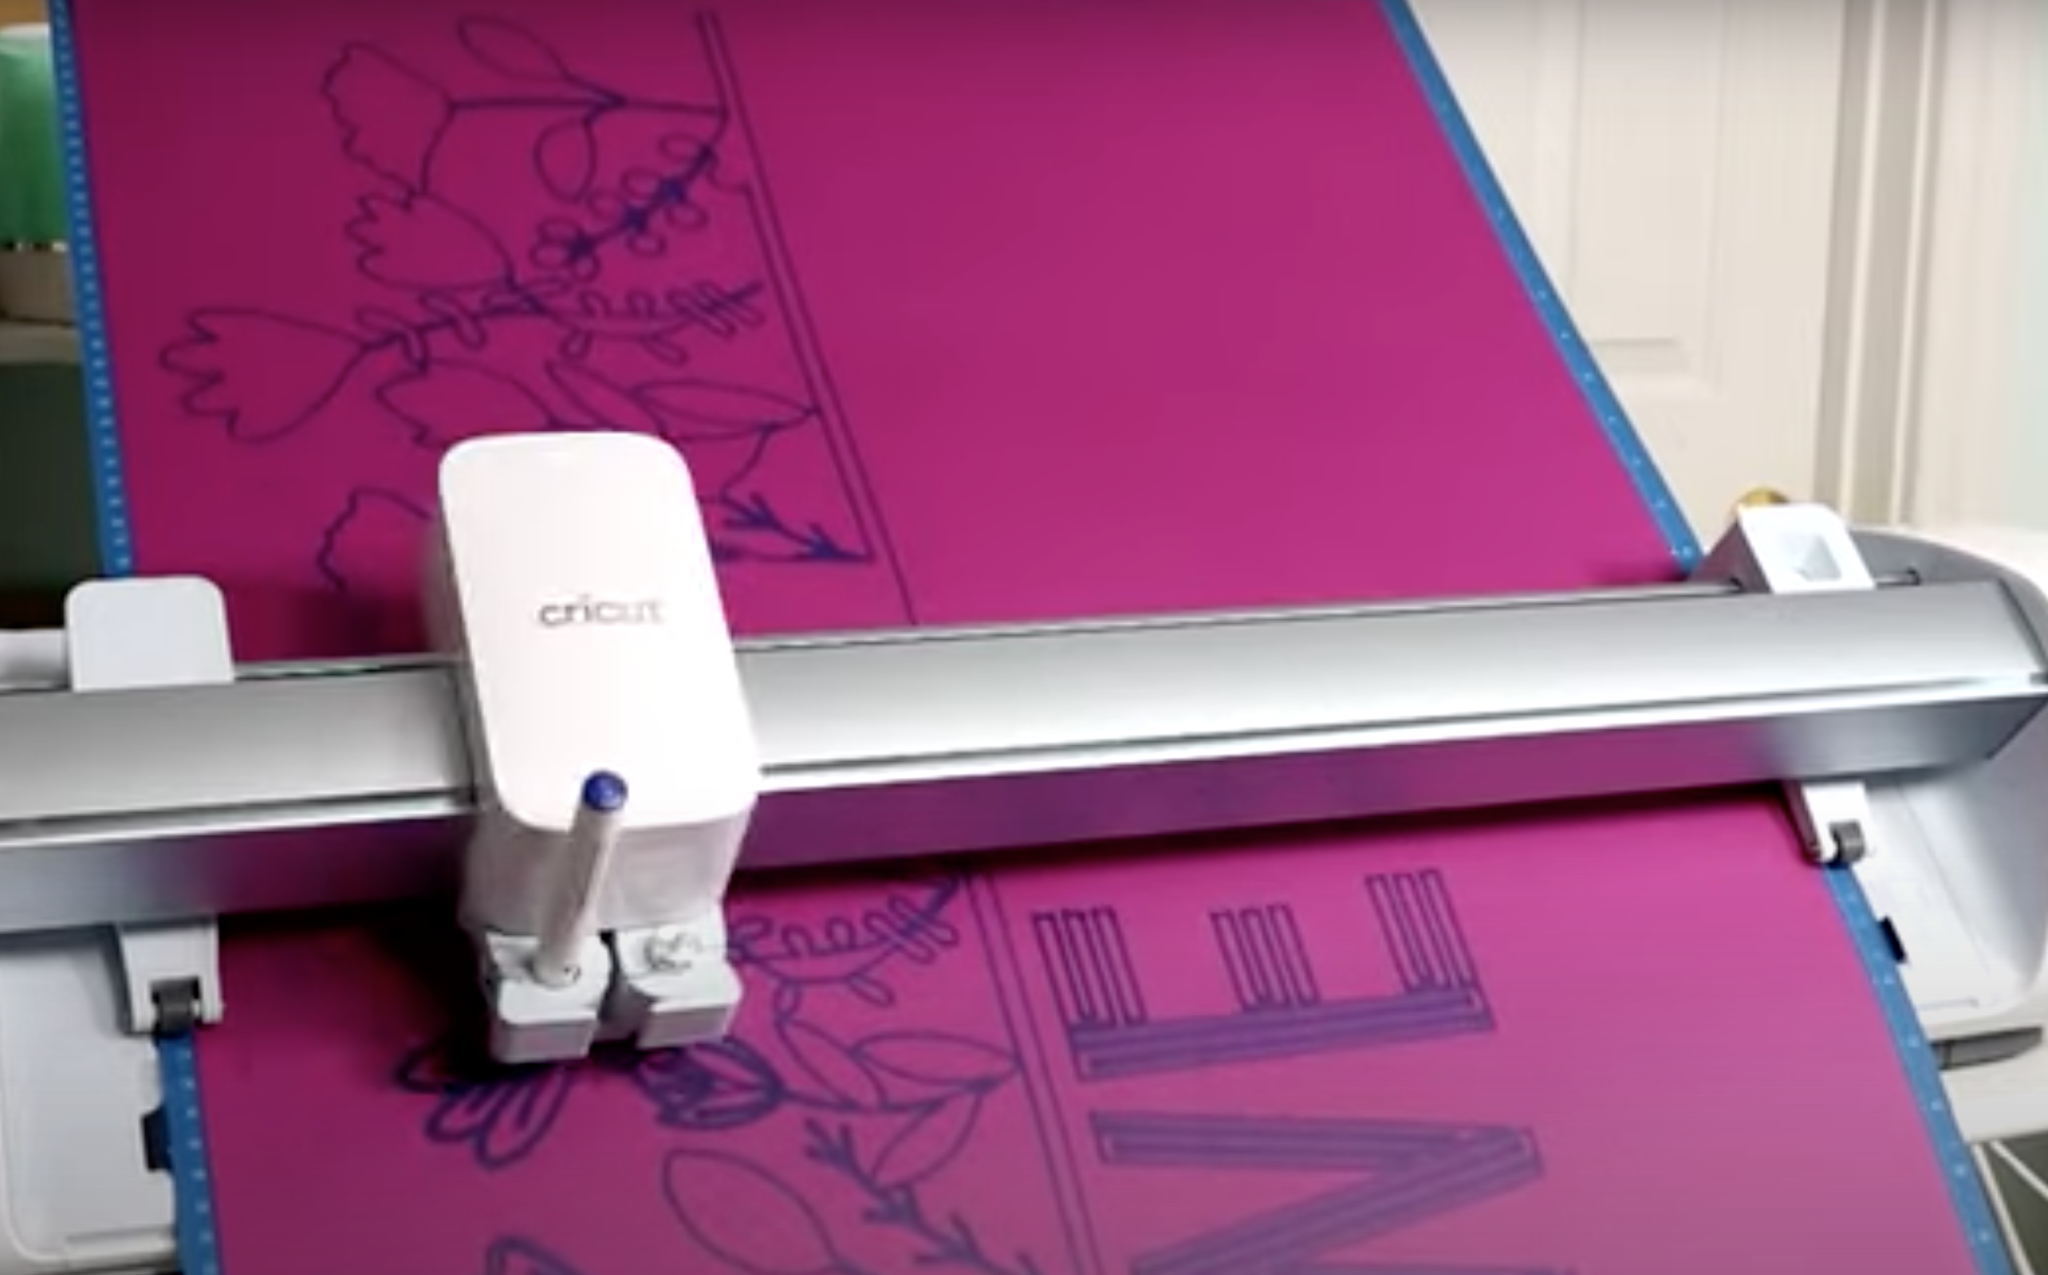
On this large sign, the engraving font kind of looks like stripes instead of filling in the whole area as it does with smaller engraving projects. I love the way it looks on this sign with the flowers, it’s just a fun different look than you get with a regular writing font.
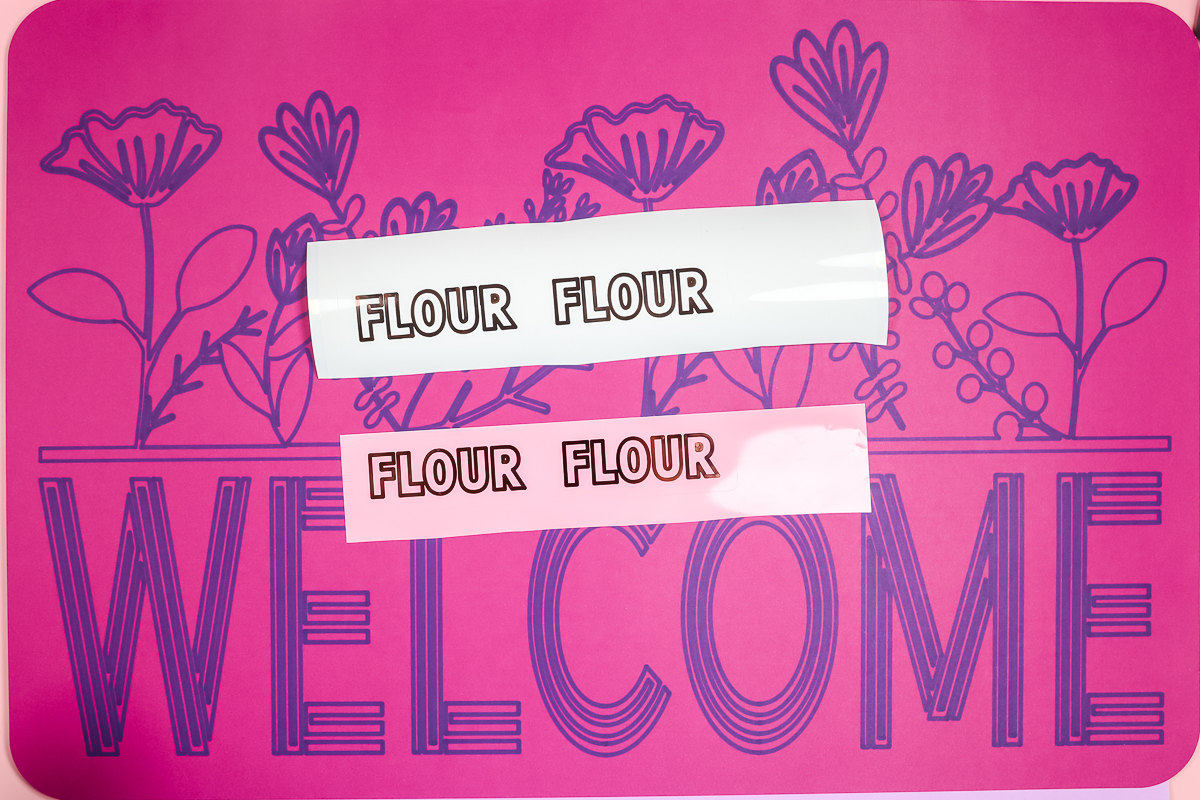
Finished Permanent Marker Projects
Here are the projects I successfully made with different Cricut machines using the new permanent markers. You can see that on all three materials, the ink dried without any smearing.
I really think on cardstock you could use almost any design or font and it will turn out really well.
Permanent Marker Fails
Now I want to show you situations where the Cricut Permanent Markers didn’t perform well. From my experience, this seemed to happen with certain font and material combinations.

I tried using the same engraving font that I used on the large cardstock sign to make vinyl labels and as you can see it failed both on the mat and matless.
I really think this is a matter of a lot of ink in one area and it doesn’t have time to dry before it moves through the machine. It’s possible that if the text was larger it would be able to dry, but this font in this size did not dry on vinyl and smeared all over the place.
Final Thoughts on Cricut Permanent Markers
I really, really love these markers. From huge poster boards to small labels, you can make them permanent with these new markers from Cricut.
I do really want to stress that it’s important to test the font and material you’re planning to use in the size you want to make sure it has time to dry and won’t streak.
I think the font choice matters less if you’re using paper. The markers definitely dry more quickly on paper and I didn’t have any problems with them streaking even in areas on the flowers where the lines are very close.
Can you find a filled font that would work on vinyl? You might be able to, especially if your text is large. I would definitely test the font first, and see if it works. If it works you can try a larger project and see if it continues to work without smearing.
I hope I’ve answered any questions you might have about Cricut Permanent Markers. If you have any additional questions, feel free to leave them in the comments and I’ll answer them for you.