This post and photos may contain Amazon or other affiliate links. If you purchase something through any link, I may receive a small commission at no extra charge to you. Any supplies used may be given to me free of charge, however, all projects and opinions are my own.
Are you ready to start using your Sawgrass printer? Today we’re going to deep dive into Sawgrass Creative Studio. This software is included with the purchase of your Sawgrass printer! You might also want to read the post on Sawgrass Print Manager so you know all of your printing options.
If you’re just getting started with your Sawgrass printer, check out my start guide here.
Sawgrass Creative Studio
To really learn how to use Sawgrass Creative Studio I suggest you watch me walk through the whole program and how to use it by clicking play on the video below:
What is Sawgrass Creative Studio?
Sawgrass Creative Studio is a program that comes with the purchase of a Sawgrass Printer. The programs included with your Sawgrass sublimation printer are Sawgrass Print Manager and Sawgrass Creative Studio.
Sawgrass Print Manager is what you will use to print out of any program to your Sawgrass printer or you can print any type of picture file really quickly right from Sawgrass Print Manager. You can learn all about Print Manager in my video here.
Sawgrass Creative Studio is the program you will use if you want to get more advanced and do things like create designs or use templates. It’s a pretty simple program and works with your Sawgrass Printer. You do need an internet connection to use Sawgrass Creative Studio.
Is Sawgrass Creative Studio Free to Use?
Portions of Creative Studio are free and other portions are paid. You can use Creative Studio for free without having to purchase anything. There is a monthly fee to access the paid features in Creative Studio. Do you need those premium features? Let’s take a look inside and see.
If you decide to subscribe, I do have a coupon code that will give you a discount – head to sawgrassink.com and use code ANGIEXSAWGRASS30 to save.
How to Use Creative Studio for a Sawgrass Printer
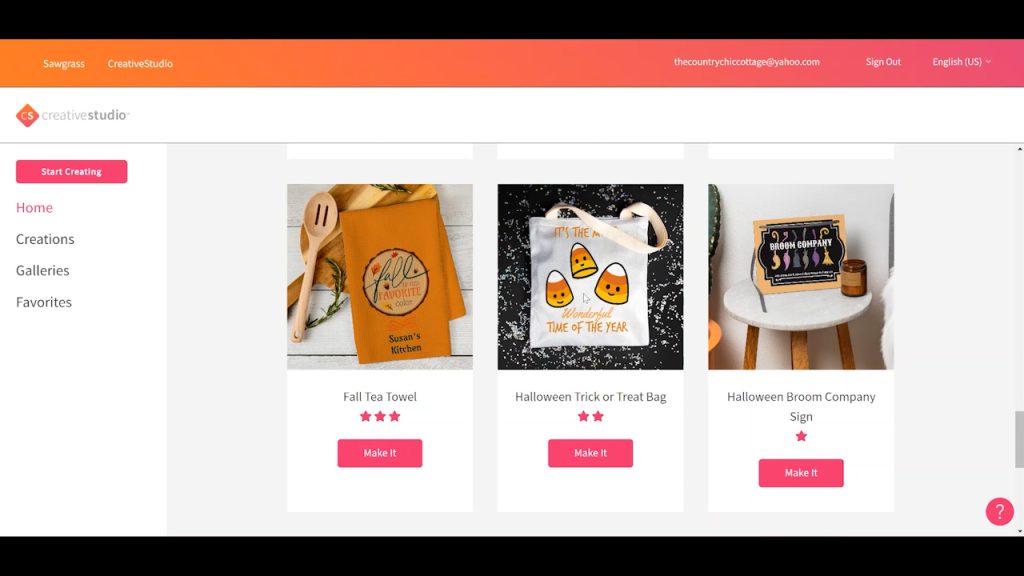
When you first open up Creative Studio you can scroll down and see some different projects. There are free and paid things you will see. You can make these projects or use them as inspiration.
If you wanted to make a project, you would simply click make it. From there, you will get more information about the project including materials needed, pressing guide, where to get the designs, etc. You would follow those instructions exactly to make any of those projects.
On the left side of the screen, you have start creating, creations galleries, and favorites. These will all be specific to your personal account. If you don’t want to make one of the example projects you can click start creating and print anything out of Creative Studio.
Blanks and Templates
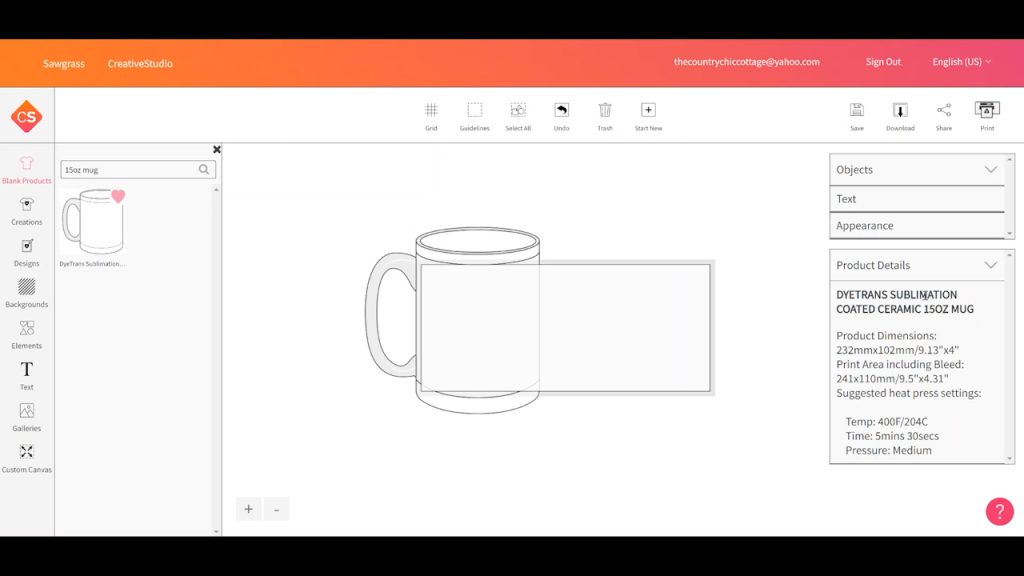
Creative Studio has blanks that you can choose from to get templates for creating. There are a wide variety of blanks that you can search through.
For example in drinkware, you can search your brand, size, or type of drinkware to see if they have it in their system. You can also search for something like a 15oz mug. When I search that, I can select one and see where the product came from, what the dimensions are, and what the print area is along with some instructions including the time, temperature, and pressure that are recommended.
Creating a Custom Blank in Creative Studio
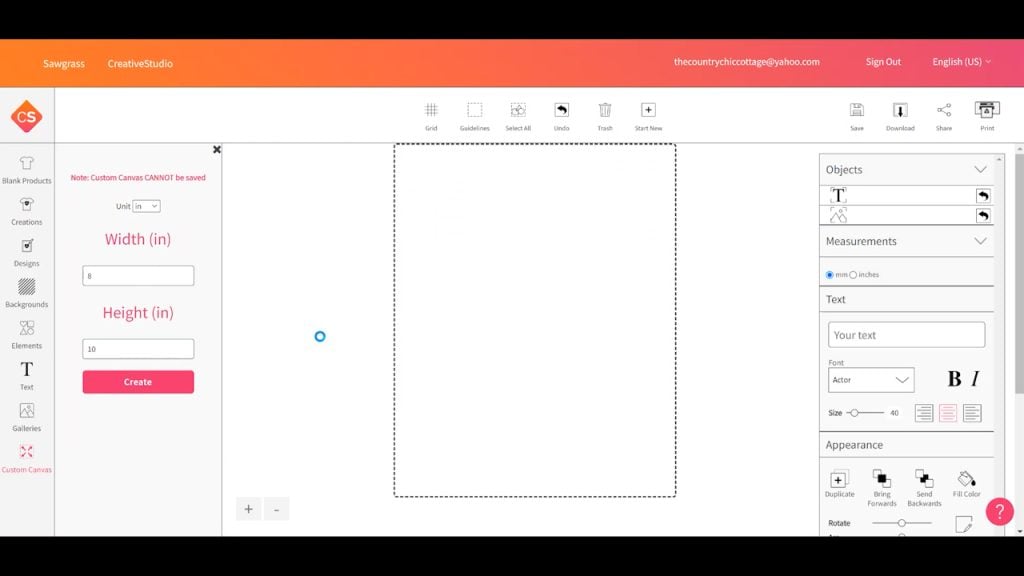
If you have a blank you can’t find in the blank products, you can make a custom canvas. A custom canvas can’t be saved, but you can make a canvas any size you would like. If you have an 8 by 10 piece of metal to make a sign, you can click create. Select start new, click custom canvas and make a blank canvas. With this process, you can create a canvas in any size you need.
Creating a Design in Creative Studio
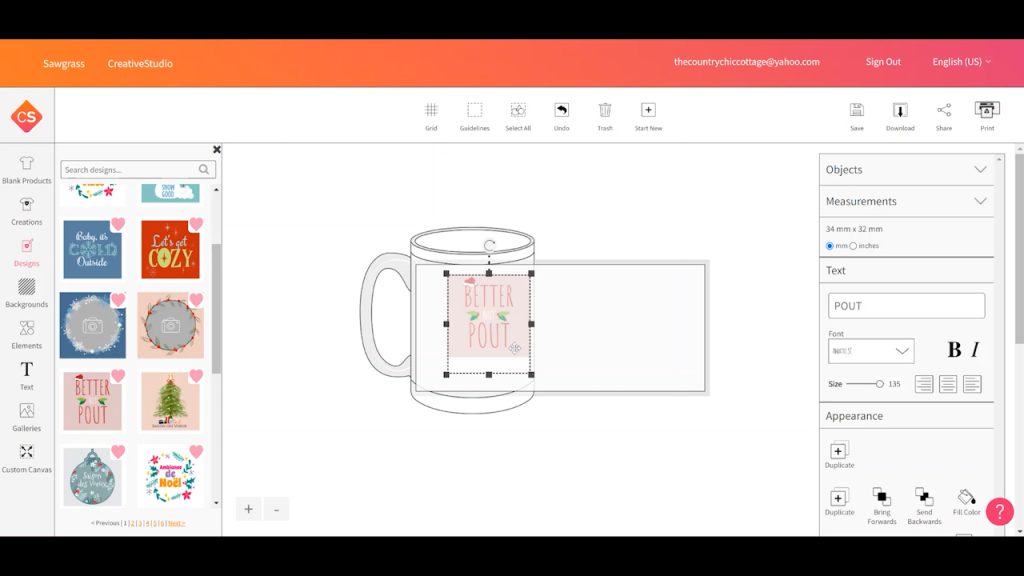
Now that we have the right-sized blank template we can decide what we want to put on our mug. Click designs to see things that are in Creative Studio. If they have the premium logo, you will only get those designs with the premium subscription. Designs without the premium logo are free ones that you can use without a paid account.
It’s much easier to follow this whole process by watching my video all about Sawgrass Creative Studio here.
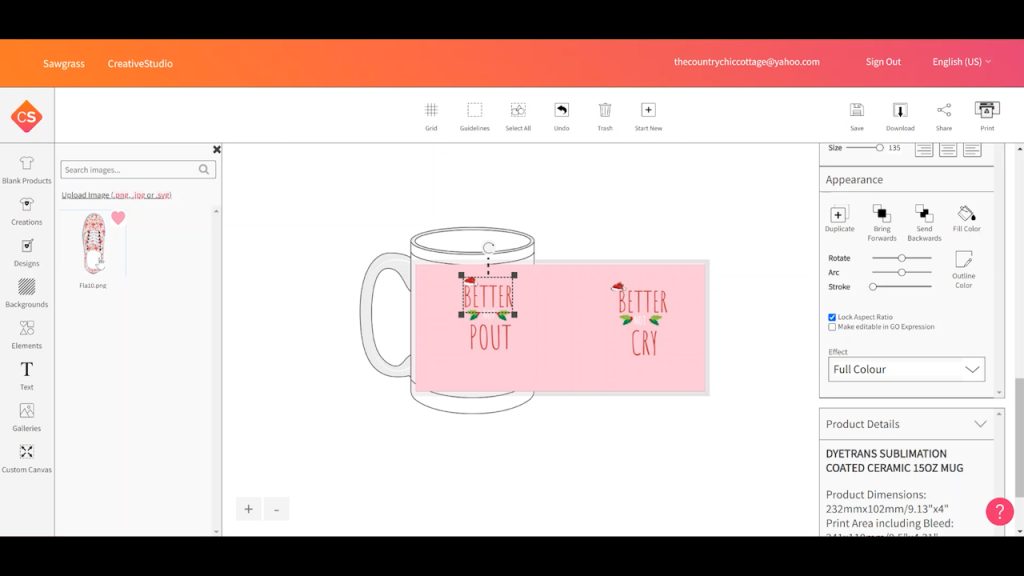
I’ve selected a free Christmas design to put on my mug. When it opens, each of the design elements is separate. Which means that I can edit each piece of the design. You can also select all, move it around, resize it, and even duplicate it.
Altering Designs in Sawgrass Creative Studio
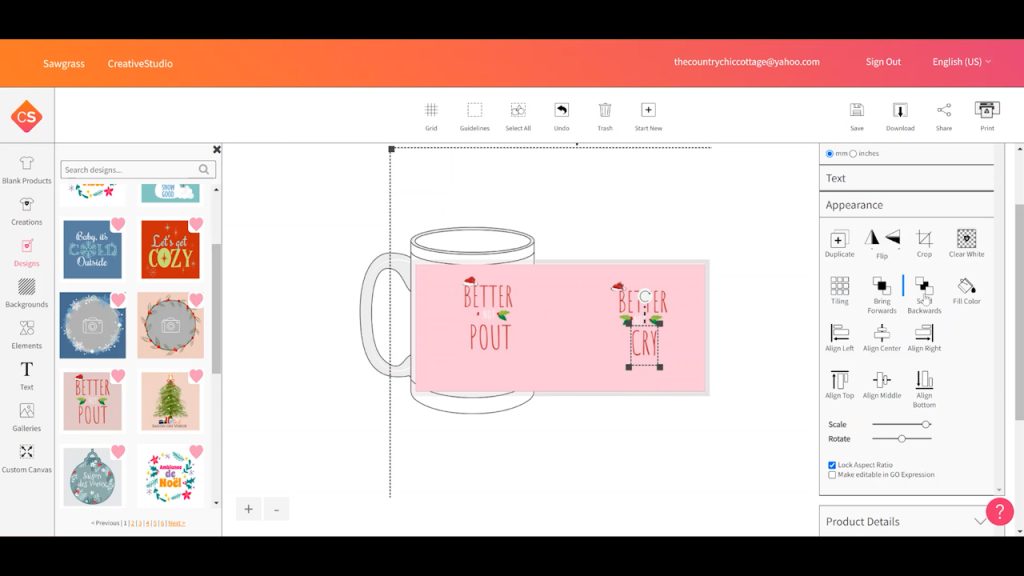
Because each of the items in the design opens as its own element, we can alter each one. I can change the text, change any colors, delete items I don’t want, and add new elements if I wanted. There are a lot of options within Sawgrass Creative Studio that allow you to change designs that are already in the program.
Pay attention to changes you make to your design. It’s possible an element may open behind a larger layer and it wouldn’t be seen when printed if it isn’t moved to the front.
How to Upload Your Own Designs
To upload an image into Creative Studio, you’ll begin by going back to designs and selecting My Designs. This area is where you would upload a PSD file. That is a design file so if you have one of those you would upload it there.
If you want to upload a picture, you would select galleries and then click on my images. Here you can upload PNG, JPG, or SVG files.
Select the file to upload it and then it will be added to your gallery. From here you can resize your image to fit onto the blank you’re going to use. You can also rotate and move your design just like we could before.
Working with Text in Creative Studio
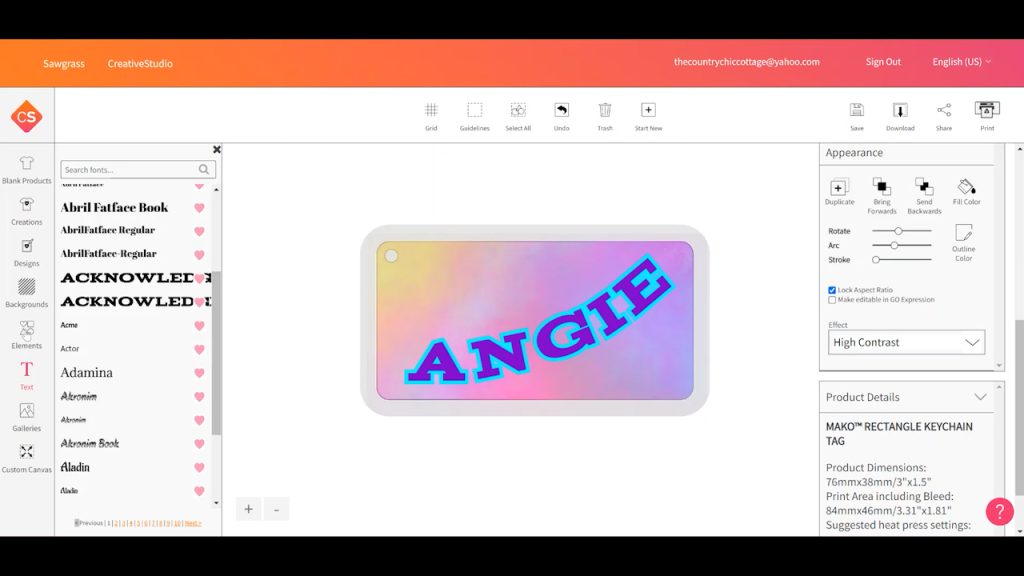
In Creative Studio, you’ll find Creative Studio fonts. If you want to use your own fonts, you will need to upload those. To upload a font, you would click upload font and upload either your TTF or OTF files.
Click on whatever font you want to use and then start typing. We can change the size by pulling it out or by changing the size in the slider tool. We can change the fill color, rotate the text, arc the text, add a stroke, etc.
There are so many different effects you can try and see which one really helps your text pop off the design so it will stand out.
Adding Elements to Uploaded Images
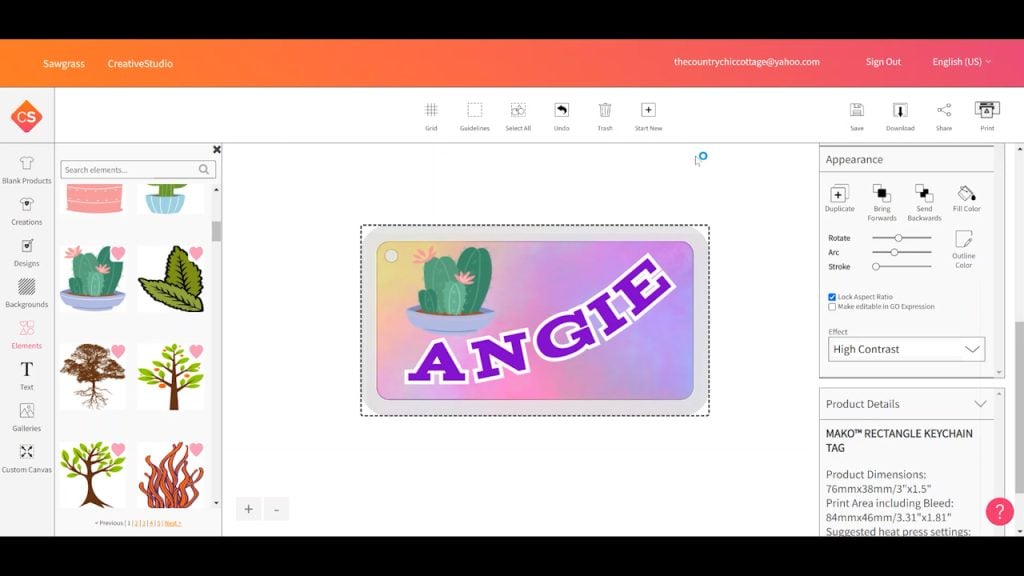
Elements are individual little pieces, like a flower or a leaf. You can use these elements to add detail to your uploaded image. These elements can be changed just like other pieces we’ve talked about before. Resize them, change colors, rotate them, anything you want.
NOTE: Some elements are free and some will require a premium subscription.
Removing Background from Elements
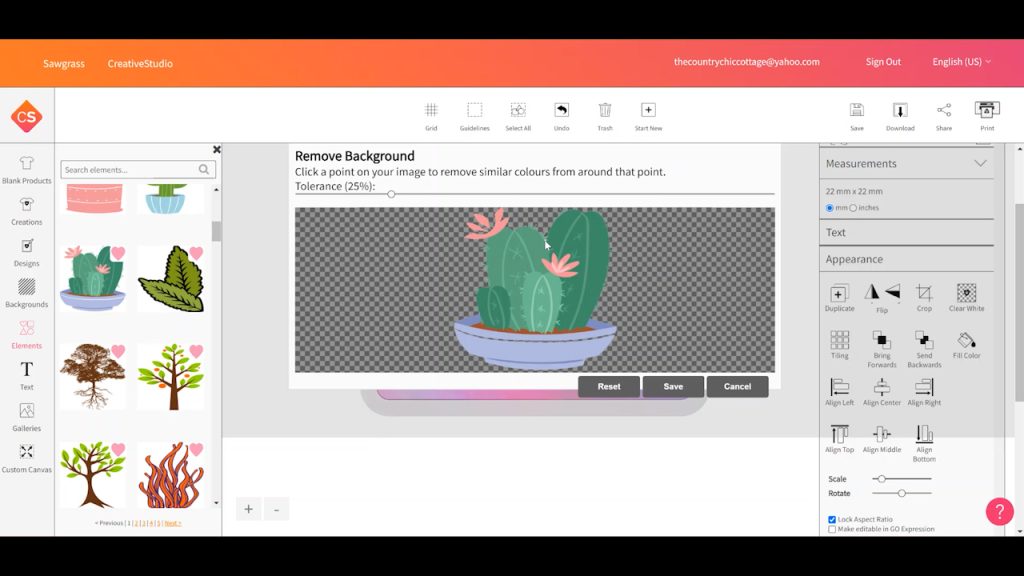
Some elements have a background. If you want to remove that background, on the right side of the screen, click clear white to remove the background. That will open the element in a new little window and you’ll use the cursor arrow and point it at the section you want to remove and it will remove it. This tool also works with images you upload.
More Features in Sawgrass Creative Studio
When you’re in Creative Studio, across the top you’ll see a few options like turn a grid on. This is a great tool if you need to align elements. You can turn guidelines on or off. Guidelines would help you make sure your image isn’t too big for your base.
Other tools you’ll see are select all, undo, trash, save, and download. Select all will select everything in the design. Undo, trash, and save are all exactly what they are in other programs. Download allows you to download your design as a PNG or an SVG file that you could use other places like Design Space.
You can also share designs. If what you’ve made is from Designs in Creative Studio free designs, you can share them with other people. You can also of course print your design.
How to Print out of Sawgrass Creative Studio
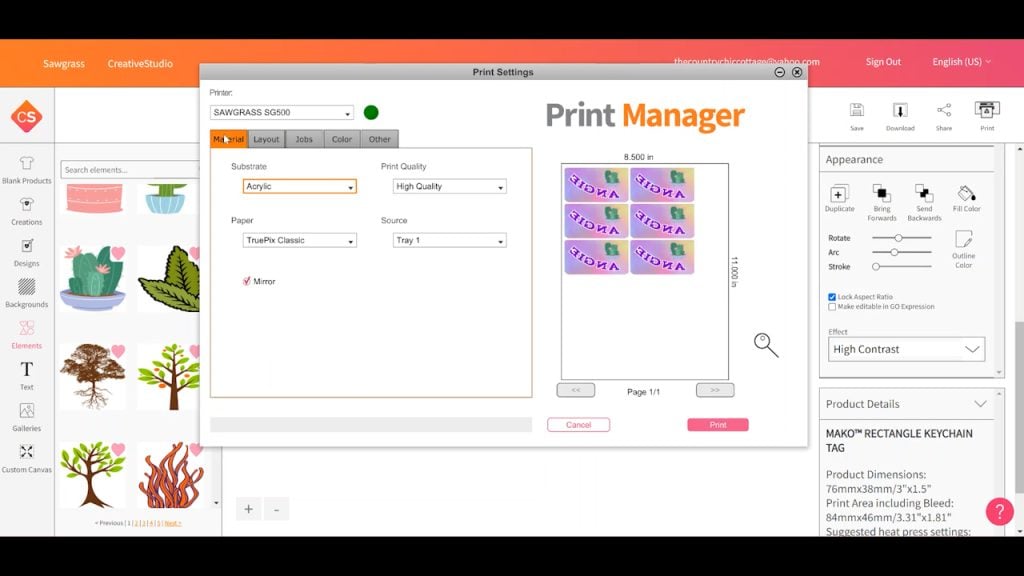
To print out of Creative Studio, you begin by clicking print. You always want to mirror your image so make sure you select mirror. If you want to make multiple copies you can adjust your copies here. Select the surface you’ll be applying the print to and then select TruePix Classic paper. That is the Sawgrass sublimation paper, you can use any type of sublimation paper you want but you need to select that setting.
Choose your printer and make sure print high quality is selected. If you have a color palette you want to turn on you can do that here too. Click print and then a message will pop up that says your print has been successfully queued. Click okay and it will pull up Sawgrass Print Manager.
Using Sawgrass Print Manager
I have a full video on using the Sawgrass Print Manager that you can find here. I’ll quickly walk you through what it looks like to print through the Print Manager.
Make sure the paper size in the Print Manager is the same size that is in your printer. Double-check that the image is set up how you had it in Creative Studio. If you were printing more than one copy, make sure it’s set up correctly.
By default the print will be more centered on your page. You can potentially save yourself a little bit of paper if you uncheck the center button. Make sure that the imposed margin button is checked so the whole image prints within the margins.
From here, I could change any of my settings. If I wanted to alter any settings I could at this point. I could even add other jobs, and I show how to do that in the video above. Once everything is set up, click print to print the page.
Final Thoughts on Sawgrass Creative Studio
I really like Sawgrass Creative Studio. I think it’s easy to use and has a lot of great features you’ll really enjoy using.
Do you need a premium subscription?
What I always tell people is to try first and then decide if you want to buy. You can download Sawgrass Creative Studio, you can start playing with it. Try the free designs and free images. You can use the free backgrounds, whatever you would like to use, and all the freebies. And then, as you get into it, if you really like Sawgrass Creative Studio and you see other designs maybe popping up that you would love to use but they’re part of the premium subscription, at that point, I would go ahead and pay for a month, and give it a try.
After you try it you can ask yourself these questions:
- Do you like it?
- Do you use it enough to justify the cost?
If you do, sign up for the annual subscription. That will save you a little bit of money. I do have a coupon code that will give you a discount – head to sawgrassink.com and use code ANGIEXSAWGRASS30 to save.
I always recommend giving things a try first, because not everyone needs a subscription to Sawgrass Creative Studio. You might need it, you might not. And the only real way to find out is to use it.
I do think it’s an amazing program to use with your Sawgrass printer, regardless if you pay for the premium subscription or not. I hope this helps you know how to use Sawgrass Creative Studio. If you have any questions leave them in the comments and I will answer those for you.
