This post and photos may contain Amazon or other affiliate links. If you purchase something through any link, I may receive a small commission at no extra charge to you. Any supplies used may be given to me free of charge, however, all projects and opinions are my own.
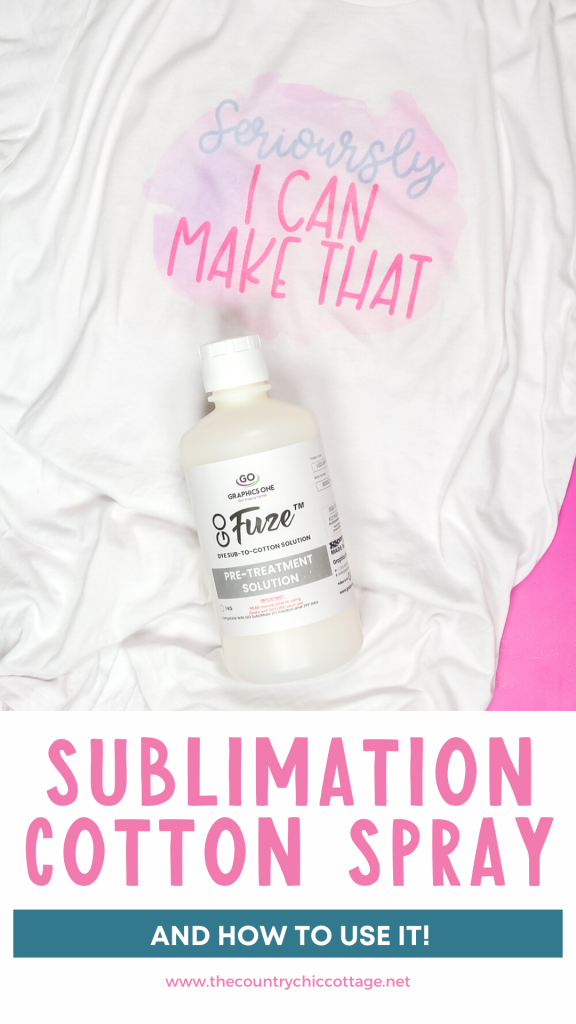
Do you have a favorite cotton t-shirt that you love? Have you wanted always wanted to add sublimation to cotton but didn’t know how? Today I’m sharing how to use a sublimation cotton spray product that actually works!
I have tried sublimation sprays in the past that unfortunately did not leave me with a finished product I was proud of. Keep reading to learn which one finally worked.
If you’re new to sublimation and are curious about what you need to use, check out my Sublimation Beginner’s Gude.
Please note that I did realize AFTER I filmed this video that the file had a typo in it! Luckily, the post isn’t on sublimation files!
Before we begin let’s talk about sublimation on cotton. You cannot sublimate on cotton on its own. Sublimation ink bonds with polyester fibers, which is why you need a high-count polyester fabric to use sublimation. In order to sublimate on cotton, you have to prep your fabric. This is where sublimation cotton spray comes in!
You can actually watch me walk you through the whole process by clicking play on the video below:
What is Sublimation Cotton Spray?
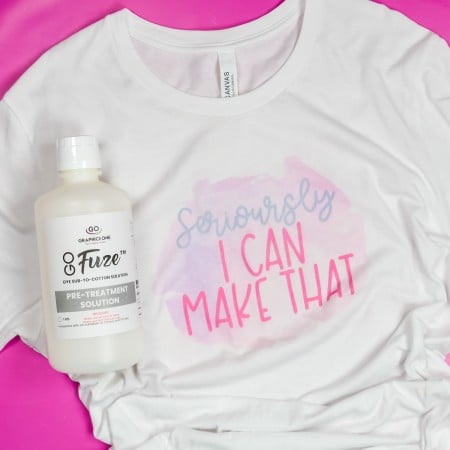
To add sublimation to cotton, we need to prep the fabric first. Today I am using a product called GO Fuze. I mentioned before that I have tried sublimation sprays before and didn’t have great success. I had heard about this GO Fuze product and was excited to try it out.
GO Fuze can be purchased in a couple of different ways. You can buy the GO Fuze Solution alone or purchase a starter kit. The starter kit includes a very large bottle of solution, an application spray bottle, a roller for application, a piece of polyester fabric, and a large application board.
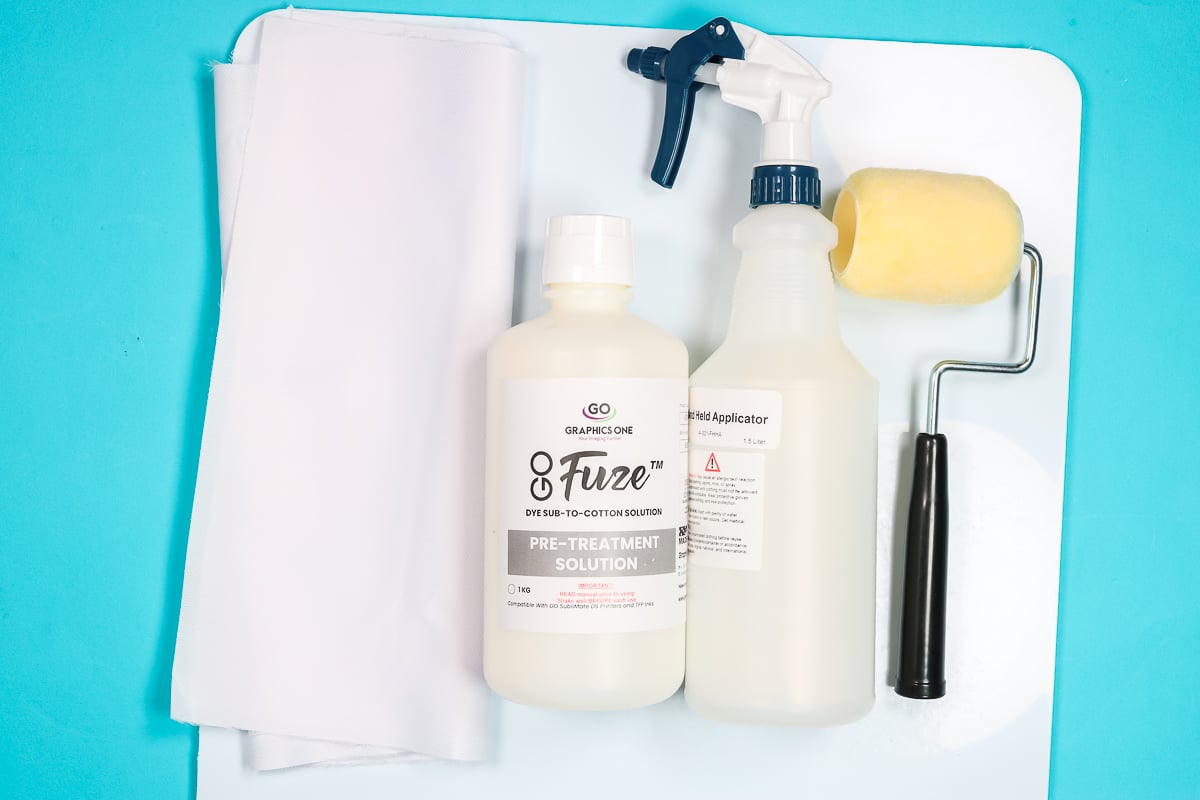
If you didn’t want to buy the starter kit, you could purchase all of the items separately, I do think you could have a hard time finding the board. It is a fairly firm plastic board that is about a quarter of an inch thick that allows you to really push down on it to get the solution inside the shirt fibers.
You would only need to purchase the starter kit once because you can reuse all of the items except the solution itself.
Why Try Sublimation on Cotton?
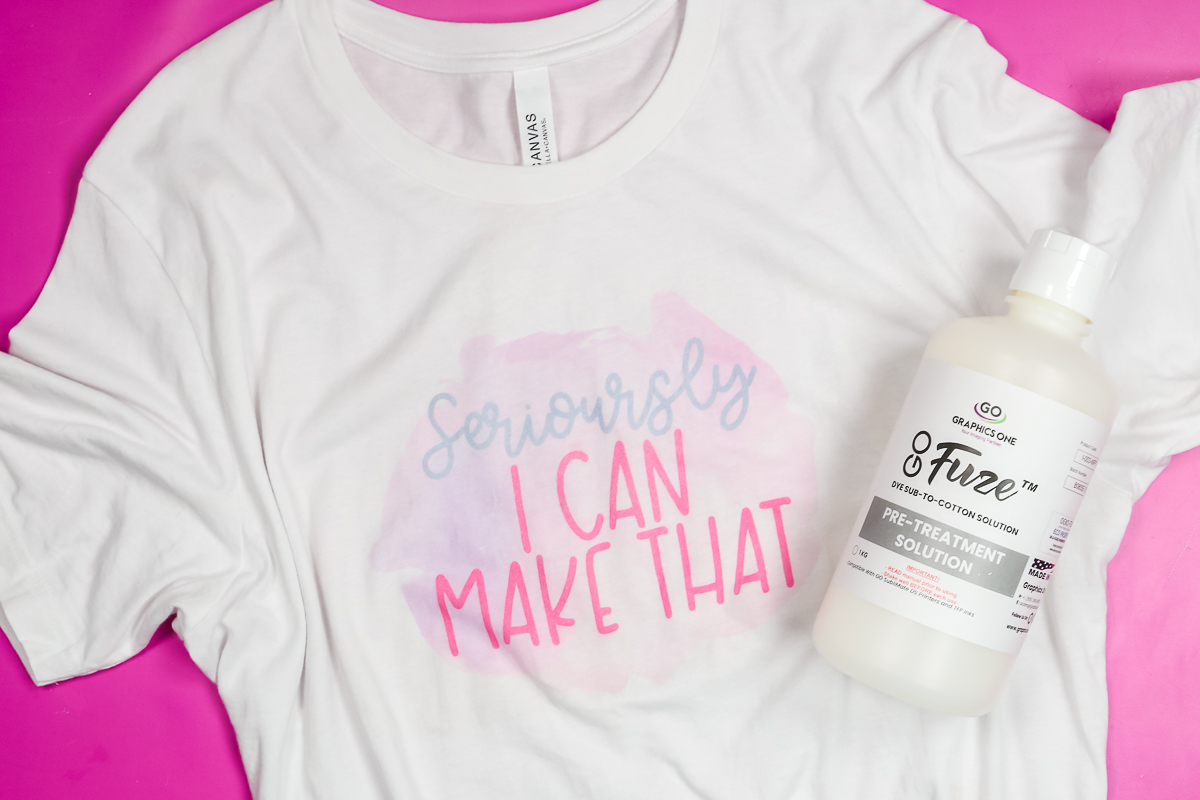
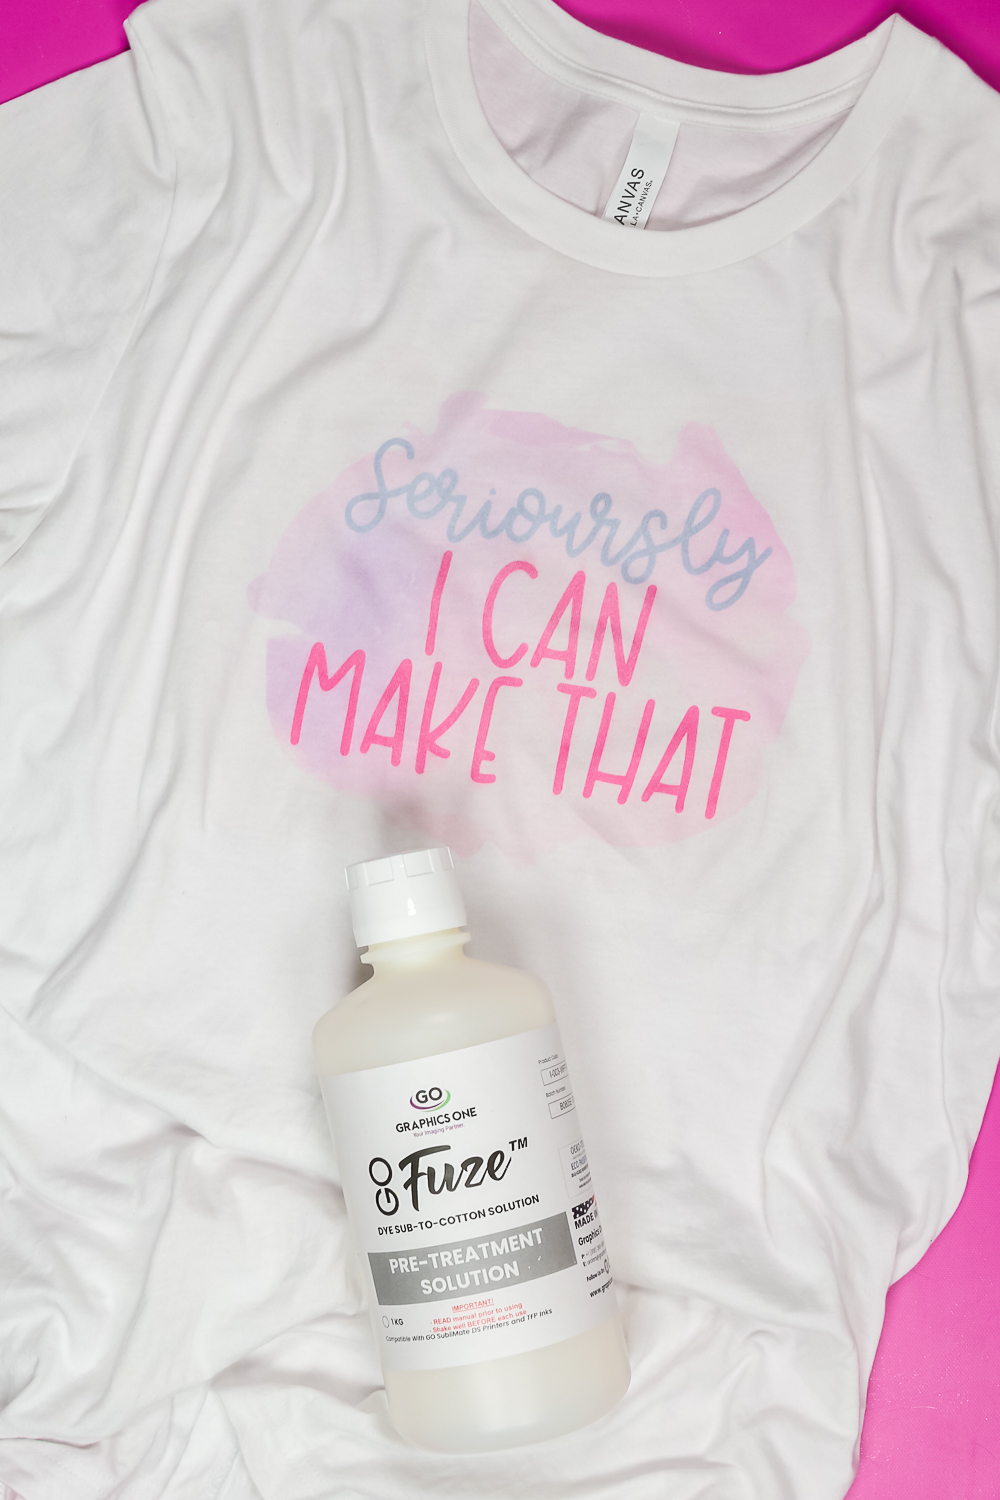
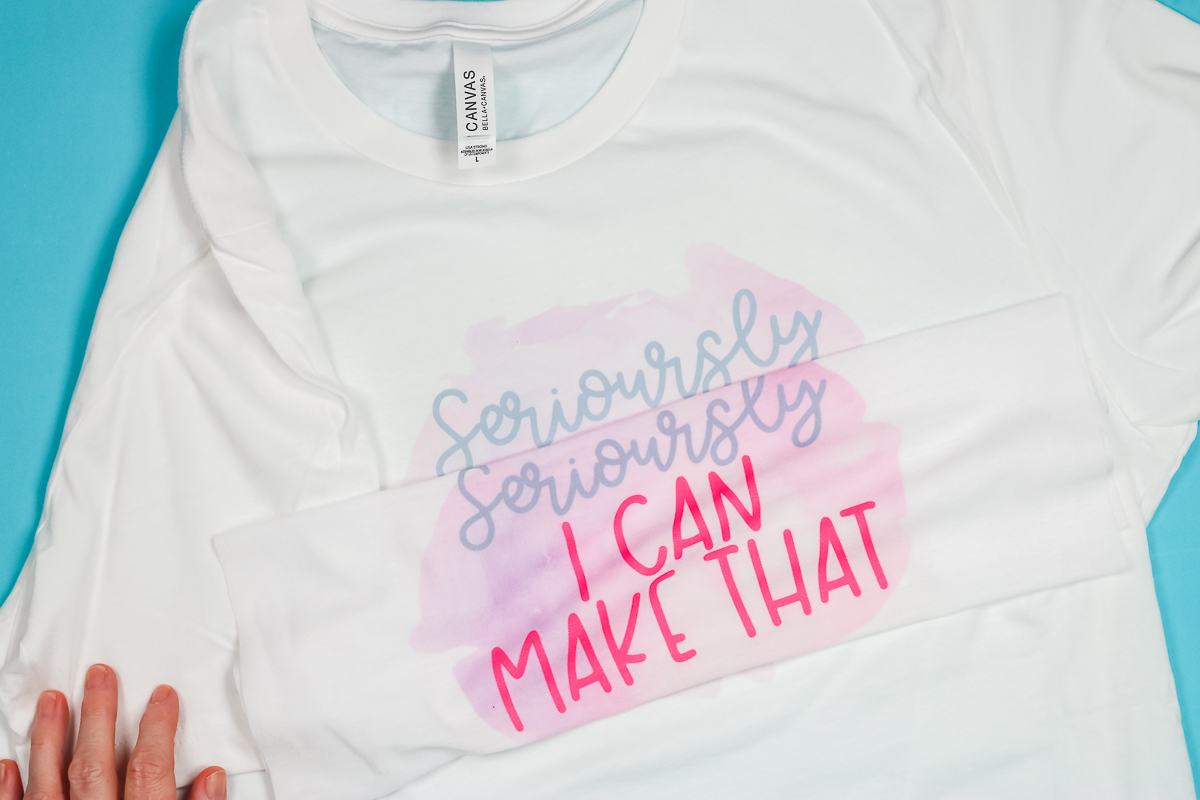
Why do I want to try sublimation on cotton? Because I wanted to use my favorite BELLA+CANVAS 100% cotton shirts for sublimation. I love them for their softness and adding sublimation to them would make them even better!
NOTE: Using a sublimation cotton spray doesn’t change the fact that you need a light-colored or white shirt. The sublimation ink is still translucent and any color in the shirt will show through the ink.
What is GO Fuze?
GO Fuze is a solution that treats the cotton fabric so it can accept the sublimation ink and make it permanent. GO Fuze states it will last for 25 laundry cycles. I’m going to wash some of my finished shirts so you can see what it looks like after washing.
Why Use BELLA+CANVAS T-shirts?
I am using BELLA+CANVAS because I love the feel of their shirts. If you’ve ever picked one up and felt it you know what I mean by that. They’re also a company I can stand behind. They’re eco-friendly and have manufacturing in the United States.
Also, you can now order wholesale even without a wholesale license. If you buy shirts in bulk, I would definitely check out the BELLA+CANVAS website.
Supplies Used for Sublimation on Canvas
NOTE: For your sublimation print, you will need sublimation ink printed on sublimation paper from a sublimation printer. I am using a Sawgrass SG500 for this project.
How to Use GO Fuze Solution Sublimation Spray
Place the board inside the shirt. I did pre-press my shirt to remove any wrinkles from the area where I’m going to put the solution.
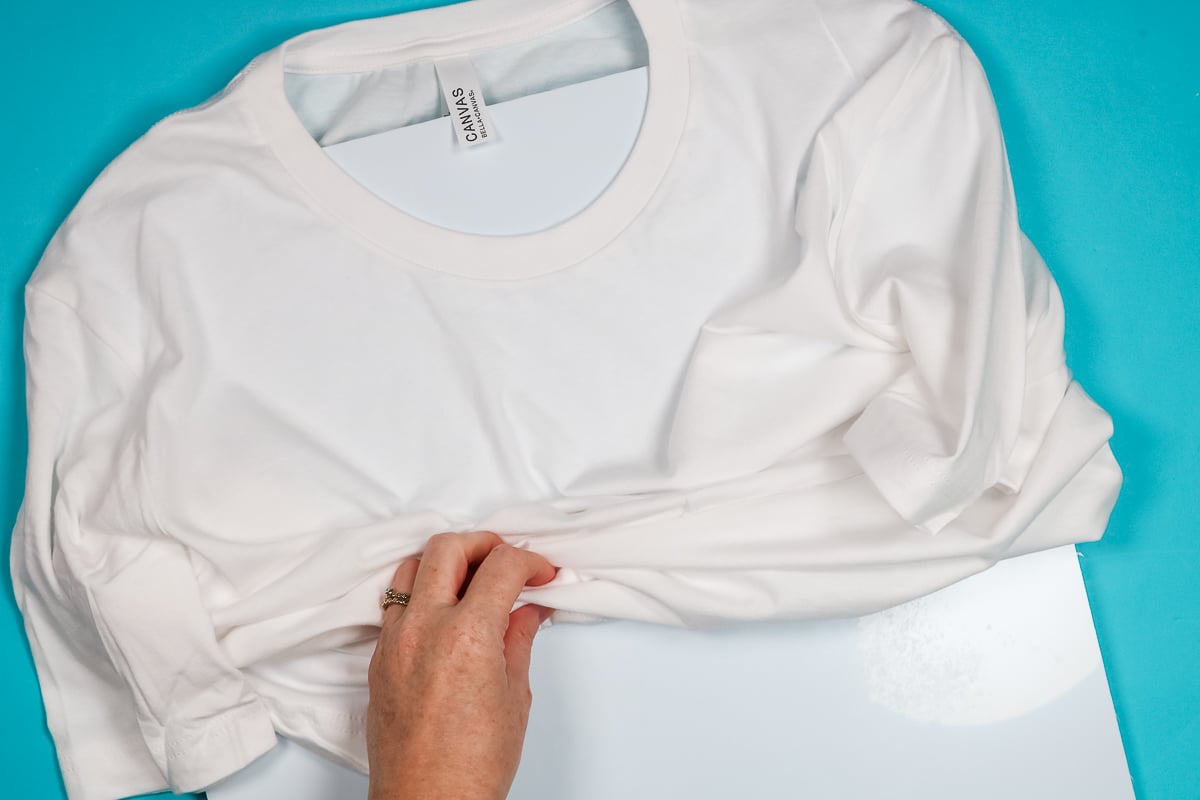
With the board inside the shirt, we want to elevate one end of the board a little bit. I placed my tape dispenser under one end so the board is up at an angle. This makes it easier to spray the solution onto the shirt since spray bottles don’t like to spray straight down.
How to Apply the Sublimation Cotton Spray
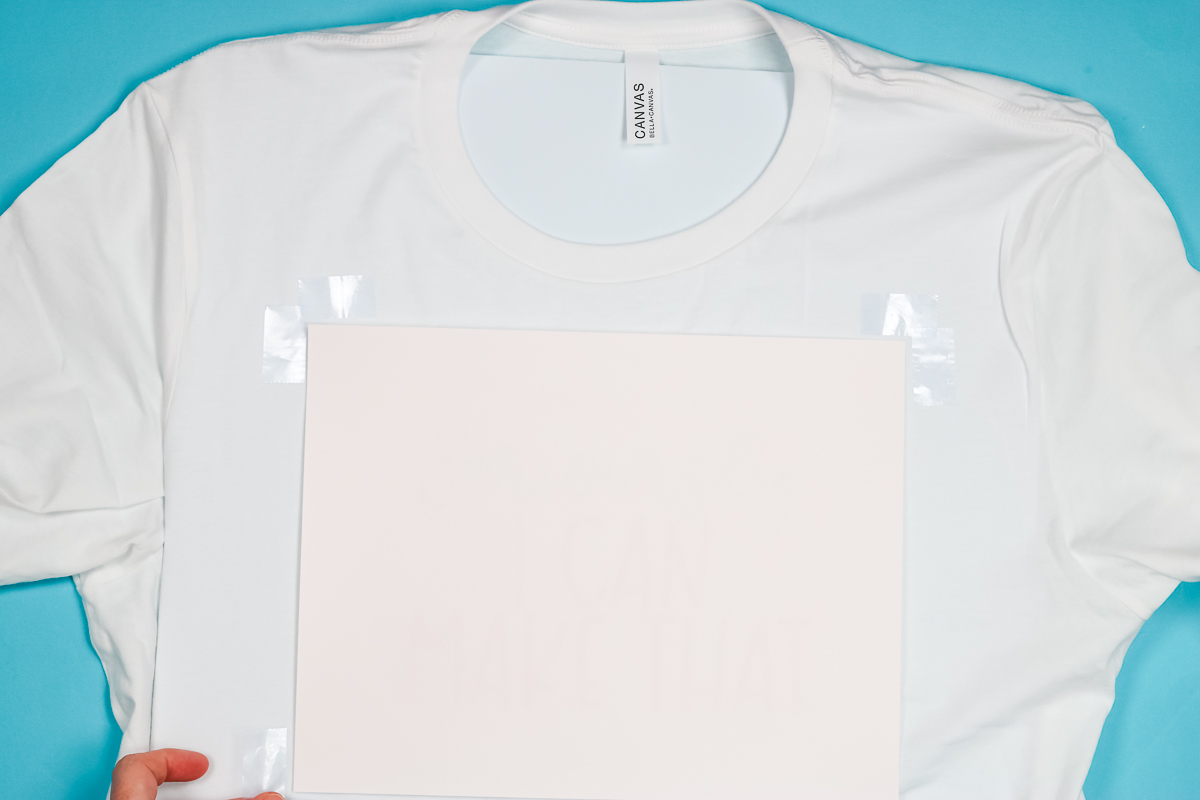
We don’t want to waste the GO Fuze spray by using it on portions of the shirt that we aren’t applying sublimation.
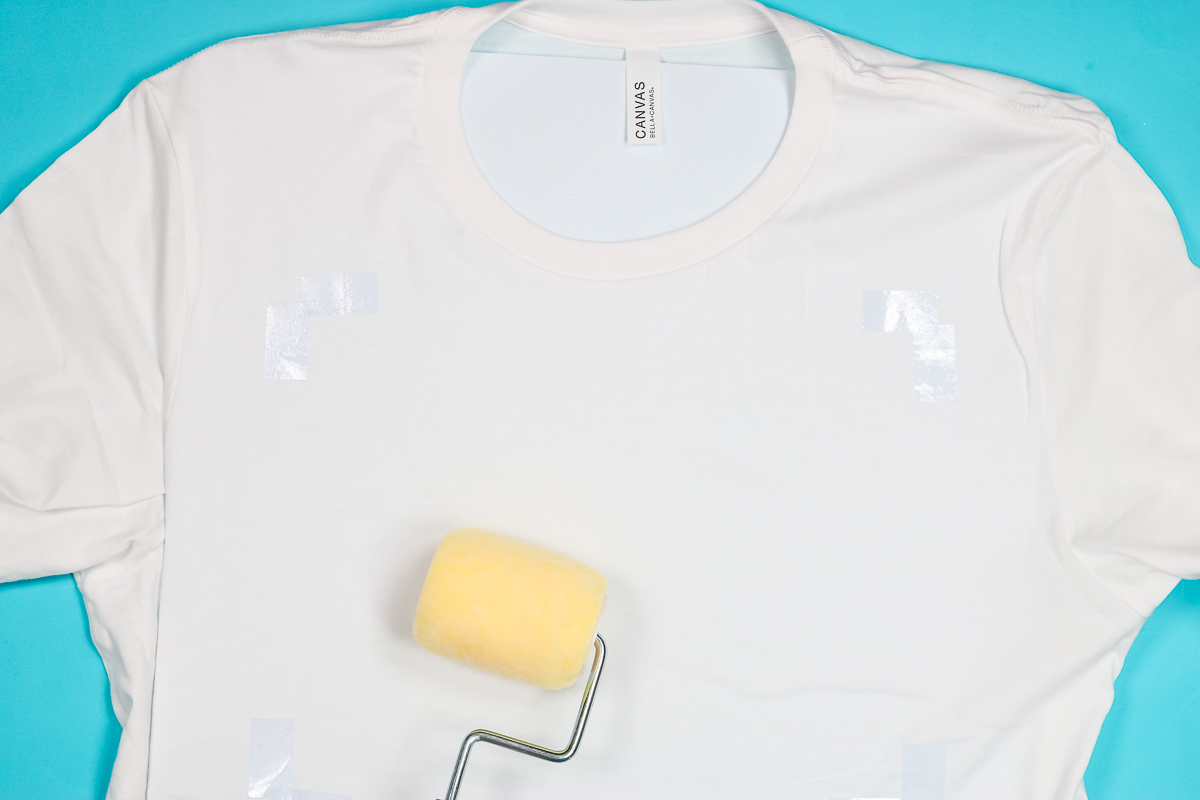
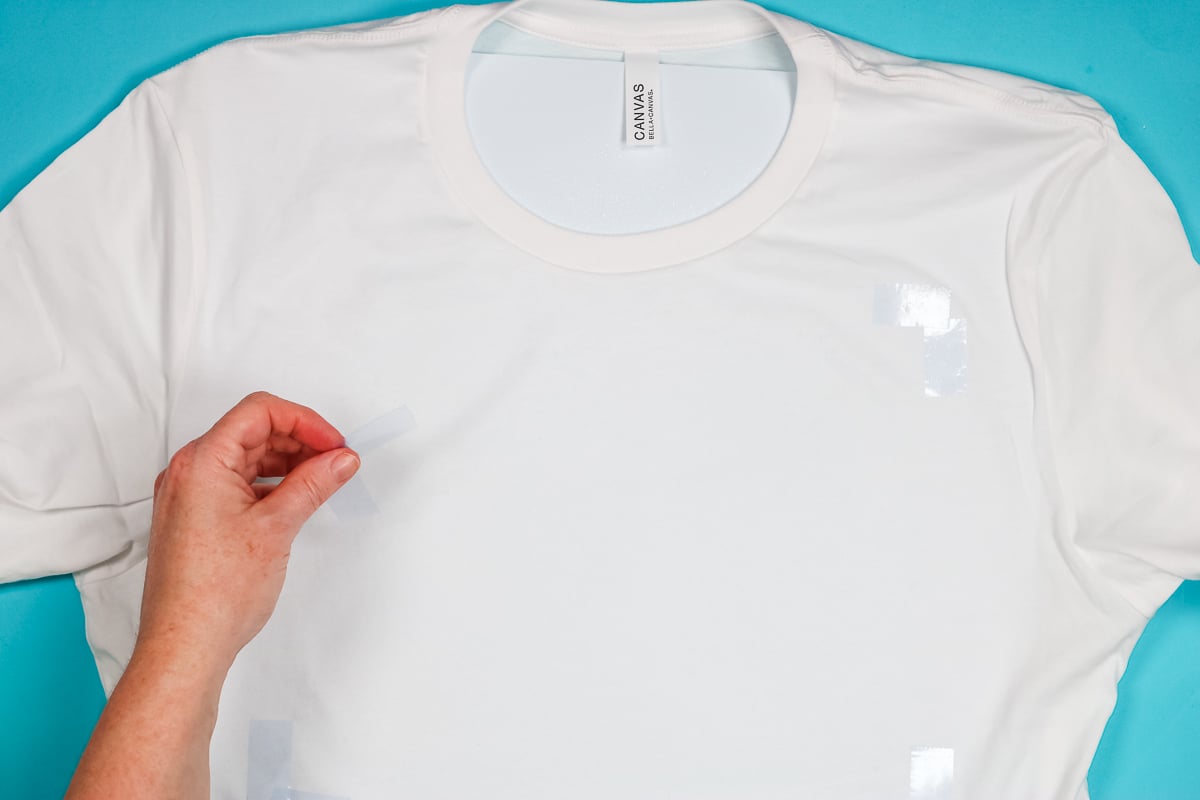
I like to use whatever design I plan to apply to the shirt. Take your print and lay it out on the surface right where you want the design. I am using tape to mark the corners so I have a rough idea of where I need to apply the solution. You can use the same pieces of tape over and over again.
How Much Solution Do I Apply?
You don’t want to apply too much or not enough of the solution. For a standard 8.5 x 11 sheet of paper, we will do 10 pumps. That’s 10 full pumps of the spray bottle they provide. If you were doing a 16×20 area, that would be 20 pumps. If you were doing a smaller area, you would have to dial in the correct amount for yourself.
Shake well before starting. Then spray inside the area you have marked. Set your spray nozzle to the mist setting, not the stream setting.
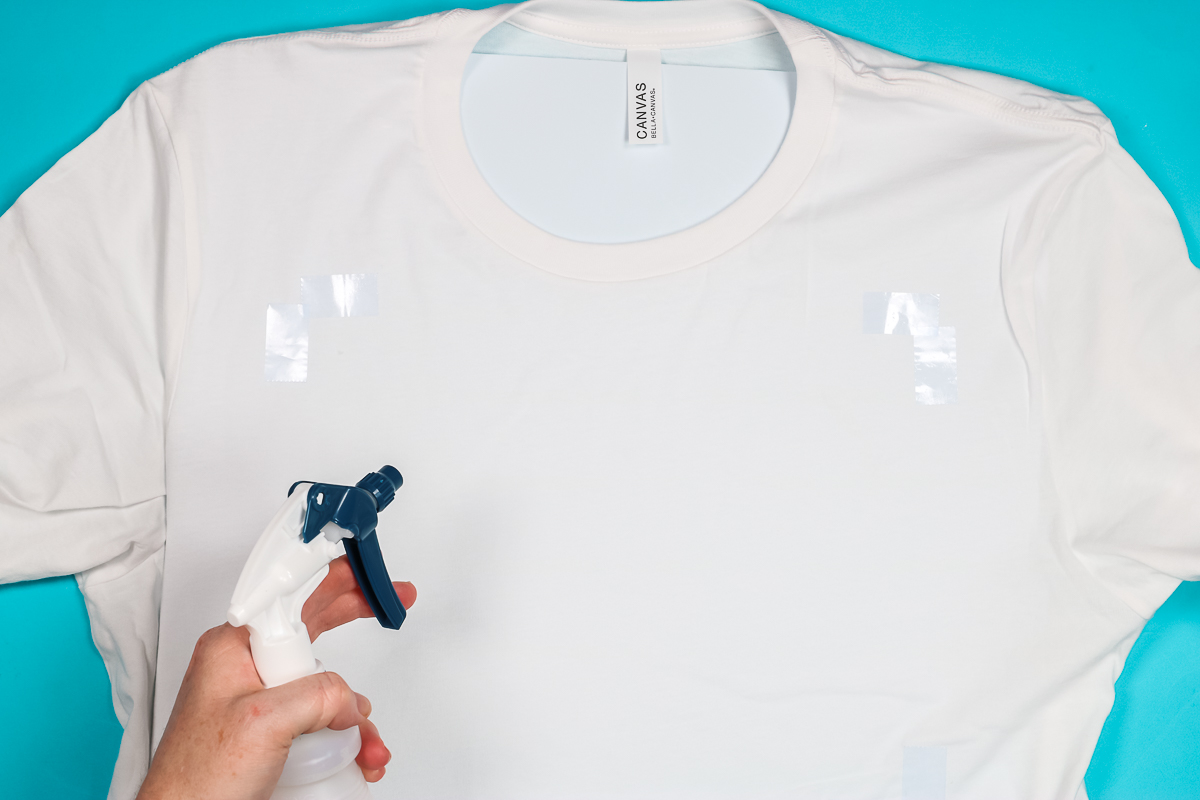
I really want to stress that you want to make sure you spray over the whole area you want to sublimate onto. If you miss the area and then sublimate onto that portion, you would have the same result as if you had sublimated onto untreated 100% cotton.
I like to do my 10 pumps left to right, top to bottom, and then a couple of extra pumps right into the middle of the area because my design will be mostly in the middle of my marked area.
Note – you do not add anything to the GO Fuze solution, you just take it from the large bottle and put some into the spray bottle and remember to shake it up really well.
How to Press GO Fuze Into Cotton Fabric
Once the whole area has been sprayed, use the roller that came with the starter kit and start rolling over the surface. The board inside gives a firm surface to press against to get the solution into the fabric.
I am using pressure as I roll over the area. If the solution goes outside the tape marks, that’s totally fine, you just want to make sure the area inside the tape marks is all covered.
Roll over the whole area both up and down and side to side pressing down as you roll. The roller will help make sure everything is evenly applied over the entire surface and as you’re pushing down you’re pushing the solution down into the fibers of the shirt.
Adding a Sublimation Print to Cotton Fabric
Now that we have our cotton shirt prepped with the GO Fuze solution we can remove the tape markers (you can reuse the tape until it loses its stickiness).
I have my heat press heating up to 365 degrees. GO Fuze calls for 335 to 365 degrees, depending on your setup.
Once my heat press is up to temperature, I close it for about 30 seconds to preheat the base. Once the 30 seconds is up, I am going to open it.
This process requires medium to heavy pressure. I found that the AutoPress doesn’t do as well as my regular heat press and I don’t know that you can apply enough consistent pressure using the EasyPress.
First, we need to dry the solution. I am going to thread the shirt onto the heat press so just the front of the shirt is on the heat press. You do want to add protective paper between the shirt and the heat plate and another sheet of protective paper on top of the shirt. Then add the piece of polyester that came with the GO Fuze kit on top of the paper.
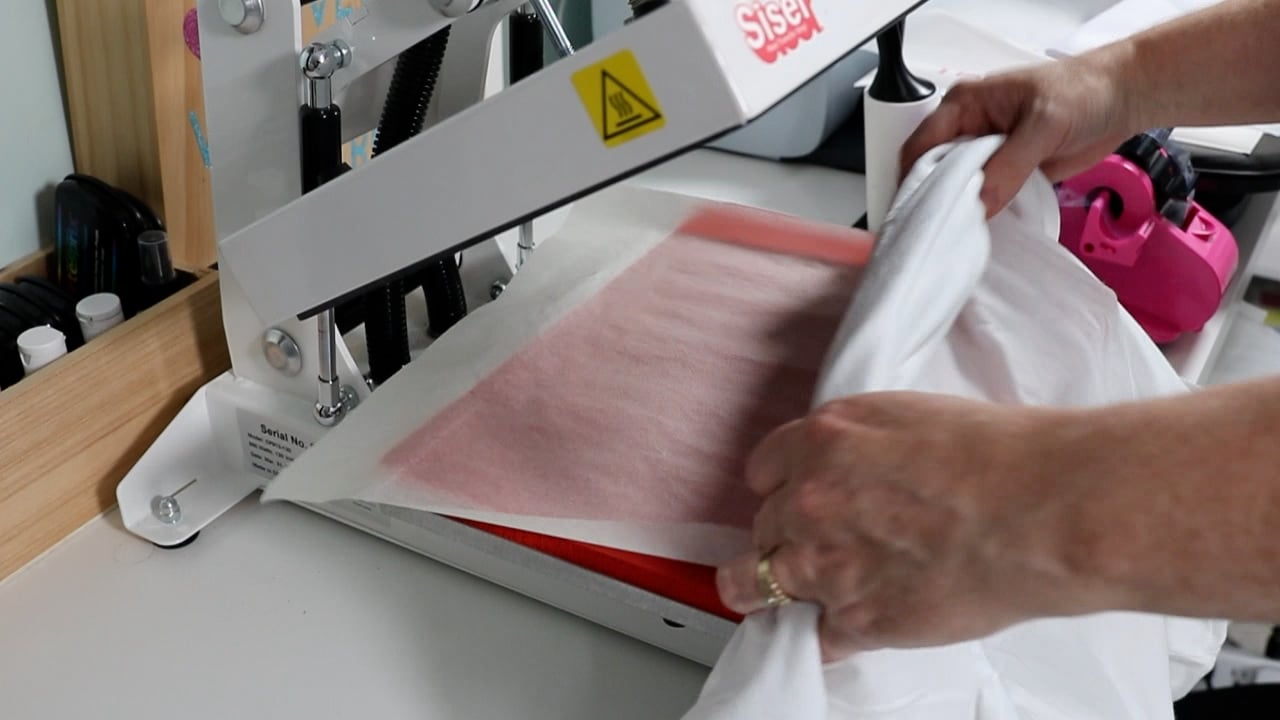
Now we’re going to close the heat press, without the sublimation print on the shirt. This is to dry the solution for about 15 seconds. During this step you will likely see some steam, that is the moisture we want to leave the shirt.
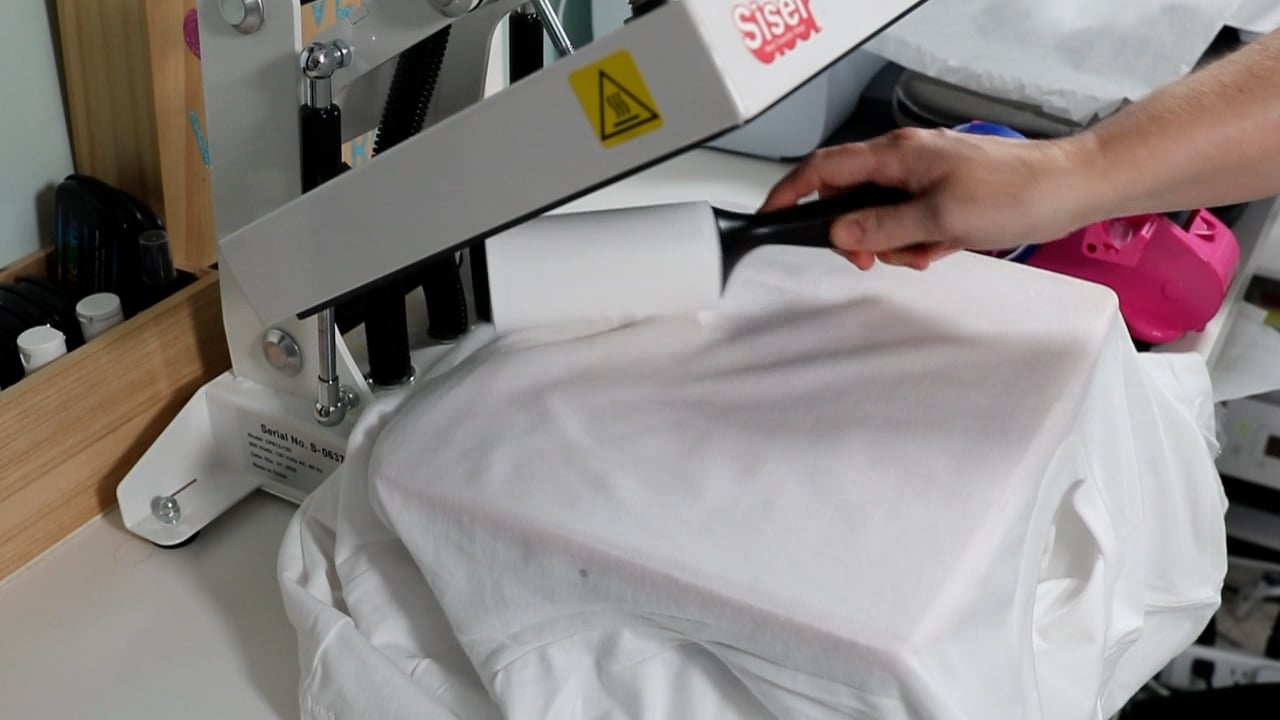
Next, we are going to open the heat press, and remove the polyester, and the paper. The fabric may still be a little moist at this point so I am going to let it cool for about 10 seconds or so and let that moisture evaporate. This step will make sure we don’t get any ghosting with our sublimation print.
Sublimating Designs onto Cotton
At this point, the process is similar to a regular sublimation project. Lint roll the surface to make sure there’s no lint on the shirt itself.
Keep the protective paper under the shirt and then add the sublimation print with the sublimation ink side down. Once in place, use heat-resistant tape to hold it down.
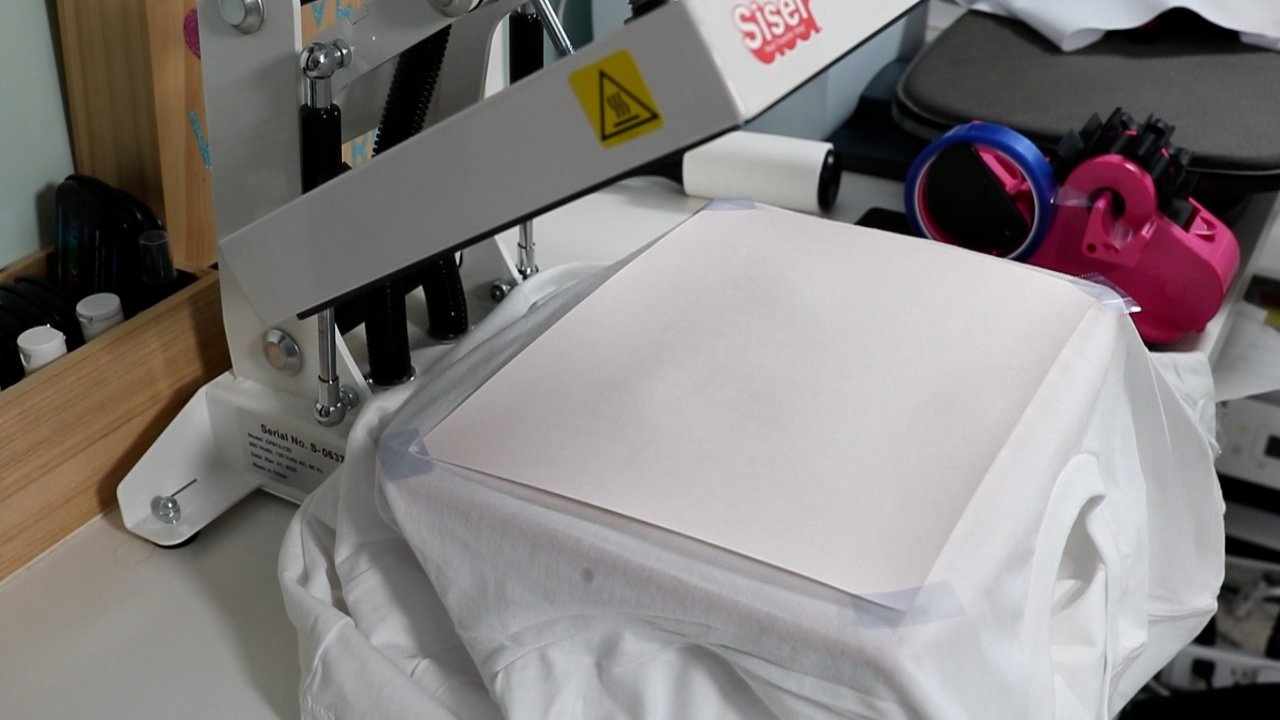
Add the protective paper on top of the sublimation print and then add the polyester cloth on top of the protective paper. Close the heat press and press with medium to heavy pressure at 365 degrees for 70 seconds.
Removing Sublimation Print from Cotton Shirt
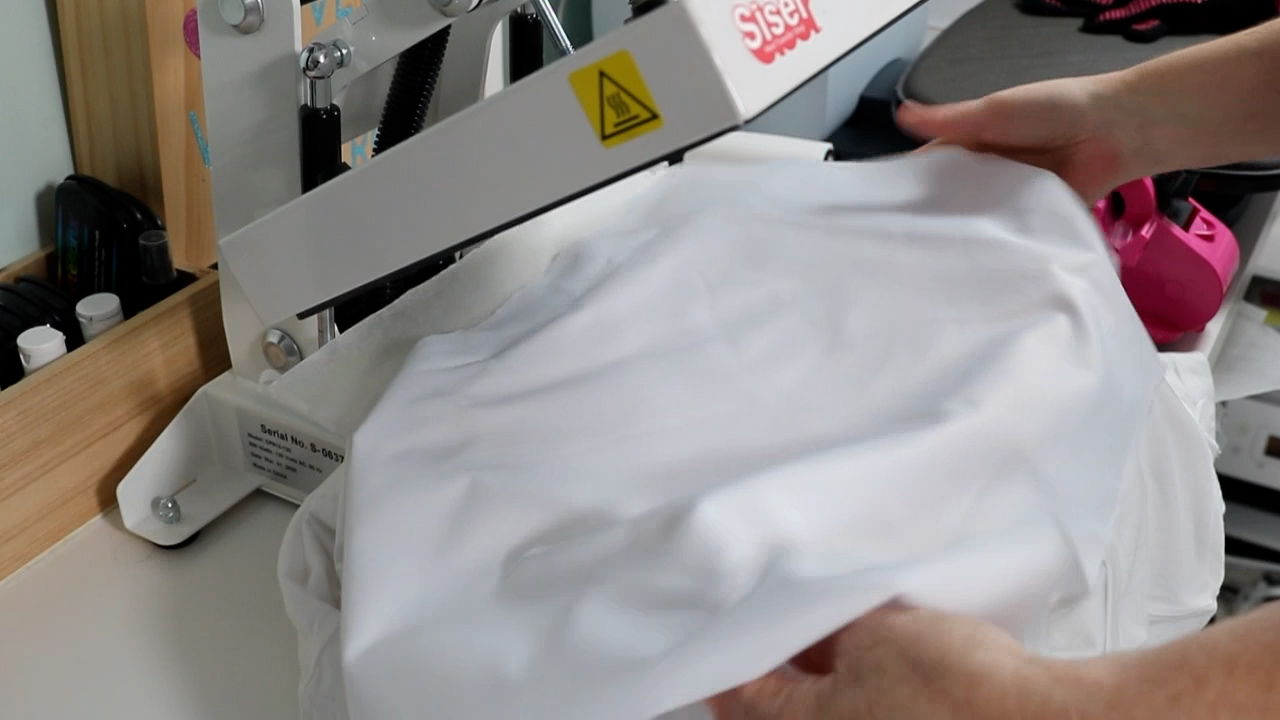
This product is a cold peel product. When the time is up, open the heat press and you can remove the polyester and protective paper but you want to wait to remove the sublimation print until everything is cool.
I removed the shirt from the press and set it aside. You could actually press another shirt while this one cools.
Once it is completely cool, peel back the design. Any press marks that you might see will go away as soon as you wash the shirt since it is 100% cotton.

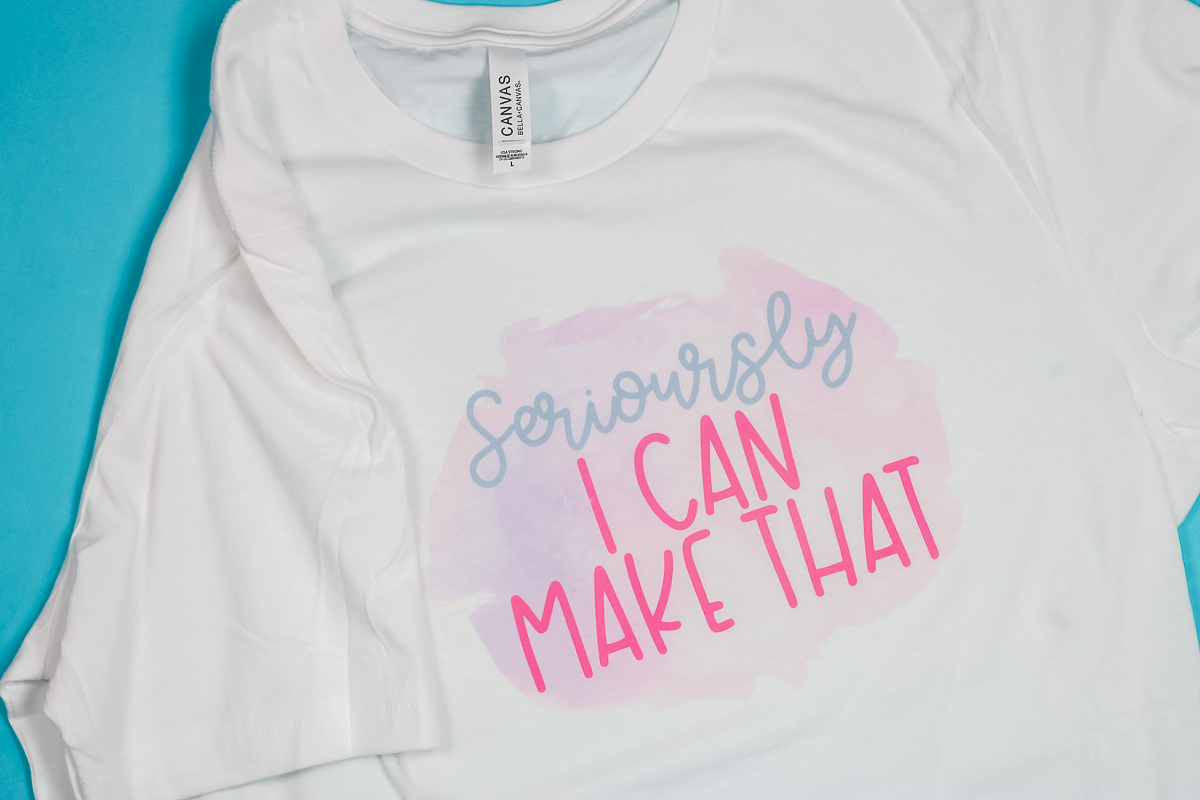
I do want to point out that normally when you try to sublimate on cotton you get burning of the fabric and it tinges brown. You’ll notice in the photos here there is no burning, the entire shirt is still white. You can also see that most of the ink from my print transferred which looks really good.
How to Finish Sublimation on Cotton Projects
Typically with a sublimation shirt that is done on polyester, when you are done pressing the design your project is finished. Sublimation on cotton is different. With this sublimation cotton spray, the fabric is going to feel stiff and may even feel a little sticky.
You do need to wash these products after you make them. Once you wash them they will go back to feeling like a soft 100% cotton shirt.
Comparing Sublimation on Cotton Shirts
These two shirts were both made with sublimation. The top shirt is a 100% cotton shirt with the GO Fuze solution and sublimation. The bottom shirt is 100% polyester with sublimation.
You can see that the 100% polyester is still brighter, however, I’m getting really nice colors with the product on cotton. In the photo below you can see the difference in the blues, both look really good but the bottom one is just a little darker.
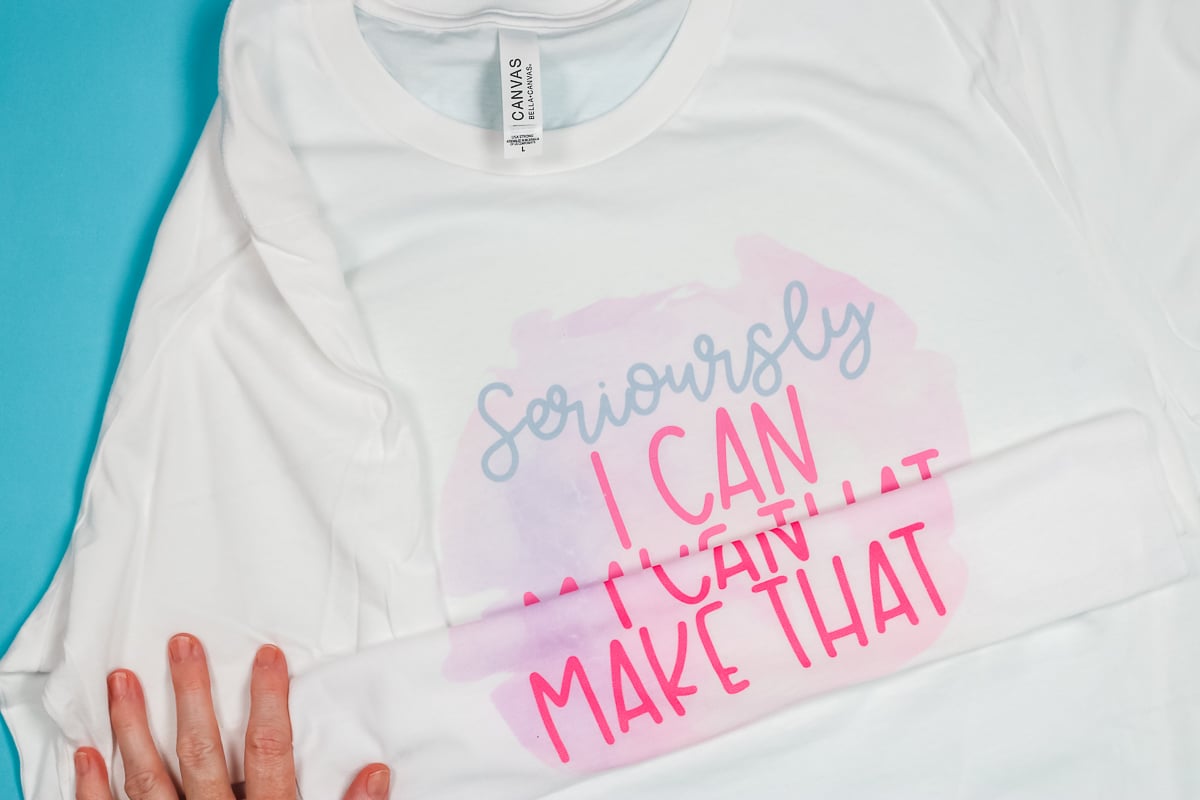
It is important to do this entire process correctly. In the photo below, I followed all the steps exactly on the top shirt and it looks really good.
With the bottom shirt, I did not apply heavy pressure and I did not do a cold peel. The bottom shirt is much lighter and has a more vintage look. I really do think you need to follow the instructions exactly in order for this product to work the way you would want.
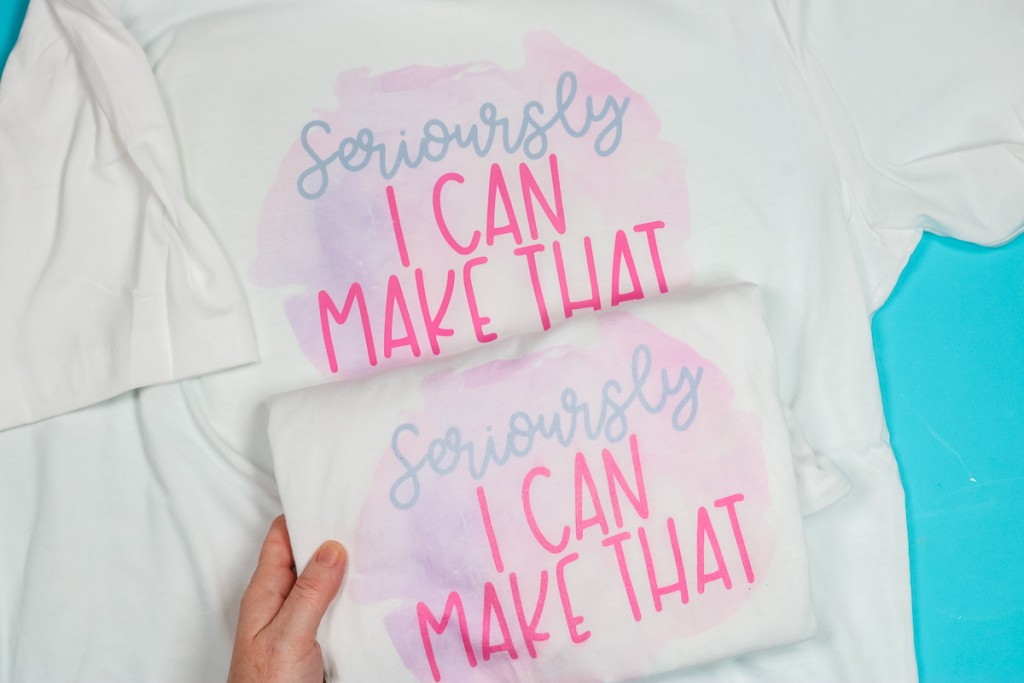
After you wash the 100% cotton BELLA+CANVAS shirt it will be completely soft just like you may be used to. I will say it does end up looking more like a 50/50 cotton/poly blend shirt when you sublimate on them. This gives it a more vintage look than how a 100% polyester shirt looks with sublimation.
This sublimation cotton spray states it will last up to 25 washes, it’s a long-lasting product but it does continue to fade a little as it’s washed.
Frequently Asked Questions about Sublimation on Cotton
Can I sell products made with GO Fuze Solution?
You can definitely sell items made with the GO Fuze solution. I do think you will need to wash the item before selling it so the fabric is not stiff or sticky. This will also help make sure your customers know that the shirt will have a more vintage look after washing.
How Do You Launder Shirts Made with GO Flex?
To help the design last as long as possible, you will want to wash it in cold water and hang it to dry. If you wash on warm or dry in the dryer, you may have more fading than I had here.
Can I Use GO Flex on Items that aren’t Shirts?
Yes, you can. You could use this solution on sweatshirts, dishcloths, socks, pillowcases, etc. It works on fabric that is 100% cotton regardless of if it is a shirt or not.
Final Thoughts on Sublimation Cotton Spray
If you want the sublimation look on cotton shirts, GO Fuze is the product to do that. I was impressed with how well the GO Fuze solution worked on my cotton shirt.
In the starter kit, the solution comes in a huge bottle. This size will definitely last for a lot of shirts. I’ve now made several samples doing tests for this post and this is the best product I have tried as far as sublimation spray for a cotton shirt and I have tried many of them.
With the GO Fuze, I was able to get a consistent look without any burn marks. With just one wash, I had the soft cotton BELLA+CANVAS feel to my shirt that I love.
I hope this has answered the questions you have about sublimation on cotton using GO Fuze solution. If you have any additional questions, leave them in the comments and I will answer those for you.
Want to print the process? Try the card below!
If you’ve ever wanted to add sublimation designs to cotton fabric, I will teach you the best products to use and how to turn your favorite cotton tee into a sublimated shirt.
Instructions
How to Use GO Fuze Solution
-
To begin we want to place the board inside the shirt. I did pre-press my shirt to remove any wrinkles from the area where I’m going to put the solution.
-
With the board inside the shirt, we want to elevate one end of the board a little bit. I placed my tape dispenser under one end so the board is up at an angle. This makes it easier to spray the solution onto the shirt since spray bottles don’t like to spray straight down.
How to Apply GO Fuze Spray to Cotton
-
We don’t want to waste the GO Fuze spray by using it on portions of the shirt that we aren’t applying sublimation.
-
To do this I like to use whatever design I plan to apply to the shirt. Take your print and lay it out on the surface right where you want the design. I am using tape to mark the corners so I have a rough idea of where I need to apply the solution. You can use the same pieces of tape over and over again.
How Much Solution Do I Apply?
-
You don’t want to apply too much or not enough of the solution. For a standard 8.5 x 11 sheet of paper, we will do 10 pumps. That’s 10 full pumps of the spray bottle they provide.
-
If you were doing a 16×20 area that would be 20 pumps. If you were doing a smaller area you would have to dial in the correct amount for yourself.
-
You want to spray inside the area you have marked and you want to make sure you shake it each time. Set your spray nozzle to the mist setting, not the stream setting.
-
I really want to stress that you want to make sure you spray over the whole area you want to sublimate onto. If you miss the area and then sublimate onto that portion you would have the same result as if you had sublimated onto untreated 100% cotton.
-
I like to do my 10 pumps left to right, top to bottom, and then a couple of extra pumps right into the middle of the area because my design will be mostly in the middle of my marked area.
-
Note – you do not add anything to the GO Fuze solution, you just take it from the large bottle and put some into the spray bottle and remember to shake it up really well.
How to Press GO Fuze Into Cotton Fabric
-
Once the whole area has been sprayed use the roller that came with the starter kit and start rolling over the surface.
-
We want to have the board inside because it gives us a firm surface that we can press against to get the solution into the fabric.
-
I am using pressure as I roll over the area. If the solution goes outside the tape marks that’s totally fine, you just want to make sure the area inside the tape marks is all covered.
-
Roll over the whole area both up and down and side to side pressing down as you roll.
-
The roller will help make sure everything is evenly applied over the entire surface and as you’re pushing down you’re pushing the solution down into the fibers of the shirt.
How to Apply Sublimation on Cotton Fabric
-
Now that we have our cotton shirt prepped with the GO Fuze solution we can remove the tape markers (you can reuse the tape until it loses its stickiness).
-
I have my heat press heating up to 365 degrees. GO Fuze calls for 335 to 365 degrees, depending on your setup.
-
Once my heat press is up to temperature I close it for about 30 seconds to preheat the base. Once the 30 seconds is up I am going to open it.
-
This process requires medium to heavy pressure. I found that the Auto Press doesn’t do as well as my regular heat press and I don’t know that you can apply enough consistent pressure using the EasyPress.
-
First, we need to dry the solution. I am going to thread the shirt onto the heat press so just the front of the shirt is on the heat press. You do want to add protective paper between the shirt and the heat plate and another sheet of protective paper on top of the shirt. Then add the piece of polyester that came with the GO Fuze kit on top of the paper.
-
Now we’re going to close the heat press, without the sublimation print on the shirt. This is to dry the solution for about 15 seconds. During this step you will likely see some steam, that is the moisture we want to leave the shirt.
-
Next, we are going to open the heat press, and remove the polyester, and the paper. The fabric may still be a little moist at this point so I am going to let it cool for about 10 seconds or so and let that moisture evaporate. This step will make sure we don’t get any ghosting with our sublimation print.
-
First, we’re going to dry the solution, and that’ll be about 15 seconds. Next, we’re going to add the sublimation print and sublimate, and that’ll be 70 seconds. So my heat press is heating up, so let’s head there and finish the shirt.
Sublimating Designs onto Cotton
-
At this point, the process is similar to a regular sublimation project.
-
Lint roll the surface to make sure there’s no lint on the shirt itself. Keep the protective paper under the shirt and then add the sublimation print, sublimation ink side down located into place with heat-resistant tape.
-
Add the protective paper on top of the sublimation print and then add the polyester cloth on top of the protective paper.
-
Close the heat press and press with medium to heavy pressure at 365 degrees for 70 seconds.
Removing Sublimation Print from Cotton Shirt
-
This product is a cold peel product. When the time is up open the heat press and you can remove the polyester and protective paper but you want to wait to remove the sublimation print until everything is cool.
-
I removed the shirt from the press and set it aside. You could actually press another shirt while this one cools.
-
Once it is completely cool we can peel back the design. Any press marks that you might see will go away as soon as you wash the shirt since it is 100% cotton.