This post and photos may contain Amazon or other affiliate links. If you purchase something through any link, I may receive a small commission at no extra charge to you. Any supplies used may be given to me free of charge, however, all projects and opinions are my own.
If you’ve ever struggled to line up HTV or sublimation designs, this article is for you! Today I am going to teach you my t-shirt design placement tips and tricks to ensure perfect placement every time.
We’ll look at how to use different placement guides and rulers along with how to align a design without those tools.
If you’re just getting into HTV and Iron-on, my How to Use Iron-on Vinyl tutorial is a great place to start.

T-shirt Design Placement
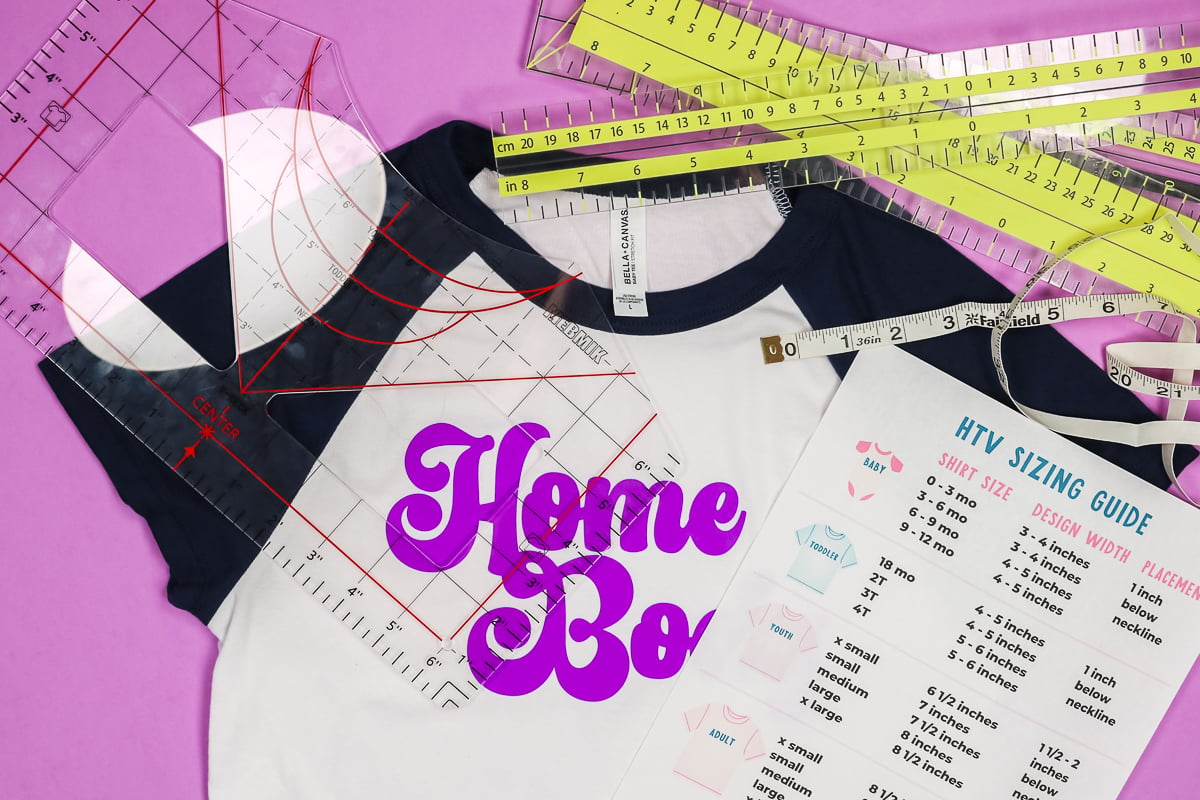
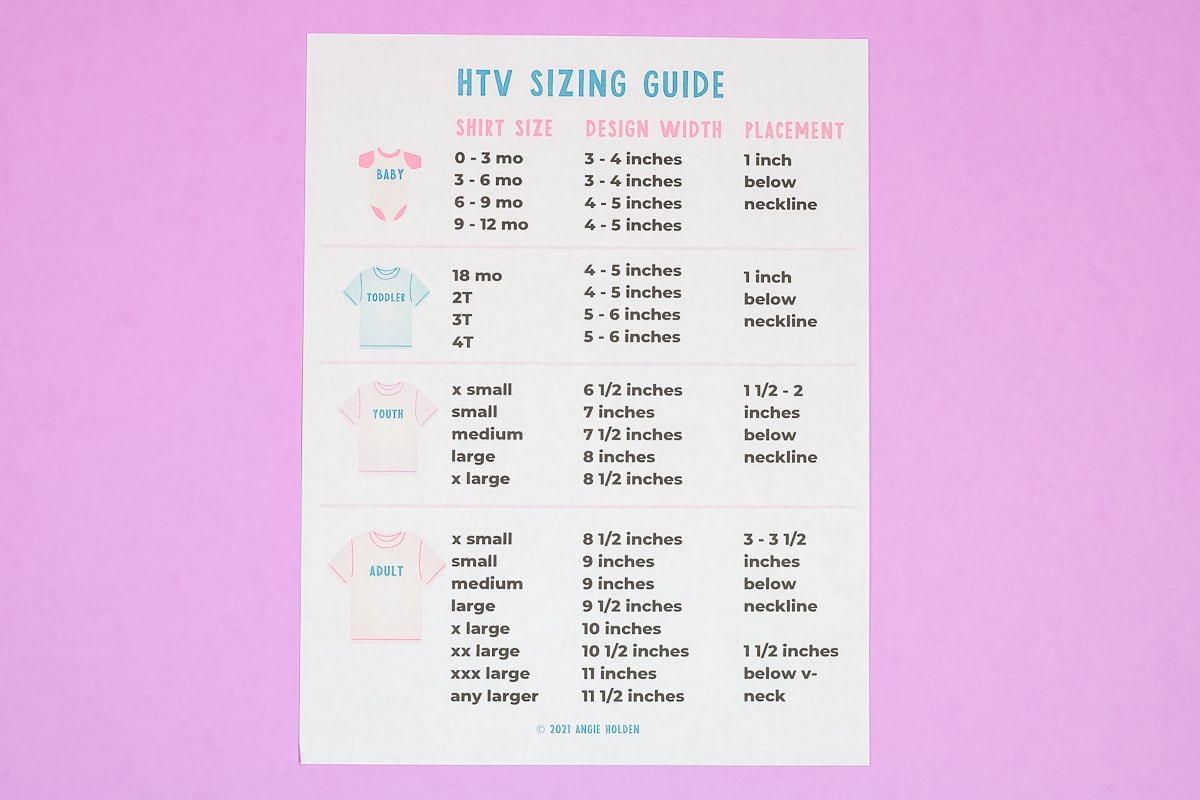
When it comes to t-shirt design placement my HTV sizing guide is a great place to start. You can get my sizing guide and HTV Use Guide to help you when you’re creating customized shirts. This sizing guide isn’t just for HTV. These guides are great for sublimation shirts as well.
Get your placement guide here!
You can watch me go through all my tips and tricks for t-shirt design placement using rulers, guides, and even just eyeballing it by clicking play on the video below.
After years of creating SVG designs and customized t-shirts, I have a lot of recommendations to share that will help you perfect your t-shirt making process.
Supplies Needed
After reading this entire article you can decide which combination of supplies you want to use to create your own custom tee. Today I’m using a variety of different Bella+Canvas apparel pieces. I love their t-shirts, especially their new line of baby tees with jersey sleeves. I am also a huge fan of their fleece, it’s so comfy and soft and it washes up wonderfully.
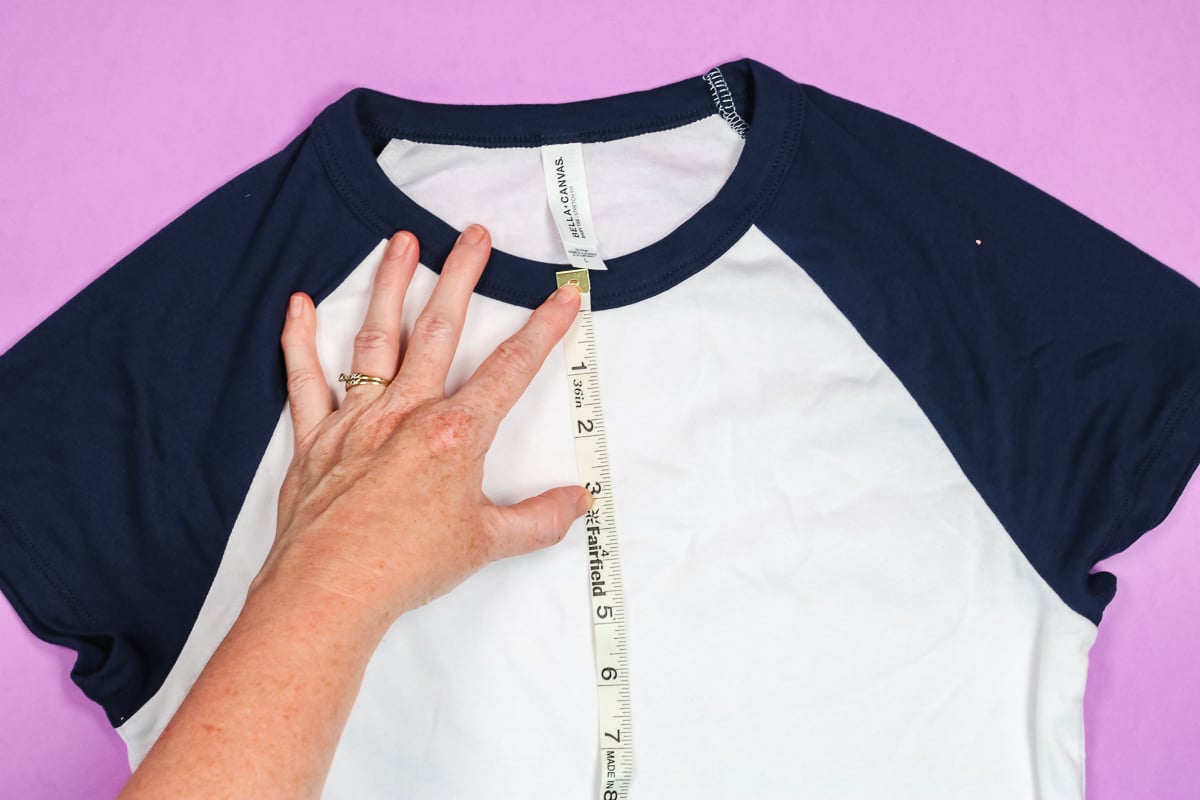
How to Measure Your Apparel
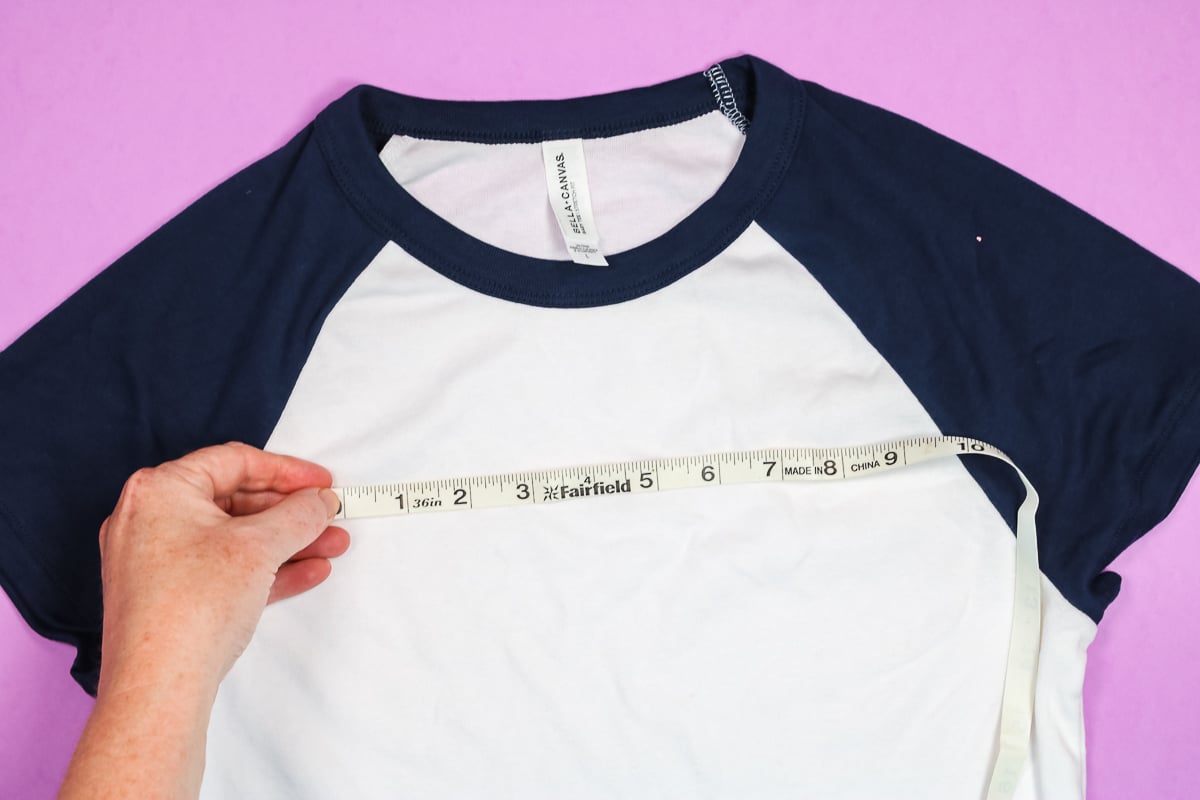
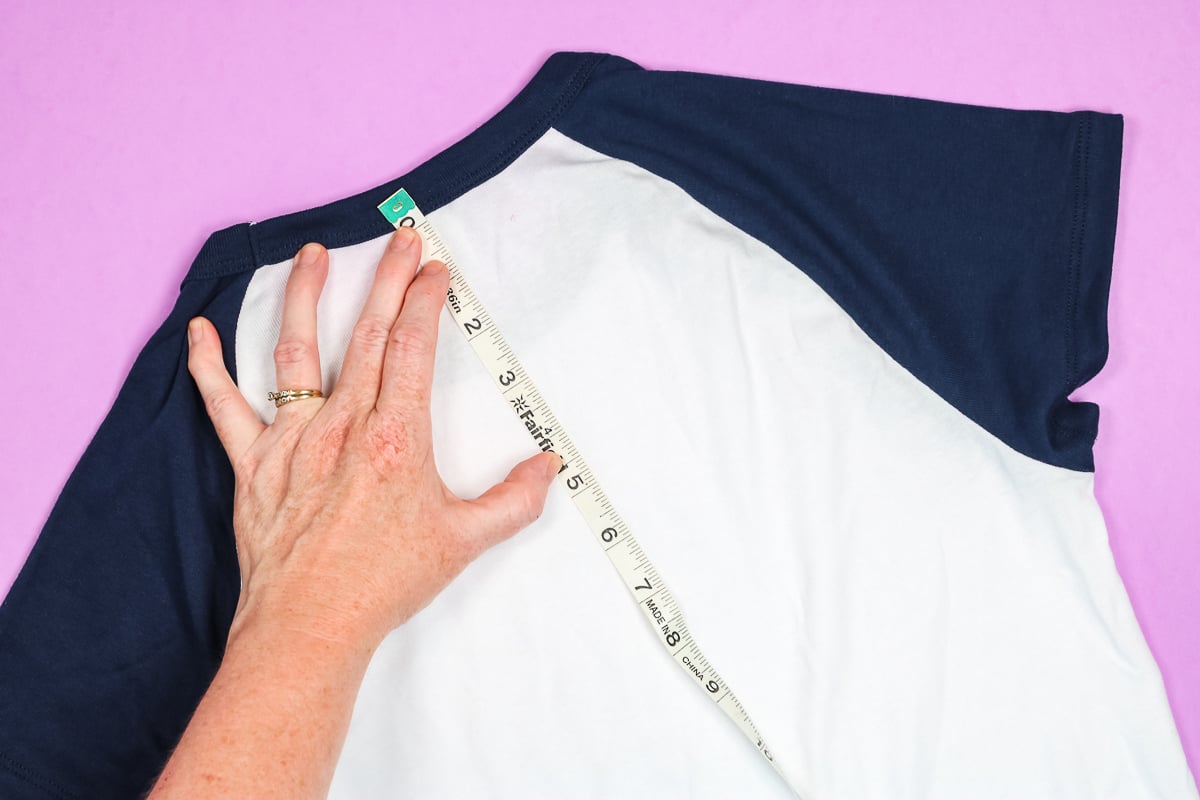
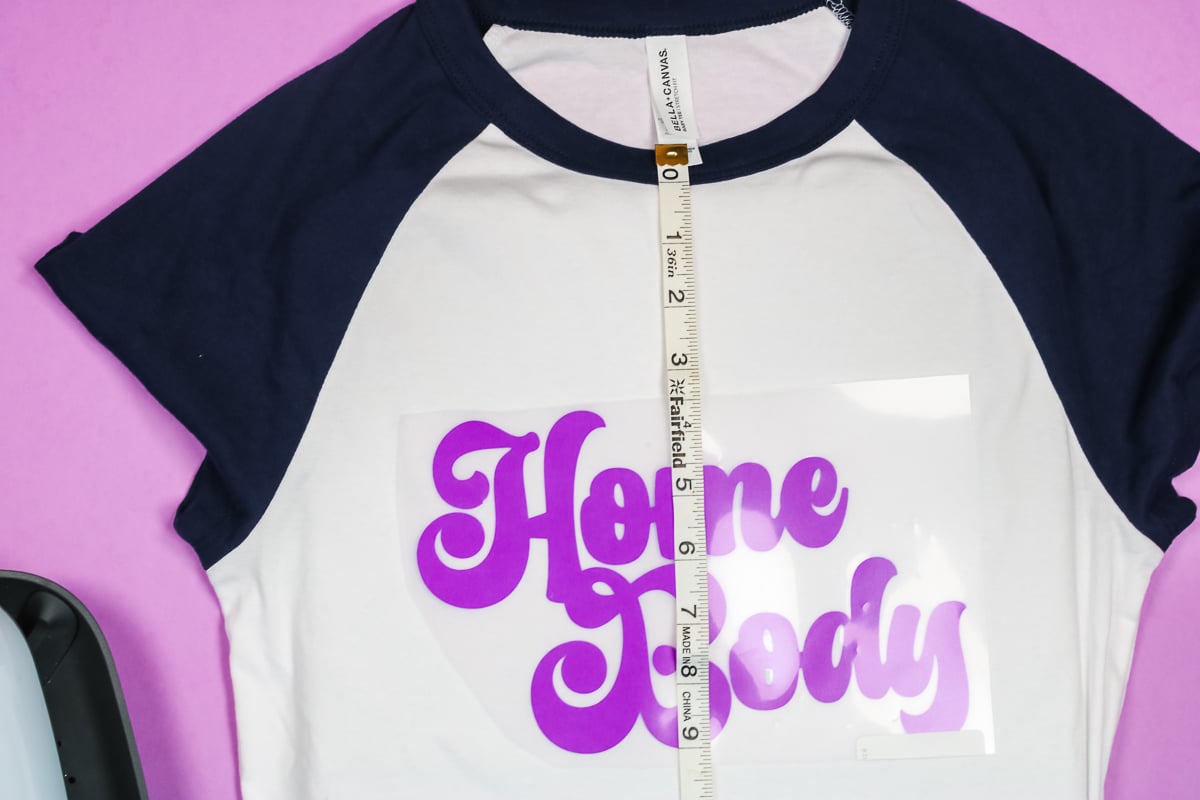
Before we begin we want to measure the shirt we’re using. I am using a flexible tape measure to help me measure the design area vertically and horizontally.
My HTV sizing guide is a great place to start when it comes to design placement. I do want to say that the size guide is just a guide. Sometimes, if your shirt is different than a standard t-shirt you’ll need to adjust the placement.
For example, this size large t-shirt is only about 10.5″ across 3″ below the neckline. If I cut out my design at 9.5″ wide it will be very close to the darker area and look oversized.
Size and placement are also a personal choice and can change depending on the design. I always begin by measuring my shirt, especially if the shirt has a different cut than a regular tee.
When it comes to the back of the shirt I recommend placing your design 3.5 – 4 inches down. You may choose to adjust the placement depending on the shirt and design. When you have the measurements of your shirt and design, it’s time to decide on the placement.
Manual T-shirt Design Placement
For my first example, I am using the Bella+Canvas Baby Tee. I’ll be placing my design without using any tools. I call this manual t-shirt design placement.
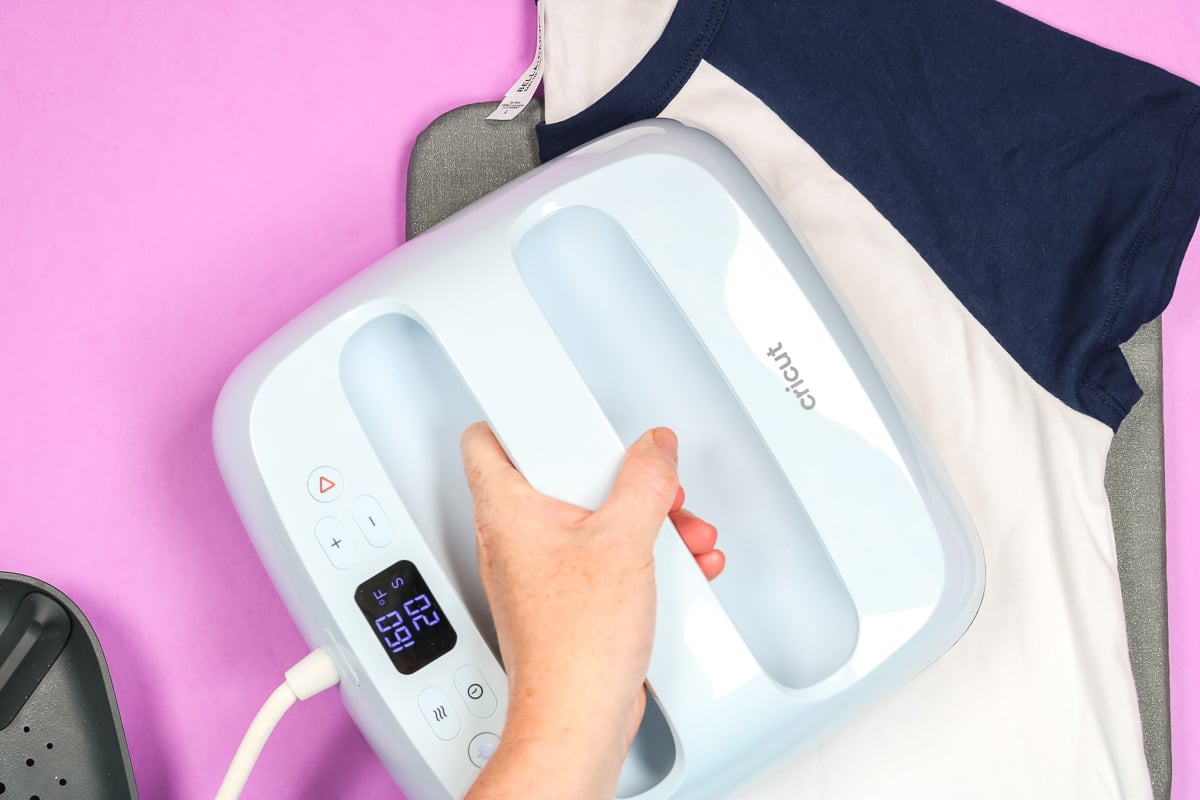
I am using my EasyPress 3 to create the centerline on my shirt. To do this, first, fold the shirt exactly in half. Heat your EasyPress to the correct temperature for the HTV and fabric. Then preheat the shirt on both sides while it’s folded.
This will remove moisture from the fabric and give you a line that runs right down the center of the tee.
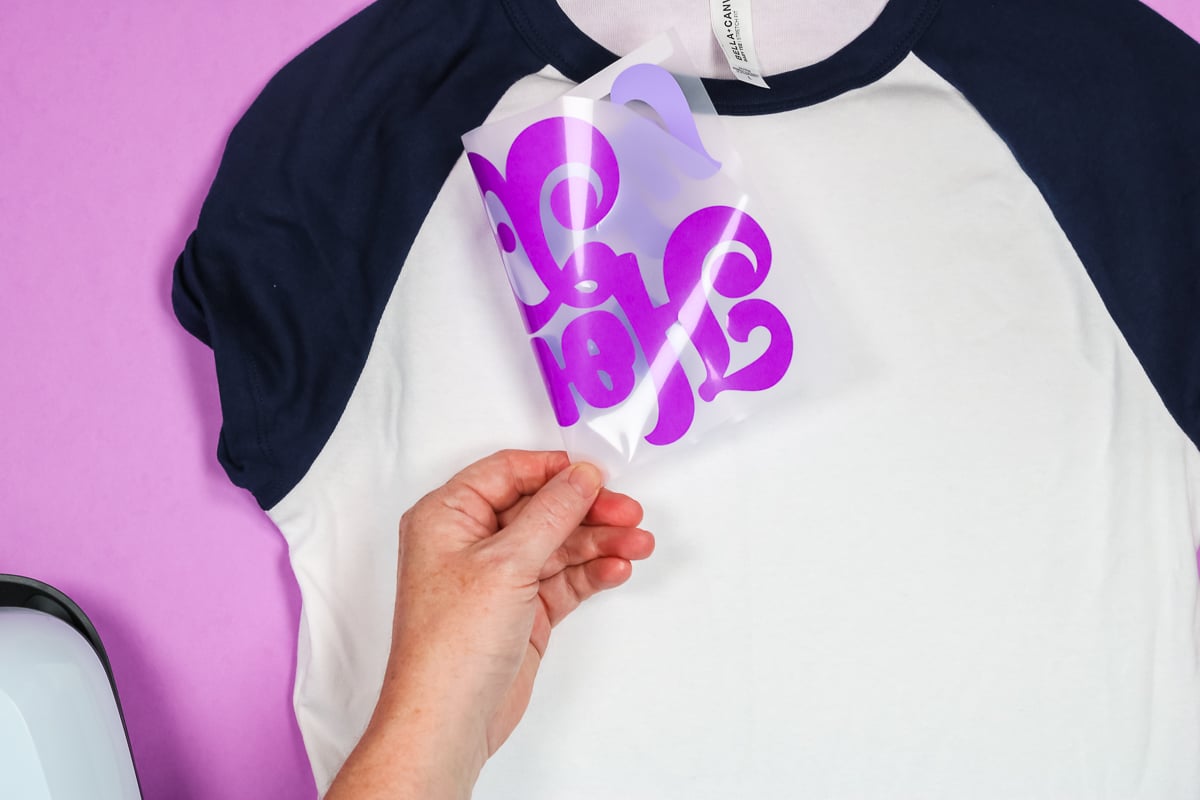
When you unfold the t-shirt, you’ll see the line. In order to make sure your design is also centered, fold the HTV in half and crease the top and bottom of the carrier sheet.
IMPORTANT: Don’t crease the HTV itself! Only crease the carrier sheet!
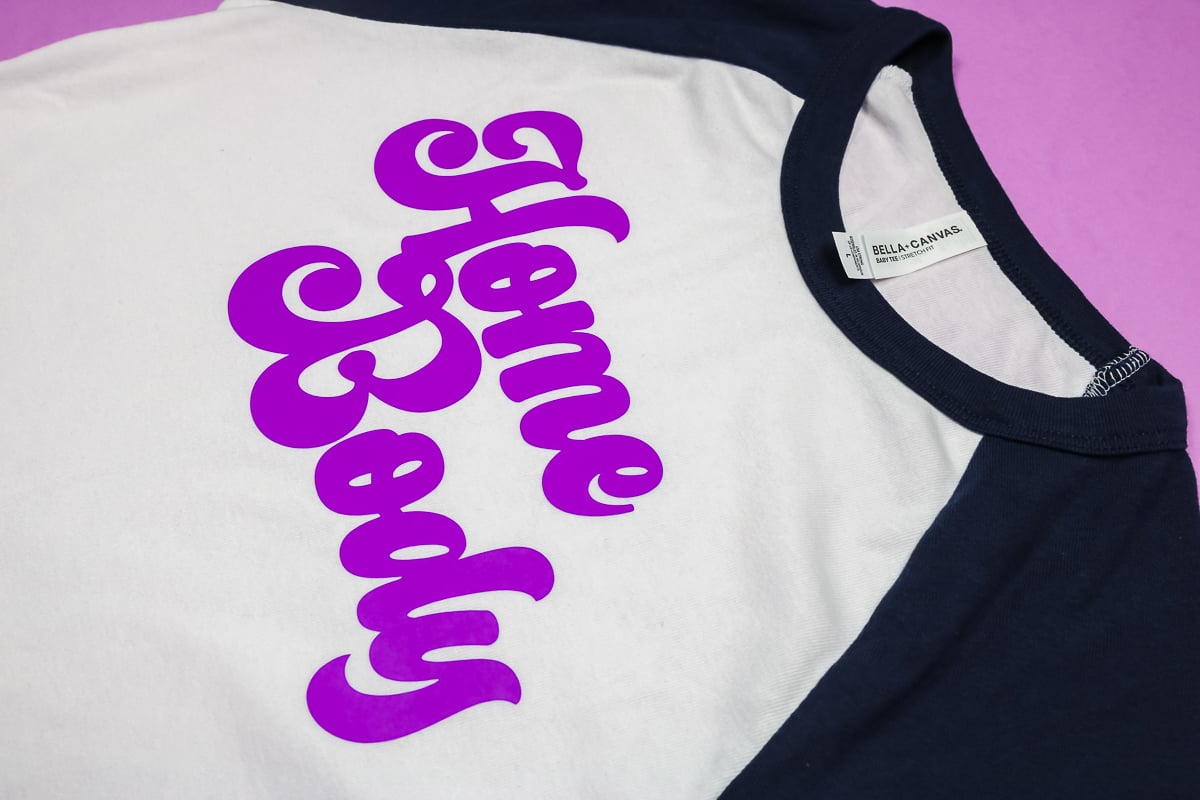
Make sure you’re finding the true center of your design. For example, with the Home Body design the H in home and Y in body are on different lines. You need to align the outer end of both of those letters and then crease the carrier sheet.
How Far Down Should You Place Your Design?
Here is an example of when a design doesn’t work with the size guide.
If I place this particular design with the top of the H at 3.5″ down from the collar, the entire design will be placed in the middle of the t-shirt, right on the belly. That would not look right.
For this design, we’ll need to make some adjustments with the placement.
Checking Manual Design Placement
Now that we know 3.5″ down is too far, we can move the design up to see where we like it best. We still need to make sure that our center marks on the carrier sheet line up with the centerline we made on the t-shirt.
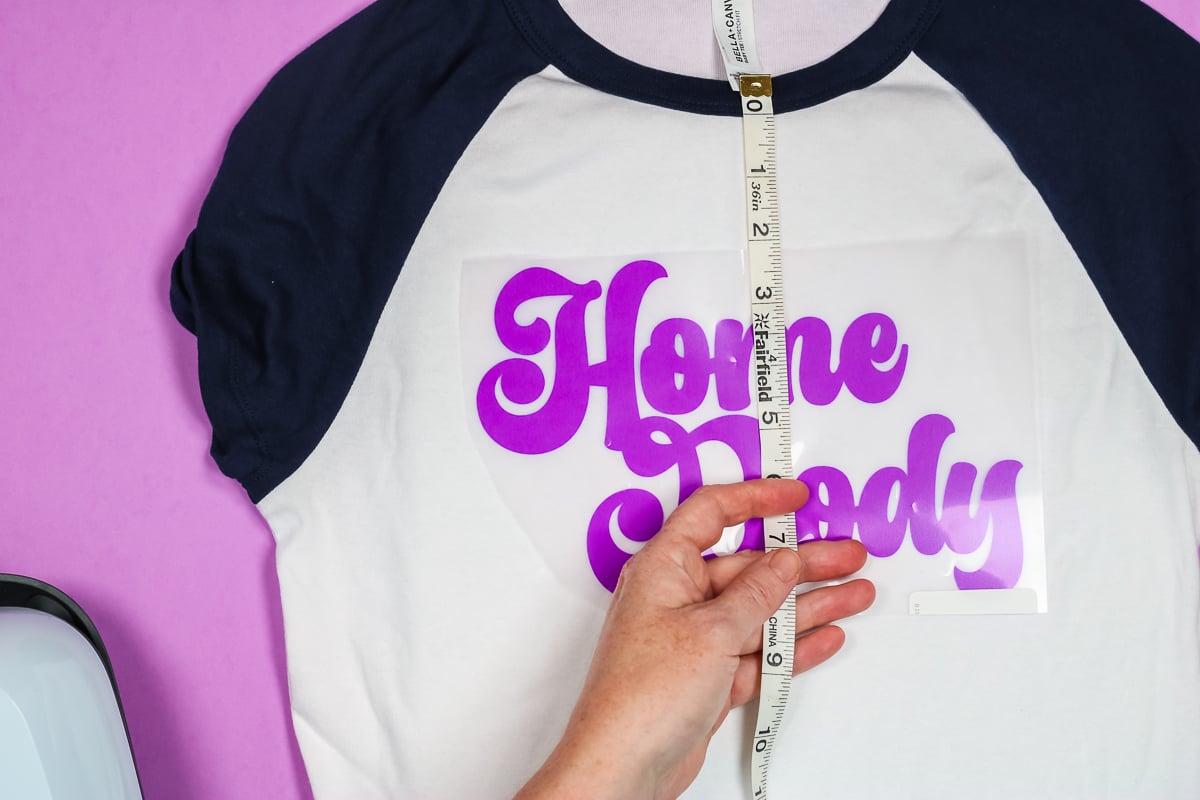
I like how the design looks on this shirt with the top of the H about 2-2.5″ down. While I have the centerline and center marks on the carrier sheet, I still like to measure the layout to confirm it’s centered.

I have to admit I am not great at eyeballing design placement on t-shirts. I tend to check and double-check the placement to ensure everything is centered.
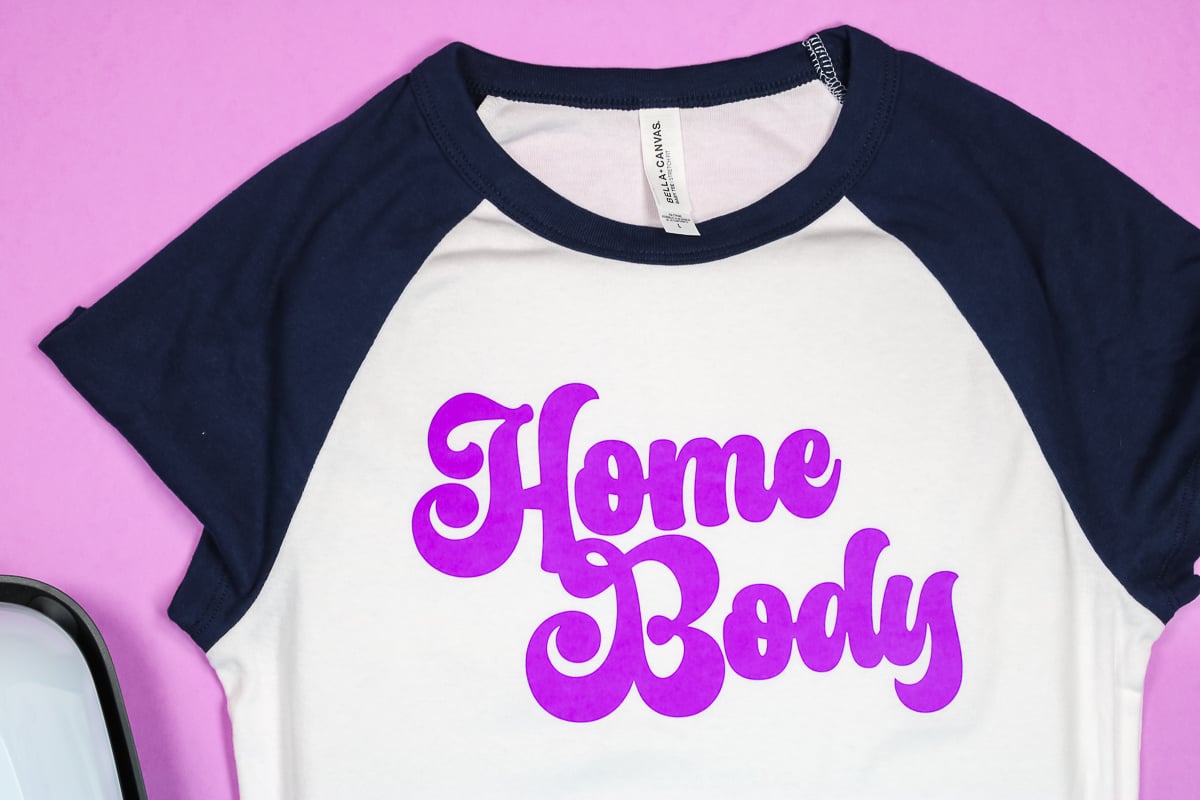
Press the design for the time and temperature the HTV calls for. If you’re using Cricut HTV, the Cricut Heat Guide will give you the time and temp. When you’re done, peel back the carrier sheet and reveal the design.
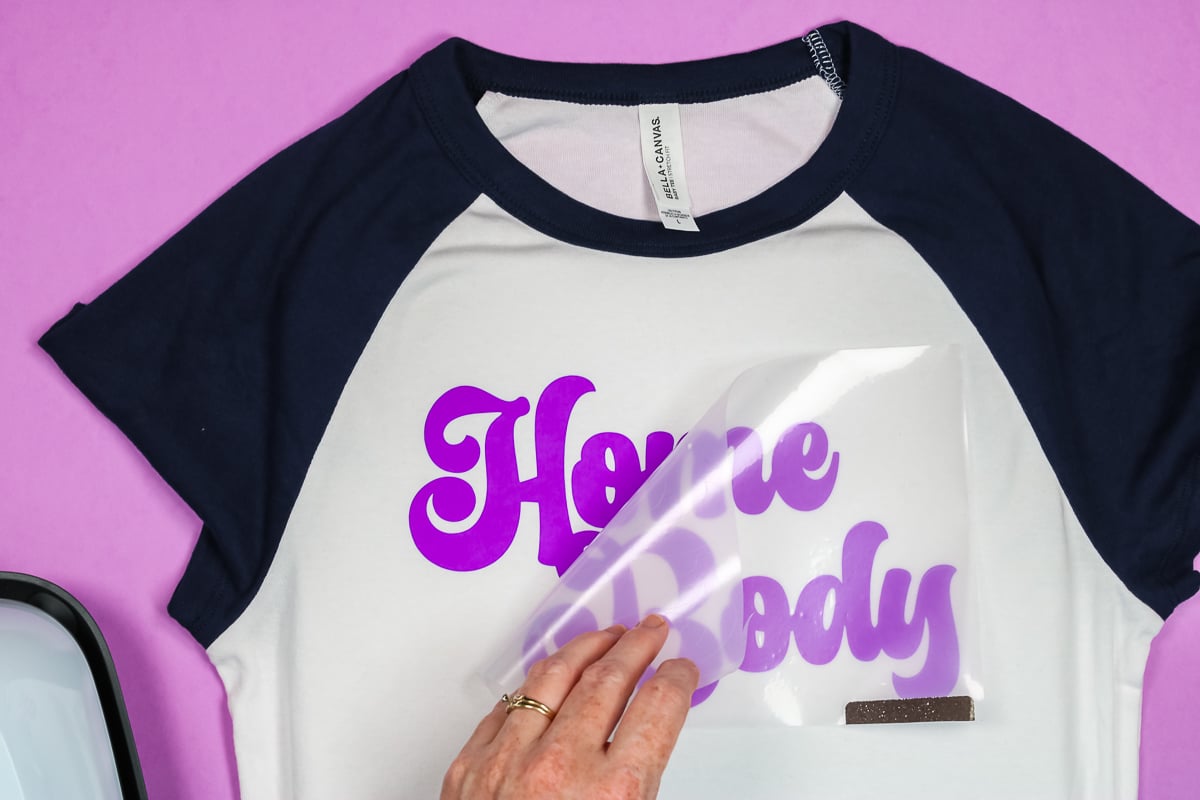
I am very happy with the placement of this design. Without using any special rulers or guides, I was able to get the placement perfect for this t-shirt and design.
Adding HTV Designs to T-shirt Pocket Area
For our next t-shirt, we’re going to add a small design to the left pocket area of a standard t-shirt. To find the right placement for my pocket design, I am going to use my EasyPress again to create a line.
For pocket designs, we want to line the bottom of the design up with the bottom of the armpit. Fold the t-shirt at the armpit seam and using the EasyPress, preheat the shirt and give yourself a fold line.
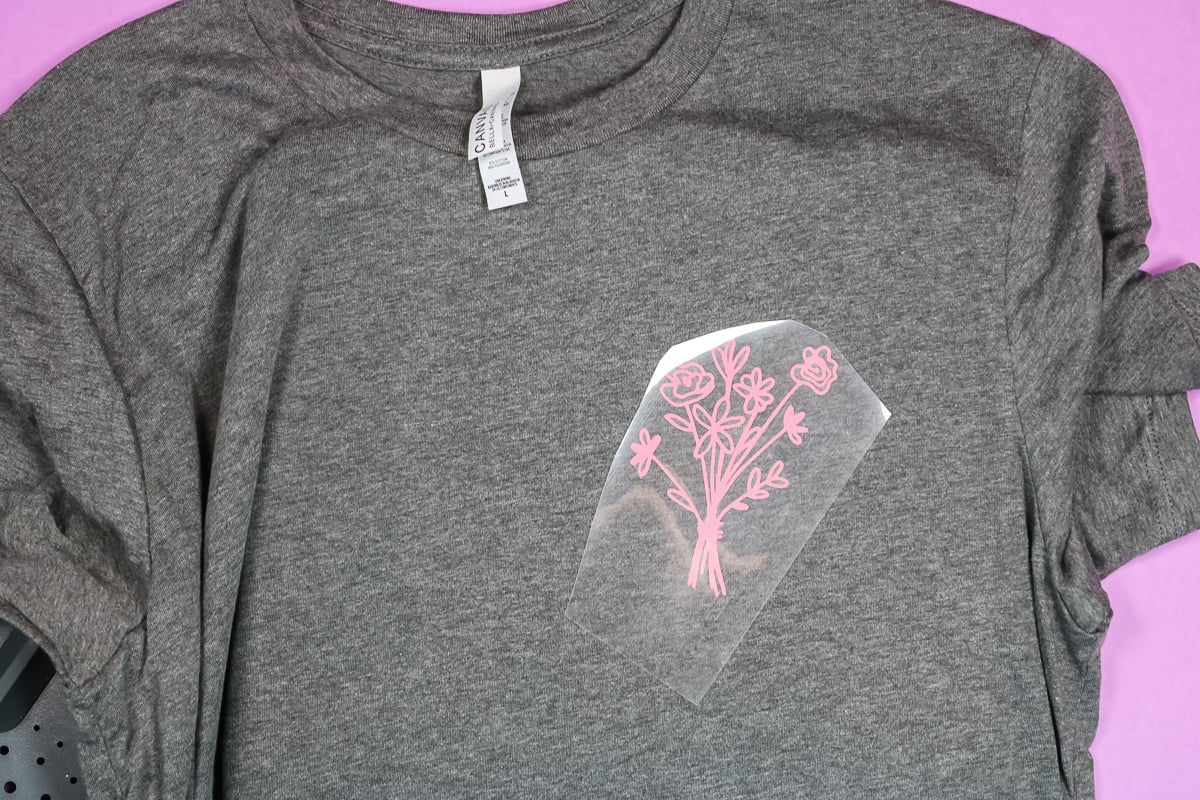
This design can be placed straight up and down or tilted. I like it a little bit tilted.
Now that we know how far down the design should be we need to figure out how far over it should be placed.
For designs like this, I use the edge of the neck seam and line it up with the middle of the design. If your design needs to be exactly straight, you can fold the shirt at the edge of the neckline matching up the bottom hem and press again to create another pressed line.
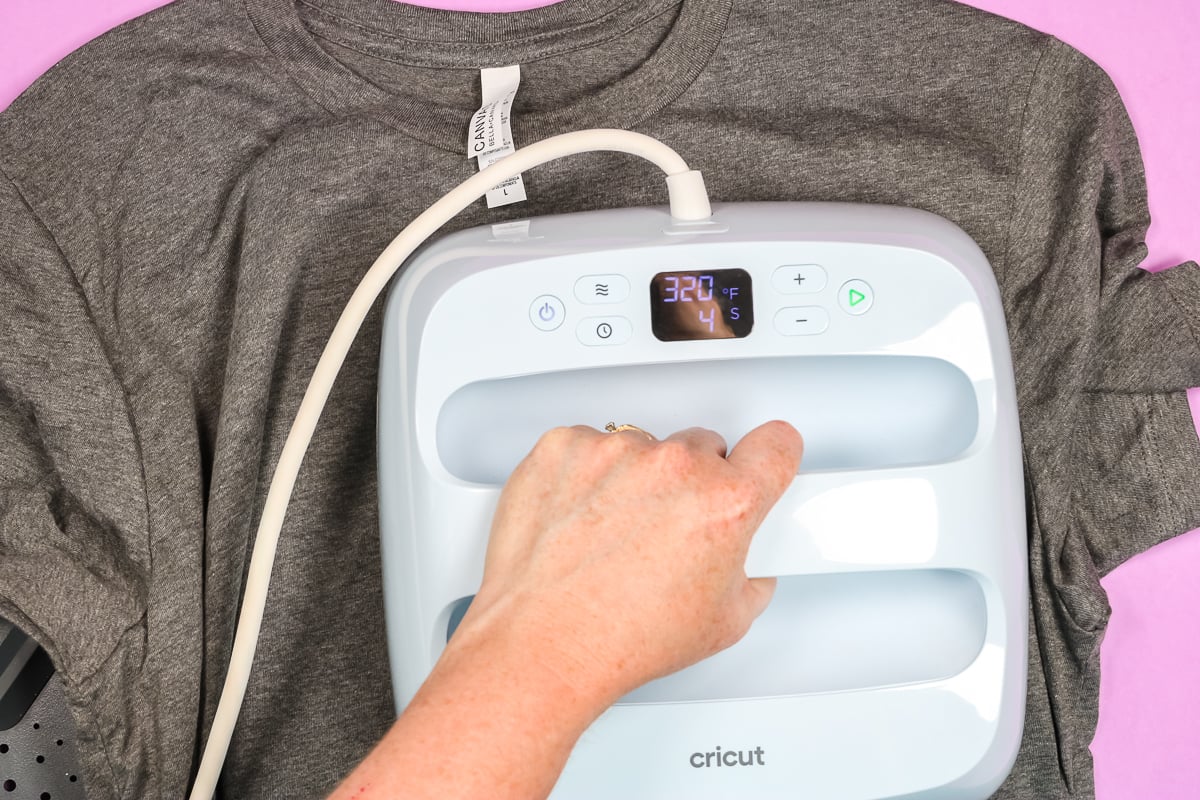
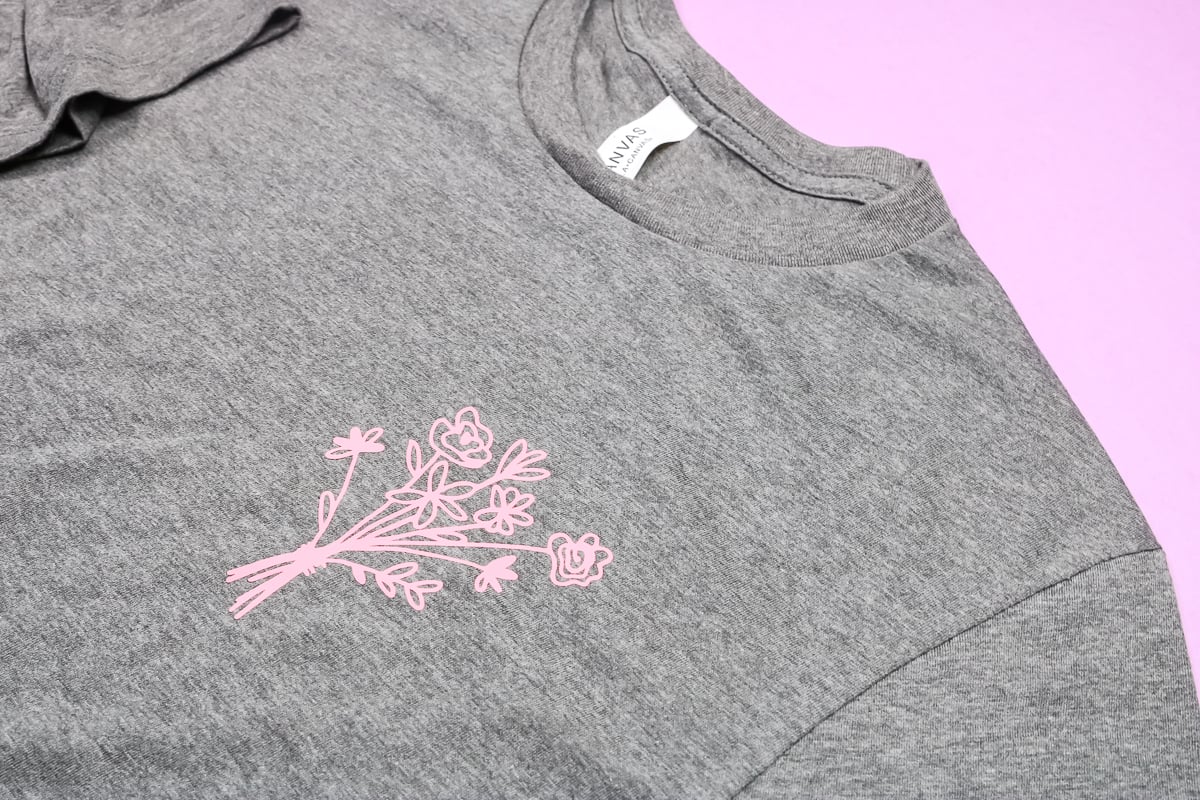
When you have your design placement right press for the correct time and temp and then remove the carrier sheet. Now we have a finished t-shirt with a perfectly placed pocket design!
How to Use a T-shirt Ruler for Design Placement
If using a regular flexible measuring tape and EasyPress to mark your lines isn’t working for you, you can try a t-shirt ruler. I really like this particular ruler because it is nice and firm. It can’t be bent or twisted which means it keeps its shape.
If you look closely at this ruler, you’ll see it has different guides depending on the type/size of shirt you’re using. This ruler has markings for Adult, Youth, Toddler, Infant, and V-neck shirts. There are markings for the centerline, top, bottom, and both sides.
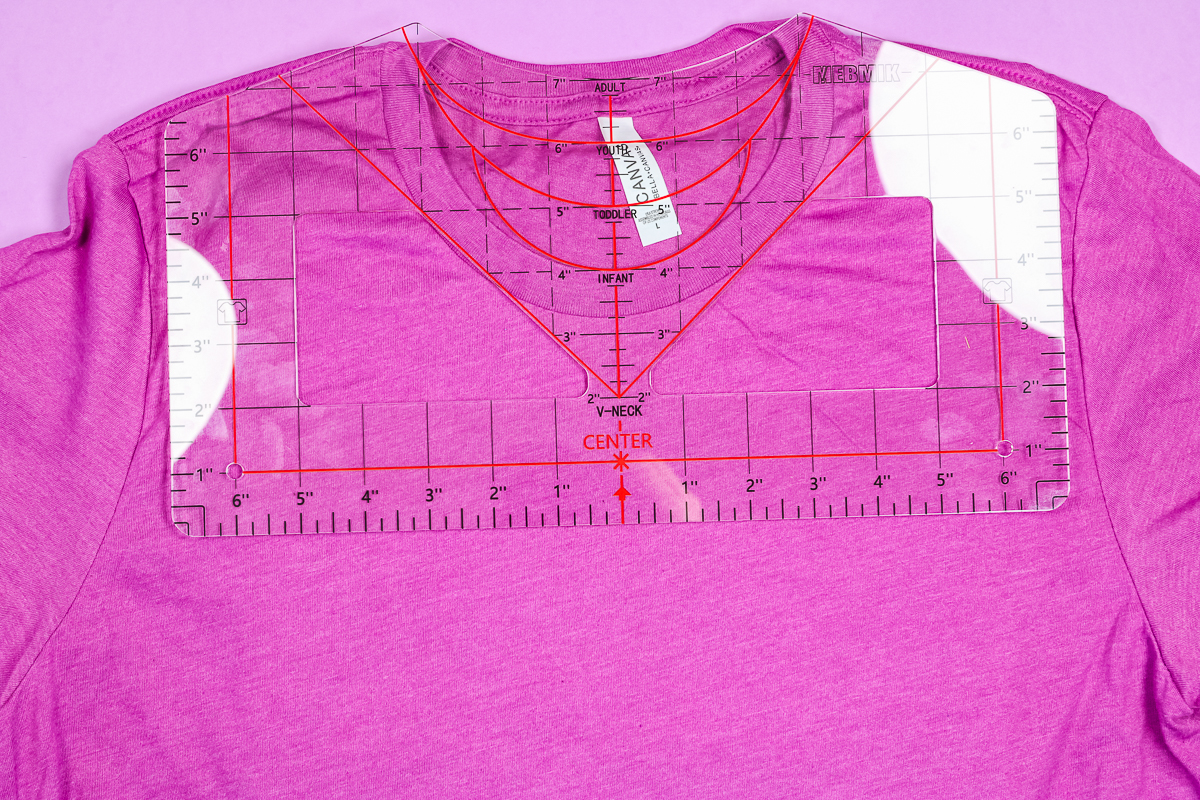
Using my t-shirt size guide, a size large adult t-shirt should be 3-3.5″ below the bottom of the collar.
I did crease the carrier sheet of my HTV design to give me a centerline to line up with the ruler.
You want to make sure you pre-heat your shirt before adding the ruler. That way, when everything is lined up you don’t have to move anything.
How to Adjust Placement for Large Designs
The design I’m using is a large design. This is a time when it makes sense to adjust the t-shirt design placement. If I place this design 3″ down from the collar, the bottom of the design will be really low.
I moved the design up and now it’s about 1-1.25″ below the bottom of the neckline. This placement looks much better. The design is centered on the tee and doesn’t look too high or too low.
With the design in the correct place, use the EasyPress to apply it to the t-shirt. My design is larger than the EasyPress plate so I had to press it in 4 different sections. Make sure you press each section for the full pressing time.
Allow the design to cool as long as the material calls for and then peel back the carrier sheet.

You can see the design looks great and is centered really well.
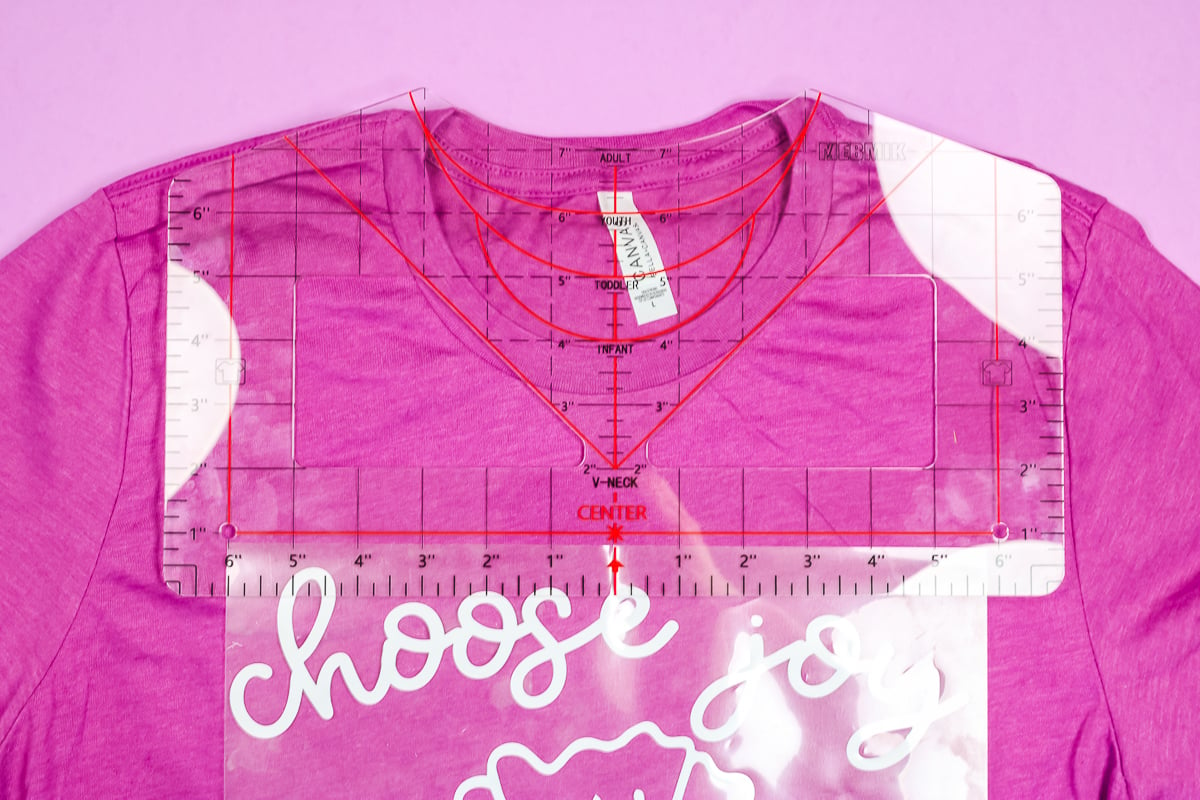
How to Use 3 Piece Alignment Ruler for T-shirt Design Placement
For my last project, I’m going to try this 3 piece alignment ruler. This ruler is different than the one I showed before. Let me show you how.
First of all, the ruler comes in 3 pieces. In the middle is the vertical piece. You’ll line the middle of the top of that ruler up with the middle of the collar.
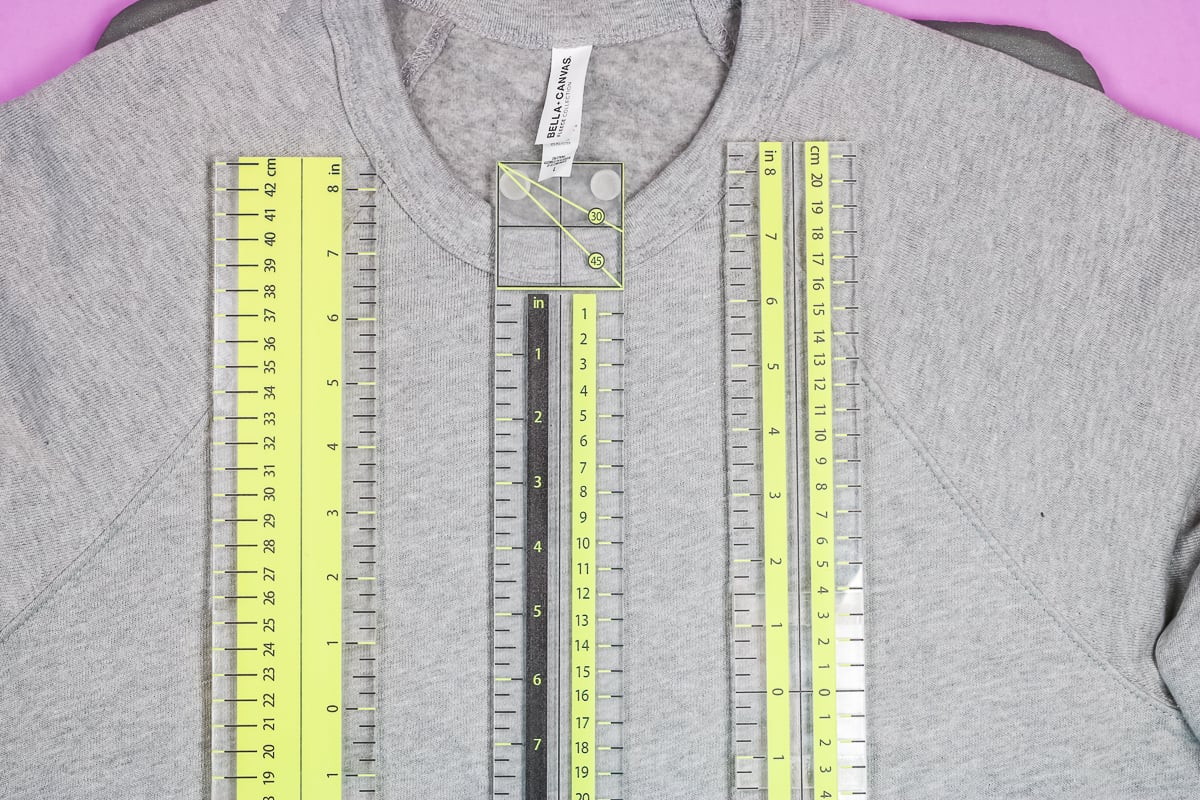
The next piece is the top horizontal piece. You can see it has more yellow than the other pieces.
This piece snaps into place at the top of the vertical ruler. You can use this top ruler to help find the centerline.
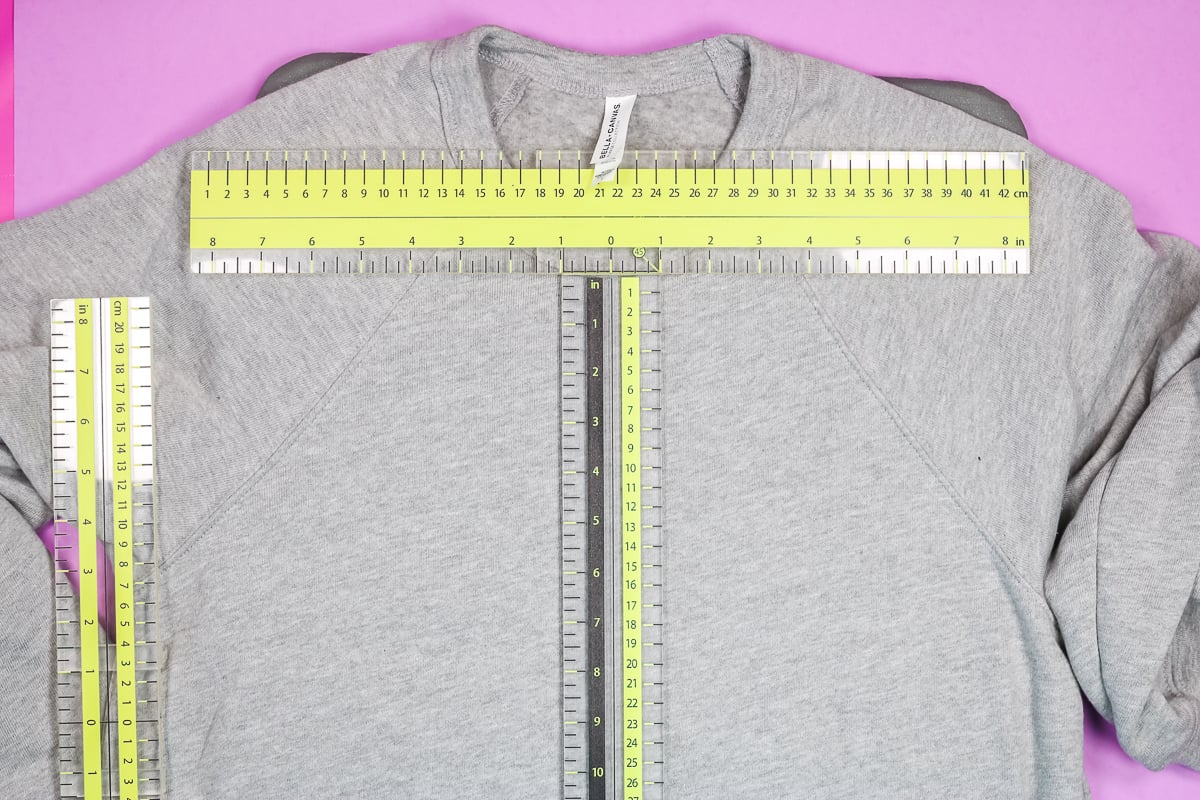
The last piece of this ruler is the bottom horizontal ruler. This ruler slides up and down the vertical ruler. All of these pieces have both inch and centimeter markings. With all of the pieces put together, we can add the HTV design to the shirt.
The vertical ruler has feet on the bottom side. This allows the ruler to sit up off the shirt a little. I like that this allows me to slide the design under the ruler without moving the ruler.
I can lift the bottom of the ruler a little and then slide the HTV under it. Now I can make adjustments to the placement without having to move the ruler.
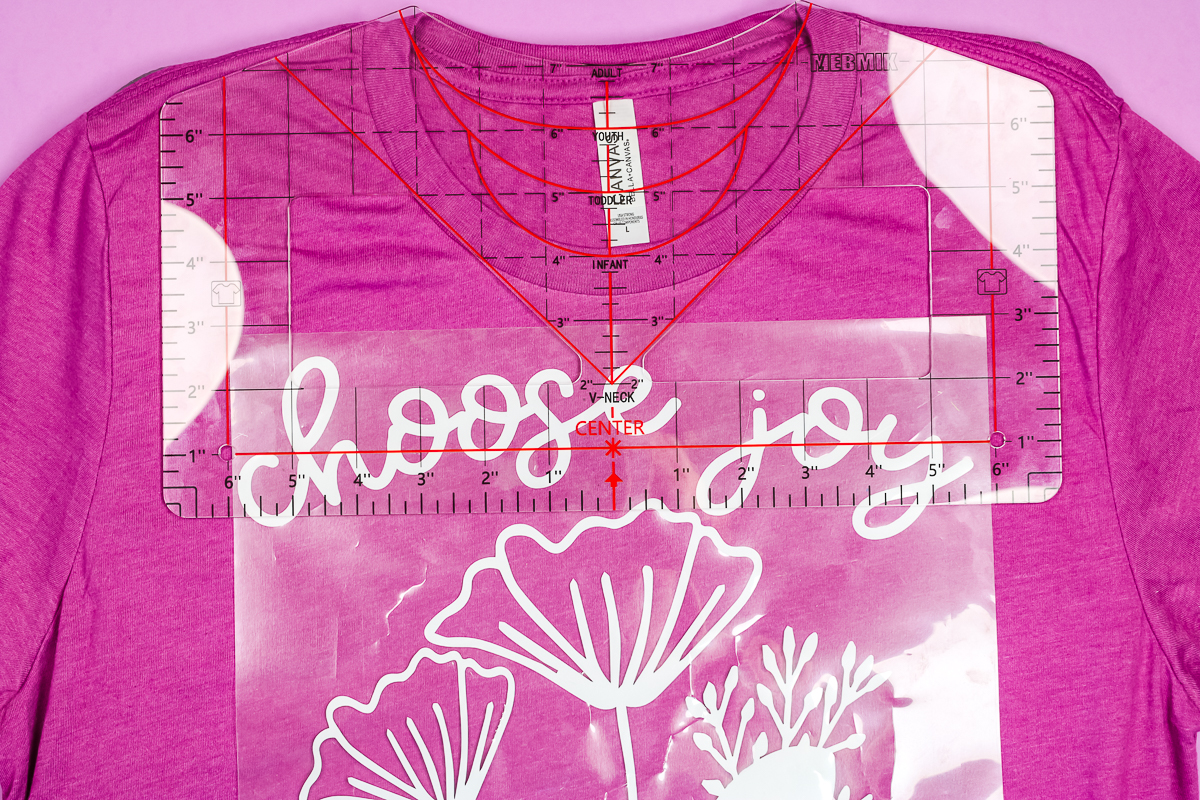
How to Make Sure T-shirt Design Placement is Straight
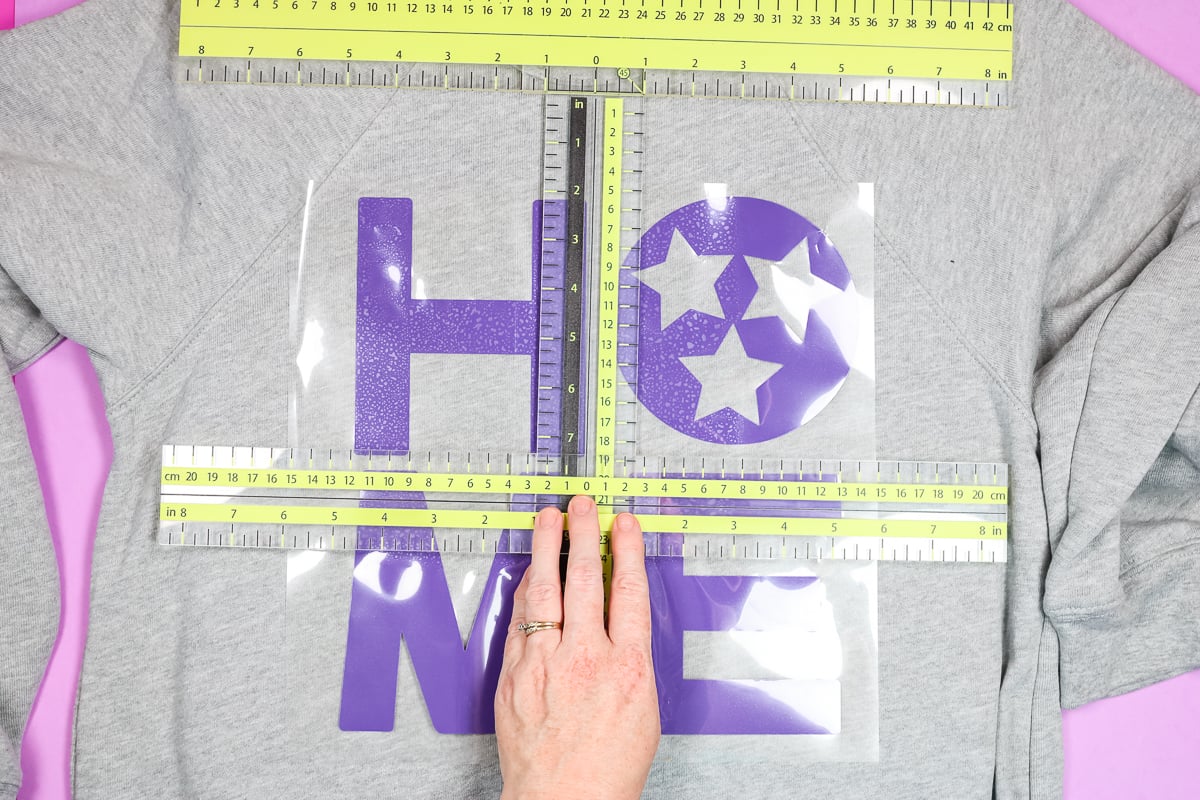
One of the things I really like about this ruler is that it gives me the ability to check if my design is straight in multiple places.
The vertical ruler will tell me if the center crease marks in my carrier sheet match up with the centerline of the ruler.
The top horizontal ruler helps align the vertical ruler and the slider ruler moves which allows you to check if the design is straight in multiple places.
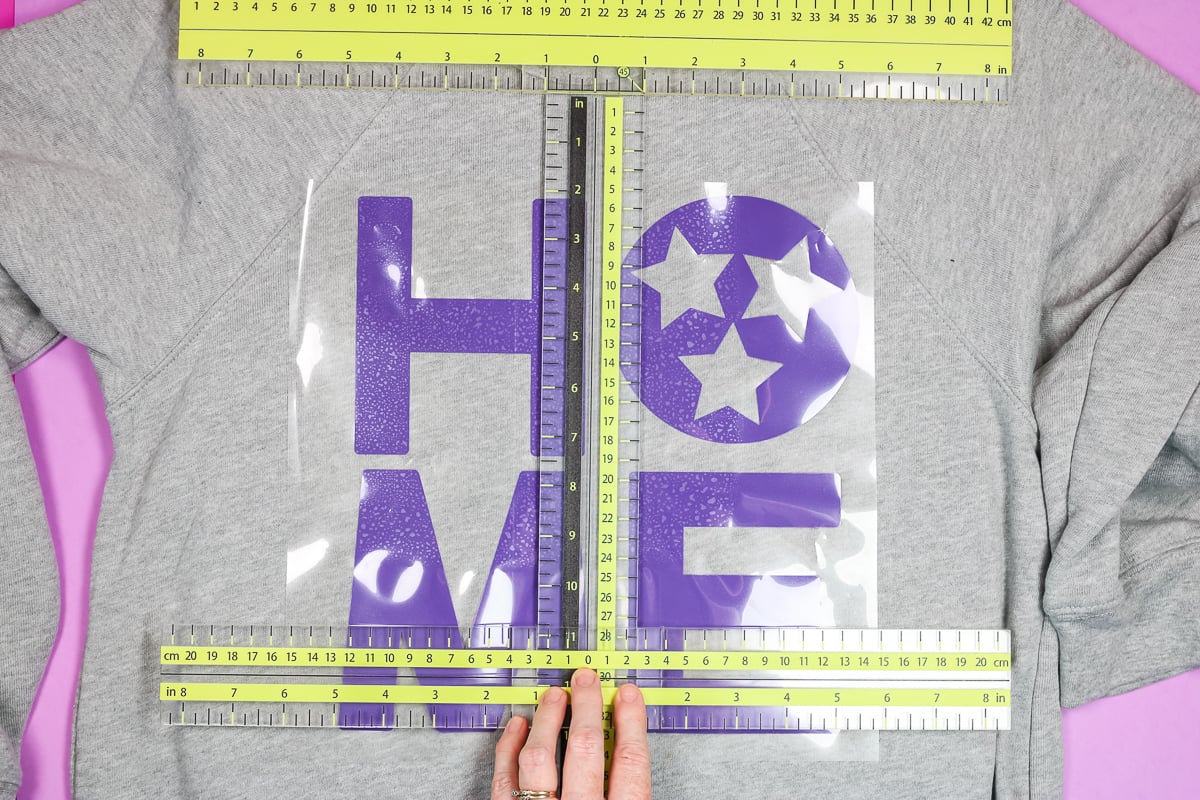
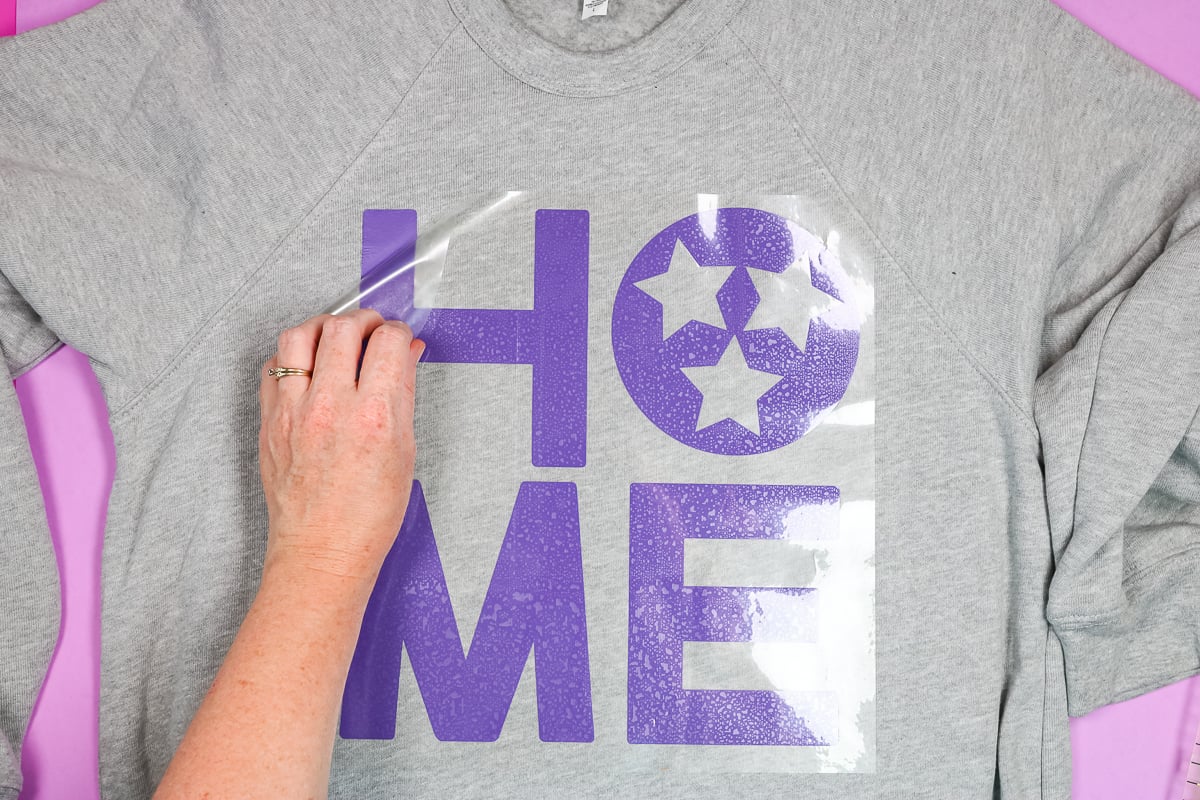
This design is a perfect example of why we need to measure in multiple places. When I measured at the top, the top of the O was a little higher than the top of the H. If I only measured there, I would have adjusted the design.
I slid the ruler down to the bottom of my design and the bottom of the E and M are lined up perfectly.
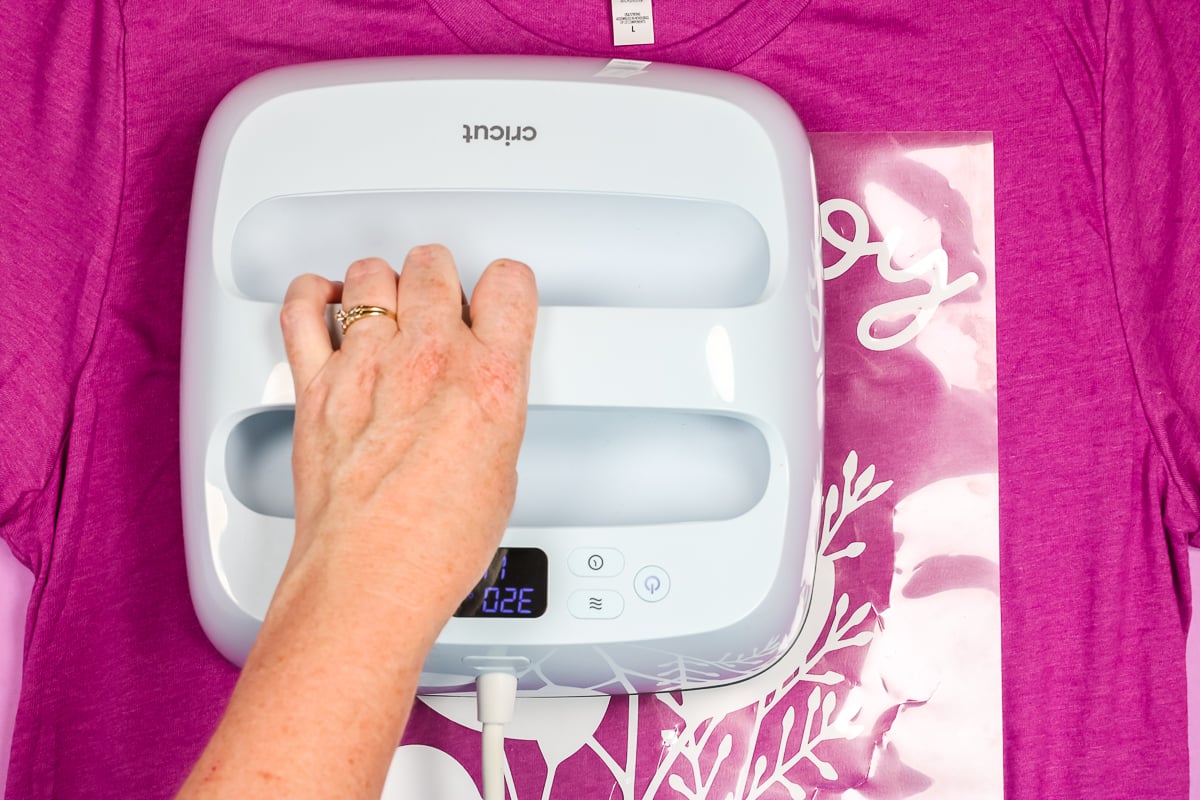
This design is straight, the O is just slightly taller than the H. Now I can use my EasyPress to press the design onto the fleece sweatshirt.
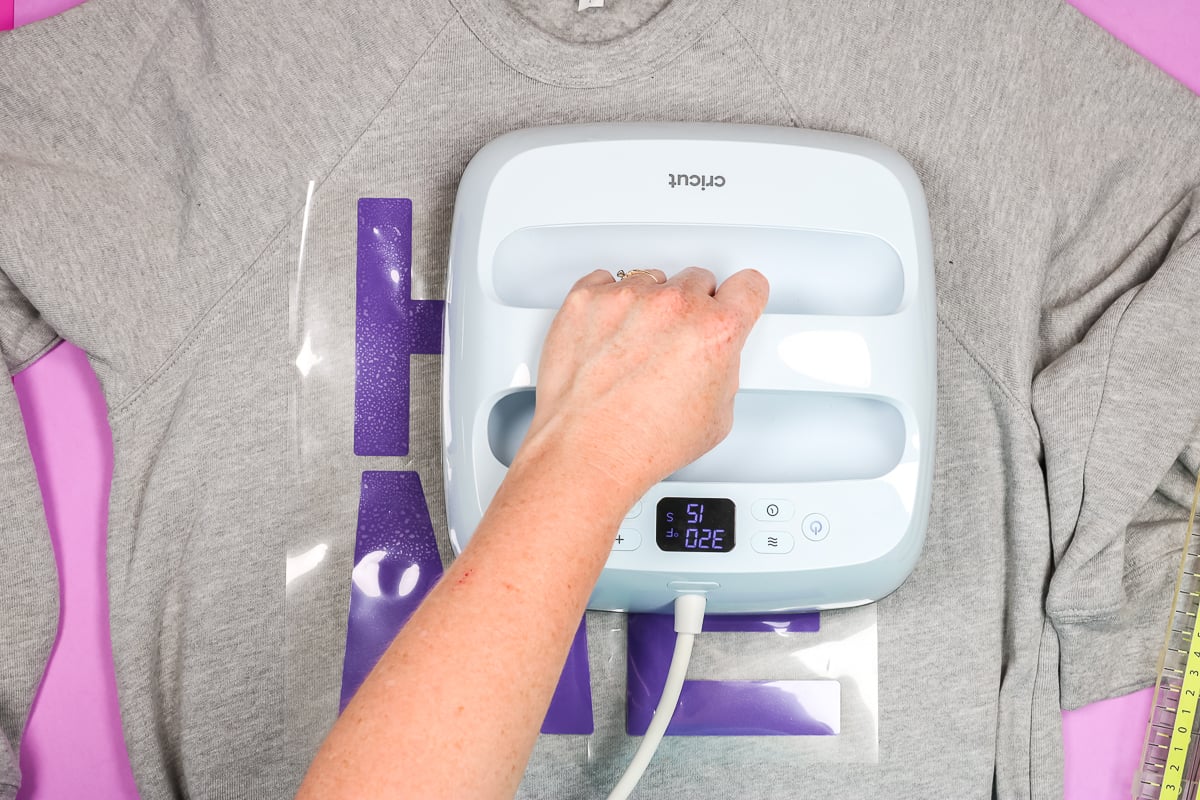
Again, this design is larger than my EasyPress so I pressed it in four different sections. Allow the HTV to cool as per the recommendations of your material and then peel back the carrier sheet.
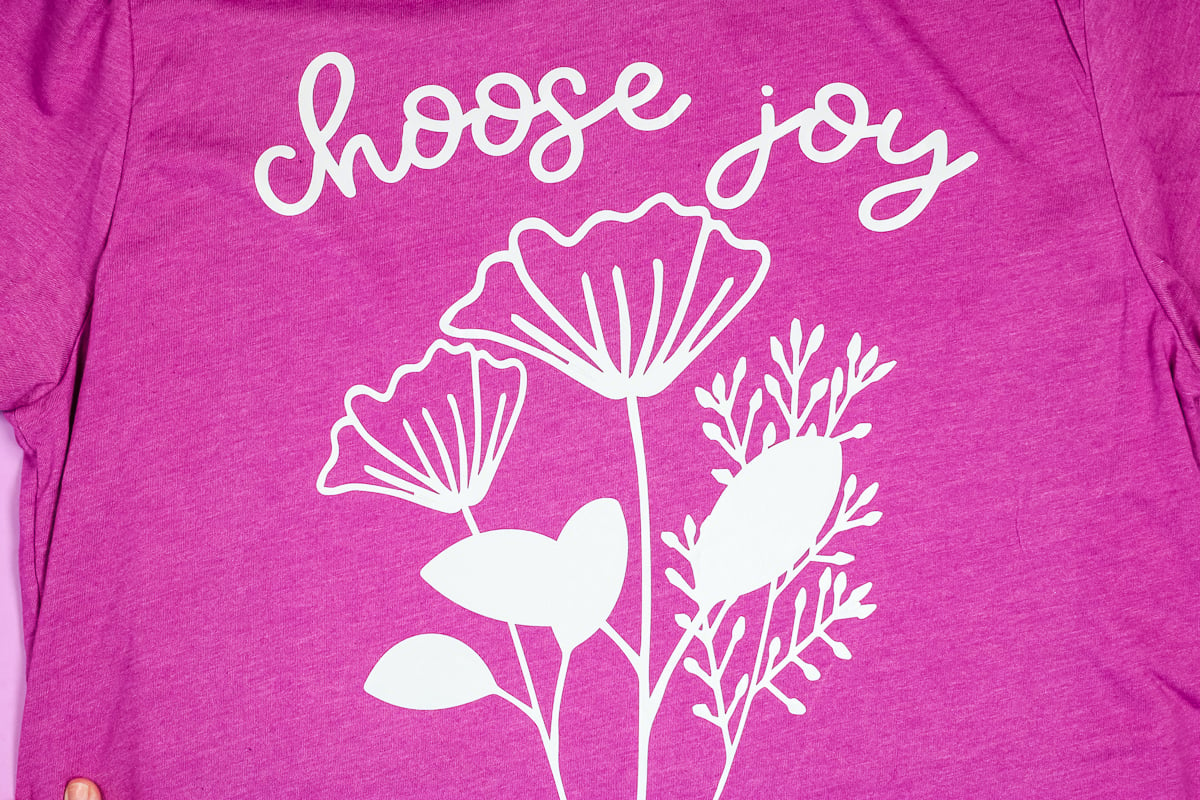
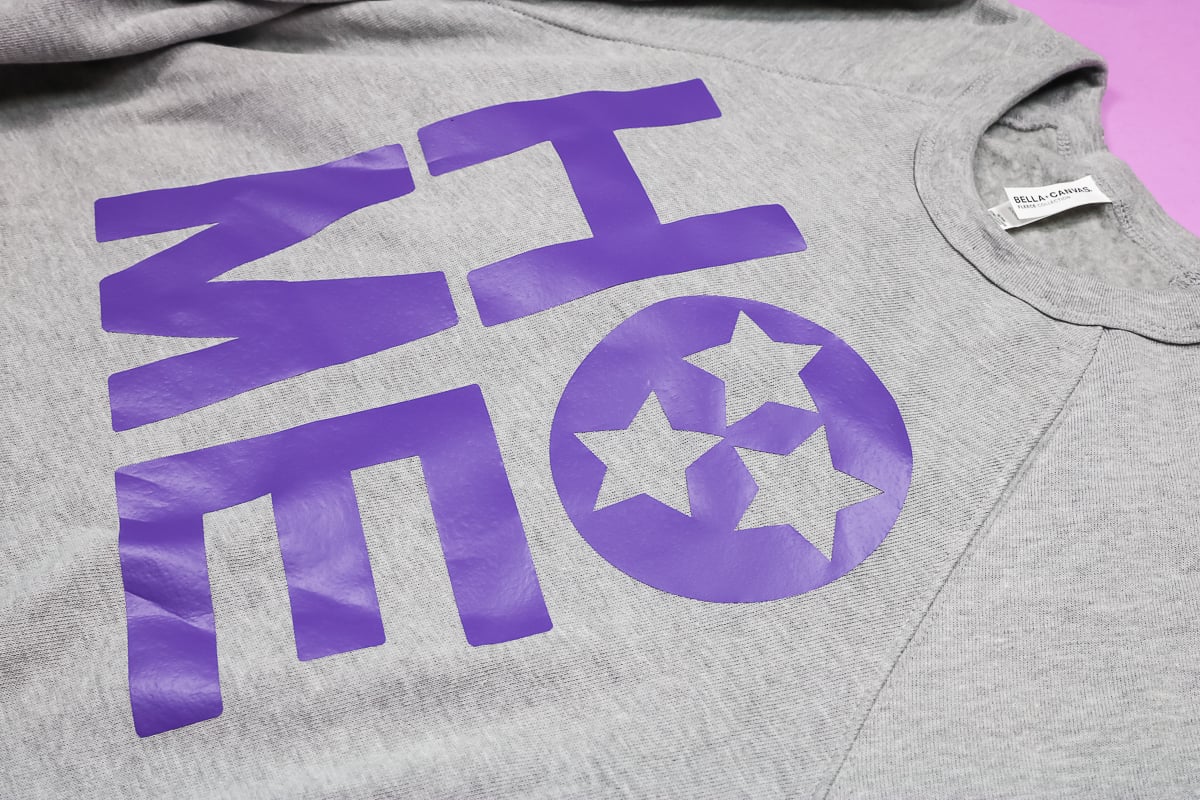
Here’s another perfectly placed shirt design using the 3 piece alignment ruler.
Pros and Cons of Different T-shirt Design Placement Methods
After testing these different methods of t-shirt design placement I can share the pros and cons of each one.
Manual Method:
Pros – you don’t need to purchase any extra tools. This method teaches you how to perfectly align a design regardless of what type of shirt you’re using or the size/shape of your design.
Cons – this process takes a little longer and you need to take more measurements than some of the other options.
T-Shirt Ruler:
Pros – if you’re using a standard t-shirt, this ruler lines up nicely with the neckline making it easy to ensure it’s centered. I also like that it is a sturdy ruler that won’t bend or twist.
Cons – this ruler lays right on the shirt. Every time you need to adjust your design you have to move the ruler. If you’re not using a standard t-shirt that fits this ruler, you have to realign it each time you move it.
3-piece Alignment Ruler:
Pros – I really like that this is a firm ruler and because it is 3 pieces it’s easy to store. With the longer ruler pieces, it’s easier to keep even larger designs straight from top to bottom and side to side. I also like that I can adjust my design without having to move the ruler. The sliding bottom ruler is great for checking the position of the design in multiple places.
Cons – it has multiple pieces and might be large for small shirts. There can also be a learning curve when you first get this ruler.

If you’re struggling with t-shirt design placement, any of these methods can help you get your designs straight.
I personally am not great at eyeballing designs, it’s something I’ve never been good at. As you can see, with each of these methods I was able to get my design perfectly placed even with shirts that aren’t standard and designs that are small and large.
If I had to pick a favorite method, I am a big fan of the 3 piece alignment ruler. I think it has a lot of pros, being able to adjust the design without moving the ruler is a big win for me.
My least favorite is probably the t-shirt ruler. Having to move the ruler every time I need to adjust the design was a big con for me.
I do think any of these options can help if t-shirt design placement is something you’re struggling with. I hope I’ve answered any questions you have about t-shirt design placement. If you still have questions, leave them in the comments and I’ll be happy to answer them for you.