This post and photos may contain Amazon or other affiliate links. If you purchase something through any link, I may receive a small commission at no extra charge to you. Any supplies used may be given to me free of charge, however, all projects and opinions are my own.
Today we’re continuing our DTF printing series. This is the second article in the series and we’ll be going over DTF printer setup and maintenance.
If you’re interested in learning more about DTF printing and what it is, my What is DTF Printing and How Does it Work article is a great place to start.
You can watch me walk you through the whole setup and maintenance by pressing play on the video below.
DTF Printers
Recently I had the opportunity to go to Heat Transfer Warehouse with my friend Cori George from Hey, Let’s Make Stuff! to learn all about DTF printing over a week. We had the opportunity to test out the DTF printers and learn how to care for them and how to create our own DTF prints.
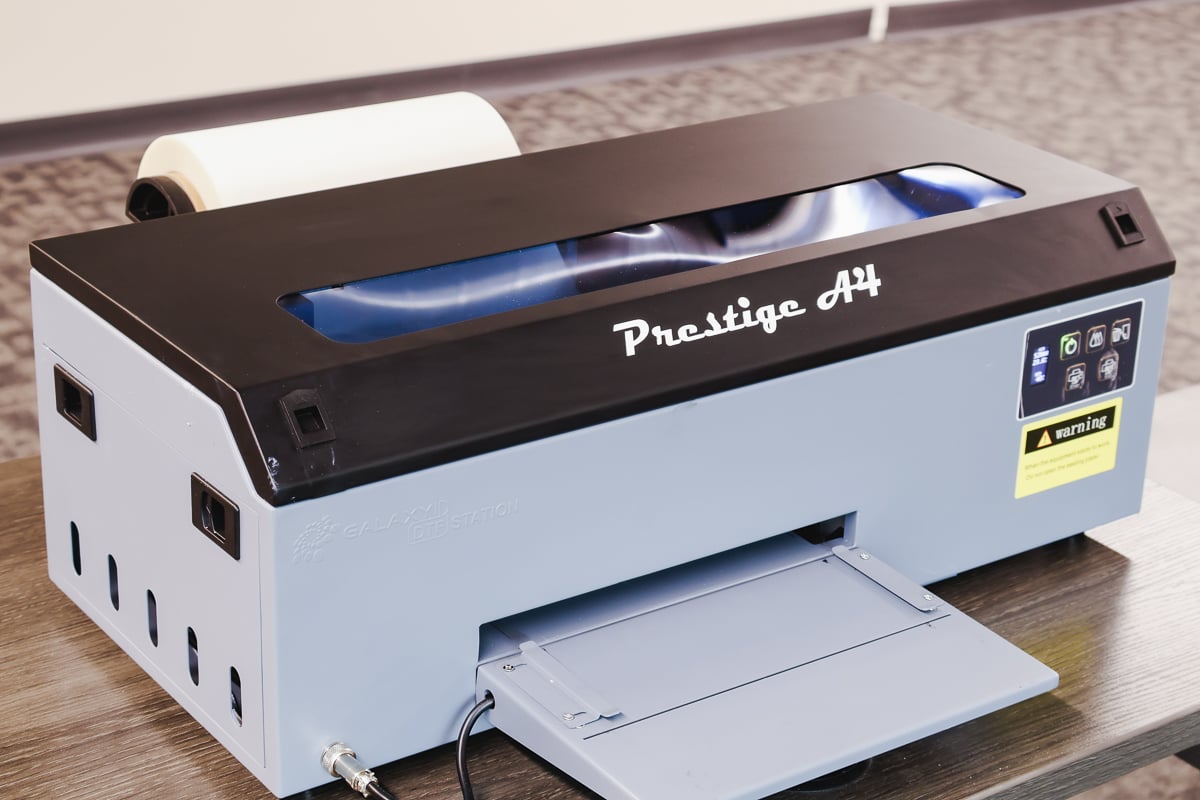
There are several brands of DTF printers on the market, I will be covering the Prestige A4 DTF printer.
Prestige A4 DTF Printer
I chose to highlight the Prestige A4 DTF printer because it is the smallest printer that Prestige makes for DTF printing. It prints approximately eight inches wide but prints on a roll so you can print long prints.
It is also the least expensive and is the smallest size making it a good option for an average craft room or for someone just starting a small business. The Prestige A4 DTF printer comes in grey, pink, and teal. I love when the machines I use match my craft room so this was a big win for me.
This DTF printer is an entry-level printer which means it’s perfect for someone just starting a DTF printing business or someone who wants to have one for their personal crafting.
How Much Does the Prestige A4 DTF Printer Cost?
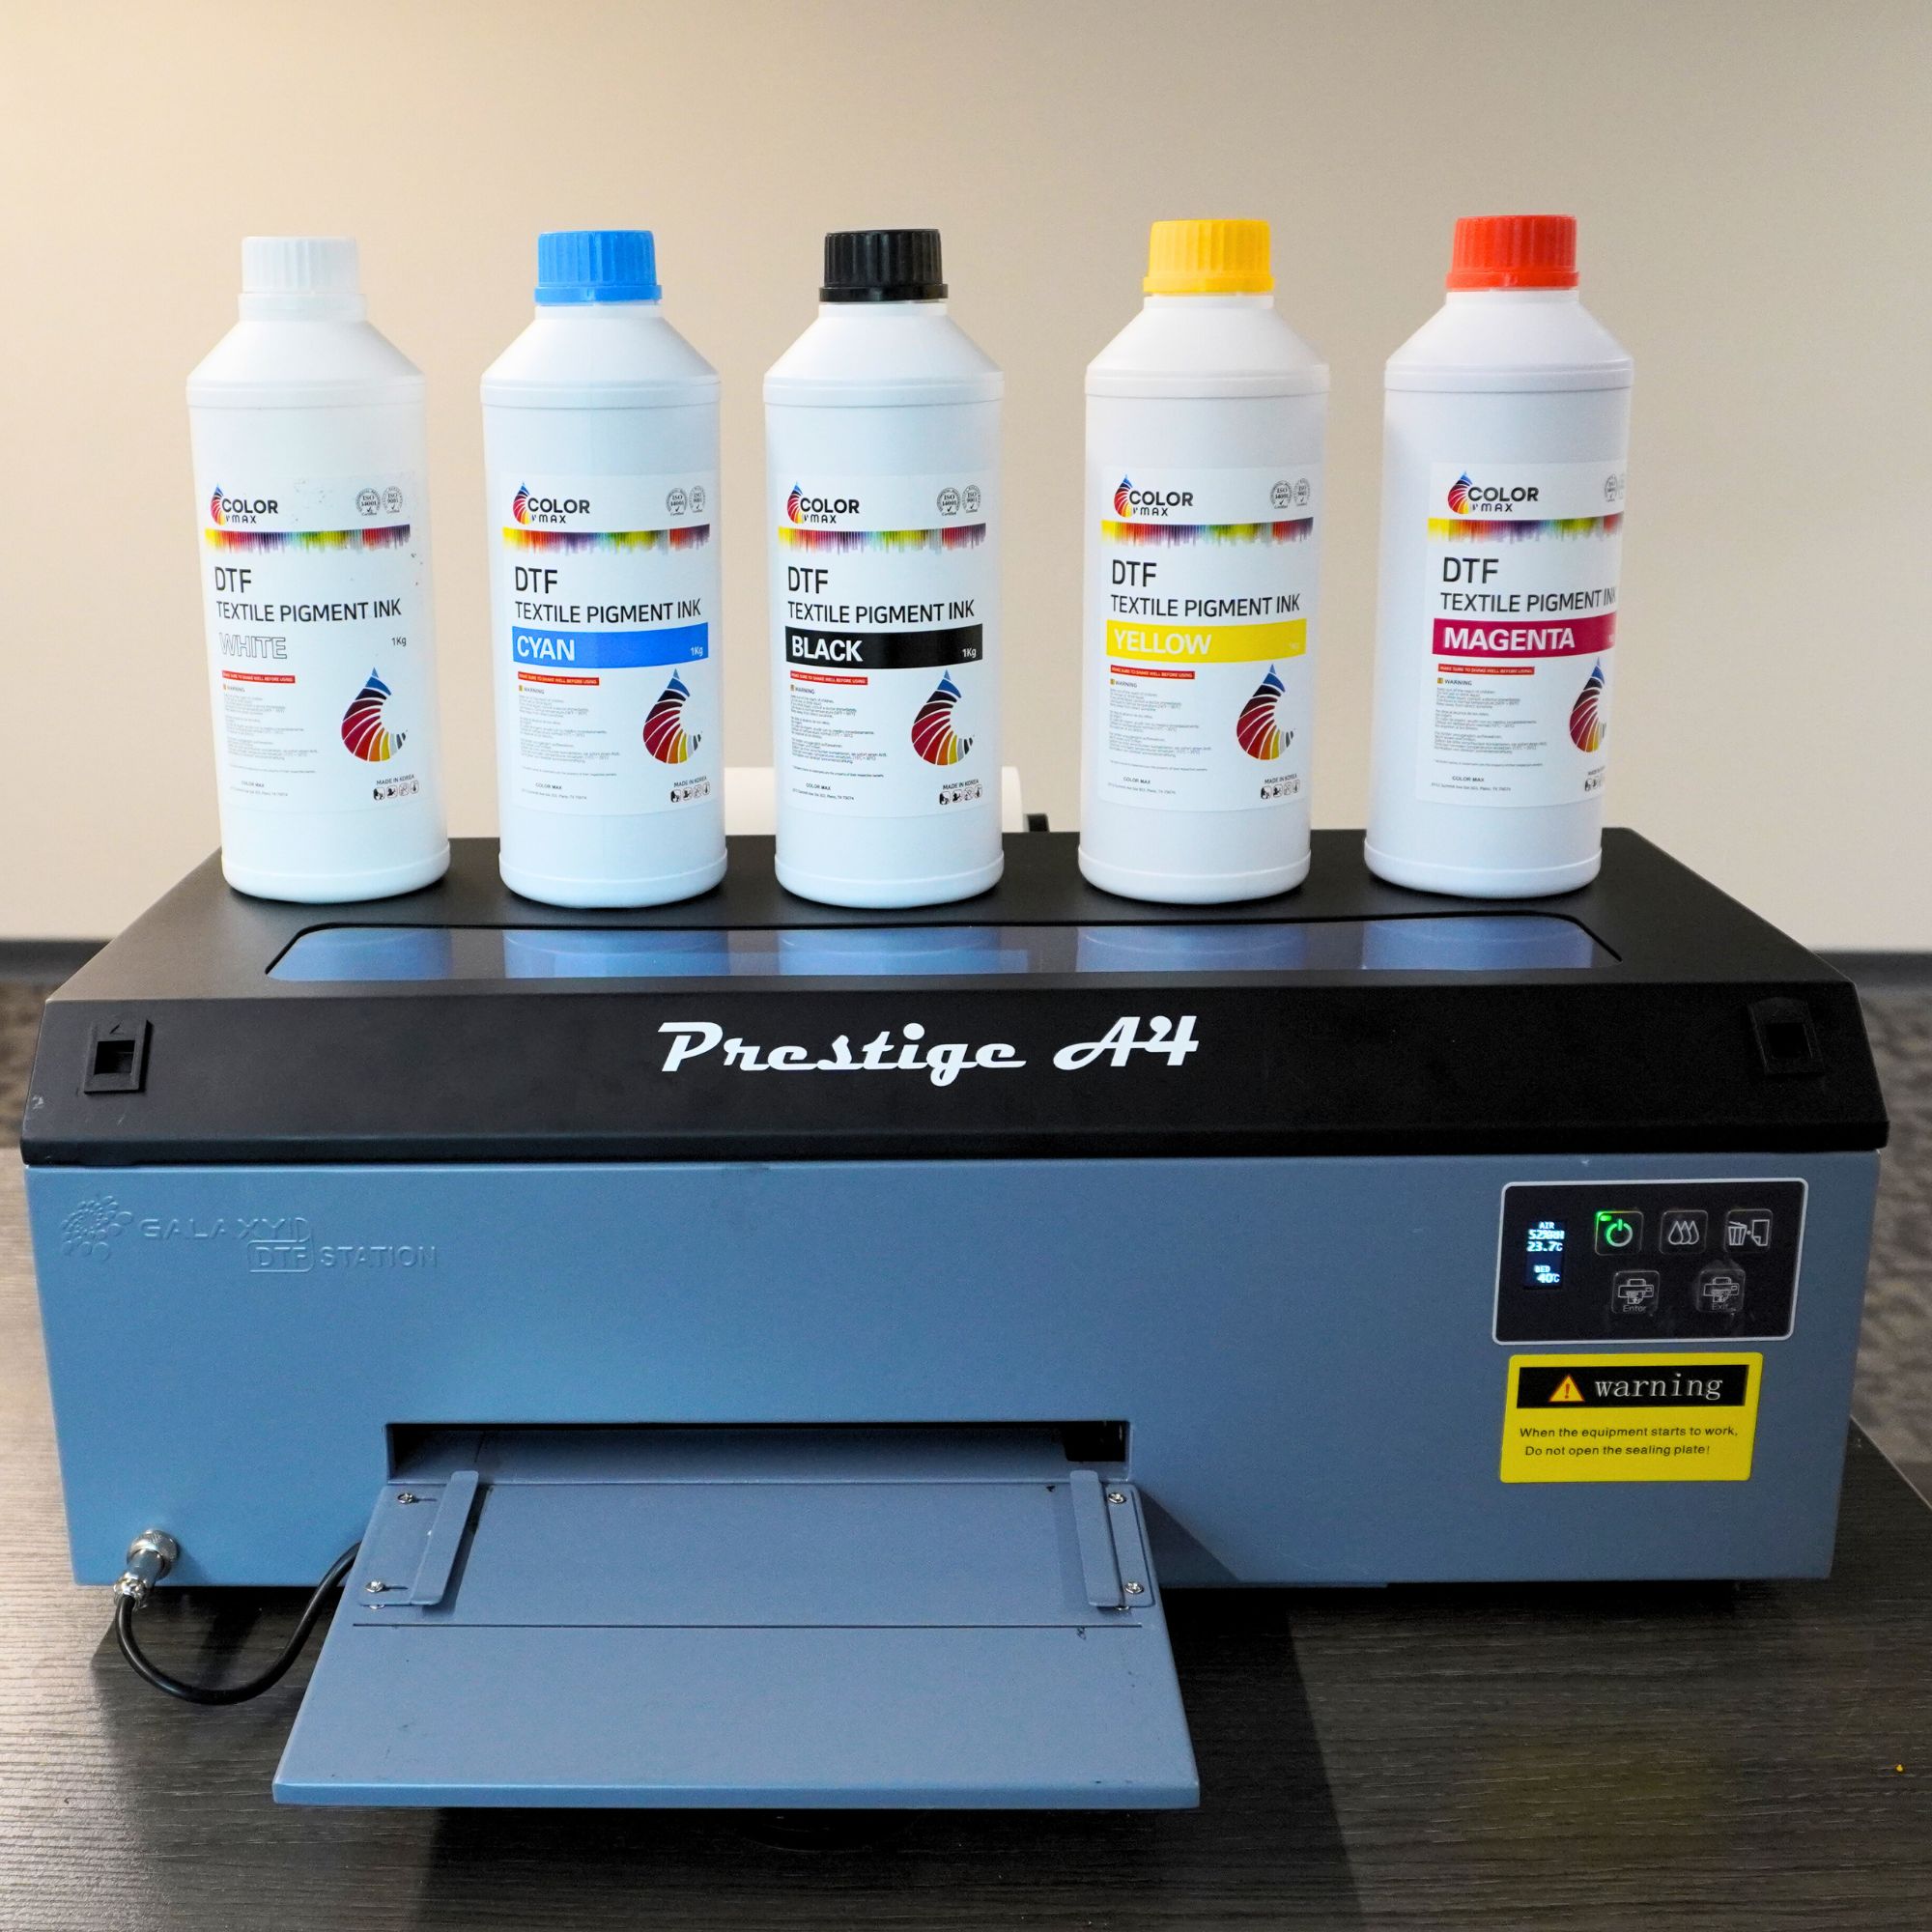
This DTF printer bundle costs about $4,000 as of the writing of this article. This price includes the printer, the oven with the air filter, ink, powder, and everything you need to get started with DTF printing.
This is not an inexpensive printer. Right now the $4,000 is the approximate retail price. You may be able to find it for a little less expensive when it’s on sale from time to time.
I do recommend purchasing from somewhere like Heat Transfer Warehouse. They have amazing customer service.
I’ve also found that the customer service with Prestige is awesome. That is one of the main reasons I chose their printer to review. With the purchase of the printer, you get access to a Slack channel where you can ask questions directly. They include training where you can do a Zoom call and get training for your specific printer and the situation you’re in.
Because these printers are expensive I think having that training directly with the manufacturer and the ability to ask questions is a huge benefit.
DTF Printer Bundle
As you’re looking into DTF printers I want to make sure you know that you will need plenty of space to accomplish everything you need and to have room for all of the equipment.
The $4,000 bundle that I mentioned includes the printer and the curing oven but does not include a shaker for the adhesive powder. This bundle is intended for use with a manual powder application which I will show you in a future tutorial.
If you want a more automated version of applying the powder, you would have the additional investment of a shaker, which would slightly automate the process.
The DTF process is a bit messy, the powder gets everywhere. I personally, don’t think the manual version vs. the automatic shaker version is going to prevent the mess. The powder is a very fine dust and it’s still going to get everywhere.
What Items Can I Put DTF Prints On?
Before we jump into the setup for this printer, I wanted to talk about what the prints can be put on.
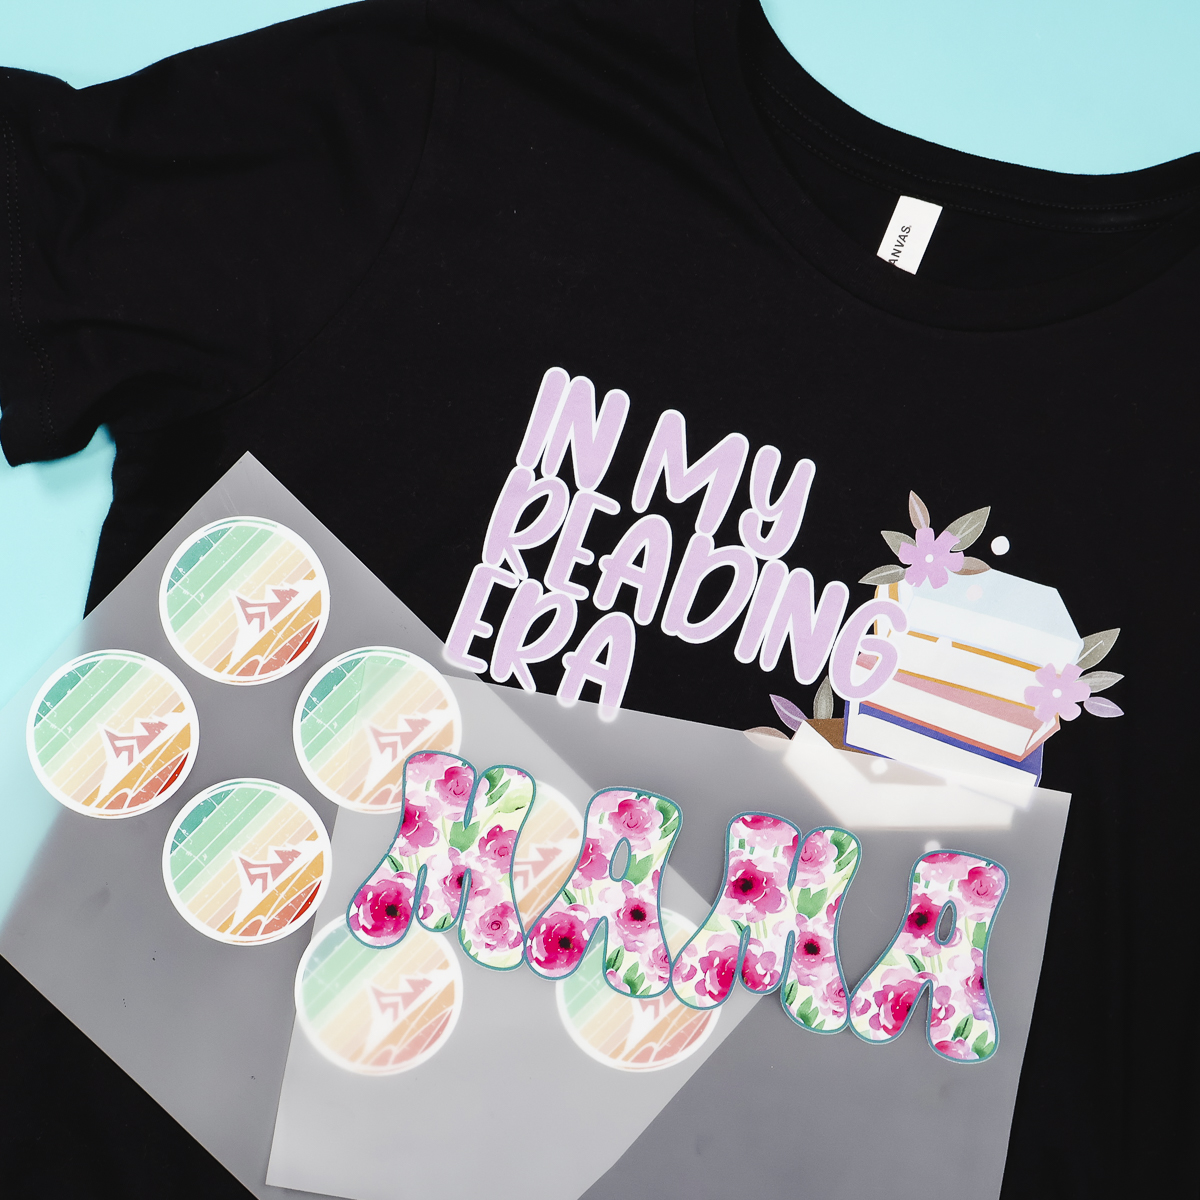
As you can see in the project I’m sharing today, I am putting this print on a black shirt. With DTF you get 5 colors of ink, including white. You can put your prints on any type of fabric and that fabric can be any color.
You’re not limited to light-colored or polyester fabrics! If your favorite tee is black and cotton, DTF will be perfect for you.
If you like my shirt, you can get my In My Reading Era design for free and use it even if you don’t have a DTF printer. Let’s jump into the setup for this printer.

Prestige A4 DTF Printer Setup
I am going to walk you through the setup of this printer and then the daily maintenance you’ll need to perform every time you use it.
There will be additional weekly and long-term maintenance required and Prestige has great videos and tutorials that will walk you through those processes. I will just be showing you the daily maintenance.
What Comes in the Box?
In the box, you’ll find the printer and a user manual that has QR codes that you can scan to gain access to videos and training. You’ll also find the printer ink, the first batch of cleaning supplies that you need, and the DigiRIP software.
Any DTF printer will require that RIP software. Because this printer prints Black, Magenta, Cyan, Yellow, and White you need a program to convert your design so it will print all of those colors including the white. RIP software is what does that.
The RIP software for the Prestige A4 DTF printer is currently PC only. There is no MAC version and there is no app. You will need a PC that has Windows 10 or 11 and you’ll need to connect directly from the printer to the computer.
While you’re setting up the printer, get that RIP software installed. That should be your first step and registration for your printer will happen during that step.
How to Assemble the DTF Printer
I am going to show you how we set up this printer but there are videos on the Prestige website that you may find helpful as well.
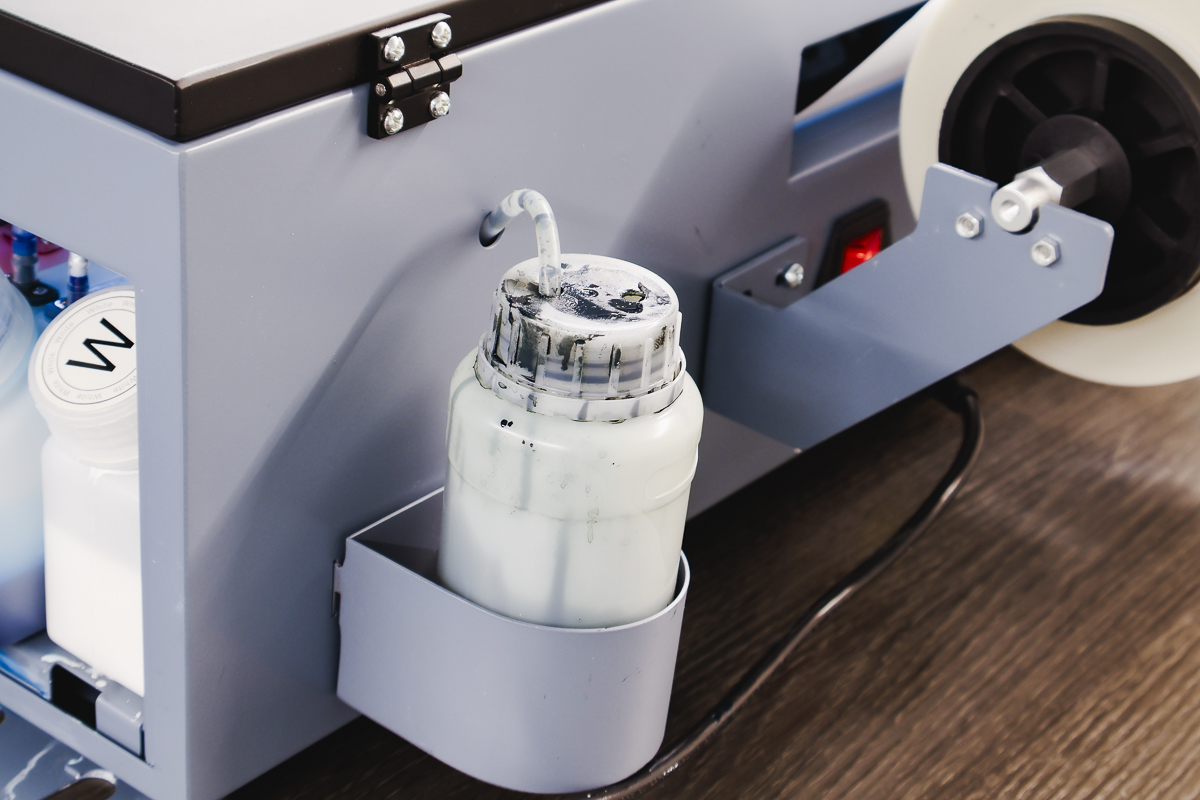
Your printer will come with a waste bottle. You will add that to the small bracket on the pack of the printer.
A waste tube comes out of the printer and you’ll need to connect that to the waste bottle. The cap of the waste bottle has two holes in it. One of those holes is where you will add the waste tube and the other should never be blocked. That hole allows air to flow into the waste bottle.
You will have ink waste with this printer. The disposal of that ink will depend on your state so make sure you check that before disposing of any ink.
Attach Brackets to the Back of the Printer
There are two brackets that you’ll need to add to the back of the printer with the included screws. These will hold the roll of film.
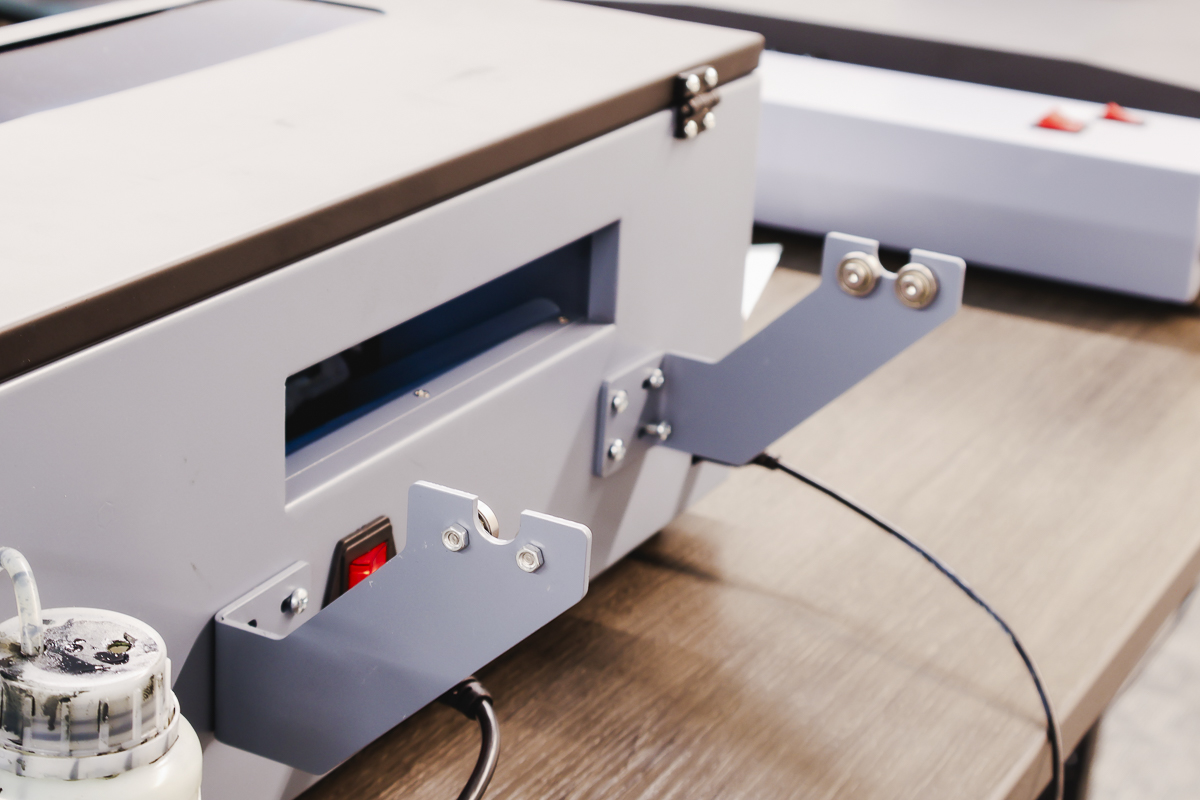
When installing the film you need to know which side of the film is the printable side. Typically the printable side is rolled to the outside and you’ll feed it over the top into the printer. Most films have a matte side and a shiny side. The matte side is the side you print on.
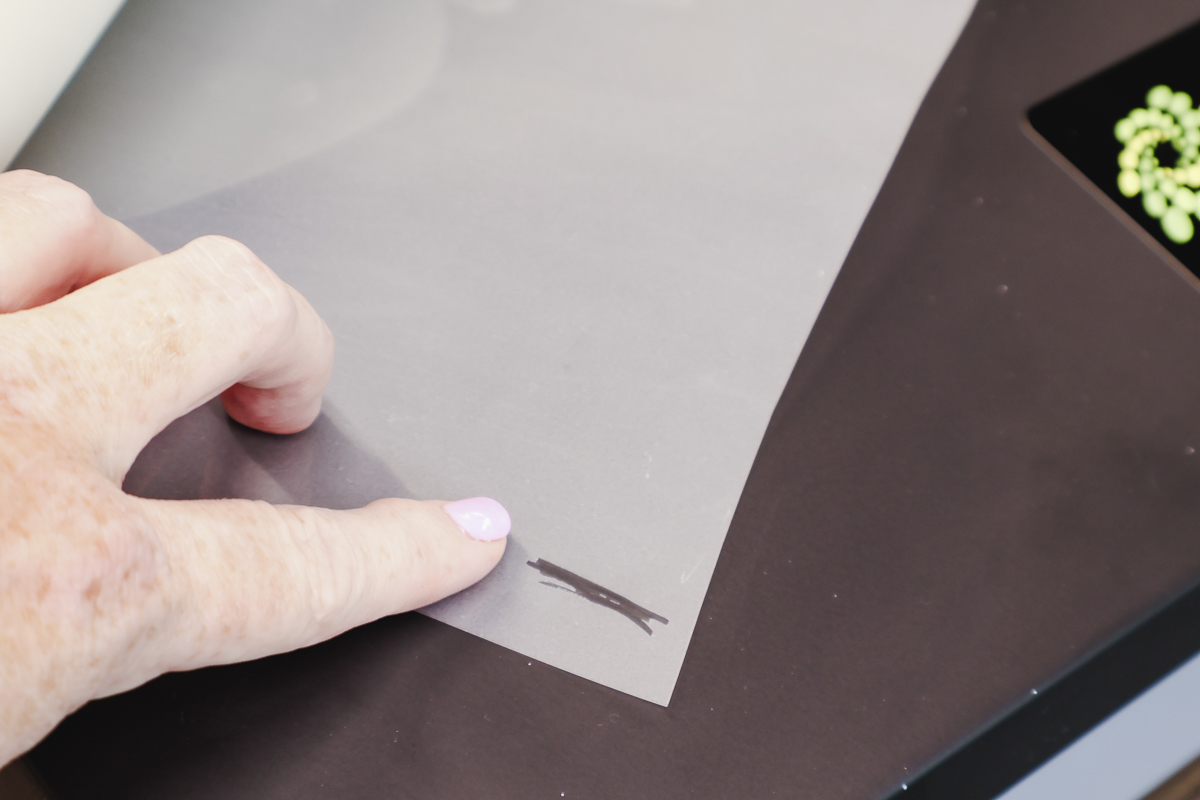
If you’re having a hard time knowing which side to print on, you can use your fingernail to scratch the film. If you see a scratch mark, that is the printable side of the film.
With the bracket, you’ll find a metal bar and a couple of plastic caps. These hold the roll in place.
The left plastic cap you don’t remove. The right plastic cap can be screwed on and off for adding the roll of film.
There are screws that you can loosen and tighten and move across the metal bar. Add the roll of film and then the right cap.
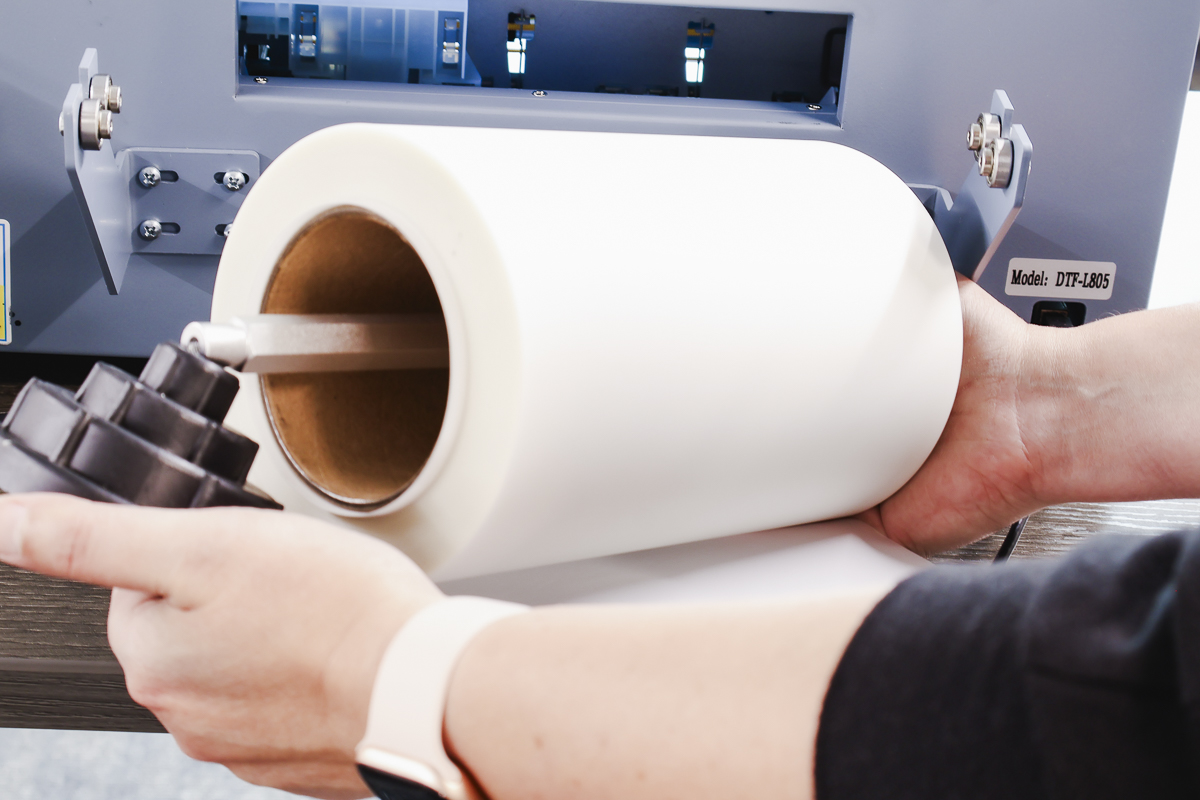
When tightening screws, don’t get them too tight. You want to tighten them just enough so the caps don’t move. You can adjust the caps as needed later when you feed the film into the machine.
Add Front Tray to Printer
There is also a front tray that we need to add to the printer. The front tray itself has tabs that slide into place on the printer.
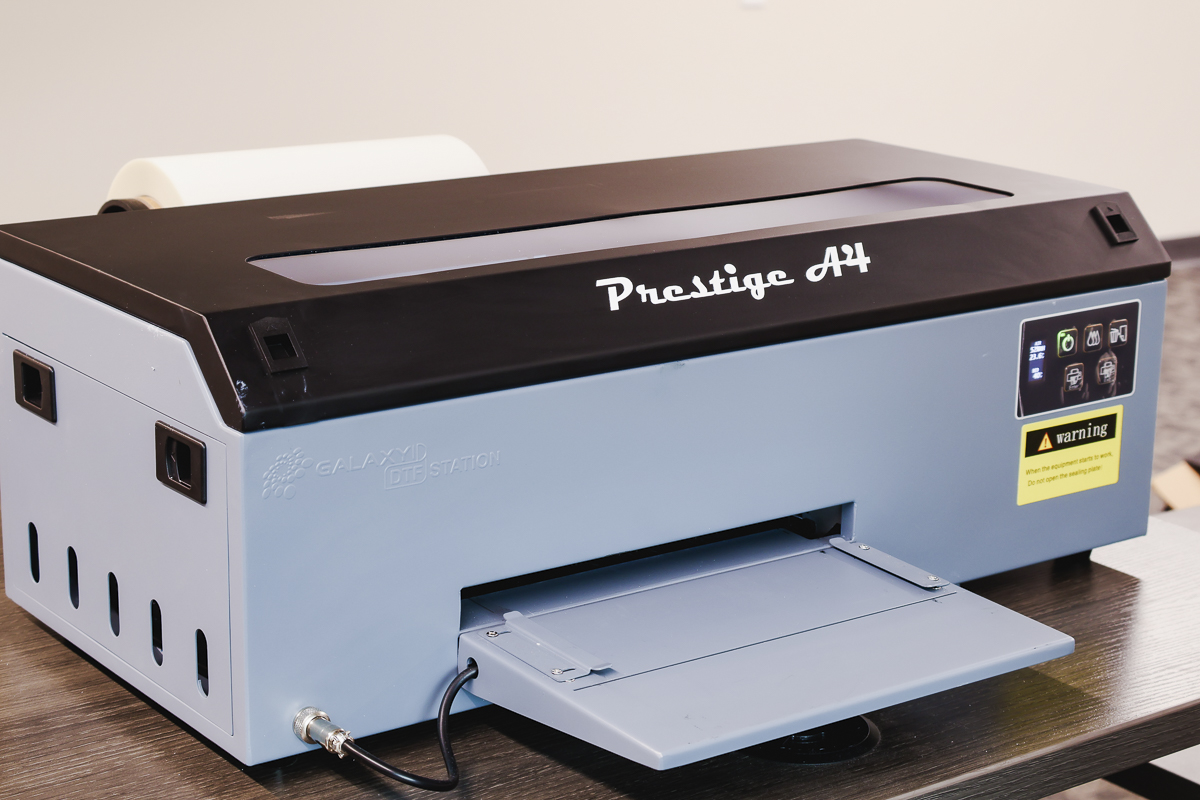
Once that is in place you’ll plug the tray into the machine and screw it into place. The front tray is heated to help dry the ink on the film which is why it plugs into the machine.
Once the tray is attached, you can plug the power cord and USB cord into the back of the machine. Plug the machine into the wall and the USB cord into your computer. Now you can click the power switch on and it’s time to add the ink to the printer.
Once you turn the printer on you should never turn it off. The printer performs self-maintenance cycles to keep the ink flowing.
You may see the printer go to sleep and that is okay. You don’t want to turn the back switch off.
How to Add Ink to the Prestige DTF Printer
Adding the DTF ink to the printer takes a few steps. To access the ink tanks you’ll push the two tabs in and then pull on the door to open it.
First, we need to shake all of the inks really well. Shake the white for approximately 60 seconds and shake it first. Set it aside and then shake the other inks for 30-45 seconds and then set them aside.
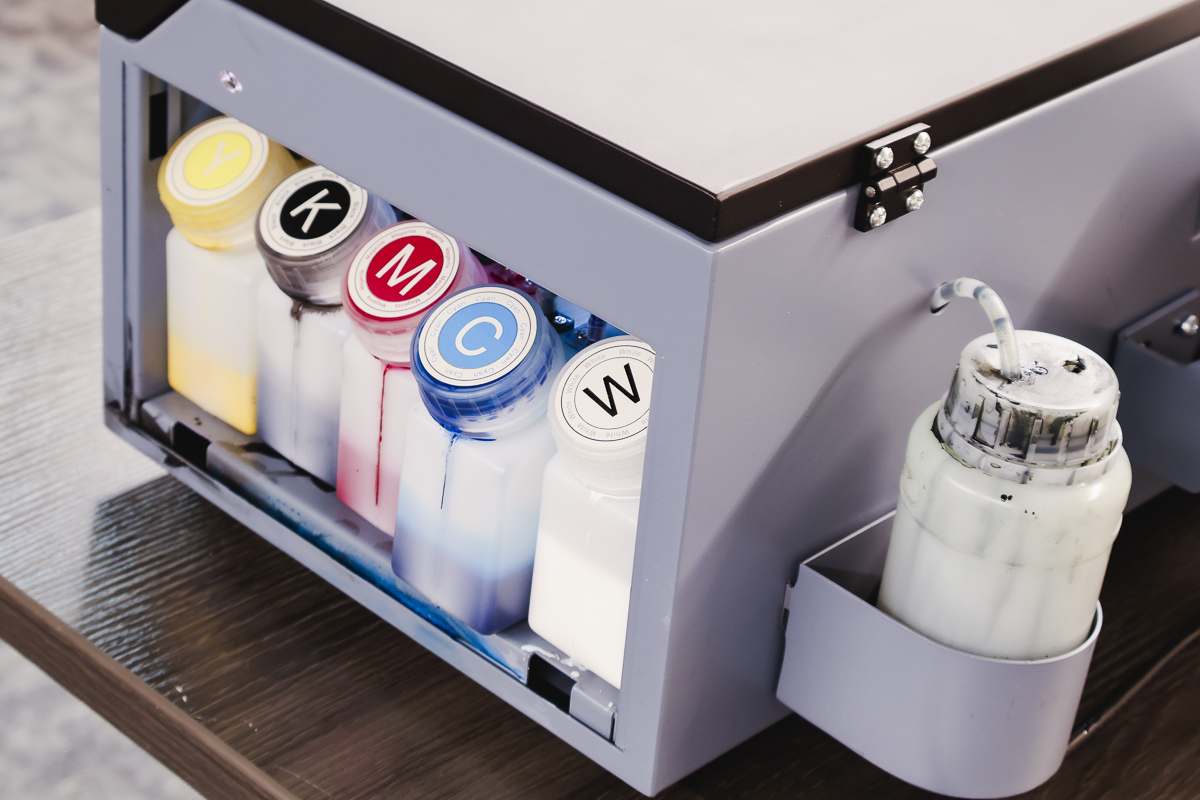
I recommend adding the inks one at a time because you don’t want to risk adding the wrong color ink to the wrong bottle.
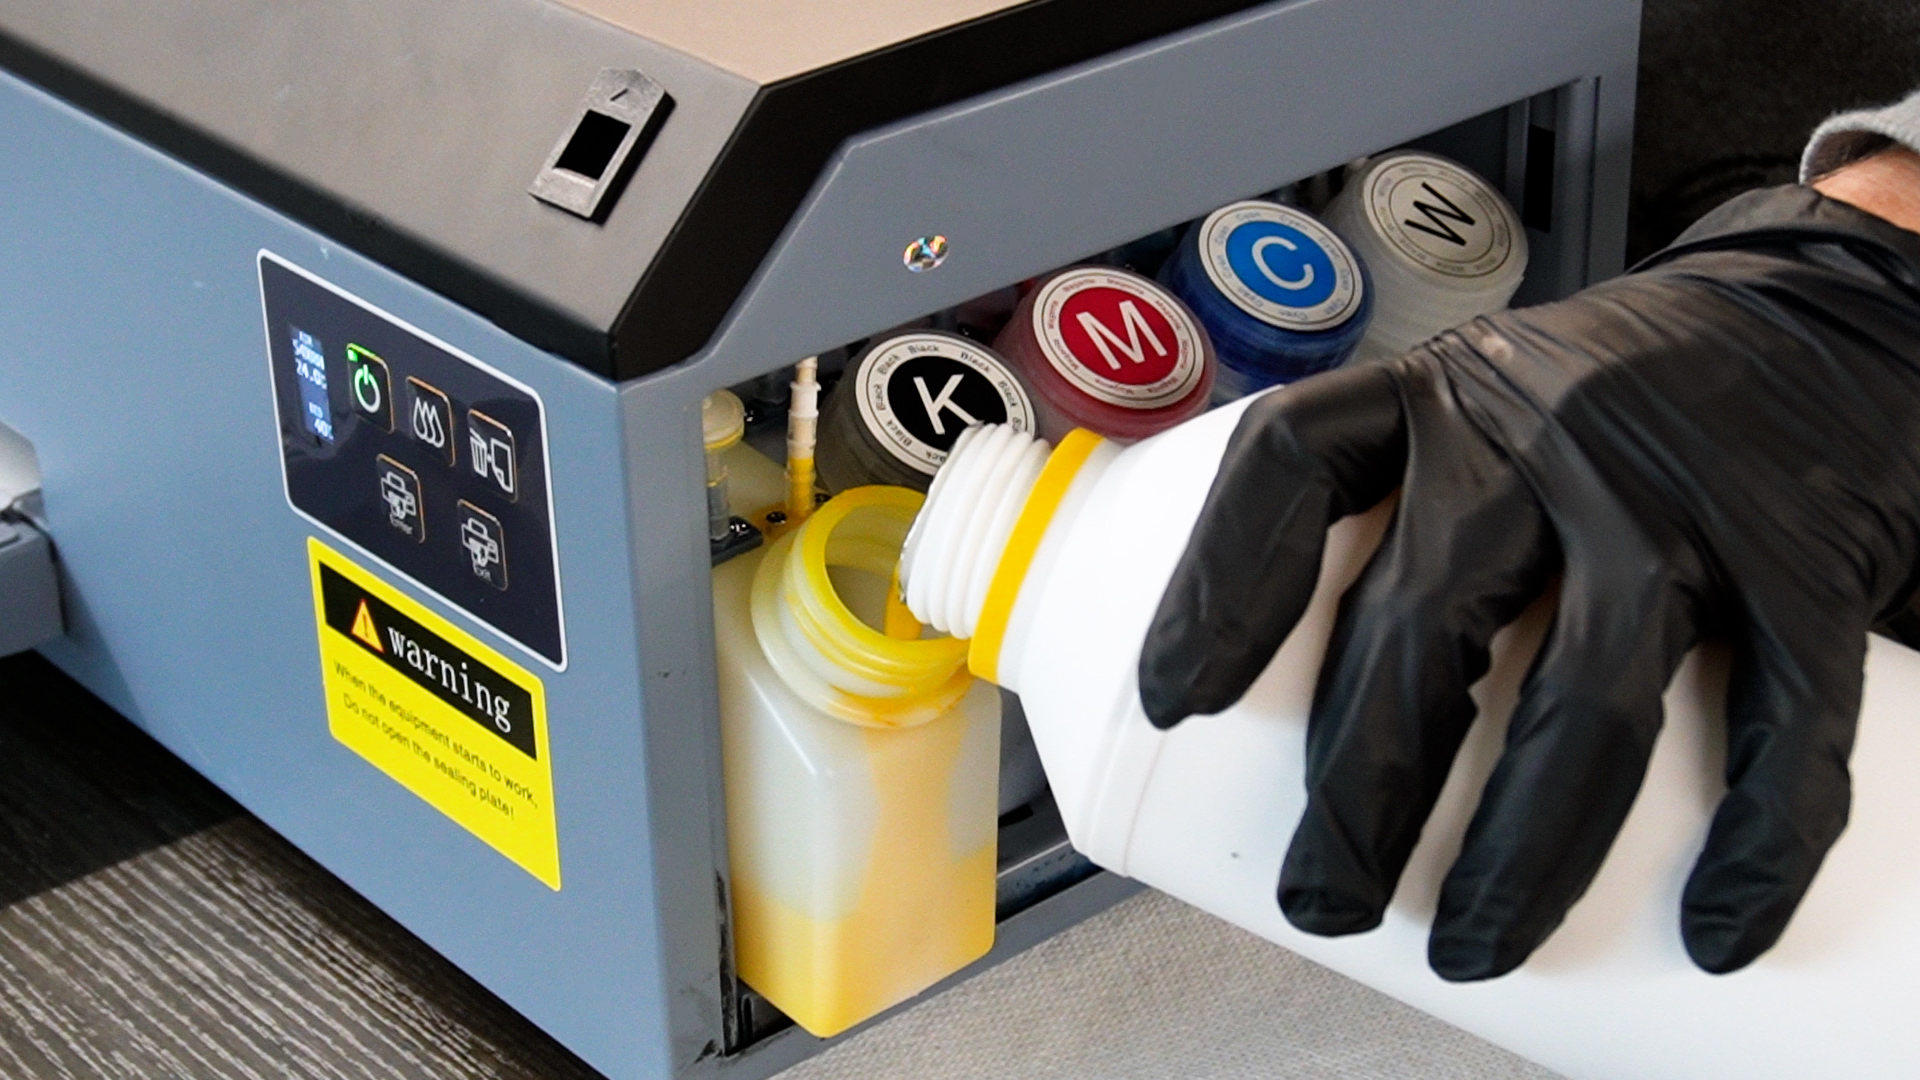
Gently remove the ink bottles from the printer. Don’t pull them out too far because you don’t want to pull on the tubes that feed the ink through the printer. Unscrew the caps one at a time and add the ink to the bottles. Again, do the white one last.
How to Pull Ink Through the Ink Lines
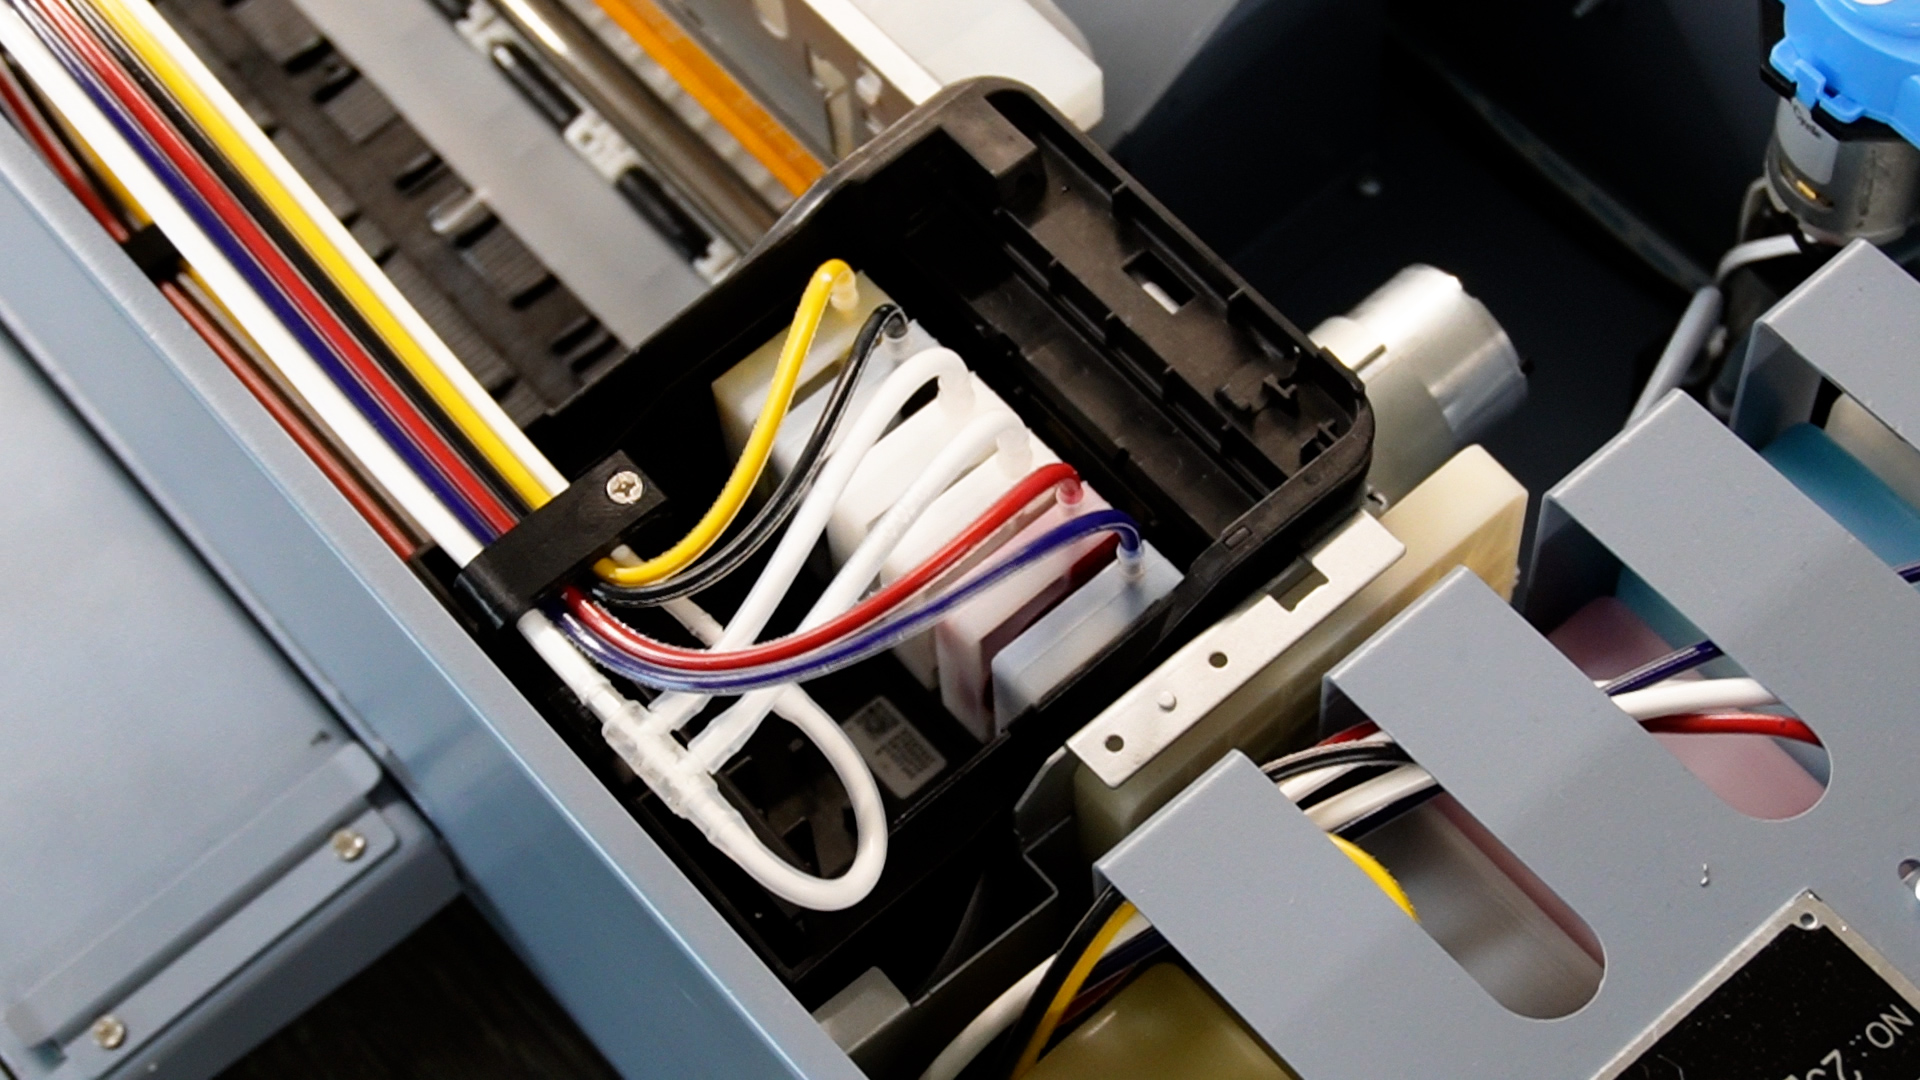
Now that there is ink in the bottles you need to manually pull ink through the dampers and the waste ink line.
Included with your printer is a syringe. You’ll pull the ink damper out being careful to not pull hard on it. Keep your fingers on the side of the ink damper. Never touch the front or back. Put the syringe inside the ink damper and pull about two milliliters of ink through the damper.
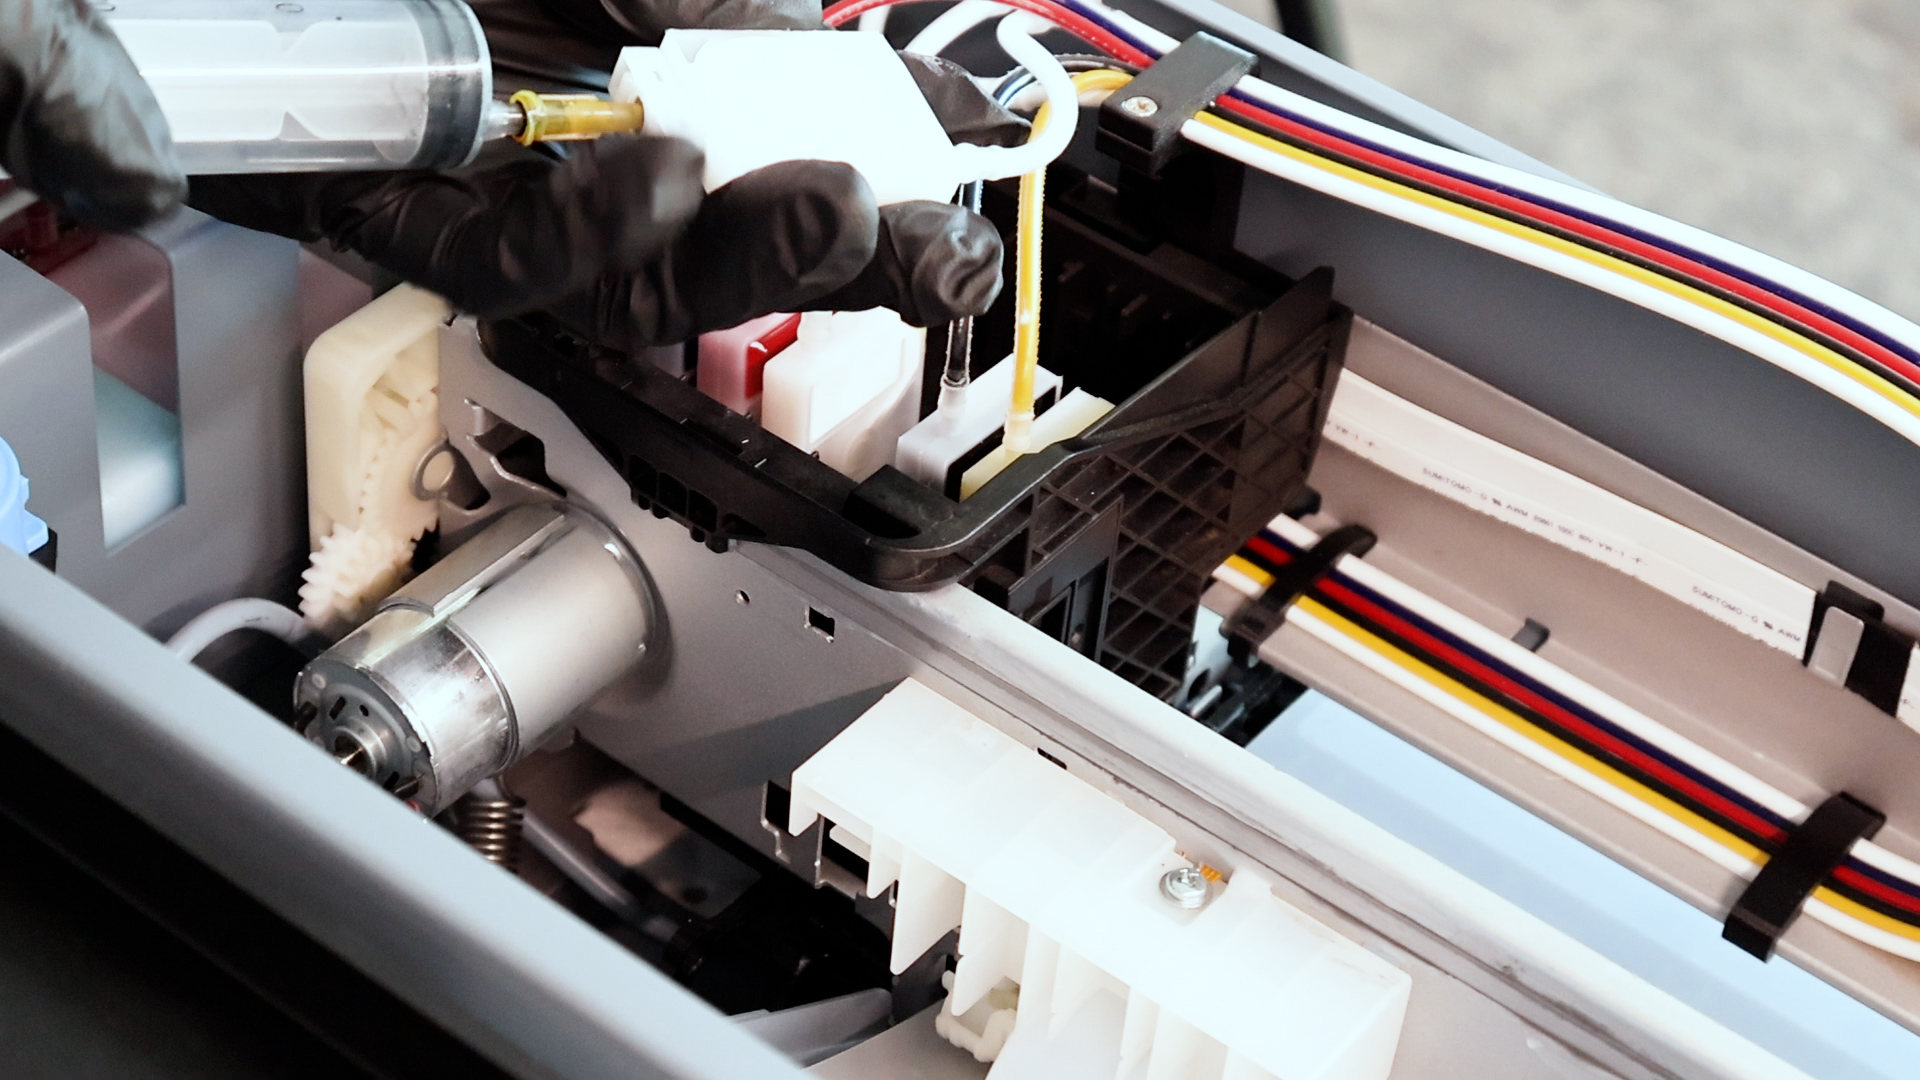
You’ll repeat this process for each color of ink. There are two dampers for the white ink so make sure you do both.
Clean the syringe between colors. You never want to mix the colors of ink.
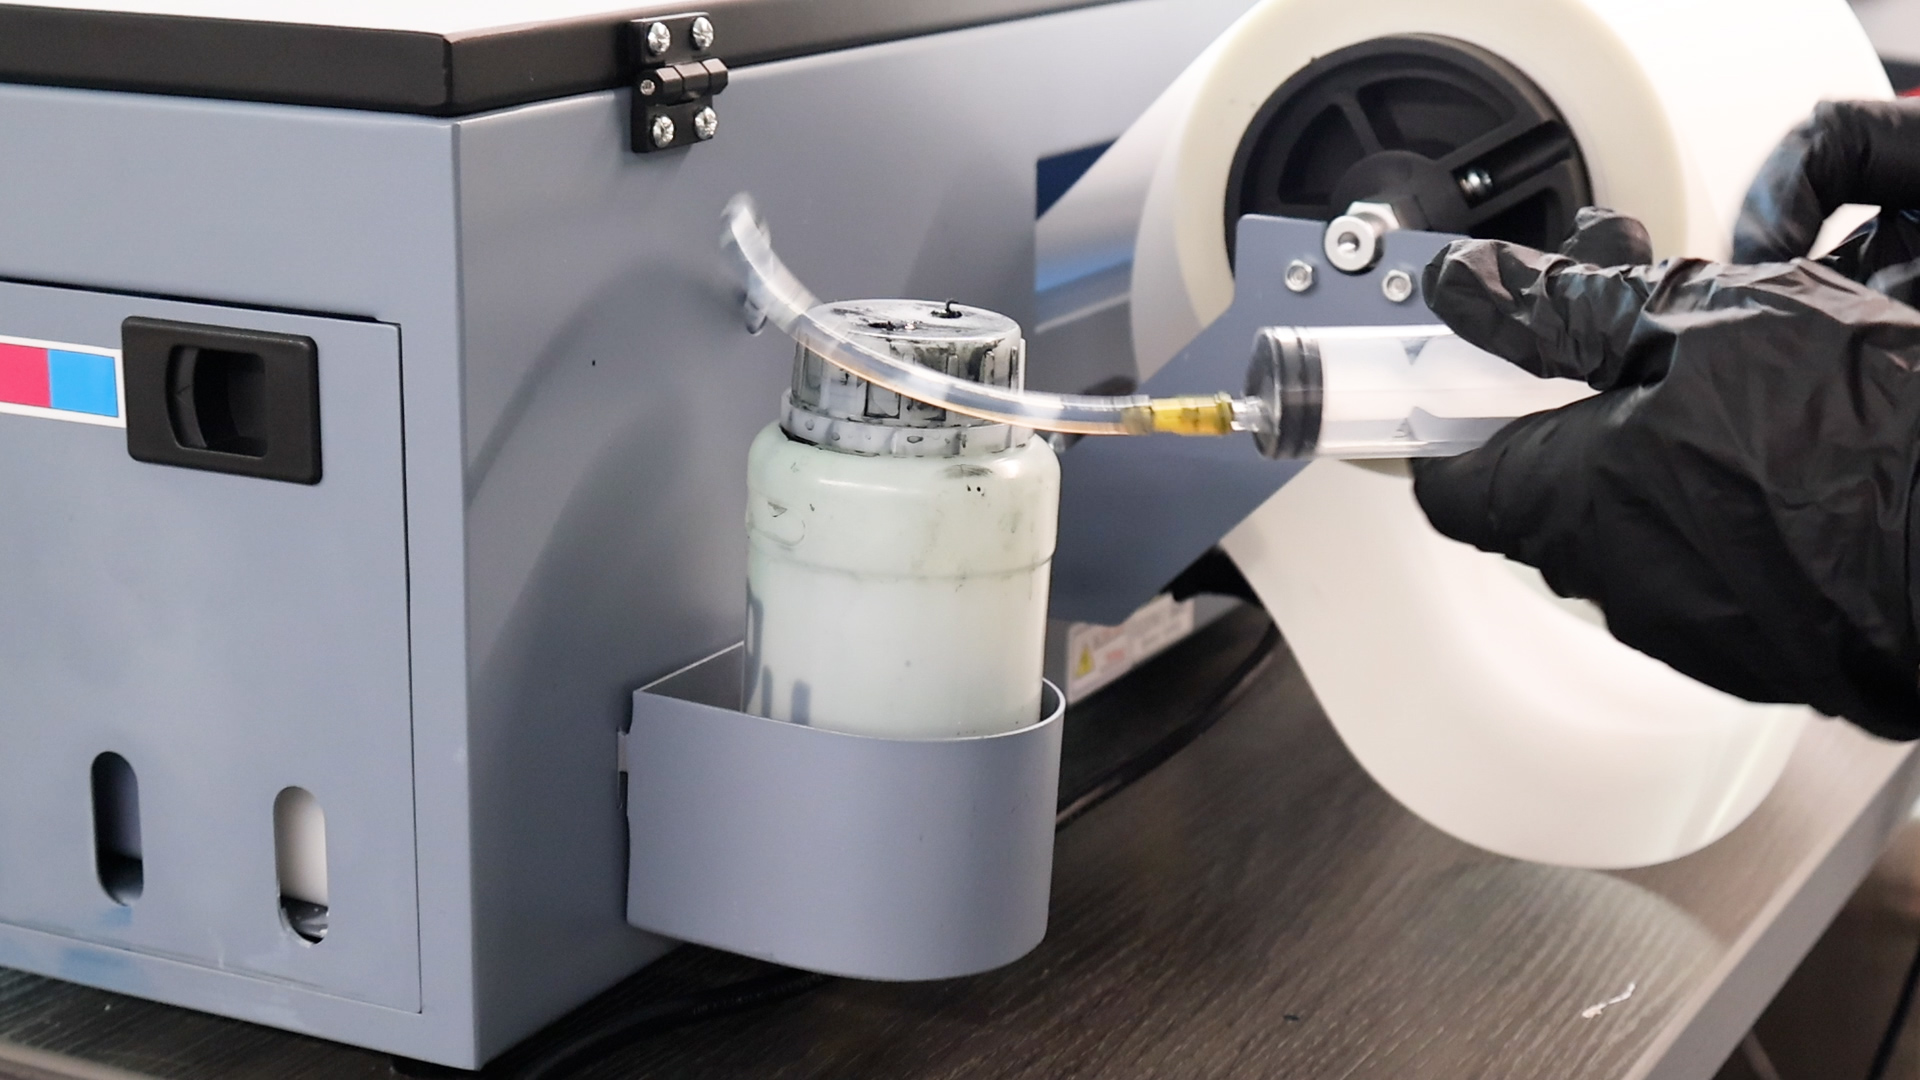
The ink that you pull through the dampers is waste. You can add that to the waste container or dispose of it in the manner that is required by your state.
Once you have all the colors done, you also need to pull ink through the waste tube. Remove the tube from the waste container at the back of your printer and pull about four milliliters of ink through.
You may find it’s more difficult to pull ink through the waste tube than it was to pull the ink through the dampers. This ink is also waste and can be added to the waste container or disposed of correctly.
DTF Printer Front Panel Controls
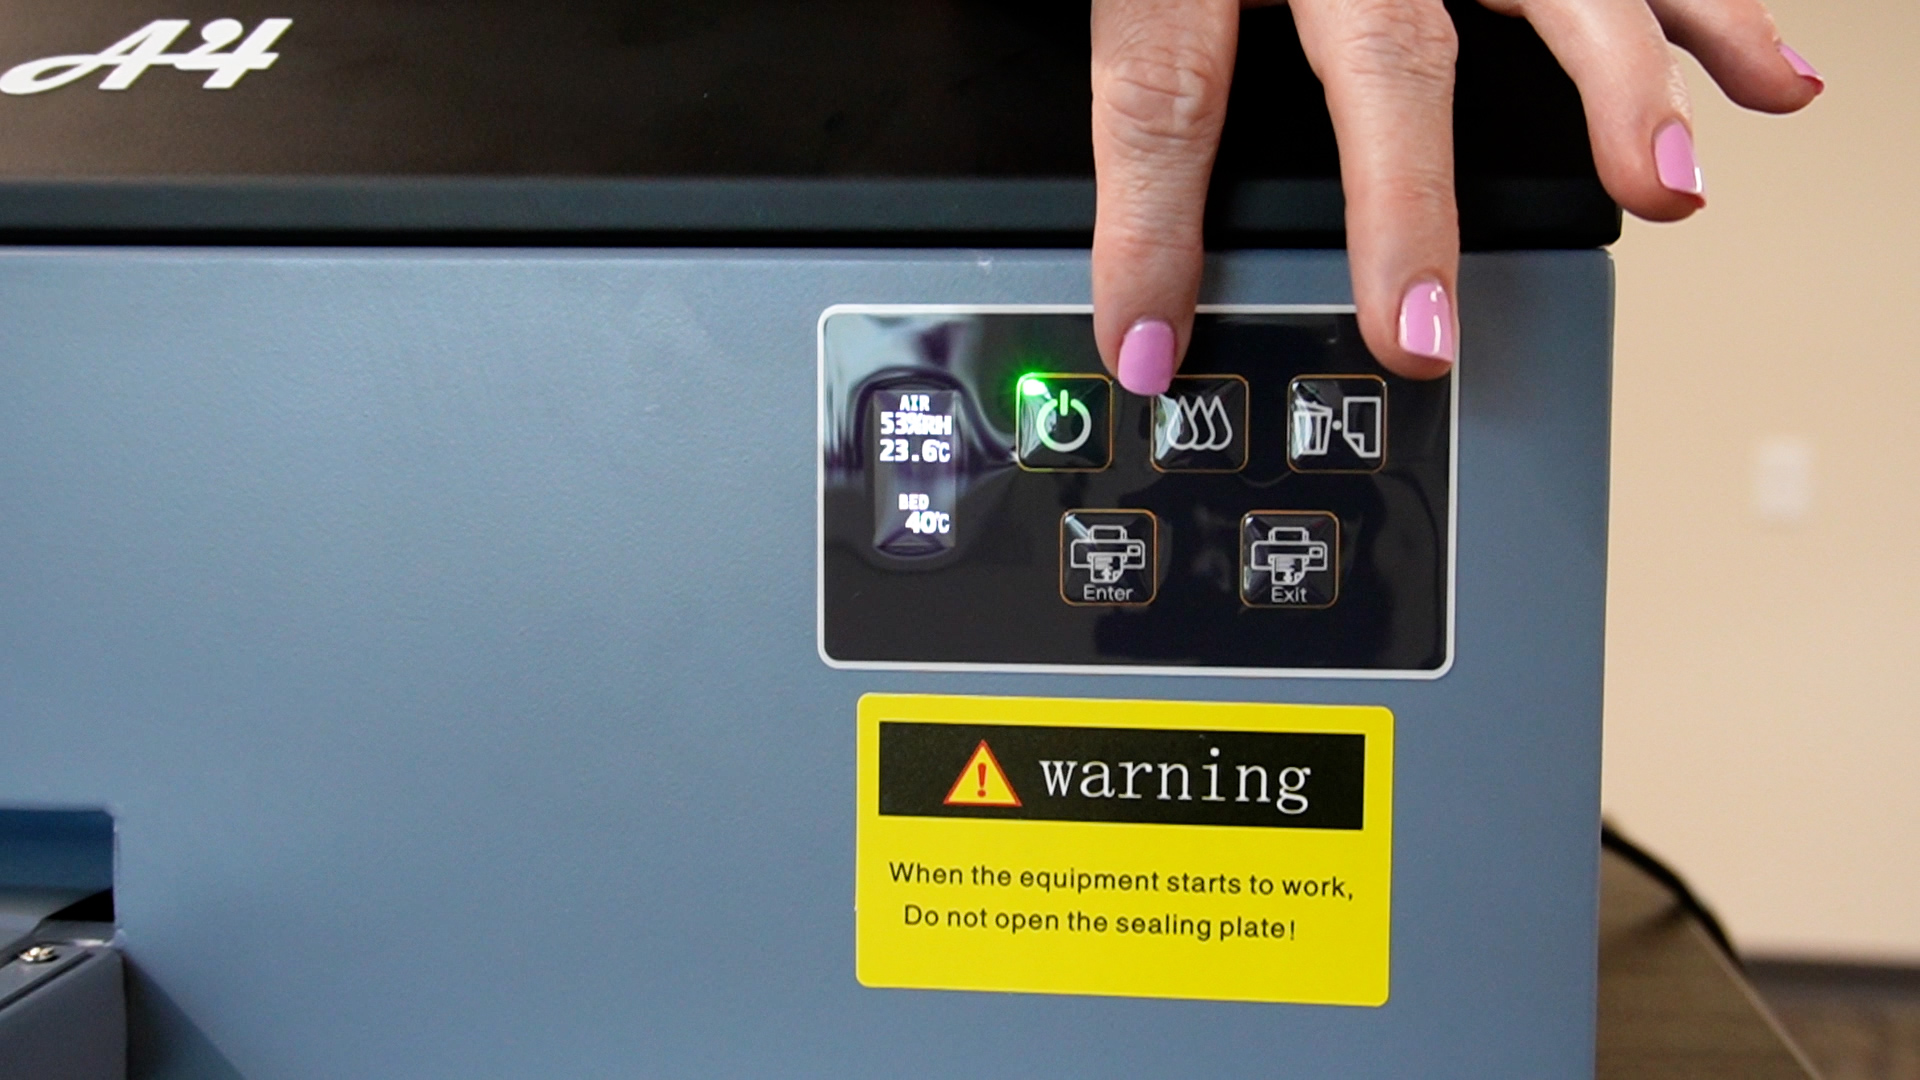
Before we feed the film through the printer, let’s look at the front panel. You’ll use the buttons on the panel to feed the film through the printer.
The front display includes room temperature, humidity, and the bed temperature. Bed temperature is the temperature on the front tray that helps cure the ink.
The control panel itself has several buttons. There is a power button to turn the printer on and off. There’s an ink button; if you press this for more than five seconds the printer will perform a head cleaning.
There’s a trash button that will cancel the job and there is also an enter and exit button that moves the film in and out of the printer.
The exit button moves the film toward the exit of the printer. The enter button moves the film toward the entrance of the printer. Feeding the film in the machine does take some getting used to so be ready for that.
How to Feed Film into DTF Printers
Before we begin I wanted to tell you that when I was feeding the film into the printer if I wasn’t wearing gloves the film got fingerprints on it. If you end up with fingerprints on your film, trim the film off straight and start again.
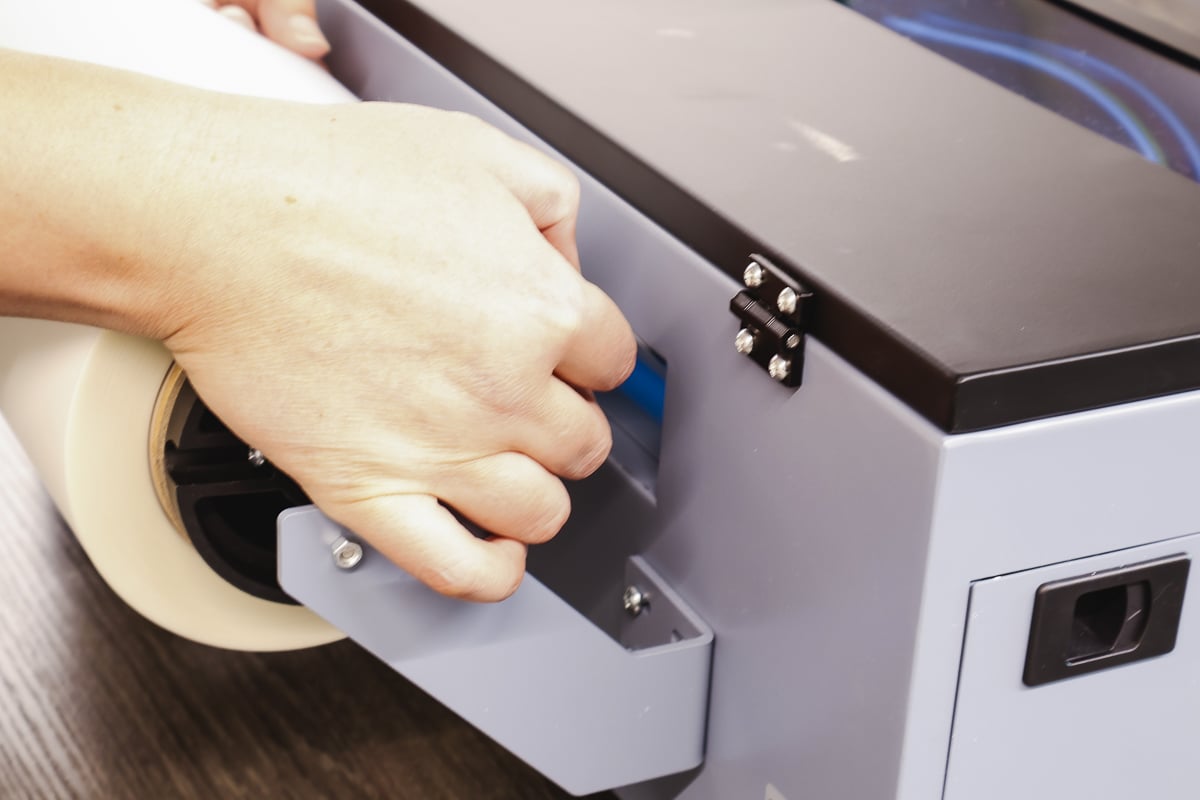
Start by feeding the film through the slot in the back and then start feeding the film down.
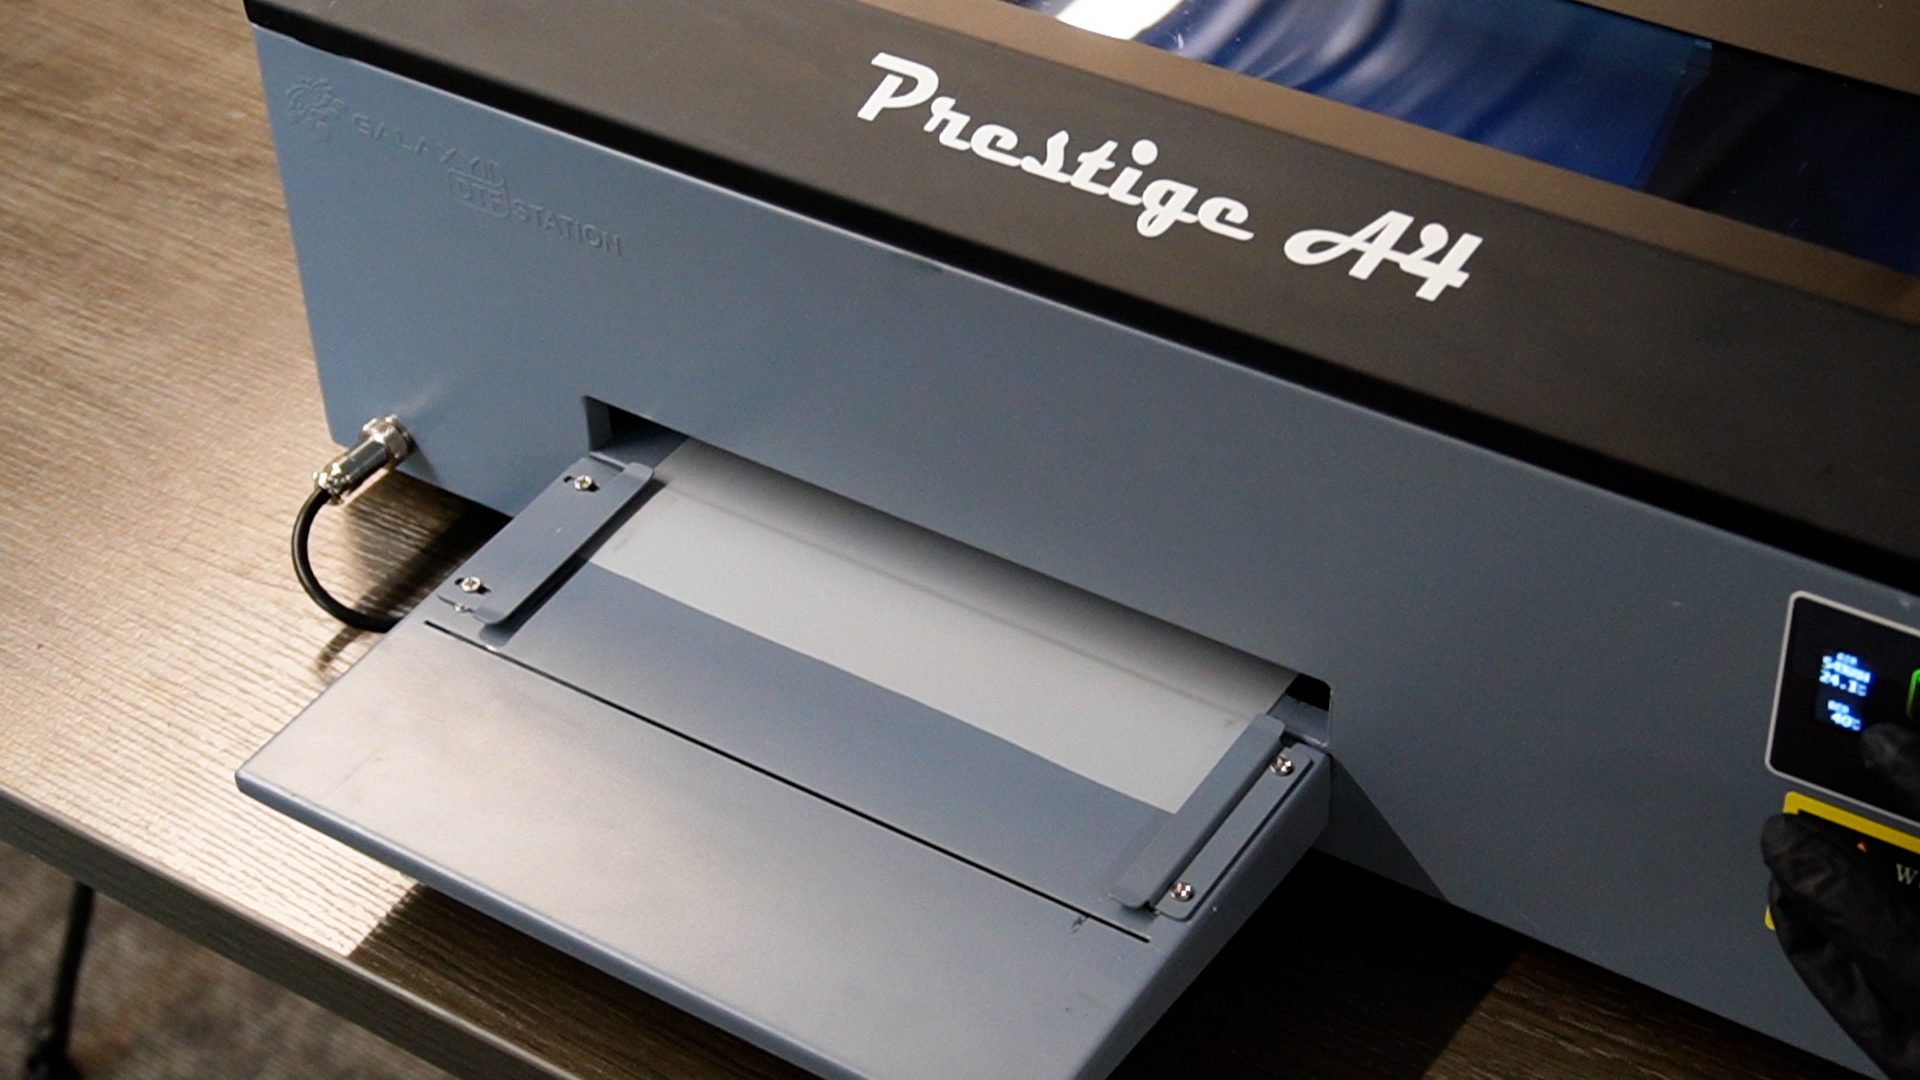
If you’re standing at the back of the printer, on the left-hand side you’ll see a white tab. The film needs to line up exactly with that tab, and it needs to be straight.
It may take several tries to get correct. Once you have the film against the rollers, press the exit button and allow the printer to feed the film through.
You will need to adjust the guides on both sides of the bed. The guides are adjustable by screws. You can loosen the screws and adjust them as needed.
Press the exit button until the film exits the printer and check to see if it’s aligned with those guides. You can move the guides or you can completely remove the film and start over again if you don’t think it’s correct.
Aligning the DTF Film is Very Important
The most critical part is aligning the film with that white tab. The film cannot be any further to the left than that tab, so it needs to line up exactly. If you get it too far to the right, your print will be off the film, so it is critical to get the placement correct.
As you feed the film through the printer with the enter and exit buttons it should move freely through the guides and the printer.
You also need to watch the back of the printer and make sure the roll is feeding the film into the printer straight. If it’s not, remove the film, adjust the caps on the metal bar, and feed it through again.
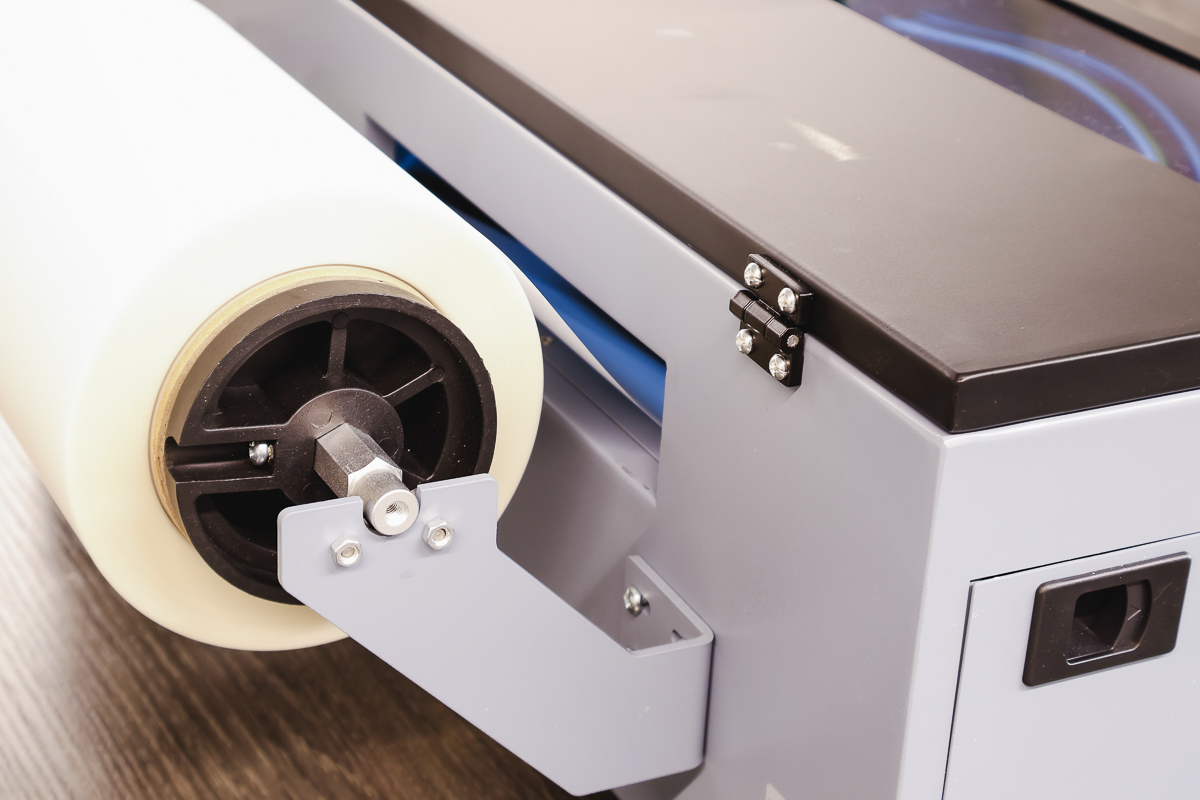
I found that the alignment of the film was the trickiest part of this process. After doing it a few times it was easier but once I had it right I wanted to leave it in the printer. Because of this, a long roll of film is what I would choose so I don’t have to reload it very often.
How to Start Printing on a DTF Printer
Once the film is loaded into the printer correctly and turned on, you’ll perform a head cleaning first. A head cleaning pushes the ink through the printer.
After the head cleaning run a nozzle check page. Both of these options can be done right in the software.
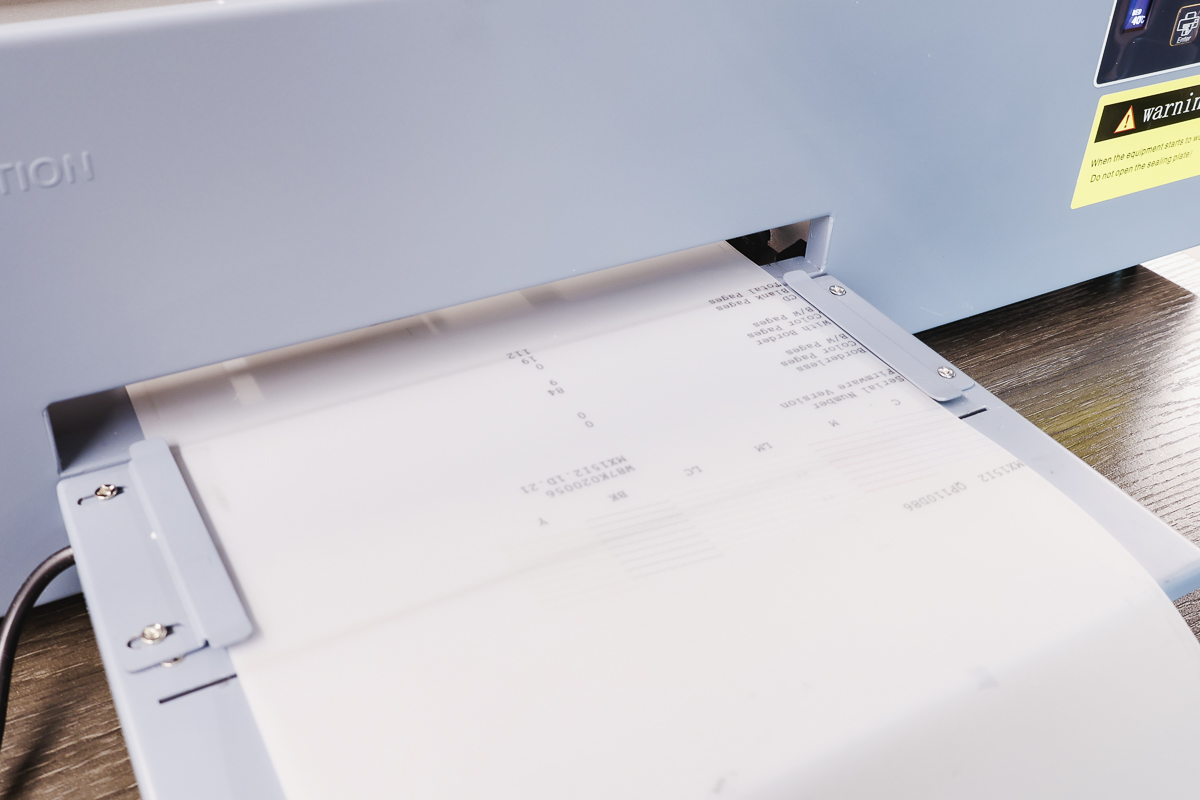
Check the nozzle check page for any missing lines or segments. If you have missing lines or segments, repeat the process. Perform a head cleaning and print a nozzle check.
If you’ve done this a few times and are still not getting a clean nozzle check page, you may need to pull more ink through the dampers and waste tube with the syringe. This could be happening because the ink isn’t flowing correctly.
Is Printer Ink Wet When It Comes Out of a DTF Printer?
When the film comes out of the printer the ink on it is still wet. The bed is heated which will help cure it a little bit but if you touch it it will smear. After applying the powder and putting the print in a curing oven, you can touch it but right out of the printer be very careful to not touch the ink.
Can I Print Multiple DTF Prints at One Time?
You can print several prints one right after another or even one really large image if needed. Make sure you have your printer on the edge of the table. This allows the prints to come off the edge of the table without getting backed up.
If you’re printing multiple prints at once, make sure that you have the film turn as it hits the floor so the ink is on top and doesn’t smear.
I tried several methods, like cutting the print off while the printer was still printing and every time I messed up the print. I would wait until the last print finishes before cutting off the prints.
You can cut the film with scissors or, with this printer there is a groove that you can run a razor blade across. Personally, I prefer the razor blade method.
Curing DTF Prints
After printing onto the film, you will need to apply the powder and heat to cure the print.
If you’re doing a manual application of the powder, you’ll need a bin to hold the powder. You need to keep the powder dry. You can put the powder back in the bag it came in or use an air-tight bin with desiccant packets to help absorb any moisture.
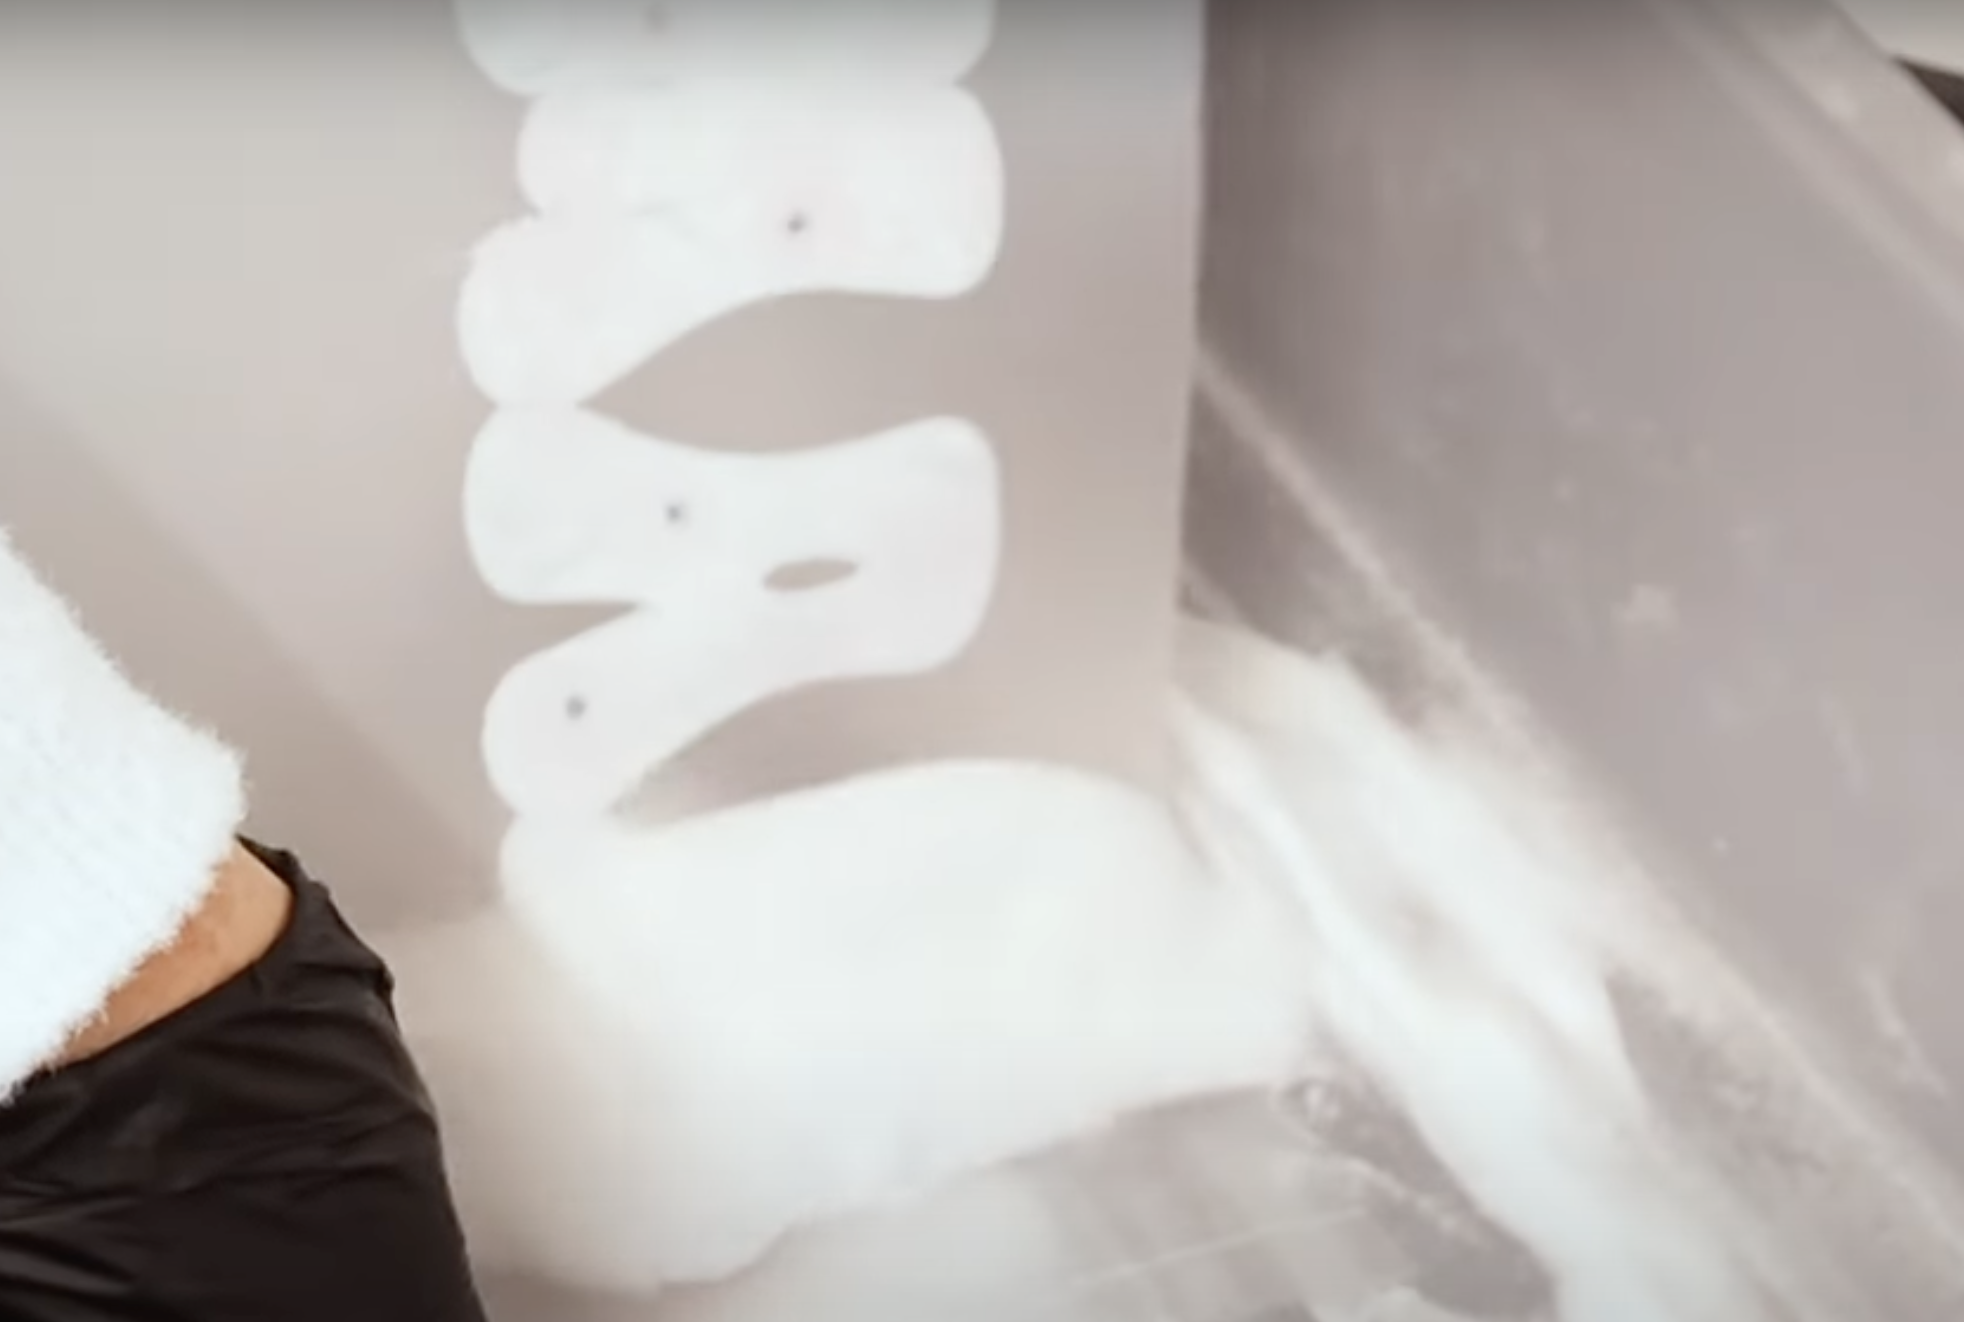
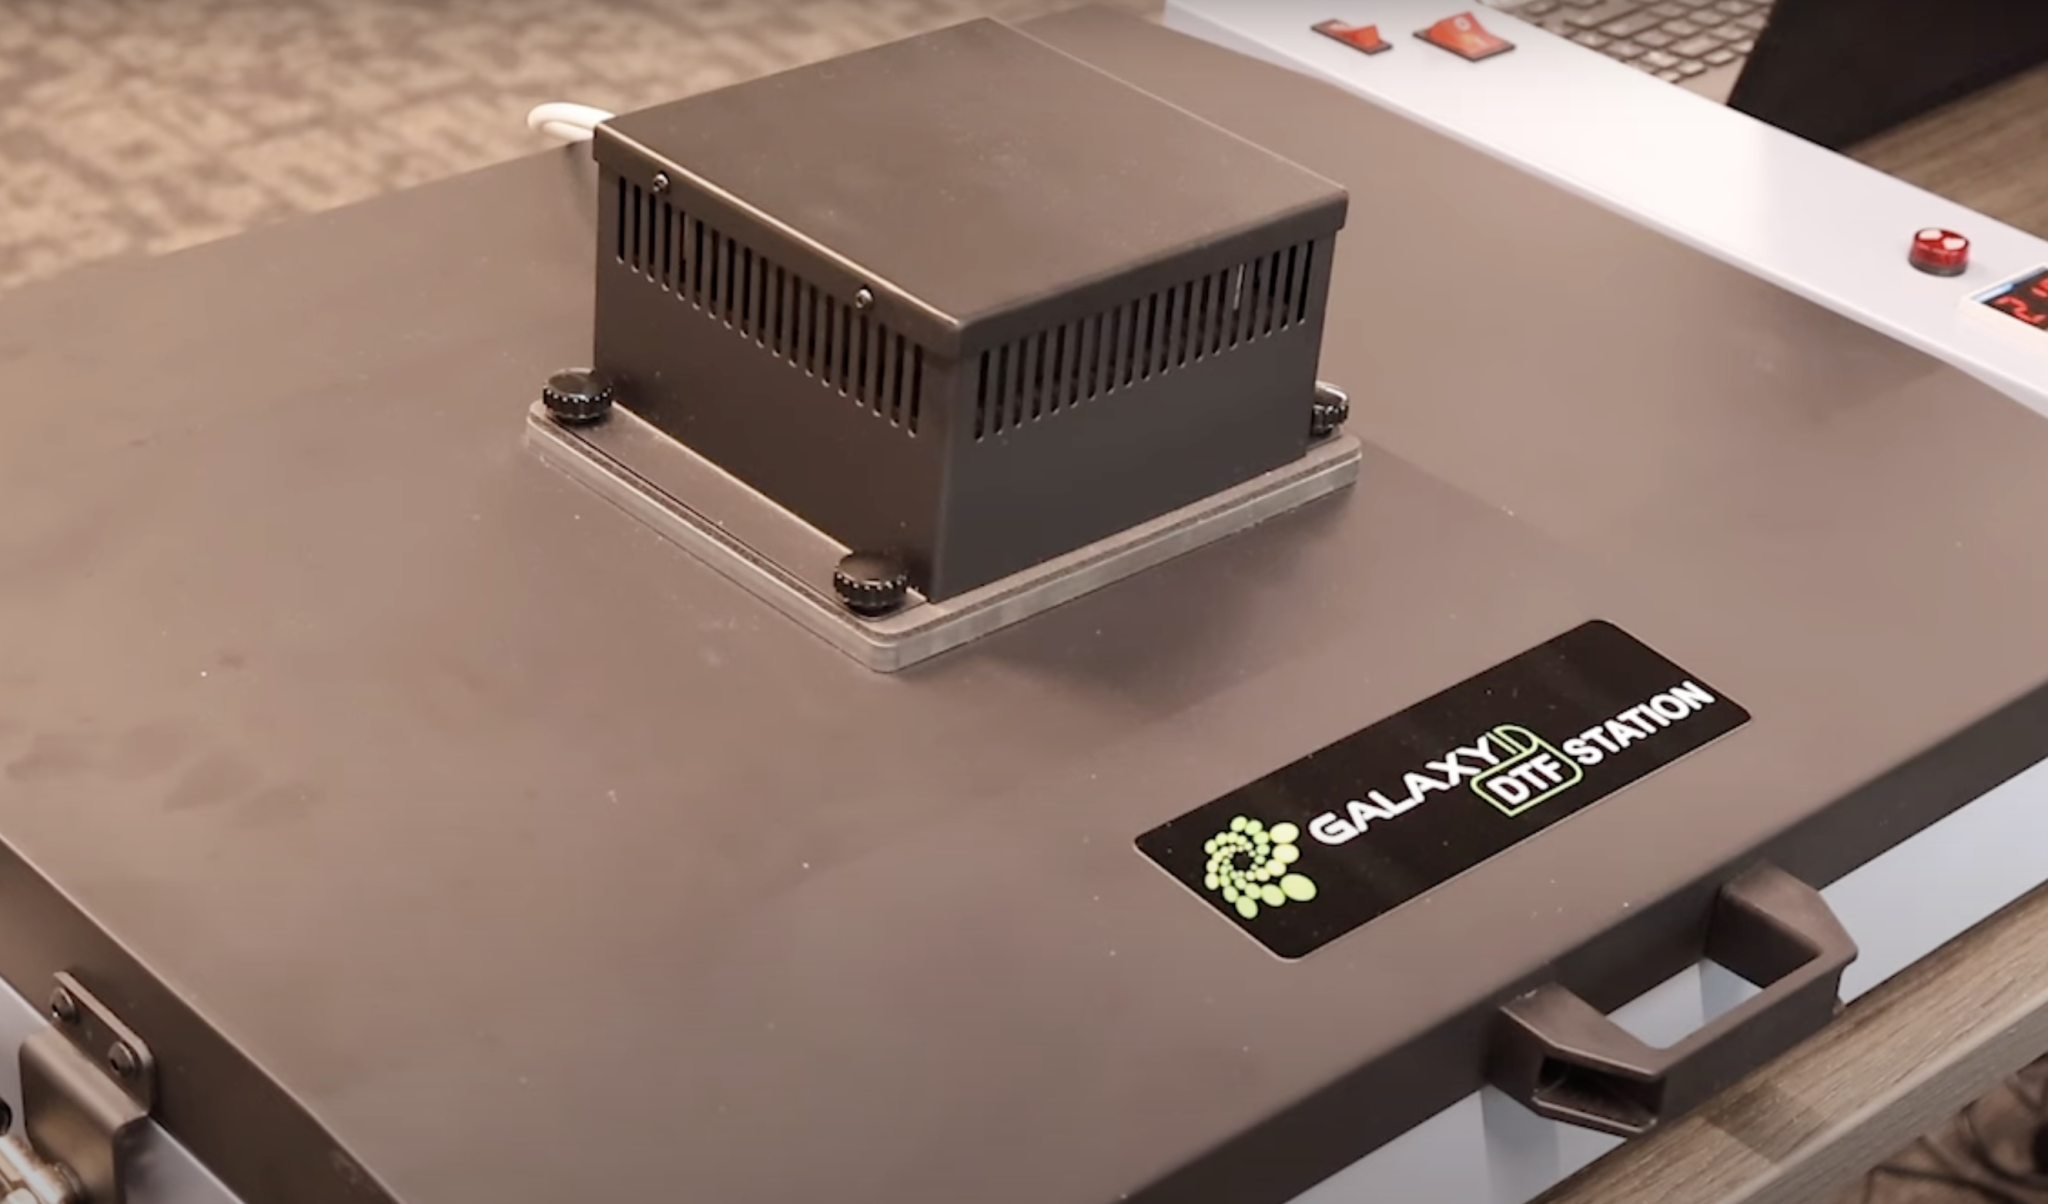
After the powder is applied, you’ll add the print to the oven and let it do its thing. Turn the oven on, let it heat up. There is a time and temperature on it. There is another switch that operates the air filter.
How to Perform Daily Maintenance on DTF Printers
I am walking you through the daily maintenance steps for this printer. There are weekly and occasional maintenance things you will need to do as well and those can be found on the Prestige website.
Start Up Process
Every day that you want to use your printer, you will need to do a head clean and a nozzle check cycle before you start printing. If you have any missing segments, you’ll need to follow the same process we did when we first set up the printer. Keep performing nozzle checks and pulling ink through the tubes until there are no missing sections.
How to Clean the Prestige DTF Printer After Use
When you’re done printing for the day, you will need to run through a maintenance cycle to ensure that everything is clean and ready for the next day. The printer comes with a cleaning solution and swabs that you can use to clean the printer.
Clean the Wiper
You’ll need to move the print head. Lift it up and to the left and then you can move the printer head over to the side.
Under the printer head, you’ll see the wiper. Place your fingers on the white portion and pull the printer head back. Use a damp swab with the cleaning solution on it and clean the wiper really well.
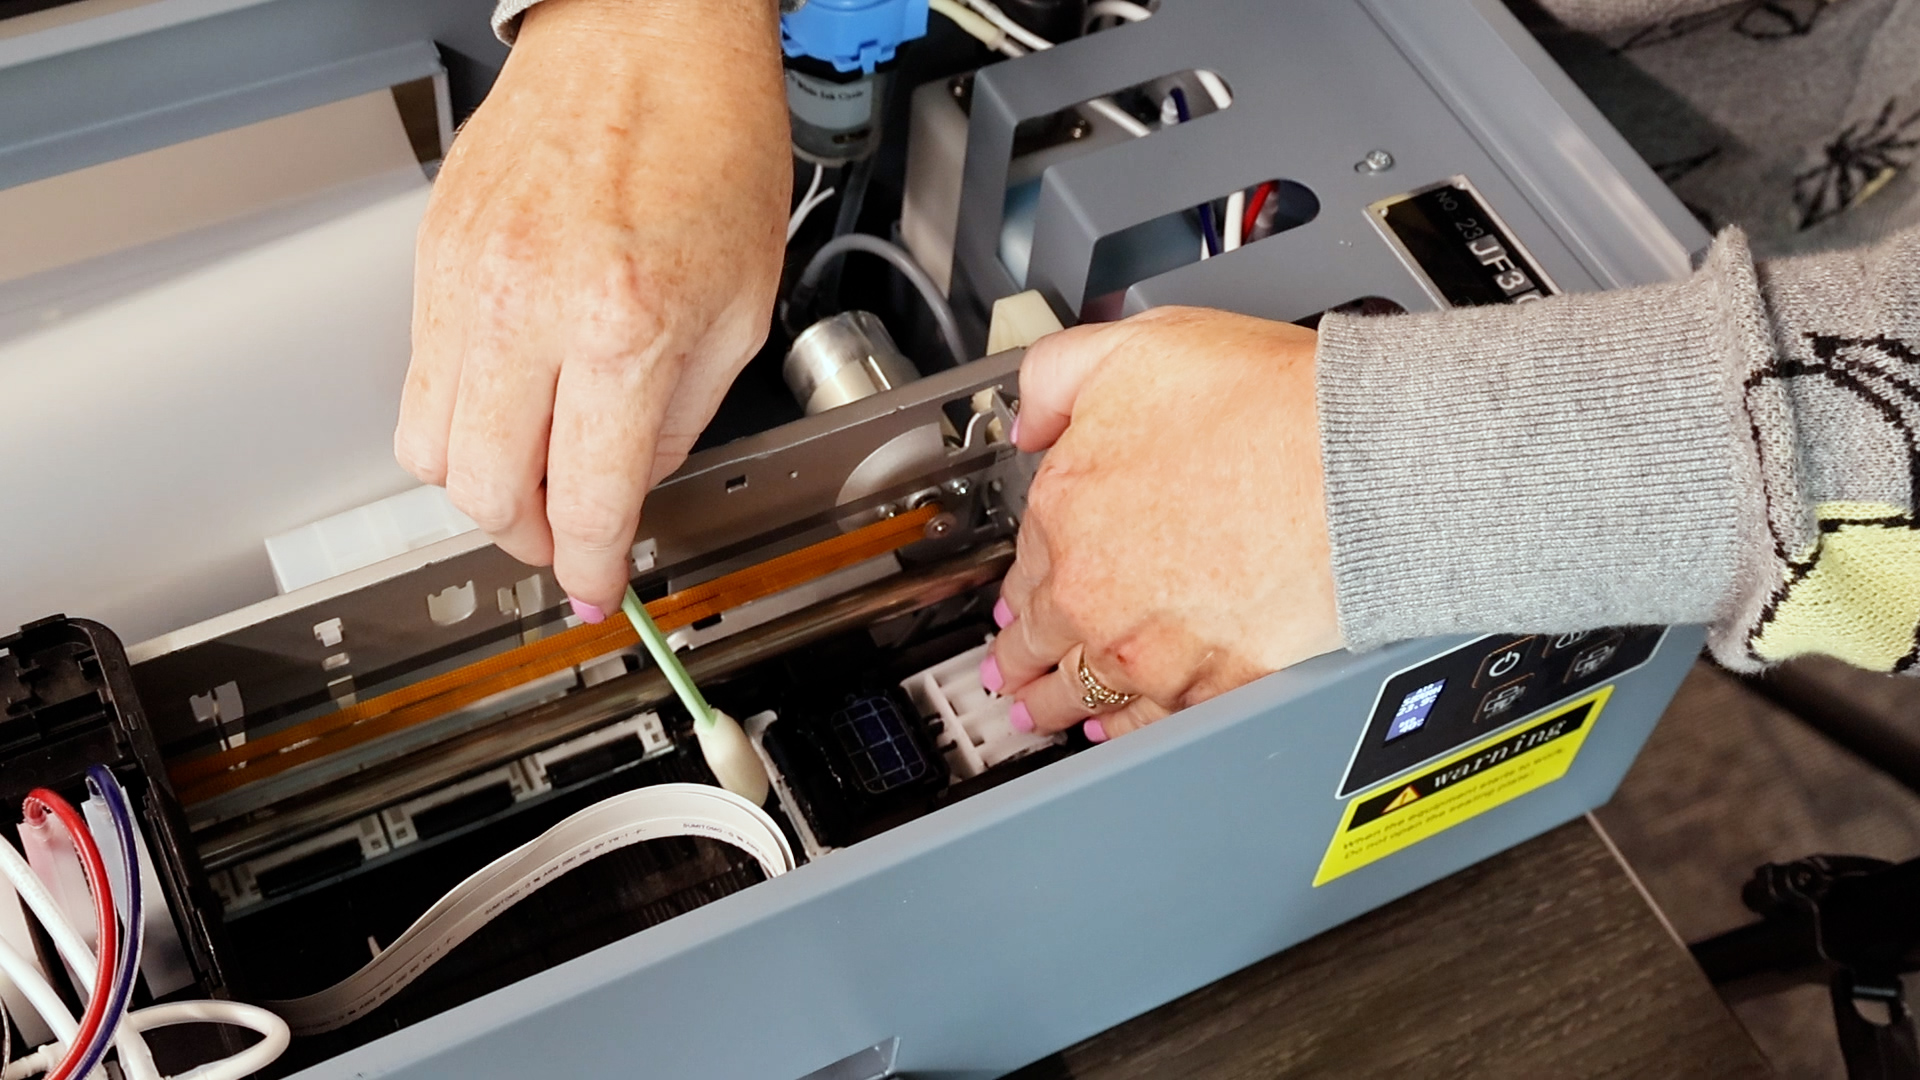
Use a lint-free cloth to remove ink from the swab. You may need to clean the wiper a few times depending on how much you’ve used the printer that day. After the wiper is clean, go over it again with a clean swab one more time.
Next, use a damp swab and clean around the print head. Only clean around the outside edge of the print head and follow the same steps for cleaning that you did with the wiper. After it’s clean, use a dry swab to go over the area one more time.
Add Solution to the Pad
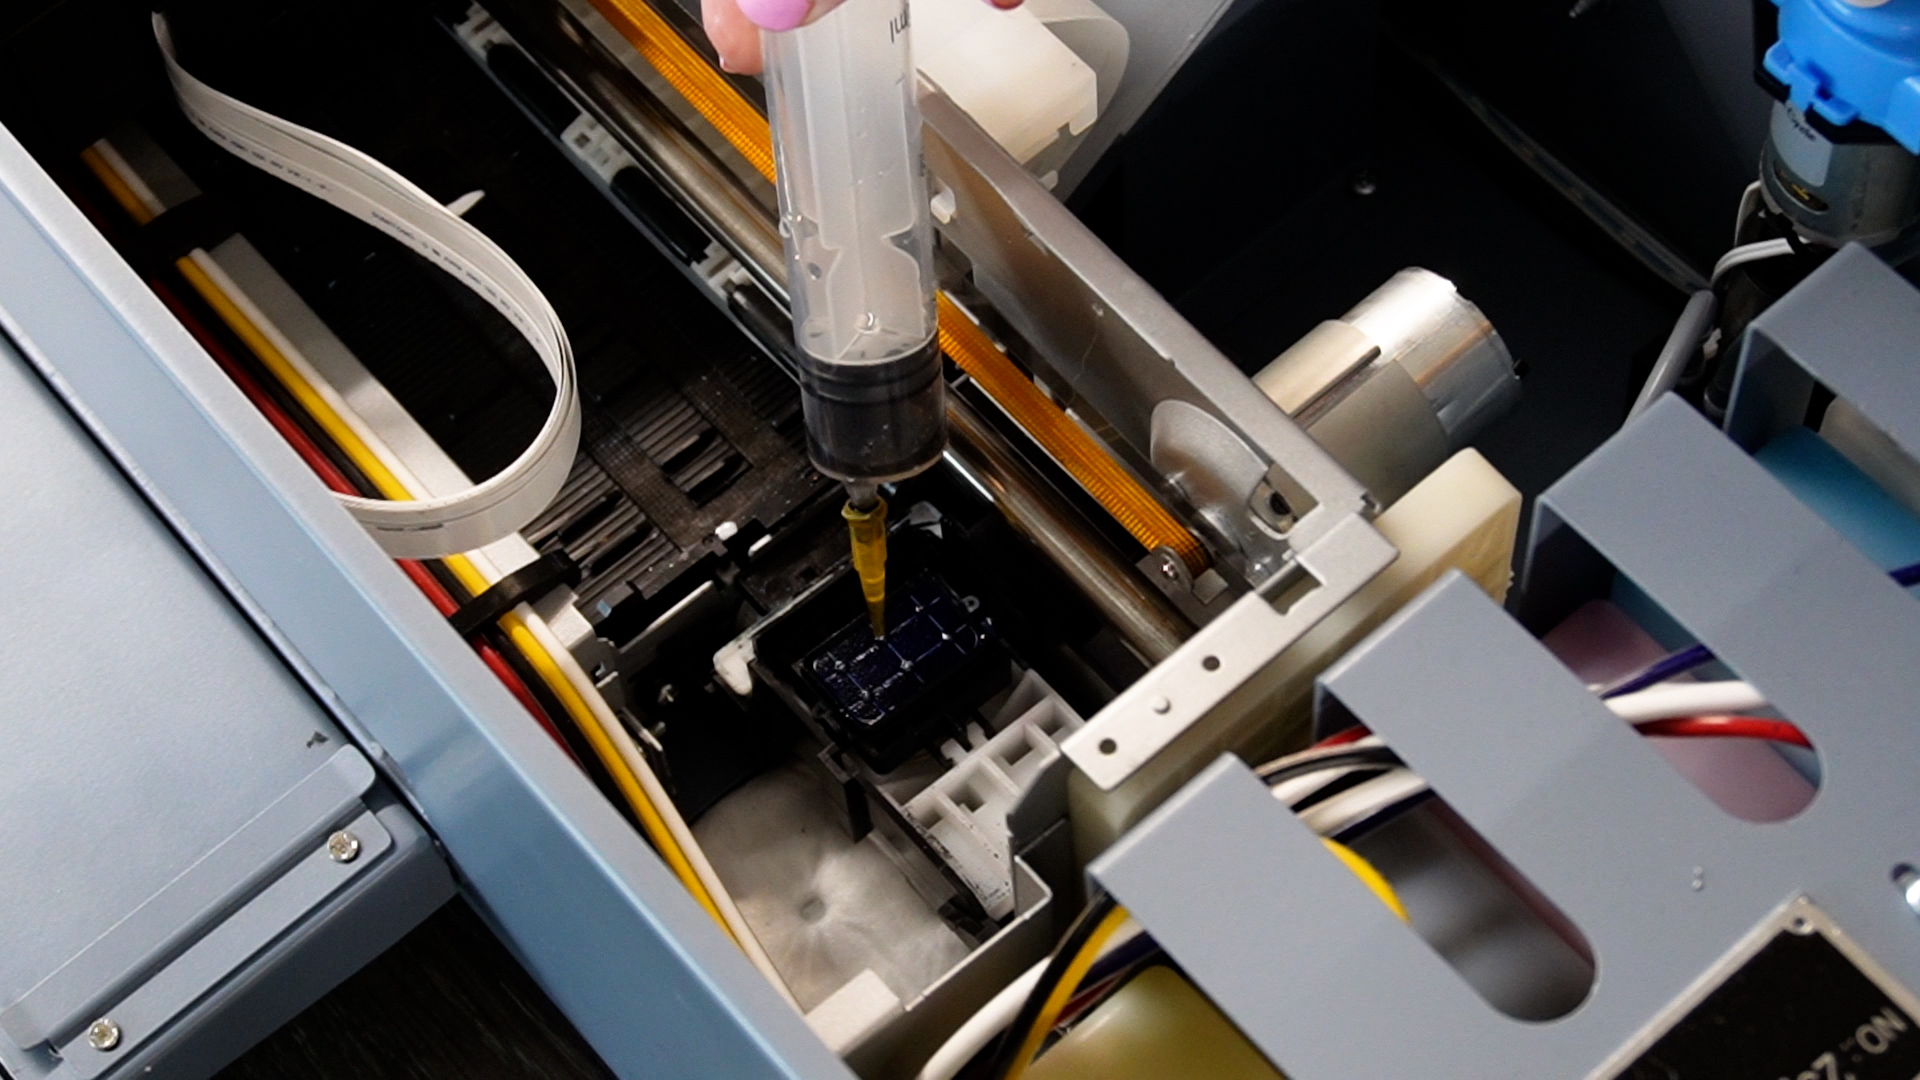
Now we want to add a little bit of cleaning solution to the pad that’s in the center. Add just enough to fill the well. I like to use the syringe for this step because I have more control over where it goes.
Clean Printer Head
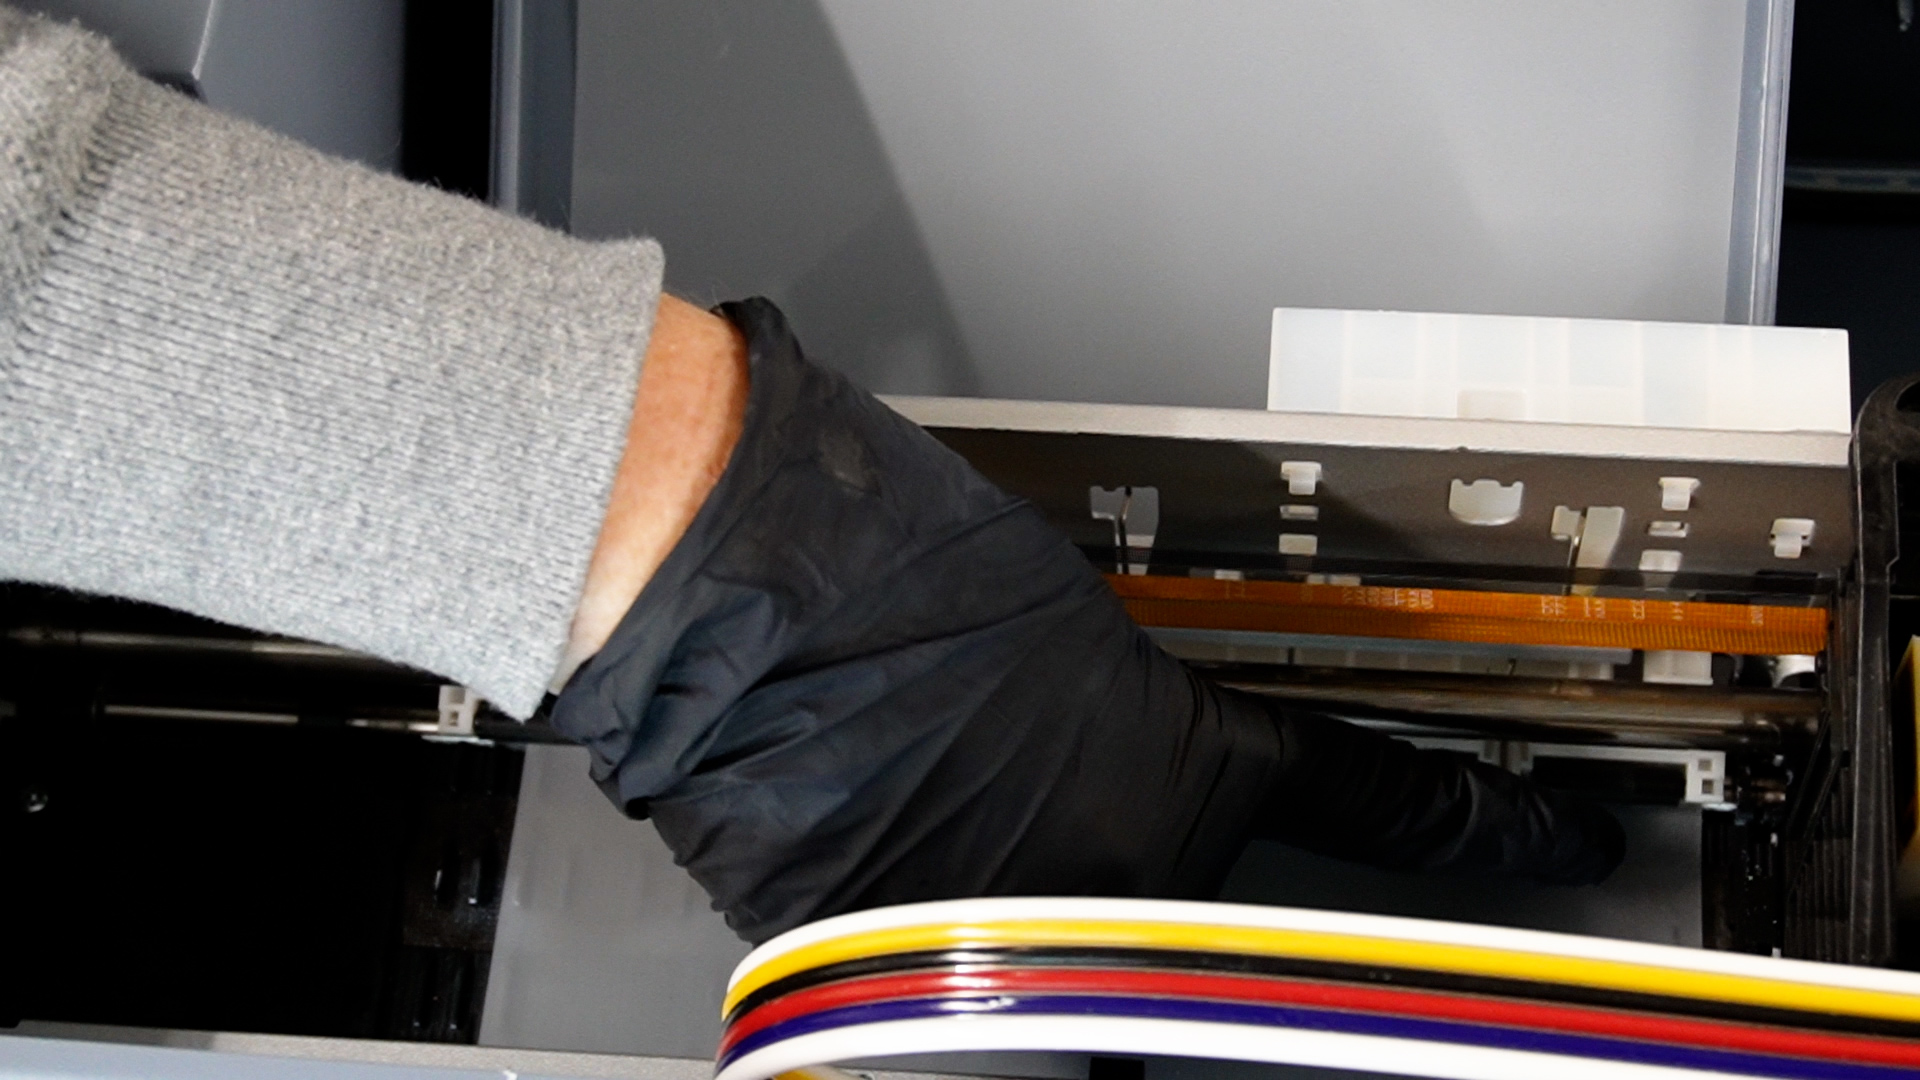
Finally, use your hands on the inside of the printer to push the print head back.
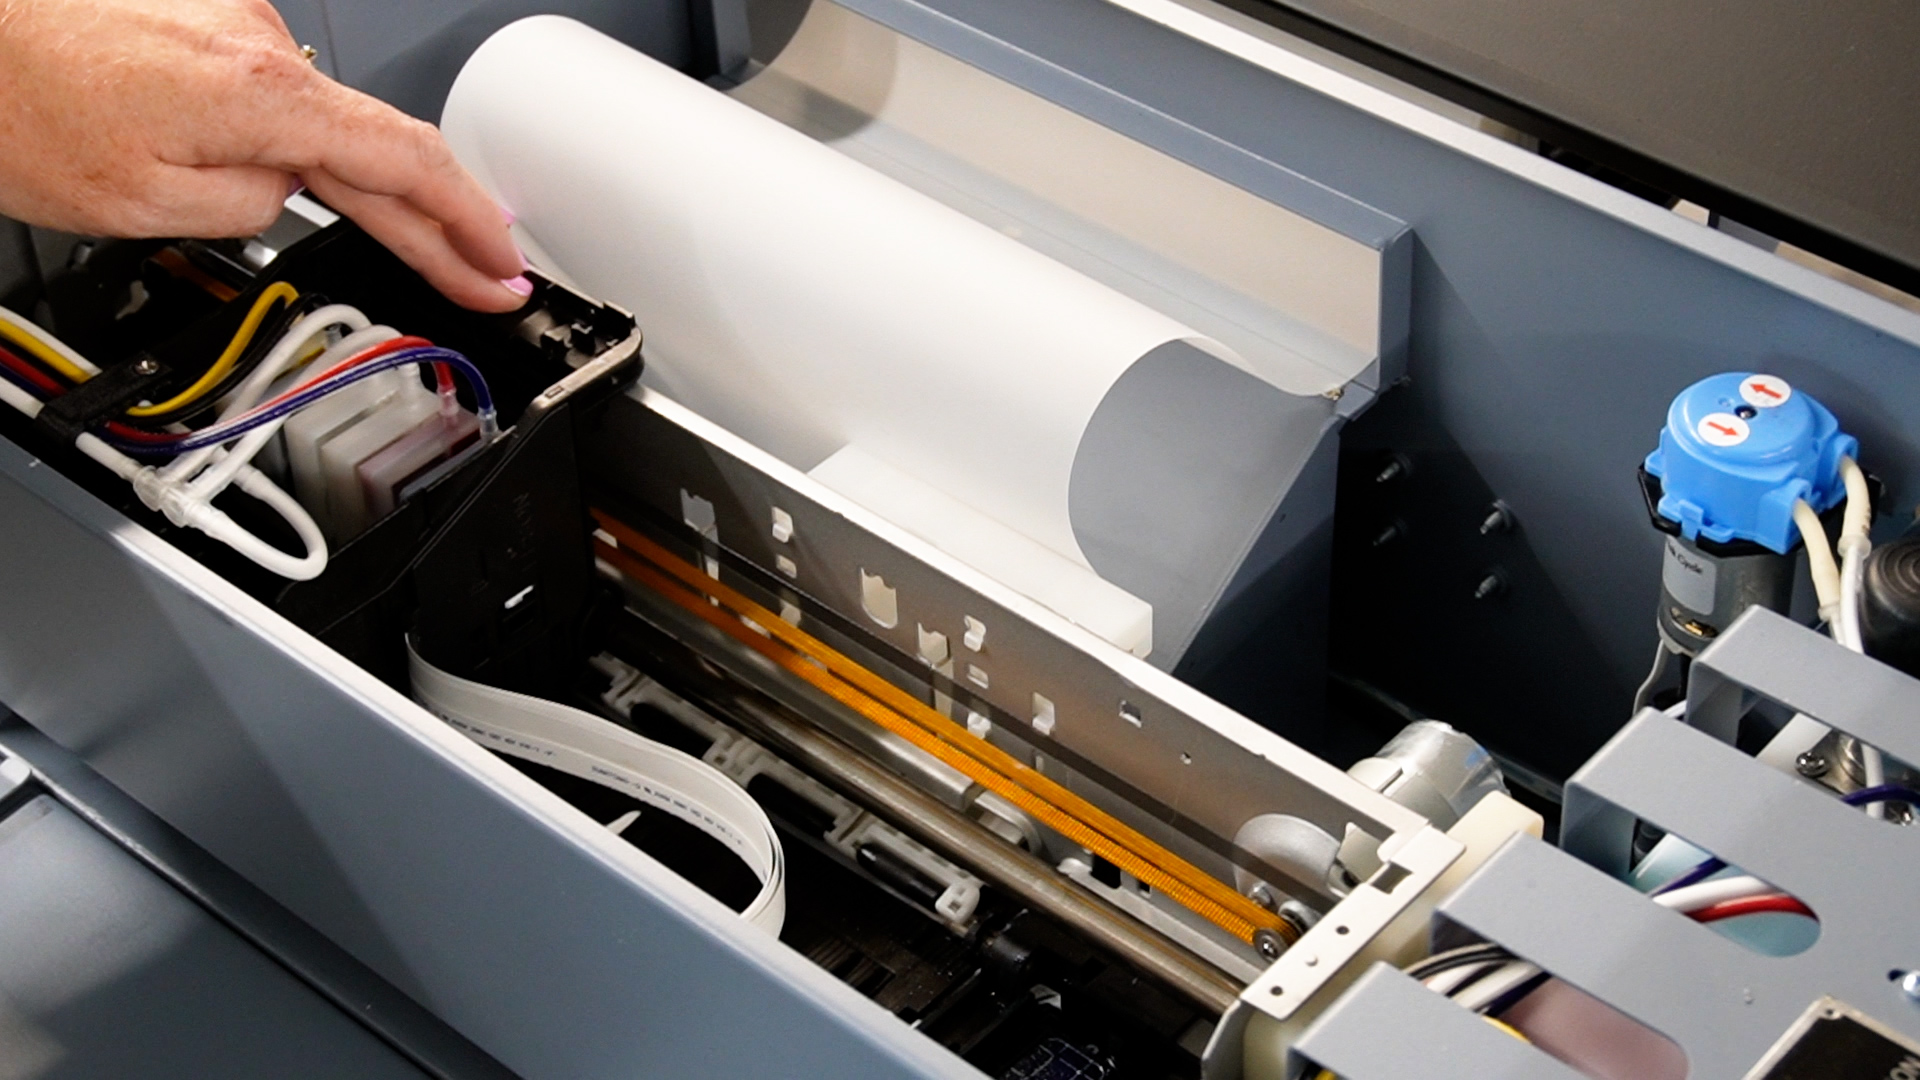
Then use a damp swab and go into the printer and clean on both sides.
There is a little silver bar that you’ll see when you look inside the printer. You do not want to touch the silver bar. Touching the silver bar with the cleaning solution can damage the printer. So just clean on the sides of the bar.
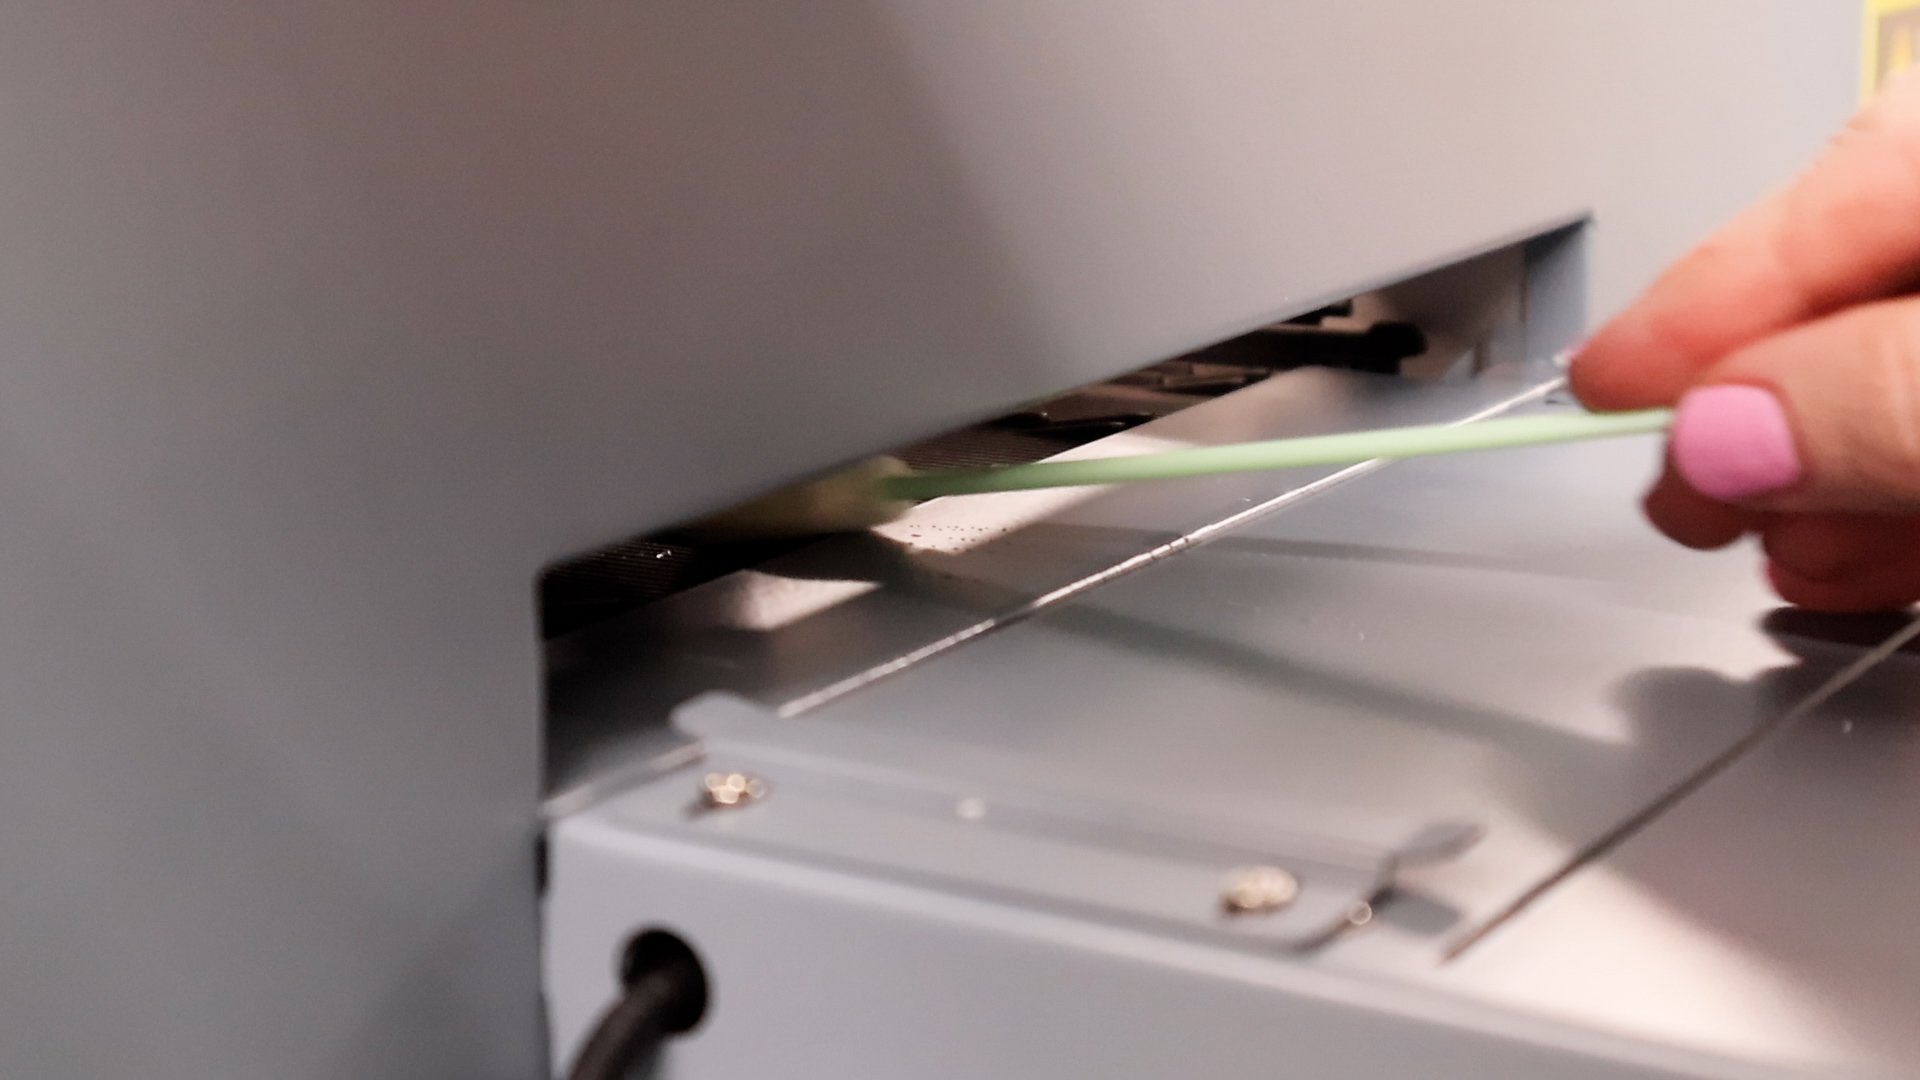
Follow the same process again. Clean until there’s no ink, dry it off with a lint-free cloth, and use a clean and dry swab at the end. Move the print head back into position and then leave the printer to sit.
Prep DTF Printer Before Printing Each Day
The next morning, repeat the head cleaning first and then print a nozzle check page. Check for any missing segments, and repeat if necessary.
The general rule is, that if you’ve done more than five head cleanings and nozzle checks and you don’t have a clean pattern, then you need to break out the syringe and start pulling ink through your dampers.
Pull ink through the dampers of the ones that are missing segments, you don’t have to pull ink through the dampers that are printing fine.
Are You Interested in DTF Printing?
Today I showed you DTF printer setup and maintenance. If you’re interested in DTF printing and don’t want to miss the DTF content I’m releasing, I have an email list you should sign up for.
If you’ve read this whole process and think it’s too much for you but like the look of DTF prints, Heat Transfer Warehouse will print any file you upload onto DTF film for you. It will already have the powder applied and be ready to press. Pressing is the easy part and we will get to that in a future post!
Is the DTF Printer Setup and Maintenance worth it?
My thoughts on the Prestige DTF printer are that I love the prints it provides and I love how the shirt turned out. The process however was not my favorite. The setup is a lot and there is a very steep learning curve.
The process of adding the powder is very messy, I’ll show you that in my next tutorial. That is not my favorite part.
If you read my first article about DTF printing, you know that I have some safety concerns with the whole process. I recommend that you wear proper safety equipment when operating DTF printers throughout the whole process.
Right now, I would probably order my DTF prints. I am not running a DTF printing business. Whether a DTF printer is right for you will depend on where you are in your business journey.
If you’re making just a few shirts, the Heat Transfer Warehouse website would be a great way to do that. If you’re at a point where you’re making hundreds of shirts and are looking to cut costs, doing DTF printing from home may be the right choice for you.
Is DTF Printing Easy?
Once you’ve gone through the DTF printer setup, the printer itself is easy to operate and use as long as you’re performing the maintenance cycles discussed here.
DTF printing takes up quite a bit of space. The printer itself is large, and the oven you need to cure the prints is larger than I expected. You don’t want to have to have the powder near the DTF printer. You need to have the supplies spread out a bit. You’ll need a place to print and a separate area to apply the powder.
You’ll also need a place to set the prints while you wait to cure them. If you’re printing multiple prints at one time, you’ll need space to place them so they don’t get smeared before they’re cured.
Once they’re cured, you can stack and store them in one place. Until that step, you need a lot of space for the DTF printing process.
Selling DTF Prints
If you’re still trying to decide if a DTF printer is for you, I wanted to remind you that along with selling finished goods like shirts with DTF prints on them you can also sell the DTF prints themselves. Once DTF prints have the powder applied and have been cured, you can easily ship them to whoever wants them.
Pressing DTF prints is really easy. It’s something anyone with a heat press can do and they’re easy/lightweight to ship.
If you have any questions about the setup and maintenance of the Prestige A4 DTF printer, leave those in the comments and I’ll be happy to answer them for you. If you have other questions about DTF printing, ask those too. I’m working on answering all of your questions through my DTF printer series.

