
One of my favorite projects in our house is the custom fireplace that I built for our living room, and I really, really love it. But after year of growing into this space it was time to add some custom storage solutions to it. Since the living room is so close to the kitchen I wanted everything to tie in together. So, I decided to make easy and custom cabinets + floating Shelves! Throughout this project I also had to manage my house’s uneven floors and not square walls, so if your house is anything like mine keep an eye out for some bonus tips along the way that can help with those challenges. Keep reading this tutorial to see how it all comes together!
This post contains affiliate links, which help support more projects on my website! For my full disclosure policy regarding affiliate links, click here!
Want to see this build in action? You can watch my build video here (+ make sure to subscribe to my channel)!
Tools + Materials
Tools
Materials
1. Build & install the base for the cabinets


First things first, I built a base for the cabinets out of 2x4s and screwed them together to form a support and dry fit them into the space.


Next I used my multitool to cut the molding away from the wall and a blade to cut the seam along the top of the molding. After removing the molding I was able to able to push the base cabinets flush against the wall.

I used a level and shims to make sure the cabinet support was level even though my floors are not.

Then I was able to drill the base directly into the wall.

Of course, this whole process got repeated on the other side of the fireplace as well.
2. Install the cabinets


I assembled the cabinets and then installed them on the supports. If you want to see more details on how they get assembled check out my Small Kitchen Makeover video where I go a little more in depth into the steps.

I chose to use wall cabinets instead of base cabinets for this project because they’re thinner. These are 12” deep. But because I want them to be flush with the fireplace I had to improvise a bit. But stick with me, it was a great modification. So first I traced a line on the wall to mark the height of the cabinets.

Then I took a 2×4 as a spacer and attached it to the wall at the cabinet height.

Once the spacer was in place I attached the cabinets to each other and to the spacer on the wall. This also helped to make them super sturdy so they won’t tip over.
3. Paint the cabinets

Once I had the cabinets in place it was time to paint them to match the fireplace.

These are pre-painted cabinets so I did have to scuff them up before applying new paint.

They also got a few coats of primer, with a sanding at 320 grit in between each coat.
4. Cut & laminate the shelves

I used my circular saw to make long cuts in my 3/4″ plywood for the floating shelves.

Then I used the miter saw to cut the shelf pieces to the correct width to fit next to the fireplace. I did leave them a tiny bit wider and longer than I needed for the space, I’ll explain why in the next step.

I wanted thicker shelves than just the 3/4″ plywood. So I decided to laminate these boards together. The first part of that process is to apply wood glue and spread it evenly all over the board. When I laminate boards together I always leave them slightly bigger than I need them to be in case there’s any movement while drying. I can always trim them down after they’re dry.

Then I put the two faces together and repeated the process with the other boards.

Lastly, I clamped them all together to ensure they dried flat. I of course forgot to grab my clamps from the shed shop so I also put a few kettle bells on top for some extra weight.
5. Paint the cabinets

Spoiler alert, the weather was not on my side. So after a spray coat and then a back roll I had to admit defeat and finish hand painting these inside. But in the end they turned out just fine and I’m happy with the color I chose to match the fireplace.
6. Cut the shelves & install brackets

Once the glue dried it was time to remove that little extra I had left and cut the shelves to their final dimensions on the table saw.

For in stalling the brackets you’ll want to clamp the shelf down to a flat surface.

A 12″ drill bit makes this process so much easier.

A self-centering dowel jig is my other secret trick. It automatically finds the center of your shelf, so it takes the guesswork out of installation.

Measure where you want to install the bracket.

Line up the self-centering dowel jig and drill through the 1/2″ hole.

Insert the bracket and trace around it.


Now we’re going to route out a space so that bracket sits flush with the shelf.
6. Finishing touches for the shelves

I applied edgebanding with my iron to give these shelves a finished look. They really look like a solid piece of hardwood now.

Final finishing always means a sanding to make sure everything is smooth to the touch.

After sanding it was time for stain which I applied with a brush.

Then I went back with a paper towel and wiped them down. I also applied a few coats of clear finish as well.
7. Installing the floating shelves

I did have to remove some of the barn wood on the fireplace to make sure the cabinet top was square. Then I was able to use elongated screws to attach the top to the cabinets.


I made this template to help me hang the floating shelves. I placed it on the wall with a level and used the holes I made to drill into the wall and place the floating shelf brackets. It’s a great way to line everything up for hanging multiple shelves.


I placed each shelf depending on the items that would be stored on them. I did make them symmetrical on each side of the fireplace. I also added some extra support by securing the shelves through the fireplace as well.
8. Finishing touches


I drilled holes to be able to access the outlets and I did cap them off to make them look more finished.

I added hardware to the cabinets as well.


Last step was using my brad nailer to add a panel to the side of the cabinets, a toe kick along the bottom and final trim pieces to the corner. (Yes, the trim also got paint to match!)
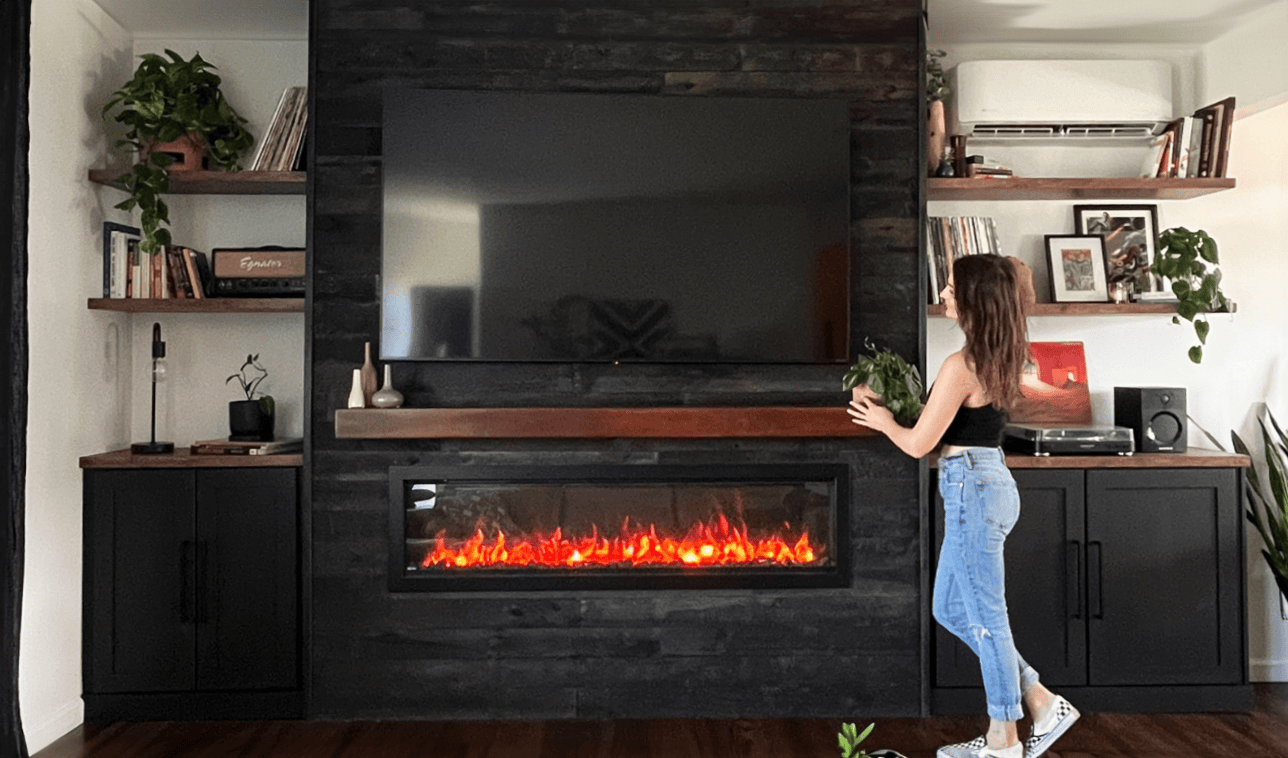
The Finished Project


It is incredible what a couple of cabinets and some custom shelves can do to a space. Honestly, I am so stoked about this upgrade to our living room and I am so looking forward to more upgrades as we grow into our home. Using premade cabinets was a really easy way to make make this space look more unique but still while saving time. It did take 4 days instead of the 3 I had hoped for, but still a really quick project in my book. As always, happy DIYing!
Save This for Later
I hope you enjoyed this project! If so, make sure to Pin It for later!
