This post and photos may contain Amazon or other affiliate links. If you purchase something through any link, I may receive a small commission at no extra charge to you. Any supplies used may be given to me free of charge, however, all projects and opinions are my own.
Did you know you can use pattern fill for engraving projects with your Cricut machine? Today I’m sharing a free pattern fill file that you can use to create engraved projects with your Cricut machine that are more than just an outline.
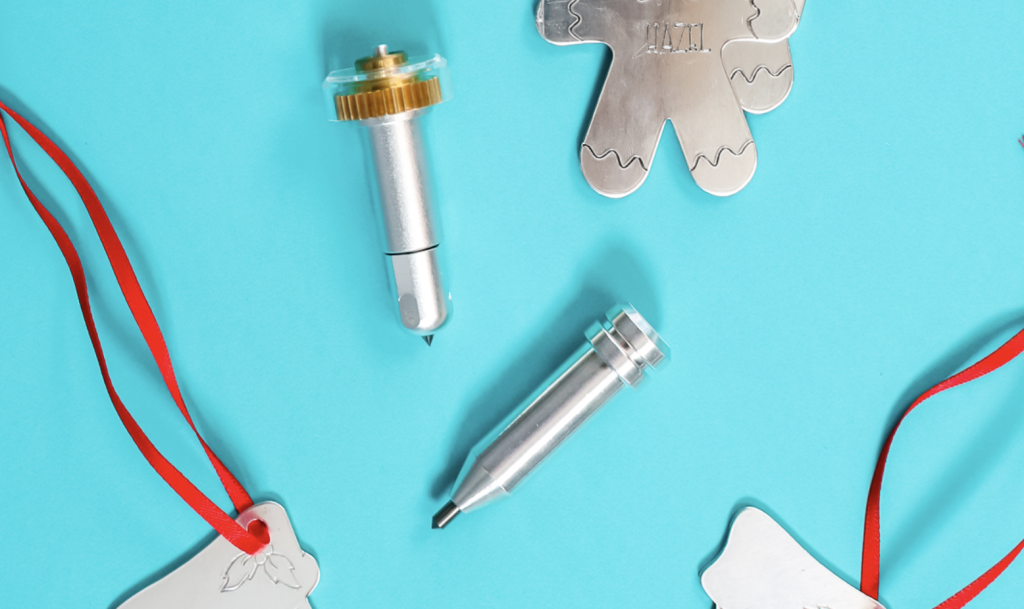
You can actually engrave metal like this with both Maker machines and Explore machines. Learn more about the Maker Engraving Tip and Explore Engraving tips then get started with engraving.
Engraving with Cricut Machines
Typically when engraving with Cricut machines you get an outline. The tip of the engraving tool is a fine point. It is not like engraving with a Glowforge or other laser cutter.
If you want a larger section engraved with a Cricut machine, using a pattern fill can help. You can watch me test out different ways to engrave using a pattern fill by pressing play on the video below.
Not just any pattern fill will work for engraving and I’ll show you why as we engrave our tests.
Supplies Used
Using Pattern Fill Files for in Cricut Design Space
To get the free pattern fill file I’m using, click here and then enter your info and it’ll be emailed right to you. You could try another pattern fill but you’ll definitely need to test it first to see if it works how you want it to.
How to Upload Pattern Fills into Design Space
While I’m testing the engraving, I will show you what it normally looks like when you engrave with a Cricut Engraving tip.
I’ll also show you two different ways of using the pattern fill file. I’m using a heart shape as an example but you can use these steps for any design or font you’re using.
Uploading a pattern fill into Design Space is the same as uploading a design into Design Space. From the Design Space canvas, click on Upload and then click Upload Image and then find the SVG on your computer and it should upload as a cut file.
This file is about 11 inches by 11 inches so it’s pretty big. It may take a while to upload and even to add to your canvas.
How to Add a Pattern Fill to a Shape
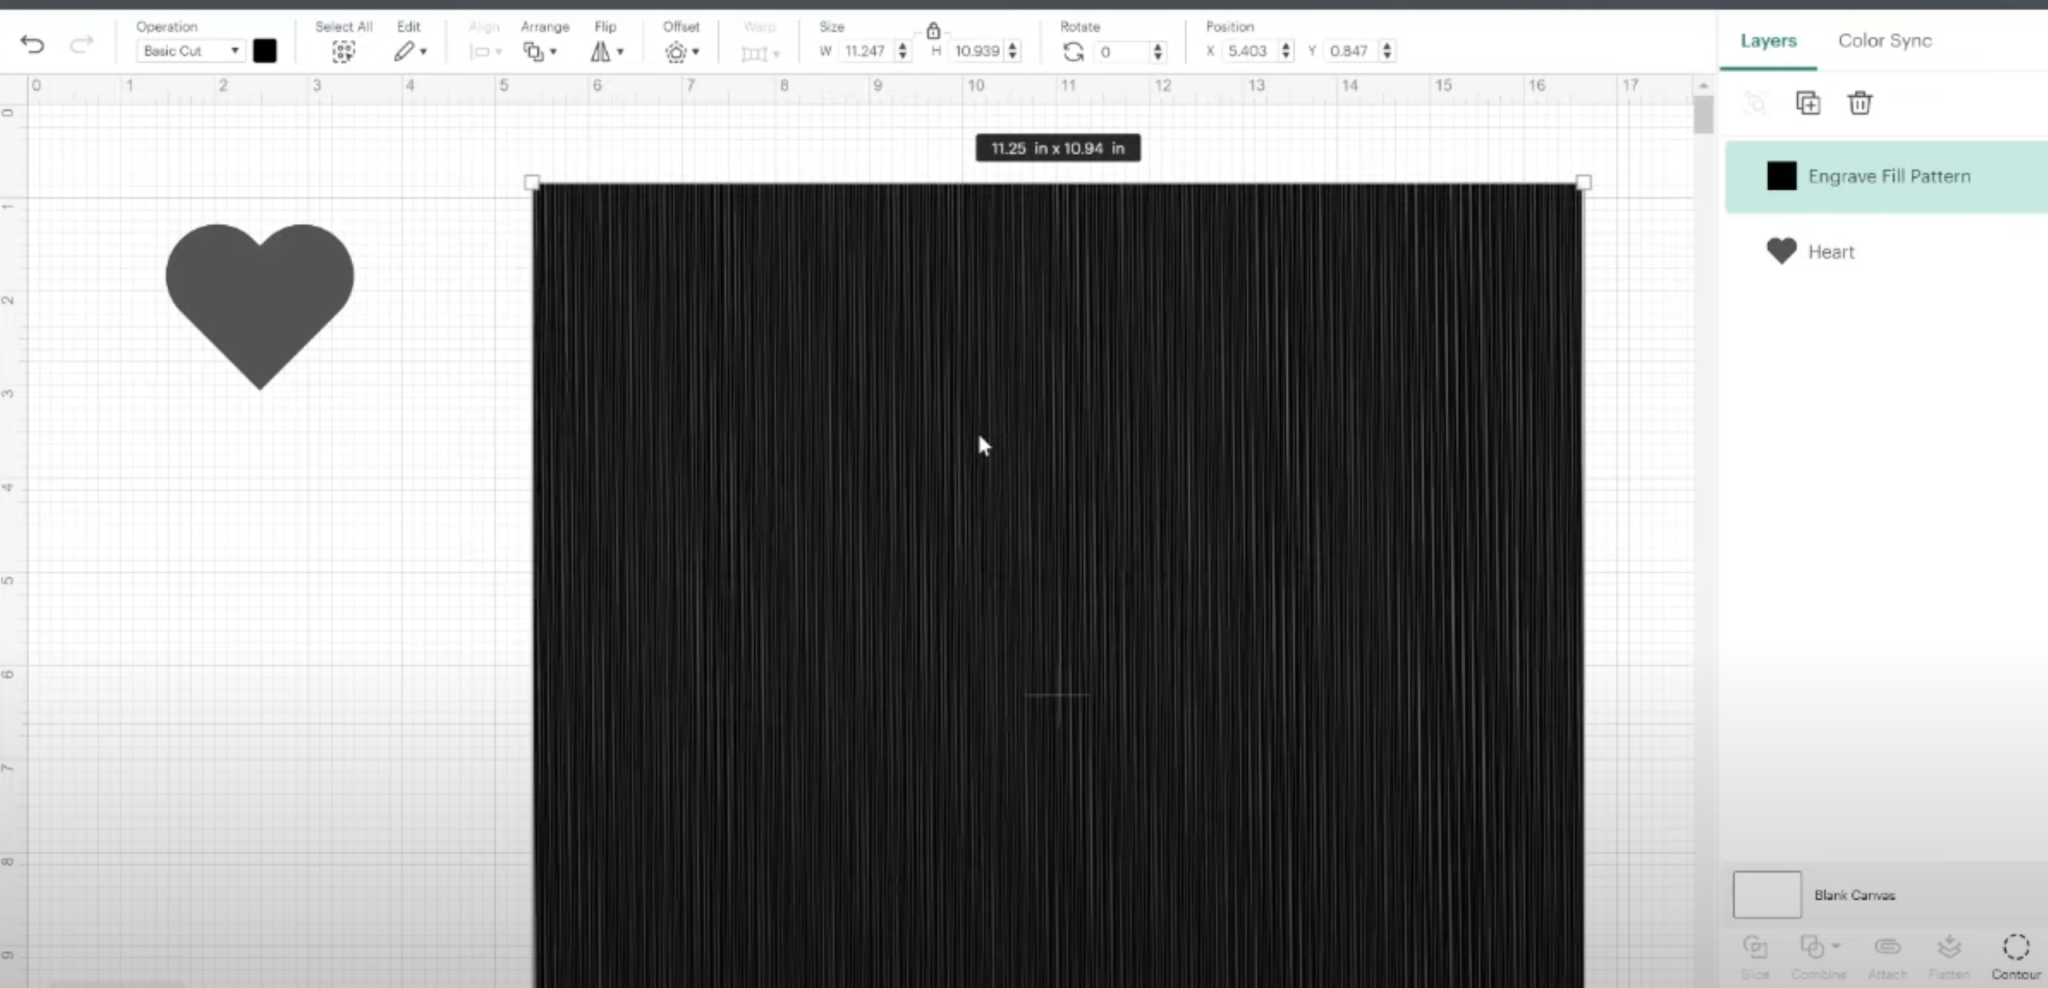
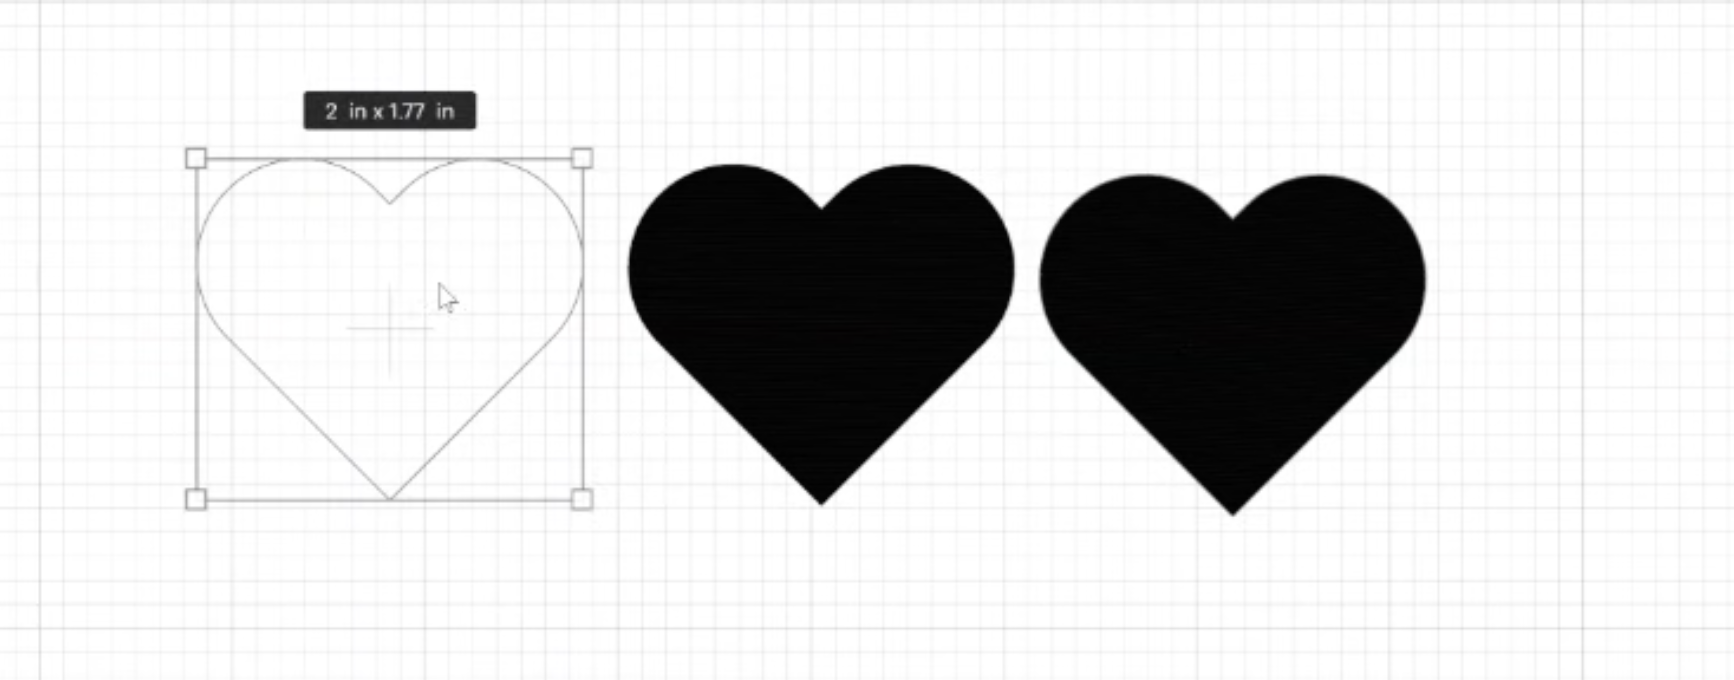
I am using a heart shape and I want the heart to be 2 inches. Before I set the size of the heart I need to get the pattern fill added to it.
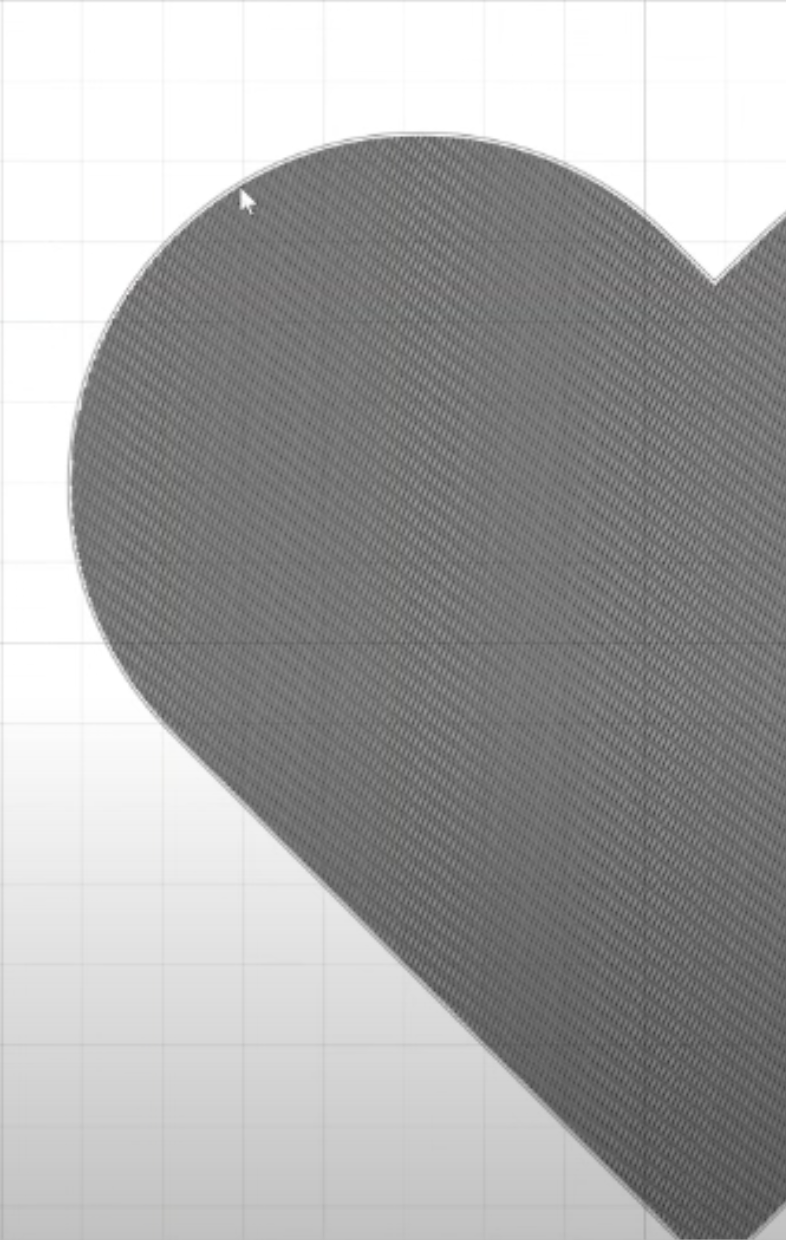
Allow the pattern fill to load onto the canvas full-sized. Next, we want to make the heart as large as we can while still fitting completely into the pattern.
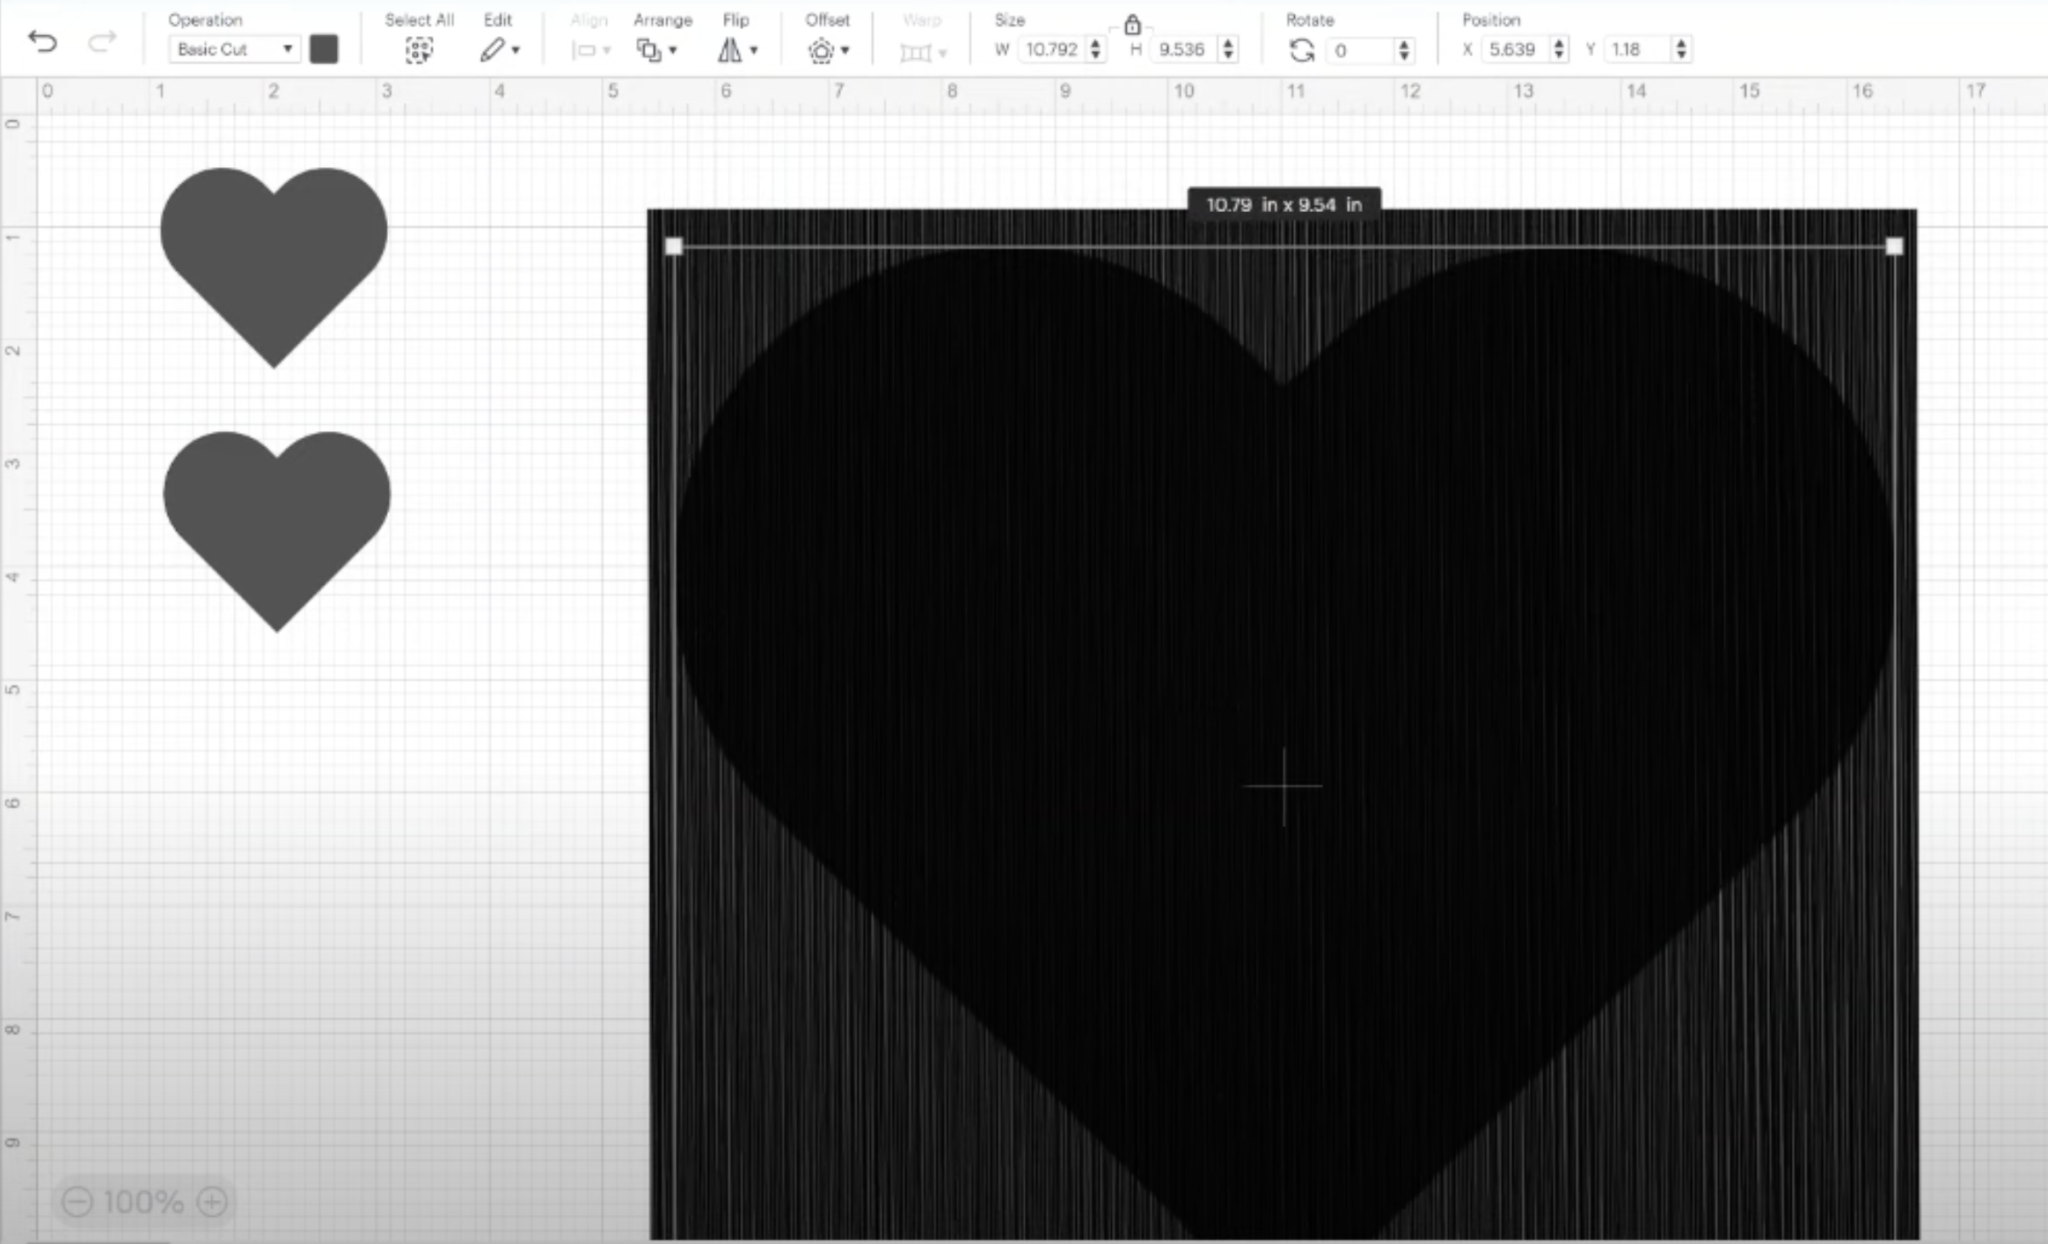
We want to get as many of the engraving lines as possible into the heart shape.
The lines for this pattern are vertical. If you want them to be horizontal or at an angle, you can rotate the pattern fill piece. Just make sure the heart fits on the pattern fill.
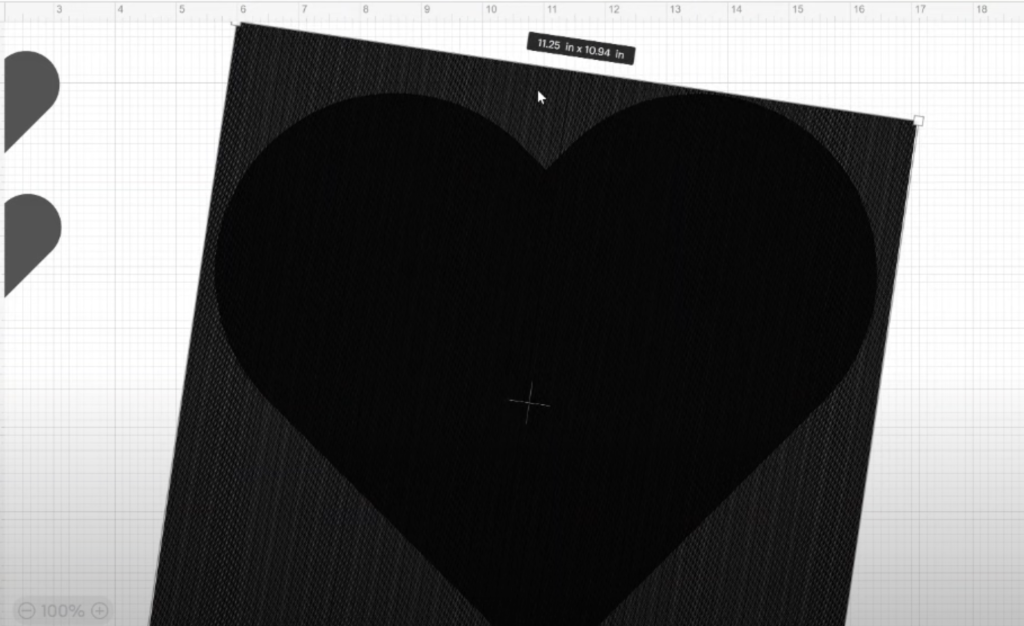
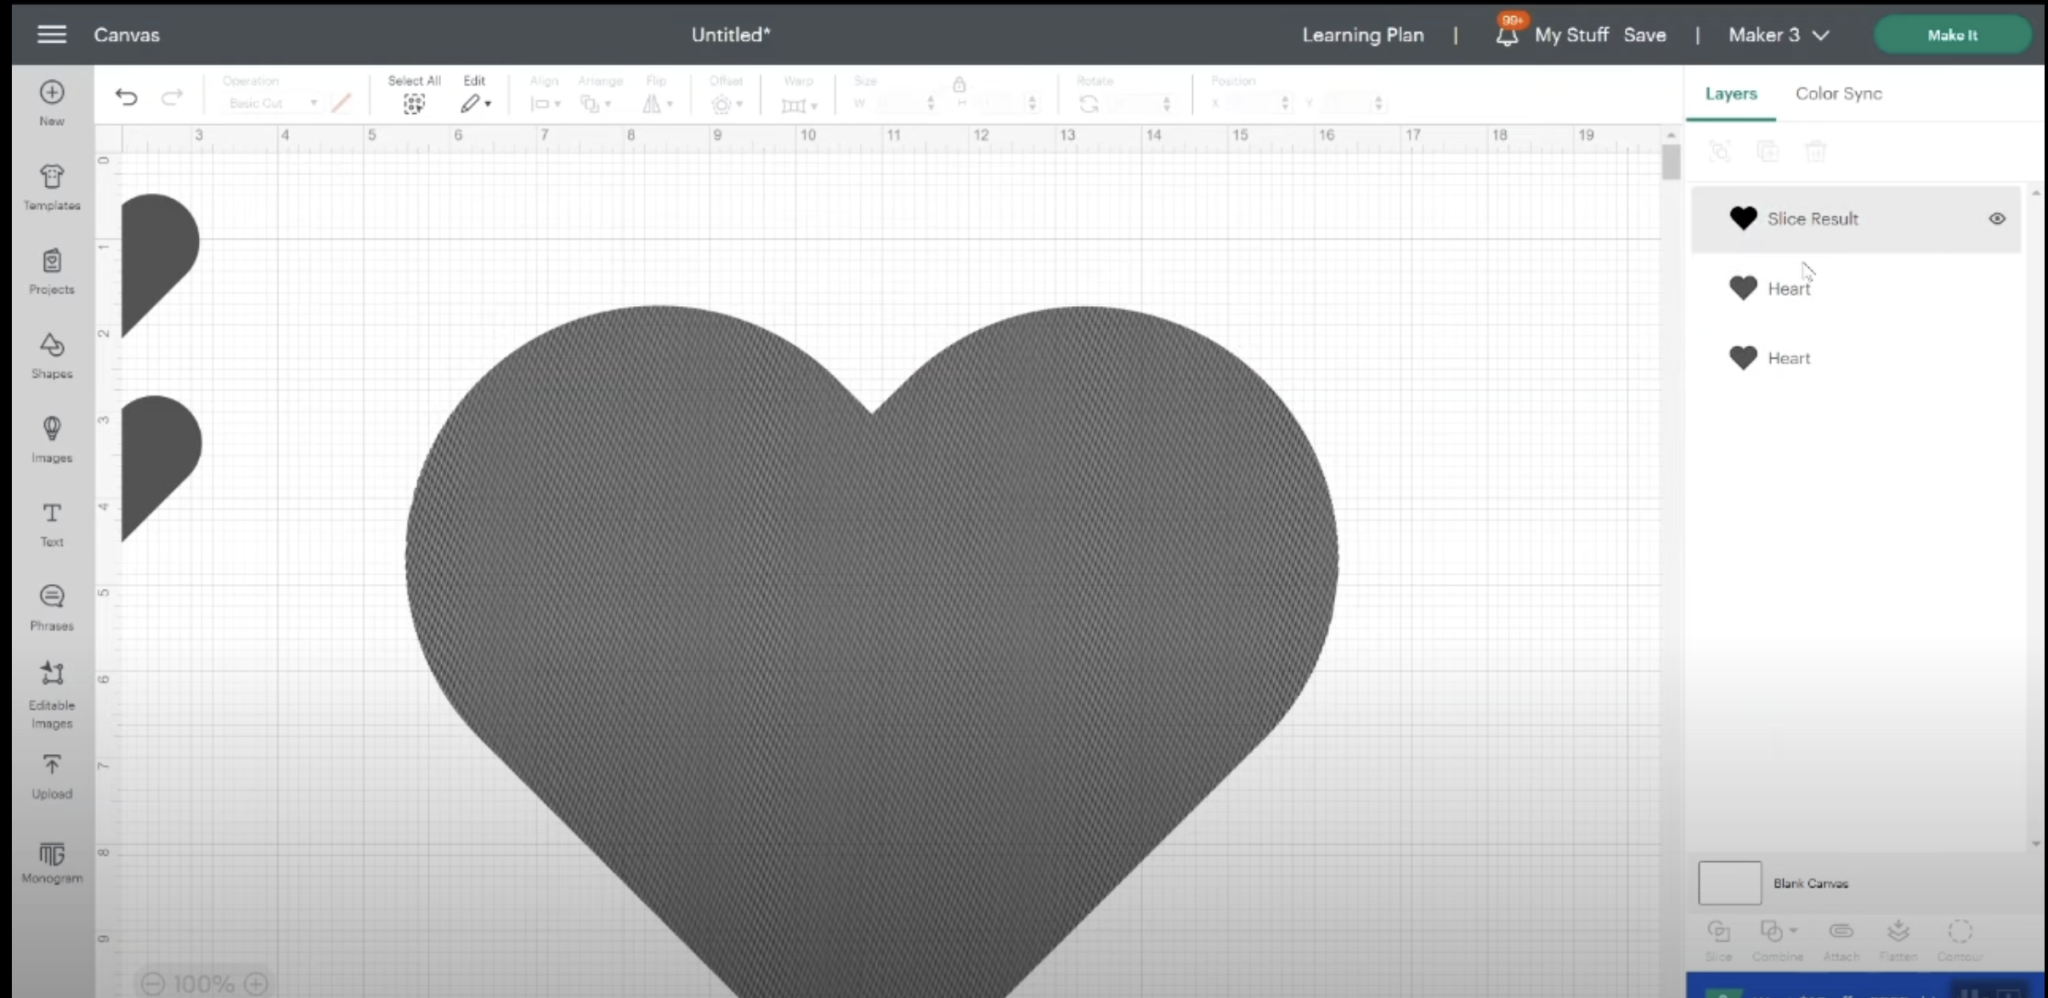
To get the pattern onto the shape select both layers and then click Slice.
If the slice option is greyed out, you need to check that your design has only one layer. You can only slice two layers at a time. The pattern fill is one layer so the shape can only be one layer also.
Because the pattern fill is so large slicing may take a while so just give it time to work. When it’s done, you’ll have extra layers over in the layers panel. You can delete all the extra sliced layers.
Change the operation type from Basic Cut to Engrave.
How to Add an Offset to a Pattern-Filled Shape
While I was doing my testing, I came across a step that helped give a cleaner edge line for some projects. It’s not very noticeable with the heart but with other shapes, you may find it helps give the crisp edge you’re looking for.
Start with a solid heart shape in the size you want and then add an offset. In the end, I added an offset of 0.005.
Once the offset is done, delete the solid heart and leave just the offset. Change the operation type to Engrave.
Now, take the engraved heart from before and duplicate it. Select the offset layer and one of the engraved hearts and then click Align and Center. Attach both layers and you now have an engraved heart with a thin engraved offset around it.
Adding the offset does make the image slightly larger than the 2 inches I wanted so I resized it to be the same size as the other hearts.
How to Engrave a Pattern Fill with Cricut Machines
Now I have three hearts on my Canvas. The first one is what the heart shape looks like without the pattern fill when the Operation type is set to Engrave. The middle option is the heart with the pattern fill and no offset. The last heart has the pattern fill and the offset.
All layers for this project are set to engrave. Click Make It and follow the prompts on the screen. Choose your material type and the blade you’re using and then prepare your material.
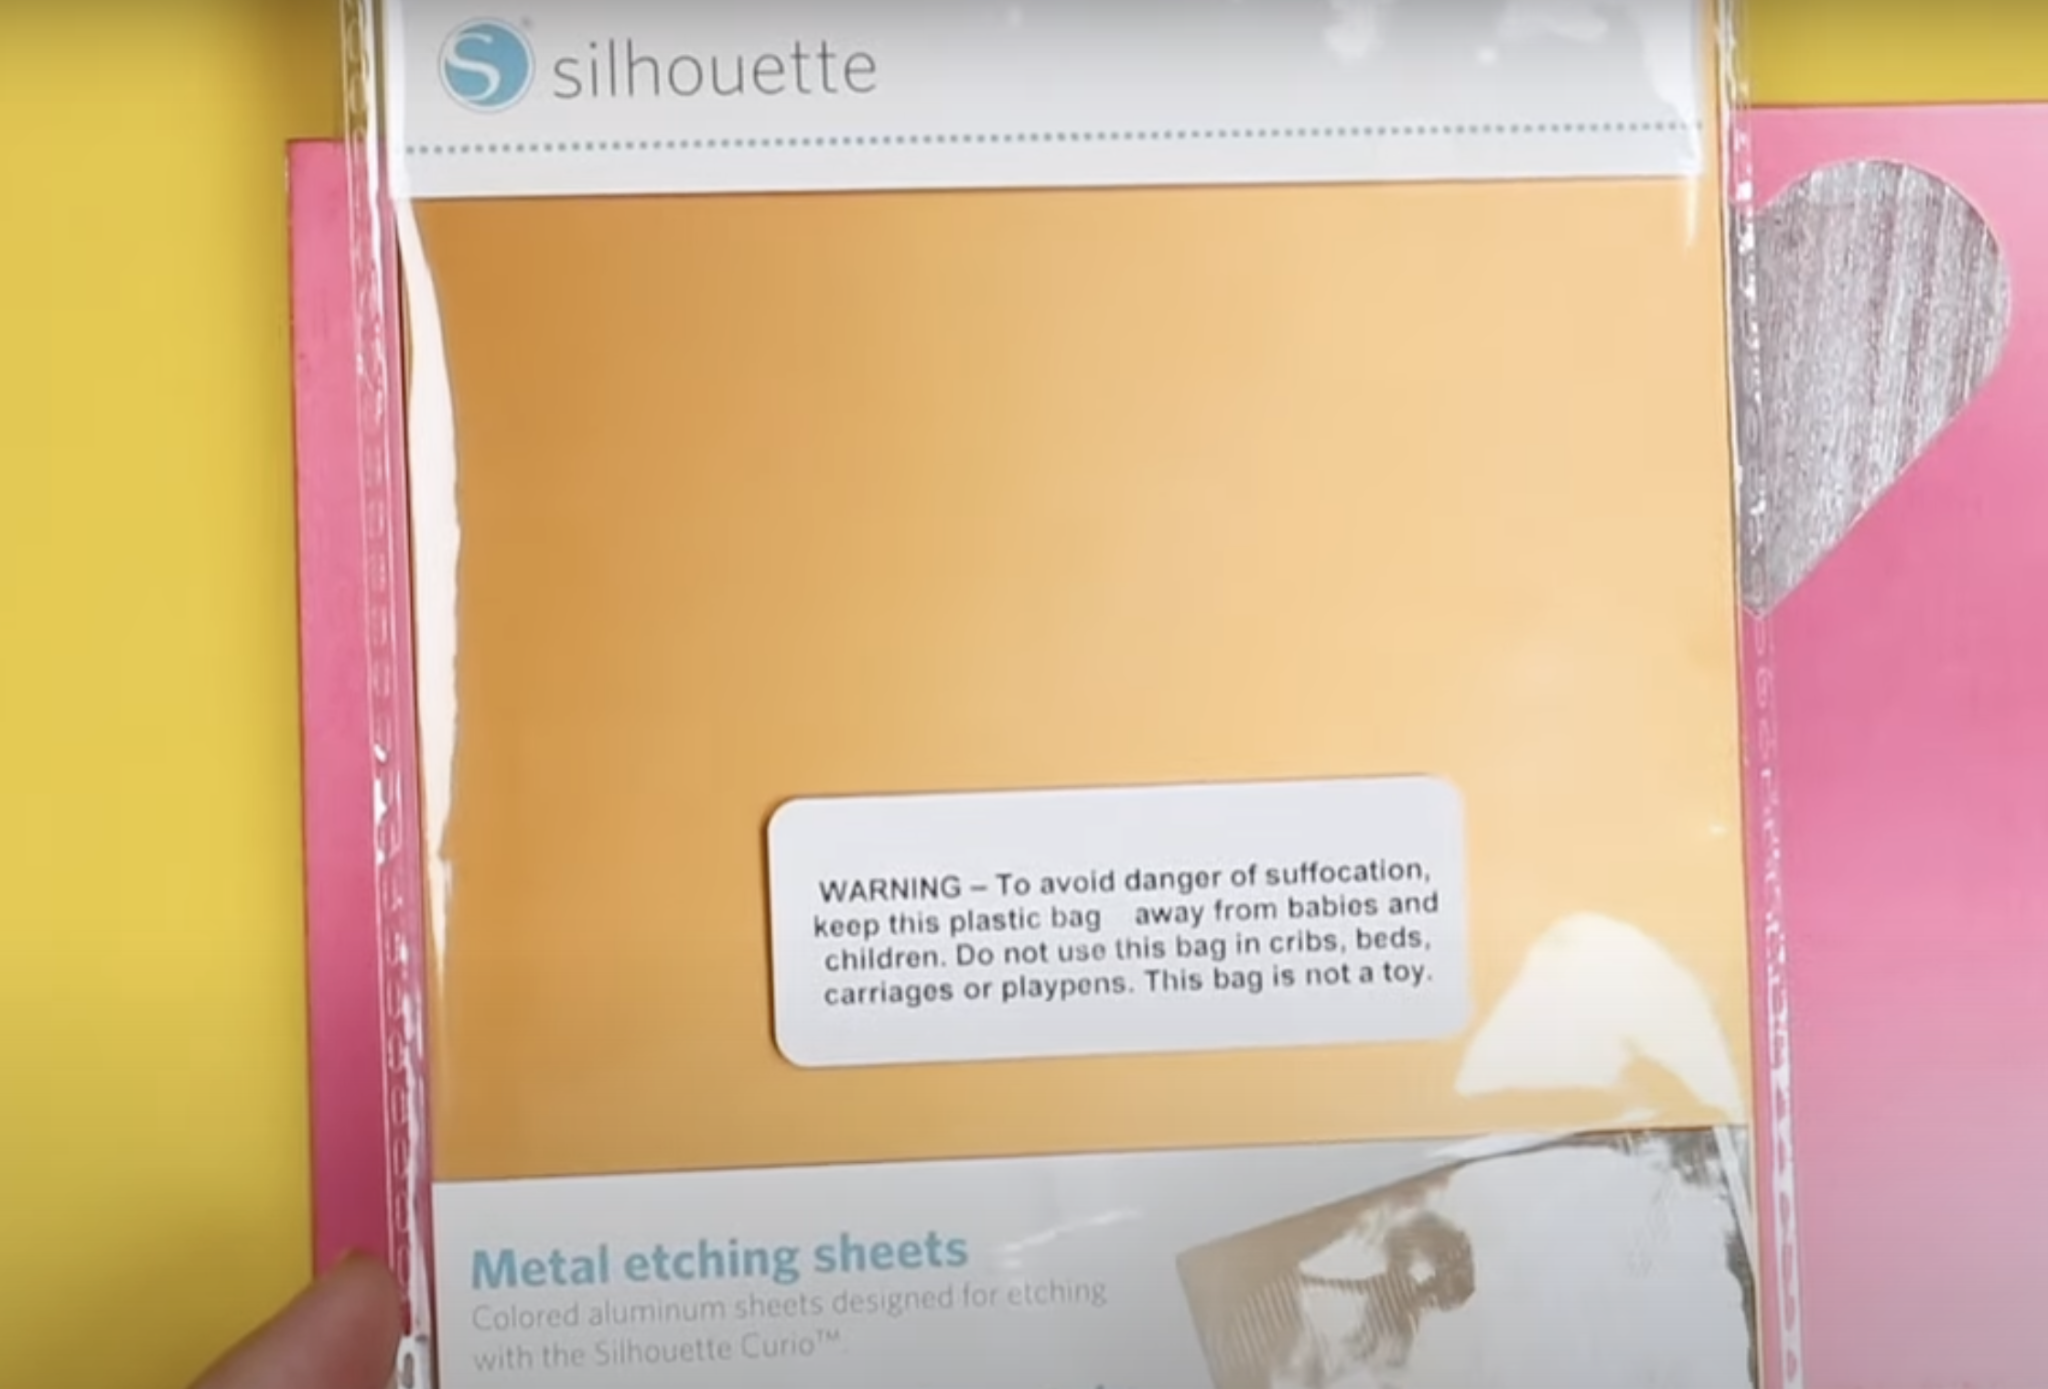
How to Engrave Metal Sheets with a Cricut Machine
I am using these metal etching sheets from Silhouette to test my engraving design.
Because these are already painted they’re great for testing etching designs. You can easily see the design and how it will look. If your project requires a metal sheet, they work well for projects too.
Add the metal sheet to a StrongGrip cutting mat and use painter’s tape on all sides to hold it in place.
Load the mat into the machine and press Go. The filled engraving will take a very long time on your machine. You’ll want to stay by your machine the whole time it’s engraving.
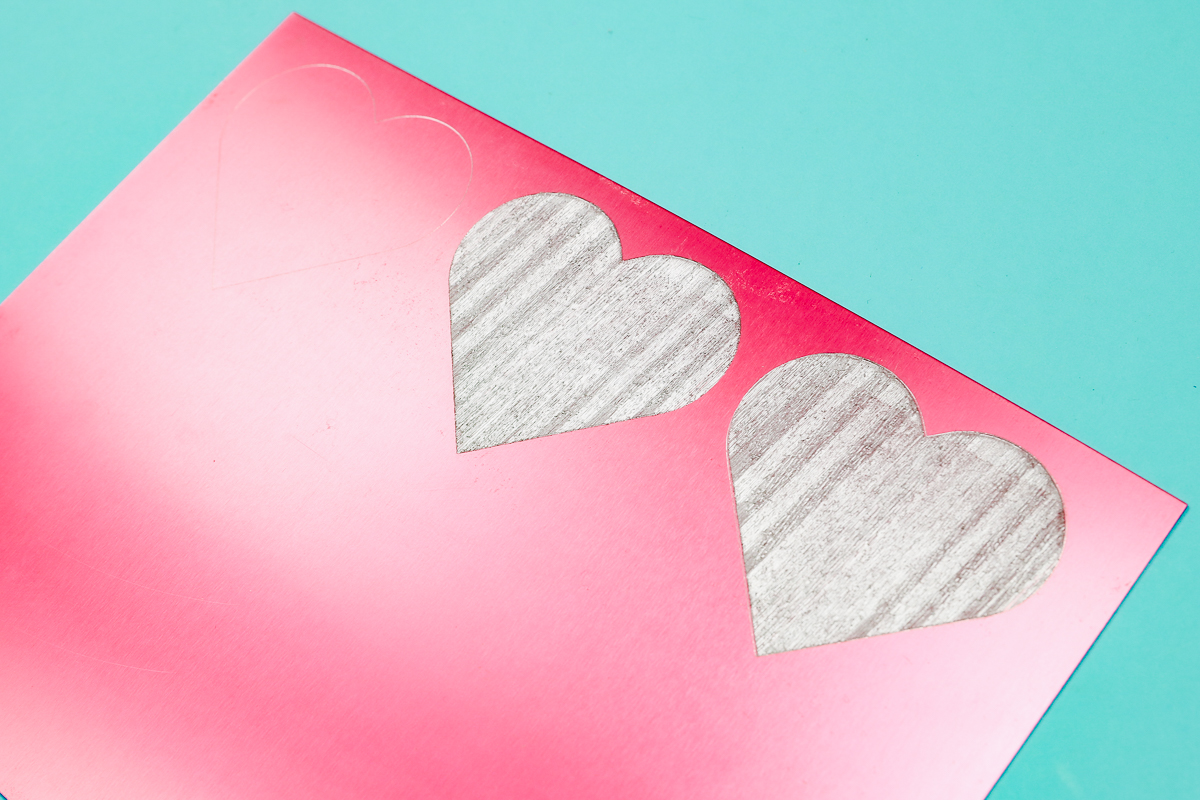
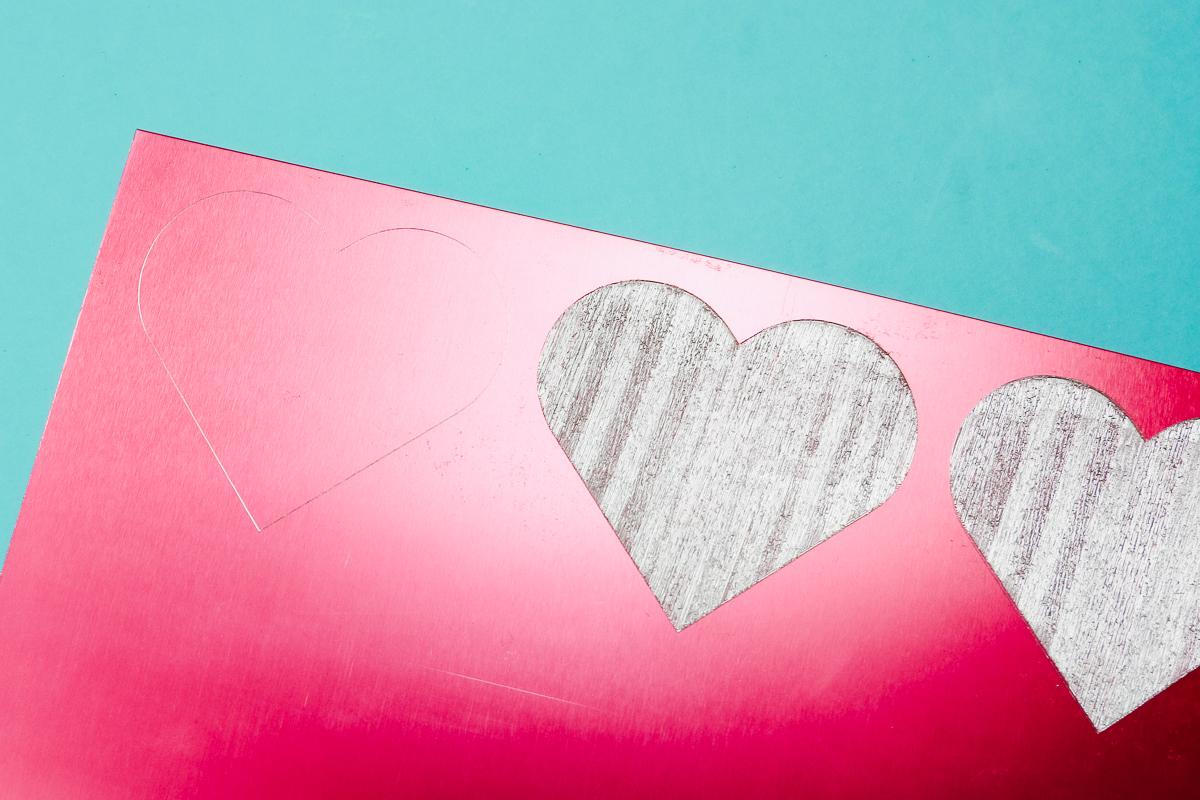
Close Up of Pattern Fill for Engraving with a Cricut Machine
Here you can see all three of my hearts. See what a difference using the pattern fill for engraving makes!
The first heart is how a heart would normally be engraved in Design Space with nothing additional done to it. The next two look pretty similar. I do think the last one with the offset looks a little cleaner around the edges.
Final Thoughts on Pattern Fill for Engraving with a Cricut Machine
The first thing to note is that the engraving with a Cricut machine is still rough. You can feel each of the engraved lines. Using a pattern fill doesn’t change how Cricut engraves. The engraving will not look the same as they do when using a Glowforge.
I love how much more obvious the engraving is using a fill pattern vs. not using one. Since the engraving tool for Cricut machines is a small tip, without a pattern fill the engraving is not very noticeable.
The engraving tip scratches across the surface of the metal. If you want help making those designs pop even more, you can add color to to the engravings. If you’re using plain aluminum, adding some color can really help those engravings stand out.
I hope I’ve answered all the questions you have about using pattern fill for engraving with your Cricut machine. If you have any other questions, leave them in the comments and I’ll be happy to answer them for you.