
This post and photos may contain Amazon or other affiliate links. If you purchase something through any link, I may receive a small commission at no extra charge to you. Any supplies used may be given to me free of charge, however, all projects and opinions are my own.
It’s finally here! The moment we’ve all been waiting for – New Cricut Print Then Cut Sizes! We’ve all been waiting for this news for a long time and I’m so excited to report that it’s a real size difference. Today I’m going to show you how to do Cricut print and cut on an 11″ by 17″ tabloid sheet of paper. We’ll then take that print and turn it into a paper gift box.
If you’re new to Cricut, head to my Beginner’s Guide to Design Space to get started.
Cricut Print and Cut Sizes
You can watch me show you all of the new features with Print Then Cut by pressing play on the video below.
Can’t watch the video or miss some of the information? You can also follow along below.
How to Find the New Print Then Cut Sizes?
I know size is the biggest question everyone has about the new Cricut Print Then Cut sizes. Let’s jump right in.
Switching to Beta for New Cricut Print Then Cut Sizes
The first thing you need to know before you use the new Cricut Print Then Cut sizes is that as of the writing of this post, they are only available in Beta Design Space.
To change your Design Space to Beta, click the three lines in the upper left-hand corner of Design Space, and go the Settings. Then, under the General tab, make sure you’re on Beta and not Live. That should give you the larger Print Then Cut sizes.
If you are reading this post after its original date, it’s possible the new sizes will be included in the version of Design Space you have. Eventually, Cricut will roll these changes out with an update.
Machine Types for Print and Cut
Another thing you need to know is that you have to have an Explore series or Maker series machine for Print Then Cut. Cricut Joy does not have the ability to do Print Then Cut projects. Be sure that you have the correct machine picked in Design Space.
How to Change Paper Size
With the new Print Then Cut sizes, you can print on a variety of different paper sizes. Head to Design Space and open a Print Then Cut image. You can resize the image to any size you want that will fit on your paper of choice.
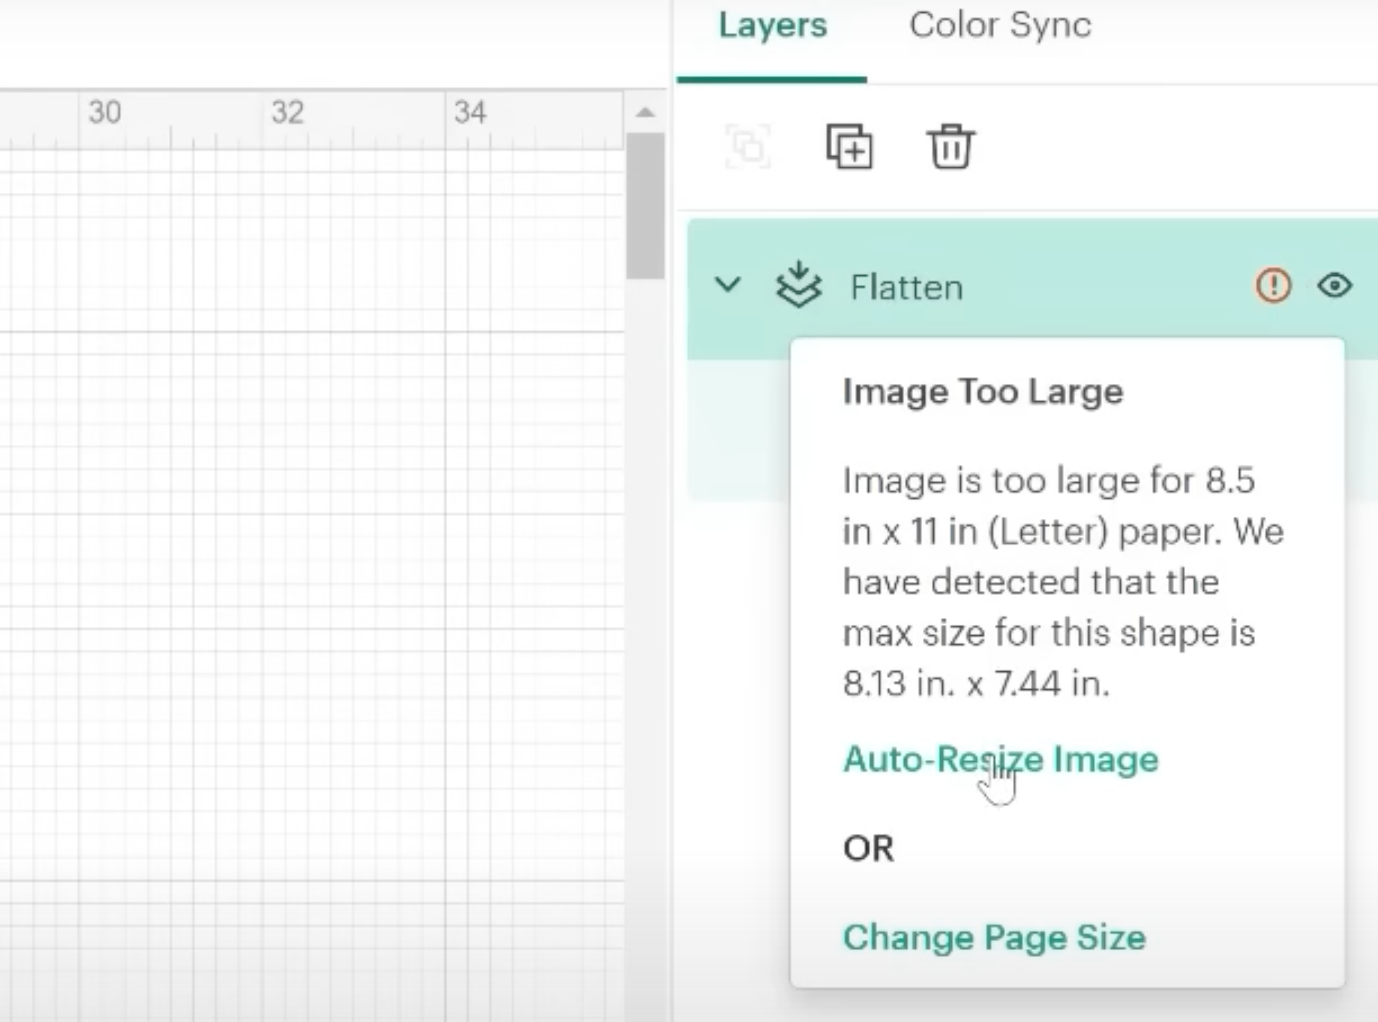
Check the layers panel and if you get an error button on that layer you can click it and then do two different things. First, we can change the paper size.

Click on “Change Paper Size” and you’ll see that there is now a variety of different Print Then Cut paper sizes. Your printer will dictate what size you’re able to print but the different options are A4, Letter (8.5″x11″), Legal (8.5″x14″), Tabloid (11″x17″), and A3 paper.
If your printer has a max paper size of 8.5″x11″, you cannot choose a paper size that is larger than your printer can print.
How to Choose Your Paper Size First
If you want to choose your paper size before you begin resizing your image, click the 3 lines in the left-hand corner of your Design Space home screen and click on settings. From here, you can choose the Load Type setting and select the paper size you want to use.
Auto-Resizing Image
Once the paper size is selected, I can click to Auto-resize the image. You’ll notice that the dimensions are unlocked, don’t worry. The Auto-resize feature doesn’t change the proportions so the length and width will change at the same time.
What are the Maximum Print Then Cut Sizes?
Let’s go over the maximum size that I found for each size sheet of paper.
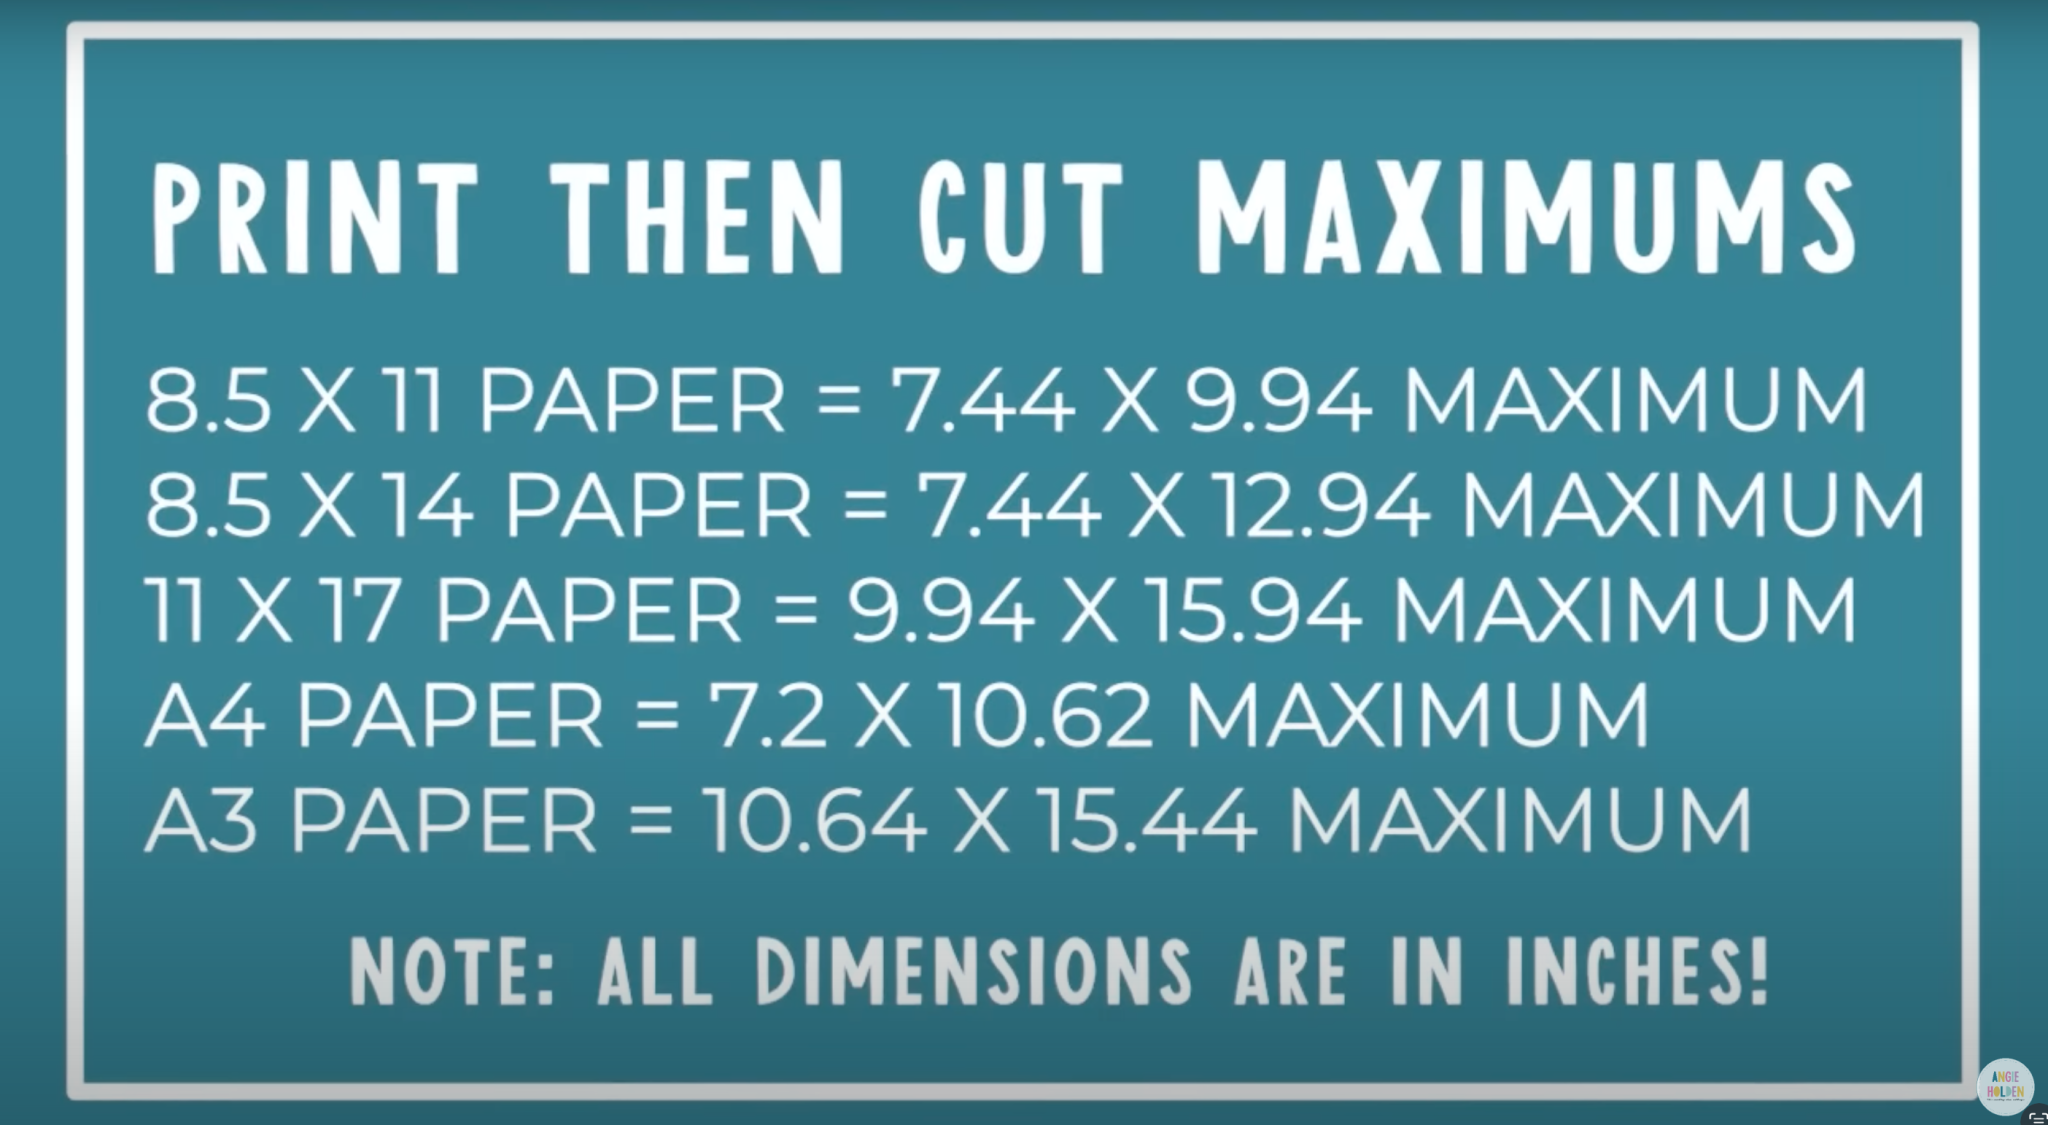
- 8.5″ x 11″ paper is a maximum design size of 7.44 by 9.94 inches.
- 8.5″ x 14″ paper is a maximum design size of 7.44″ x 12.94″.
- 11″ x 17″ paper is a maximum design size of 9.94″ x 15.94″.
- A4 paper is a maximum design size of 7.2″ x 10.62″.
- A3 paper is a maximum design size of 10.64″ x 15.44″.
Even on an 8.5″ x 11″ sheet of paper, the Print Then Cut size is bigger than it’s ever been before.
New Registration Marks
The maximum size we can fit on an 8.5″ x 11″ sheet of paper is 7.55″ x 9.94″. While this is the maximum size, you do need to be aware that you need room in the corners for the registration marks.
If your print is a full sheet, you will need to resize it so it has room for the registration marks in the corners. If you have something like this cross, you can make it the maximum size without issue as there isn’t any printing in the corners.
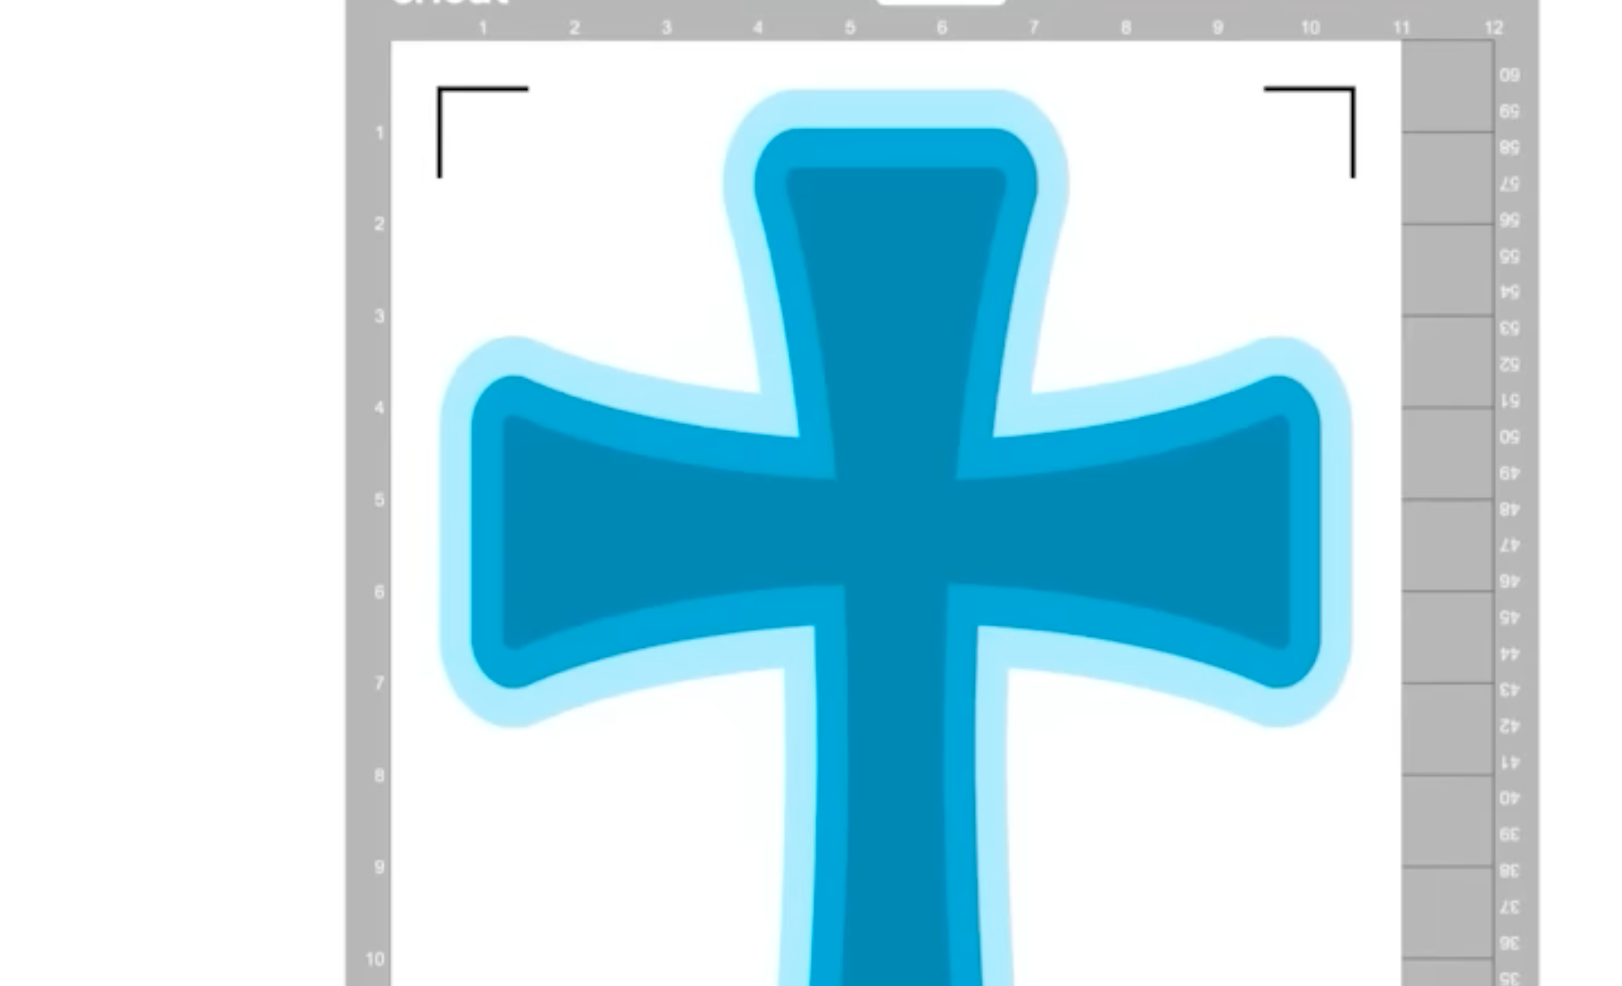
You always need to leave room for the registration marks in the corners of your page. Because of this, the maximum size doesn’t always apply. In reality, the maximum size is for the middle section of both the length and width of your design.
Calibrating Your New Cricut Print Then Cut Sizes
If you haven’t already used the new Cricut Print Then Cut sizes, you will need to calibrate your machine. Currently, the calibration process hasn’t changed.
From the home screen in Design Space, click the 3 lines in the upper left-hand corner and then select calibration. From there, you will select Print Then Cut and then follow the prompts until your machine is calibrated.
Click here to see a video to walk you through the calibration process.
I do recommend making sure you have plenty of time set aside to go through the whole calibration process before you begin.
What Else has Changed in Design Space?
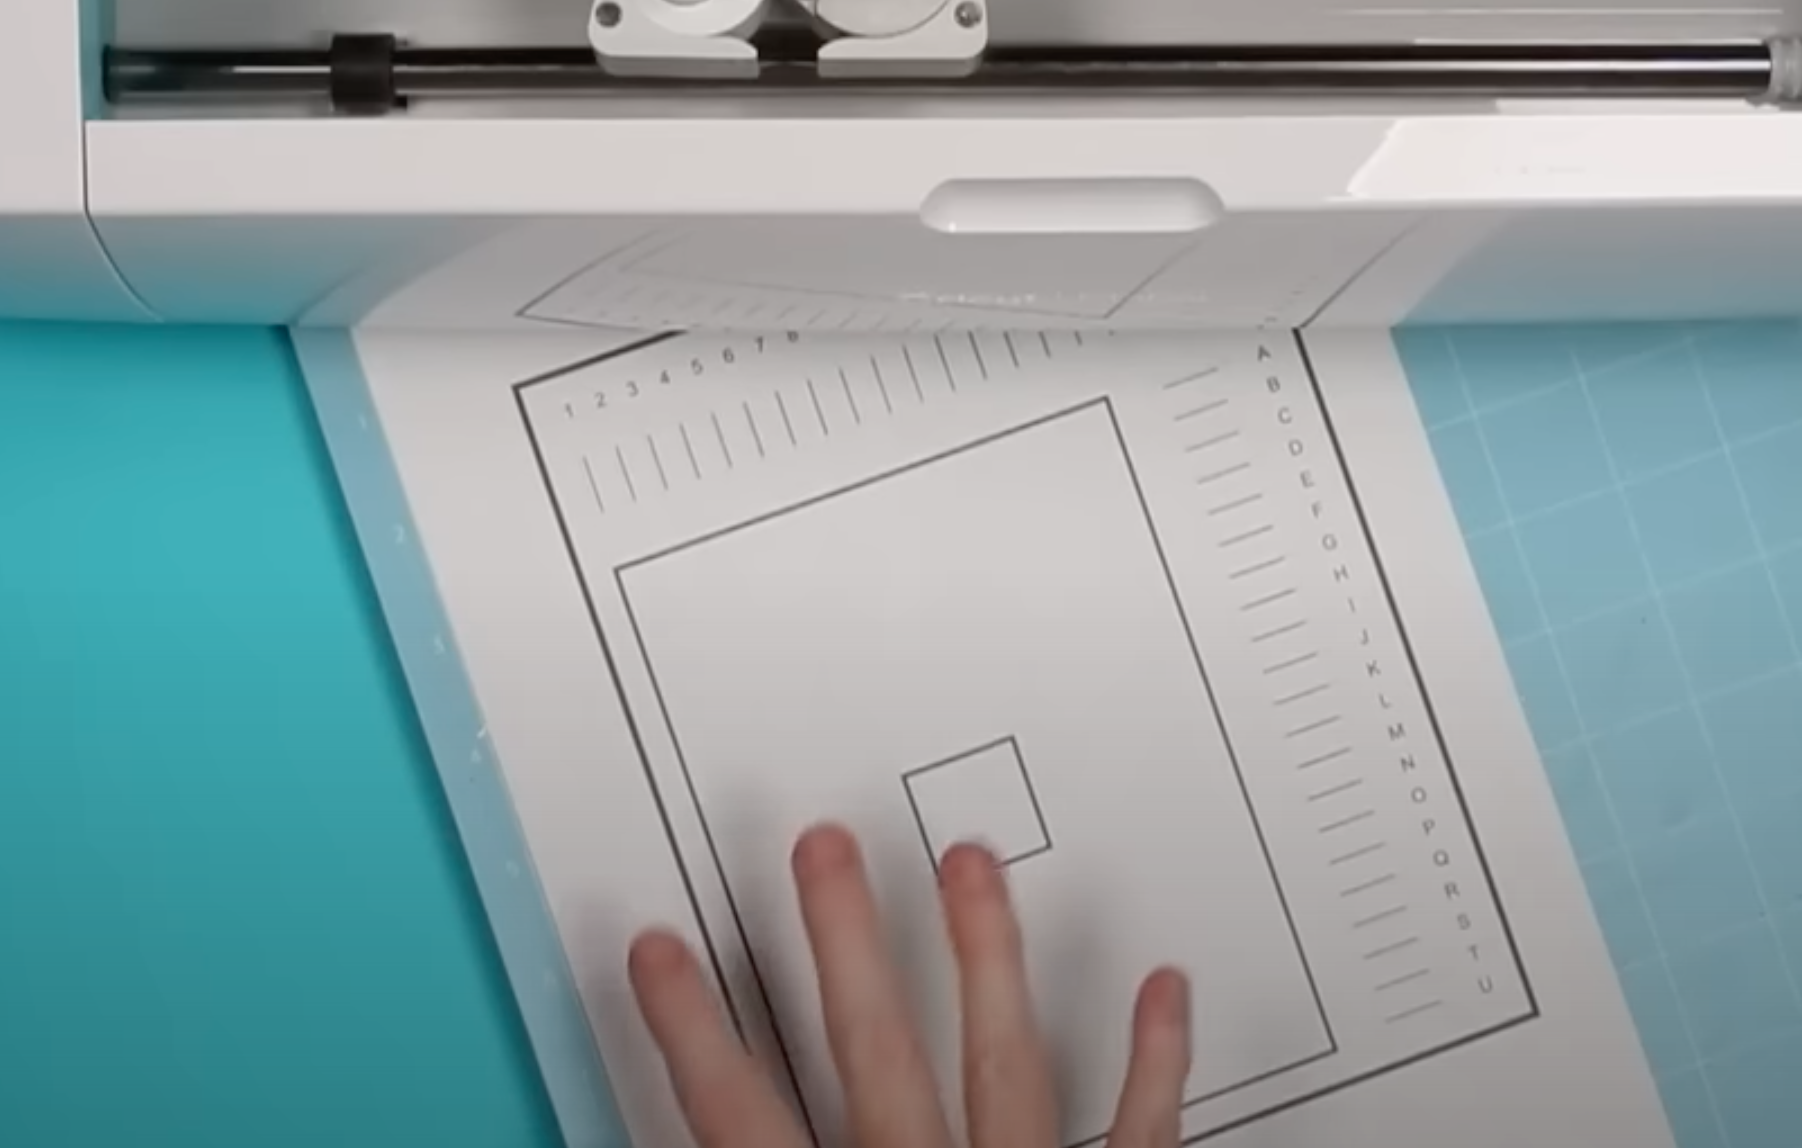
Another change you may run into in Design Space when using the new Print Then Cut sizes is the need for a larger cutting mat.
In the past, the maximum size you could Print Then Cut easily fit on a 12″ x 12″ cutting mat. Now, depending on the size of the paper you’re printing onto you may be required to use a 12″ x 24″ cutting mat.
Also, I mentioned the new registration marks before. The main difference here is that instead of adding a box around the entire image there are now just marks in the 4 corners around the design.
How to Make Multiple Small Print Then Cut Designs
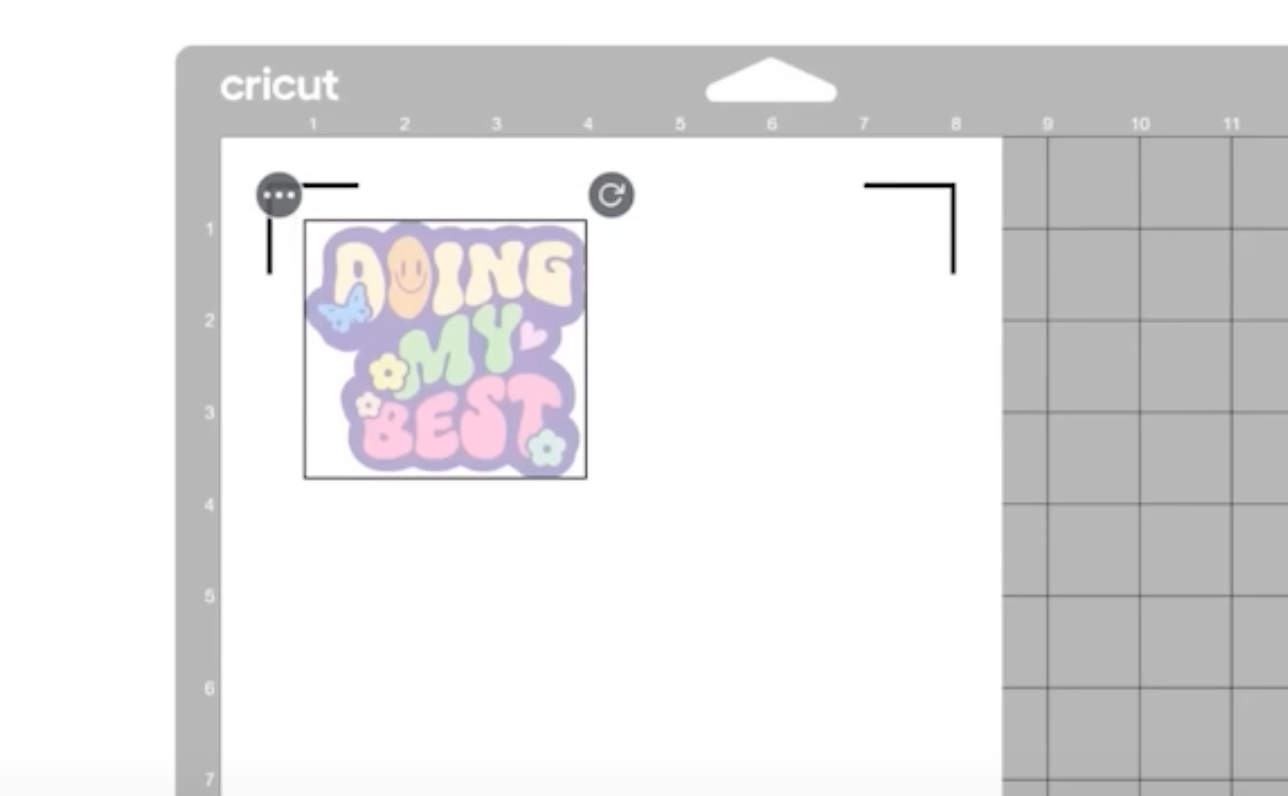
For my next example, I’m going to show you how to take one small image and use it to make several stickers. Because most people have a printer that prints on an 8,5″ x 11″ sheet of paper, we’re going to use that paper size.
Go to settings, select Load Type, and choose 8.5″ x 11″. Next click Make It. You can see we have the registration boxes in the corners and right now I have just one sticker on my page.
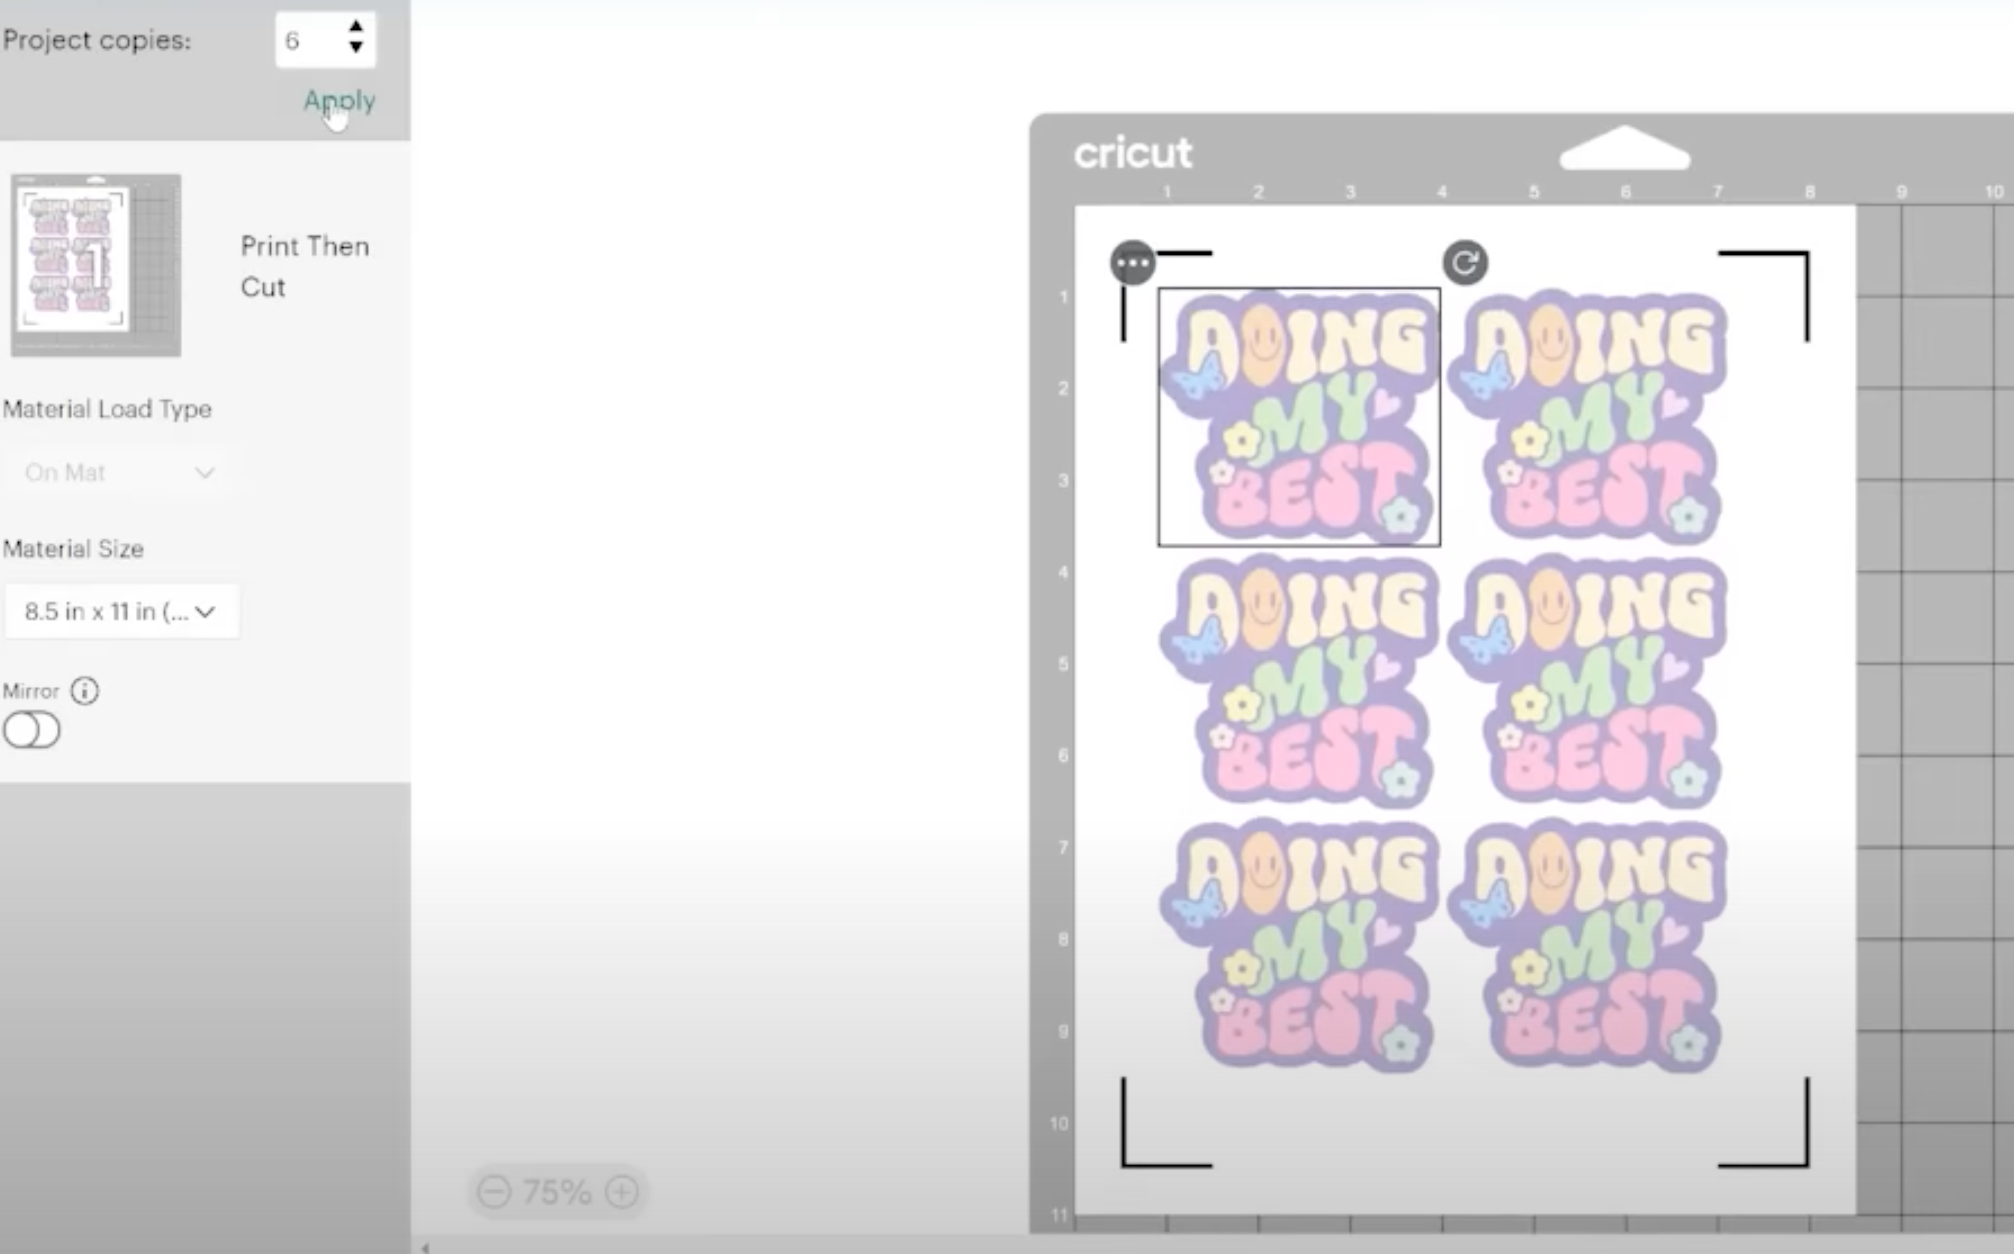
Adding More Project Copies
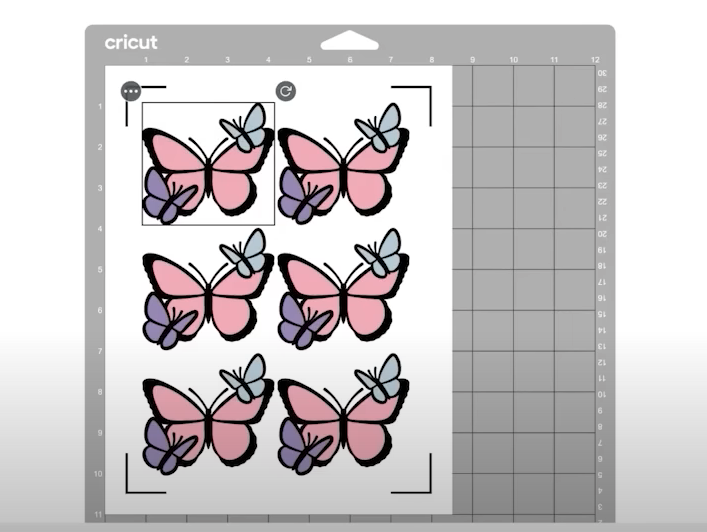
I can easily fill up my sticker sheet with more copies of the same design by changing the copy number and clicking Apply. For this sticker design, six stickers fit perfectly on this paper size so I am going to apply those settings.
You can see in this case, the stickers are laid out relatively well and I’m not wasting very much sticker paper.
How to Maximize Your Print Then Cut Paper
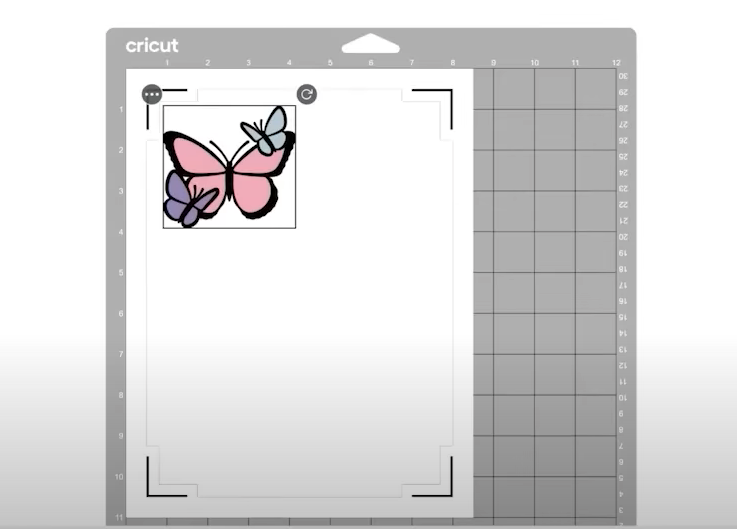
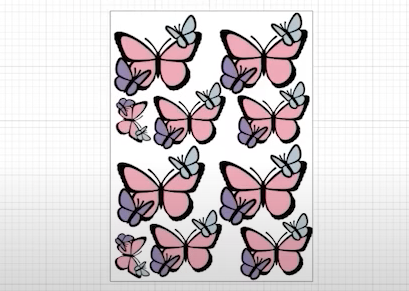
Let’s look at a different sticker and an alternative way to make a sticker sheet. For instance, say we had this butterfly image we wanted to make a sticker sheet.
When we click Make It we’ll see it looks similar to the project we did before. If I increase my project copies and click Apply, again it will be similar.
It is possible, because of the shape of the sticker, that we could rearrange the butterflies to make them use less space. Simply, click on an image, and then you can move it around. This is a great way to maximize your Print Then Cut space.
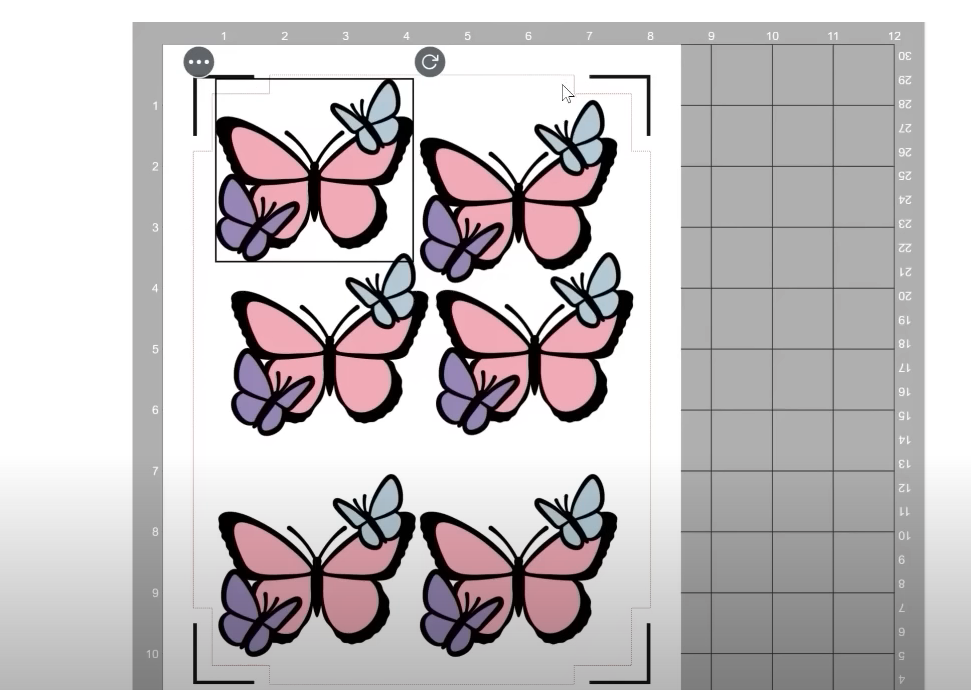
In the photo above you can see there is a box all the way around the design. This red dotted line won’t print but it does help you know where the printable area of your page is. You cannot move your design outside that area, if you do when you release it it will move back into the printable area.
From this screen, you can move your designs and you can rotate them, you cannot however resize them. If you really want to use up the whole sheet of printable material, head back to the canvas.
How to Create a Full Sheet of Stickers
As I mentioned above, you cannot resize your images after you’ve clicked Make It. To do this, I like to add a visual to the canvas and make it the maximum Print Then Cut size. I like to turn it white so it looks like a sheet of paper.
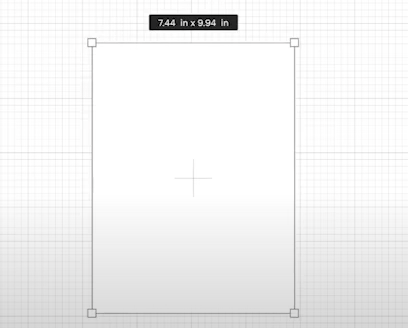
For the 8.5″ x 11″ sheet of paper, that maximum size would be 7.44″ x 9.94″.
Now I can add copies of the butterfly image onto the visual and lay them out on the page. I can even resize some of the images to add those to the blank spaces to make a full sticker sheet.
Once I have things laid out how I want, I like to delete the background page layer.
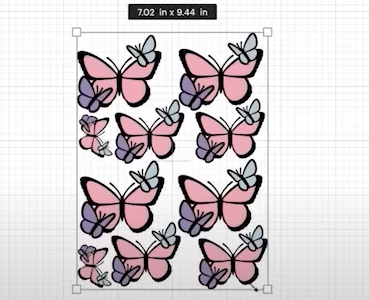
With the rectangle page visual removed I am going to select all the butterflies and click Attach. This will keep the page laid out exactly as I have it on the canvas when I click Make It.
Remember, if your design is in the area where the registration marks need to be you’ll need to move them or resize your whole image.
This is a good example of how the maximum size really applies to the center of the paper both up and down and left to right.
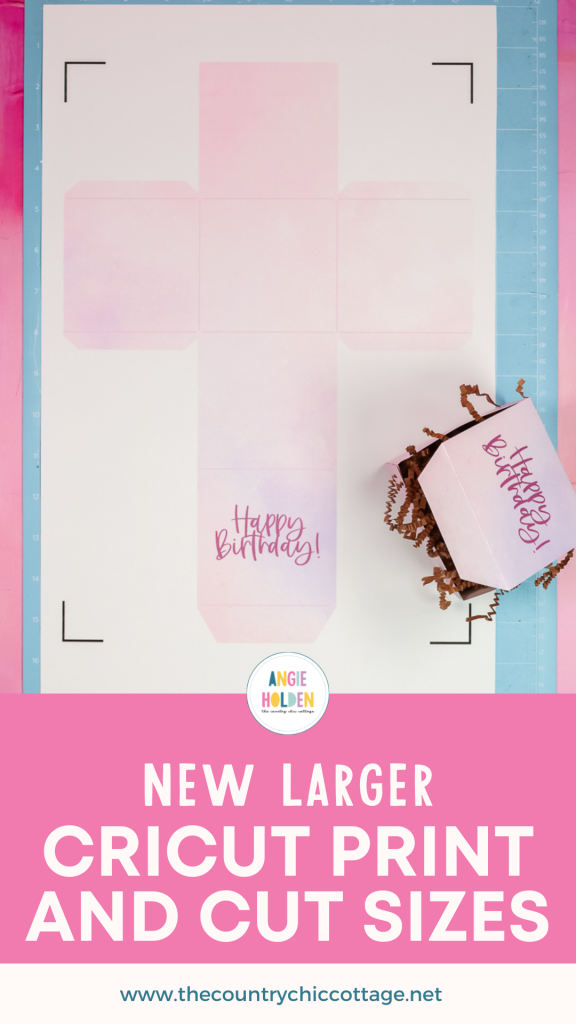
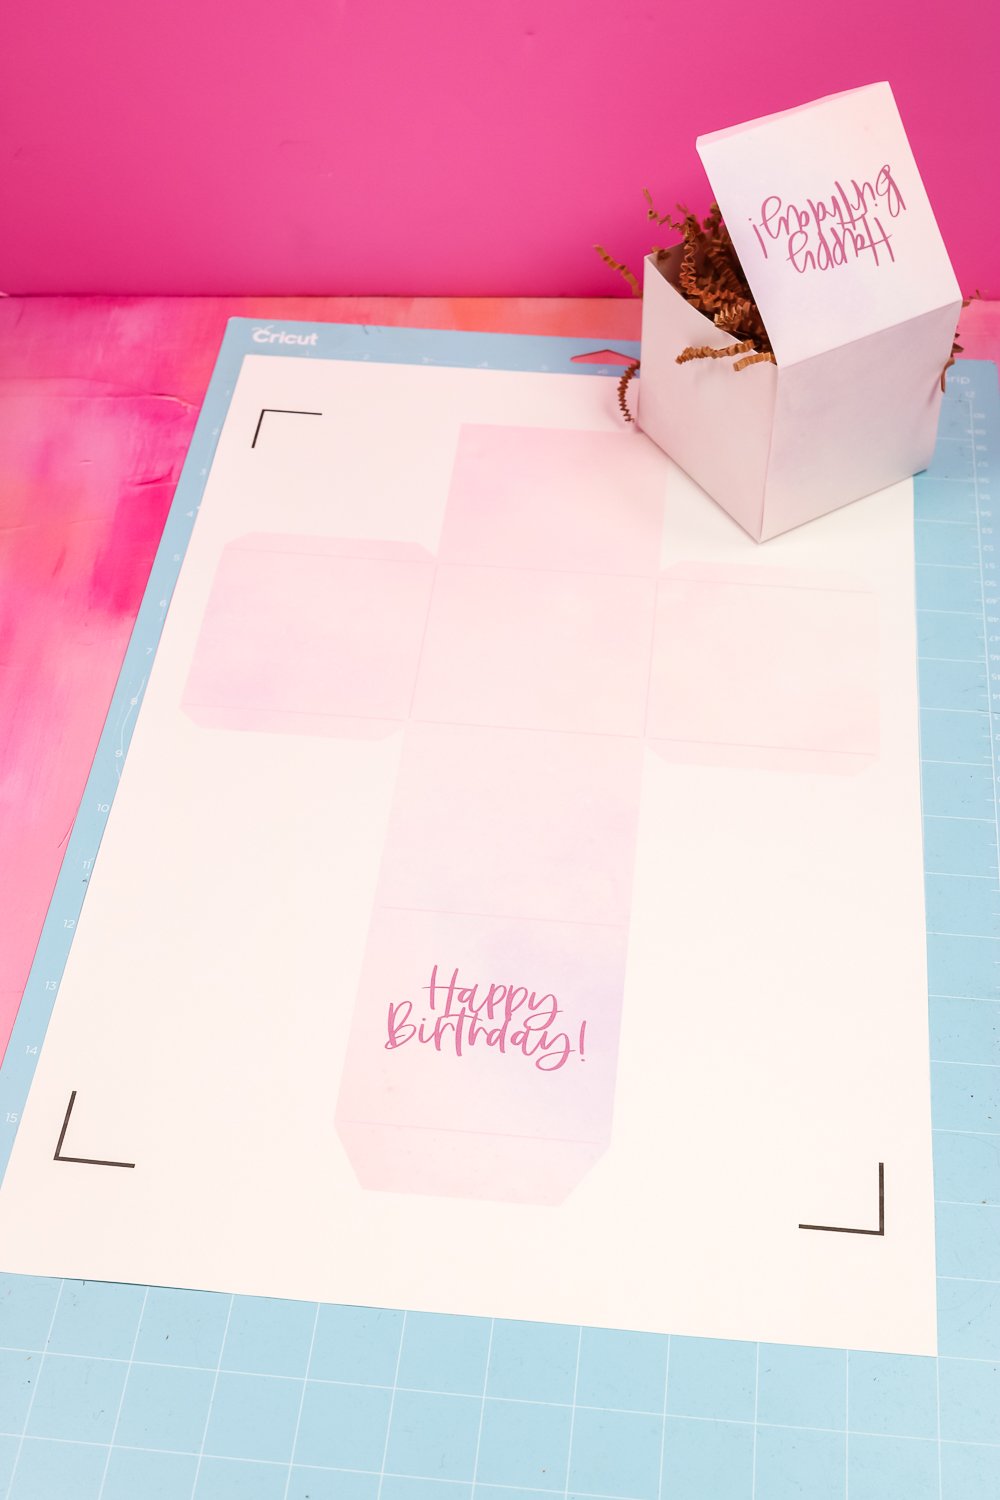
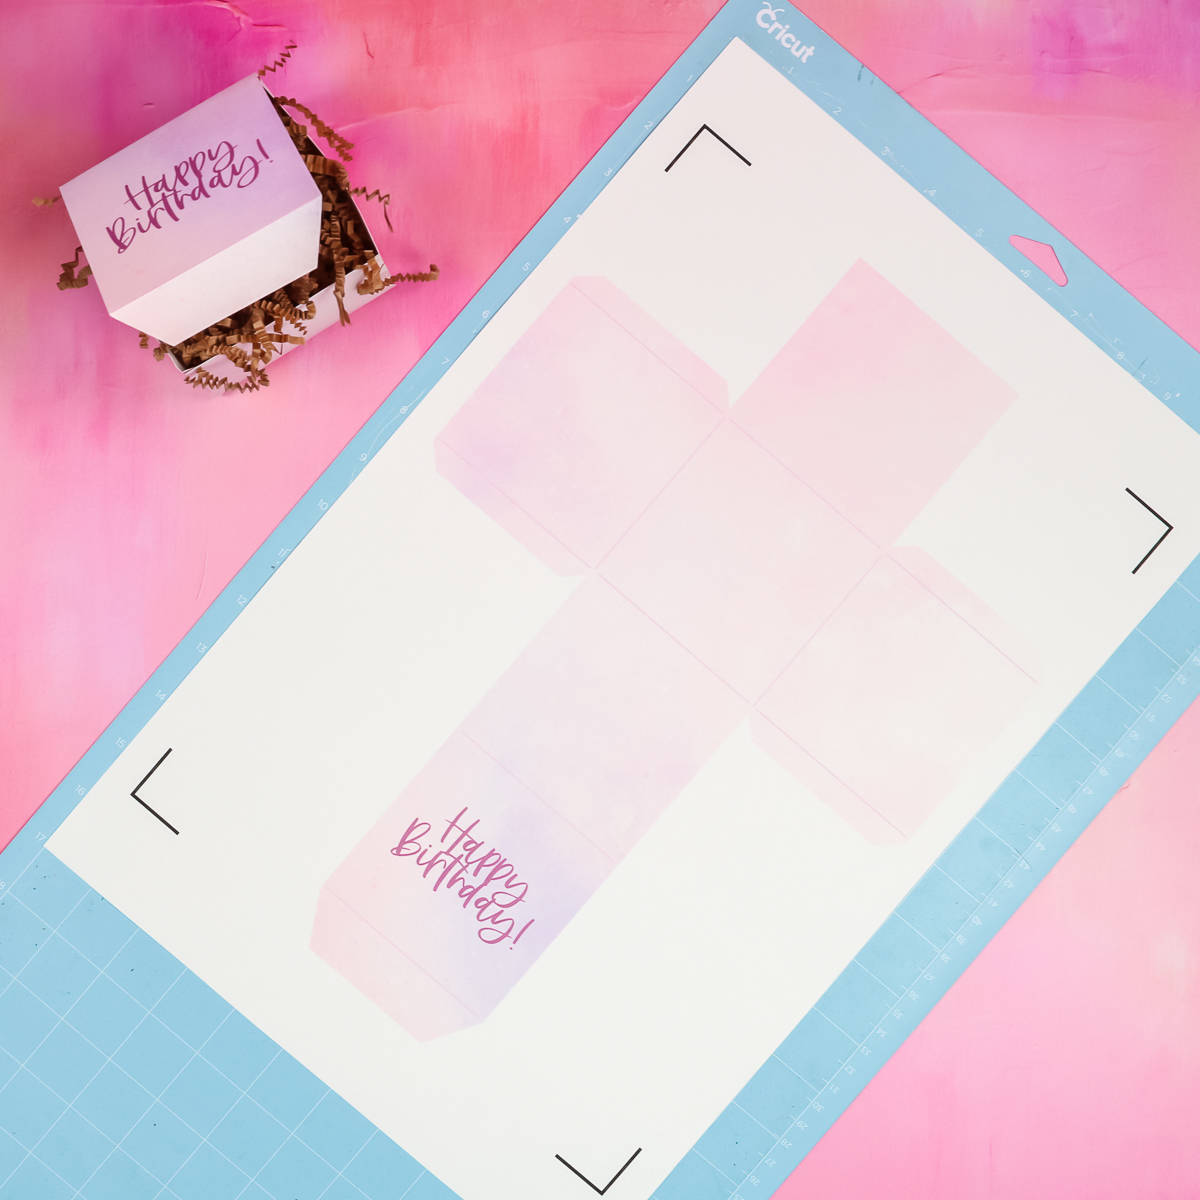
How to Make a Cricut Print Then Cut Paper Box
Now that we’ve looked at the new Print Then Cut features, let’s make a project. I have uploaded a design into Design Space, it is a large design that we’ll fold and turn into a gift box.
Supplies Used
Adding Design to Design Space
Upload the file you downloaded above to Cricut Design Space. You can see more about how to do that here. I am uploading it as a print then cut design and we will talk more about adding the score lines later in this post.
Resizing and Picking Paper Size
I want to print this onto an 11″ x 17″ sheet of paper. Because the box design itself is kind of like a cross shape I can make it the maximum size.
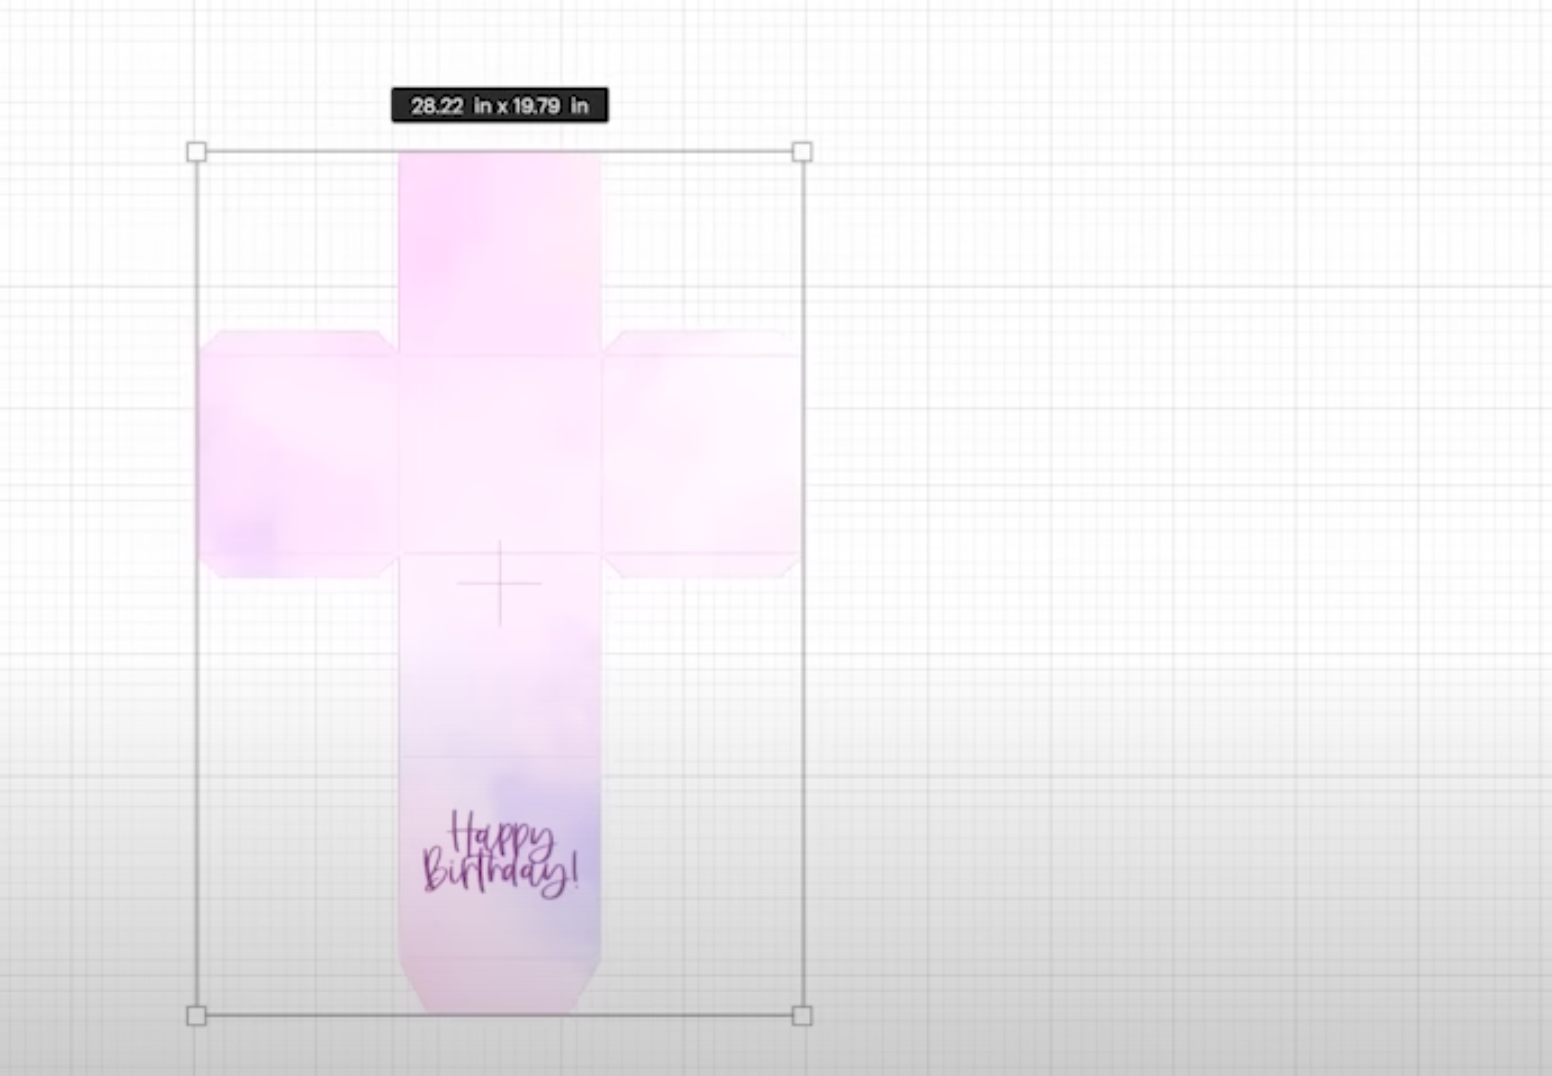
The maximum width I can use is 9.94″. I am leaving the dimensions locked so the length will adjust to the maximum width.

If you haven’t already changed your paper size, you’ll need to do that now. Follow the instructions at the beginning of this post to do so.
Adding Score Lines
Because you need to upload this design as a Print Then Cut object the score lines are not added. You can go through and add score lines with the shape feature and draw them right over the lines on the design. Or you score the box manually after it’s printed and cut.
I am going to add mine manually as I find that easier, however, you can choose the option that works best for you. You can see how to add score lines in Design Space here.
Printing Your Project
Click Make it to print. We don’t need to mirror anything for this project. Click Continue and send the design to the printer.
Remember, the printer needs to be able to print the paper size you have selected for your project. If you haven’t already calibrated your machine, do that now. I did add bleed to my print.
Final Thoughts on New Cricut Print Then Cut Sizes
Okay, that’s it! New Cricut Print Then Cut sizes are here and I am so excited about this change! You can now make Print Then Cut projects larger than ever even with an 8.5″ x 11″ paper size.
I do caution you to remember that the maximum size is only applicable to the middle of the paper. You need to have room for the registration marks in all four corners.
Design Space will tell you the maximum and it will automatically resize your image to the maximum. All that’s left for you to do is grab your printer and start printing larger sizes.
Remember to give yourself extra time for calibrating your machine and the opportunity to learn about the new paper sizes and features.
I am really impressed with the results of the larger Cricut print and cut sizes. I just know that you’re going to love it. If you have any questions about the new Cricut Print Then Cut sizes, leave them in the comments and we’ll get them answered for you.