This post and photos may contain Amazon or other affiliate links. If you purchase something through any link, I may receive a small commission at no extra charge to you. Any supplies used may be given to me free of charge, however, all projects and opinions are my own.
If you’ve been trying to figure out what sublimation printer to purchase, you’re going to want to keep reading. My Sawgrass Sublimation Printer Start Guide will help you learn more about the printer and how easy it is to set up. Then you can decide whether to get a Sawgrass printer, convert an Epson EcoTank, or get an Epson F170 sublimation printer.
If you’re just starting on your sublimation journey check out my Beginner’s Guide here.
Sawgrass Sublimation Printer
In this Sawgrass Sublimation Printer Start Guide I will cover the following:
- What is a sublimation printer?
- What’s inside the box?
- How to set up the printer.
- What program is used.
- Printing a sublimation print.
You can watch me go through the Sawgrass Sublimation printer setup. Just click play on the video below:
Supplies used:
Today I am using the following supplies.
NOTE: You can get a special Sawgrass bundle here that has everything you need to get started with sublimation!
What is a Sublimation Printer?
A sublimation printer is a printer that uses sublimation ink. It prints onto a sublimation paper that can be used to create sublimation projects. In order to create lasting sublimation projects, you need all of the pieces. The printer, ink, paper, and sublimation blank. All of these together create a project with a permanent image applied.
What Comes Inside the Sawgrass Printer Box?
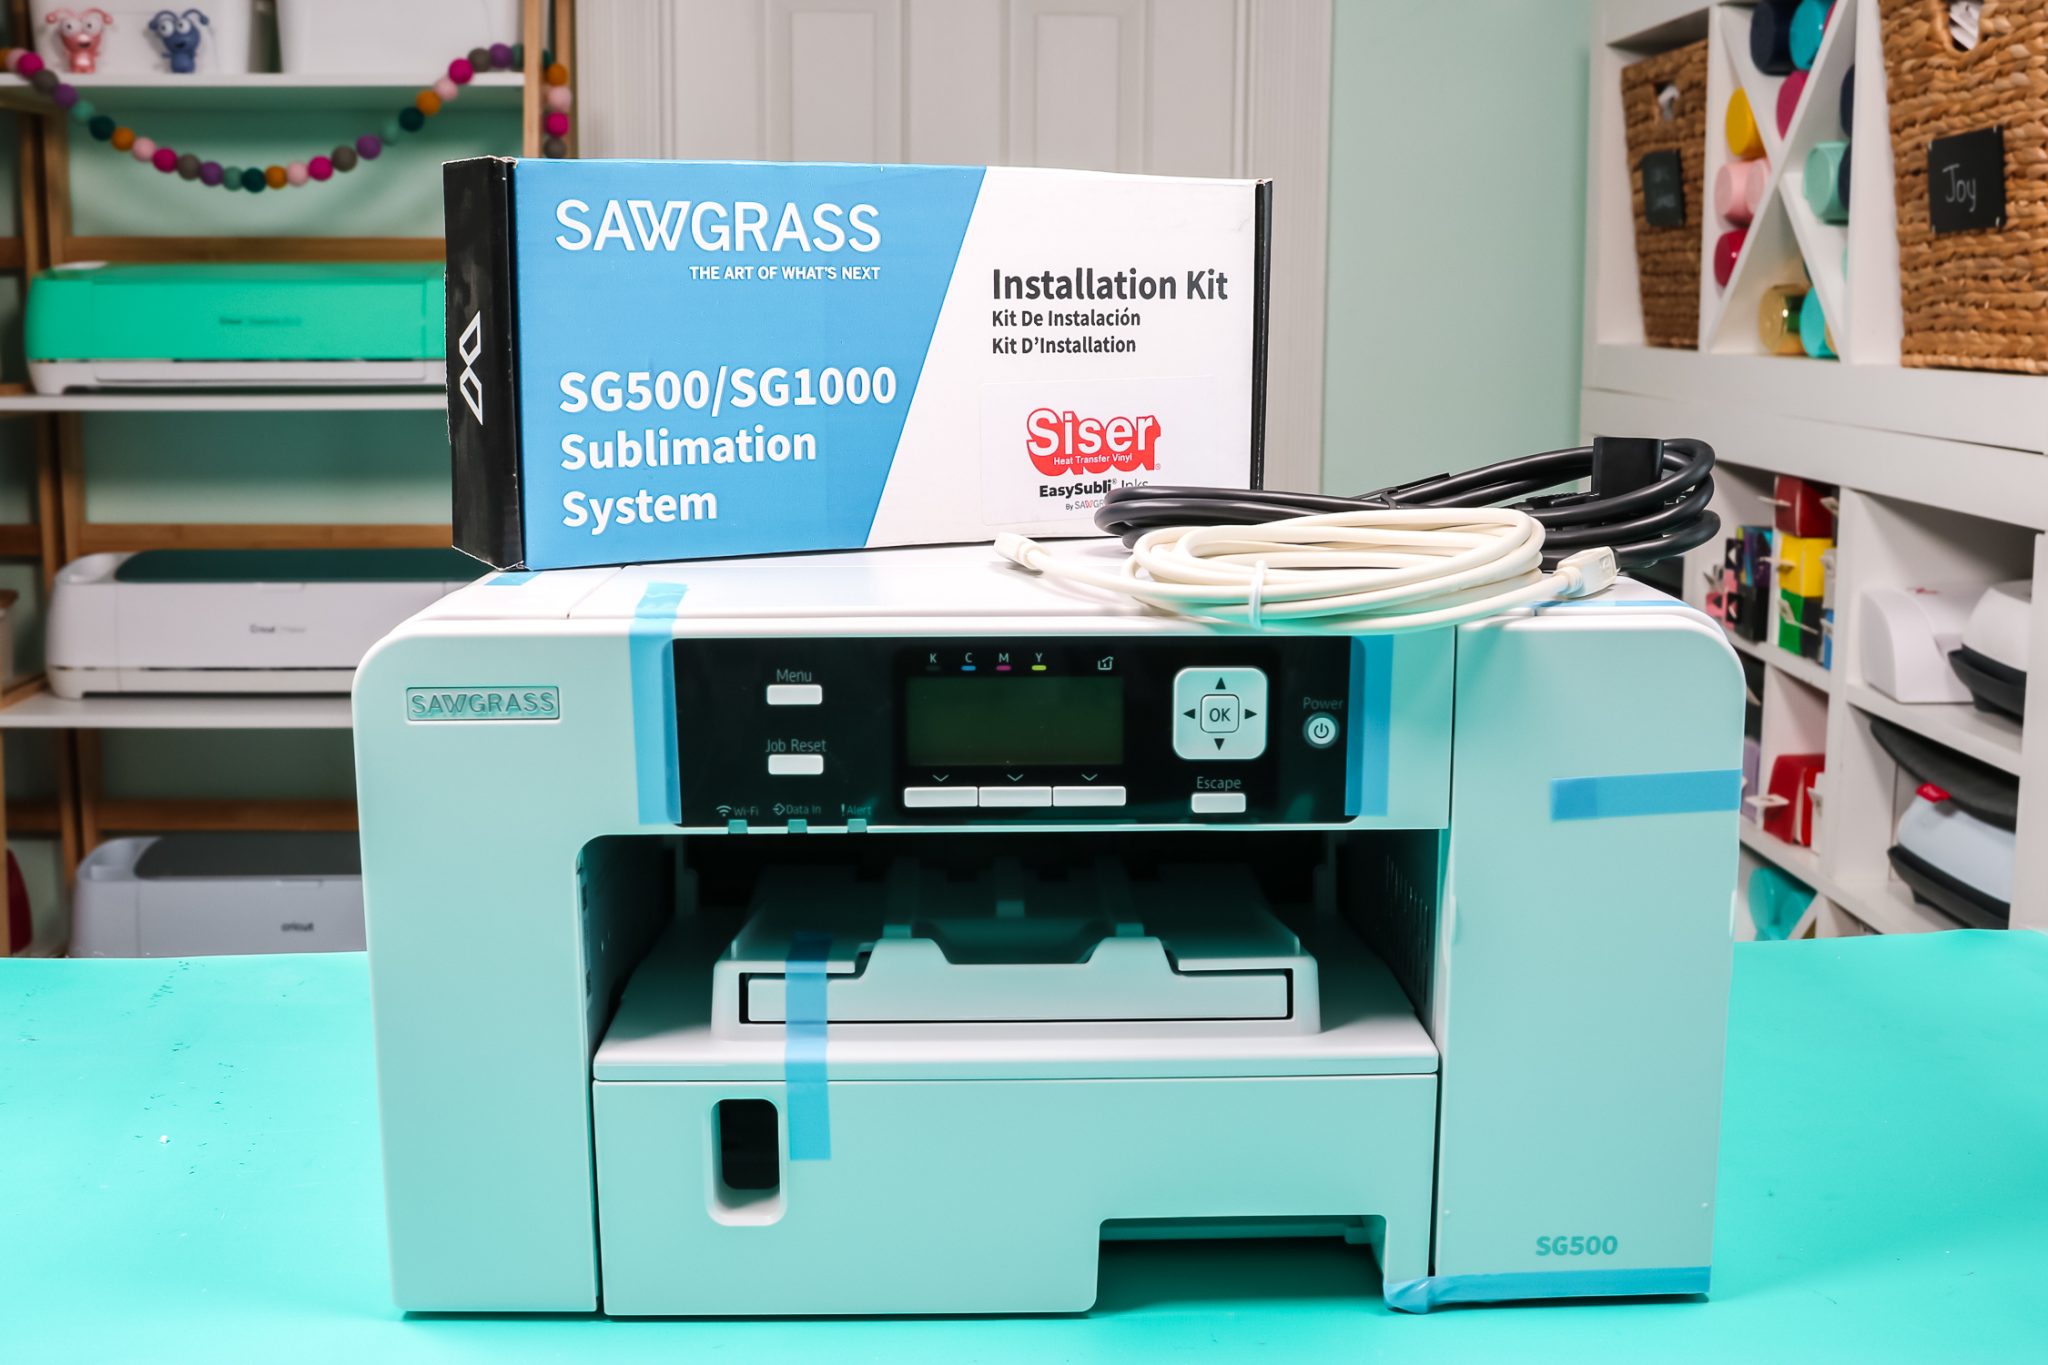
When you purchase the Sawgrass SG500 sublimation printer you’ll find the following inside the box:
- Sawgrass SG500 Printer
- Two Different cords – a power cord and a cord to hook it up to your computer
- A set of ink cartridges
What Ink Comes with the Printer?
When you purchase the SG500, you have two different ink options. I chose EasySubli Ink. EasySubli Ink can print on sublimation paper but it also prints on EasySubli material that allows you to sublimate onto cotton.
I wanted that feature in my own craft room so I chose the EasySubli Inks. EasySubli Inks are specifically designed to print directly onto EasySubli paper and dry rapidly so you can cut it with your Cricut machine.
You can also choose the SubliJet inks. With those, you won’t get the ease of printing directly on that EasySubli paper. It does print on regular sublimation paper great so you need to decide what projects you’re going to be making with your sublimation printer.
How to Set Up a Sawgrass Sublimation Printer
To set up your printer, you’ll begin by removing everything from the box. Remove the packaging material and all tape pieces.
Sawgrass One-on-One Call
Before you do anything else I recommend you take advantage of a feature that comes with your new printer.
When you purchase your sawgrass printer you get a one-on-one call with Sawgrass. They will help you set up your printer, answer any questions you may have about your printer, and help you with your sublimation crafting journey.
I am going to briefly go over the setup process below but I highly recommend setting up that call and allowing them to walk you through the steps so that you know your printer is set up correctly. Make sure you have all the questions you have about your printer and sublimation so they can help you get started the correct way.
Sawgrass Sublimation Printer Set Up Steps
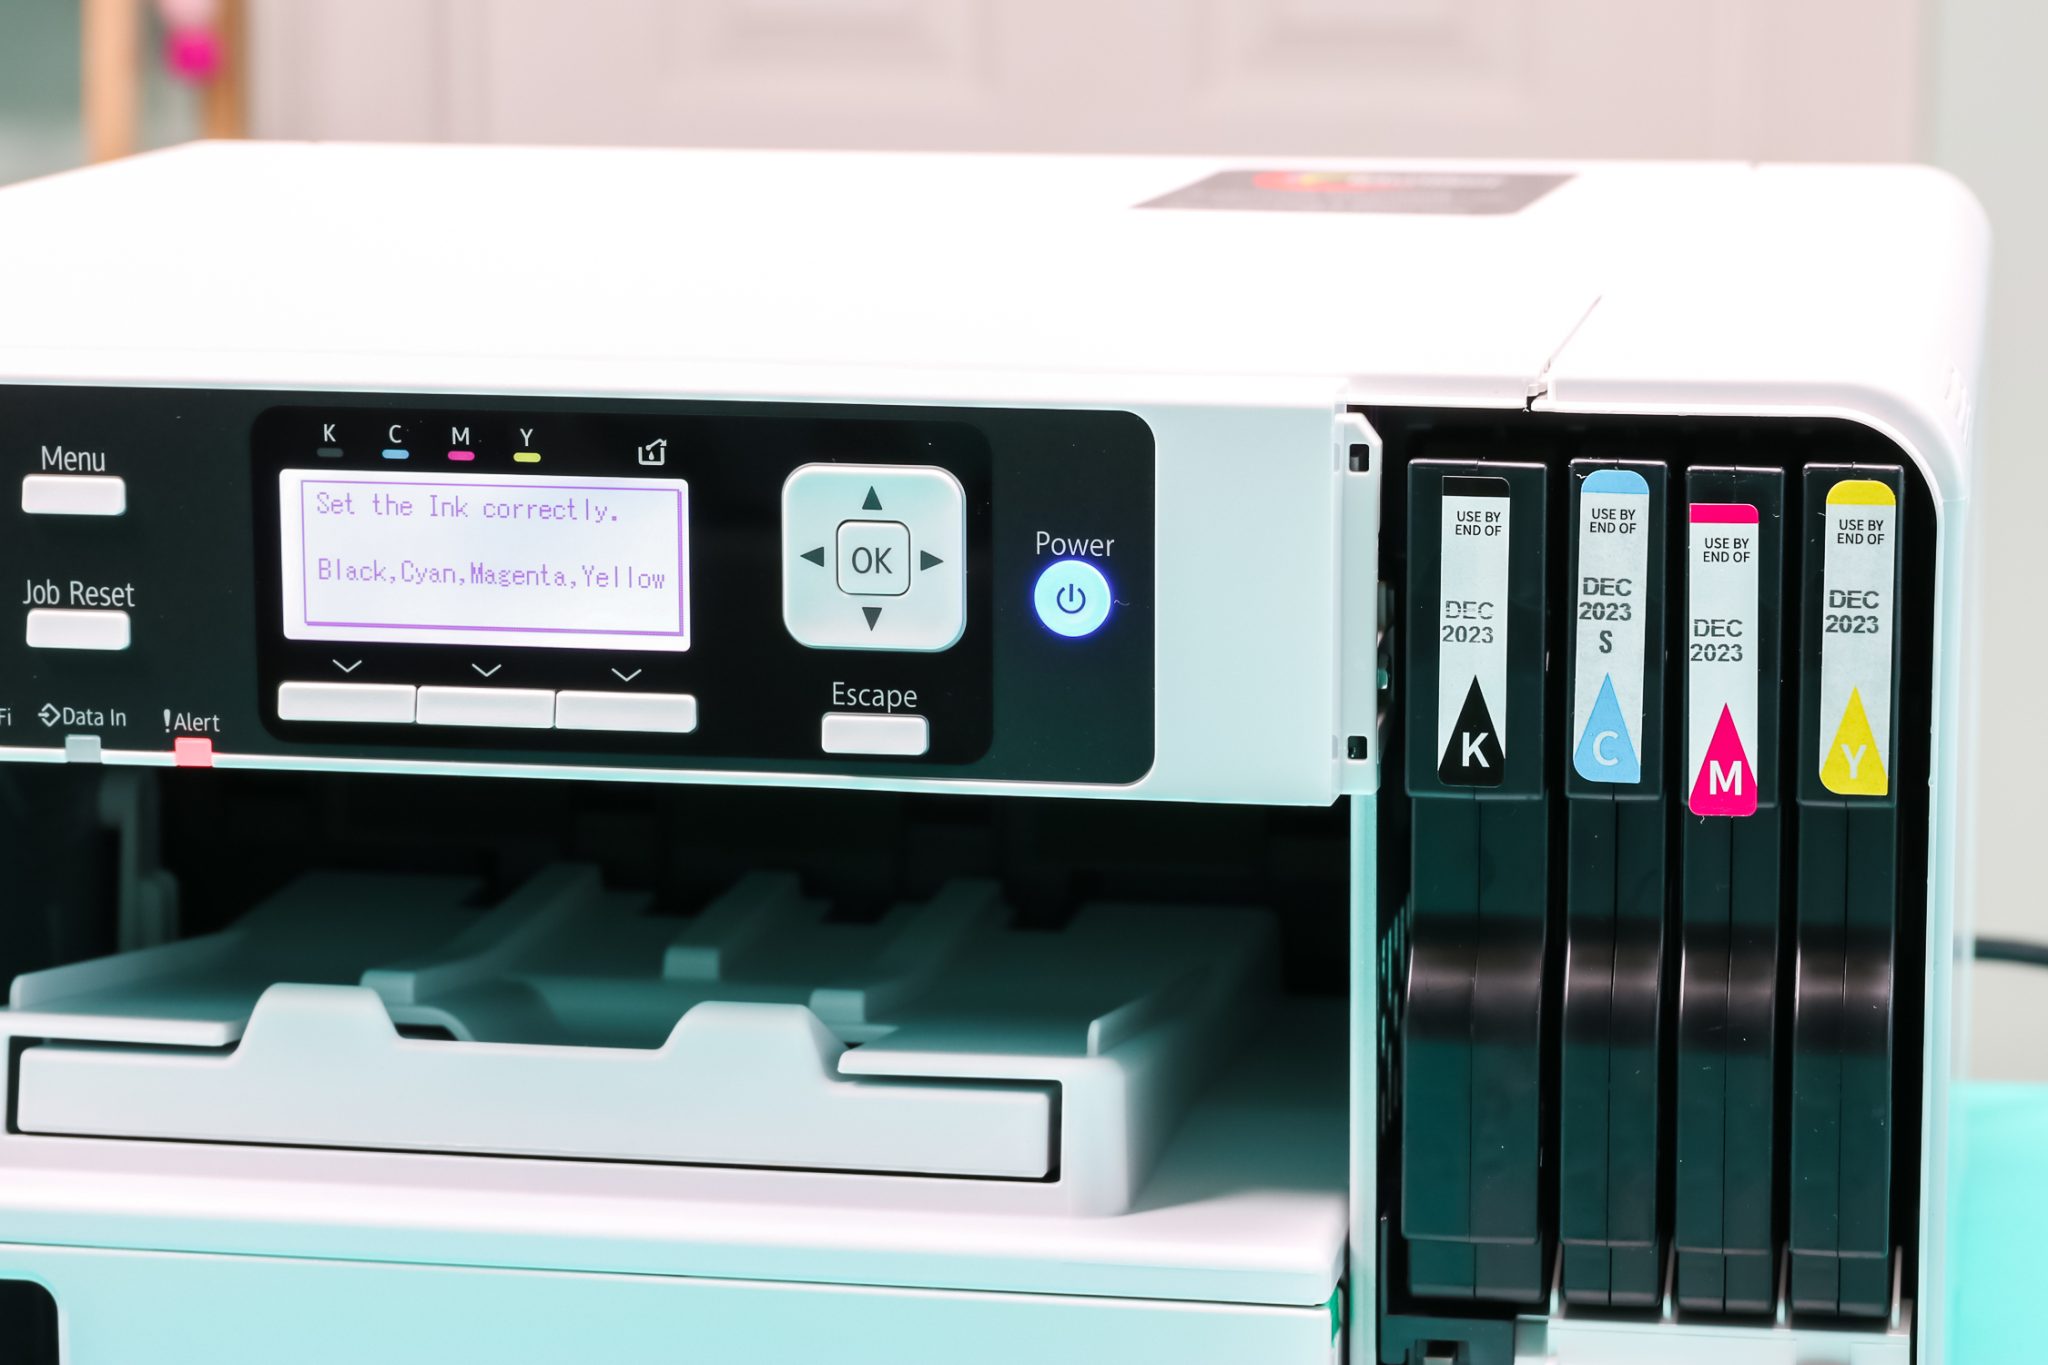
First, plug in the printer. You’ll find the place to plug the cord into the machine on the side. After you have plugged in the printer power it on. You’ll then be prompted to install the ink cartridges.
In the box, you’ll find four ink cartridges, cyan, yellow, black, and magenta. The cartridges come in a protective plastic bag.

On the right front of the printer, you’ll see a side panel that opens. Open that panel and you’ll see there are slots for the cartridges, one for each color.
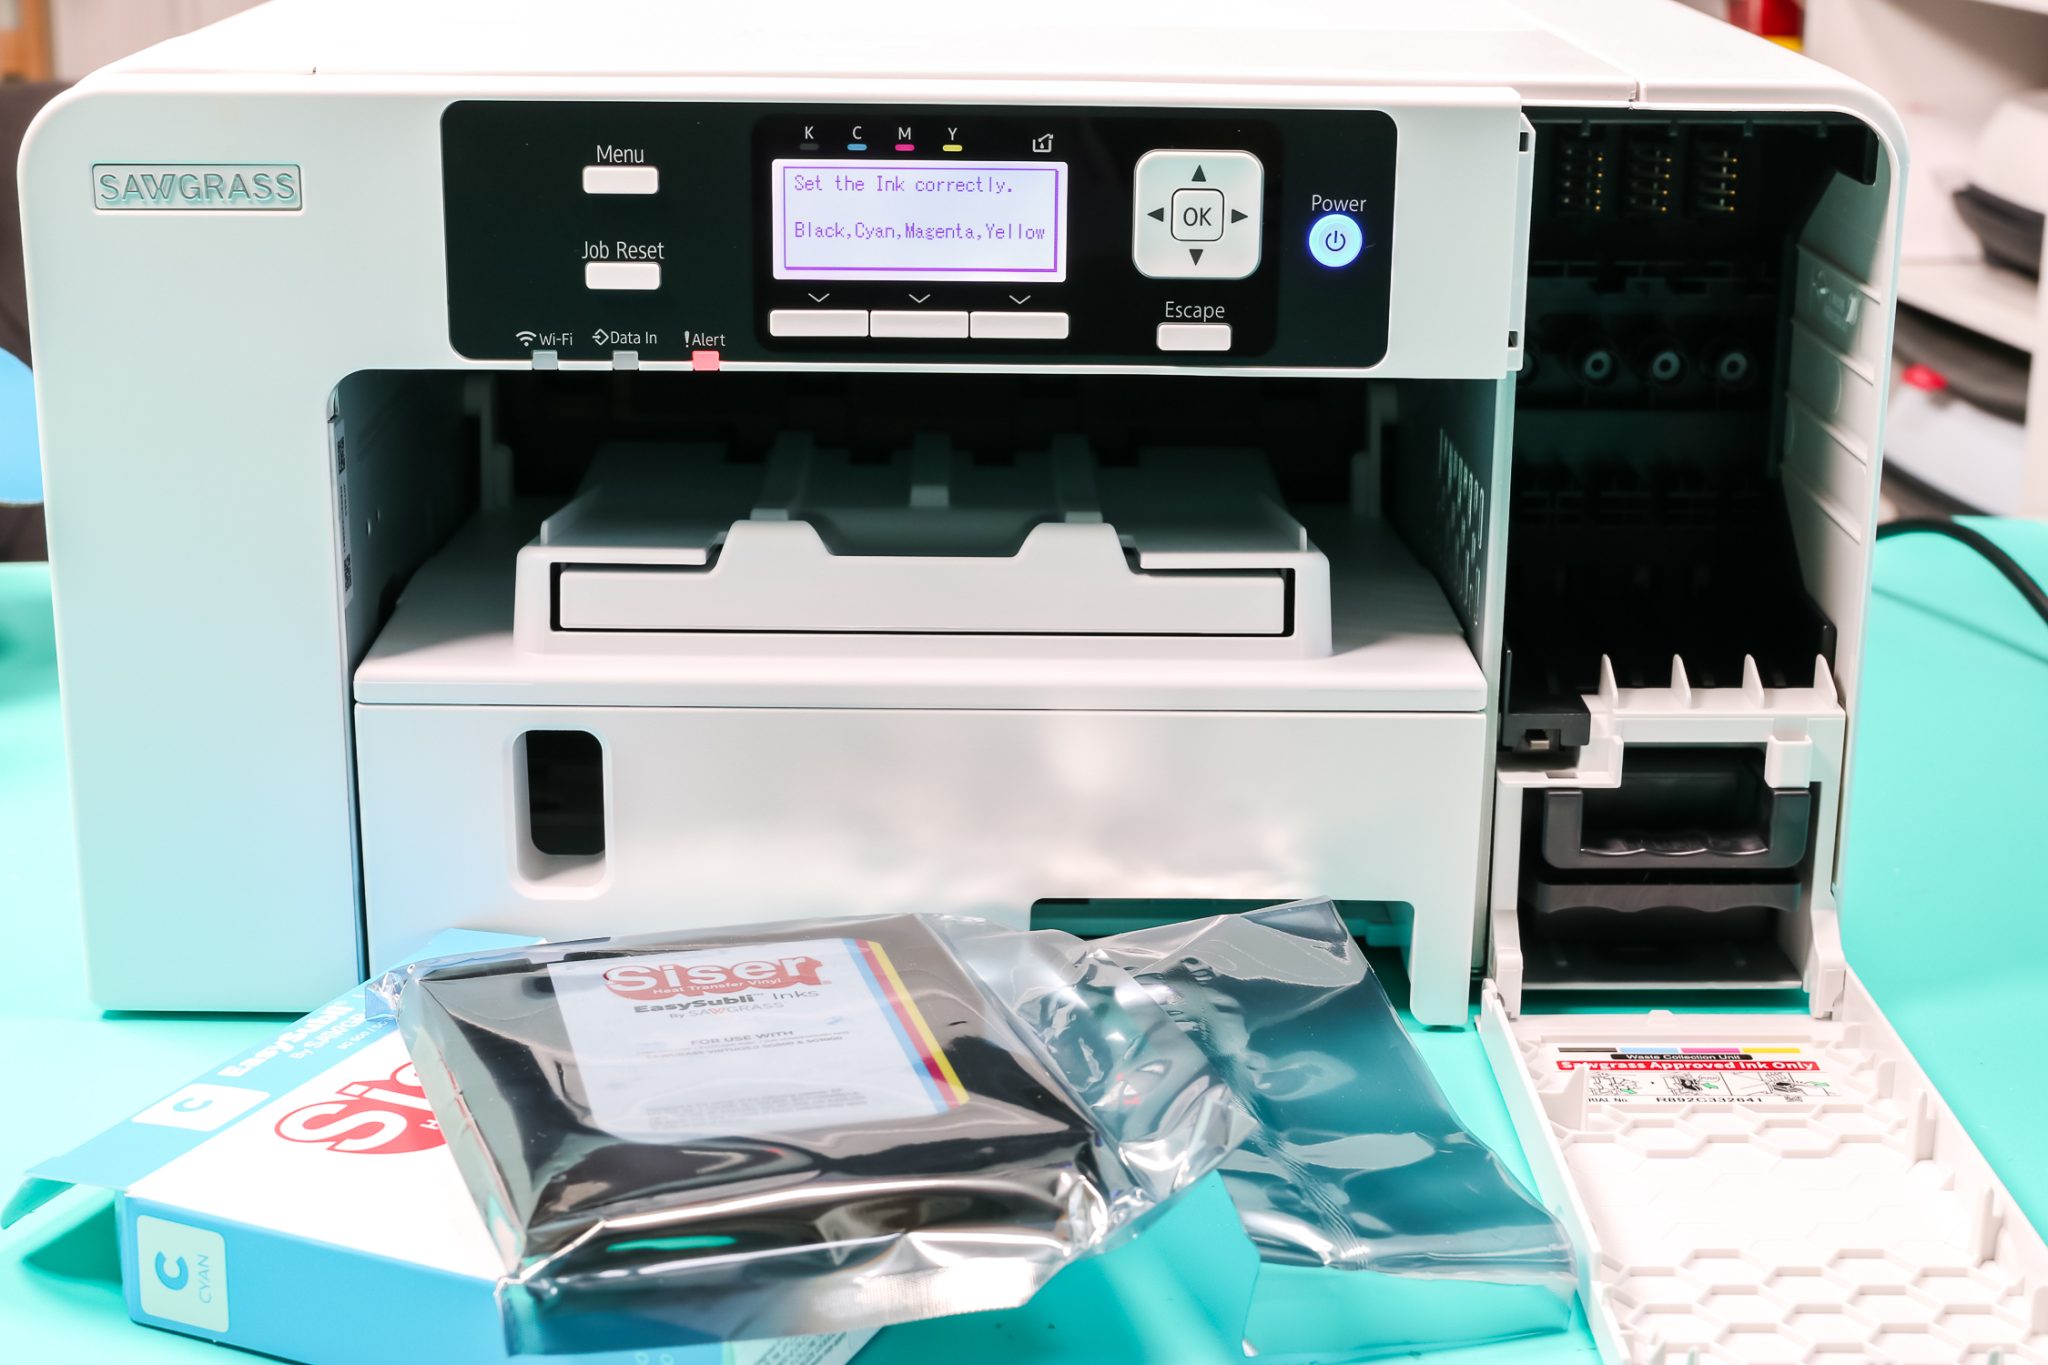
Remove the cartridge from the bag, and make sure the cartridge label is facing the front. There are guides both on the top and bottom, slide the cartridge into the printer. Match the color of the label to the color of the labels on the bottom of the panel. Repeat the process for each additional ink cartridge.
Sublimation Ink Expiration Dates
On the label of each ink cartridge, you’ll see that there is an expiration date. Make sure you pay attention to that date. Sublimation ink does have a shelf life and your prints can be affected if you use the ink after that date.
Loading the Sublimation Ink
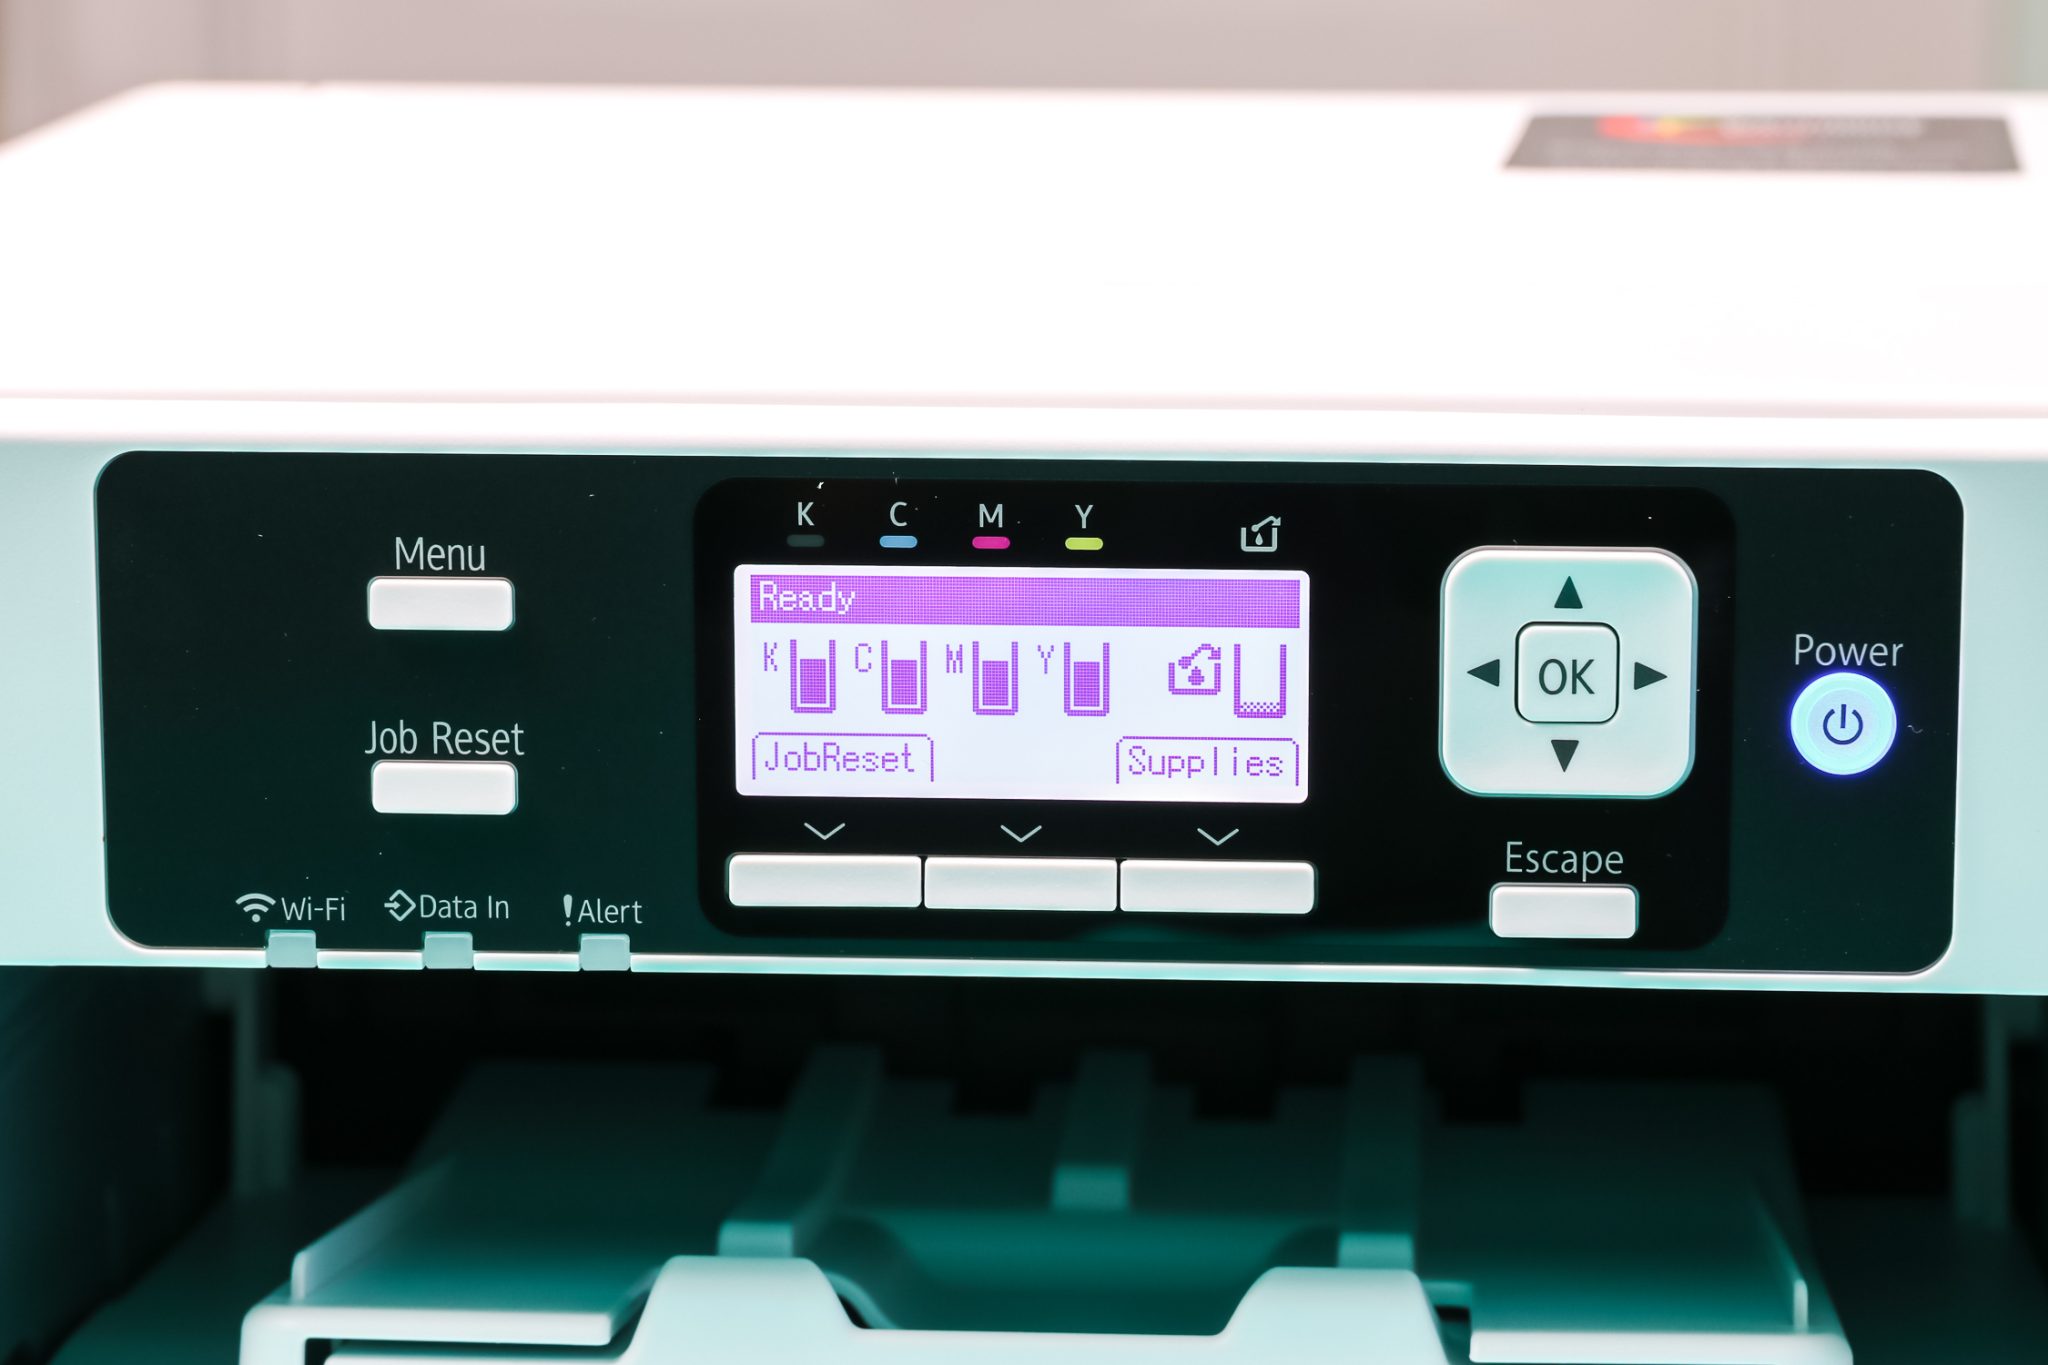
Now that all the cartridges are installed just close the panel door. The printer will automatically start loading up with ink. This process can take up to seven minutes. Allow it to run completely. Once it’s done the front display will show you how much ink is in each of the wells.
My bundle included full ink cartridges. However, the charging used some of that ink to fill the lines. Before printing anything my ink levels are around 65%. The levels will depend on the length of the lines.
Setting Up The Wireless Connection
Next, you can set up your wireless connection. I do recommend going to the Sawgrass website here for a full video on how to set up your wireless connection. It will also walk you through the setup of your printer if you want to watch that video. Once your wireless connection is successful, it will say connection successful, and you will get a Wi-Fi light on the front of your printer.
If you don’t have Wi-Fi, you can use the cord included to connect your computer to your printer. You’ll find the port on the same size as the power cord spot. There is a door that you can remove to insert the cord. The little door can be replaced at any time.
What Programs are Used with Sawgrass SG500?
So, now I have my printer set up, inks are installed, and it’s connected to Wi-Fi. What’s the next step?
You are gonna want the Sawgrass Print Manager on your computer because that’s part of what makes the magic happen. Head to the Sawgrass website, download the Print Manager, and install it on your computer. You should be able to just follow the prompts to download and install the software.
Other Programs Used
Along with the Print Manager, comes the download for Creative Studio. So you’ll have three icons on your desktop. Creative Studio, Print Manager, and a folder called Sawgrass Smart Folder.
Once the software is downloaded, you will be prompted to pick your printer, the type of ink, as well as connect to your printer, either via Wi-Fi or by hooking directly to the printer with a cable. Once Print Manager is installed and your printer is connected, you are ready to print. It is so easy!
How to Print a Sublimation Print
For the next part of this Sawgrass Sublimation Printer Start Guide, let’s go through and print something to the printer. There are several different ways to print to your Sawgrass printer. You can print out of any program that you’re using. If you use Photoshop for your designs, you can print directly from Photoshop to your Sawgrass. You can also print an image directly to your Sawgrass printer which we’ll go through in just a moment.
You also have the option of using Creative Studio to resize your image to different templates, grab designs that are already in Creative Studio and print those. There are a lot of options and ways to use your Sawgrass printer.
Printing From Print Manager
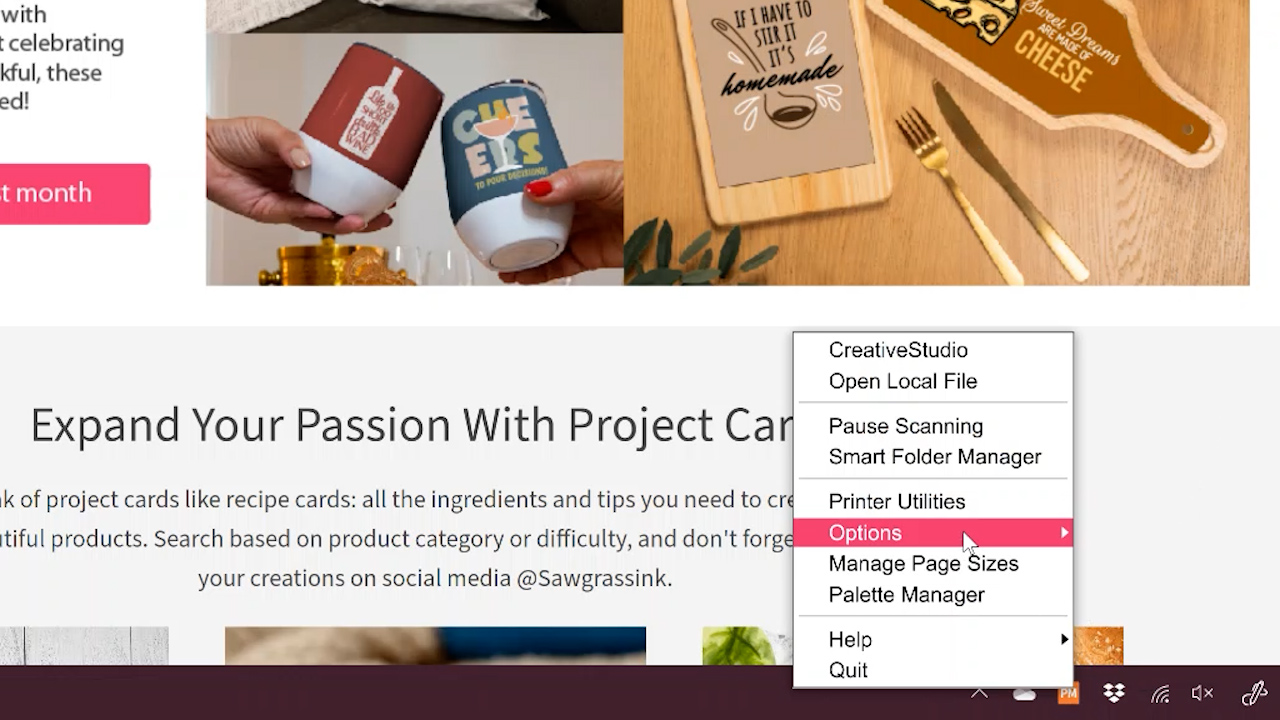
When you click the icon for Print Manager it opens in your tray at the bottom of the screen. If you right-click, you’ll see tons of different options.
The first one we want to look at is printer utilities. This will tell you if your printer is ready, tell you your ink levels, as well as your waste container levels. The waste container holds excess ink and things like that. When you receive your printer the lines are filled with fluid. That fluid is pushed out to the waste container during the charging process. The waste level will be around 10%.

From the utility screen, you can also do several different troubleshooting things like a nozzle check, head clean, printing a primary chart, or printing full-page bleeds. You can also see your printer status, ink levels, and the print queue to see what documents are printing. You can also cancel documents if you need to.
Changing the Default Settings
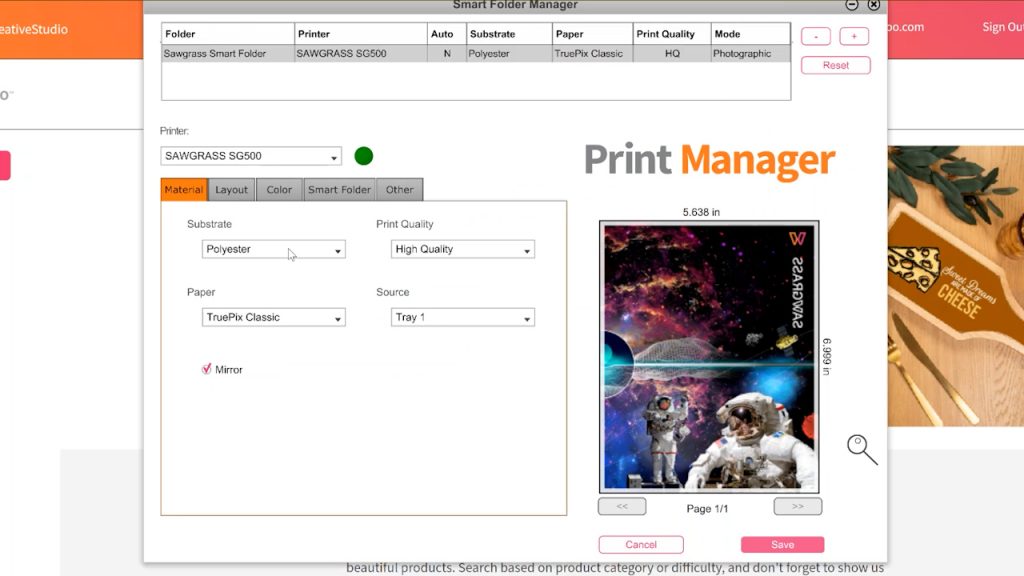
Every time you print to your sublimation Sawgrass printer, it will open up a printer settings box. If you needed to change the default settings you can right-click and go to the Smart Folder Manager.
Any changes made in this area will change the default. If you print to EasySubli vinyl more than you print to anything else, you can change the default to EasySubli vinyl. Everything else will change for that setting and then you could save. Now every time you go to print your printer will default to these settings.
Checking Print Settings
To print from Print Manager, right-click on the icon, and select Open Local File. From here, you can open any file on your computer that is a JPEG, PNG, or image file. You can see the options for the file types in this dropdown box.
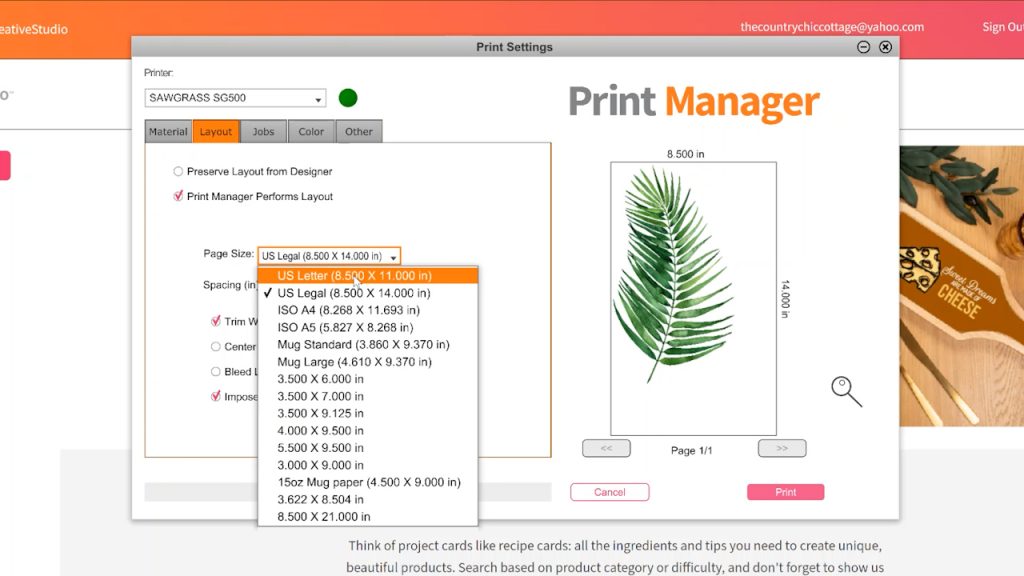
Different Paper Sizes
Once I open the file, you can see the size it’s going to print your sublimation image. For this particular image, to print at the full size I would need to have 8.5×14-inch paper. My SG500 can print that size.
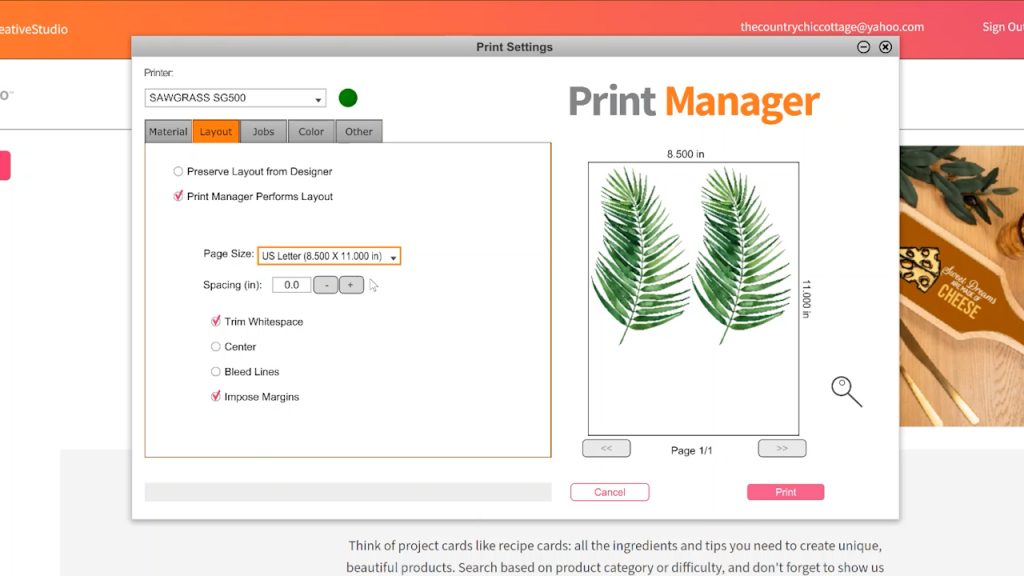
Go to the layout tab and select “Print Manager Performs Layout”. Then you can pull down the page size box and see different print sizes.
You do want to make sure you have the Impose Margins box checked so it doesn’t cut off any of your print around the edges of the paper. You can also center the image if you wanted
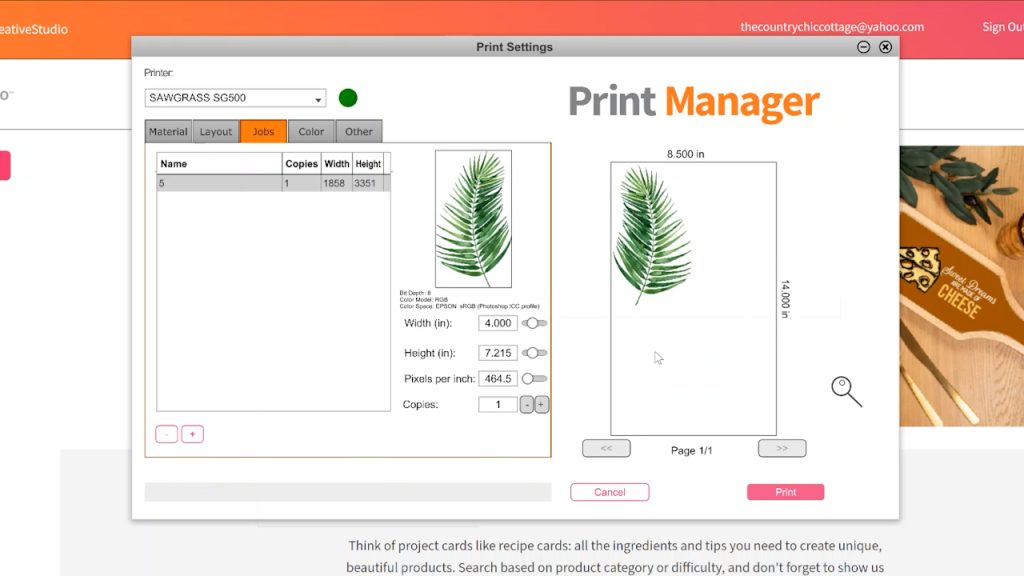
If I didn’t have that size paper, I can actually change the size of the project. Click on the Jobs tab. Here we can change the size. If I wanted my image to be four inches, I can set that and it will automatically change the height to match the width.
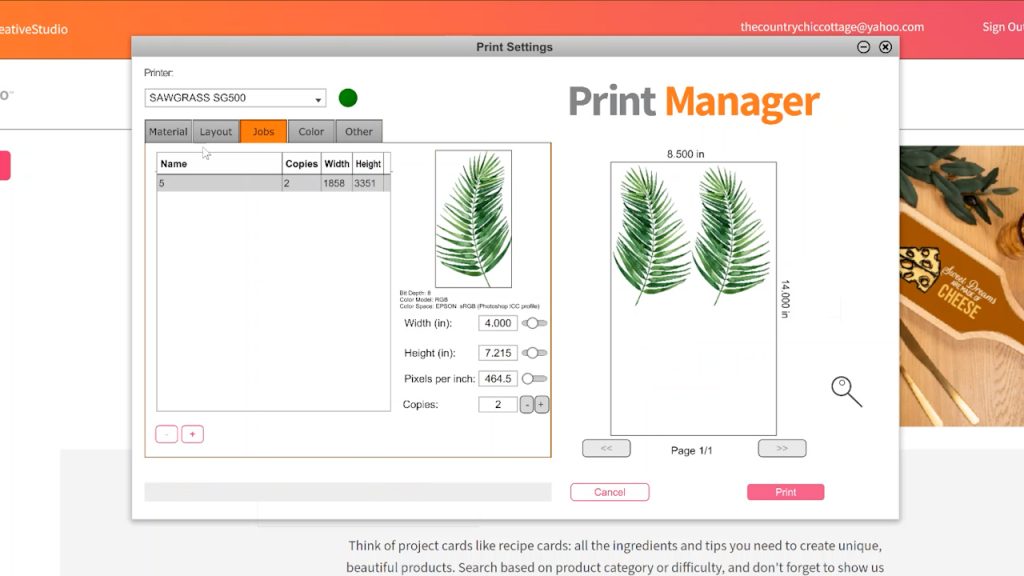
You can also change the number of copies which will help to fill up your paper for less waste.
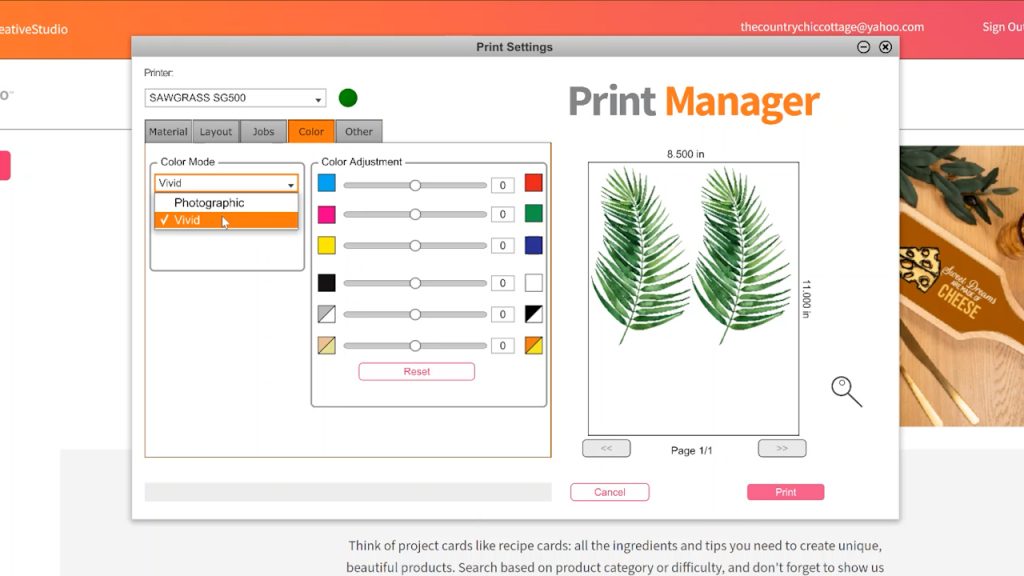
There is also a color tab where you can adjust the color slightly. In the pull-down menu, there is a Photographic setting. This is mainly for photographs of people. Vivid would brighten those colors up a little bit for other images. Then you can use the sliders to adjust contrast, saturation, or even tint your image. These are all personal preferences for which look you like.
What Type of Sublimation Paper Can I Use?
Your Sawgrass printer is going to default the paper to TruePix Classic. This is the Sawgrass sublimation paper. You can use any sublimation paper that you like in the Sawgrass printer.
Sawgrass Printer Settings
On the Material tab, select the material and the substrate you are adding your print to. If you’re putting your sublimation on a mug, mouse pad, or polyester shirt, you need to select that substrate, for example. The printer quality will default to high and the Mirror button will be checked.
I always double-check that the dimensions on the side match my paper size. If everything is right, we can go ahead and print. If it is not correct, you will want to go to the Layout tab and fix the paper size before printing.
The Sawgrass Printer prints faster than any other sublimation printer I have tried. It is however louder when it’s printing. When it’s not printing you won’t hear any noises at all but while it’s printing it’s a little bit loud. I am super impressed with how fast it is. The finished print is a gorgeous high-quality print.
Final Thoughts on a Sawgrass Sublimation Printer
I really liked how easy it was to set up the Sawgrass SG500. However, I started the setup process before I had my one-on-one call. I had already added the ink and downloaded the Print Manager before the call. On my one-on-one call, they helped me finish the setup, get my Wi-Fi working so I could print wirelessly, and do my first print.
For me the one-on-one call was invaluable. It helped me quickly set up the printer and they have the ability to take over my computer so they could fix anything that I personally did wrong. I hit the wrong button as I was going through the setup. If I had tried to figure out where I went wrong, it would have taken me a while. They knew in seconds what had happened and were able to fix it for me on my computer.
Once I was up and running they walked me through the Print Manager, as well as Creative Studio and how to print. I was able to ask questions along the way so I knew what I was doing and why I was doing it. This helped me make sure I know exactly how to print with my Sawgrass. I love that they offer this feature, you’re set up for success right out of the box.
I hope you’ve found this setup helpful. As I use the printer more, I will have a full review and compare it to the other sublimation printers I have. If you’re in the market for a sublimation printer, be sure you subscribe to my YouTube channel or check back here because I will have a full comparison along with other Sawgrass videos/tutorials coming soon.
If you have any questions about the Sawgrass Sublimation Printer Start Guide, leave them in the comments below and I’ll be happy to answer them.